climbinggeorge
-
Posts
51 -
Joined
-
Last visited
Everything posted by climbinggeorge
-
 I have a daikin altherma 3 split system and a mixergy hot water tank. My understanding is that the mixergy tank is the 'smart' part, this calls for the hot water as required. I set the schedule on mixergy to heat 90% of the tank at 5am, and then if it drops beneath 30% to reheat to 75%. Except, it's not happening. I can see on the mixergy side it's calling for hot water, but it doesn't react immediately and can take hours before suddenly sending hot water in. If I turn the ashp off and on, it will react to the call and heat immediately. This hasn't happened in winter, so I presume it's something related to hot weather, perhaps not wanting to run a short cycle?? any ideas welcome as my partner keeps managing to have cold showers
 -
ASHP and Tank lack of communication
climbinggeorge replied to climbinggeorge's topic in Air Source Heat Pumps (ASHP)
Hmm, as I've just heard it click on out of nowhere, it must be waiting for X to happen before it agrees with the tank's call to heat the water. Just need to find out what X is ... -
ASHP and Tank lack of communication
climbinggeorge replied to climbinggeorge's topic in Air Source Heat Pumps (ASHP)
Thanks No solar diverter, all the panels etc are clear of the system. The mixergy tank, was on about 65% and 45c at midday when it should have been topped up to 100% (and gets to 60-ish degrees I think) The temp/timing may be an aspect though, I've set it to run at 9am instead of midday and will see what happens -
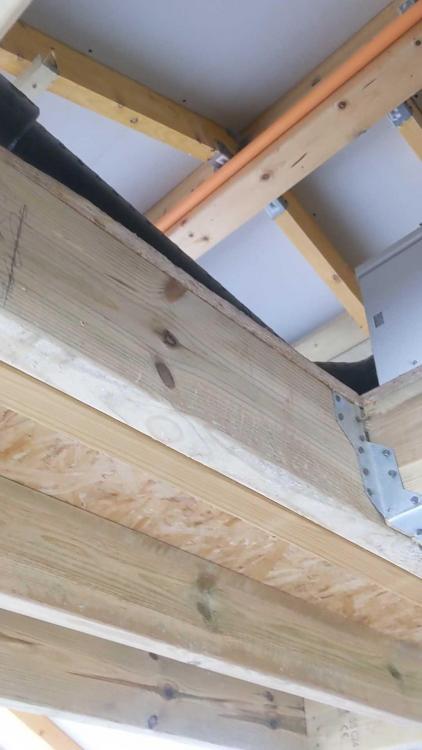
This isn't my area of expertise, but a couple of times in the last week I've had issues that the tank looks to be calling for HW (set for midday to fill it up) but the ASHP doesn't kick in. I've got a Daikin Altherma 3 split system for a heat pump, connected to a mixergy tank 150L, I think the the tank is meant to be the 'smart' part that drives the system. My solution had been to turn the outside heat pump off for 30 seconds and then back on again. They then seem to speak and the tank fills up, however this has now happened 2 or 3 times in the last few weeks. It had happened twice in the year previously (been running since last April) Looking through the various menu buttons on the internal screen of the ASHP I can't see anything in the malfunction history screen. Any suggestions on the next parts to check?
-
UFH zones - staggered timings or all at once?
climbinggeorge replied to climbinggeorge's topic in Underfloor Heating
Thanks all. I'll put short cycling on my research list for this lunch to find out more about that, and stop trying to be clever with the timings -
At the end of the build now so on the balancing/commissioning stage, we've got UFH upstairs - kitchen and living space 50m2 in 1 zone, and downstairs - bathroom and bedrooms 50m2 over 5 zones all driven by an ASHP. We have solar panels but we don't get much sun through the windows until mid afternoon. It makes sense to me make the most of the solar panels and warm the building when we have the excess energy ie 10 - 4 and then you are pre warmed for the evening within the building envelope. I don't know how the ASHP works most efficiently, is it better to spread out heating for a few hours per zone over that 10 to 4 period ie office 10-1, hallway 11-2, bathroom 12-3 etc or just have all zones on for the 10-4 time frame? Trying to get a grip on it before it turns cold
-
Switching on UFH for the first time
climbinggeorge replied to climbinggeorge's topic in Underfloor Heating
Thanks all. I'm confident the screed was dry, I'd just been following my flow chart and saw that running the system is next. I'll delay that until we actually need the heat -
The UFH is installed, ASHP is running and we've finally got all the floor protection up so we are now able to start using our UFH. The only issue being its mid-summer We have wet UFH upstairs and downstairs, upstairs is the wundatherm system with engineered wood (wood is laid on the boards, pipework runs within the boards), downstairs is UFH laid in screed with tiles and engineered wood on top. The plan was to run the water temp at 25' and gradually increase it by a couple of degrees a day up up to 45' then back down again. The ambient air temperature is currently around 21' so I need to push the required time up a few degrees on thermostats so it actually sends something around the system. My question is how long should be I be running the UFH each day? I don't want to turn the house into a sauna, currently I've got it running at 23' from 0600 to 0800 and to kick in again if needed 1700-2000 to 21'. I don't feel this is actually putting much heat into the floor currently but apart from waiting for winter I'm not sure on the next step
-
Trim and floor around top of stairs
climbinggeorge replied to climbinggeorge's topic in General Flooring
Thanks for the photo, makes it far easier for a discussion with my partner -
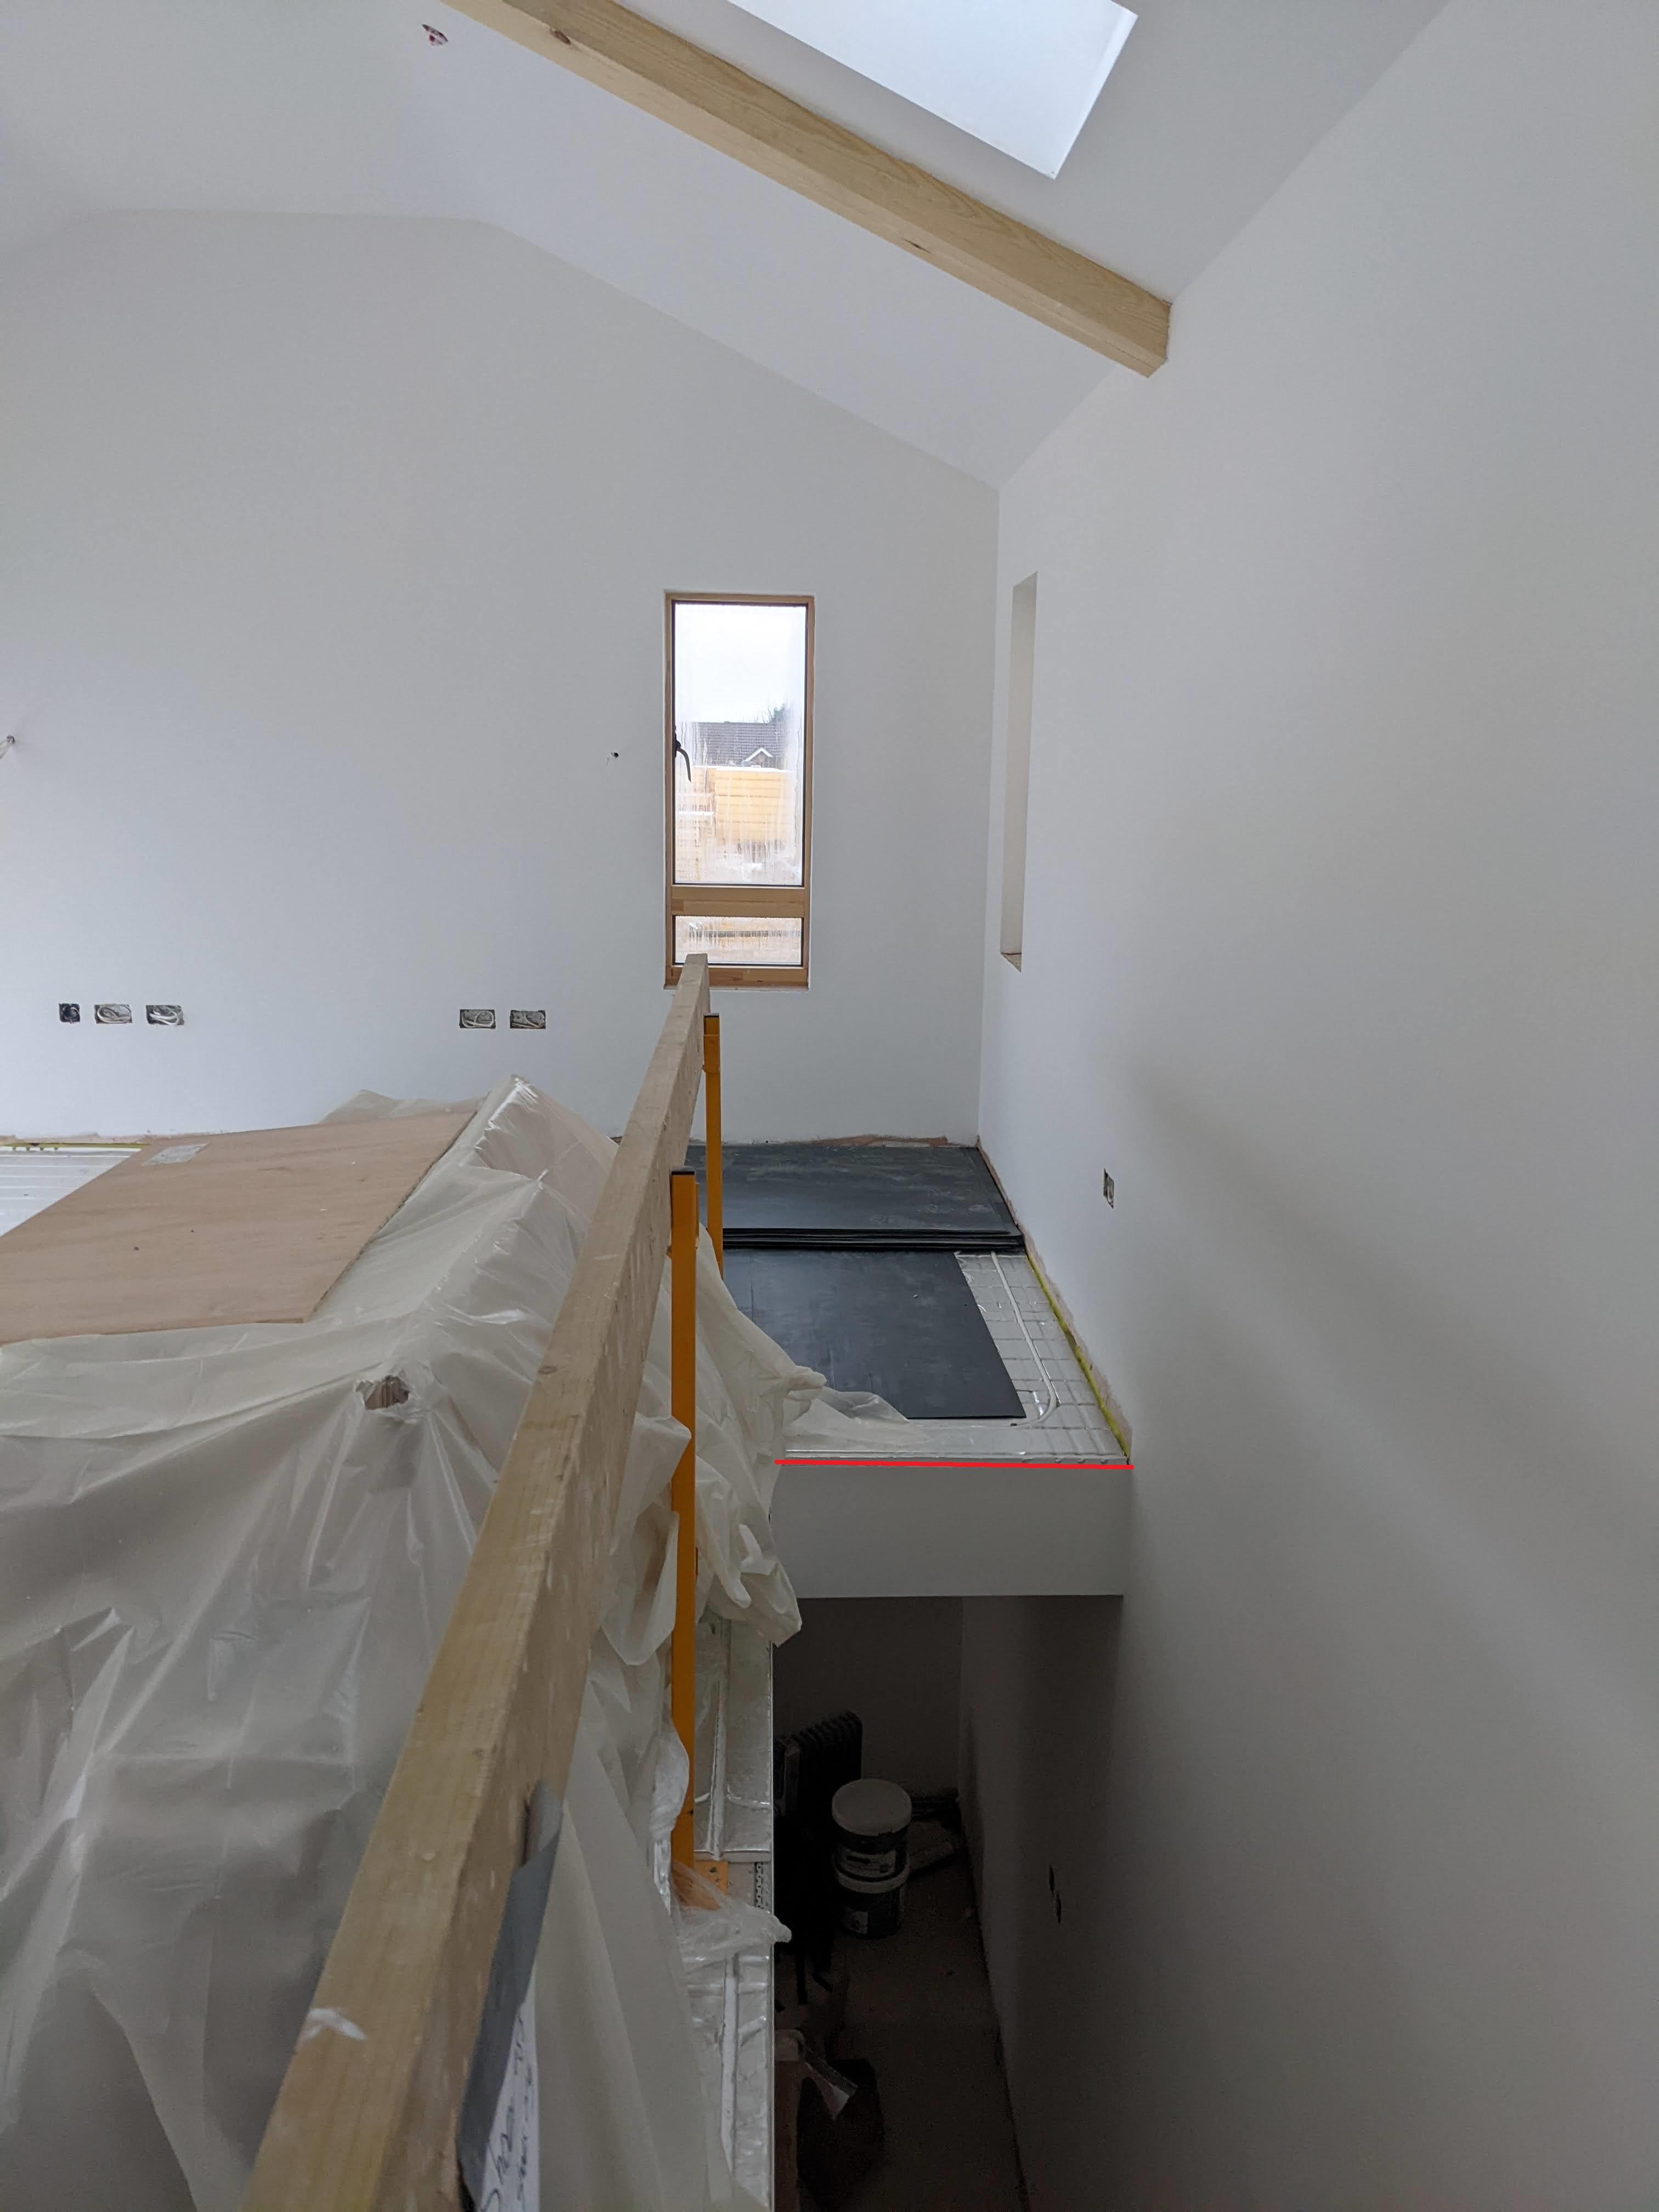
I wasn't sure if this should be posted in decorating, flooring or joinery. We've got 20mm wundatherm with 18mm engineered wood going on top as a finished floor. However as you come up the stairs the boarding on the inside of the stairwell stops at the previous sub floor level. I need to find a way to cover the 38mm showing, and apparently the engineered wood trim can't do it. I'm scratching my head on the best way to do it, I'd prefer not to put a fascia in. I'm sure I'm not the first person in the world with this issue, any ideas on a good way to solve it? Attached photos from an earlier stage show the issue with a red arrow / red line


-
Widening internal door linings?
climbinggeorge replied to climbinggeorge's topic in Doors & Door Frames
I filled with foam, cut the foam back then it had the sealant on top and filling in any extra But for the main issue, it turns out the adage about measuring twice is very relevant. I think I may have measured between the door jambs I suspect, but on a careful recheck I've actually got 833mm to play with. A little embarrassing but if that's the only mistake I'll take that -
Widening internal door linings?
climbinggeorge replied to climbinggeorge's topic in Doors & Door Frames
Thanks all, guess they are coming out. I gave the linings and required door dimensions to the carpenter, although he never invoiced me so maybe this is why he went a bit quiet -
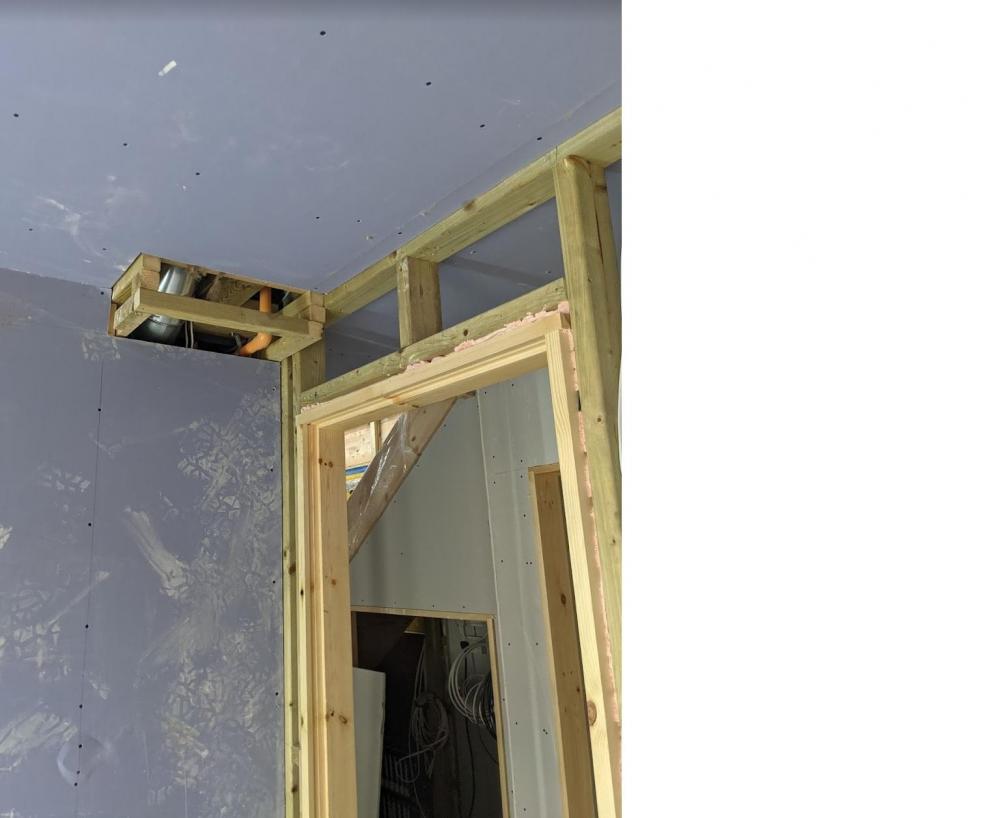
Trying to get this straight in my head before calling back the carpenter. We have 2040x826mm fire doors downstairs, we have just boarded and plastered them in place, the photo is from a few days ago. The spacing in the studwork is 910mm The door linings (supplied by me) are 42mm This should leave space for an 826mm wide door, the fireproof strips are within the door frame not the actual door. However after packing out (and foam filled by oblivious me) there is now only around 800mm space. The official guide to the doors suggest they can be trimmed by 3mm each side which means I have another 20mm or so to find. I think the way forward is to carefully cut this into the lining until the door can fit, have I missed anything or is this the logical step? Or is this normal and when I ask the carpenter about hanging the doors he would do this as a normal step. NB These are metric doors, the next size down is 726mm and we've already bought the doors so I'd really like to make them fit
-
Painting, skirting and flooring - what am I missing
climbinggeorge replied to climbinggeorge's topic in General Flooring
Excellent, shall take this as +2 to me. Perhaps my research was too vague searching "skirting before or after painting" -
I'm approaching the end of first fix and am trying to line up the relevant trades for the next few steps, its a balance of some very limited availability and our wish to crack on and get the build finished. The plasters finish in early Nov, the flooring installers are booked for 29th Nov. My intention had been to get the painter in between these trades to get all the walls painted white throughout the house. Once this is complete we can get the floors (tiles and engineered wood) laid. Everywhere I look the consensus seems to be to put on the skirting boards prior to wall painting. We are going for varnished or stained skirting to keep the natural wood look. In my mind it seems easiest to do this outside, after the walls are painted and floor is laid, then stick it to the walls afterwards, what am I missing?
-
Correcting a misjudged loft hatch size
climbinggeorge replied to climbinggeorge's topic in General Joinery
Went and bought a small bar to pry the nails out, it was easier than I expected. Instead of cutting down the existing wood I found a few spare bits and screwed them in, then decided to try and smash the hanger sufficently flat. It ain't pretty but it should work. Bearing in mind how much every tiny change from our joiners has cost, I'm very happy with myself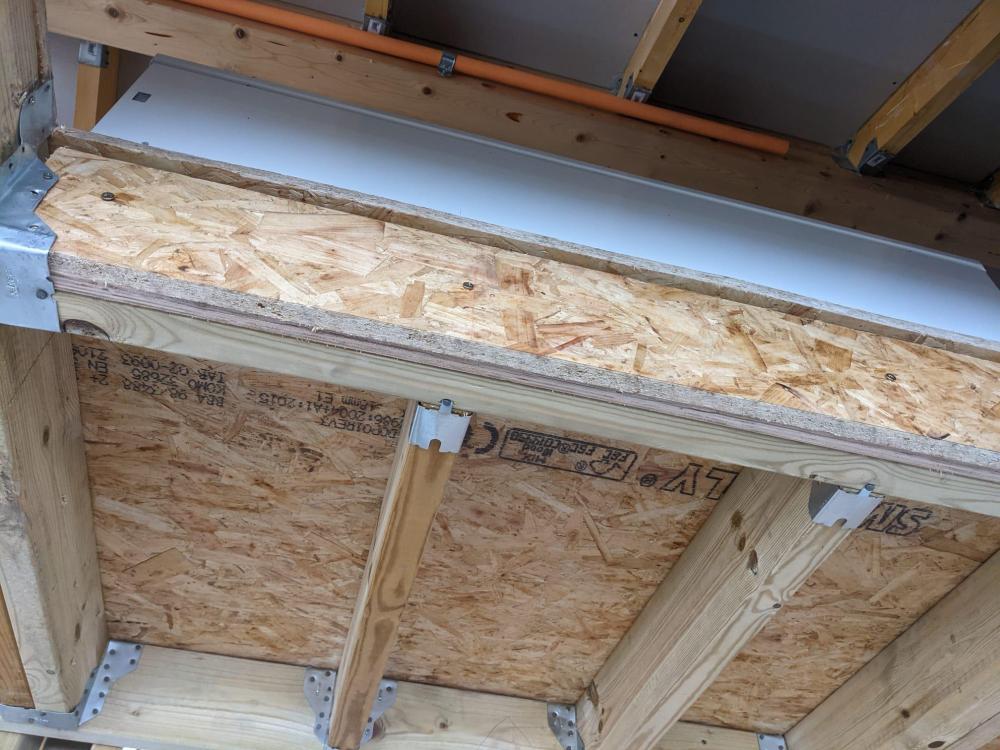
-
Correcting a misjudged loft hatch size
climbinggeorge replied to climbinggeorge's topic in General Joinery
Thanks both. Going to just dedicate Saturday to getting it out and see how it goes -
We specified an opening of 1140x540 for a loft hatch, I think this was a misread of dimensions as nearly everything needs 550 as an opening and after the casing its 540 wide. I think the options are - cutting the loft hatch down (not sure how much I've got to work with as not ordered yet) - getting a made to measure loft hatch (£) - widening the space I'm leaning into option 3 but it seems very firmly attached. We still don't have mains power so it would be me hanging off it with a nail bar or clawhammer to get all 8 out, then I'm also going to have a misshapen hanger that I might need to bash flat. So before I comment to the percussive improvement choice of option 3 I wanted to see if there were any other suggestions? On a semi-related note I may see if I can rename my user to Captain Hindsight..
-
We're going for an Ikea kitchen and currently debating the appliances; the balance of cheaper and longer warranty Ikea products against other brands. Most appliances seem to be a straight swap, however we are a little stuck if the same applies for integrated cooker hoods. Unfortunately the reviews for the ikea hood are fairly consistent on the control breaking, however if its integrated I'm not sure if its an easy swap to another one as the dims appear to change. Anyone resolved this in the past?
-
As a final update for anyone that has a similar issue , it turns out that grinding it out has the potential to loosen blocks and cause new issues. Final plan is to just screed, then stick a solid wood or metal threshold on it (something like this https://www.weatherbar.co.uk/product/metal-coverplates/ )
-
Thanks all. The builder has put his hands up about it being the wrong height and will sort - cill grinding and at their own time/cost Which means I don't have to reach a decision or alternative and can concentrate on the other N+ items currently being juggled
-
Highly artist drawing as below. I think it will just have to be a high threshold (apologies as I wasn't clear the wood was regarding the engineered wood floor finish) or we grind it down so we can lay it flat

-
There's 130mm insulation underneath (membrane inbetween). The UFH was stapled into the insulation today so its ideally staying down now
-
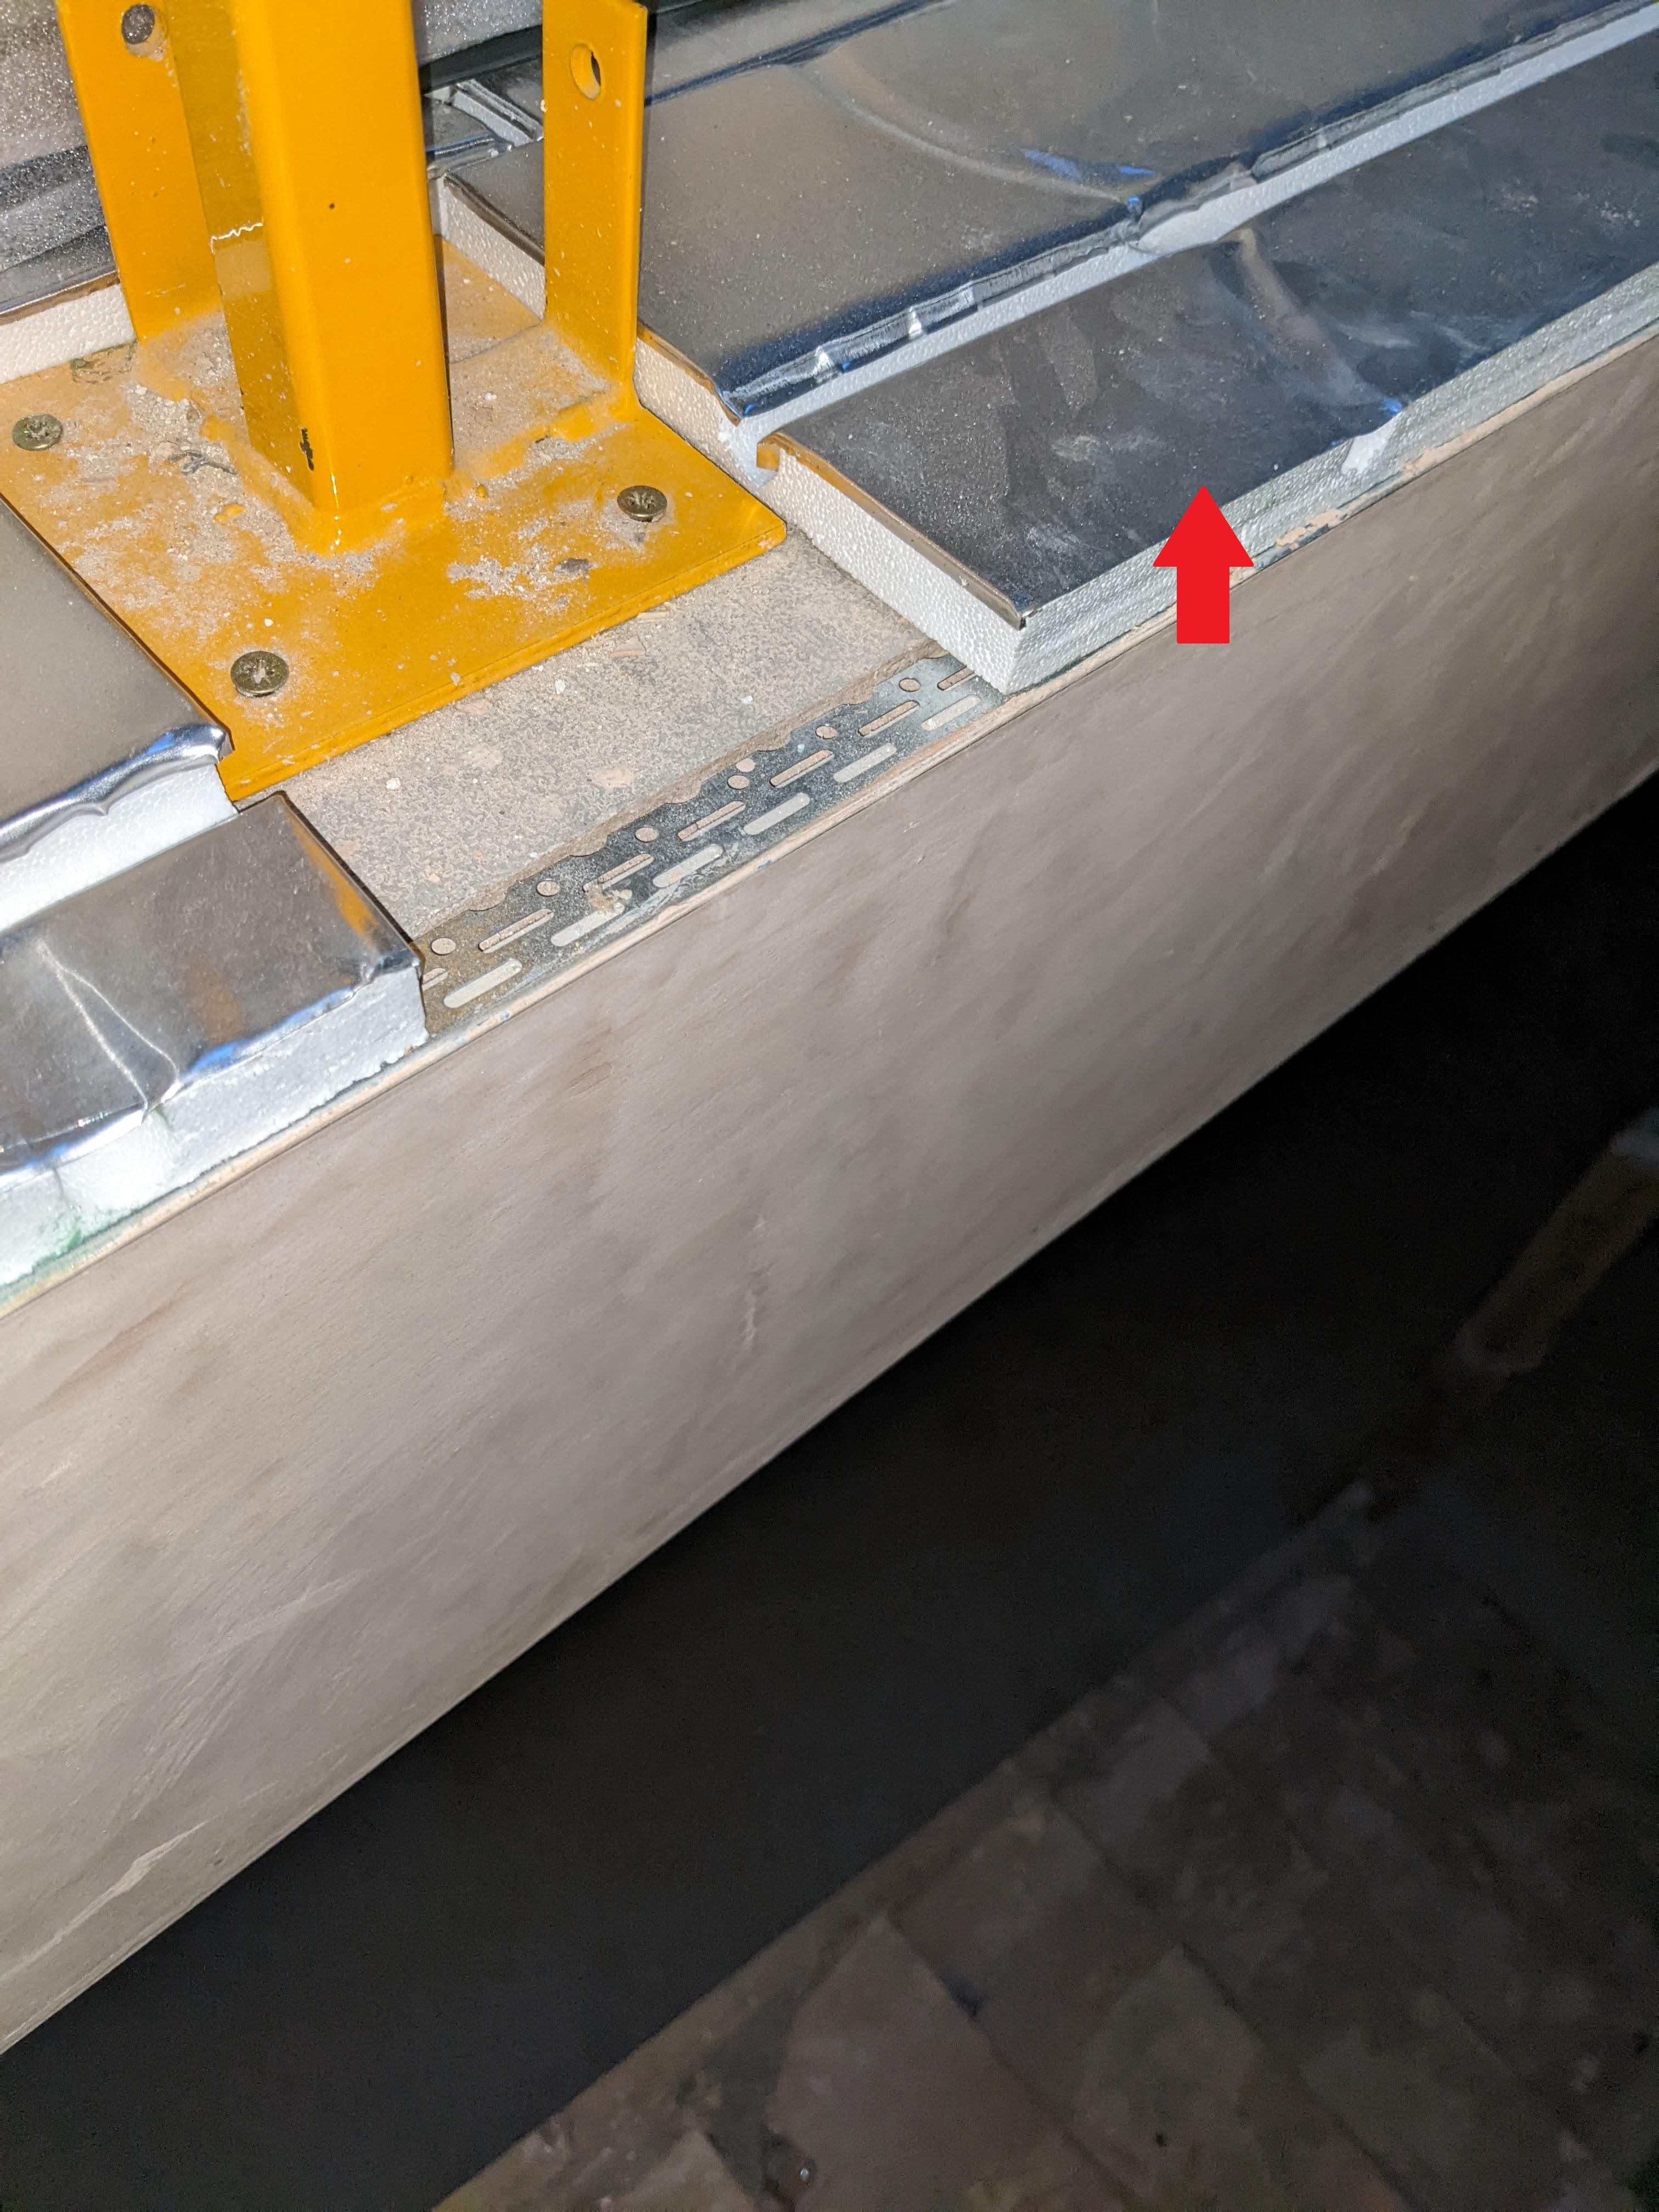
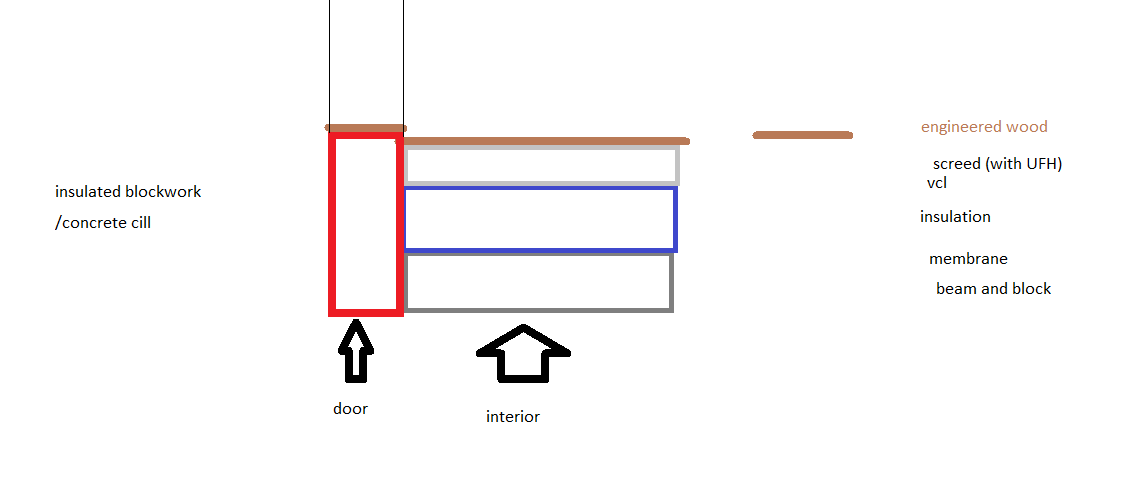
1 of my neighbours (there are a few of us building in this project) has just found this issue, I'm going to check my build after work to see if we have the same issue and will add a photo Our floor build up above insulation is 50mm screed and 20mm floor finish (engineered wood), this finished height is level with the concrete door threshold and would mean the wood within the door is higher. We have at least caught this before the screed, and presumably the best idea is to grind the door threshold down - note I'm not sure on the best term if this is the threshold/cill/etc Just thought I'd see if there are bright ideas that I'm missing?
-
Thanks all, will go straight down with insulation (plus edge insulation), tape the joints then extra membrane, UFH then screed.