DarrenA
-
Posts
41 -
Joined
-
Last visited
Everything posted by DarrenA
-
I've possibly got this wrong but I've had to build the half landings independently of the stairs so that the windows can be fitted. And the landing height is partly dictated by steels already in place and so can't be adjusted the 50mm required to even up the 2 flights. I'm going to to make some temporary stairs anyway so will test the different riser heights but I'm feeling more assured it will be fine. Thanks for the suggestions.
-
Thinking about it, the bottom flight could be 10 steps with 250mm going and 153mm riser. That would be better right?
-
Our self build staircase goes up 9 steps to a half landing and then a further 7 steps to the first floor (then 8 steps and 8 steps to the second floor). Due to minor changes and mistakes, the half landing position doesn't exactly match the architect plans. As things stand the first flight of 9 stairs will have a going of 250mm with 170mm risers. The following 3 flights will all be 250mm going but only 160mm risers. I'm pretty certain this is all OK with building regs but was wondering if this change of riser will be noticeable or a problem. The half landings are 2m x 1m with a 180 degree turn to the next flight of stairs so quite a large space for your body to reset and lose the rhythm of the previous flight of stairs. Would appreciate any thoughts or comments thanks.
-
Graven Hill build, 7 weeks of brick laying update
DarrenA replied to DarrenA's topic in Introduce Yourself
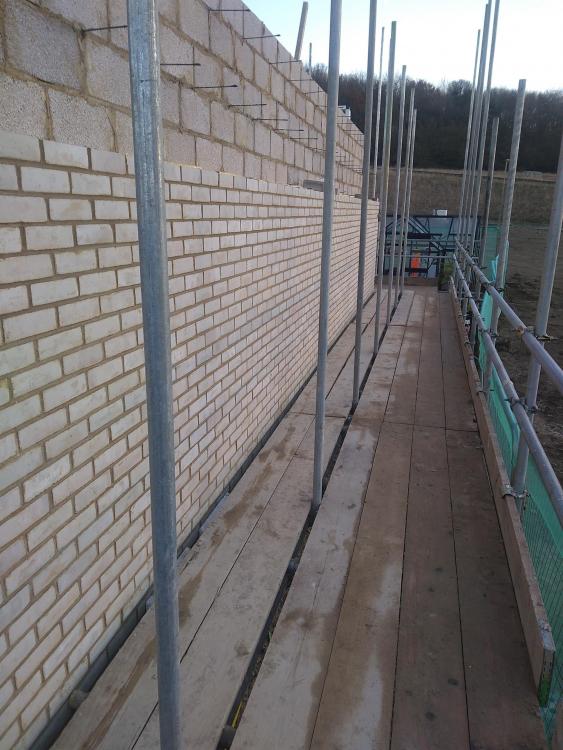
We put a lot of thought into the best way of getting light mortar. In the end though, we followed advice from this site and sourced the lightest local sand we could find and mixed with regular cement and lime. It's hard to tell in these wet conditions but it dries to a very acceptable colour. https://forum.buildhub.org.uk/topic/11082-white-mortar-any-ideas-please/ -
Graven Hill build, 7 weeks of brick laying update
DarrenA replied to DarrenA's topic in Introduce Yourself
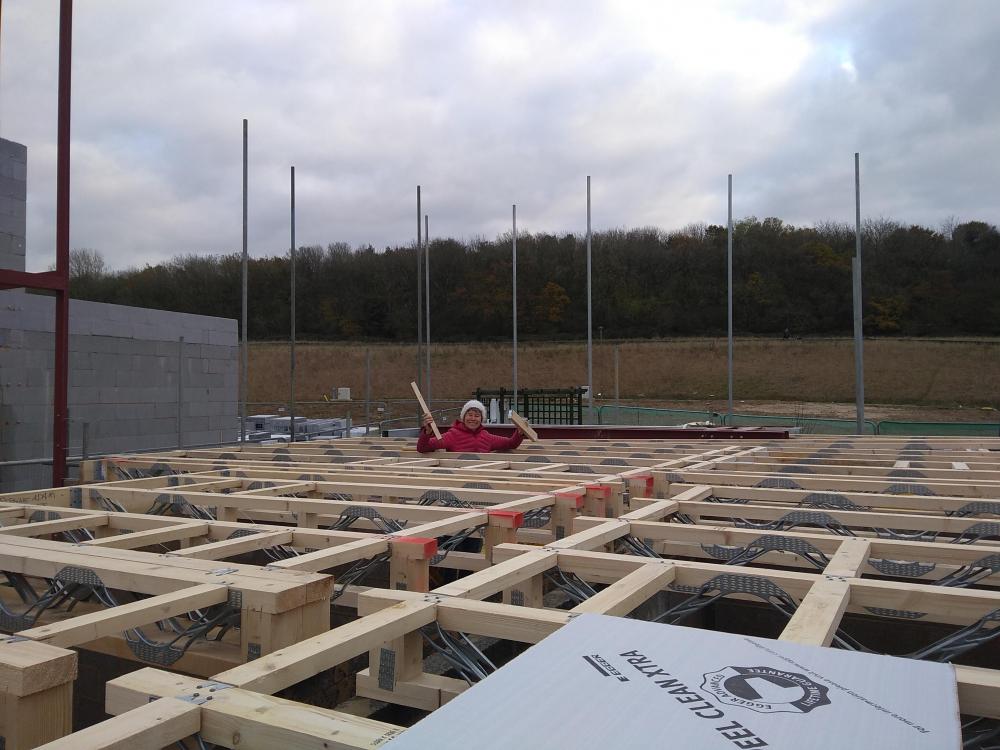
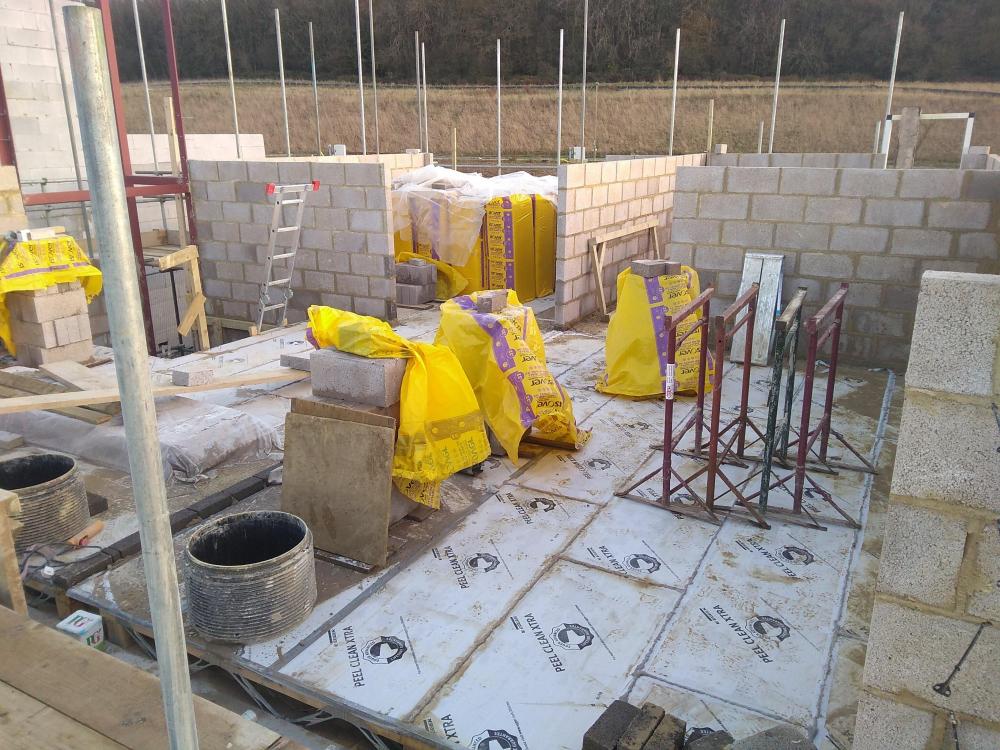
This was supplied by the joist manufacturer as part of the first floor joists package. We didn't choose it but were aware we'd need something to survive the weather so were happy to go with it. We had a nightmare unloading though (no hiab on their lorry) so have specified joists only for the remaining 2 storeys and are sourcing the boards from the builders merchant instead. They don't stock Egger so we're switching to the Caberdek equivalent. Interestingly the joist manufacturer think Egger are far superior to Caber. But we don't have a choice. The only obvious difference is that the Egger product doesn't need tape sealing so is quicker to install. -
It's 120mm insulation. I'm doing the falls using firring on top of the joists (cross firrings to create diagonal falls. Then 22mm ply on top. The roofers take it from there although we are supplying the insulation. Overall there are walls and parapets all round, 11 internal corners, 1 external corner, 5 drainage outlets and one soil vent detail. It's a reputable company and I agree seems like a reasonable quote. 3534 WD07G External Services and internal Penetrations, Roof Plan.pdf
-
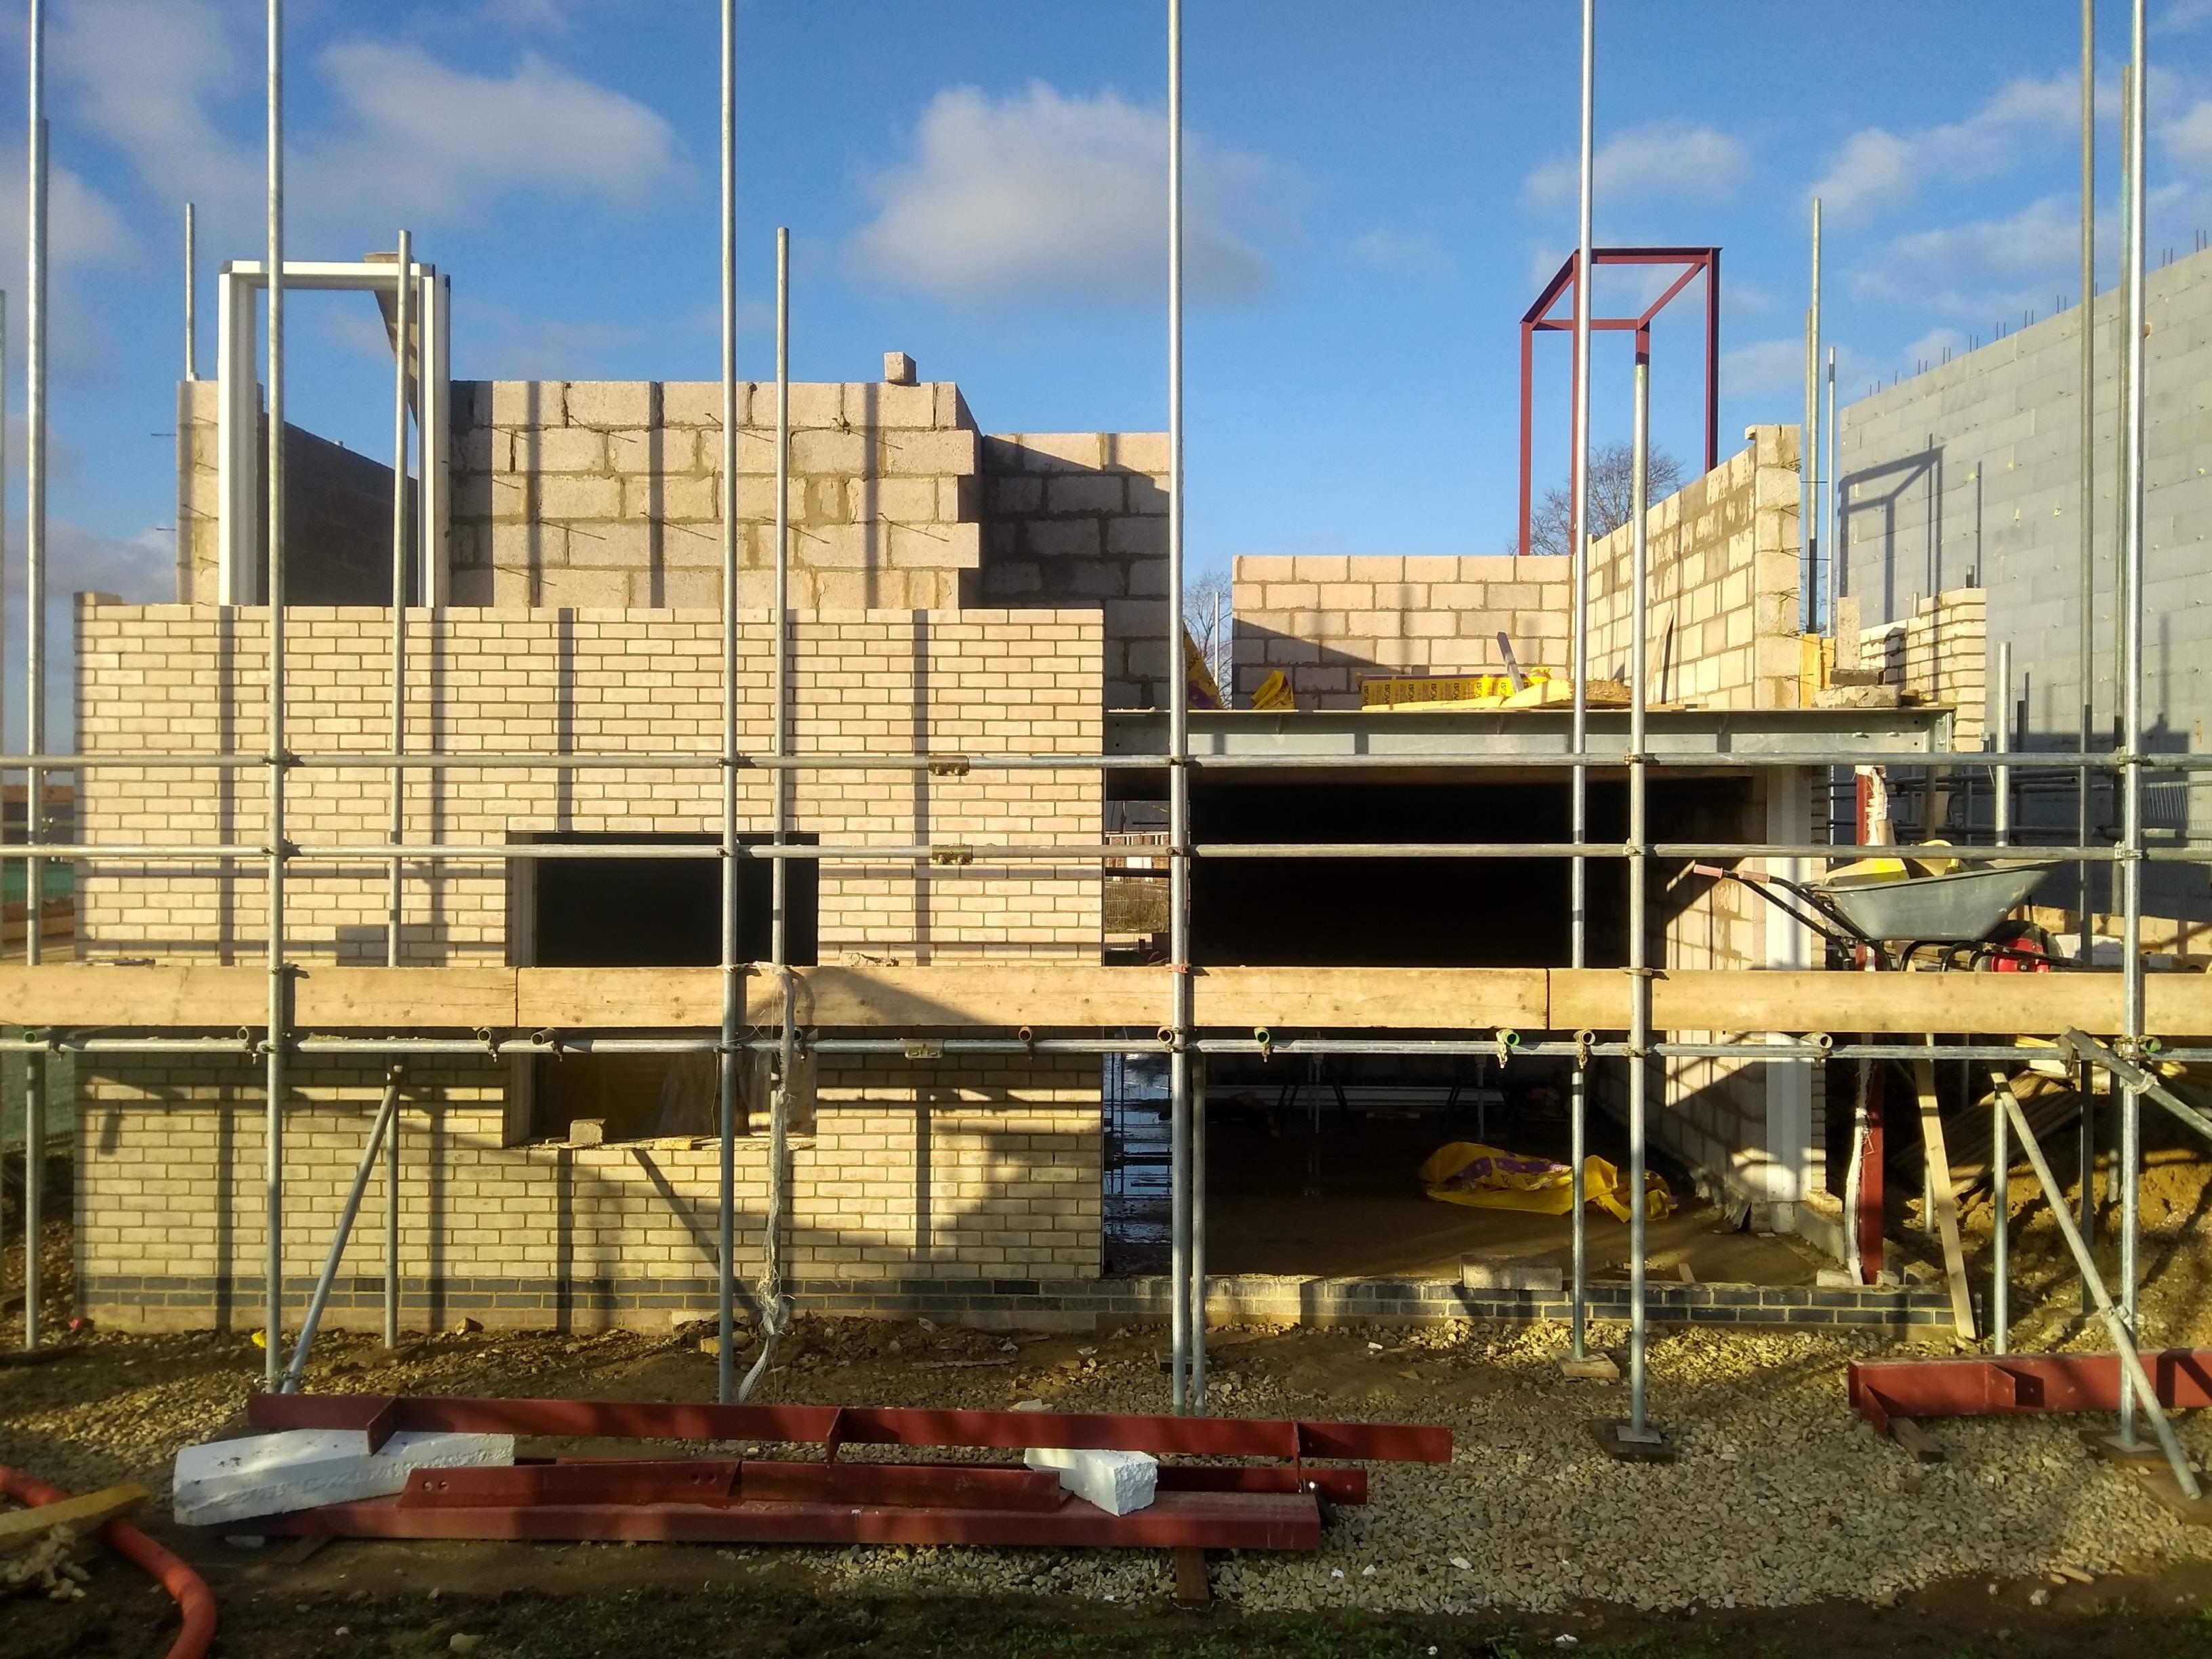
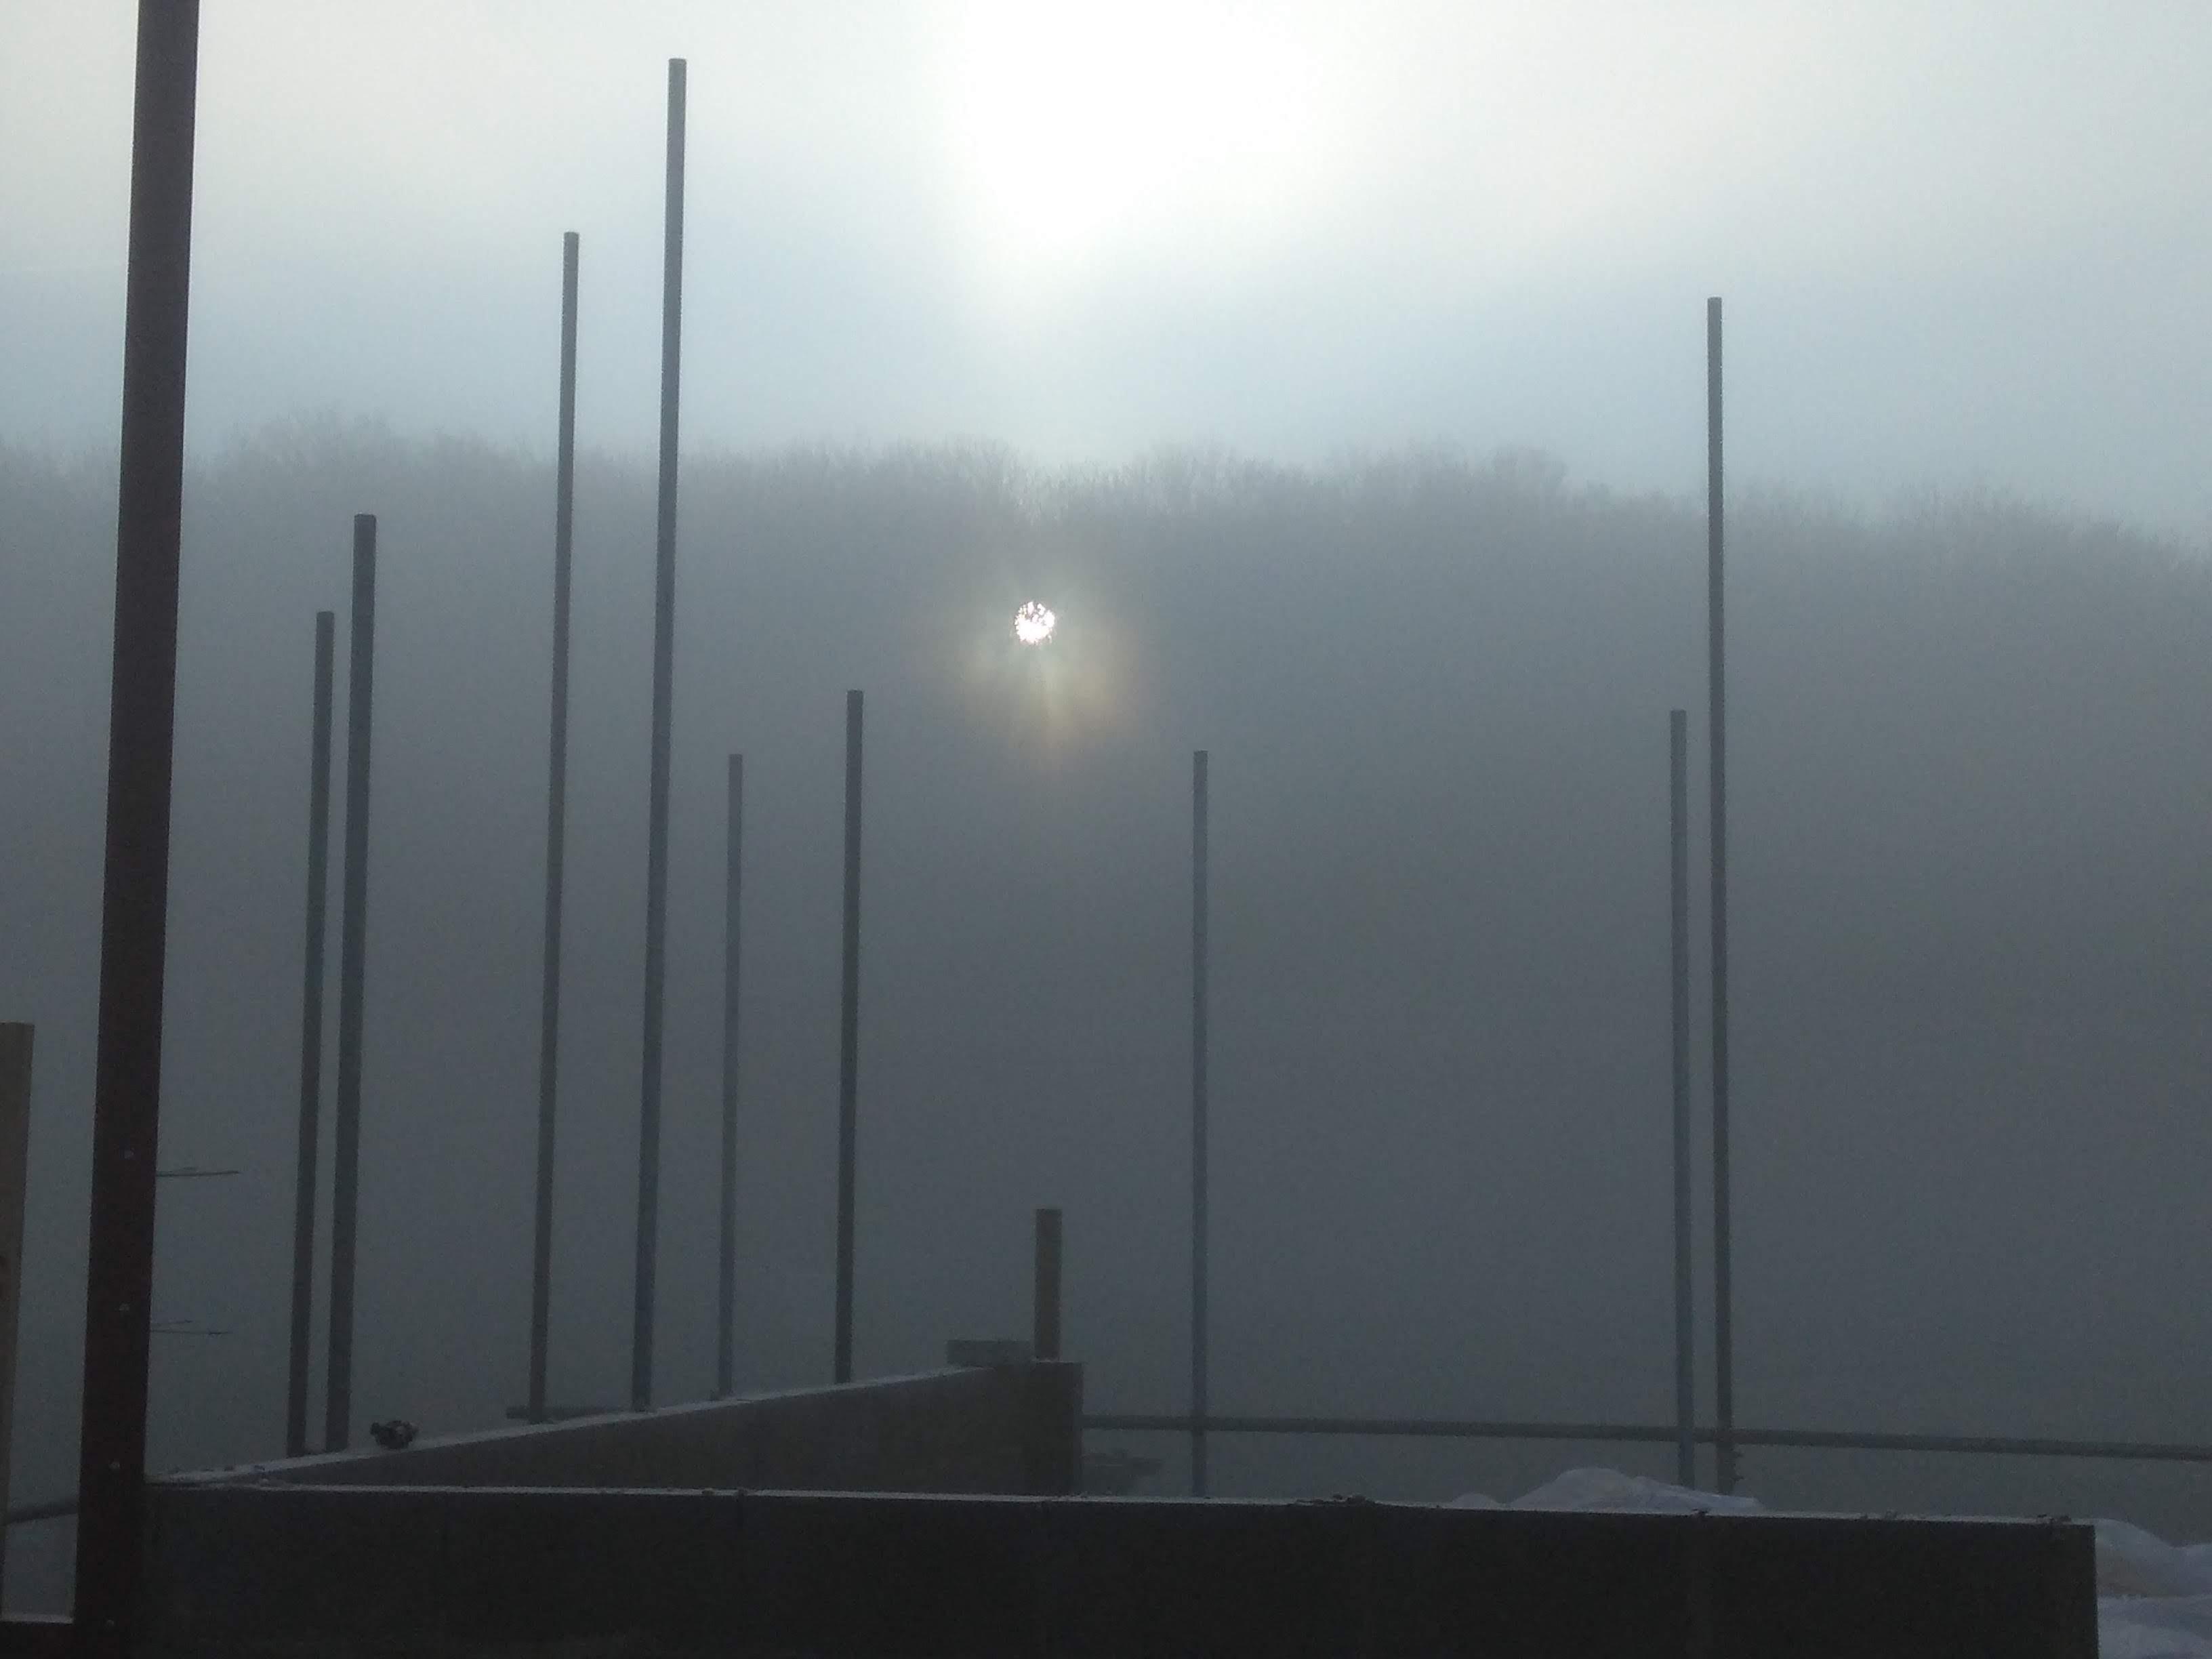
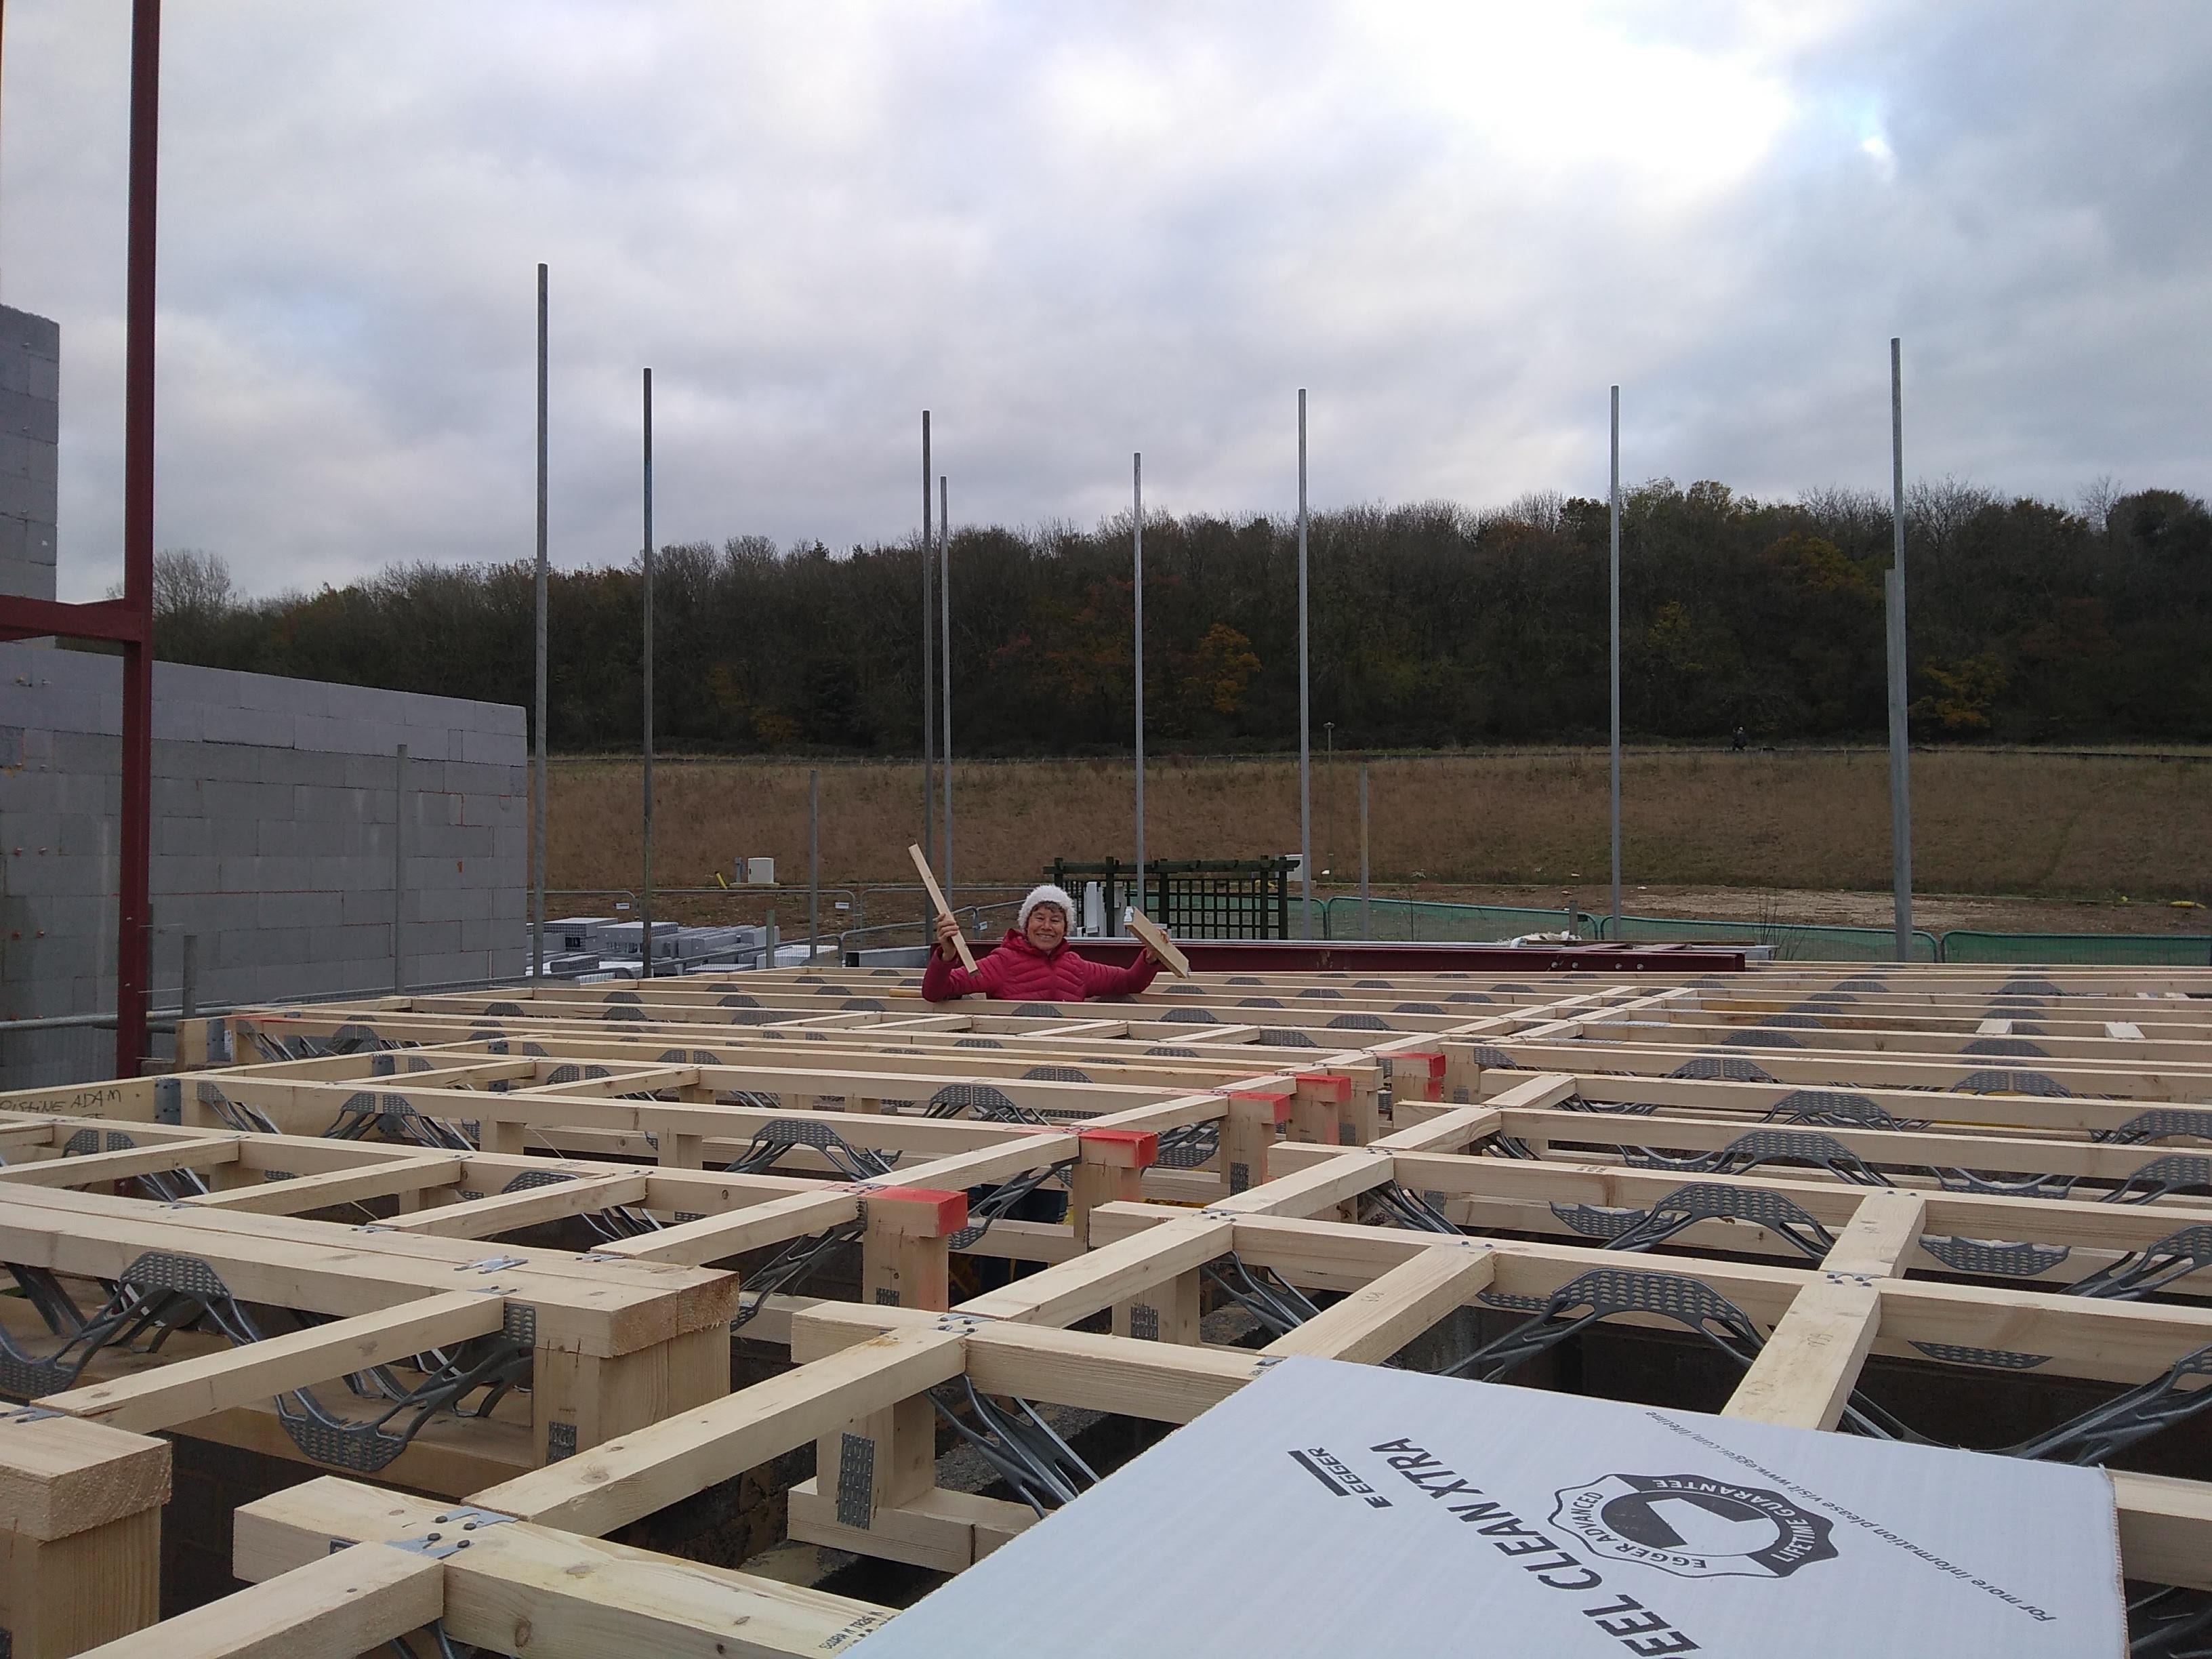
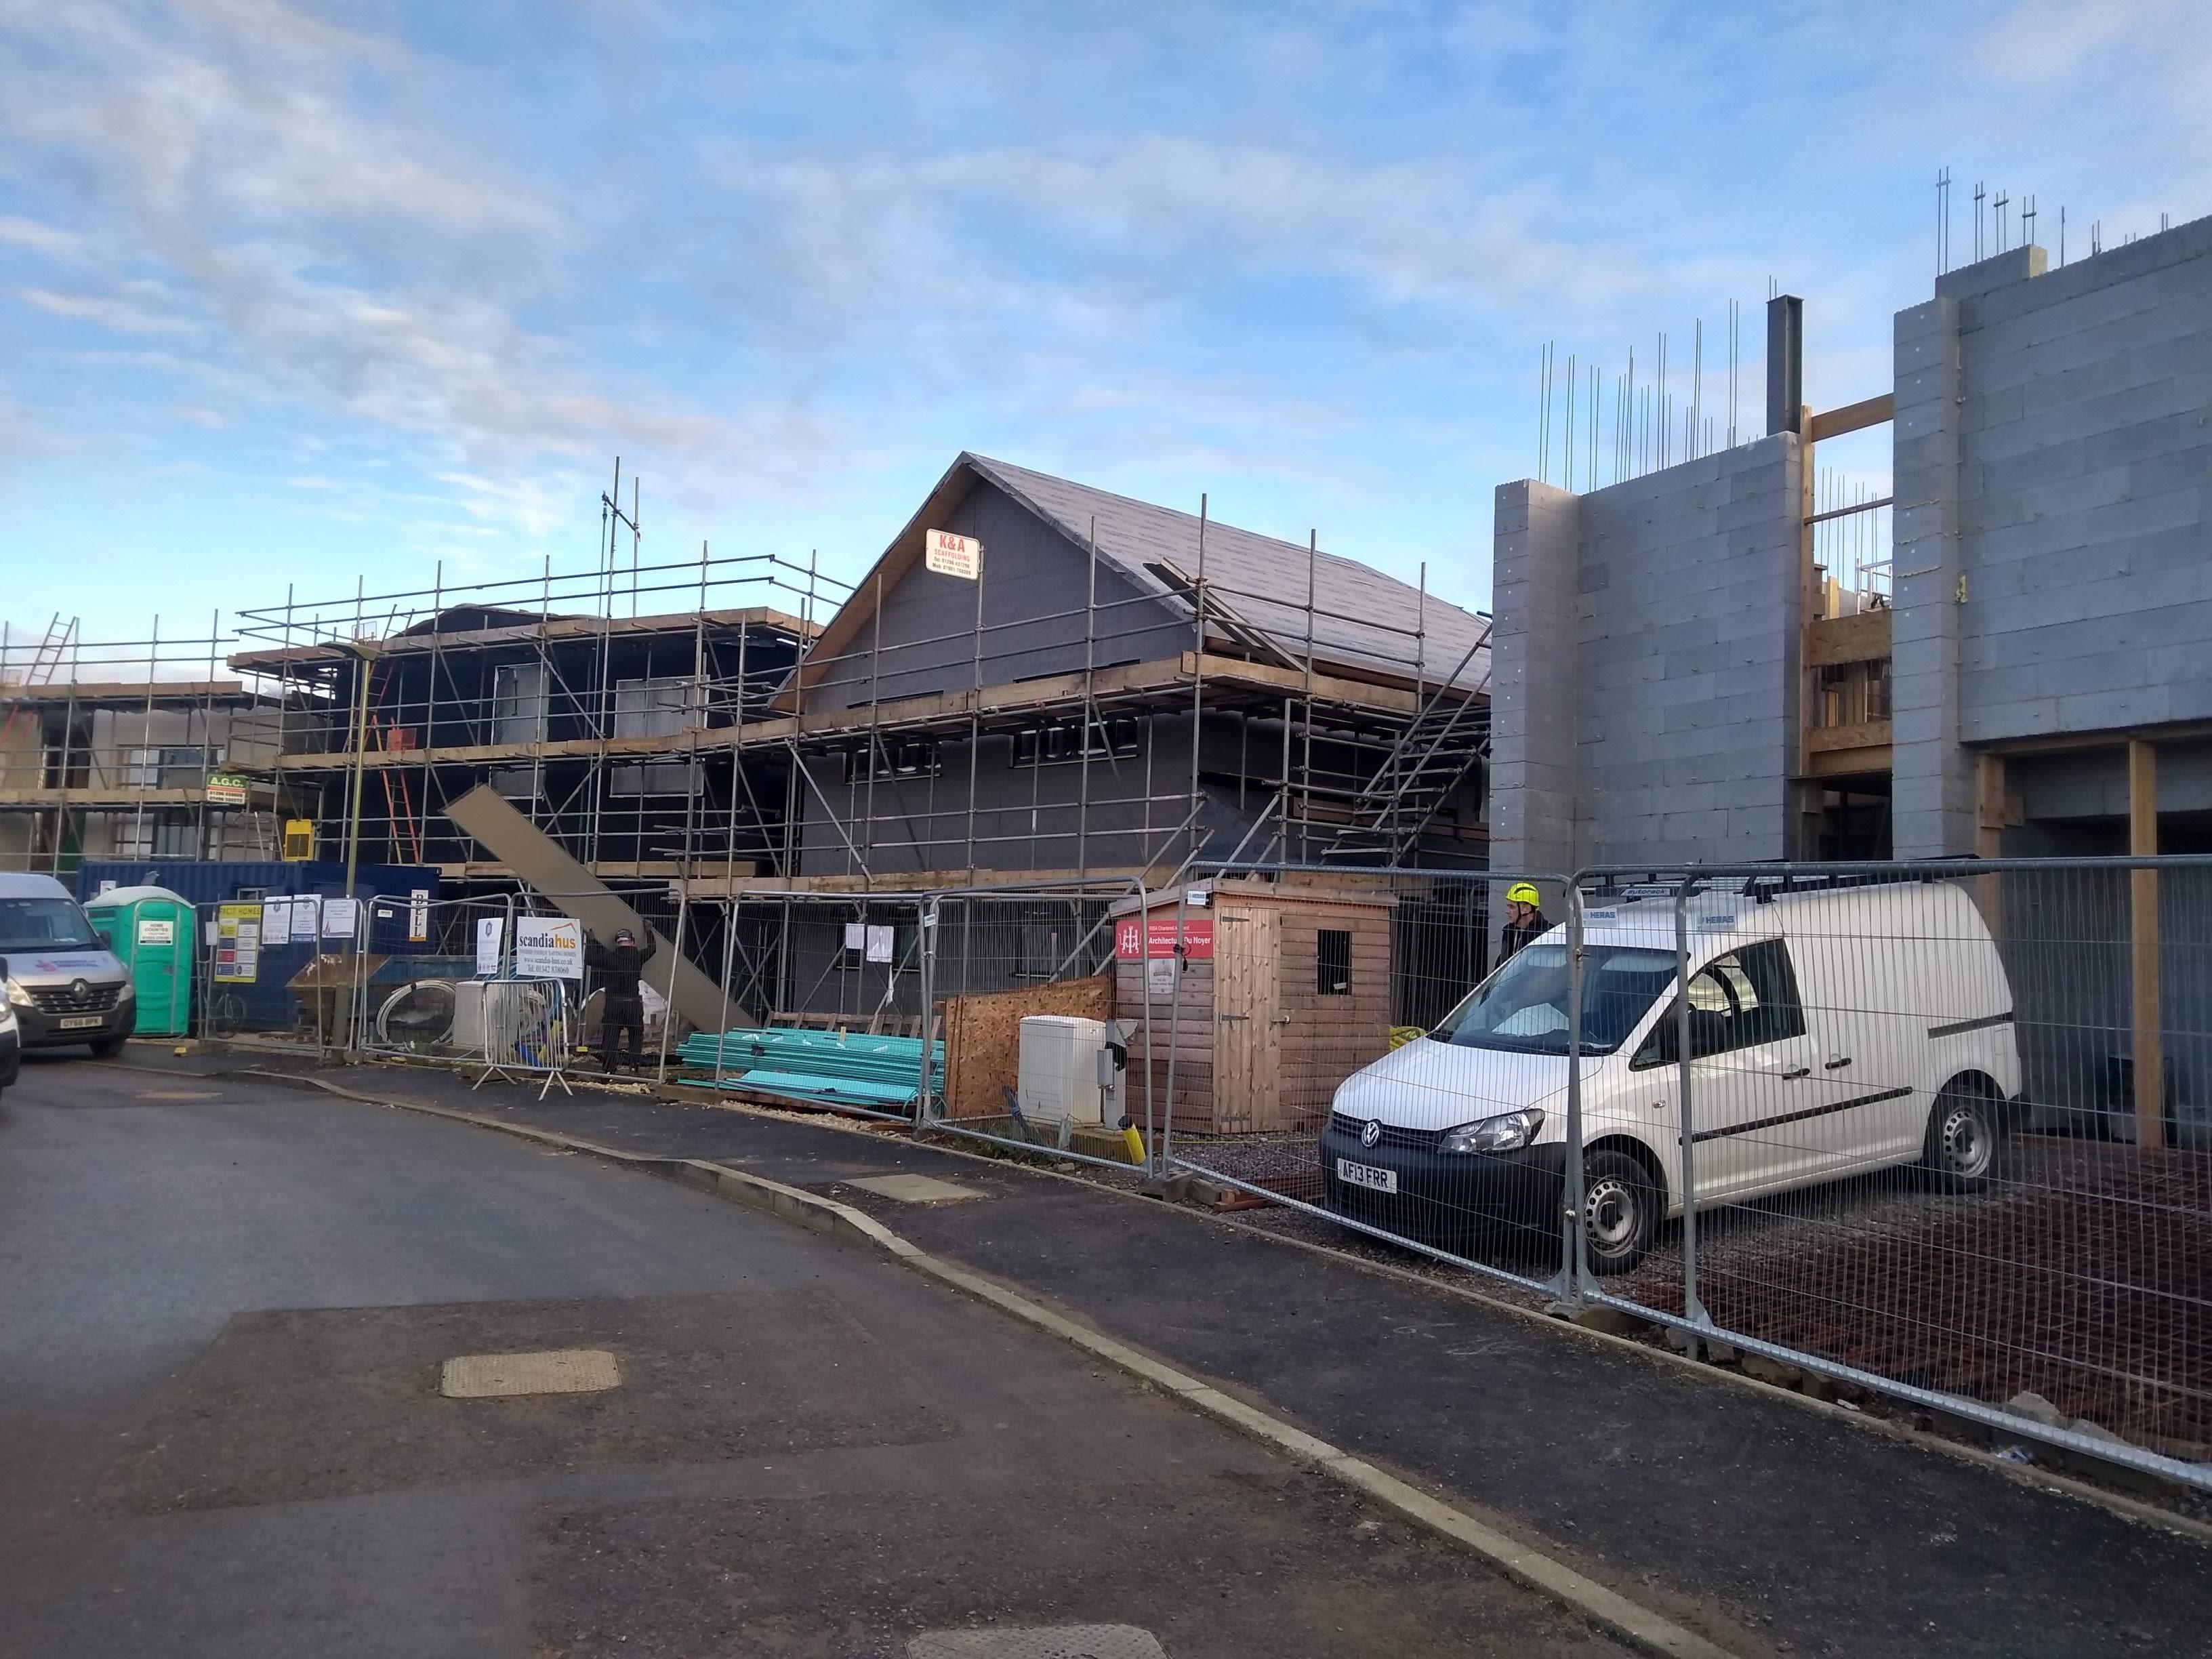
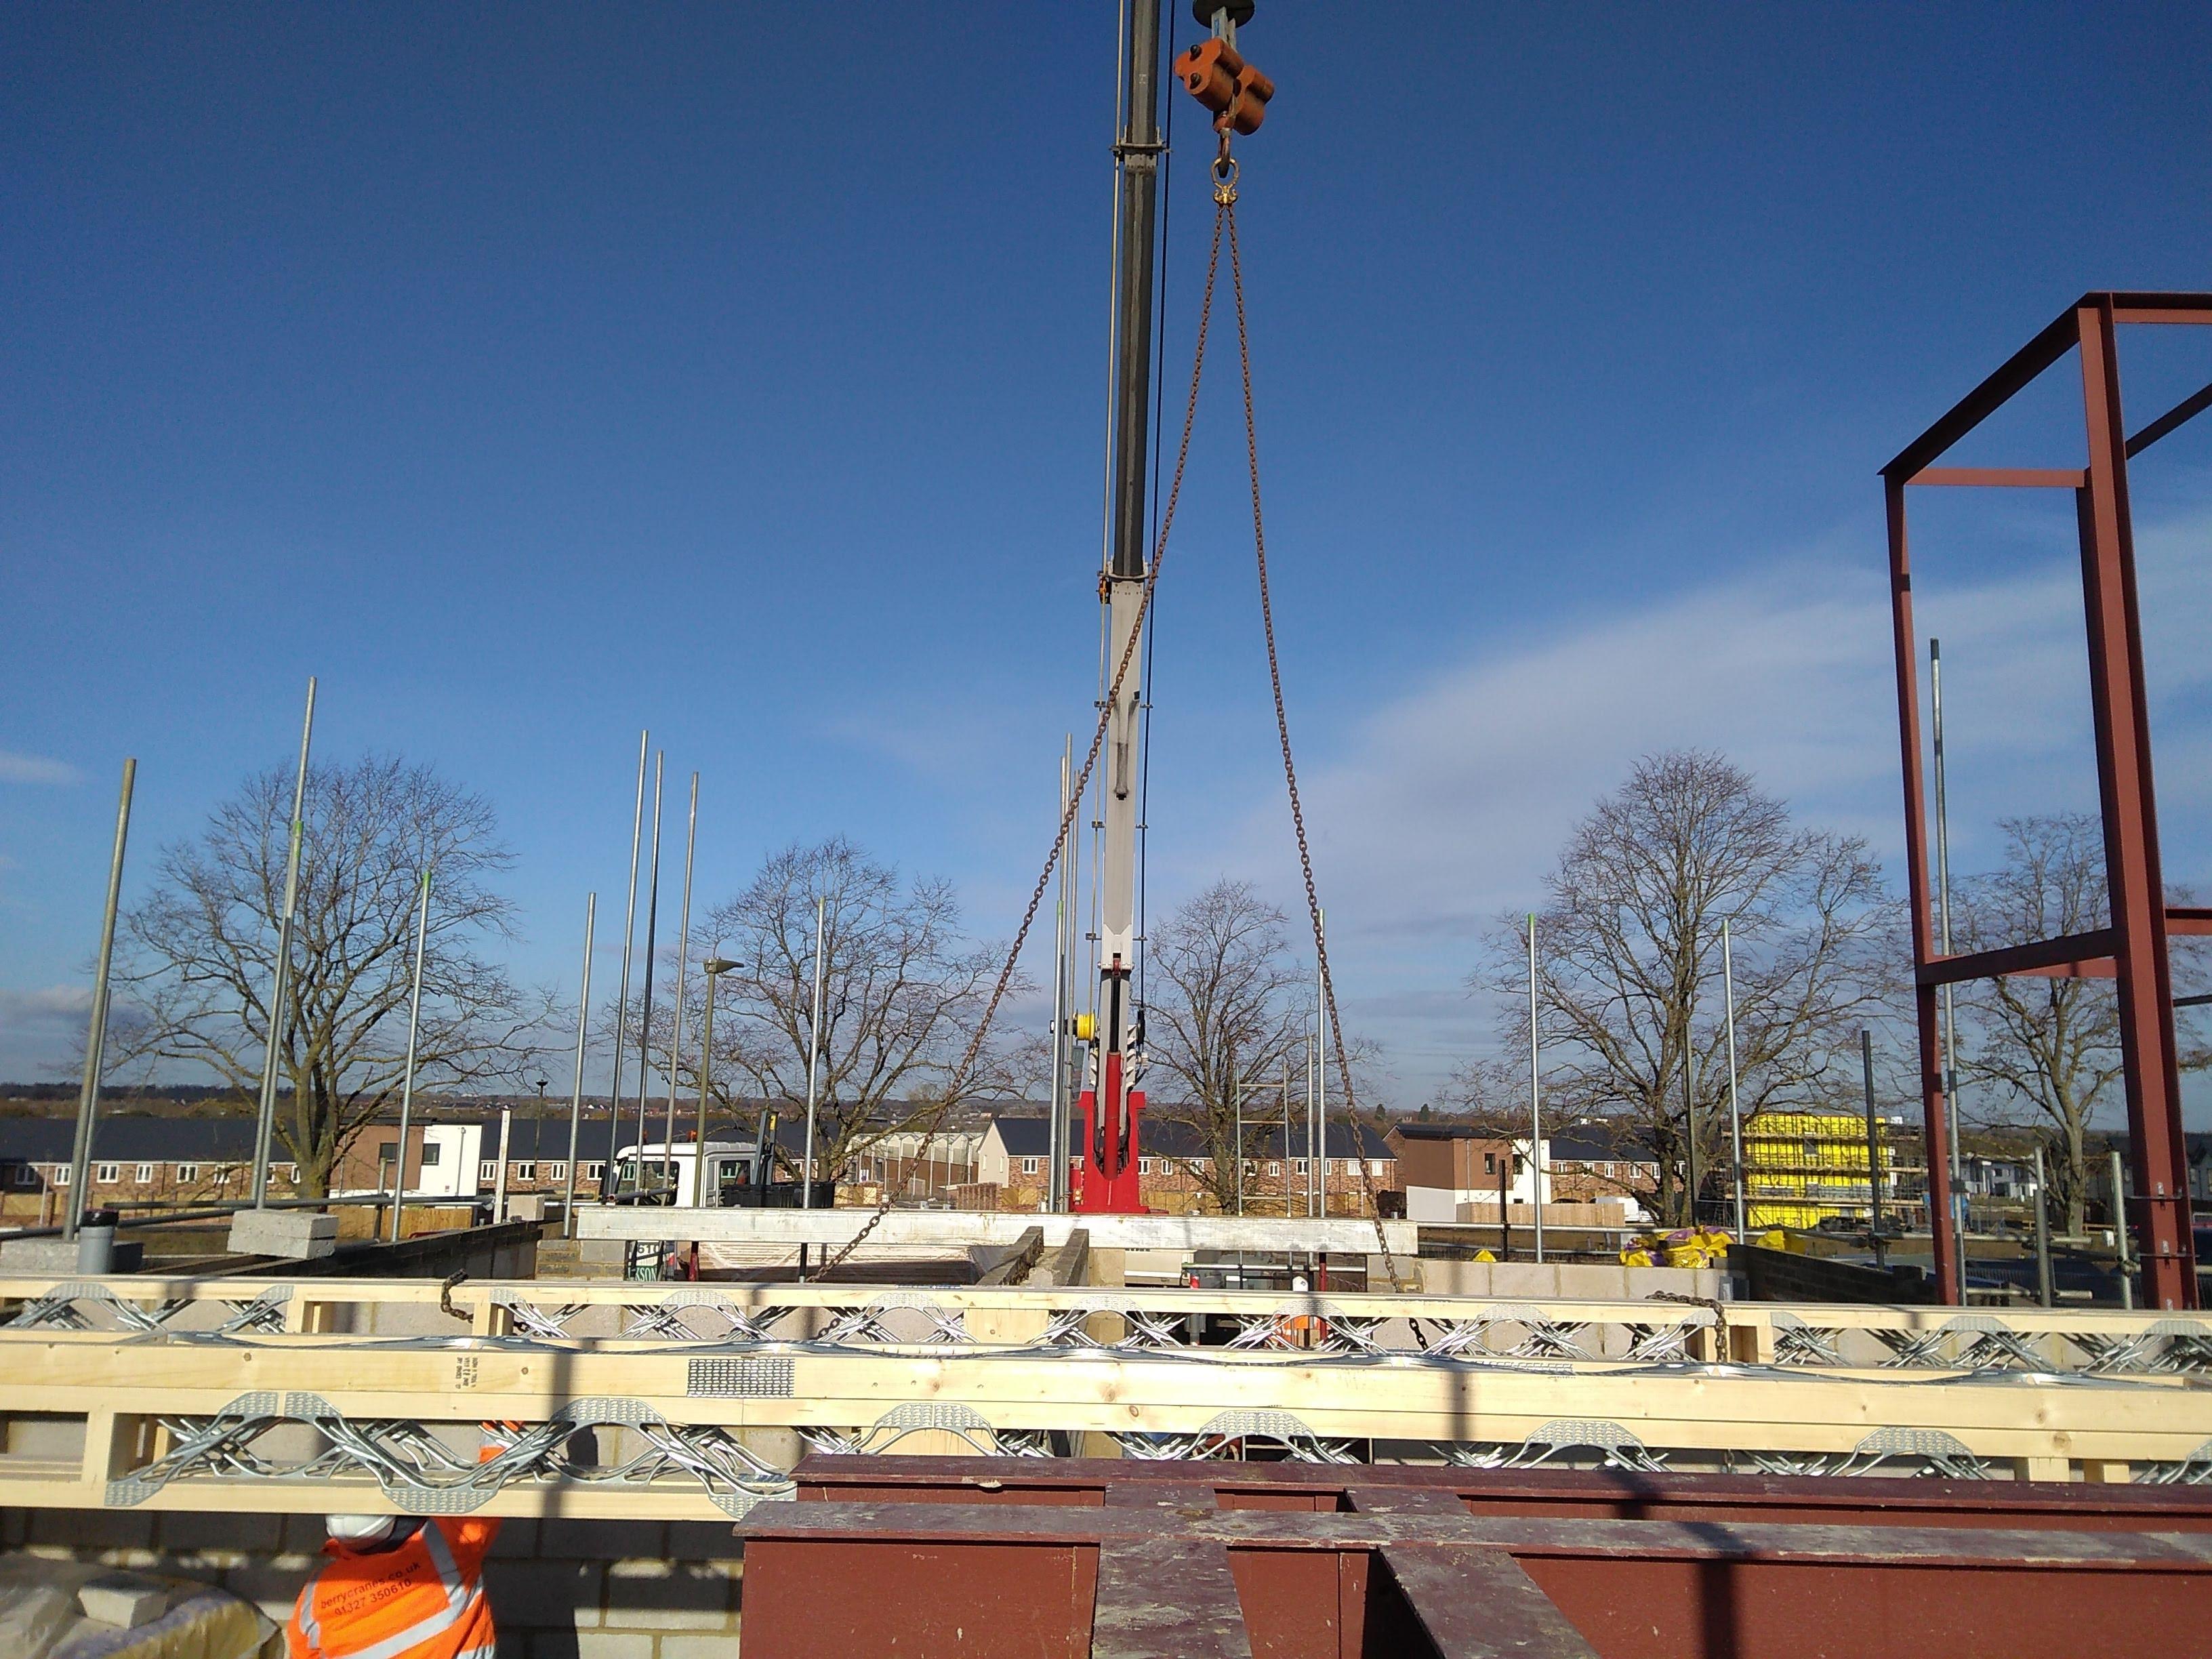
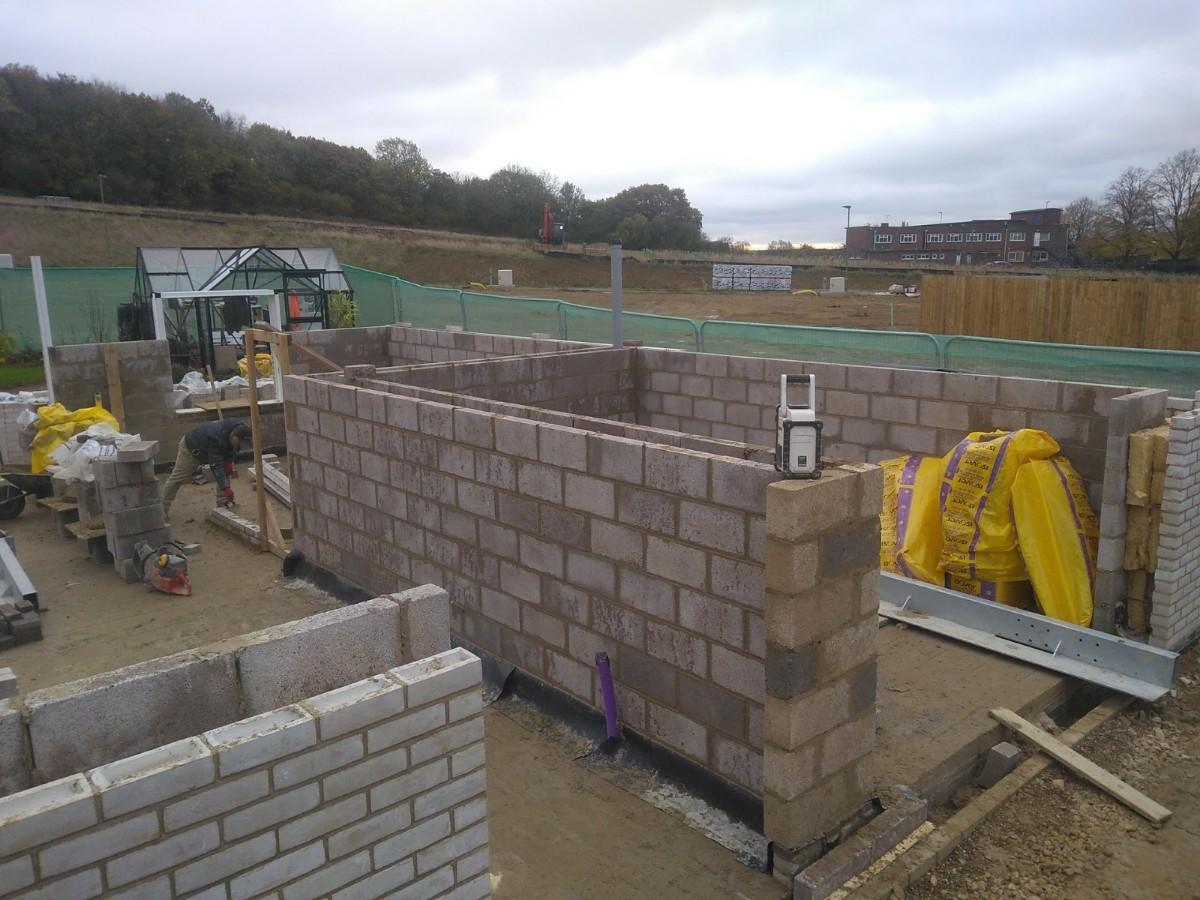
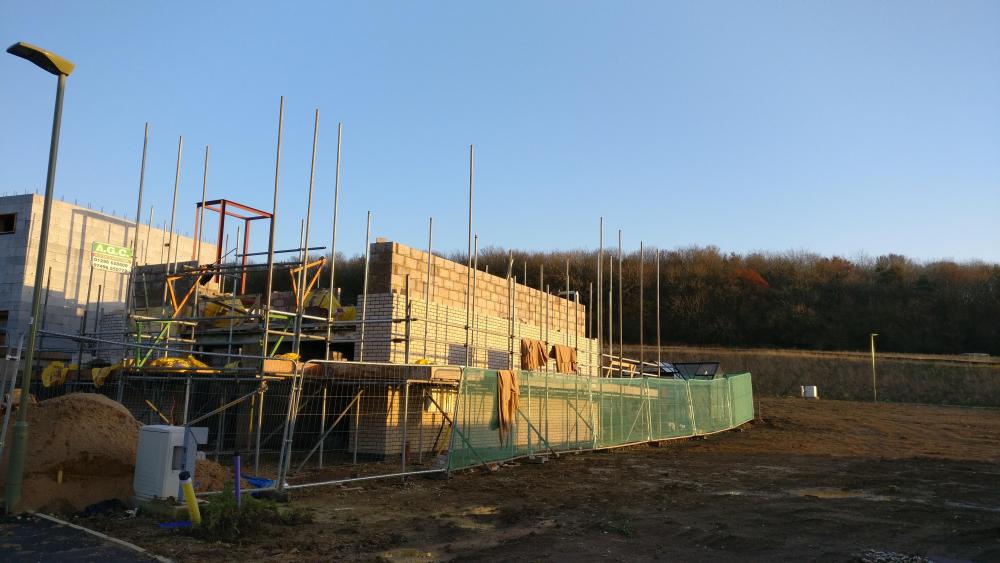
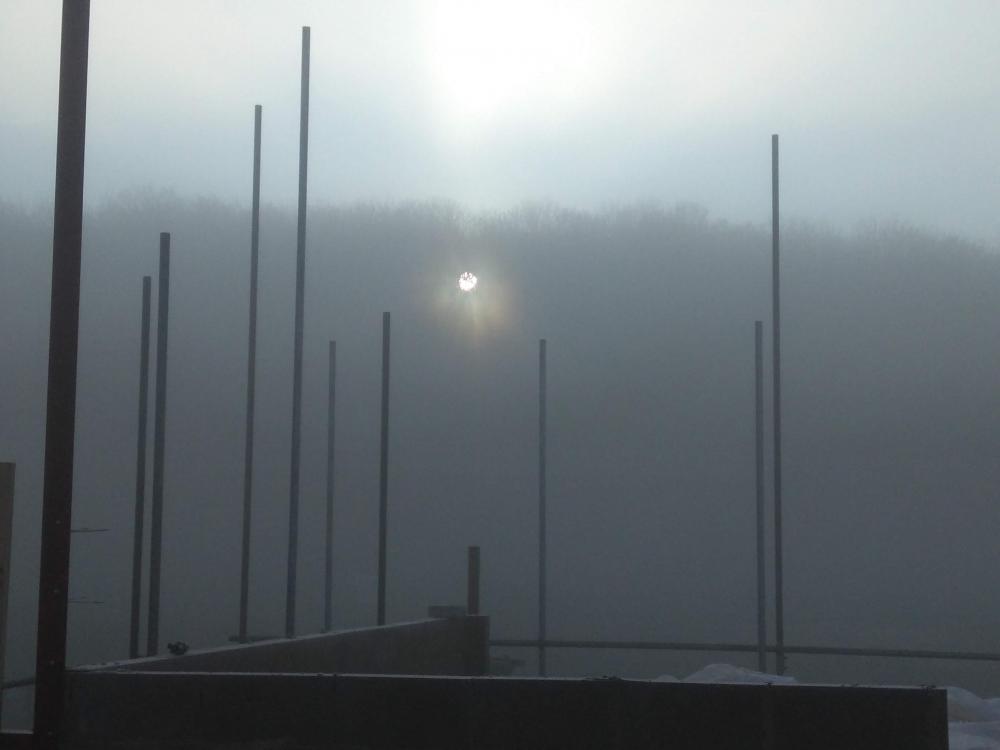
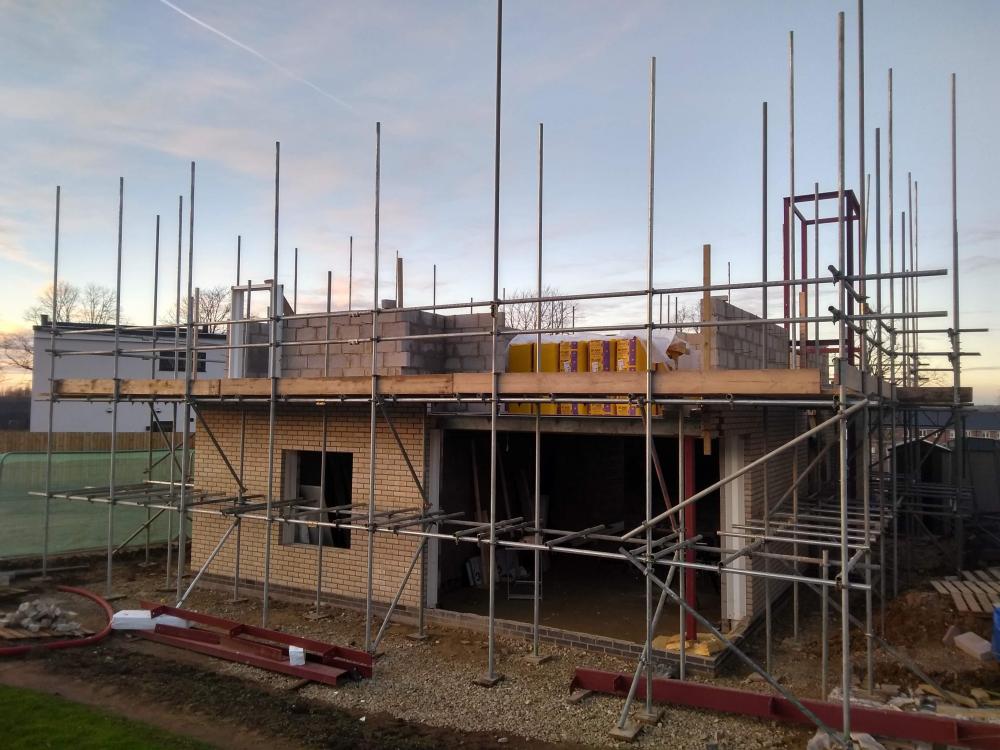
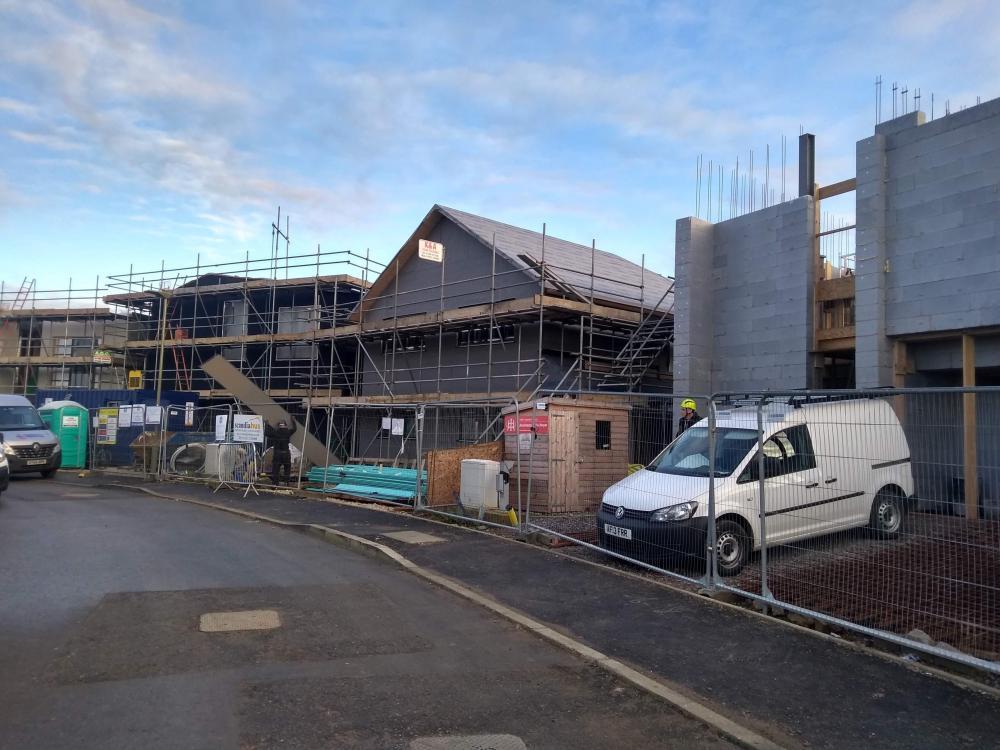
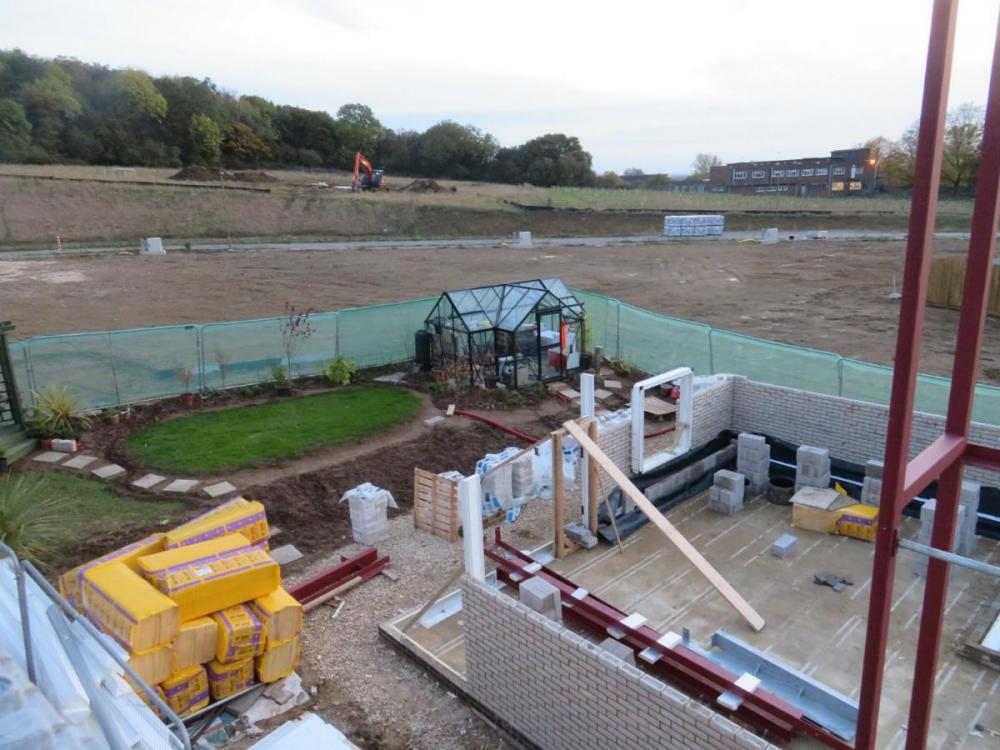
This follows on from my previous update https://forum.buildhub.org.uk/topic/12101-graven-hill-build-2-month-update I've reset the clock on this. Our actual time line is that we exchanged on the plot in May, the foundations were finished in August and we completed and got access to the plot at the beginning of September. However our bricklayer was on another job so we just set up the site and made a garden for 6 weeks. Our bricklayer started mid September and has been on site for 7 weeks. It's going very well and we are shocked at the speed of progress. The bricklayer works alone although we have done a lot of labouring for him. The ground floor is complete, we did the joists and floors and the second storey is half done. The most stressful day was when we had to hire a crane. The hire company had a 3 hour option (£700+vat) and it was a worrying time getting everything done. This was for putting up the steels for the balcony and others bits at first floor level. In fact, we finished comfortably in time so also used the crane to lift the 8m joists into place and spent the final 20 minutes drinking tea. The weather has been awkward and I strongly recommend building your brick and block house at a different time of year. At the moment even though it's just about light at 7.30am, it's normally too cold to mix the mortar. So the actual bricklaying window is only around 6 hours a day. Also our white bricks are marking really easily so we only lay bricks in the dry. The blocks aren't so bad and although it's been cold and dark, we've been lucky with the rain. So overall, we've only lost 2 days so far due to weather and never run out of things to do. We've had 2 lifts of scaffolding with 3 to go. My £70 silverline hoist is doing very well so far lifting lintels and mortar. Our scaffold height is now at the limits of the hiab cranes on delivery trucks so after the next lift we will have a new problem getting the bricks and blocks where we need them. Next steps are thinking about what flat roofing system to use and preparing for the second crane hire to bring in the rest of the steels. So far so good, we've enjoyed every second. I've attached some progress pictures and also a picture of our neighbours all at different states of completion. It should be a very interesting street when we're all finished.


-
Bit late to this thread but we need to put our flat roof on in the next few weeks and still haven't decided on a system. Our architect specified single ply which I took to mean EPDM. But we've just had a quote from a roofing company recommending Protan. Never heard of it before but it looks to be a tried and tested system. Single ply but pvc based rather than rubber based (my interpretation from the website, I'm happy to be corrected). The quote was just over £8k for 95m2 of roof. Most of that is roof terrace or balcony that needs to withstand foot traffic. It's also in 4 sections so not the most straightforward job. I looked at the rough price of raw materials for a DIY EPDM roof and that is around £2.5k. Quite a big difference but I'm minded to go with the pros on this one. Any thoughts or experience of Protan? Protan website
-
Those flames! ? That would definitely freak out the site health and safety guy ?
-
I intend to post periodically here and will do my best. My wife puts something up most days if you are interested in more frequent updates. Christine's Blog
-
I'm pretty sold (well unsold) by Alex's comment so am off charred wood and back on the painted/artificial wood route now. Just to be clear, the huge price difference at yours was purely down to whether it was fire proofed or not? I like the look of yours and suspect we'll not need the additional fire proofing as there are no timber frame buildings nearby.
-
Thank you, that's very useful. Sounds like another no go.
-
It certainly sounds better in Japanese ?. No I'm not looking for the fireproofing properties. I'm looking for a dark black solution that doesn't fade or need maintaining.
-
It looks great, I assume it is holding up well? My main criteria is something that looks sharp and keeps its looks maintenance free.
-
Anyone have any thoughts or opinions on burnt wooden cladding. It came up on a design TV program repeat I was watching yesterday and I'm wondering if it might be more unusual and longer lasting that black painted wood or the engineered painted wood like thermopine. I'm thinking about buying it preburnt from somewhere like carbonbydesign.co.uk rather than DIY charring.
-
Maybe... I've ordered some samples thanks
-
Do you have any idea of the price and whether they sell direct rather than through installers. I've gone through my samples pile and found some and it might work.
-
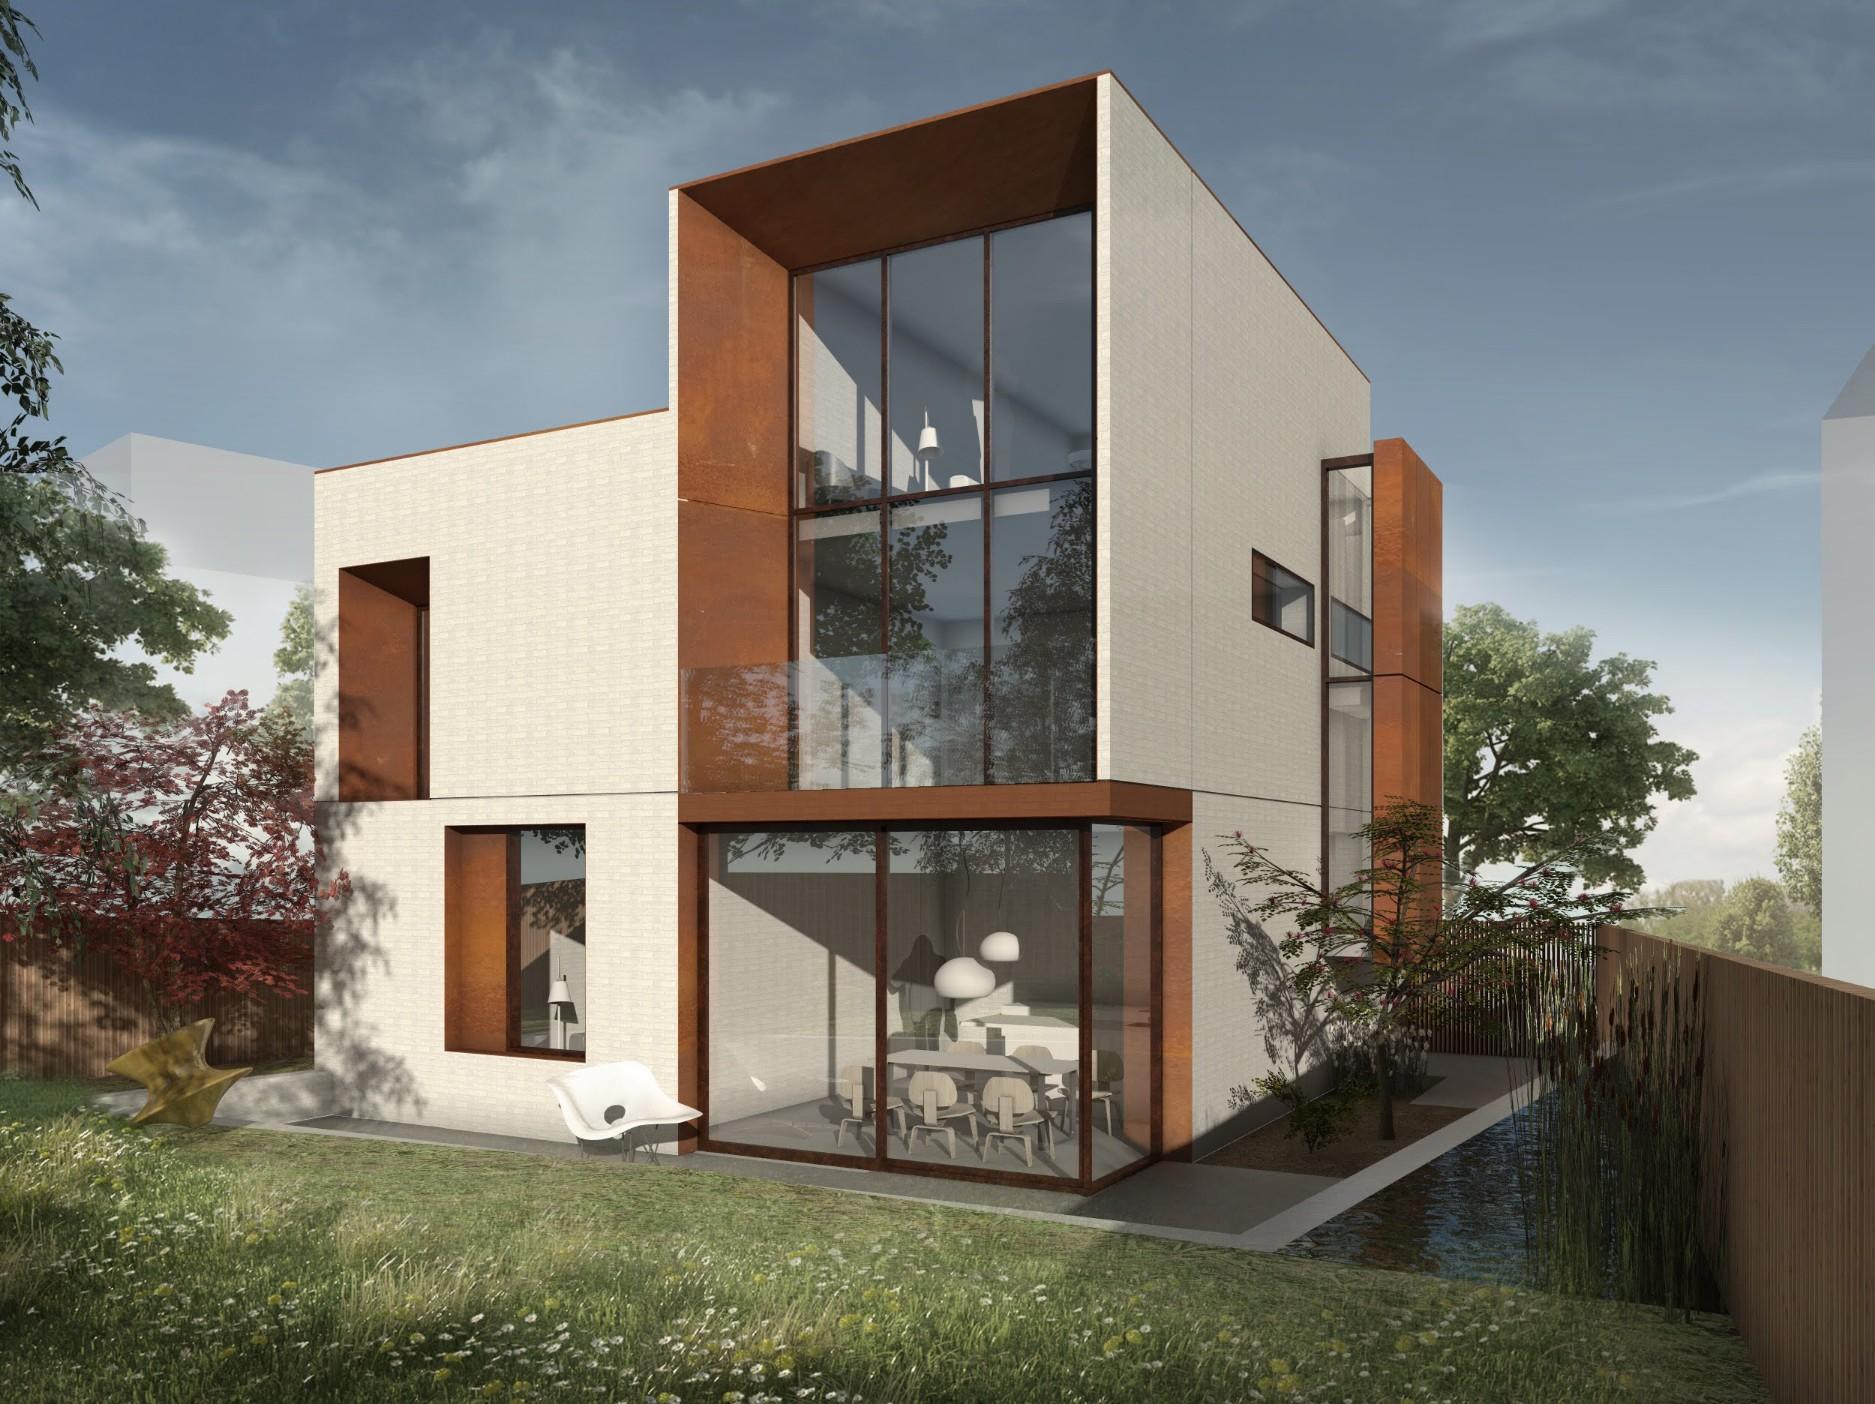
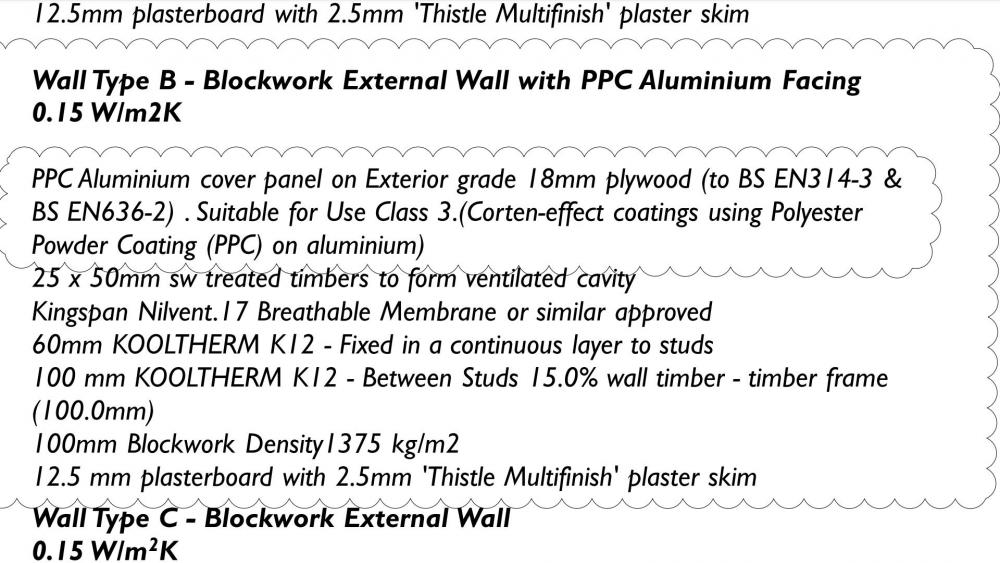
Our architect has been great but has also been paid so she isn't keen on changing the design, especially for free. But she recommended the Kingspan corten cladding solution. I'm pretty sure this comes in stable sheets of corten wrapped around insulation. I'm going on their installers training course next week to find out more. But my gut feeling is that it will work out far more expensive than plain sheets. I also went on the Tata Steel Colorcoat-Urban course for painted steel cladding. It was impressive, easy to fix, belt and braces watertight and in budget. But the panels fitted quite loosely and didn't give a flat, smooth finish. Also the colour palette is very limited for small orders. Thanks for the rust advice, it has put me off a lot. The question is what cladding to use instead. I tried to get PPC aluminum cladding quotes based on our plans but the only company who seemed to consider the job properly came back with a quote of nearly £20k. Nothing came in under £12k. Colorcoat Urban came in at £4k which is in budget but like I say, we didn't like the product for our house. Black timber cladding is to our taste and might be where we end up. It's also a possibility to have elements of corten in areas well away from the brickwork such as around the staircase. Decisions decisions.
-
Yes, that has crossed my mind. If the drips drop down I think the run off can be managed to avoid the bricks. But if they are blown around in the rain and streak sideways then yes it's going to be an issue. My fallback plan is to hose the bricks down but am not sure if that will remove the stains. It's a very good point.
-
Our build has quite a lot of decorative cladding - the brown bits in the pictures (the white bits are brick). Our architect has specified aluminum cladding here but it seems very expensive and not DIY friendly. I'm considering switching to corten steel sheets instead with visible screw fixings and a gap between the sheets for expansion. I've attached the architect spec for the wall build up for aluminium cladding. Basically it is fixed to 18mm ply on batons to give a cavity behind. Does anyone have an equivalent spec if I use corten sheets instead? In particular, does it need the ply backing or can I fix it straight to batons? How do I fix it - should the screw holes be oversized for expansion, how many fixings, how much gap between each sheet, should the gap be filled with anything like rubber gaskets, etc. Also what thickness of sheet is appropriate. 1.5mm and 2mm seem common. I'd like it as light and easy to work as possible but don't want any crinkles or dents. And finally is this a good idea or am I missing something? All thoughts appreciated ?

-
I take it trowel is a term for bricklayer ?. Never heard that one, will he be offended if I tell him?
-
The bricklayer is expensive. A fixed price of £23k for around 13000 bricks and 3000 blocks. But this is the one we wanted and didn't really shop around for other quotes. I wouldn't take this as a useful indication of Oxfordshire rates. We have a 200mm cavity and are using Cavalok BigBlok. I made the frames on site from 6m lengths (around £30 a length). I'm fairly impressed for the price. We're having separate concrete and catnic lintels above the windows. The brickie thinks the closers will be in the way in which case I'll take the tops off. But they were useful for keeping things square.
-
No, we just have the fenced area. 460m2 I think. Our house is a row of 9 in an inner crescent. We back onto larger plots up the hill on the outer crescent. It will be a while before any of the outer crescent houses are built. One unexpected surprise is getting flooded by rainwater coming straight down the hill from these plots and flooding our garden. We've had to make dams and canals to send the water where it does least harm. Long term we're considering embracing it and building a trench and rill around the plot and enjoying a water feature.
-
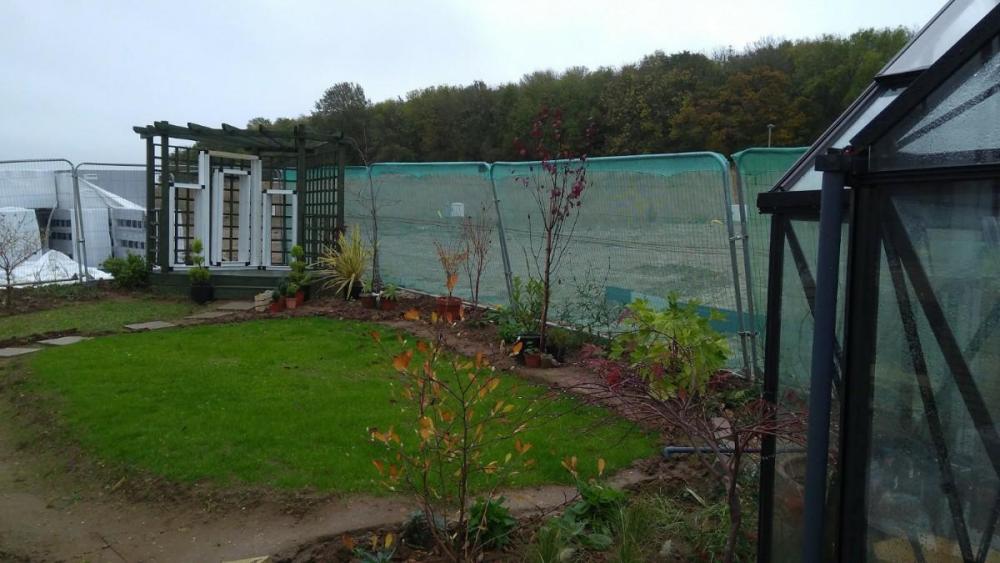
We've been on site for 2 months now. Here's the original introduce yourself thread. Introduce Myself It's been mostly quiet while we waited 6 weeks for our bricklayer who was delayed on his previous job. We think we put the time to good use by doing the garden. The grass seed has turned into a very healthy lawn, the wildflower area is growing something, probably weeds, we have a greenhouse that doubles up into a very comfortable welfare area, a fully plumbed toilet in the garden shed and a gazebo for project meetings next summer. However all the professionals who have visited the site laugh and say they've never seen a garden before the house site. Our bricklayer has been on site for 2 weeks and we are ready for the first scaffold lift. It's going very well, the bricklayer is a perfectionist, the weather has been tolerable and we are very happy with the layout of the house so far. The white bricks are very easily marked and we will end up with a more natural white house than the toothpaste coloured cube we were expecting. That's probably for the best in hindsight. We took the advice from here to use a lime mortar mix to keep the colour light and that's going well so far. Scaffolding arrives tomorrow, joists and first floor next week, crane to lift the steels soon after and then we can think about ordering the windows. Current decisions revolve around whether to go with single ply rubber or fibreglass for the flat roof and terrace and what cladding to use. I'll start a new thread for those.


-
Yep 290. My wife Christine painted the stone months ago. Also did a painting of the house and 3 different cardboard models. It's so exciting to actually get on site and do some real work. We're building in brick and starting with the garden ?. First job is to plant the transplanted trees that are very unhappy with the move and now the weather and putting up our welfare greenhouse. We're keen to sow the grass for the garden but it won't last long on a wet day when the telehandler is around. You can tell this is our first build. Sure we will bump into each other soon.