Gballam
-
Posts
27 -
Joined
-
Last visited
Gballam's Achievements
Member (3/5)
4
Reputation
-
Hi all, Was going to submit this to BC but thought I'd post here in case anyone can see an improved design/obvious issues. Don't want to have ICs at the front of the house or to have to dig too deep nearer the house hence this arrangement. Thanks very much 050626 Drainage Plan.pdf
-
Not managed a self build before and am copy pasting the structure of house my parents and then brother built. Seems like a good way of getting a well-insulated house especially as we want to be doing bits ourselves
-
No it will be open panels. Preferred the rockwool approach as we can do that ourselves
-
Just need to decide on beam and block vs slab plus strip footings for the floor. Have got a 450mm change in level running straight across the whole house on which will sit a load bearing wall. Anybody solved that well thermally before?

-
Here's the final plan (unless it makes sense to go to 100mm financially - although conscious of making doing the battening really hard) 1. Walls Target U-value: 0.12 W/m²K & Airtightness Target 0.6 ACH Structural Frame: 140 mm C24 timber studs with 9 mm OSB3 external sheathing Primary Insulation: 140 mm mineral wool (e.g. Rockwool Flexi) friction-fitted between studs Airtight & VCL Layer: Pro Clima Intello Plus installed to the internal face of 140 mm studs Membrane to extend 150–200 mm above the wall plate Internal Insulation: 80 mm continuous PIR board (e.g. Celotex) Rim-board detail to accommodate 80 mm of insulation and a pre-installed Pro Clima Intello Plus strip All joints taped with Tescon Vana to create a secondary vapour barrier Service Cavity: 50 mm battened void Battens fixed through PIR/Intello into studs using Pro Clima Tescon Naide on back of every batten Weathering & Ventilation: Taped Protect TF200 breather membrane Minimum 30 mm continuous cavity formed by vertical/horizontal counter-battens for boards Fire & Vermin Safety: Non-combustible cavity barriers at windows/floor junctions Integrated vermin mesh at cavity base 2. Warm Eaves Hybrid Ventilated Roof Target U-value: 0.11 W/m²K Main Insulation: 400 mm mineral wool in two staggered layers Eaves Detail: Tall ventilation baffle to maintain 50 mm continuous air path from soffit to ridge and act as wind-wash guard for insulation Ceiling Service Void: 25 x 50 mm battens under Intello membrane Solar & Weathering: GSE in-roof integrated mounting system Protect TF200 under slates with ventilated ridge tiles
-
That's interesting - will look into to that
-
Thanks for your replies - have decided to do almost exactly this 🙂
-
Aiming for near-passive (and hoping to have walls around 0.13) so will need both internal and external the hybrid design
-
Thanks all, very helpful thoughts. Yes I have been wondering whether a hybrid wall of 60mm woodfibre outside studs plus the mineral wool and then pir inside studs is more achievable
-
The why is trying to avoid thermal bridging without a twin frame. The issue is the complexity!
-
Has anyone built a wall build up like this? Any thoughts? Walls – U-value 0.12 W/m²K Internal Finish: 12.5 mm Plasterboard Service Cavity: 50 mm battened void (filled with extra mineral wool?) Airtight & VCL Layer: Pro Clima Intello with joints taped using Pro Clima Tescon Vana. Structural Frame: 140 mm timber studs. Insulation: 140 mm full-fill mineral wool cavity insulation (e.g., Knauf RS45 or Rockwool RWA45). External Sheathing: 9 mm OSB3. Breather Membrane (Frame): Protect TF200. EWI: 160 mm high-density mineral wool (e.g., Rockwool Frontrock or density-equivalent RWA45 slabs). Weather Seal: High-performance W1-rated breather membrane (e.g., Tyvek Housewrap) installed over EWI. Cavity Fixings: Thermally broken structural insulation screws (e.g., HECO Topix-Plus Therm) installed at a 60–67° angle. Screws must achieve a minimum 50 mm embedment into structural timber studs. Ventilation: Horizontal structural battens (min. 38x89 mm) + vertical counter-battens Fire Safety: Euroclass A1 non-combustible cavity barriers. External Finish: Cedral Click vertical cladding + starter/top profiles + vermin mesh.
-
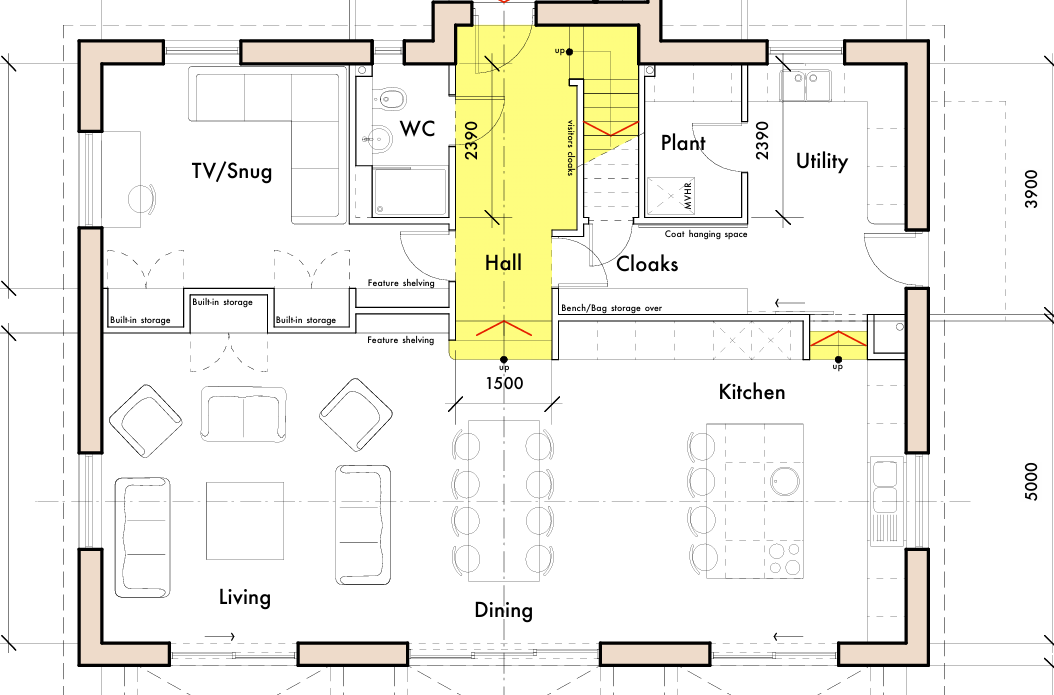
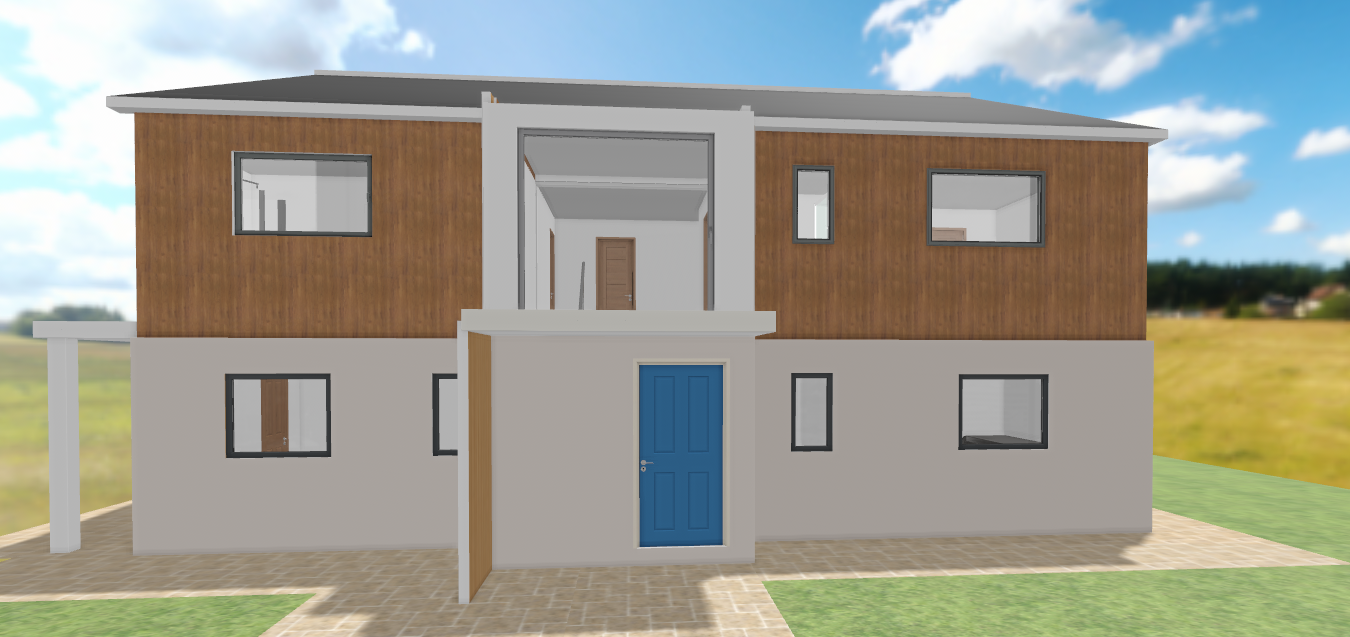
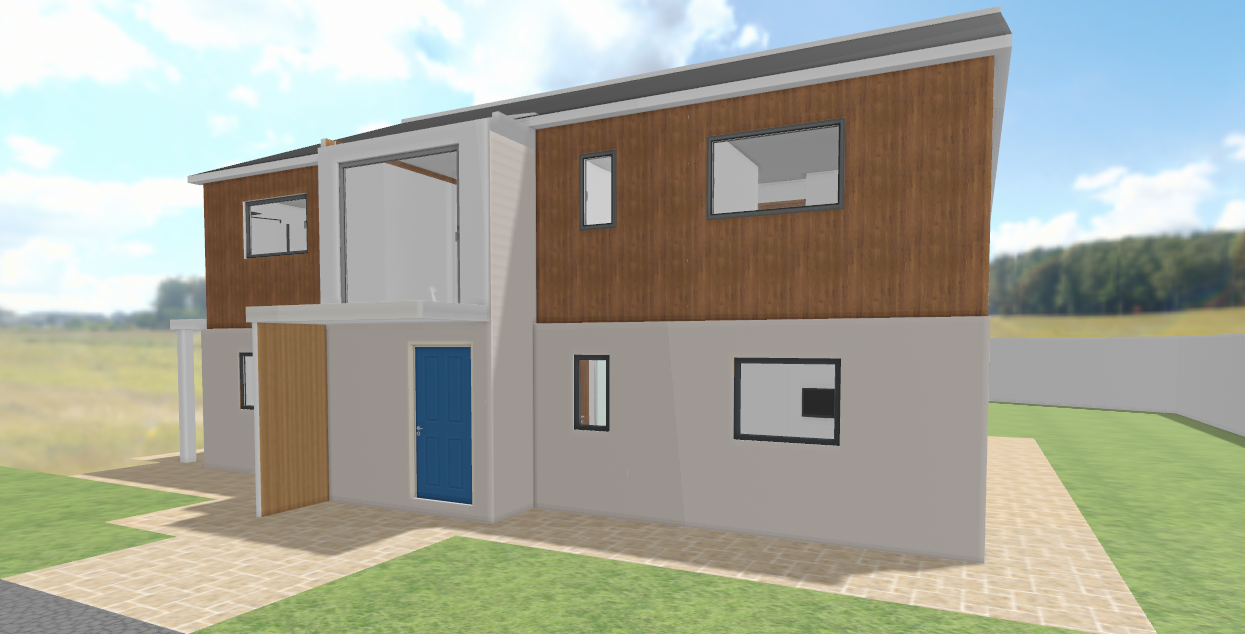
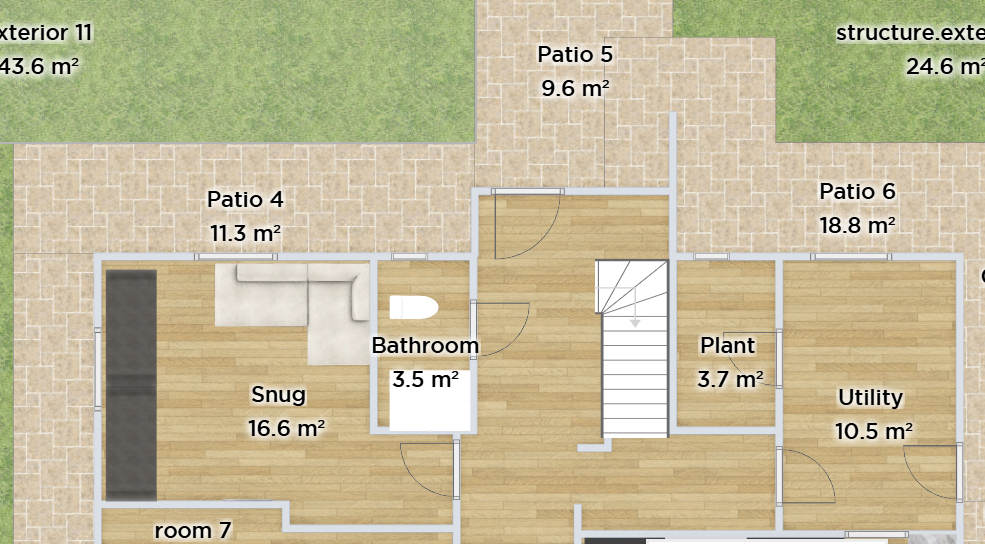
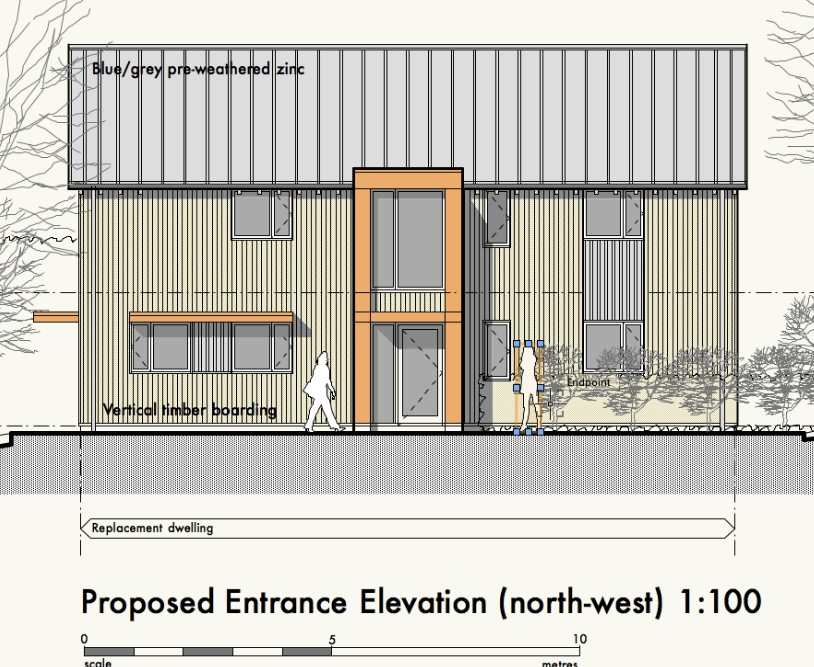
Hi helpful people from last month, I've been playing around with facade options to try and address the massing issues. Done in budget-version HomebyMe so visuals a bit unrefined. Wondering about removing the standing seam and switching it for slates on the roof. Then a half render/composite cladding for the walls. We've also pulled across the porch a bit make more of a feature of the asymmetry, get more light and views upstairs and create a porch. Floor plan change shown here too. Any comments on this? Is silicone render on a timber frame really flexible enough to tolerate the movement!? Many thanks for your wisdom


-
@garrymartin Thanks Garry for your thoughts. Keen to keep the plant room window as we’re going to have laundry drying space in there so will be in and out frequently. Good point that widening the little projection (and door/glazing) would add more balance
-
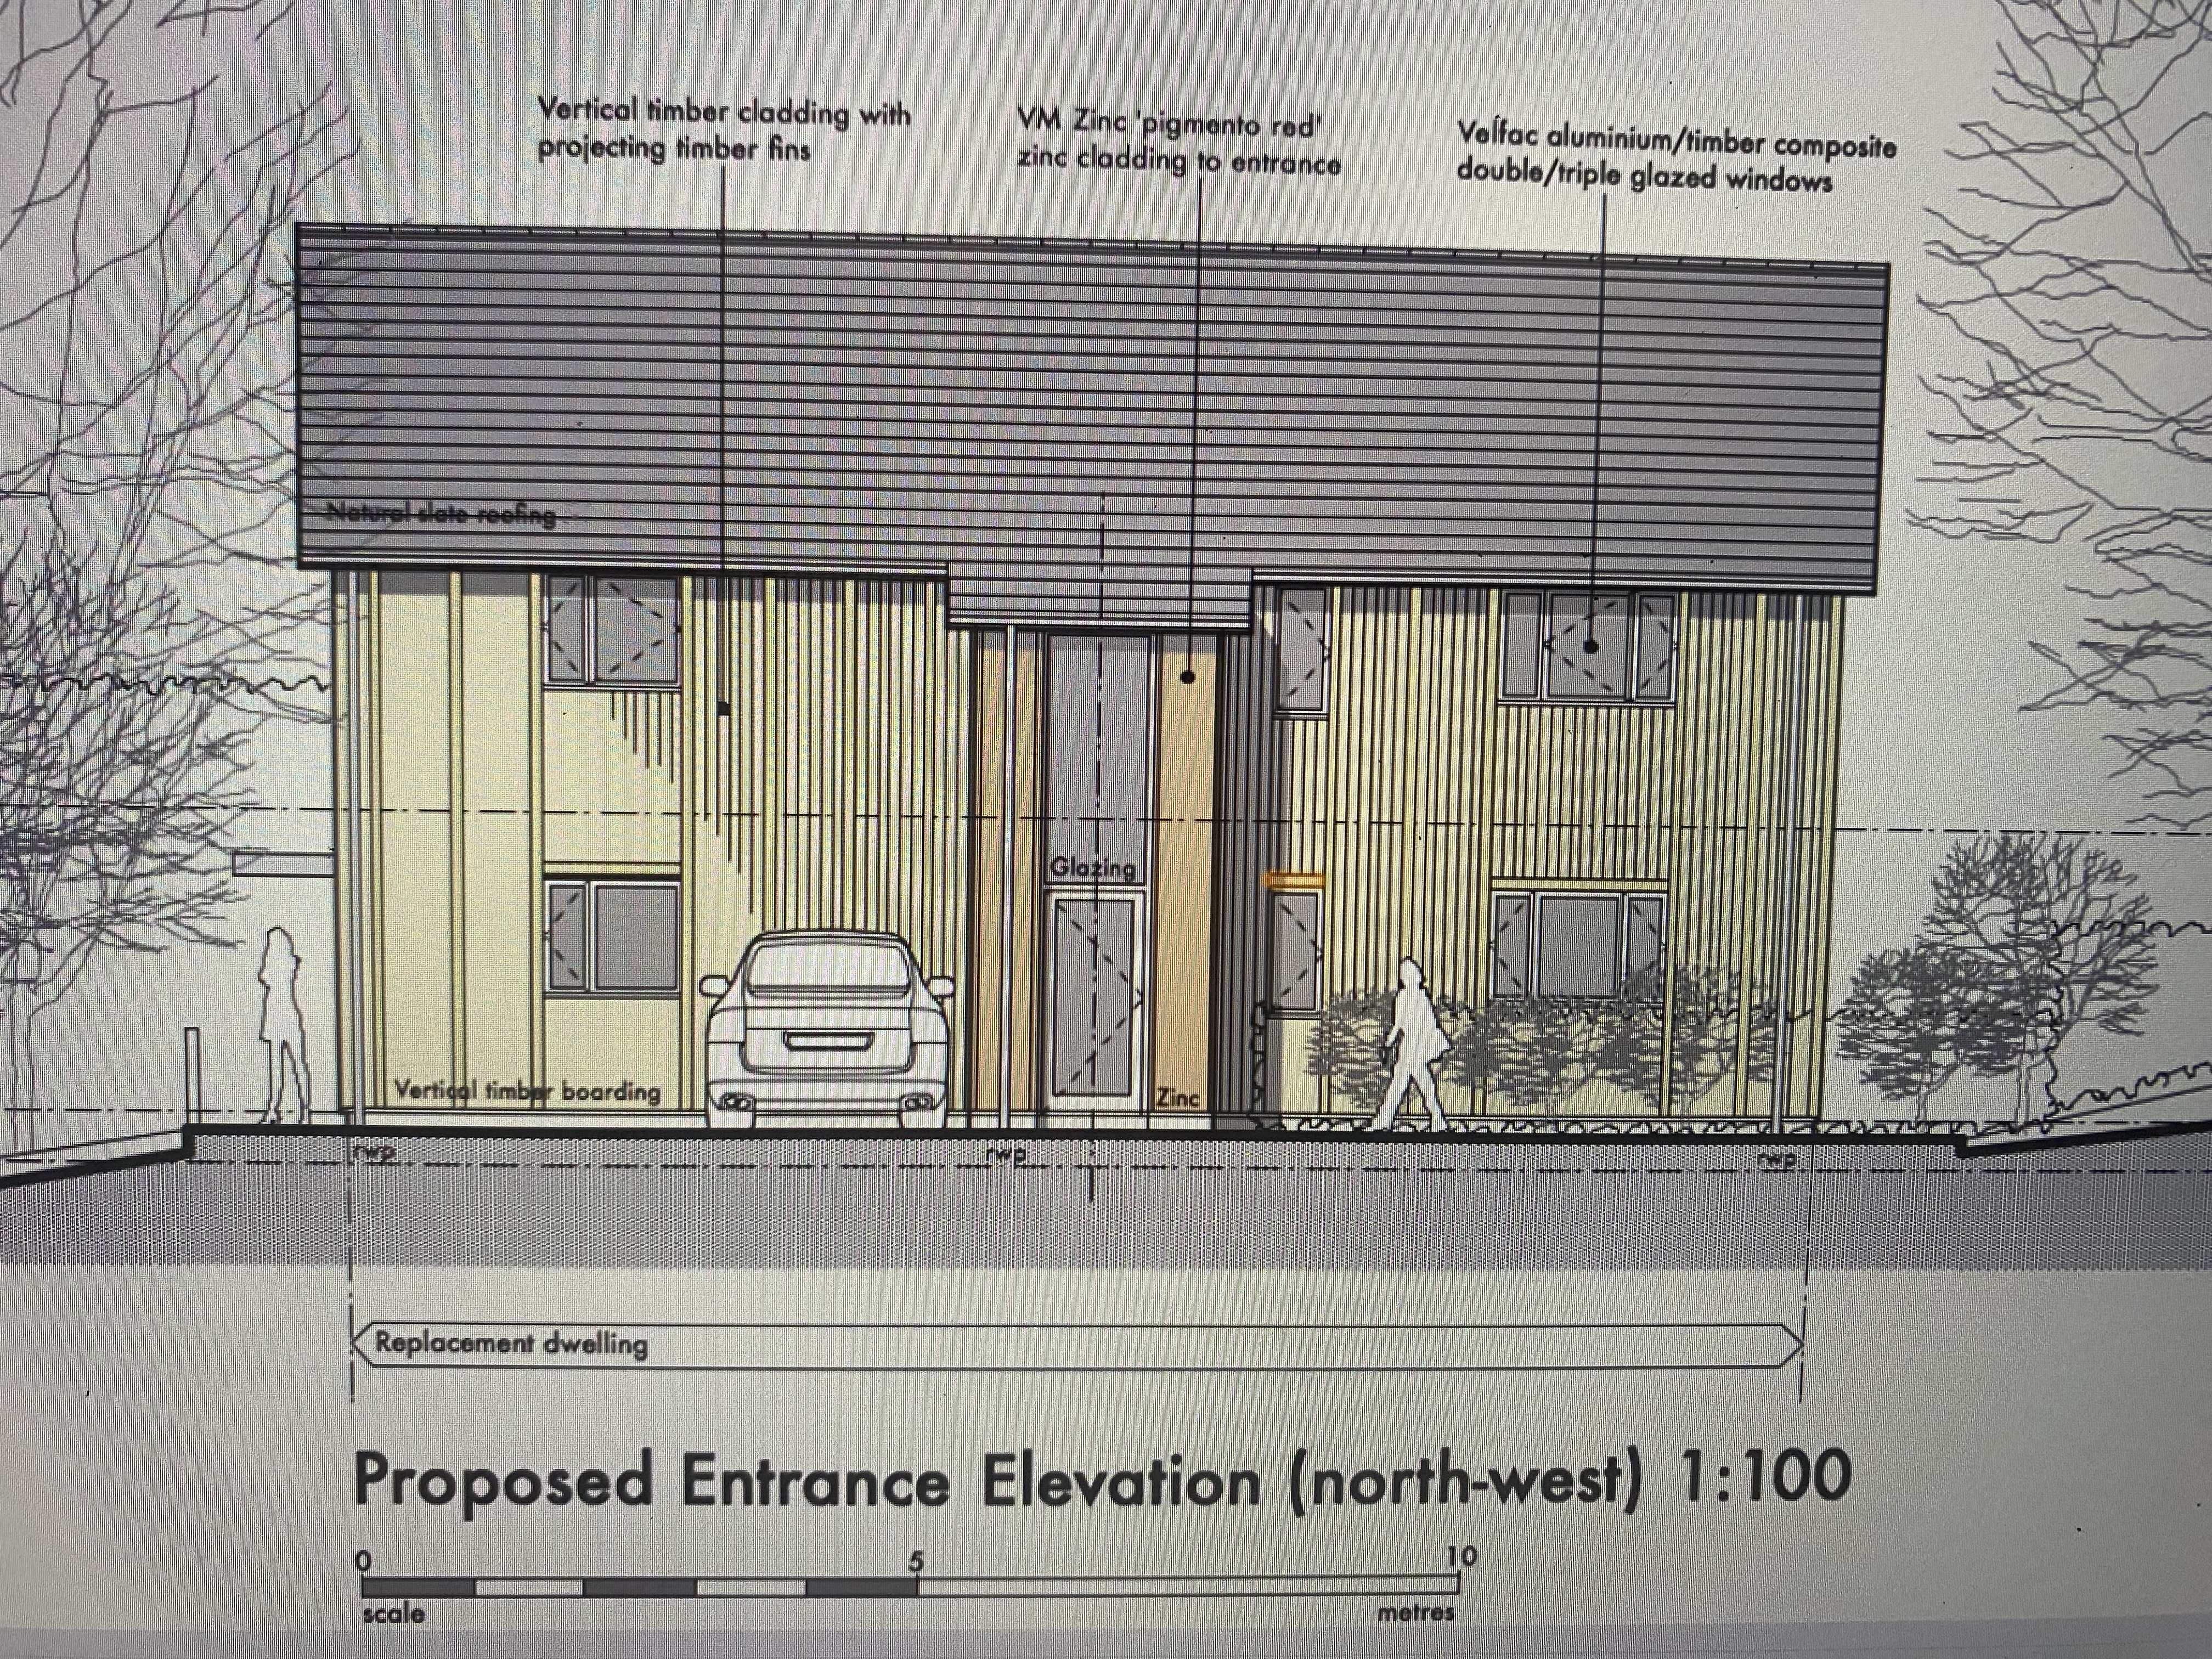
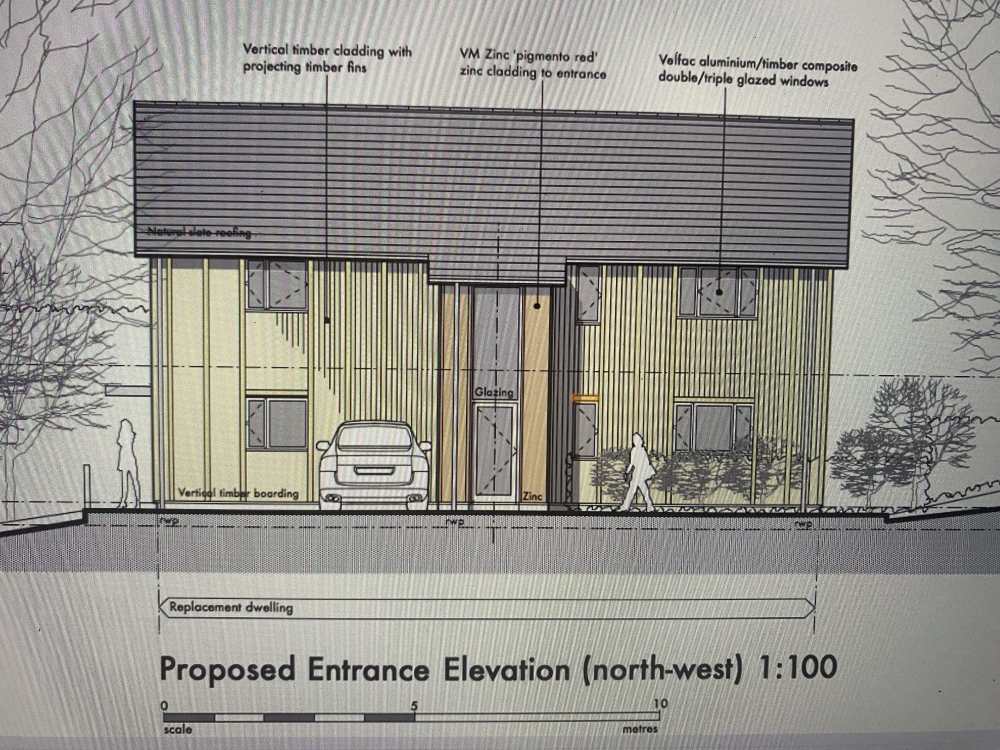
Yes I’m not sure why the first floor looks to be wider than ground - it will be ever so slightly due to the metal cladding but not as it looks here. We thought running the metal cladding down around the front door projection would help the two sections mesh together better. It’s the same as the roof - not the orange Corten. Here are the other versions from the architect…
-
@Gus Potter Many thanks for explaining this - I had assumed massing meant it’s all in one block, rather than the materials. Due to the slightly uphill, wooded and curved approach of the track leading to the house, the roof will hardly visible on approach. We included the half wall of metal cladding to break up the front facade which otherwise we thought was too blocky. We also thought a darker colour at the bottom (such as Metal Green Cedral Click) and then a lighter roof zinc-coloured steel roof would also help. We’ve played round with lots of variations and materials and are struggling to know what looks the best - if you/anyone has any suggestions on improving the front facade then we’d welcome them!