GeoffSmith
Members-
Posts
48 -
Joined
-
Last visited
Everything posted by GeoffSmith
-
Hi Joth, Thanks for the advice. At the moment, chasing in a new cable isn't practical, because truthfully, there's no way to know where the head of the spur is at the moment without a ton of investigating. For all I know, there might actually be an FCU embedded somewhere making all this fine, but short of ripping up the floors to know where the cables go, it's never going to be known. It's on old house, with weird wiring, and it simply just needs redoing completely, but that's for another year. In this instance, then, is the best temporary measure to switch the 32a for a 16/20a? For the short term, with as little faff as possible, I just need to make it so that I can rely on it to not blow the house up Thanks mate!
-
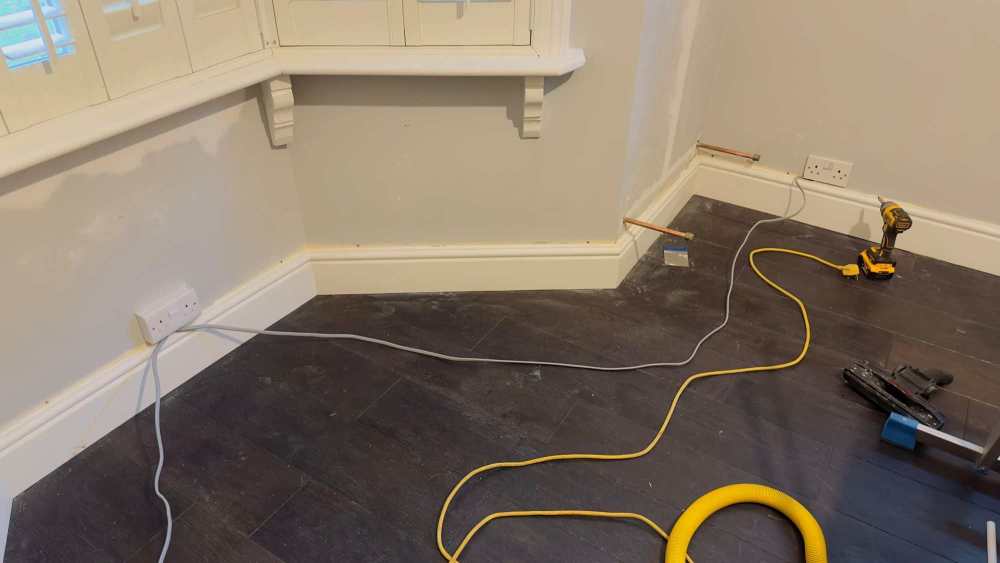
I've just discovered that the house I've bought has a spur off a spur off a spur, all going back to a 32a MCB. I've removed the middle spur, so it's now just a spur off a spur, but obviously this still isn't safe or ideal. My short term plan is to just not use the sockets in a way that might overload them, but is there a longer term plan I can do to guarantee safety here? My current plan is this: I will have socket 1 completely unused, and then ensure that anything going into socket 2 is well below 13am peak draw. Is this OK in the short term? The sockets are not on the kitchen ring. I'm wondering if it's worth switching out the 32a MCB for a 20a? I will get an electrician in once the new year is here, but for the meantime, I need to decorate this room while there's time to do so, and if I can make this safe without having to get an electrician in, I would like to be able to do so. Any help would be much appreciated. Thanks!
-
No, I just freehanded the whole thing. It's a cordless Dewalt - I didn't have any problem with it beyond the first 30 seconds. If you hold it as close to the neck as possible, the torque doesn't really produce any discernible wobble. That being said, cutting vertical with one hand is significantly harder for some reason, and I'd say more than half the dust leftover was from the two small vertical chases I had to do - very hard to follow a straight line with one hand, and as you veer off without realising, the angle the grinder spits the dist out changes and sends plumes of it past the vacuum! I also wouldn't freehand if I was doing it for longer than a few minutes, because you have to remain quite tense, and it's bloody tiring as a result trying to juggle everything. I'll probably buy a dust shroud for it next
-
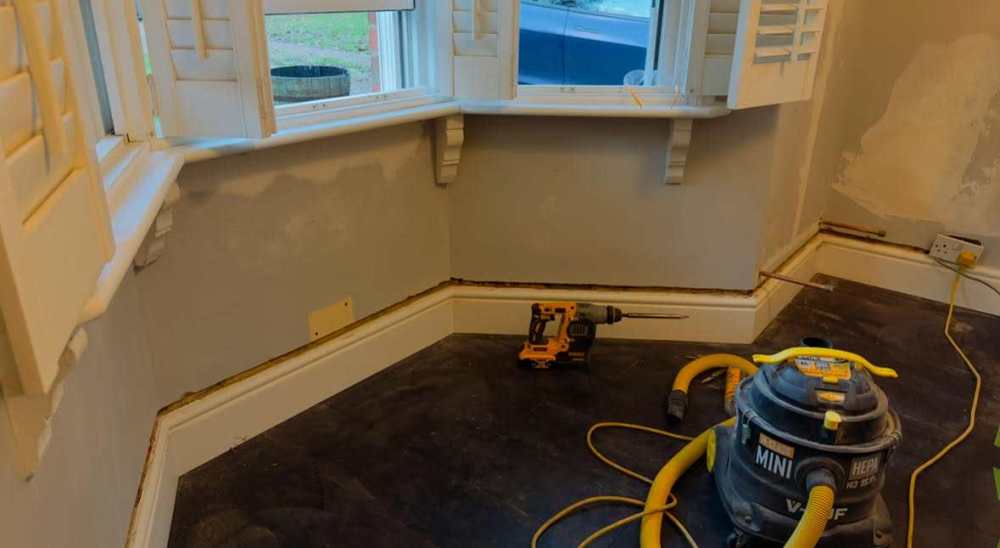
All done. Bloody hell, suggestions to rip up oak floors, hire all sorts of machinery, all for it to end up taking 15 minutes, and 5 minutes to clean it all up. Barely any dust gets loose if you one-hand the grinder and hold a decent dust extractor right next to the cutter. For anyone else who ever comes across this thread during a Google search, here's what worked for me: 1. Set yourself up with a bit of plastic that you can tape off the room with. Takes about 5 minutes total. That way you can zone out 90% of the room and protect it from dust 2. Remove as much from the room as possible, and open up the top and bottom windows to create an air current 3. Make sure you set up all of your tools to go on the right side of your sealed off area - you don't want to open it up again while this happens. 4. With your vacuum or dust extractor in one hand and the grinder in the other, work at a moderate pace, with the vacuum attachment about 50mm from the cutting dust, and 90% of it will be sucked straight into the bag. 5. Chisel out everything with an SDS, chisel into the cut so as not to blow plaster 6. vacuum up all leftover bits, including the chase, and use a dustpan and brush for the big bits. 7. Leave room for at least 30 mins, then return to vacuum up the rest of the settled dust. A mask is essential. You wouldn't want to do this in a room with carpets, or, I guess, in a room you weren't planning to decorate again, for obvious reasons. The dust increases dramatically if you cut into brick, but then you just go slower so that the vacuum can catch more. It's an easy job, but the dust is definitely a nightmare. I cannot imagine how much you'd produce if you didn't seal off the room and work with an extractor. It would be like a sandstorm.
-
Mate, what are you even going on about? It's so weird how no matter what forum you're on, there's some passive-aggressive guy trying to make things weird. Have you even asked yourself why you have such a bee in your bonnet about a complete stranger's home that you know nothing about beyond a single photo? There's no heating issue in the room. The entire house is cavity wall insulation, and the room isn't cold. Do you understand? The room doesn't have an issue with heat loss. I'm not going to reduce the size of an already tiny room, and triple the amount of work, and quadruple the expense of the job for no benefit. The outside temperature is 10c, the inside temperature is 19. I'm OK with that. You've seen a single corner of a room and presumed that putting a stud wall on one side is somehow the obvious job. There's alcove shelving, cabinets - all of which would need to be removed and redone if I was to suddenly reduce the size of the wall they're on by 100mm. All because I wanted to chase in a couple of cables. Jesus Christ..
-
1. I can't use a chaser, because it won't be able to make full contact with the wall due to the skirting board, making dust collection moot. It also doesn't chase internal corners, nor will it be able to chase the wall where the two central heating pipes are. 2. The dust is easily remedied by properly sealing the room, having adequate ventilation, and wearing the proper PPE. The job is not one anyone would want to do, but it's not quite the nightmare you're suggesting. It's a 4m chase 30mm deep, 25mm of which is lime render that cuts like butter.
-
The dust is something I'm absolutely dreading. I can't believe how much the grinder spits out the moment it touched a brick. I'm going to fashion a slightly bigger extraction end out of a large bottle in the hope I can at least grab a decent chunk of it. Beyond that, I'm going to partition the entire room floor to ceiling with plastic and have the windows open. I know it's going to be a nightmare though, with that inevitable bit when I get halfway through and wish I'd just used trunking!
-
Only problem with the wall chaser is that it won't work that close to the skirting board as far as I can tell, and it also not useful for internal corners. With the wall chaser I will have to hire all the bits separately, whereas I already have the angle grinder and SDS. My plan was to use a diamond bit on the internal corners. I also won't be able to use the chaser where the radiator pipes are sticking out. If it was just a vertical run, I'd definitely hire it, but this seems like a job for a more flexible solution. I'm able to seal the entire room off and I assume I can just catch at least 50% of the dust with an extra held against the direction of the cut. The wall is a cavity wall with polybead insulation
-
Hi everyone, Just wondering what the best method of chasing into a lime render living room wall? It's crumbly and blown in places, which I'm fine with replastering. My plan is to chase the cables in directly above the line of the skirting board. It was originally held in place with plastic square trunking, which looked awful. I have an angle grinder and an SDS, but I've never chased into a wall before, so really looking for some tips opn how to go about it and what to expect/look out for. Also, if anyone wants to chime in and say, "Don't bother, just get some d-line trunking" and re-fit it", I'm also open to that, too!
-
Hi Joe, I thought that myself, but wasn't sure. I'll scrim the duct tape just to be sure, but yeah, I figured the plaster would hopefully bridge over whether it stuck or not, and the expansion would be solved by the fact that 75% of it, being the sides and rear, were essentially open. Thanks guys, really appreciate the input.
-
Hi everyone, just have a couple more questions: So I have my pipes covered as described, with foam behind and duct tape over the front - I'm about to fill the chase. I'm using SBR because the walls are lime and brick, with hardwall plaster. Can I put the SBR over the duct tape, and can I be sure that the hardwall plater will stick to it? Thanks!
-
They didn't have Denso tape at hand, so I've used duct tape instead, and then backfilled with that insulated expanding foam I posted above. Can I be sure that the bonding I put over will stick to the duct tape? Also, when I wrapped the pipes, instead of wrapping them individually, I wrapped them as one, because I figured the 15mm gap between them would be good for any expansion, movement over time etc.. Does that sound sensible?
-
Thanks for the advice guys, I really appreciate it. I've thought about this a lot, and it seems that short of ripping the pipes out, making the chase bigger, and switching to plastic, my best option is as follows: Coat front of pipes in Denso tape, and then backfill the pipes with expanding foam so that they are at least completely sealed. Then cover front with bonding, then skim. Is that a solution, or is there something better I can do for the same amount of work? I'd love ot insulate these pipes, but unfortunately, they just aren't far enough apart to get the jackets on them
-
Argh, bugger, I don't think that's going to be possible, there won't be enough room to put a jacket round the pipes and the plumber has filled a bunch of it with expanding foam to hold in place. It is an external wall, but it's a cavity wall with foam bead insulation I'll see if I can get enough space around the pipes to cover with that tape, thanks so much for the advice. As per the material, can I just use normal bonding instead of lime?
-
Hi everyone, Just had a plumber fit a radiator in our living room, and we had him chase out the wall to fit the pipes. Everything's installed fine, I'm just wondering how I go about filling the hole in the pipes - what's the best practice? The chase is 80mm wide, and 2m long. Can I just fill it with bonding and then Easifill over the top, or do I need to fill with lime render? Ideally, since it's such a small chase, I'm hoping it's just ok to do it the modern way and avoid lime, but I'll do whatever needs to be done. Also, side question - do I have to protect the copper pipes, or if it OK to just completely surround them in whatever I end up using?
-
HI mate, thanks for reply. Got a dehumidifier already, but it's not having an effect. They reduced dramatically, but then came back with a vengeance. The room isn't heated, and it's pretty cold. I need ot install a radiator, but in the meantime, I still want to fumigate it because I just want them dead.
-
hi everyone, We've had a mould mite infestation in our utility room - we had a specialist round today, and he said he thought it would cost in the 190 region, and he's come back and said it's 300. He's going to smoke bomb the room, and that's apparently all he'll be doing. Is this something I can do myself, and if so, is there a specific type of smoke bomb I should buy? Thanks!
-
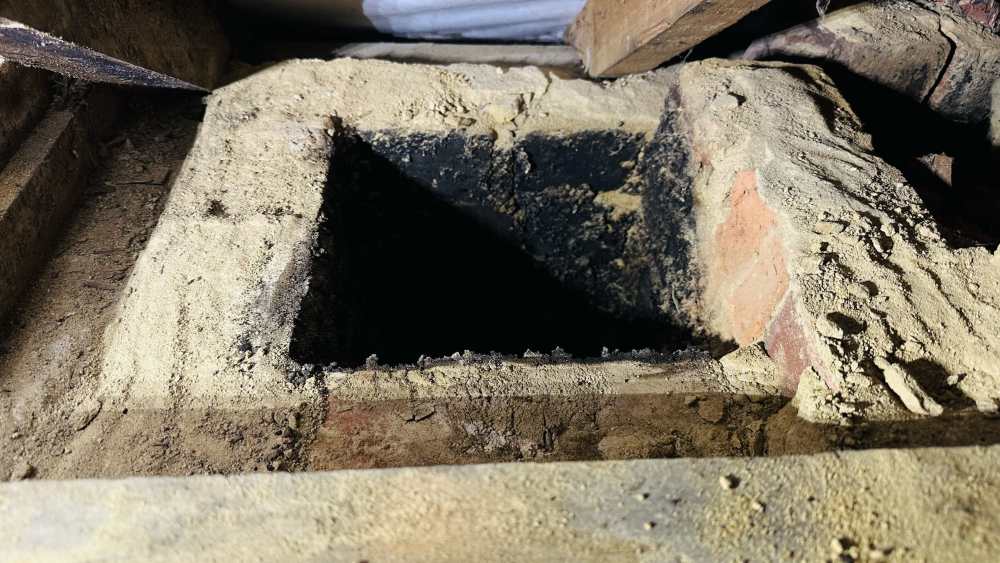
Just a quick update. So I've removed a few of the bricks to get it level and easier to work with: I decided to test them with a moisture meter while I was there, and the inside of every brick I could reach was a consistent 18% moisture. The other side of the bricks, and all bricks outside of the chimney registered 6-8%. Should I be concerned about that - I'm not sure if that's expected or if it changes anything
-
Yes, that's right, new roof and no exposed chimney - I'll get it swept and filled, and if it still causes problems, I'll remove it. Glad to know that removing it is actually an option, because I hadn't even contemplated that. Can't have a problem with something that no longer exists, so that's a good backup


