plockhart
-
Posts
24 -
Joined
-
Last visited
Everything posted by plockhart
-
The pros have been and gone. 2 of them were here for a good hour and did a whole tonne of adjustments. I tried not to watch so not to hound them (and I'm also working today myself) but they told me they readjusted both doors, lubed everything, and reset the glass. The frame was slightly twisted and they've "worked around as best they can". They were constantly up and down, open and closed adjusting things; I would never had the dedicated time or skill to fix it myself. They said next time when I'm fitting I should try to double check that the strike plates on the big door are matching up and equal to the opposite doors strike plates. It closes SO much better and the compression at the top of the door still feels good and in contact with the door. I'm so happy....headache solved for £45! Thanks Collis & Davidson Windows 👏
-
Thanks all. I don’t have a hex head on the bottom; the only adjustment I have on that axis is a 1mm compression that didn’t fix it. I suspect I just messed up the installation too much in other ways as well (like maybe twisting it) and it needs redone by someone who knows what they are doing. Doubly so since I don’t have the dedicated time to do it all in 1 go (and will probably get it wrong again!).
-
What do you mean by this? Do you mean using one of the adjustment screws? Or something a bit more adventurous? Some checks I have just done: I checked the door diagonals using the longest spirit level I have - it couldn't get fully across the corners so roughly diagonal to diagonal it seemed fush. I had a look at the weather seals on the inside corners - they were a bit doubled up so I took a stanley knife to try and trim them back in case that was contributing but I don't think it helped. I just got out my laser guide and aligning the bottom laser at the bottom of the interior door frame it seems the frame leans to the outside by 5mm when you follow it to the very top of the frame. Would this have something to do with it? I don't know much about doors but I would guess `no` because otherwise the bottom and the top would be difficult; while here the bottom outside corner matches nicely but the top outside corner does not.
-
Thanks for the reply. I have attacked pictures of the door closed, one with the lock disengaged and one after I have engaged the lock. Before engaging the lock (which requires pushing the top of the door to the frame) the hinge side of the door is flush and it tapes to the ~10mm gap at the end of the door. After engaging the lock, all is flush. Here is the hinge that came with the door. From what I can see it does not let me move the door to/from the frame. Unless I am missing something? But even then, why is it like this 🤔

-
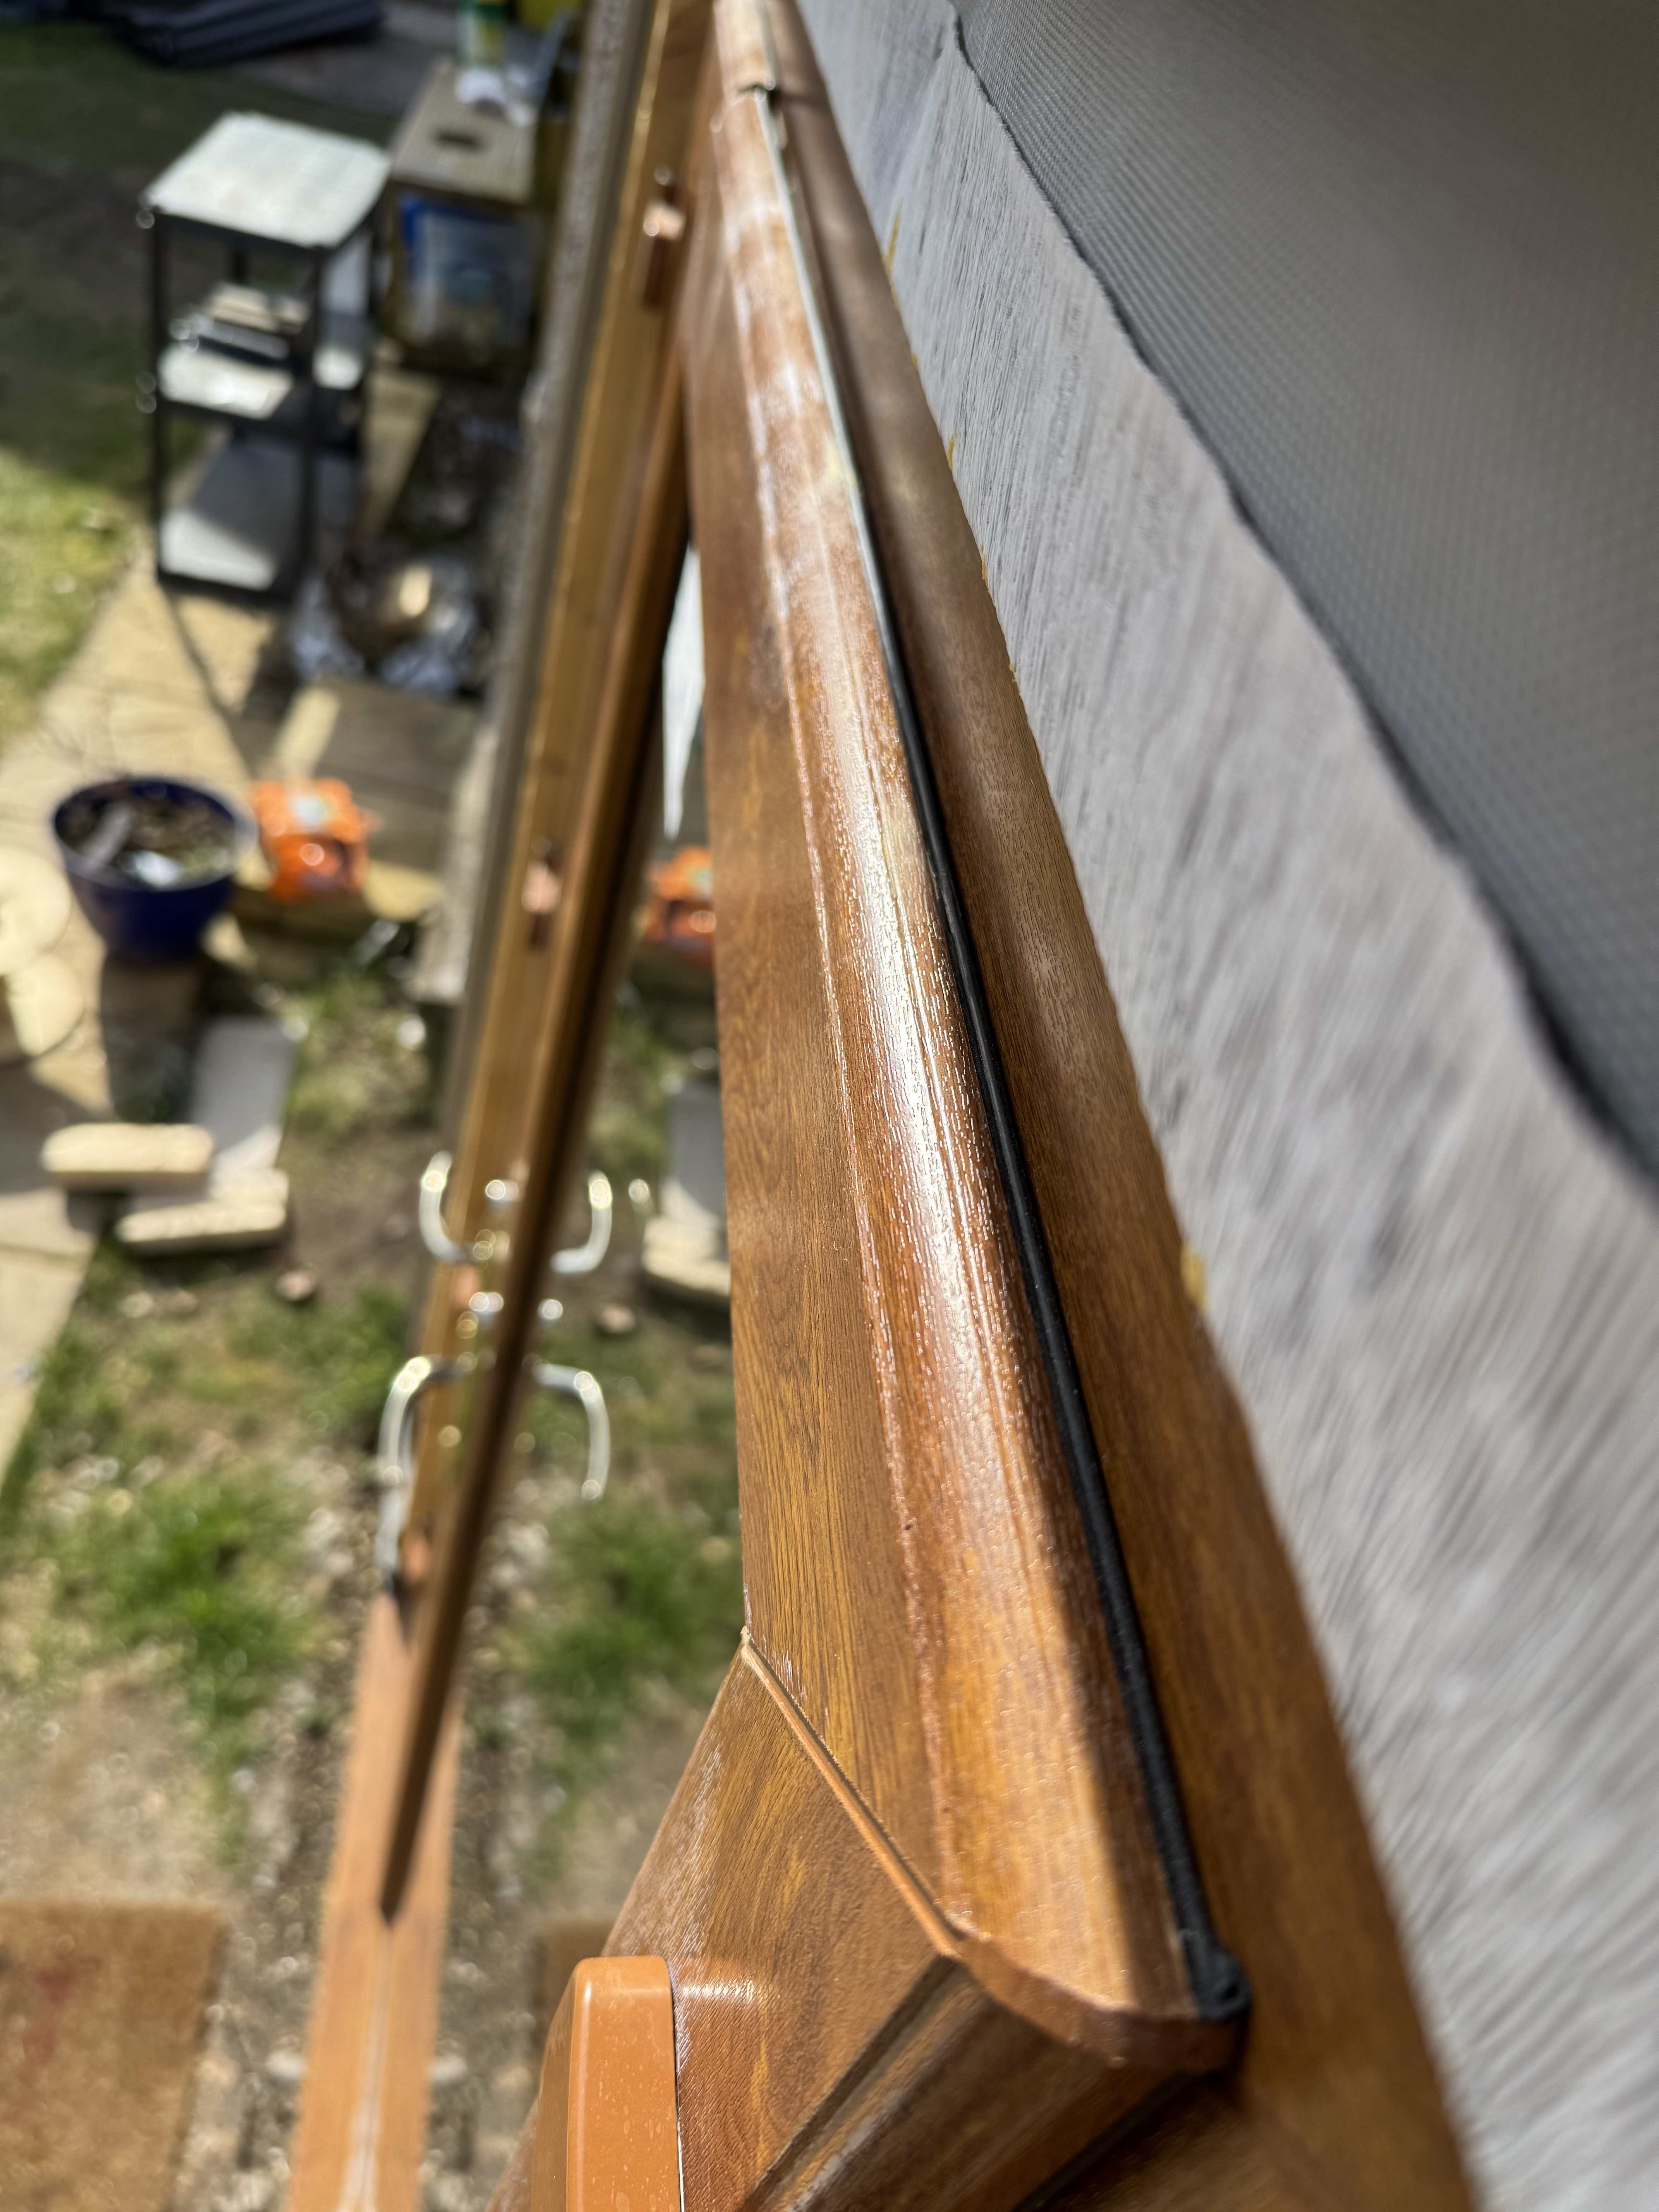
I had a french door installed and it feels rough to use. Unfortunately I cannot get the cowboy to come back and correct it because he is married to my wife. The french door was installed a while back and evidently I didn't do a good job at all. I'm coming back to it to try and improve it. When I close the door the bottom of it comes into contact with the frame (the smaller side of the french door) but the top does not and is out by ~10mm. To engage the locking mechanism I have to push on the top half of the door to bring it flush and then everything locks. It is not smooth usage. When I fitted it, it was felt like this and a bit rough to use. `good enough` as I was under a time pressure, so after it was like this I toe+heeled it and pressed on with the rest of the project. Now I'm mostly done I have come back to annoying jobs like this. I recently made a bunch of adjustments laterally already to stop it catching at the top, and raising the door vertically to stop it catching slightly along the bottom. Please see the media attached. It is as if I need to adjust the bottom of the door out a bit (towards the outside) so when everything approaches closing it is equally as flush to the other door; but there is no adjustment screw for that. Any ideas why is my door like this? Why is the lower half coming into contact with the frame before the top half? Thanks in advance. IMG_6292_480p.mov
-
I just used bog-standard foil tape from Screwfix.
-
Thanks all! What way up do I insert the silicone tube? Also does it matter if I hold the gun left handed or right handed? Is there a preferred holy day to do this?
-
Are some folks advocating doing the full length in expanding foam? Presumably the amps is low enough that I don't worry about cable temperature (1.5mm2)?
-
Thanks all for the additional replies. Some commentary from me: yes the conduit is on a slight fall the top and bottoms of the battens will have insect mesh but that won't stop the small stuff getting in I suppose
-
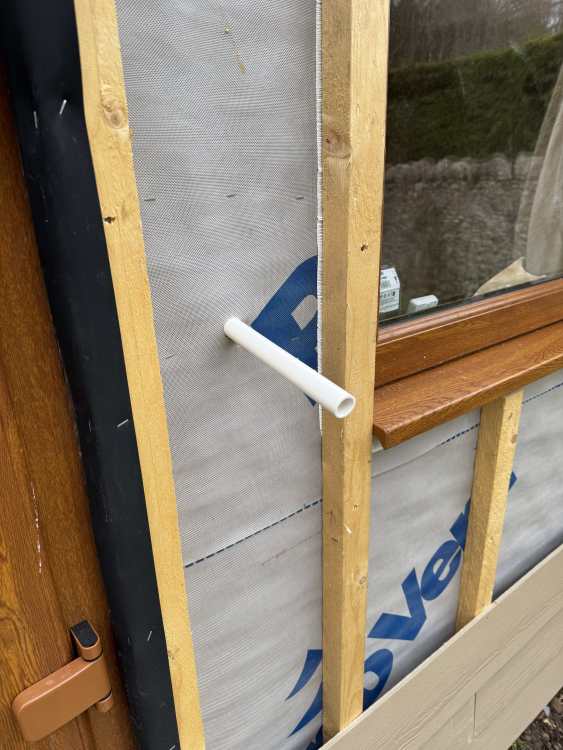
Do you silicone the outside end, the interior end, or go wild and fill the entire conduit 😅 Also do you need to do anything to prevent condensation in the conduit not being able to escape outside? Thanks in advance.
-
OR maybe I'm thinking about it wrong. Do I seal the inside of the conduit with silicone around the cable as it enters the backbox, and keep the outside end open so any condensation can drain out? if I plug the outside then maybe that results in a build up of water that can't drain out?
-
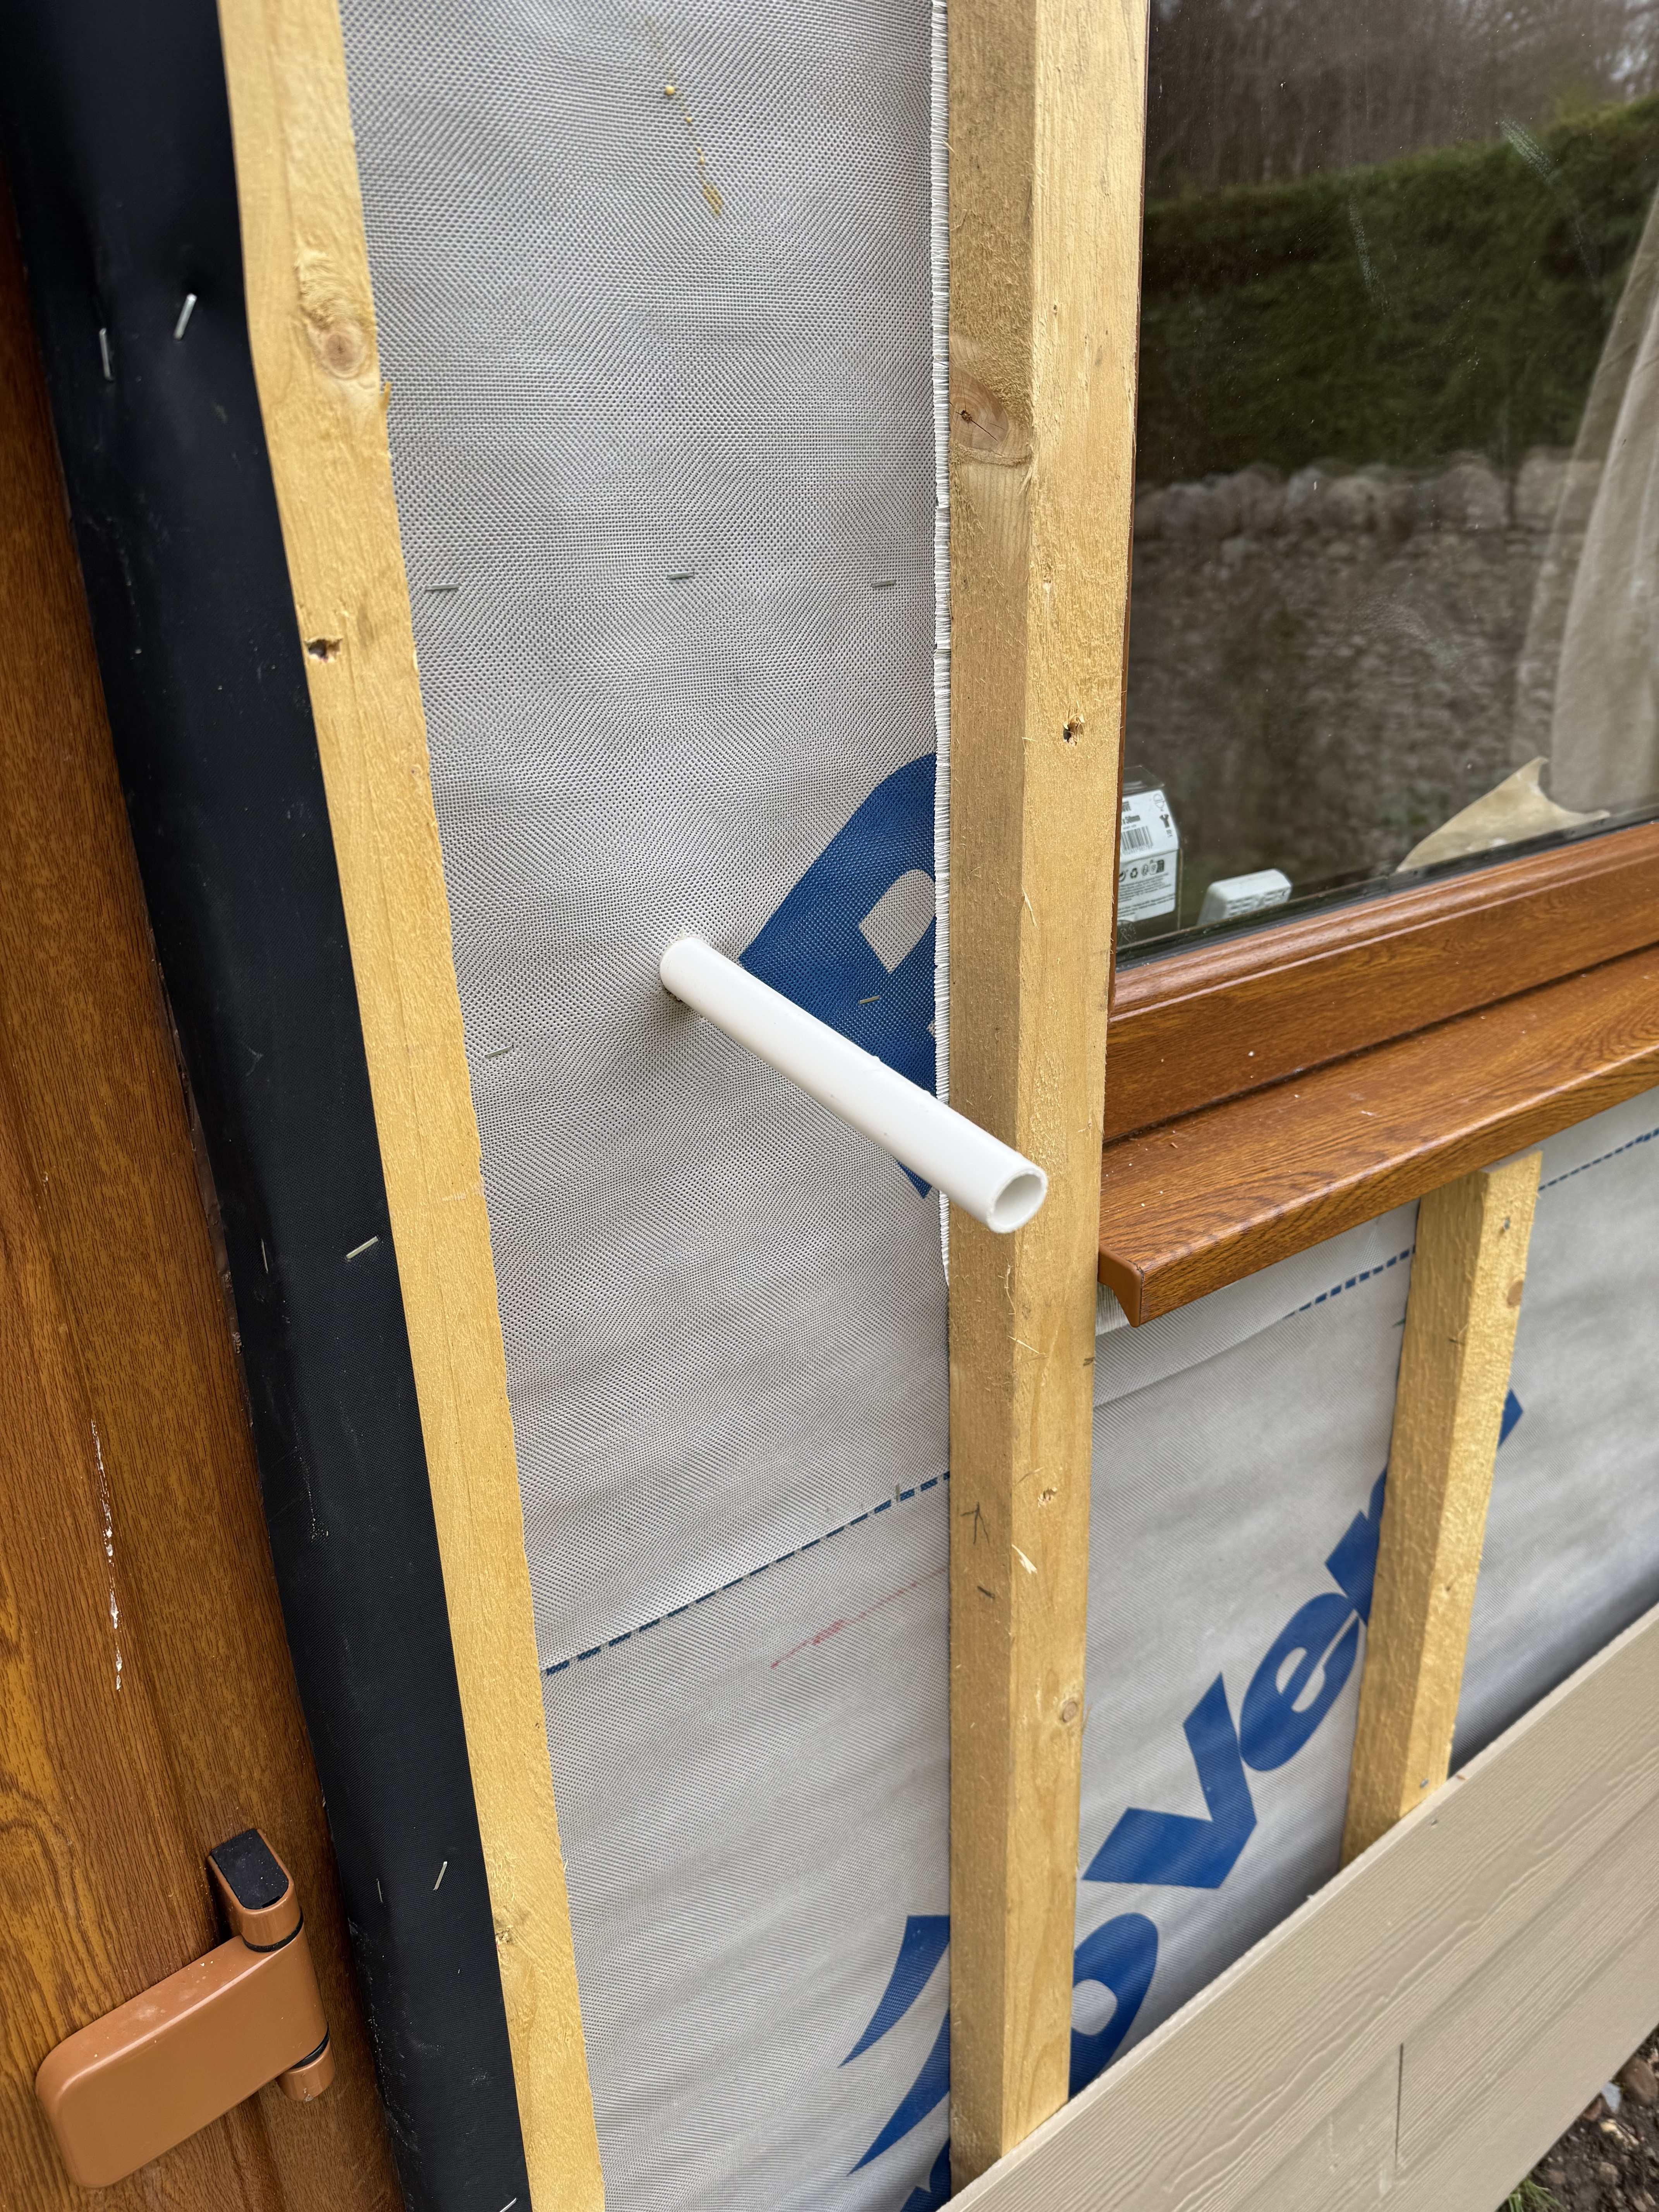
I have ran a 20mm conduit from the inside of my garden room to the outside, with the intention of running the 1.5mm T&E to an outdoor light somewhere nearby. I would like to seal the conduit but I'm not sure how to do that as the conduit won't be going into anything for this fixing. The conduit and cable will be between 38mm battens, and will be behind cladding. I have attached a picture of the conduit which I still need to trim back to behind the batten depth. I will most likely have to run the cable to it's destination before putting on the external cladding (since the cable will be inaccessible as I build the cladding bottom up), so that means the seal of the conduit would need to be resistant to movement as I work with the cable at its destination. What would you recommend I do? Thanks!
-
Thanks for the replies all!
-
Hi, I am constructing a timber framed garden room and I have not got electrics in it yet. It has insulation in the walls, a warm roof, and an insulated concrete base, and all the glazing is in. The humidity remains consistently high in it (95% humidity vs the 80% humidity outside) and I'm wondering should I try to do anything about it or worry. A few weeks ago it was particularly cold and there was condensation in the corners of the room (tiny sparkles near the top) as well tiny pools of water on the glazing on the inside along the beads. I have 2 trains of thought: - close all the trickle vents, cover the conduit holes I made in the wall (for feeding cables through etc) to try to raise the heat inside to reduce humidity - open all the windows as well as the trickle vents to increase ventilation to lower the difference between outside and inside to reduce condensation What train of thought is correct? I don't know much about how to think about the problem! Longer term I will have a air-to-air heat pump for heating and dehumidifying and will maintain it at a better ambient temperature
-
Thanks! if will be used for hobbies and maybe some office work in. Likely occupied 8 hours a day most days. I am going to heat/cool it with an air to air heat pump. The windows have trickle vents and then the heat pump can dehumidify
-
I have made a start - is this what you were thinking?


-
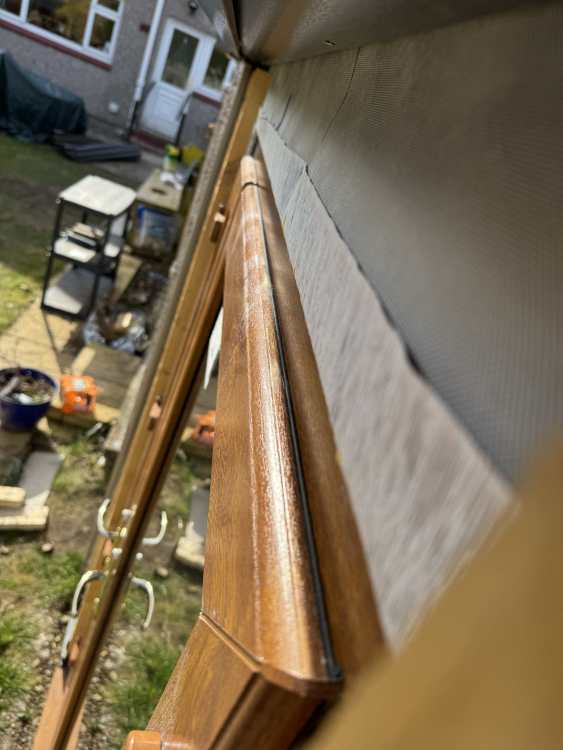
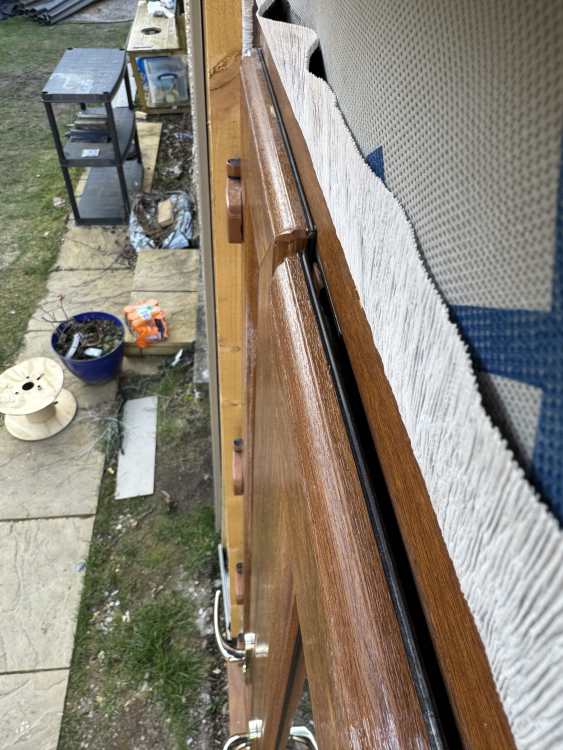
Ok thanks! Yes it's funny when I was doing all the plans I overlooked this until last night and had a `huh` moment. Just so I understand right, do you propose using insulation tape along all the edges where the joists meet the lower deck, and then taping where the joists meet the wall? Or are you talking about bringing the roof vapour barrier down along the exterior of the building to meet with the insulation at the eaves? If it is that then alas I already have my fascias on with nails.
-
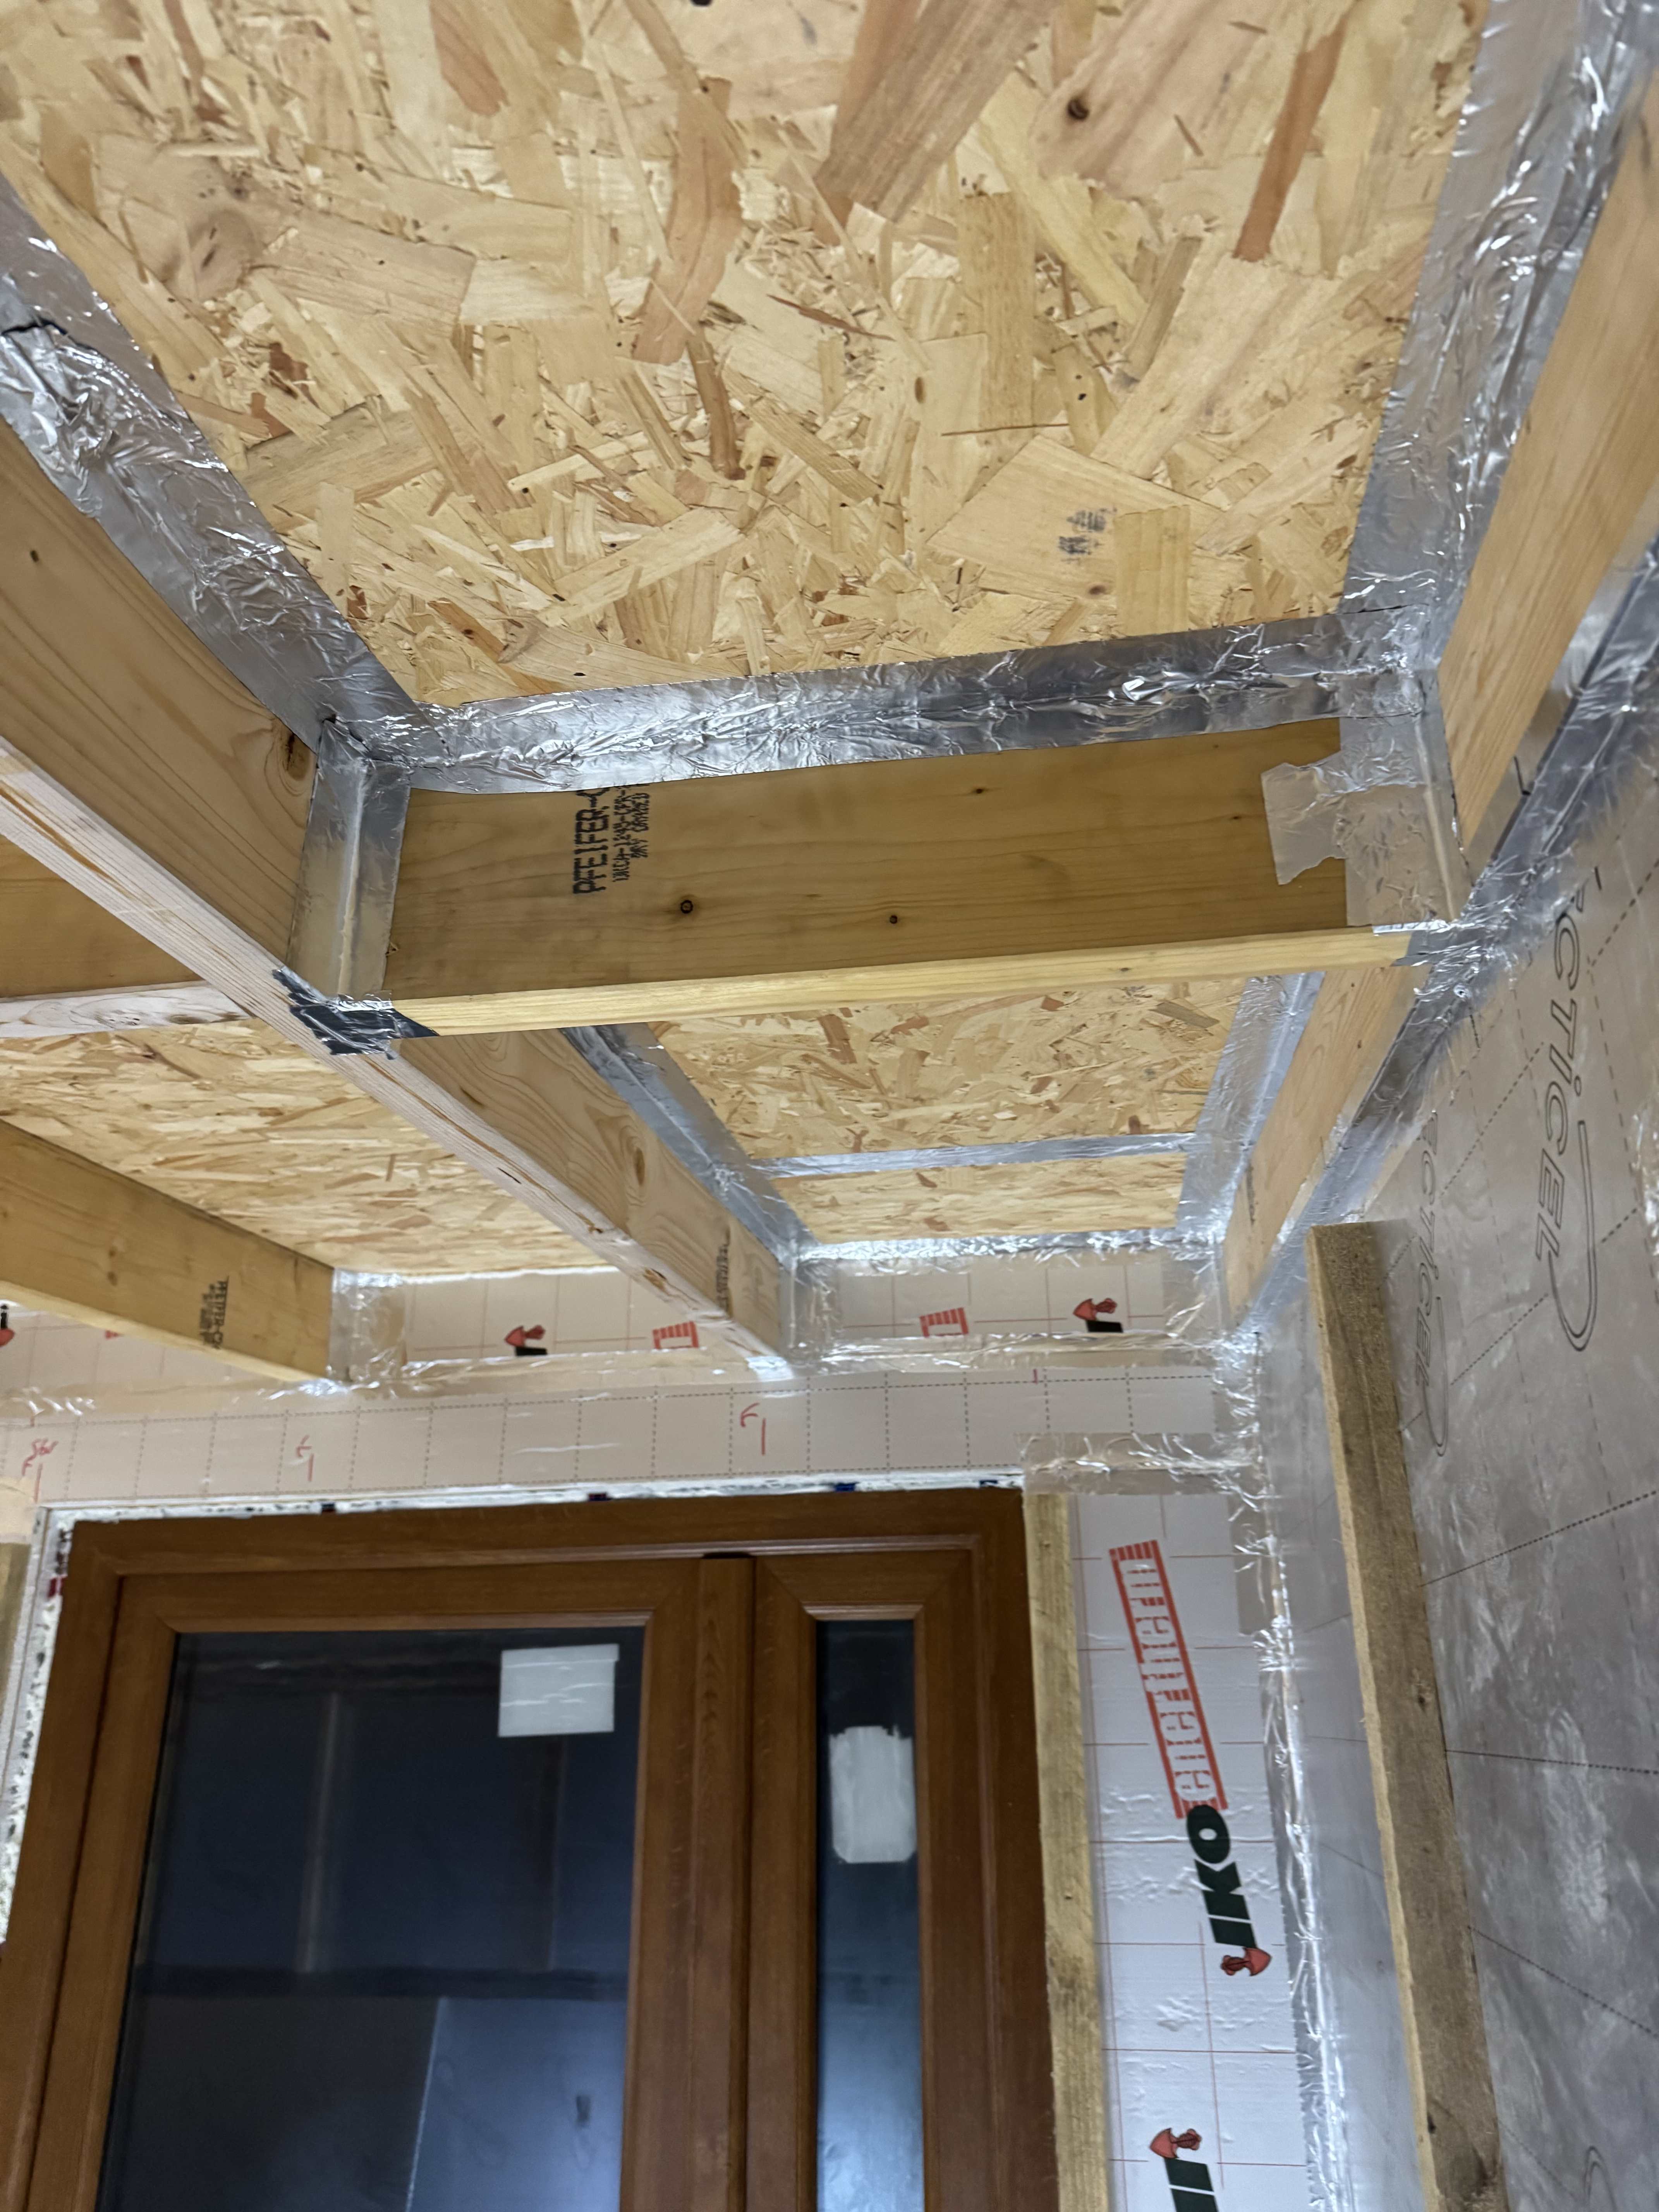
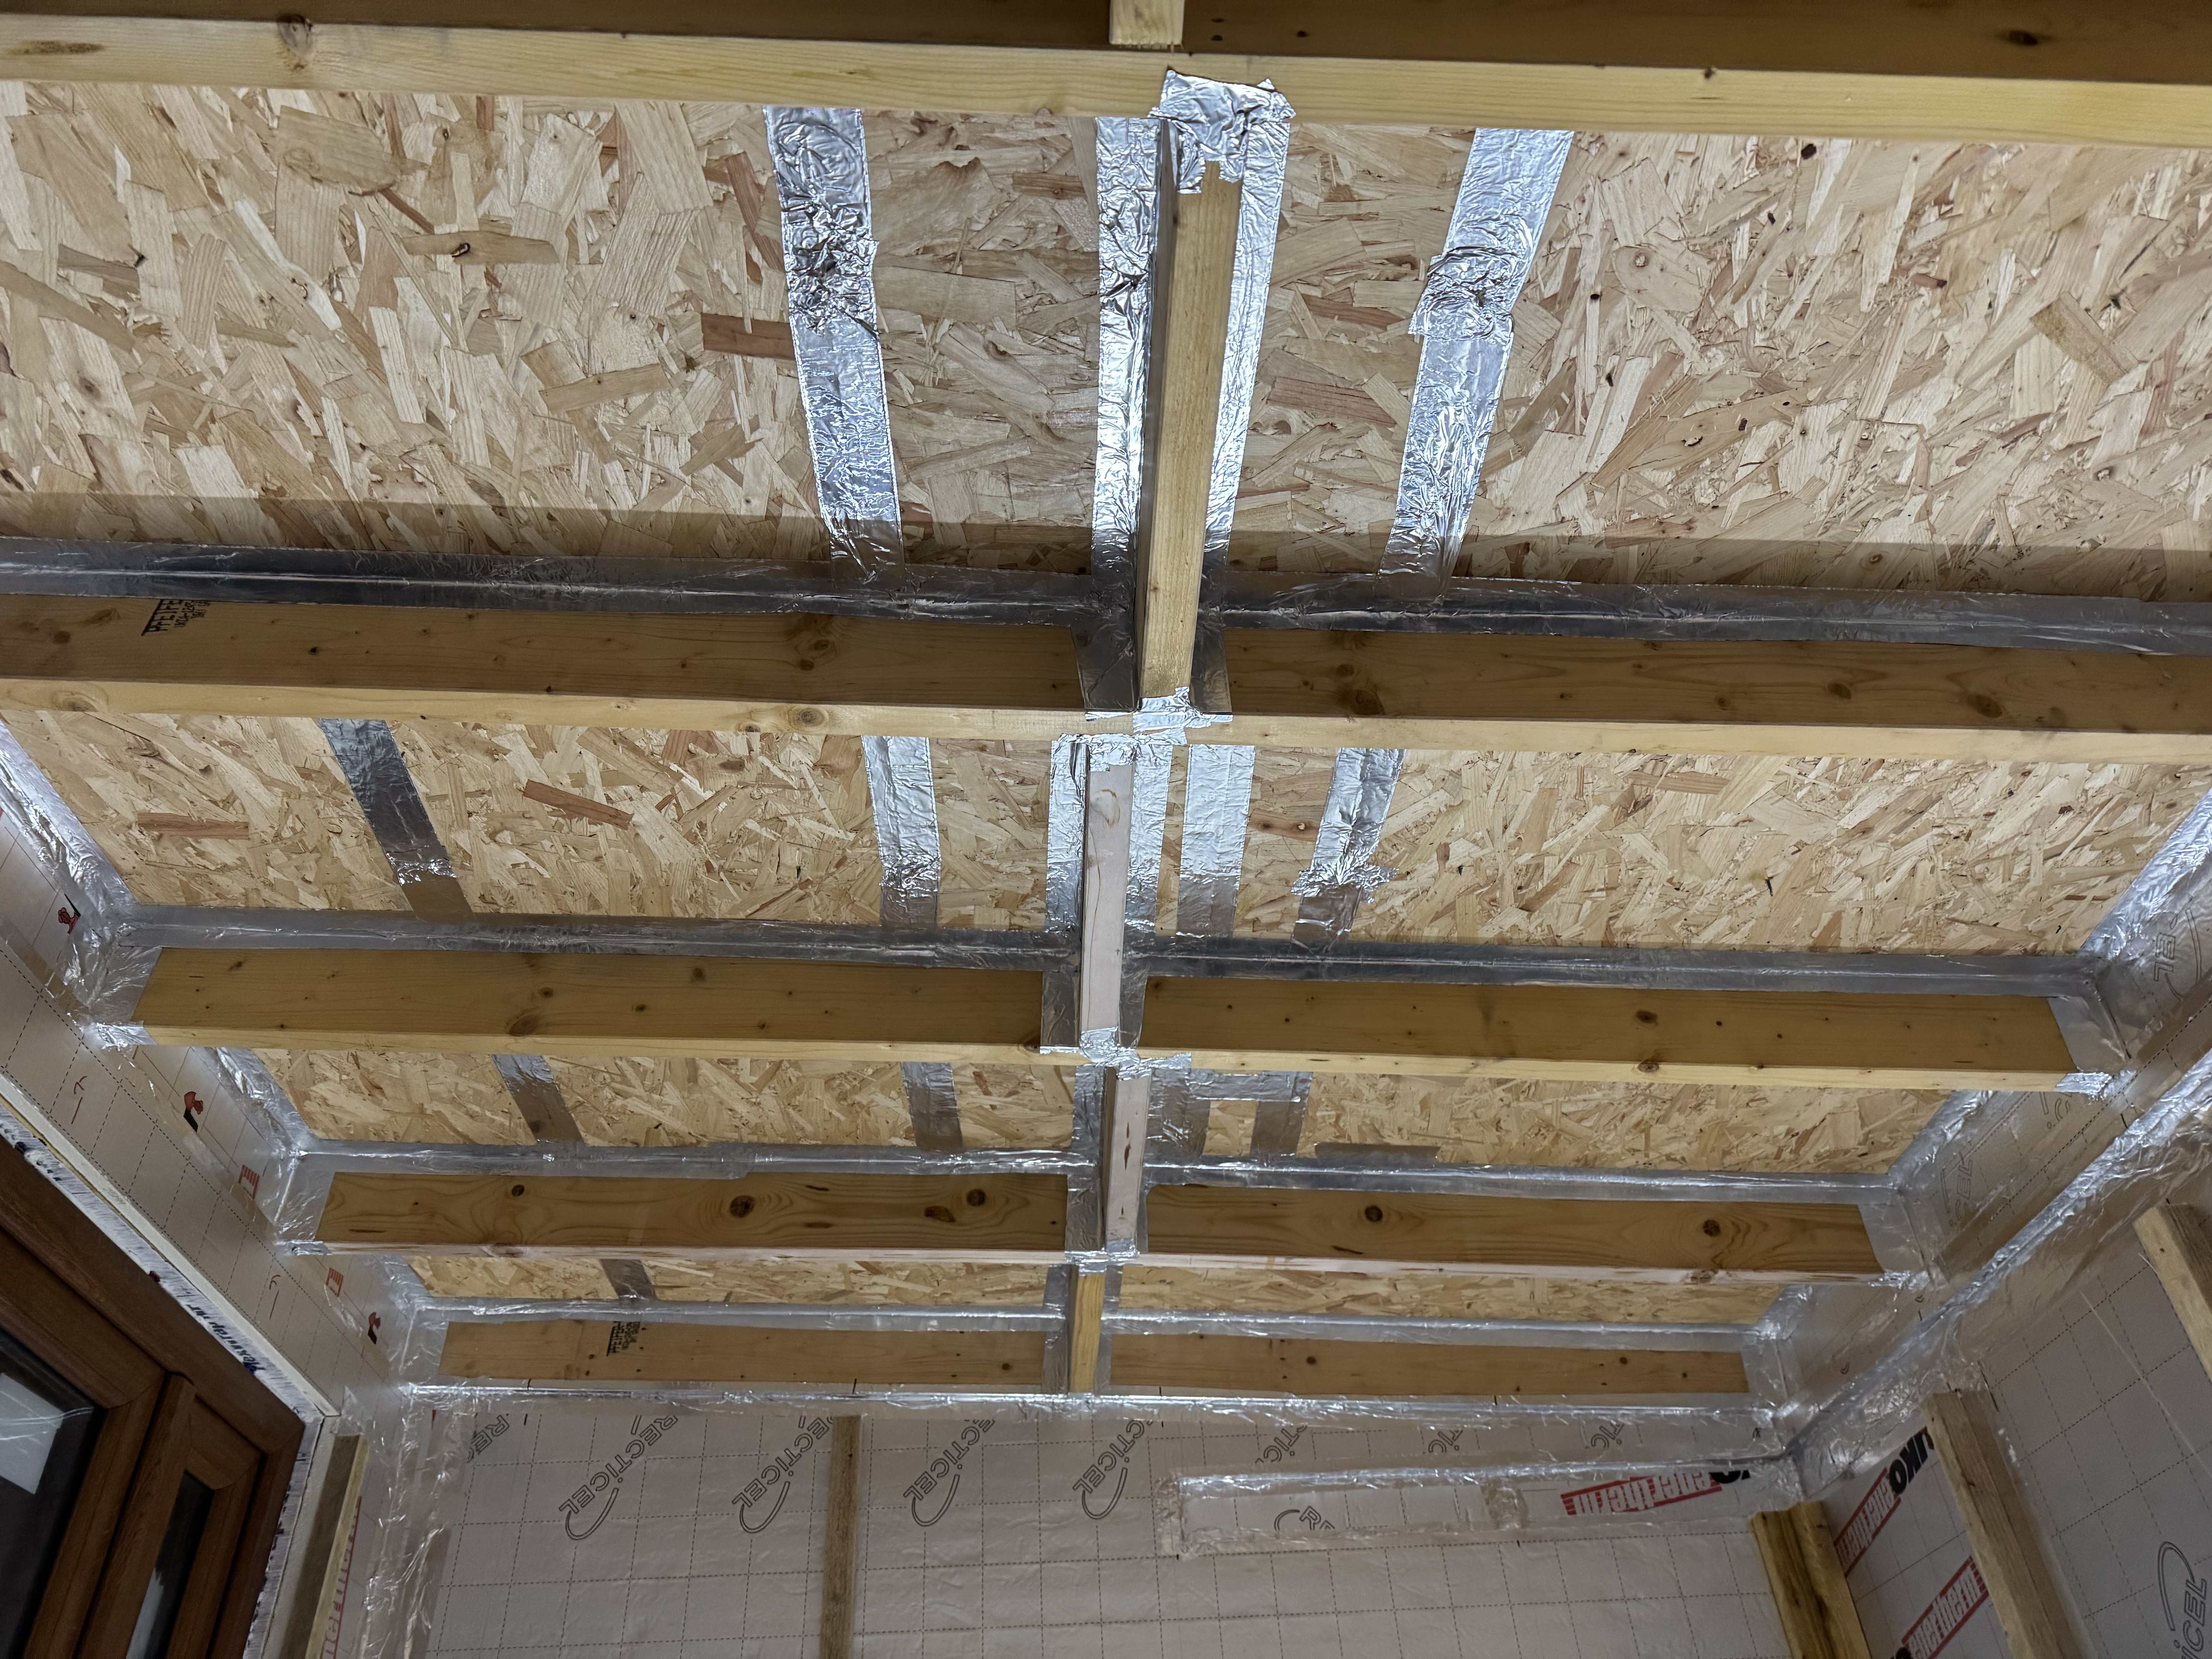
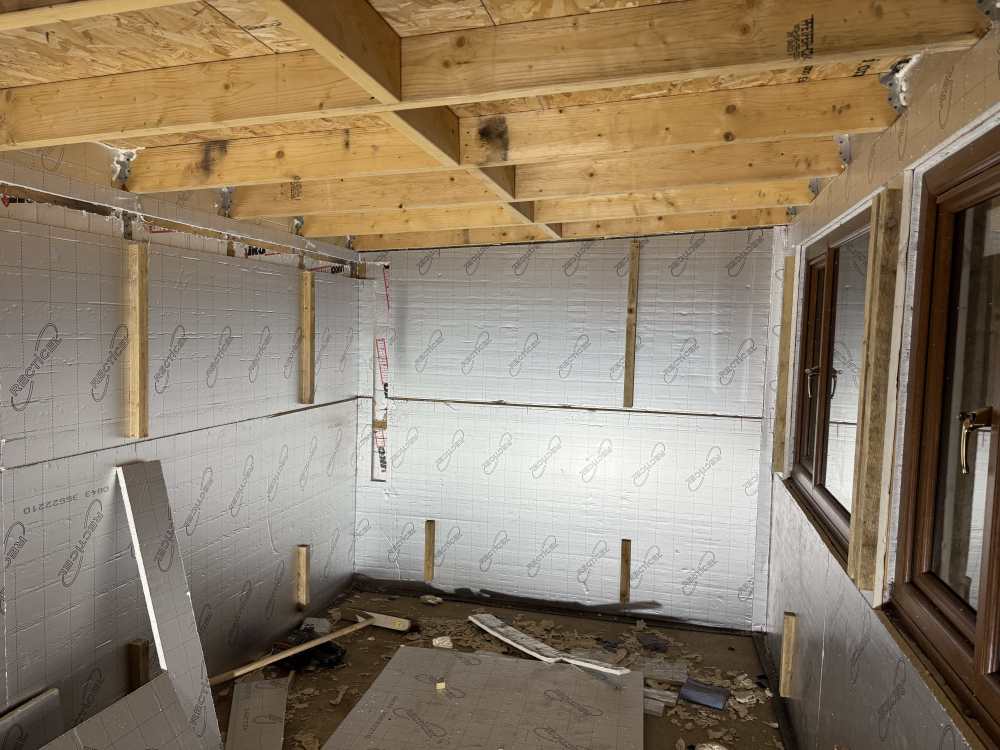
Hi, I am building a timber framed garden room, which has a warm flat roof. The construction of the roof is: 18mm osb lower deck vapour barrier 100mm PIR 11mm upper deck EPDM I have been working on the interior now, and I am starting to work on the vapour barrier there. Intend to foil tape over the joins of the PIR board in the walls to form a barrier. Then I intend to roll a vapour barrier across the insulated concrete floor, and join it up to the foil on the walls. What do I do as it goes up to the ceiling? It will meet the lower deck of the ceiling, which acts as a break in the vapour barrier. The wall construction from inside to out is: plasterboard 38mm service void 25mm PIR 95mm studs (with PIR inbetween) breathable membrane 38mm battens weatherboard The ceiling finish will just a 12.5mm sheet of acoustic plasterboard attached to the underside of the joists. Attached is a work in progress photo. Are you meant to add a vapour barrier on the underside of the lower deck as well (and thus I would have to go around all the joists)? Or add a vapour barrier to the underside of the joists before attaching the plasterboard (sealing around holes made for electric cables). Or do you do nothing, as it is just an 18mm osb sheet between the vapour barriers and it doesn't matter? Thanks in advance!
-
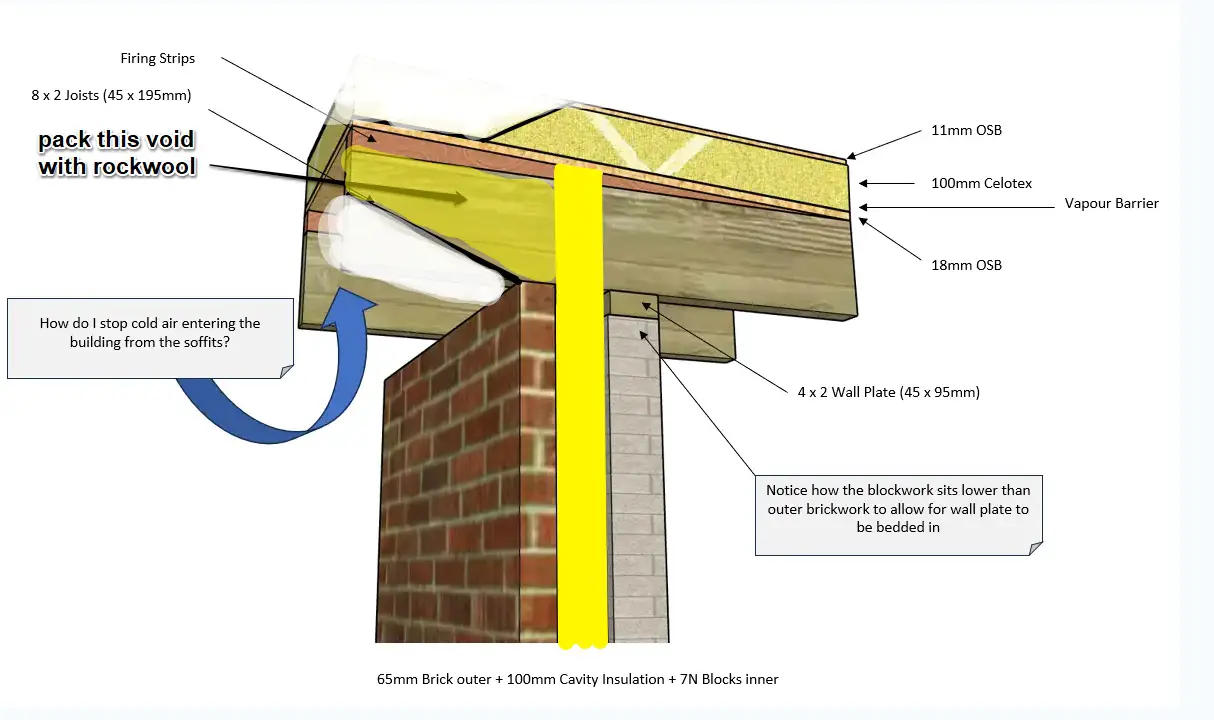
What can be used to insulate the overhang of a warm flat roof?
plockhart replied to plockhart's topic in Flat Roofs
I'm just noticing the link to the forum post I was talking about did not go through ok. Here it is here. And attached is the picture I refer to. Thanks for the replies everyone. I continued my research a bit more before I saw these and found a stockist of DriTherm Cavity Slab 32 insulation slab which use case seems similar. I would prefer a flexible product over a rigid board to be able to stuff it into the spaces I have created, but that's just a preference. I will look into the boards as well. My overhang is about 112mm and I already put the fascias on because I was in a race against the Scottish weather putting the roof on, so I just have access from below before I put the soffits on.
-
Hi, I have been trying to research this topic and came across this post with nearly the same sort of setup I have my PIR continued up the wall as suggested, and I'm wondering what can be used in the overhang between the joists, on the outside of the building. The commenter at the bottom of the thread says `rockwool` but my location means I can't get this easily or quickly delivered. Are there other products that would be suitable? I don't expect any water in here and I am only trying to reduce the risk of condensation. I would imagine `glass wool` wouldn't as it could absorb moisture. Would polyster insulation rolls like this from screwfix be suitable (reading online about polyster seems to suggest it is a bit like mineral wool in the sense it is moisture resistant). Thanks, Peter
-
Thanks all!
-
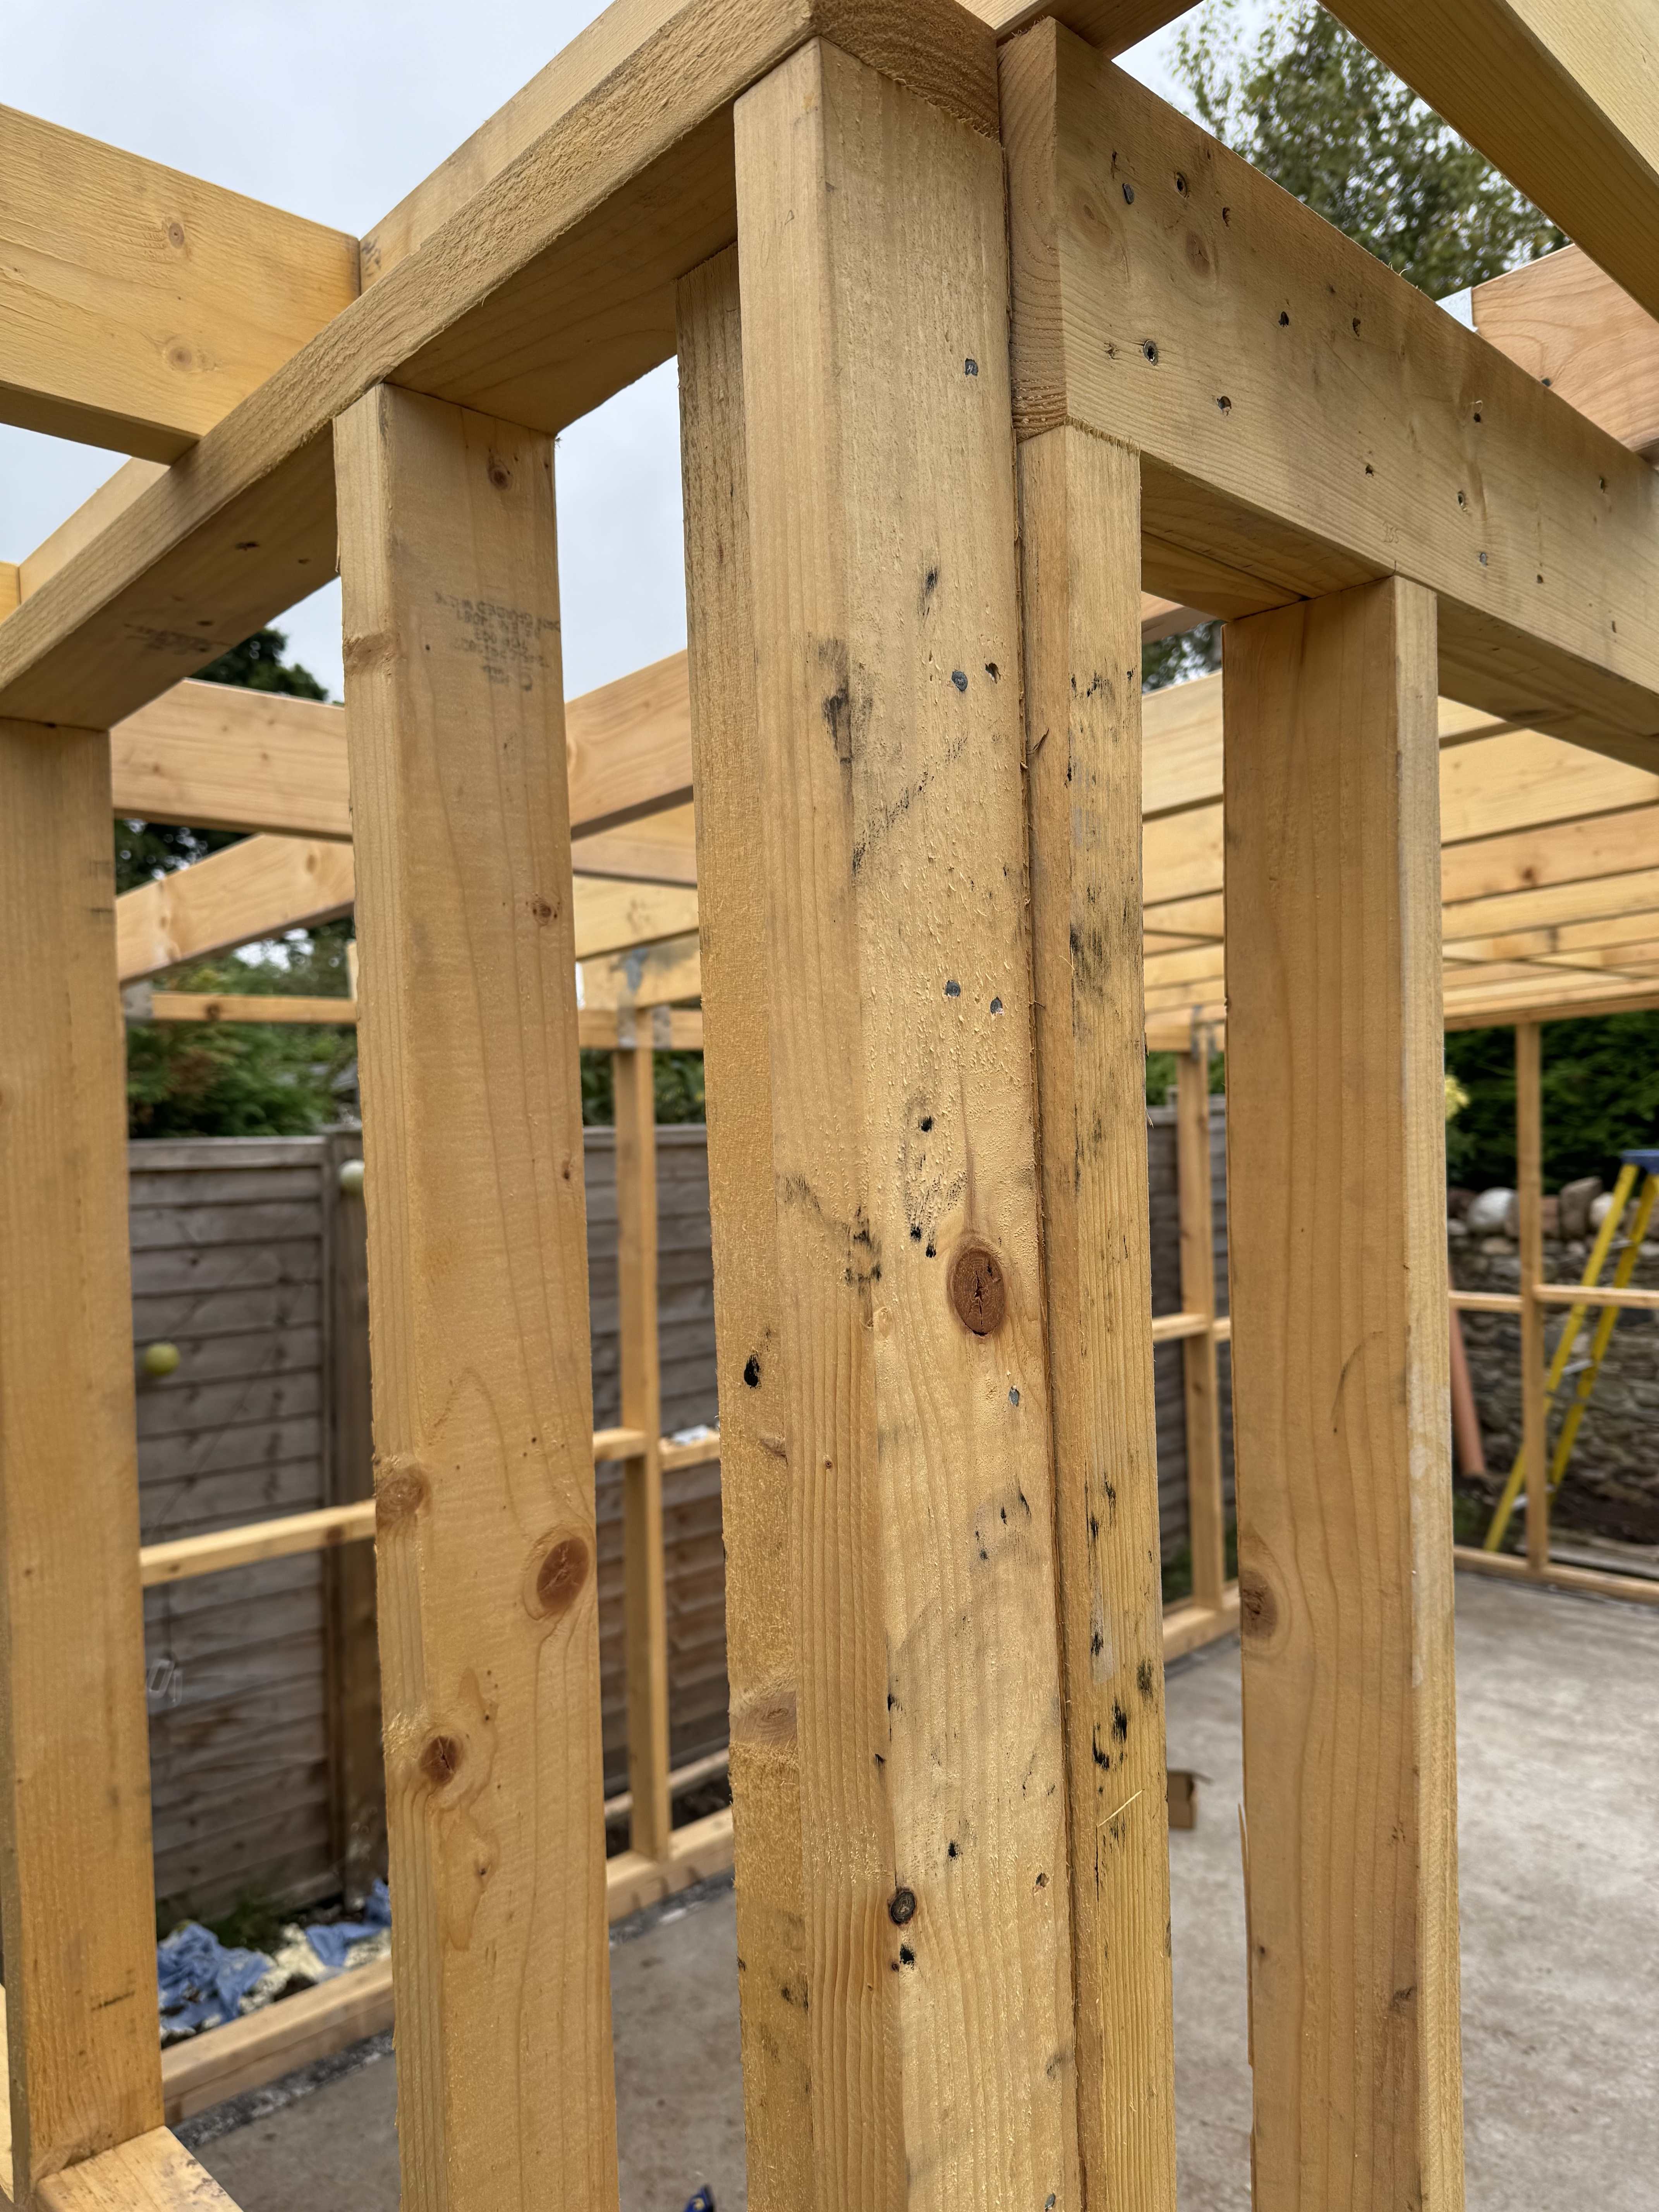
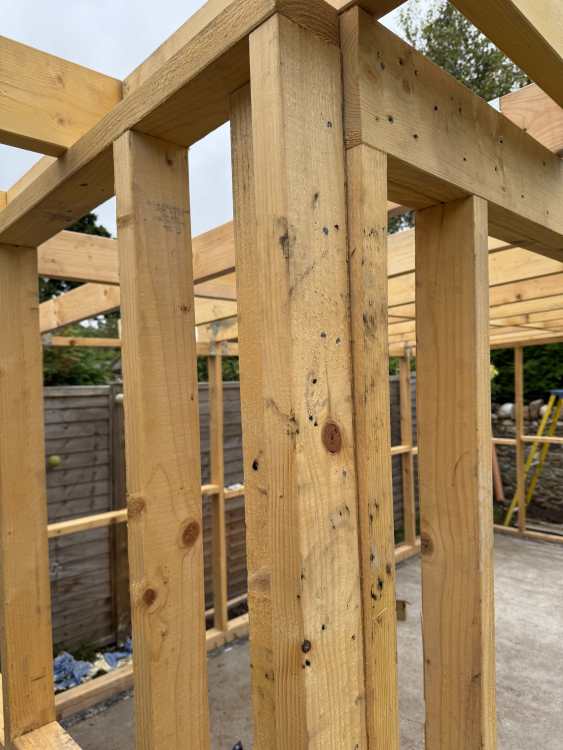
I'm self building a timber framed garden room. The construction from outside to inside is: weatherboard/cladding ventillation battens breathable membrane osb sheathing timber frame (with PIR in the middle) PIR overboarded I have the 4 walls squared and upright, the diagonals lengths are the same, and have ended up with a significant misalignment at an external corner. It's square and flush at the bottom, and at the top it diverges by about 20mm, and tapers down to 0mm misalignment 1m down. I am thinking of creating blocks/cuts of timber along that misalignment so the osb sheathing can go on flush and be supported along that top bit. As for the gaps that it leaves, can/should I use closed cell expanding foam to fill those voids? Thanks in advance
-
Hi from Scotland with a unique and exciting project!
plockhart replied to plockhart's topic in Introduce Yourself
I'm being incredibly sarcastic! Feels like everyone around me is putting the up on their garden. Blowy North there are so many great bits on the forum I have come across over the months. -
I am embarking on the unique and ambitious project of building.....yet another timber framed garden room based off knowledge from the internet. Yes I know, done to death! Over the weeks of researching I found this sub full of really helpful knowledge and thought maybe there would be a benefit to me being part of this community. I've done lots of DIY from joinery to electrics but nothing as big as this or that has put all those skills together. Should be exciting...