Pappa
-
Posts
69 -
Joined
-
Last visited
Everything posted by Pappa
-
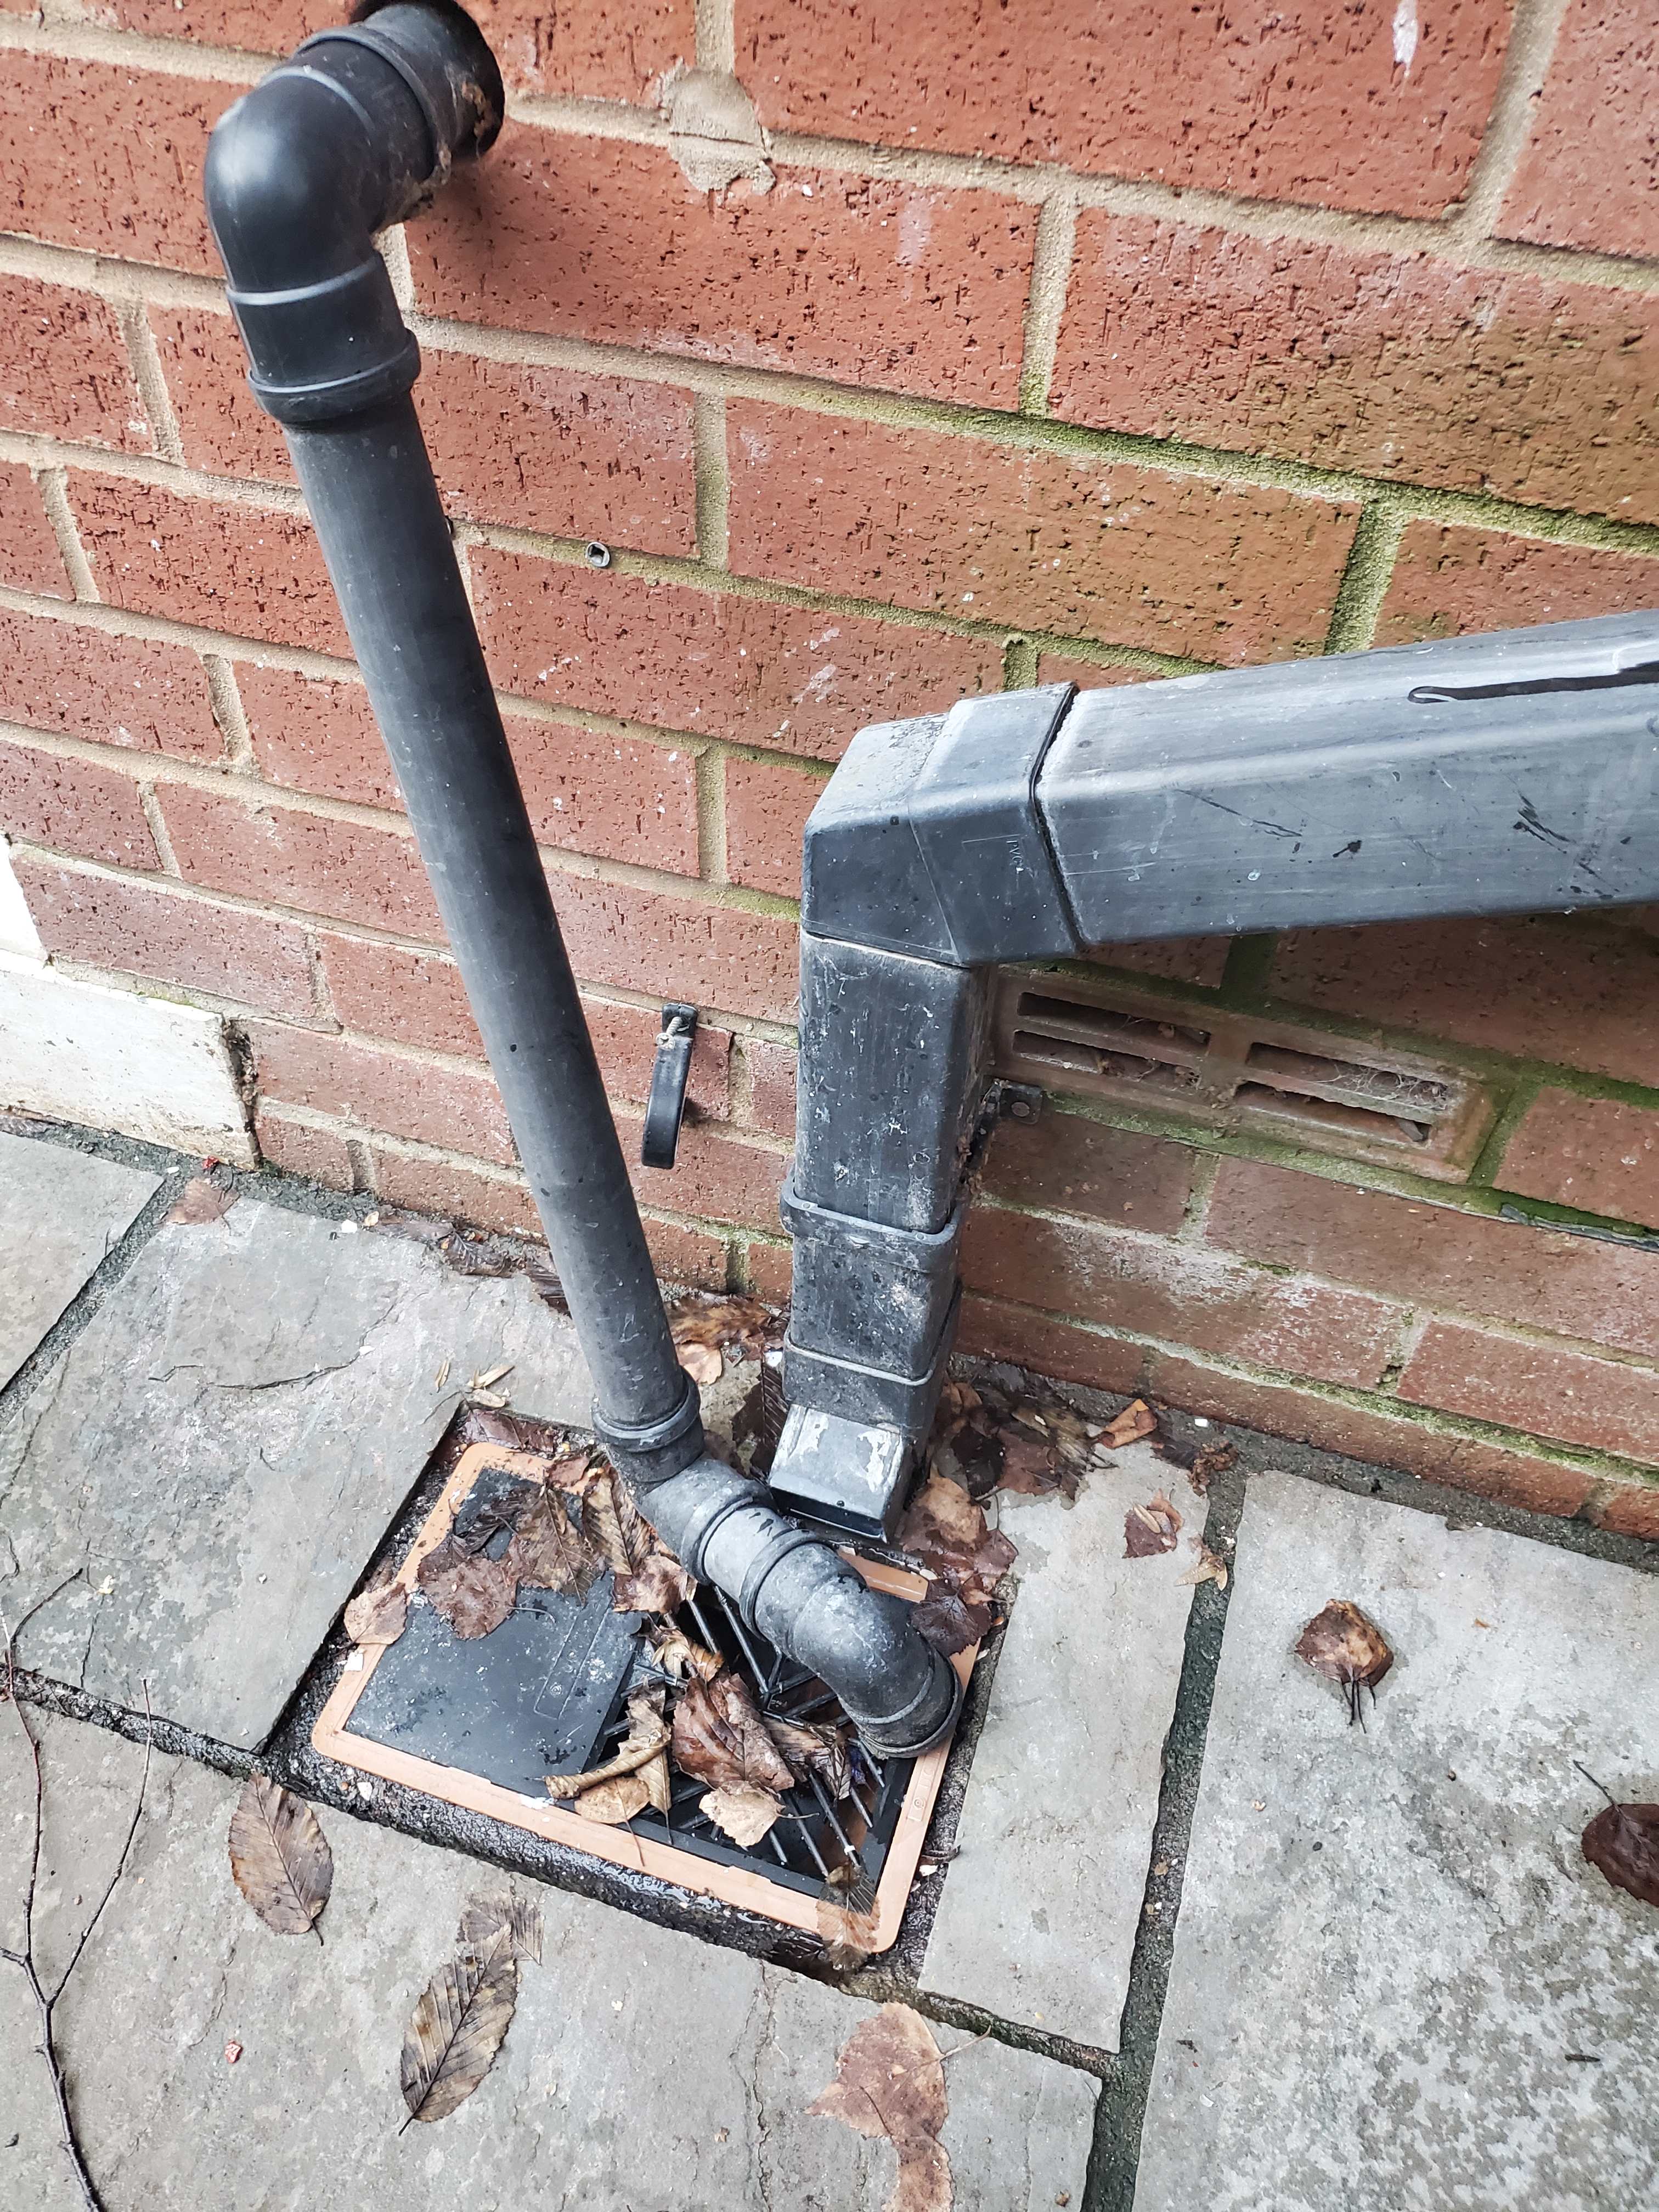
Many thanks. I'll try to do it properly first time round. Should I be cutting into the grill so that the pipes definitively exit into the drain and not onto the slabs?
-
Thanks. The round one doesn't quite bend to fit in the grill as things are. I can chop and change to make it fit, however I'm wondering if I should just drill a circular hole at the top of the square pipe to put the round pipe in to or would that be deemed a cowboy job? I want to do a proper job first time so it's done for good. Cheers.
-
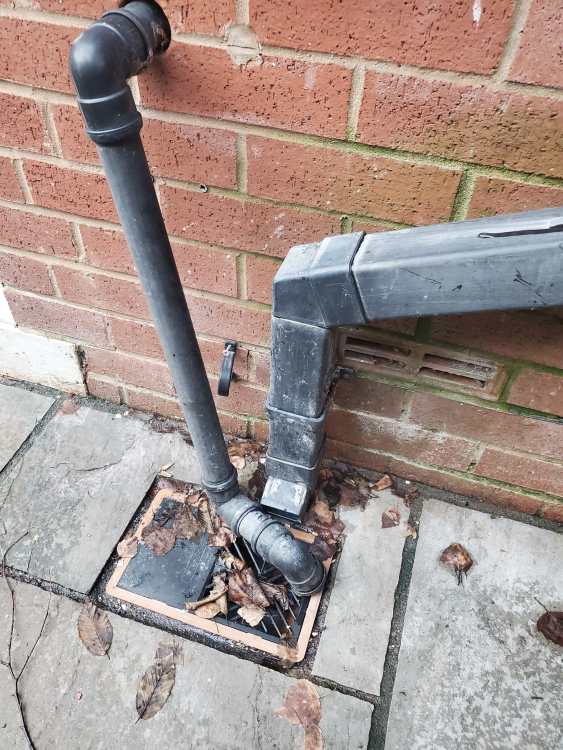
Thanks guys The leaves aren't that problematic. It's the fact that the pipes don't drain fully into the hole. Some of the water is splashing onto the slabs, in turn that is what is washing the trivial number of leaves into the damp external corner. I'm wondering if the round pipe on the left (from kitchen basin) should go directly into the square pipe coming from upstairs bathroom/washing machine. I would then need to manipulate the square pipe so it exits directly into the drain as opposed to some of the waste flowing onto the slabs. Thanks again
-
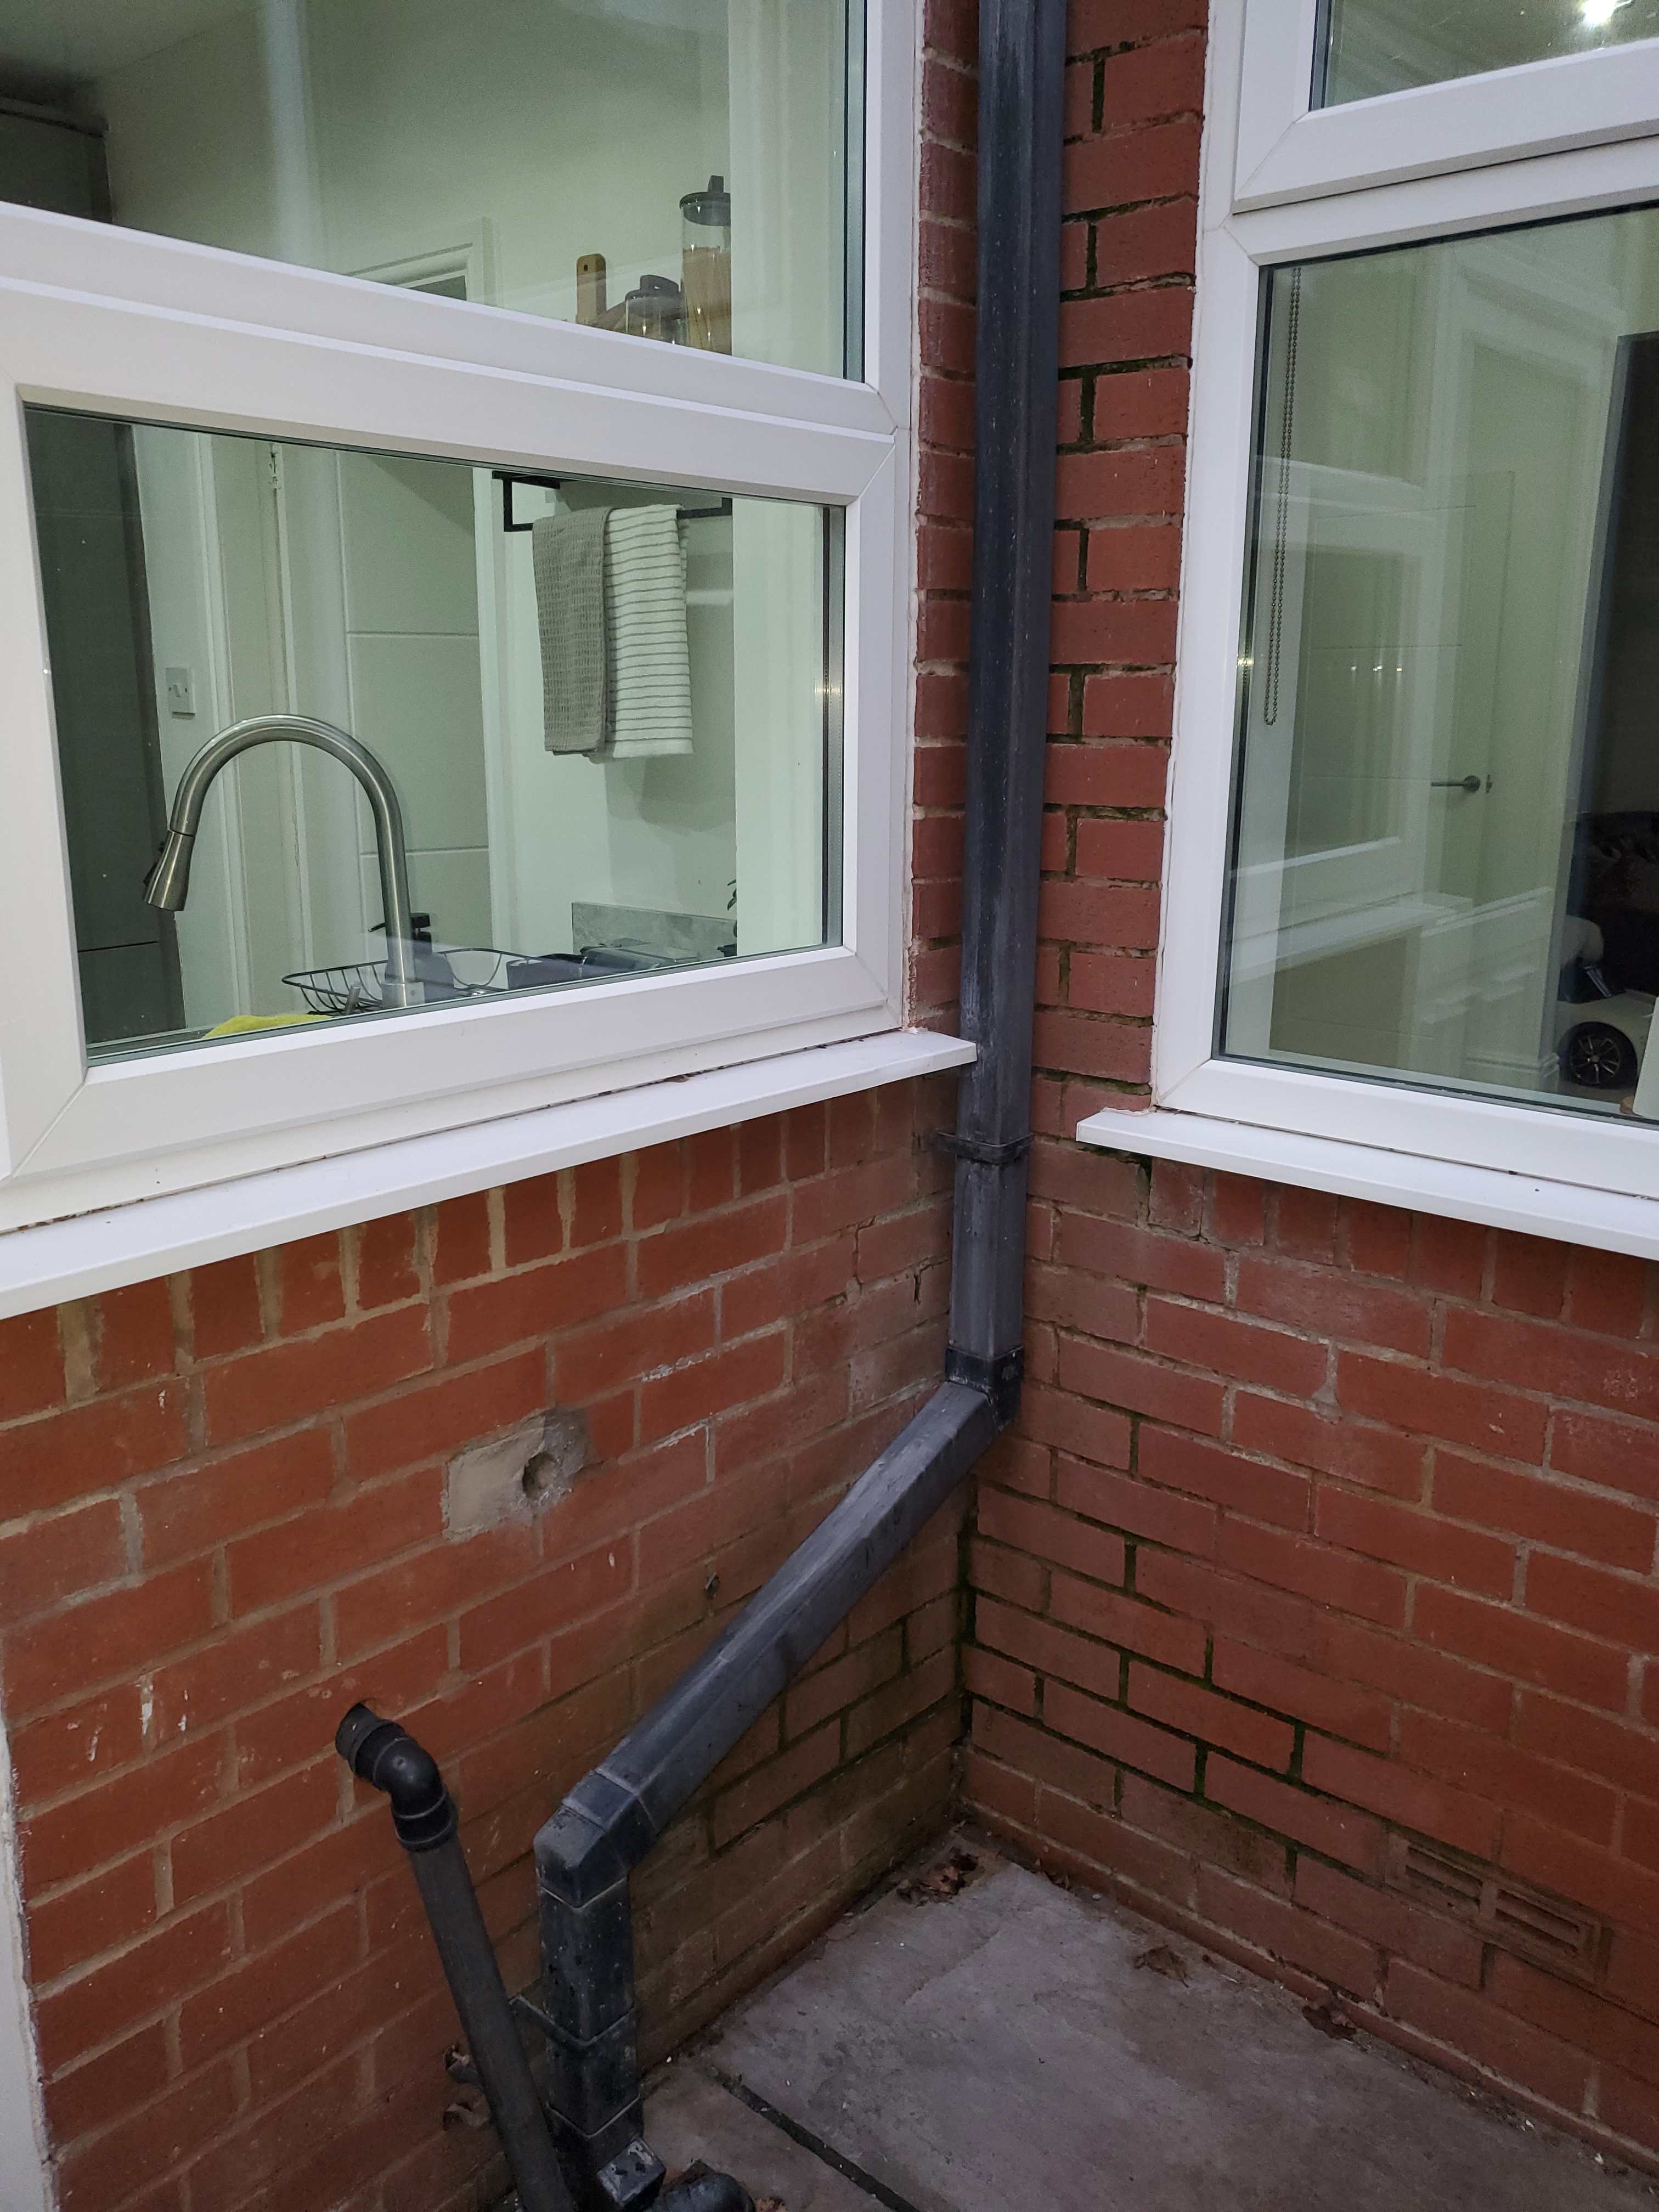
Thanks guys I will CT1 the botched junction to make a tight seal. Horizontal pipes have the proper angle, so does the floor. The attached photo is what is causing leaves to wash up in to the corner. It's not aimed directly into the drain. How do I remedy this? Thanks
-
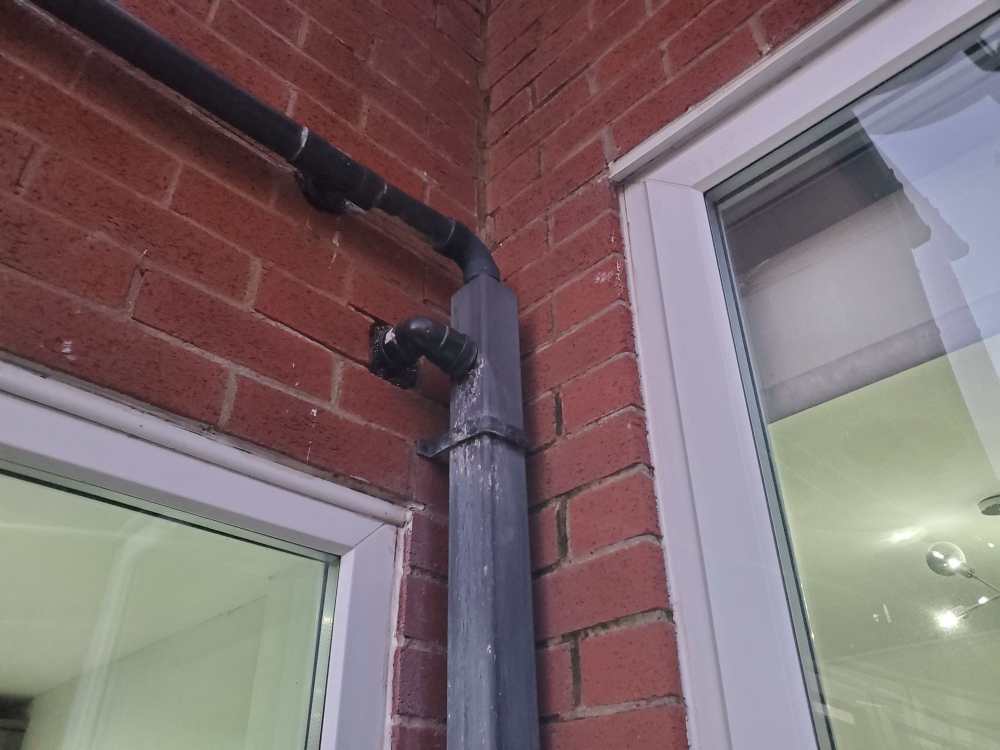
Thanks guys I've had a careful look at this. There is nothing leaking from the top (basin and shower). The bottom pipe coming out of the wall is the washing machine. This is the offending junction. How do I make an airtight seal here? Thanks again
-
Thanks guys. Would you advise doing the pointing before spring if there is X days / hours of dry weather forecasted? How many hours/days would you recommend? How much mortar do I need to rake out and refill? If you could point me in the direction of a useful guide or video that highlights best practice that would be appreciated. Thanks again
-
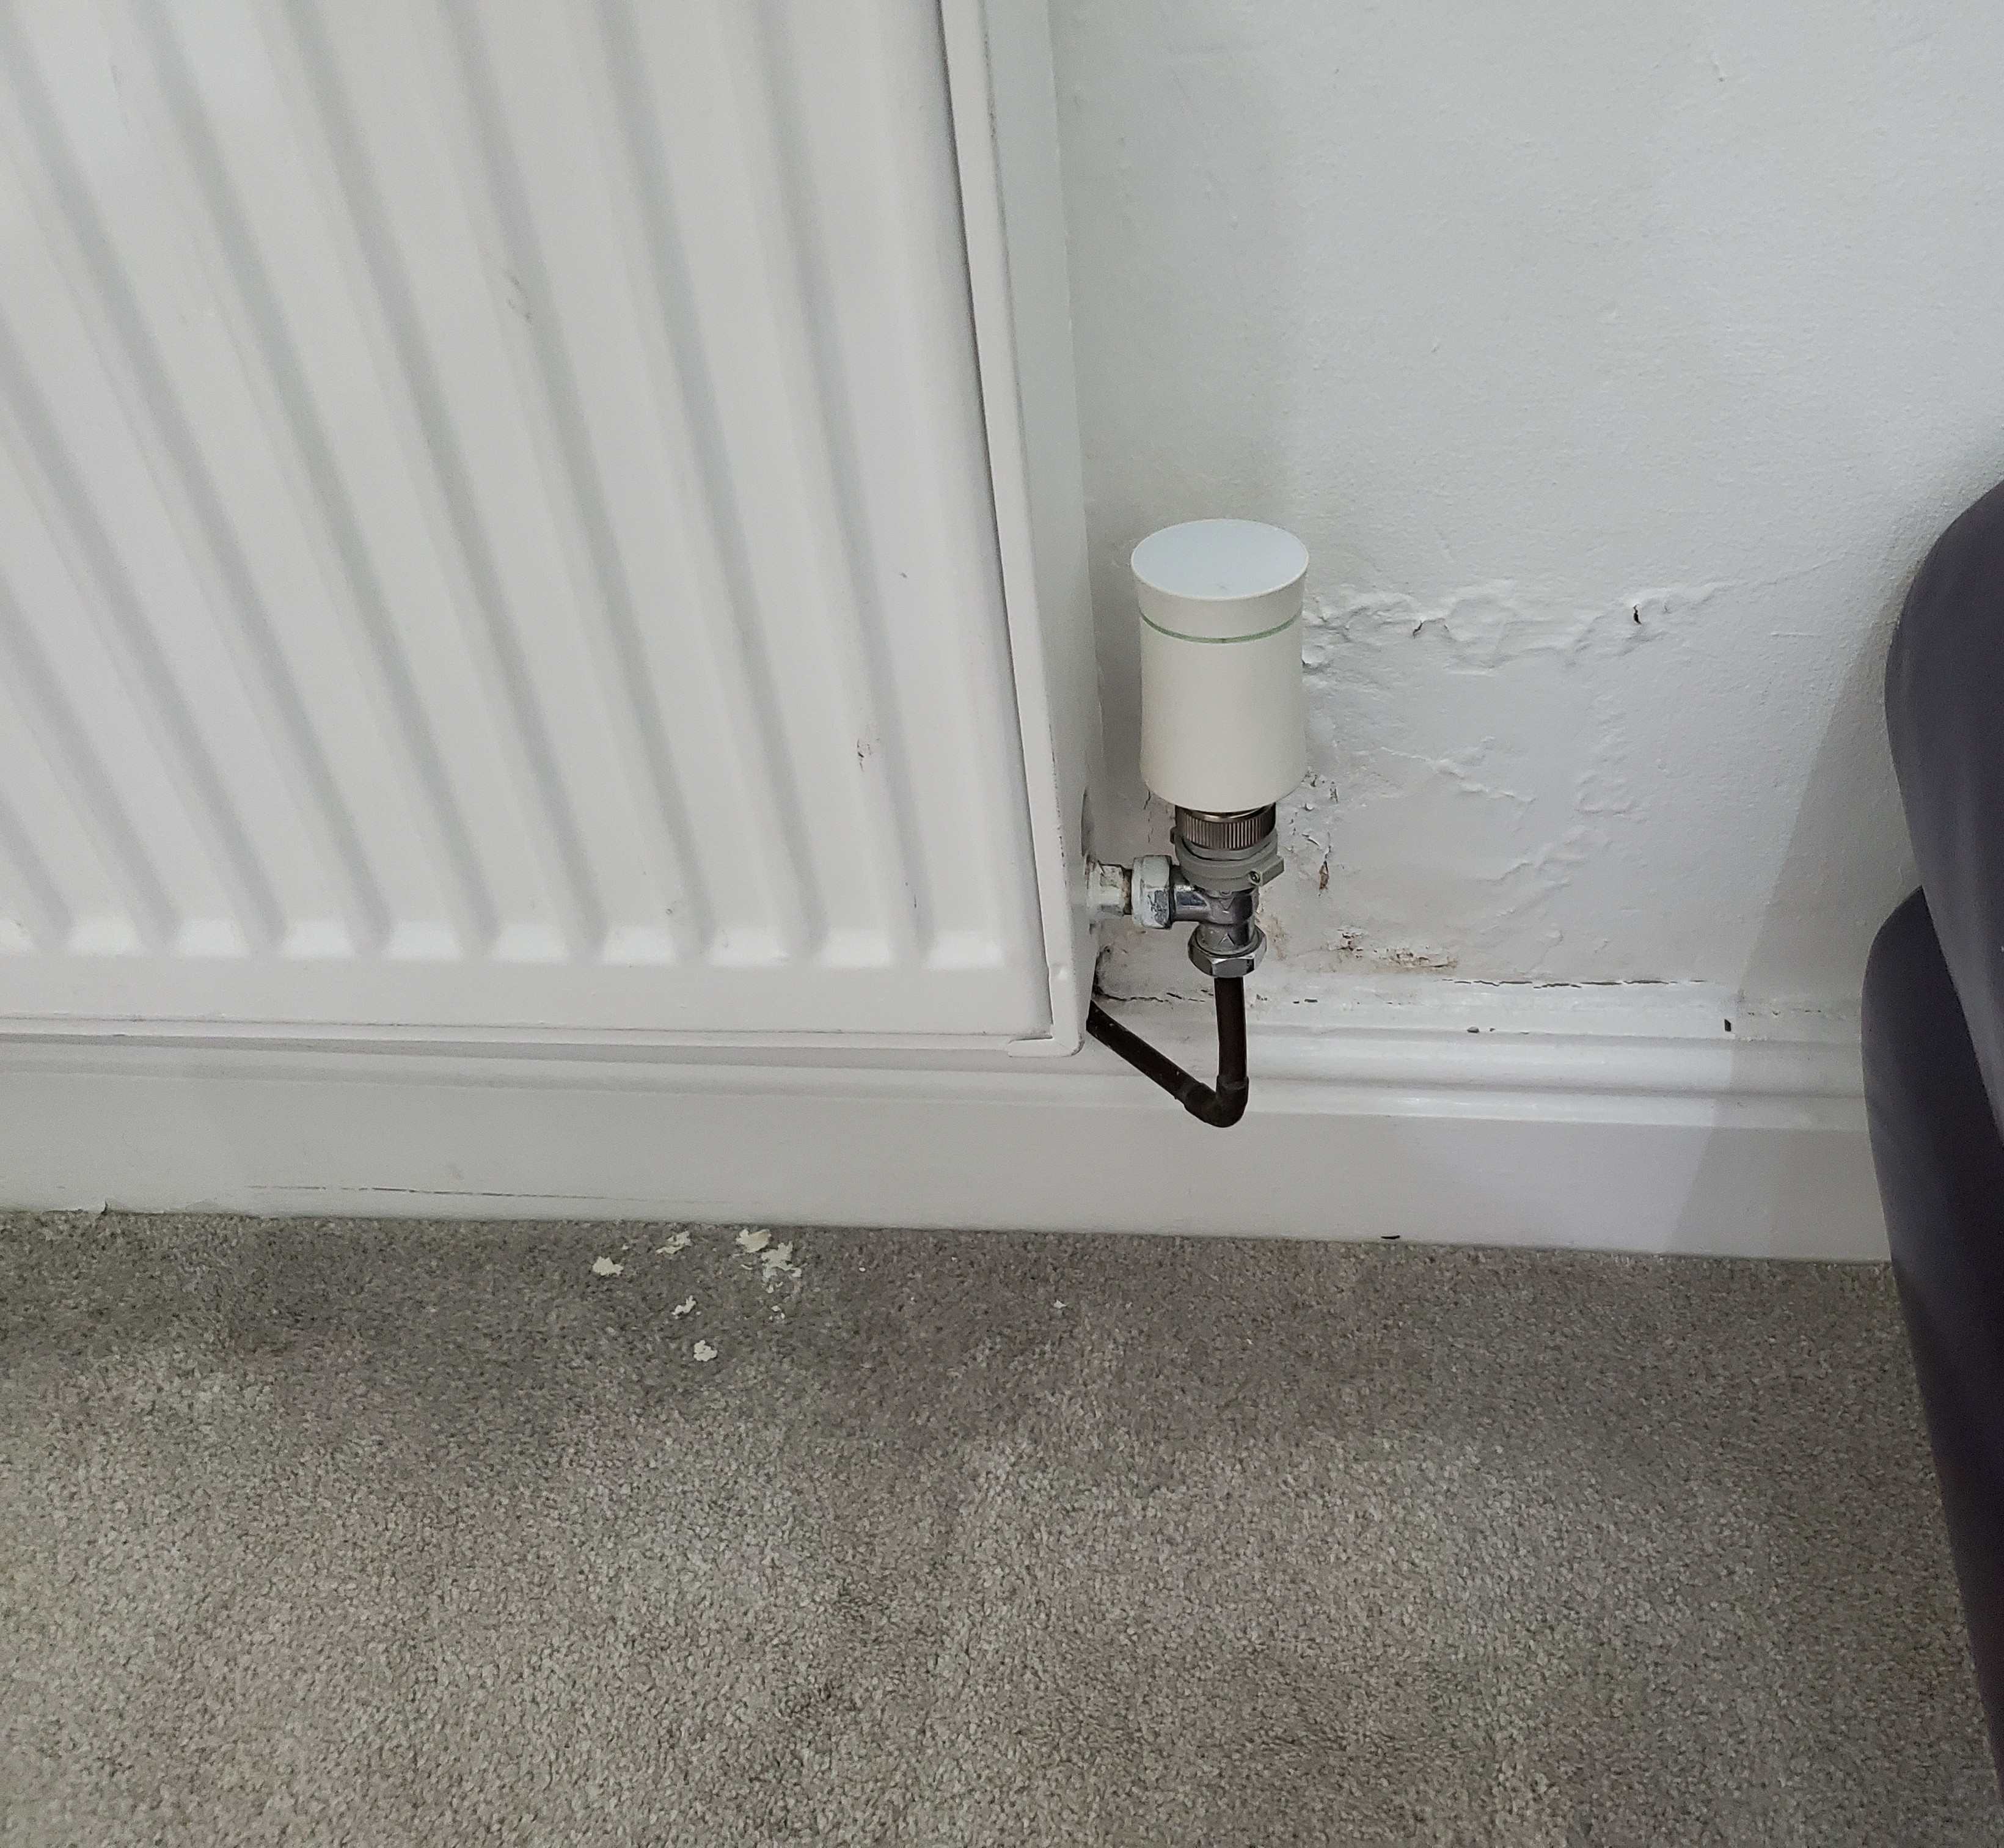
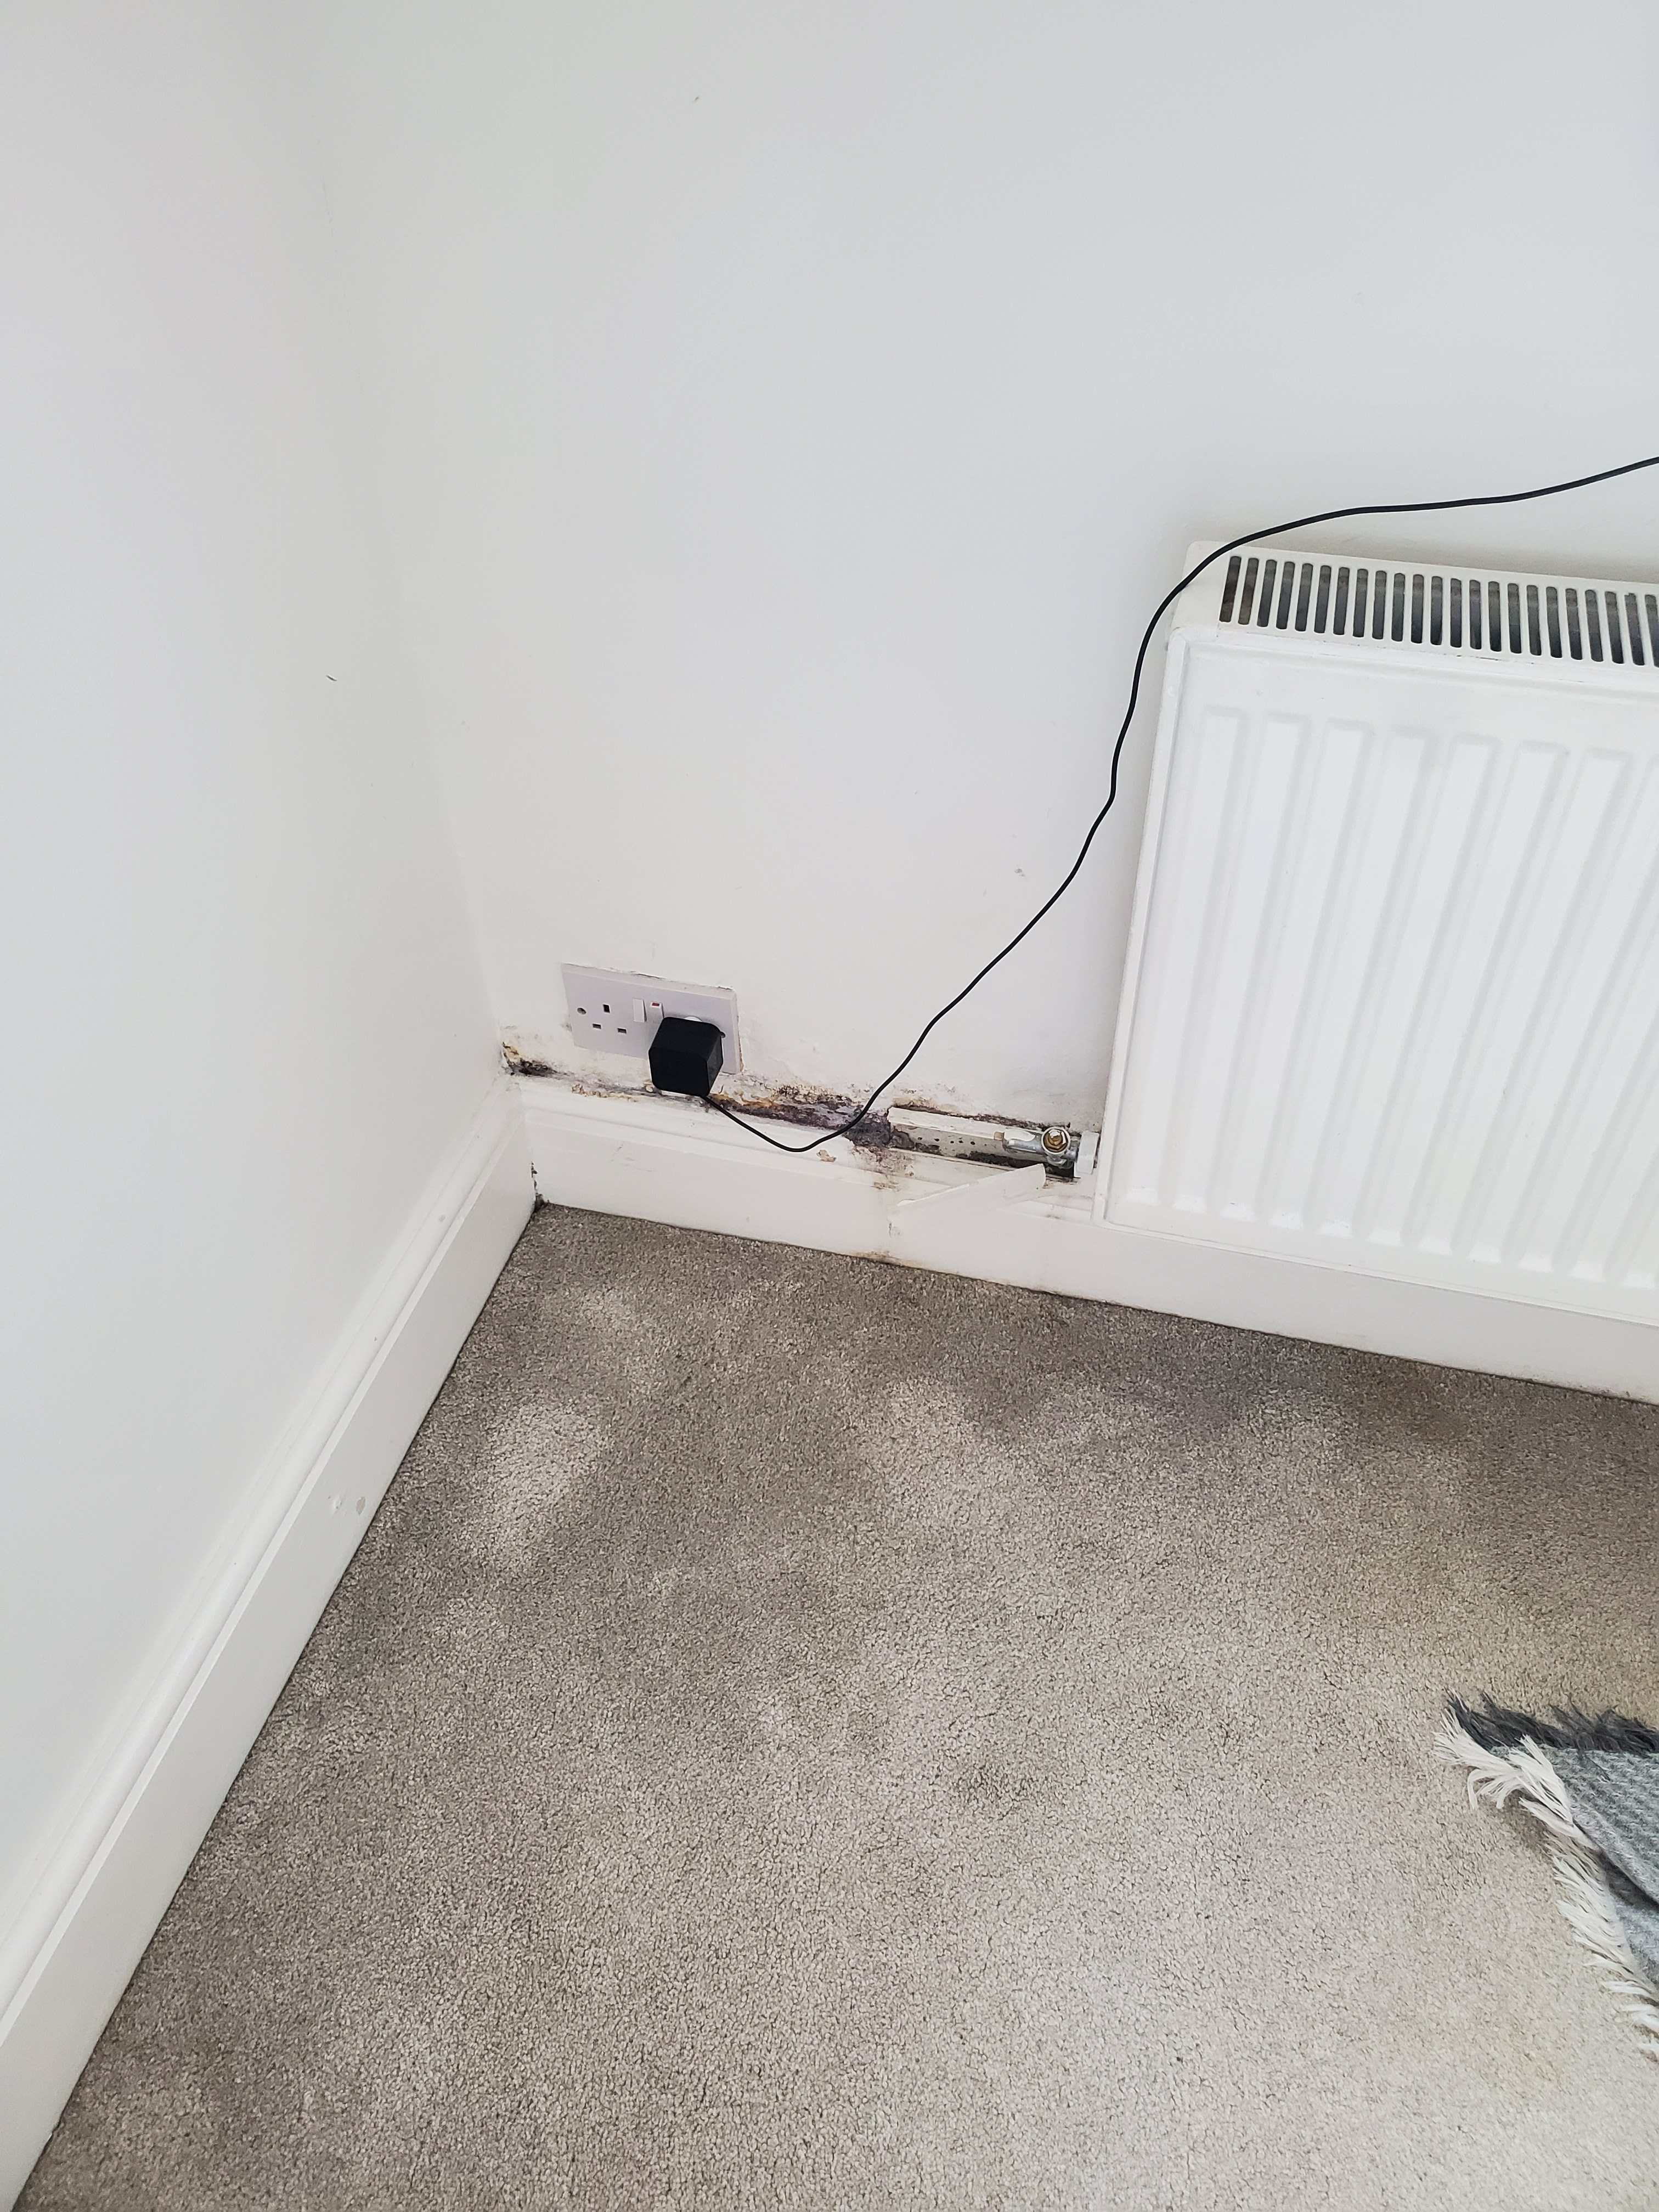
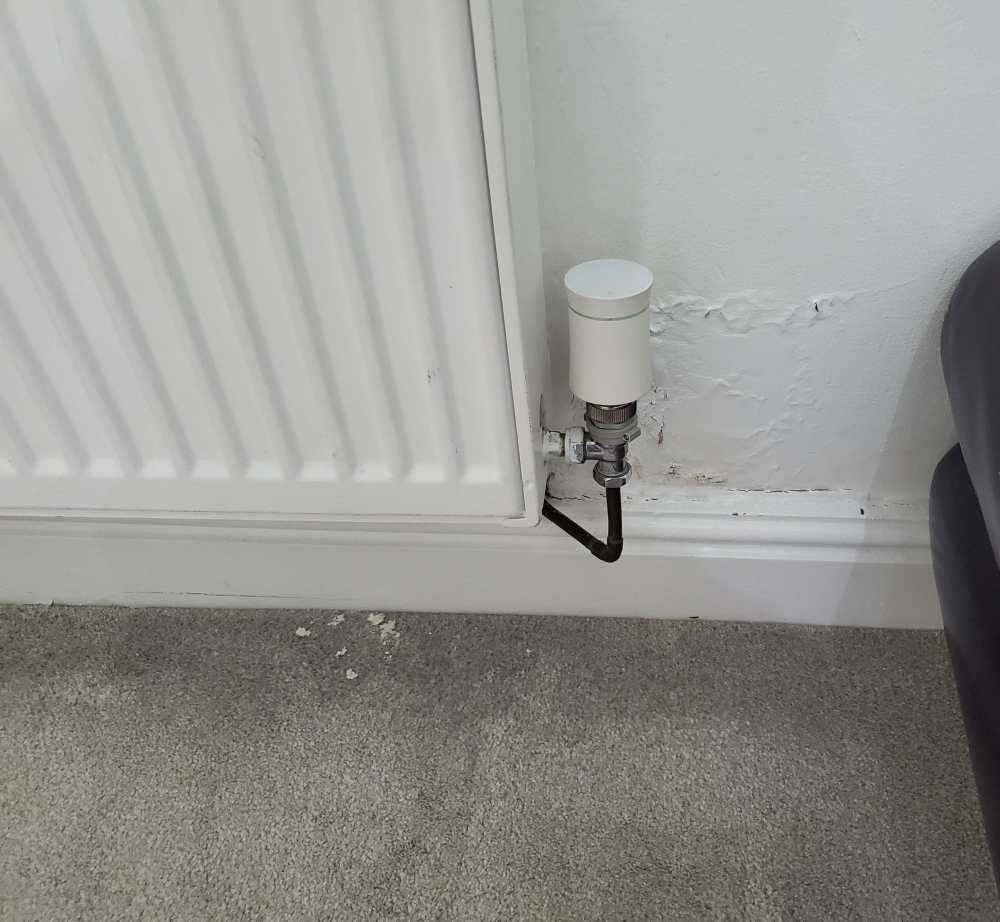
Thanks I thought so too The square patch on the interior is at the external corner or inside the external corner. The paint peels on the floor from behind the radiator correlates to the external picture approximately half way between the vent and the adjacent brick wall
-
Rainwater pipe from roof.

-
-
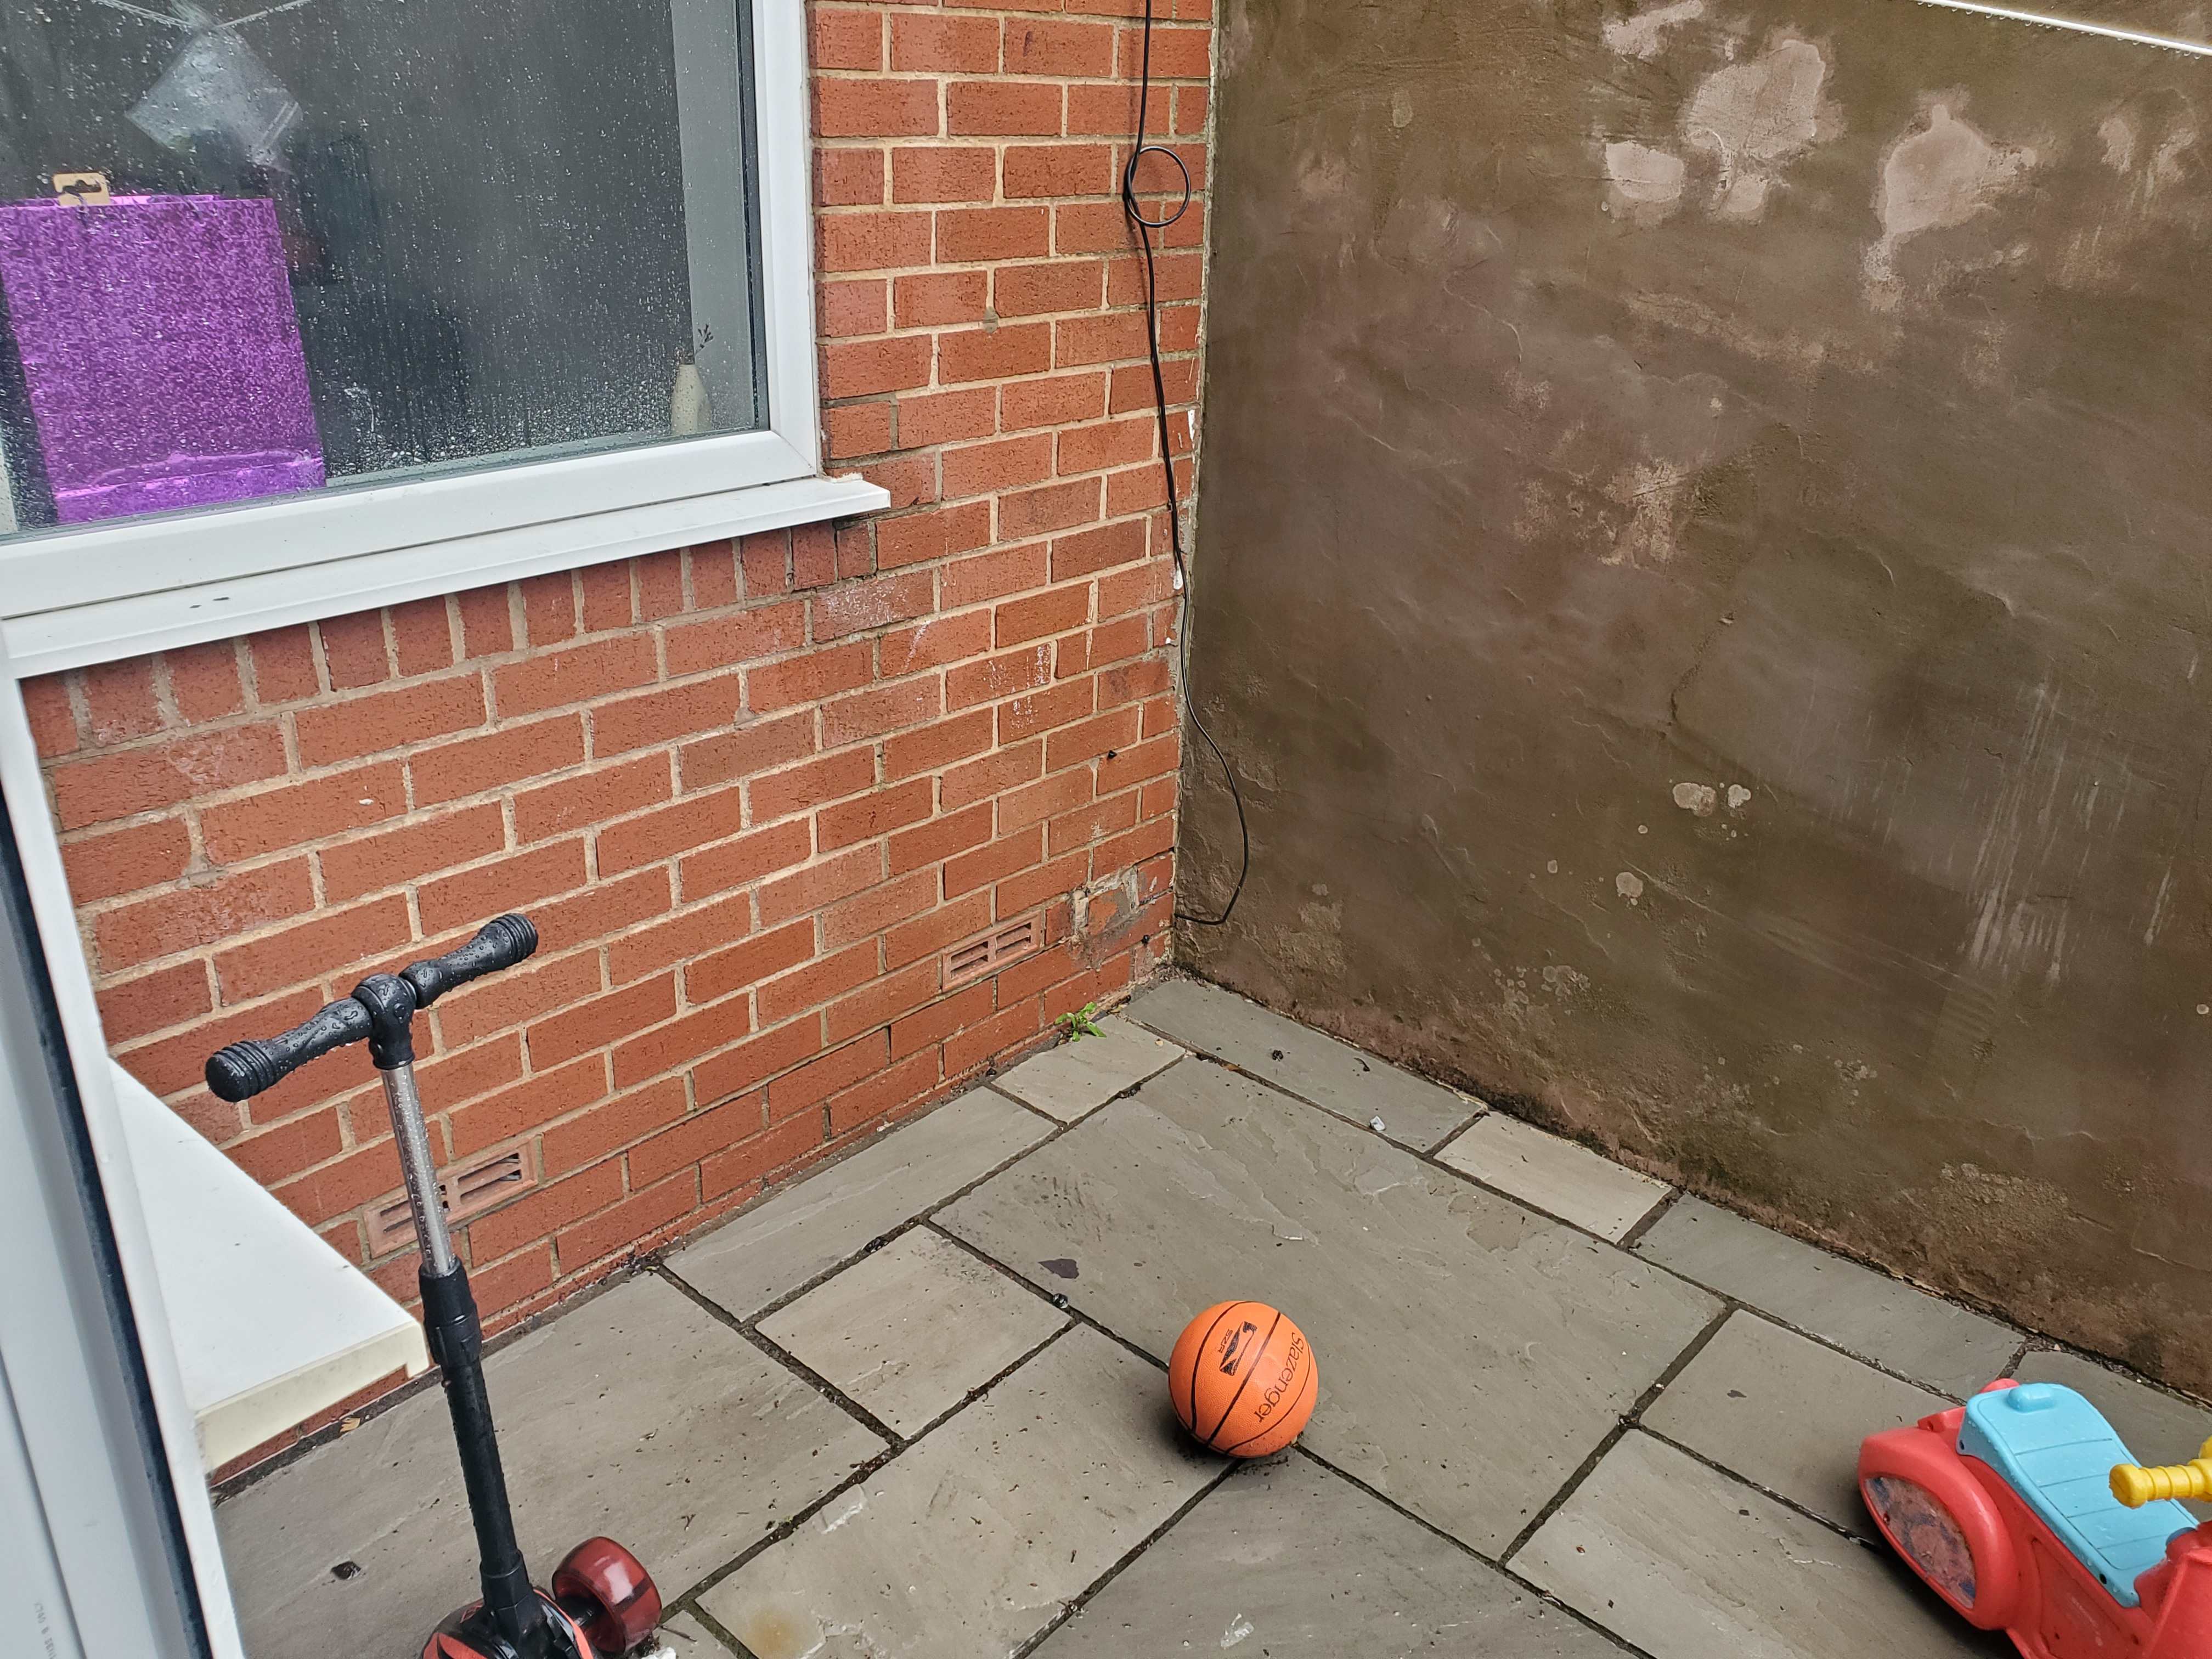
Hi guys. I've got a square patch of damp in my lounge that has just come about in the last month. Directly behind it is a brick wall that runs adjacent or away from this wall. Please note the paint peeling under the radiator. The external photo is directly behind this location. The DPC looks to be in good condition outside, although there is a rusty nail in the mortar line which has always been there. This brick wall was constructed in the last 20 years, before I bought the house. Relative humidity is consistently less than 60 percent in this room so I don't think it's condensation. Thanks in advance

-
Sorry, plain brick wall. I just guessed that it was cellulose, all I know is that it's white and fluffy. Thanks for confirming. The house is Victorian so 100 or more years, however this brickwork is definitely not Victorian. Not sure when it was given a facelift or why. I was thinking the chemical dpc would be easiest? Will that suffice as a patch up repair job or will I have to replace as like for like? Thanks P
-
Hi guys Please see internal/external photos attached. This was done before I bought the house. I'm pretty sure they've ruined the DPC and hence water travelling through the cavity insulation (probably cellulose) to internal wall. What are my options to repair the DPC please? Thanks P


-
Pros and cons of power raking tools please?: SDS chisel with raker bit. Raker drill bit. Multi tool raker. I've got angle grinder and diamond blade already but I imagine this will be the messiest option.
-
No worries, I won't bother cutting the bricks. I'll just rake them out and fill in the gaps with broken bricks and 3:1 sand cement. Thanks again P
-
Thanks guys I've spoken to SE and it turns out I was mistaken. He wants me to notch/remove brick on both sids of the span to support the timber. Ledger beam is less possible because there are only a few courses of brick above the joists. To make the ledger beam viable we would need too many resin anchor bolts which would make it impractical. It is difficult to specify resin anchor bolts when the loads are this high because their rating is based on tests under laboratory conditions. The margins of error are too high due to installation disparity (dust left in the hole). The only way to be sure would be to stress test each fixing afterwards which is again not practical. The easiest way will be to insert the timber in to the brick wall. He said its up to me how I want to do this, I can remove a couple of bricks and place the timber beam, or I can notch a pocket if I've got the approproate tools/expertise. The load on the left hand side is indeed greater due to longer span; greater floor area; partition walls; heavier bathroom appliances. I'll try my best to cut a couple of bricks using a combination of stitch drilling and diamond/masonry blade. If it is too much effort, I'll just remove some bricks and fill around the timber with mortar. Thanks again
-
SE specifically said no to ledger board on the long side. The resin anchor bolts won't be strong enough to support the weight of the floor as they needto support 4.58kN/m, that would mean having so many bolts it would be impractical/uneconomical. The beams are to go directly in to the masonry wall. We can use a ledger beam on the short side.
-
Thanks guys, really good comments here. Waterproof PVA Glue I think he only wanted to one timber to be go in to the wall so as to disturb the masonry as little as possible (the masonry is to be notched 60mm deep). He feels there was going to be a lot of weight on the left hand side wall as it was supporting a long span, hence he was being more cautious on that side. SE said the other end can be fastened on to a timber ledger beam using joist hangers as that side is supporting a shorter span and hence less weight on the masonry. I've got a question about how to notch 60mm in to the brick... Any tips as to how to achieve this? I was thinking angle grinder, multi-tool and masonry chisel? How likely is it that I'll end up breaking the brick? Thanks again P
-
Reasons for sistering as per SE: 1) Steel beams just aren't possible. 2) 6m lengths are premium priced, 4.8m etc are more reasonably priced and easier to handle / not as heavy. 3) Sistering joists (2x8inch) like this and bolting them together with steel screws gives more strength than what a 4x8 inch timber beam would have provided. This is important as it is a long (6m) span. 4) Deeper joists aren't an option because it messes with the staircase/attic headheight + cost of deeper joists increases exponentially. Let me know if you've got any more advice about how to easily fasten these together. I can do it on a trestle table and then lift the beam up, however, by the time they're all fastened together, the weight will be significantly greater and difficult to maneuvre, it will be easier if fastened in situ. Cheers
-
Thanks for the reply. How do I ensure I'm bolting them together straight? Its hard to find straight timber, by the time I've bolted the 4th timber on, I could be way off.
-
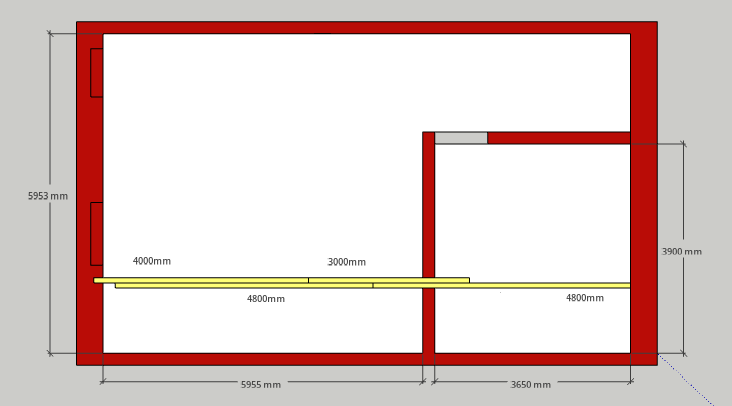
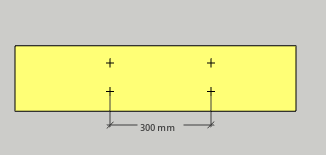
Hi Guys My Structural Engineer has designed a new attic floor for me. The diagram shows only 1 joist for brevity (structural walls in red): He has chosen 4m, 4.8m 3m lengths as they can be picked up off the shelf cheaply. He said 6m is also available at timber merchants but substantially more expensive. This is a side view as to how the joists are to be bolted together: I'm not disputing the structural side of it. But not sure about the practicality of fastening two lengths of timber together while floating in mid air. Do you have any tips or tricks that I can employ to do this? If no, I might go back to SE and ask for a 6m length timber as the main beam so atleast thats supported by the the masonry wall on either side of the long span, the sister joists will then be easier to screw together. Thanks in advance P
-

Roof insulation / air gap design
Pappa replied to Pappa's topic in Lofts, Dormers & Loft Conversions
Screw through the insulation in to the rafters using plastic insulation fixings to minimise thermal bridging. -
The key when settling small particles is to have multiple stratifying tanks, smaller containers but many of them is more efficient. I've got a near unlimited supply of these. My brother dug out his basement about 20 years ago and he swears by it. Its been a play room for his kids, then they grew up and it became a study, then a warehouse for when he ran an ebay shop, then an office when he was WFH +- a place to dump extra storage and bulky appliances - washer/dryer/chest freezer/boiler etc. My neighbour did the same thing. He doesn't need the space but he's making £800 pcm in rental income. There is already a basement underneath half of the house, but I need to excavate down by 500mm to give me a comfortable 2.4m head height + tanking/insulating the floor. I'm thinking if I'm excavating that, I might as well excavate the other half of the house and underpin it as per SE spec. In terms of the economics, houses sell for 2.5k per sq m at the moment where I live. The quotes given by builders/architect/SE makes me think I will recoup the cost of the basement dig out and make a profit when I sell +- appreciation. The basement is 50 sq m and almost a perfect square. Until you guys advised me against the idea, I was going to make the controlled hole for my water pit slap bang in the middle so its away from the foundations. I'll stick to spade and wheelbarrow for now though. This project will be a slow burner - a weekend project for me and my son. Thanks again P
-
Thanks The extension is being demolished and rebuilt so I guess I'll just rewire it even if the PVC cable is ok. Thanks again P
-
Thanks guys. I'll keep water out of my basement. Excavating foundations for a new outhouse away from the existing house and other foundations... Could this work here? Thanks again P
-
Roof insulation / air gap design
Pappa replied to Pappa's topic in Lofts, Dormers & Loft Conversions
Thanks guys Any work I'm going to do will be from inside only and I don't fancy disturbing the existing membrane/rafters/slates as the roof has only been renovated in the last few years by previous owner. I'll stick with the air gap and the above design. Thanks again P