paro
-
Posts
95 -
Joined
-
Last visited
Everything posted by paro
-
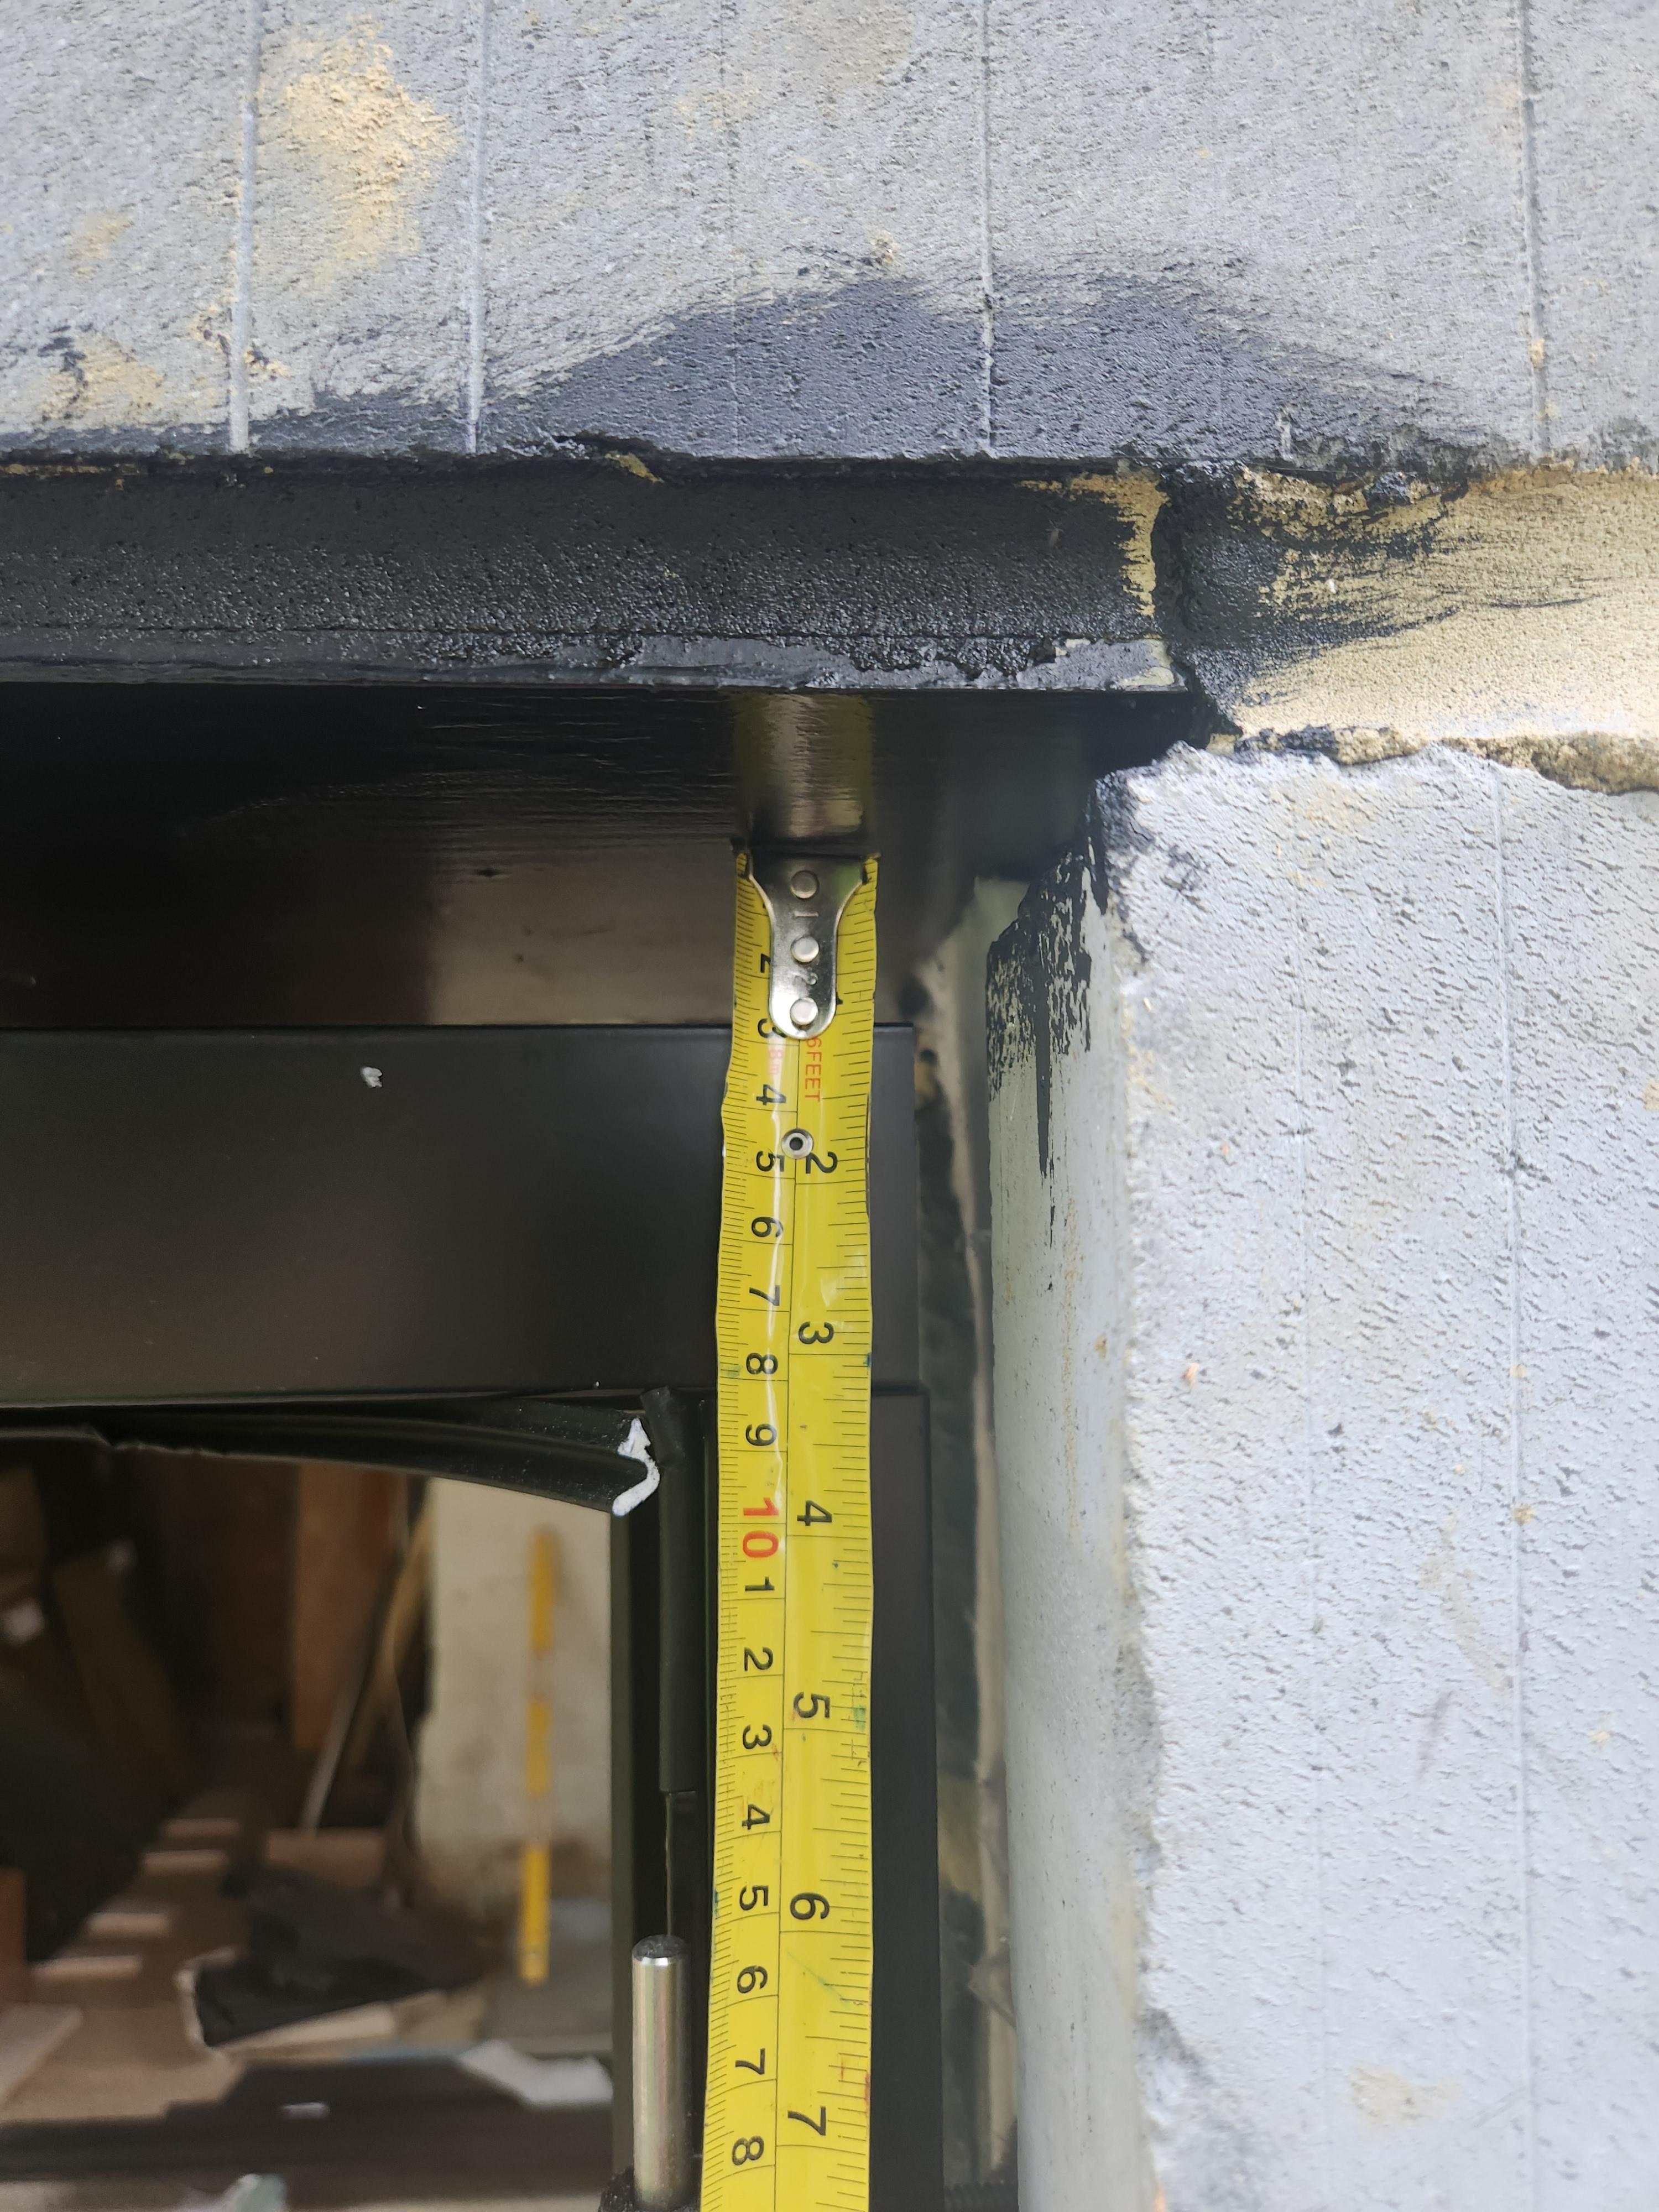
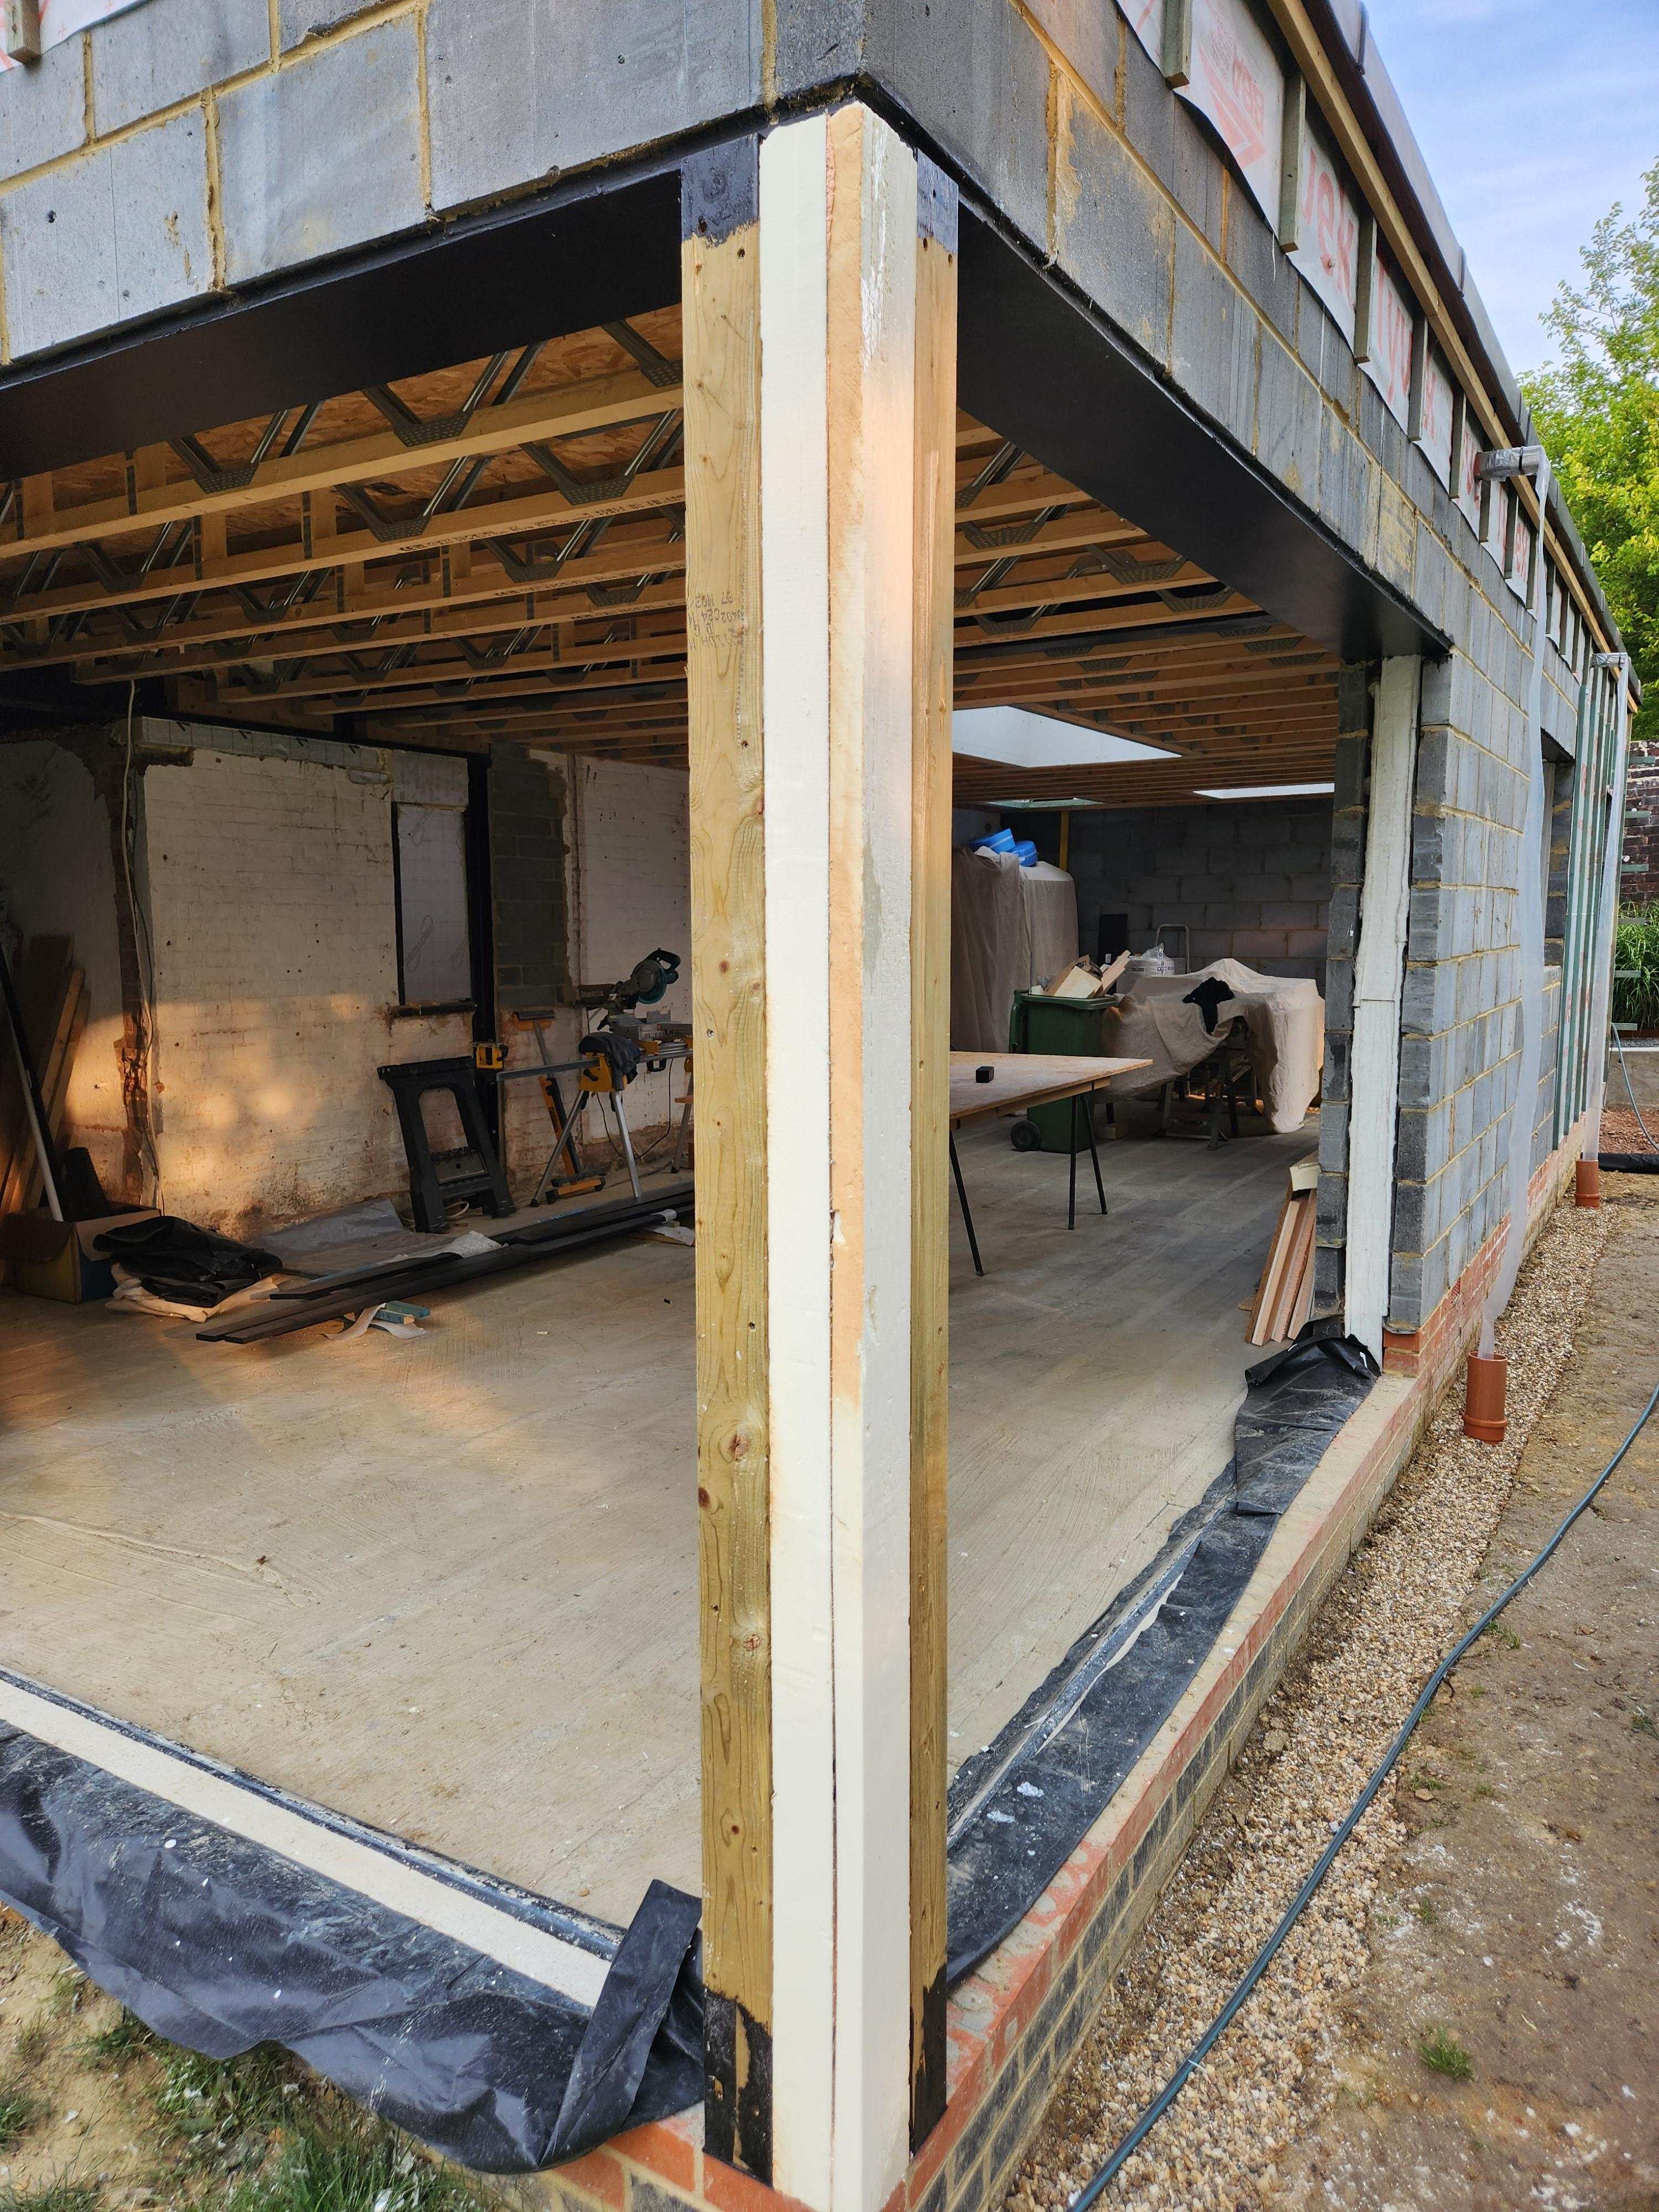
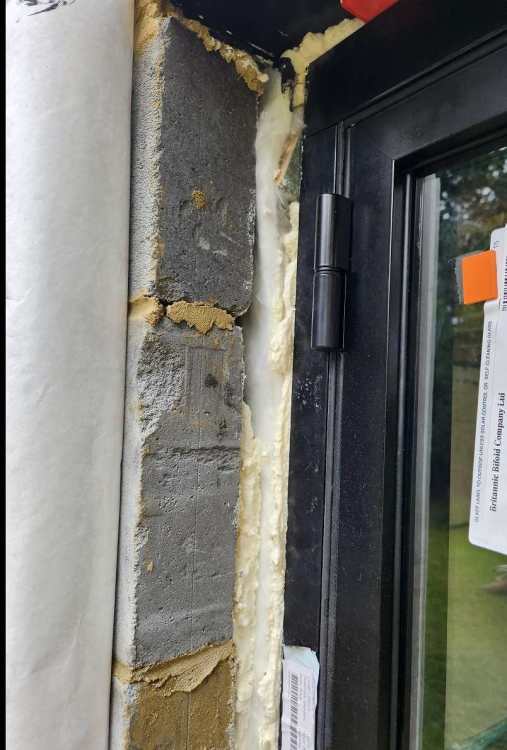
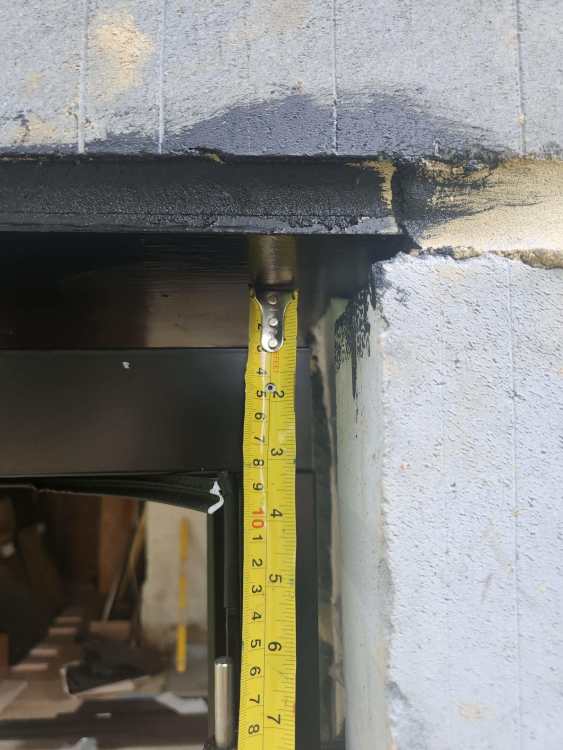
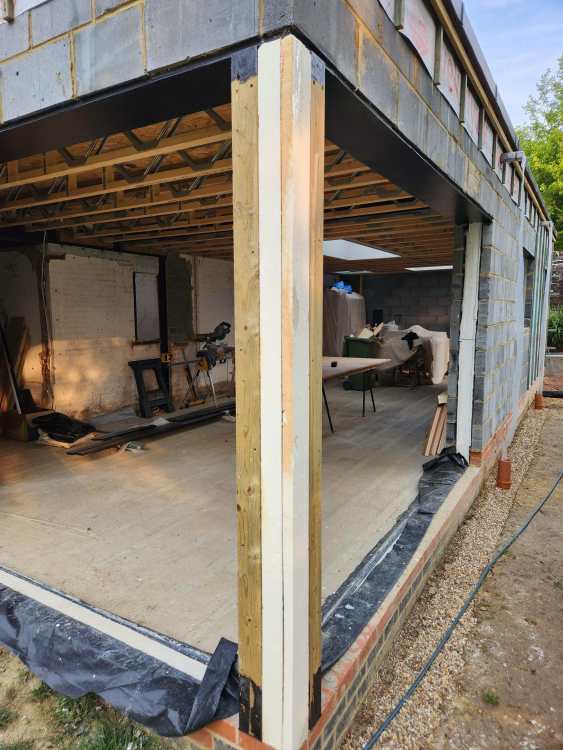
@JohnMo This was one of those things I tried to get a clear answer for from the architect, BC and the window fitters. For me I cannot see how its possible to solve that problem since the steel above goes from the outside to the inside. Per the architects drawings I wrapped the uprights in uber expensive space therm (the white in the pic) -- but honestly have no idea since it is air gapped from everything anyway so seemed complete waste of money -- I was going to put spacetherm on the top steel as well but when speaking to the fitters the doors were at least 20mm short of the top and they just filled it all with expanding foam, which I guess kind of addresses the contact between the window frames and the steel (at the expense of frame strength I would assume) but since that top steel goes all the way from inside to out I wasn't sure how to solve it. I've used 37.5mm insulated plasterboard across the top on the inside but really not if that helps of hinders. @Gus Potter Thanks for this. I'll give it a go over the weekend.
-
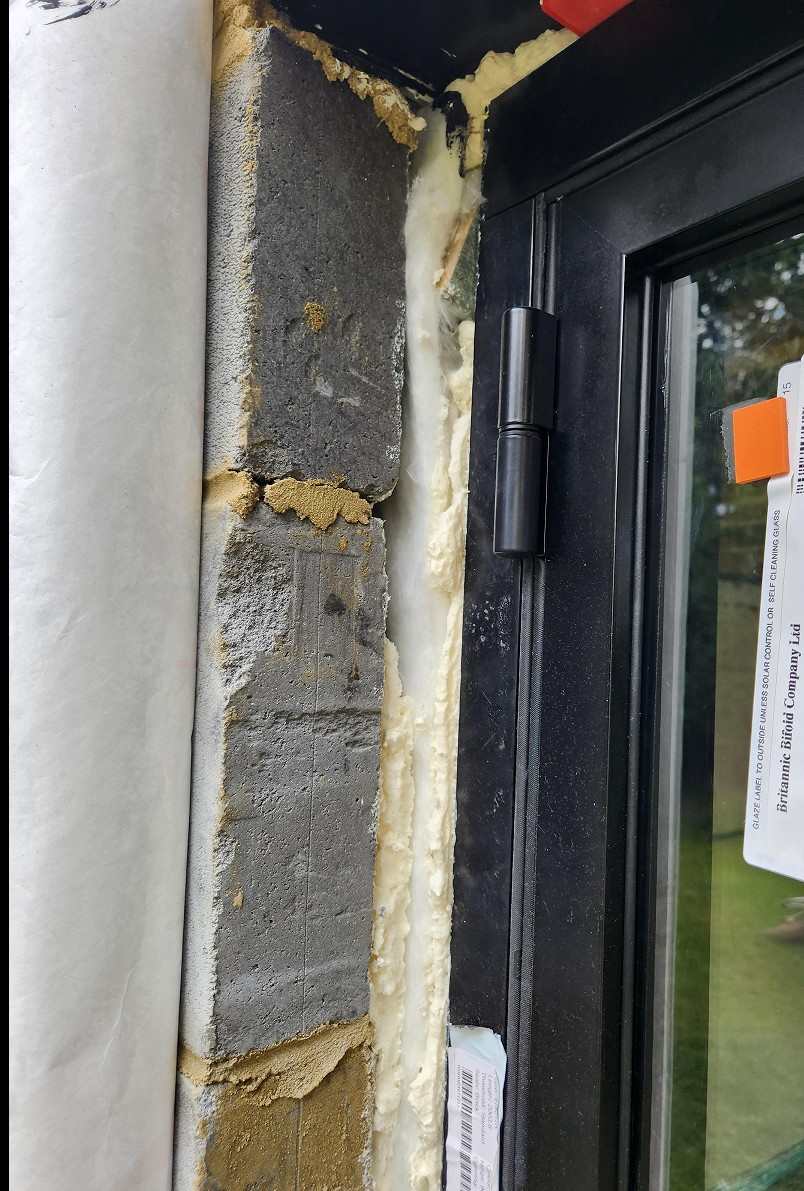
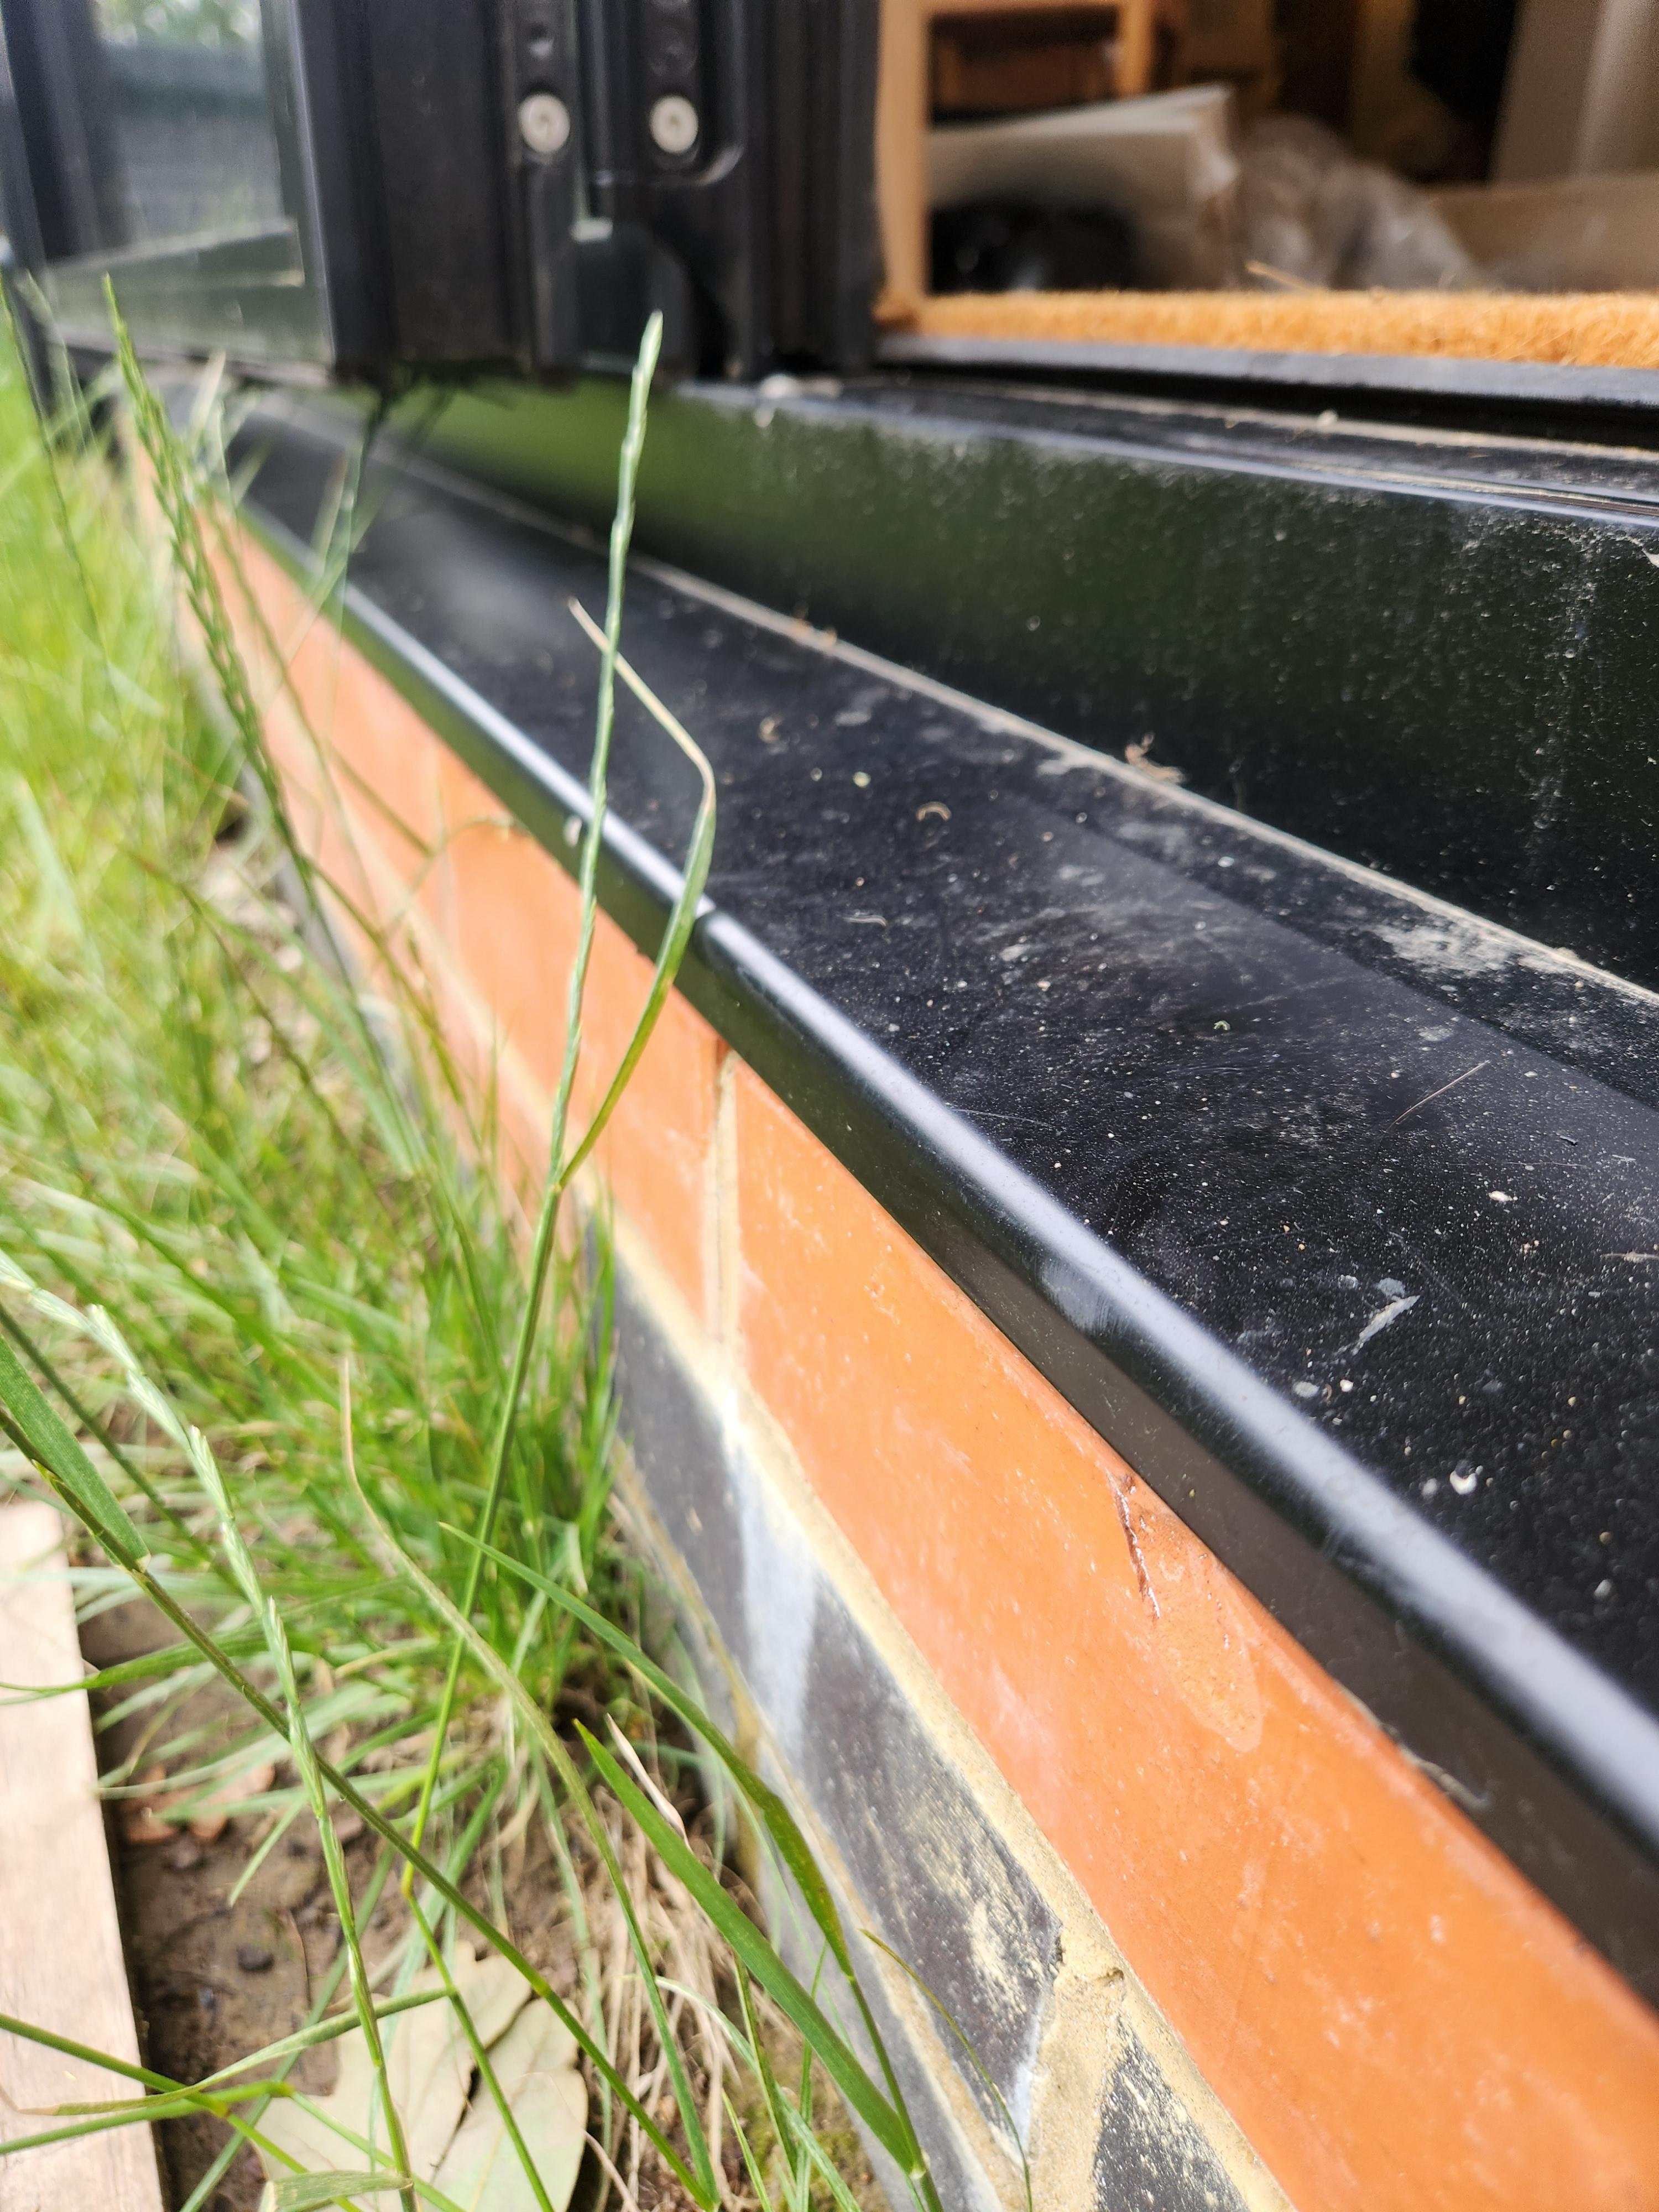
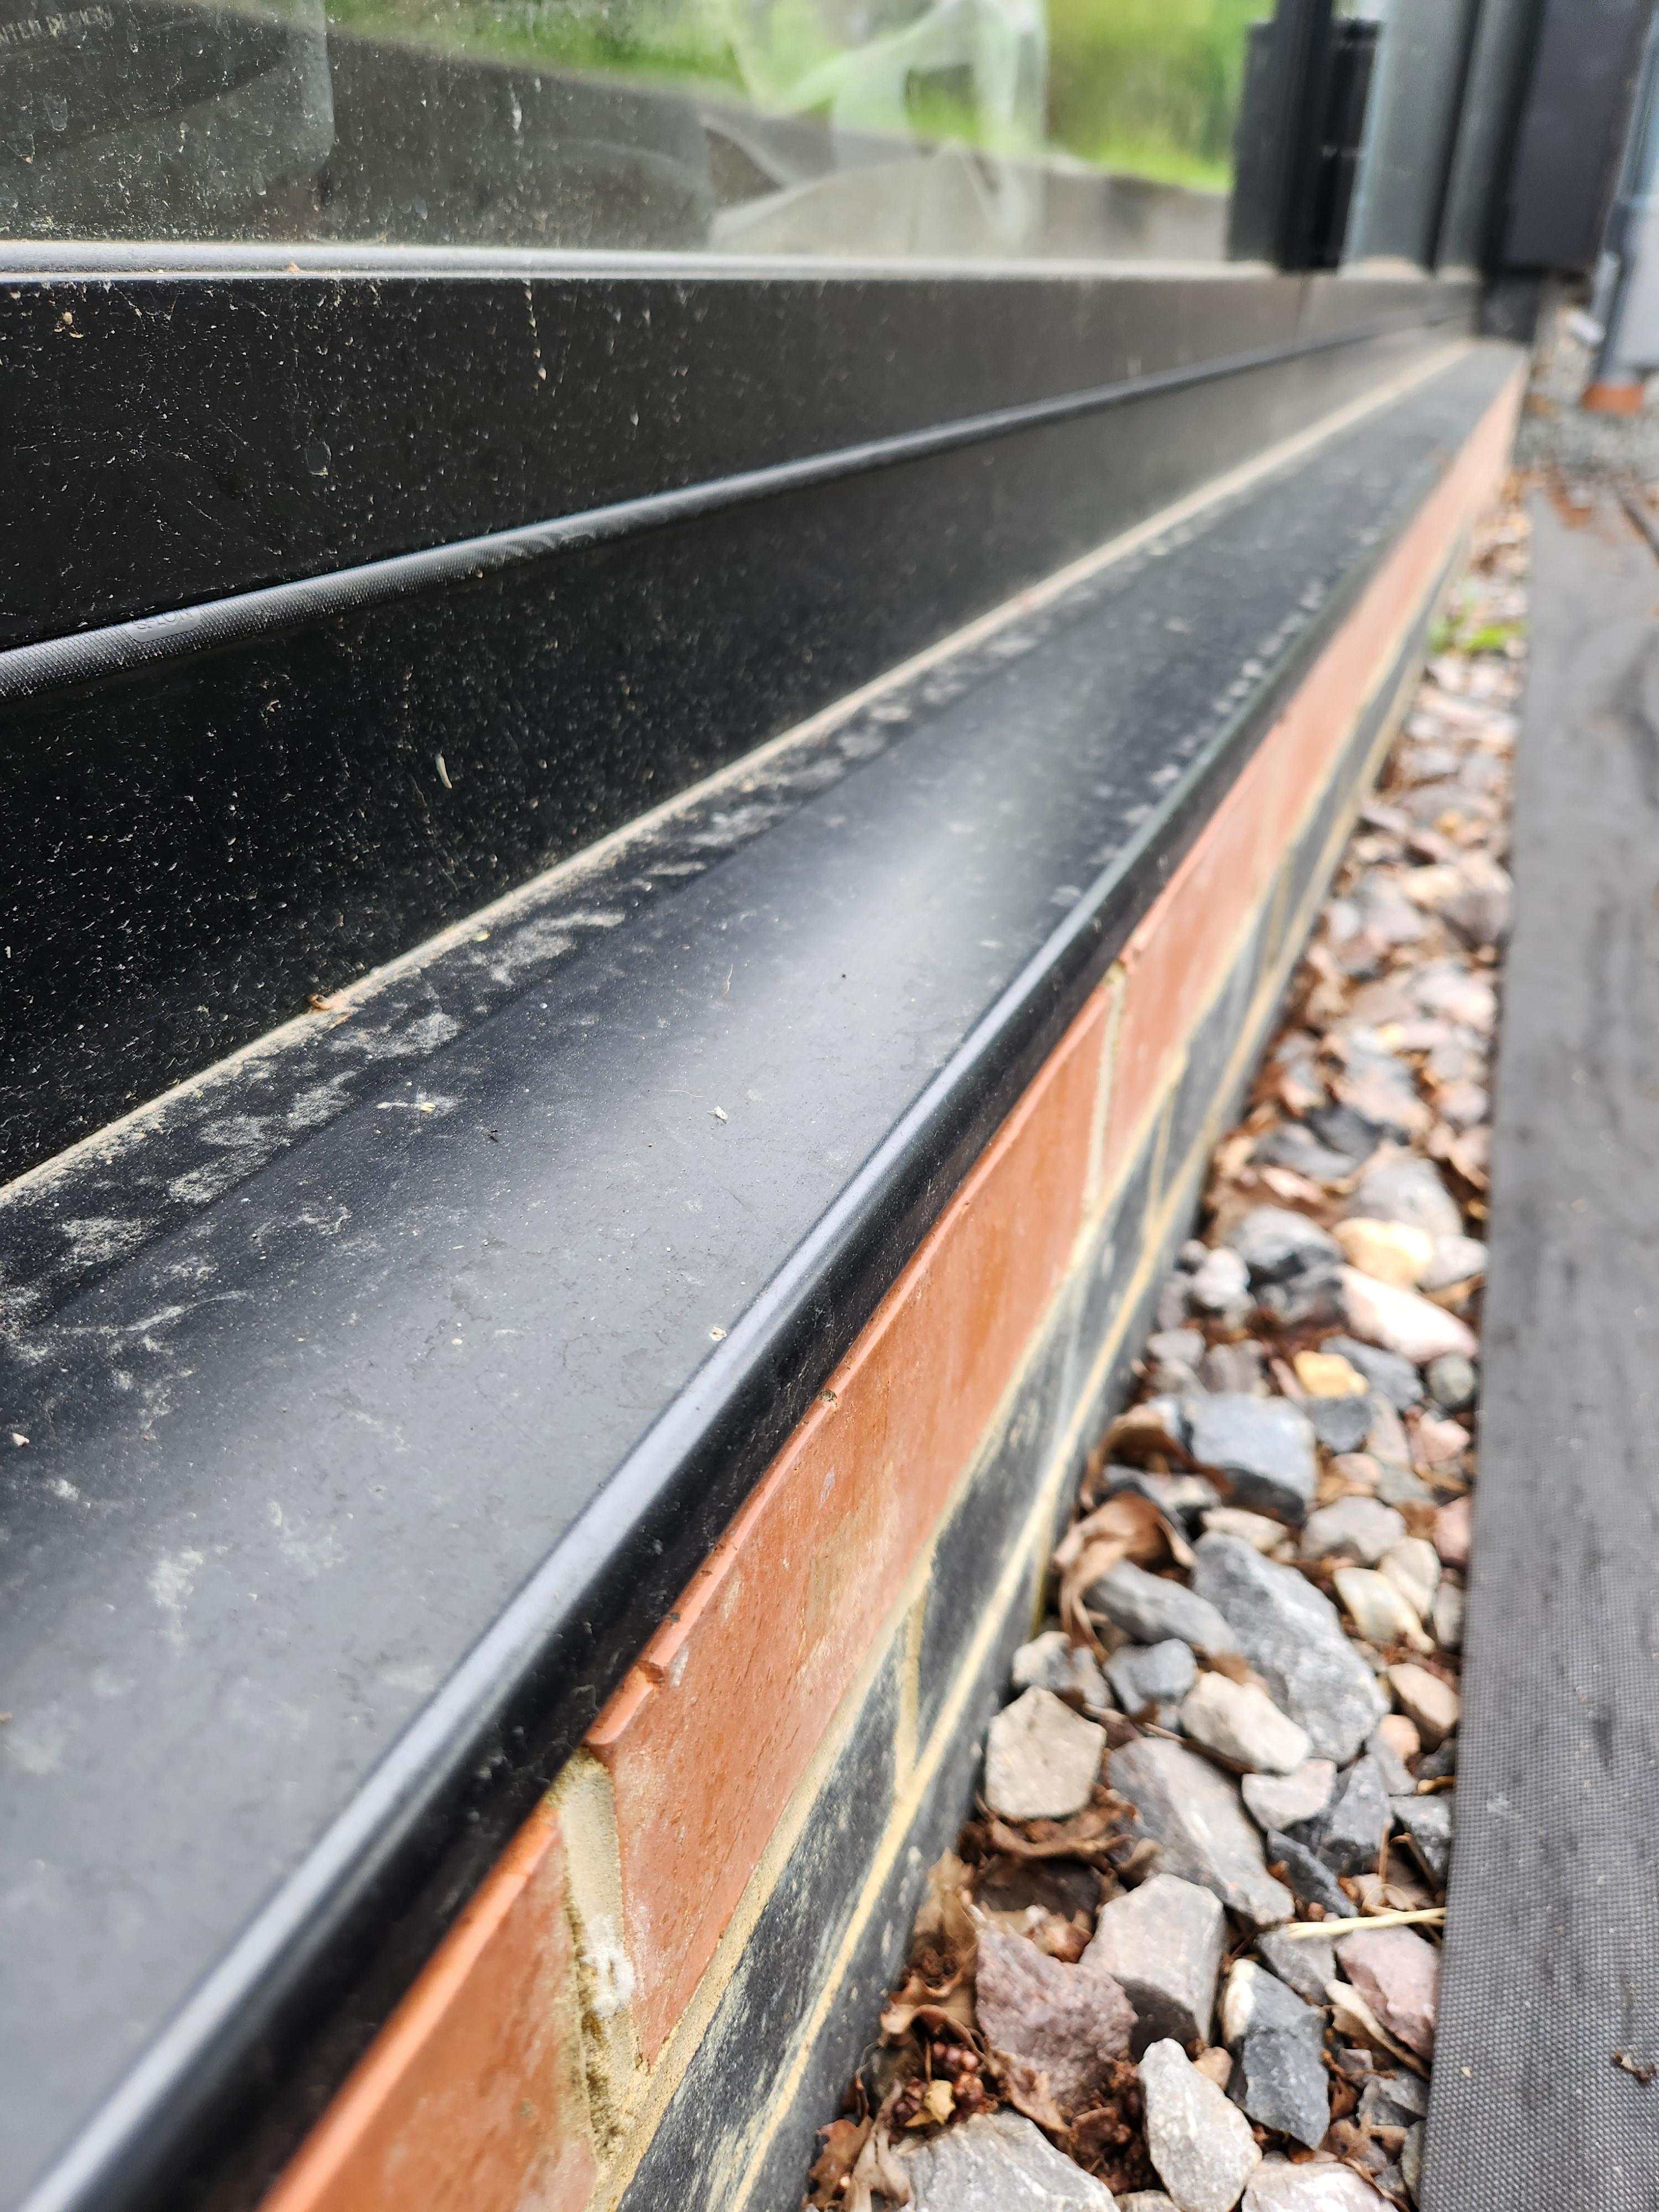
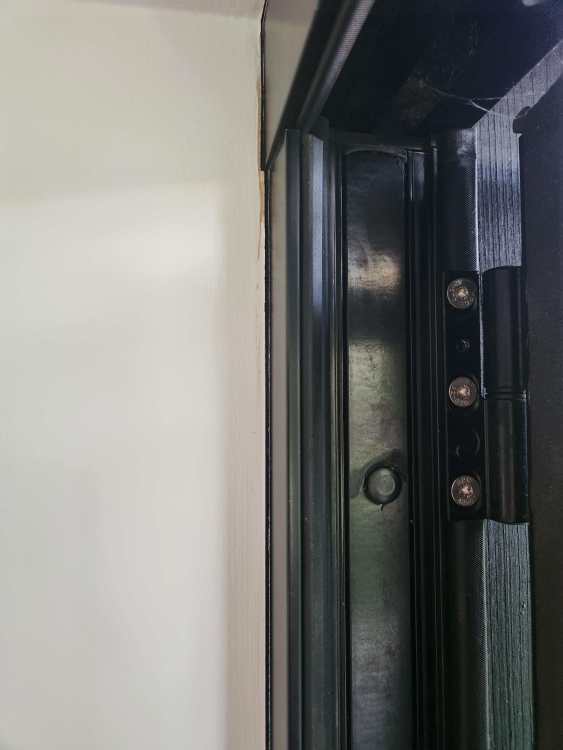
Thanks both for your detailed replies it is really appreciated. @Spinny They did the standard Origin ones, but these were just the door sizes, no reference to the wall. They actually came out twice to survey. There had been a long gap between when I first enquired and when I was ready to order plus there was a corner post to add detail too. I have the doors set in the middle of the cavity (just thought this looks nicer), and had cast a concrete base for them so there was no void. The other key advantage of this was that there are steels surrounding all of the apertures for both doors so something very solid to bolt into as opposed to the thermalites which I never want to use again. I was quite disappointed to see that the doors were a good 25-35 shy in height and width when they arrived, this was then just filled with spray foam. I like the idea of maybe removing some of the thermal bridging but it seems like it would be compromising the structural integrity of the door having screws bridging wide gaps. Originally they set the frame so that the cill sat over the brickwork but when I checked the next day they had set it back as they realised the door width was an issue. I had a whole thing with them at the time about it not being okay, they insisted it was fine and would sign it off. Spoke to BC control who's only input is 'a windows a window' and had no interest, so reluctantly accepted. @Gus Potter I'll have a go with your suggestions on checking plumb. I can see from the fact that the door has moved away slightly from the plaster that there must be some degree of stress on the door, but not sure if this is normal or not. I can only see this on one of the doors mind. The other seems okay (the one that is plumb). Not planning on changing anything myself for the reasons you've given. Some pics per my above response.
-
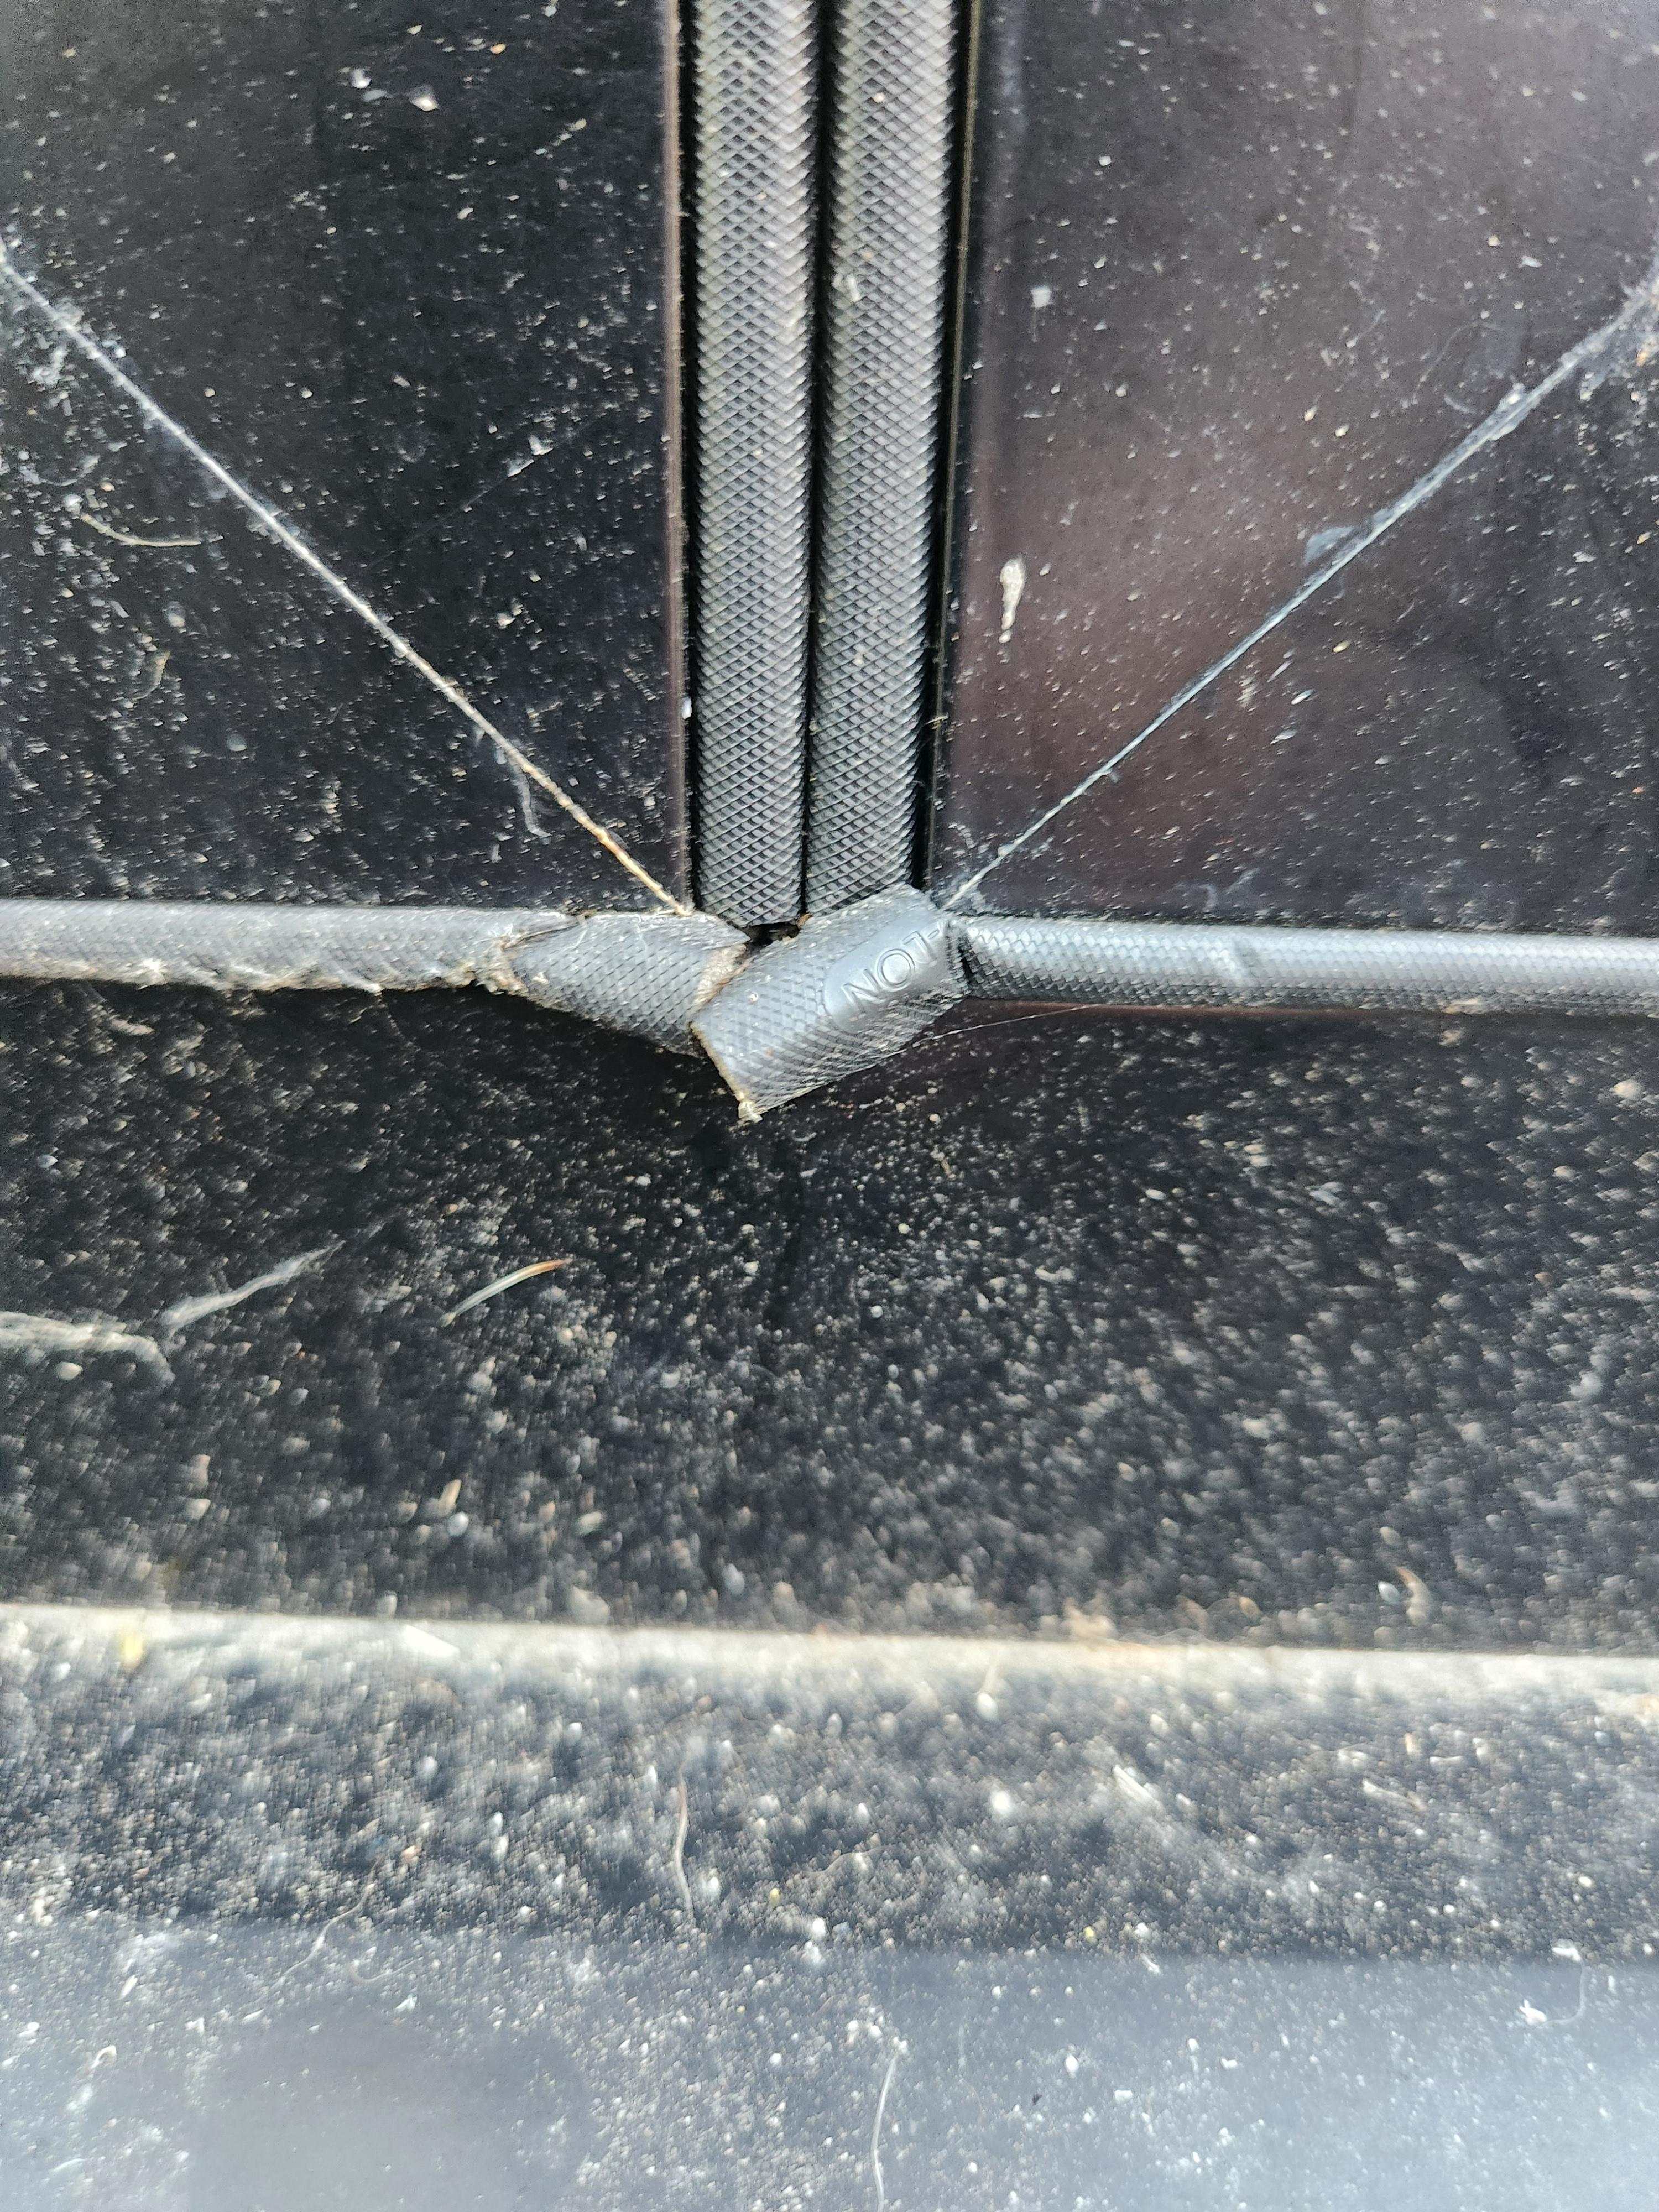
Thanks Spinny. Re the seal in the pic. Would you see that as a problem? The company that did mine came out and surveyed twice yet still managed to forget the position of the retaining wall in relation to the door opening which mean the doors ended up being set further back than intended meaning the cill didn't cover the bottom of the wall. They tick the box on looks but seem like hype in every other way. Described as the Bentley of doors but seem more like a ford escort to my untrained eye. My fault for not doing my homework.
-
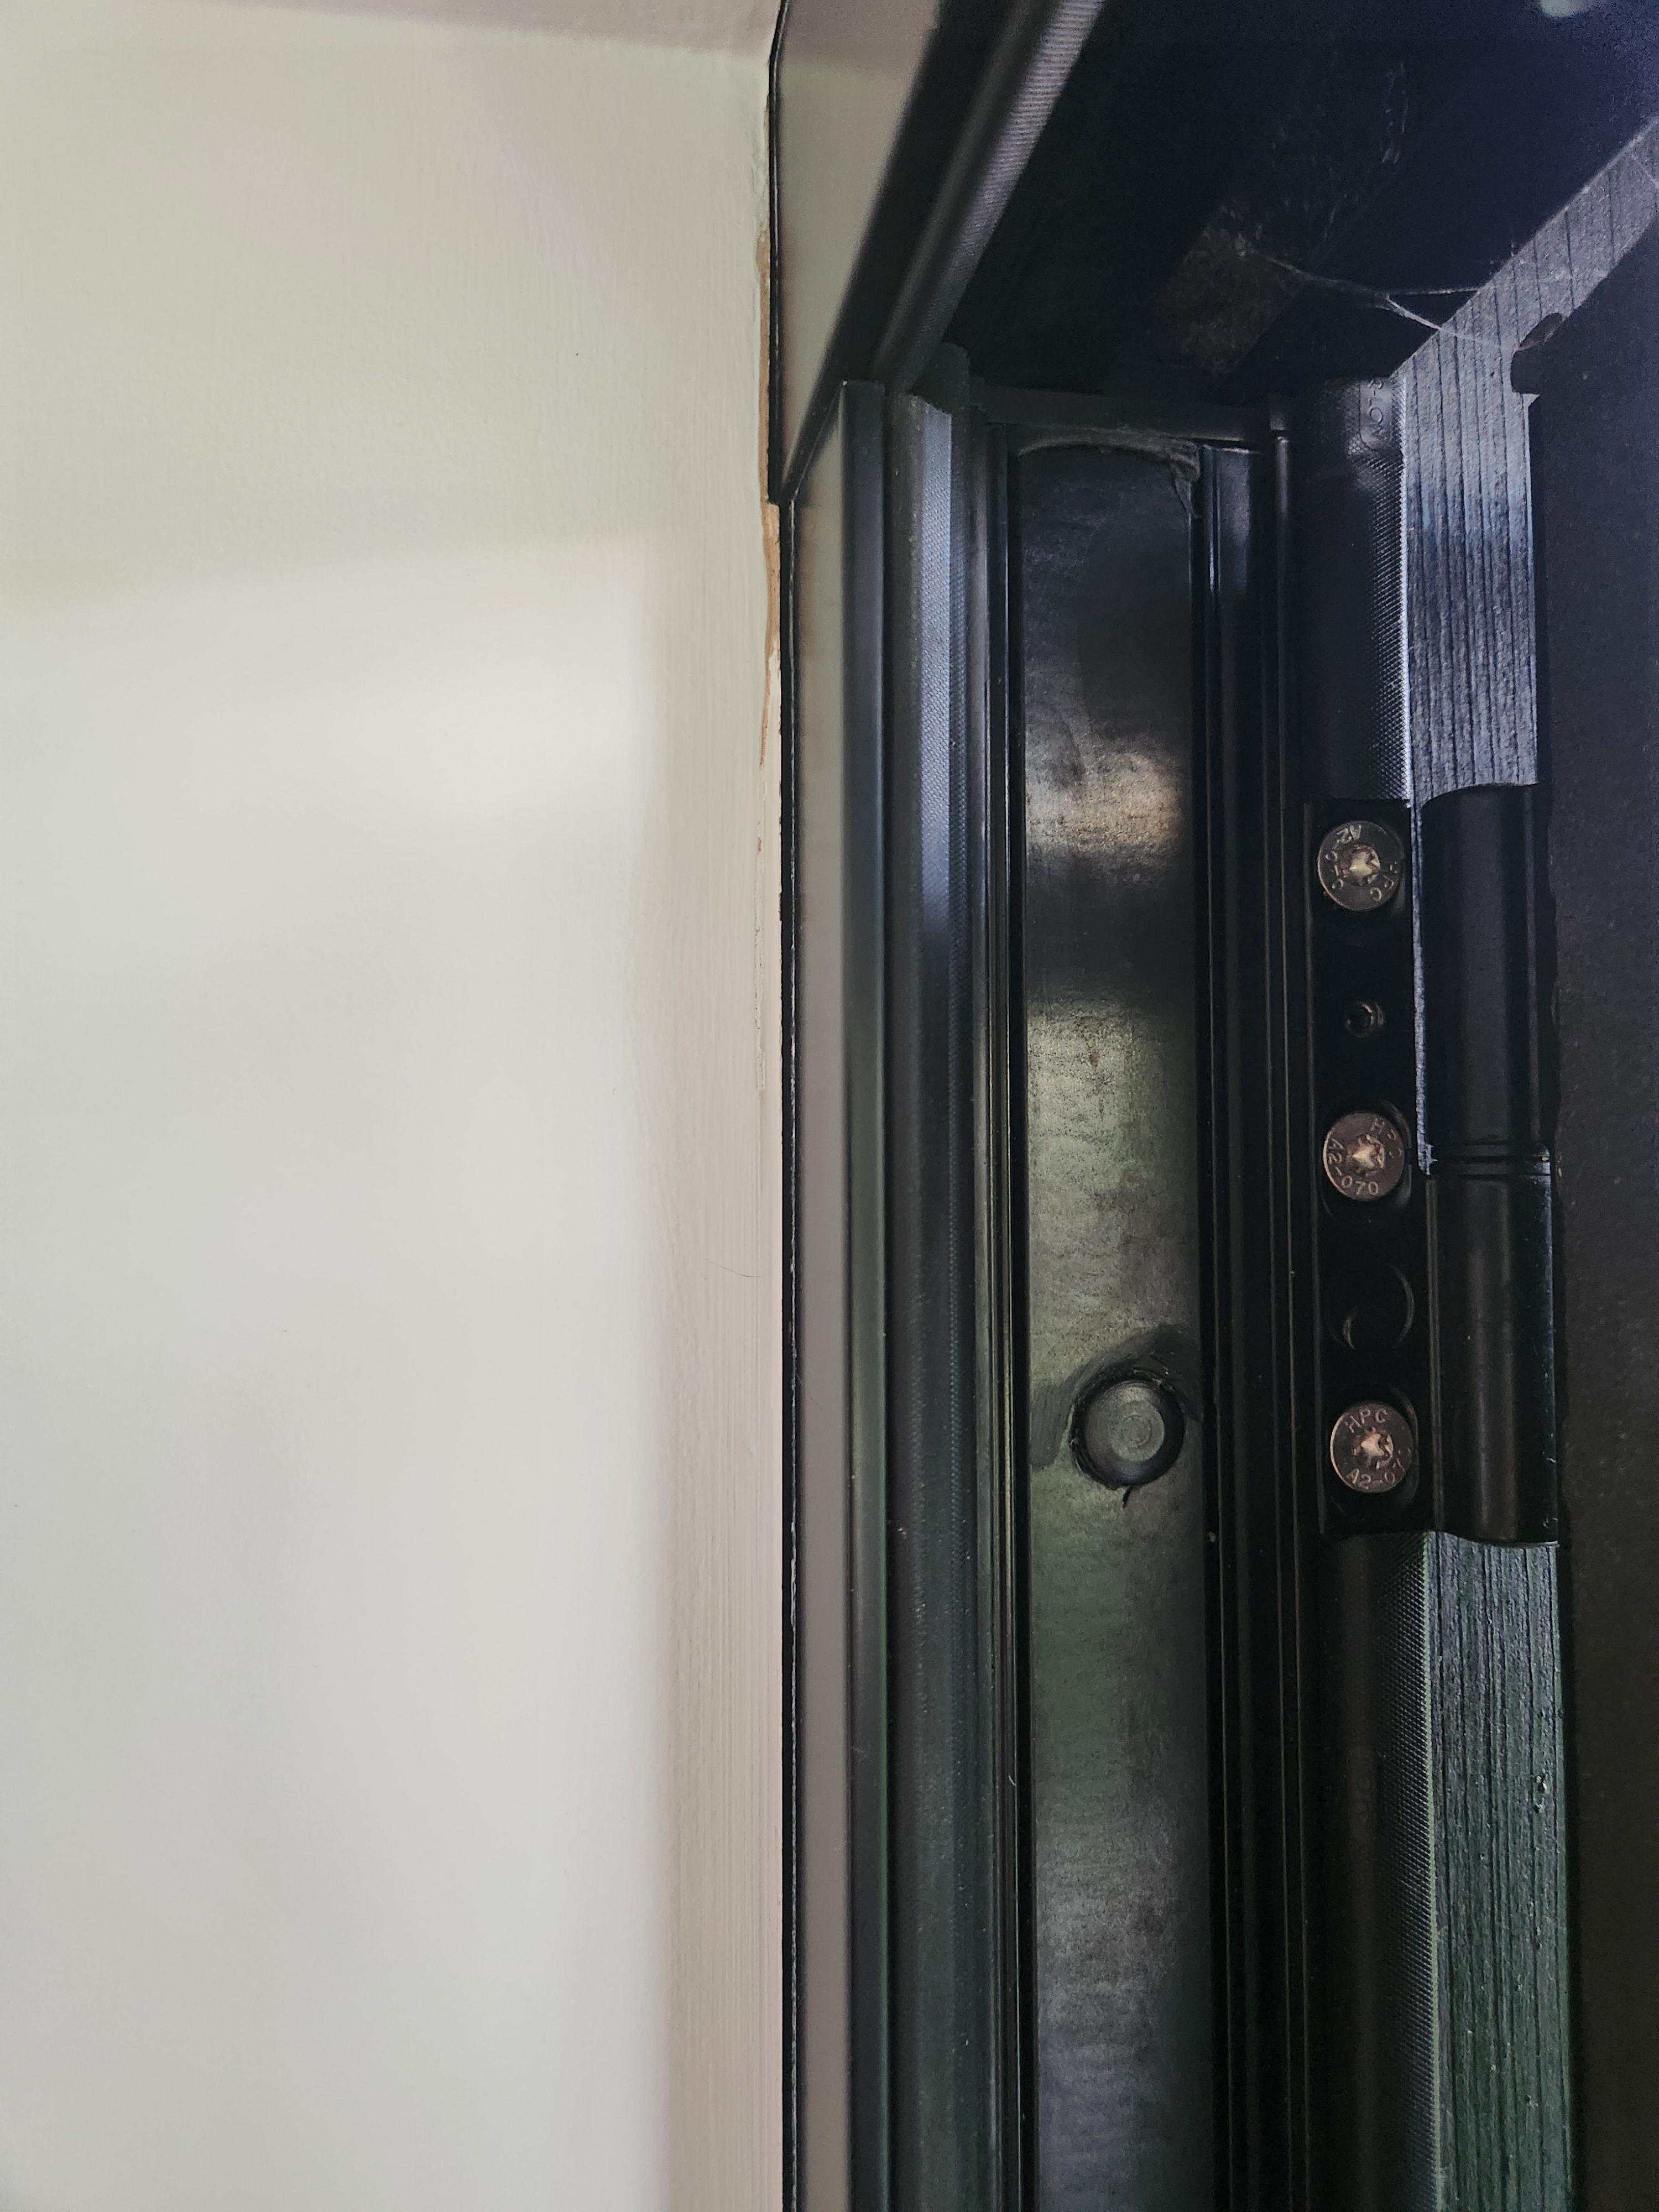
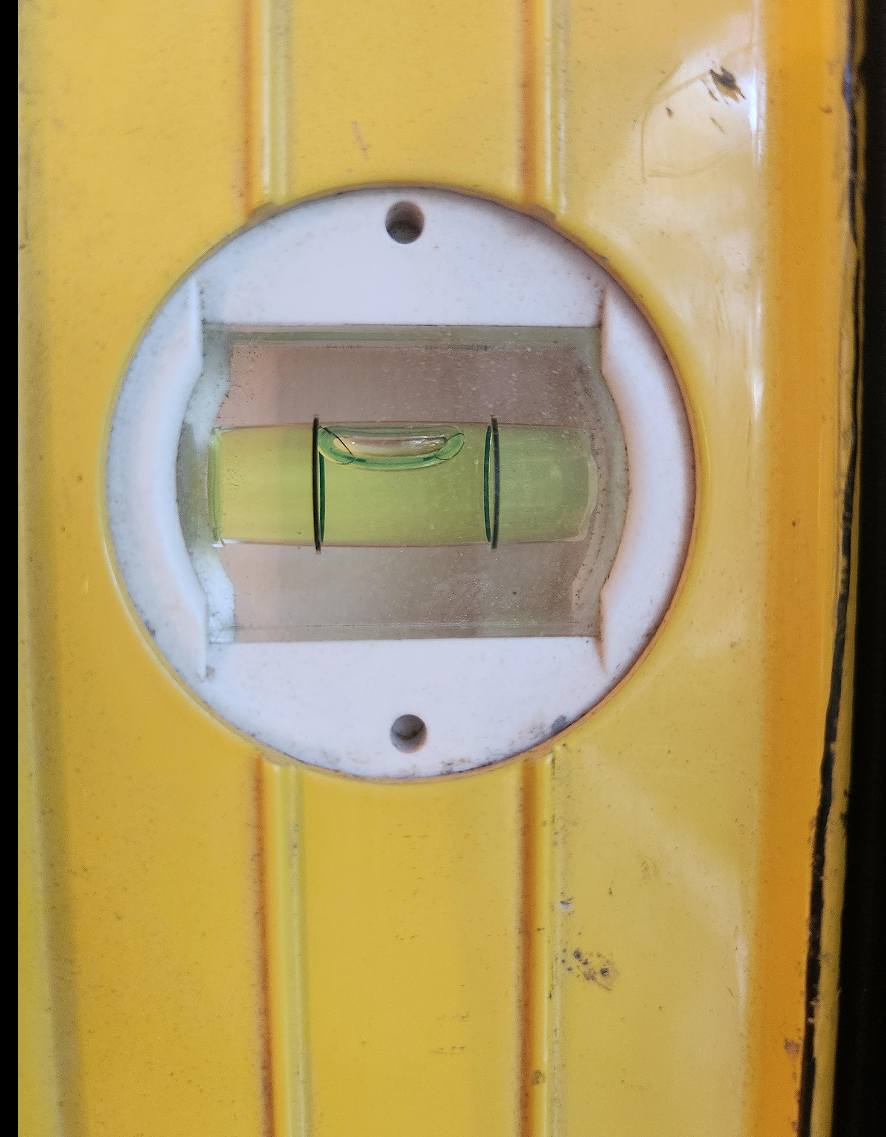
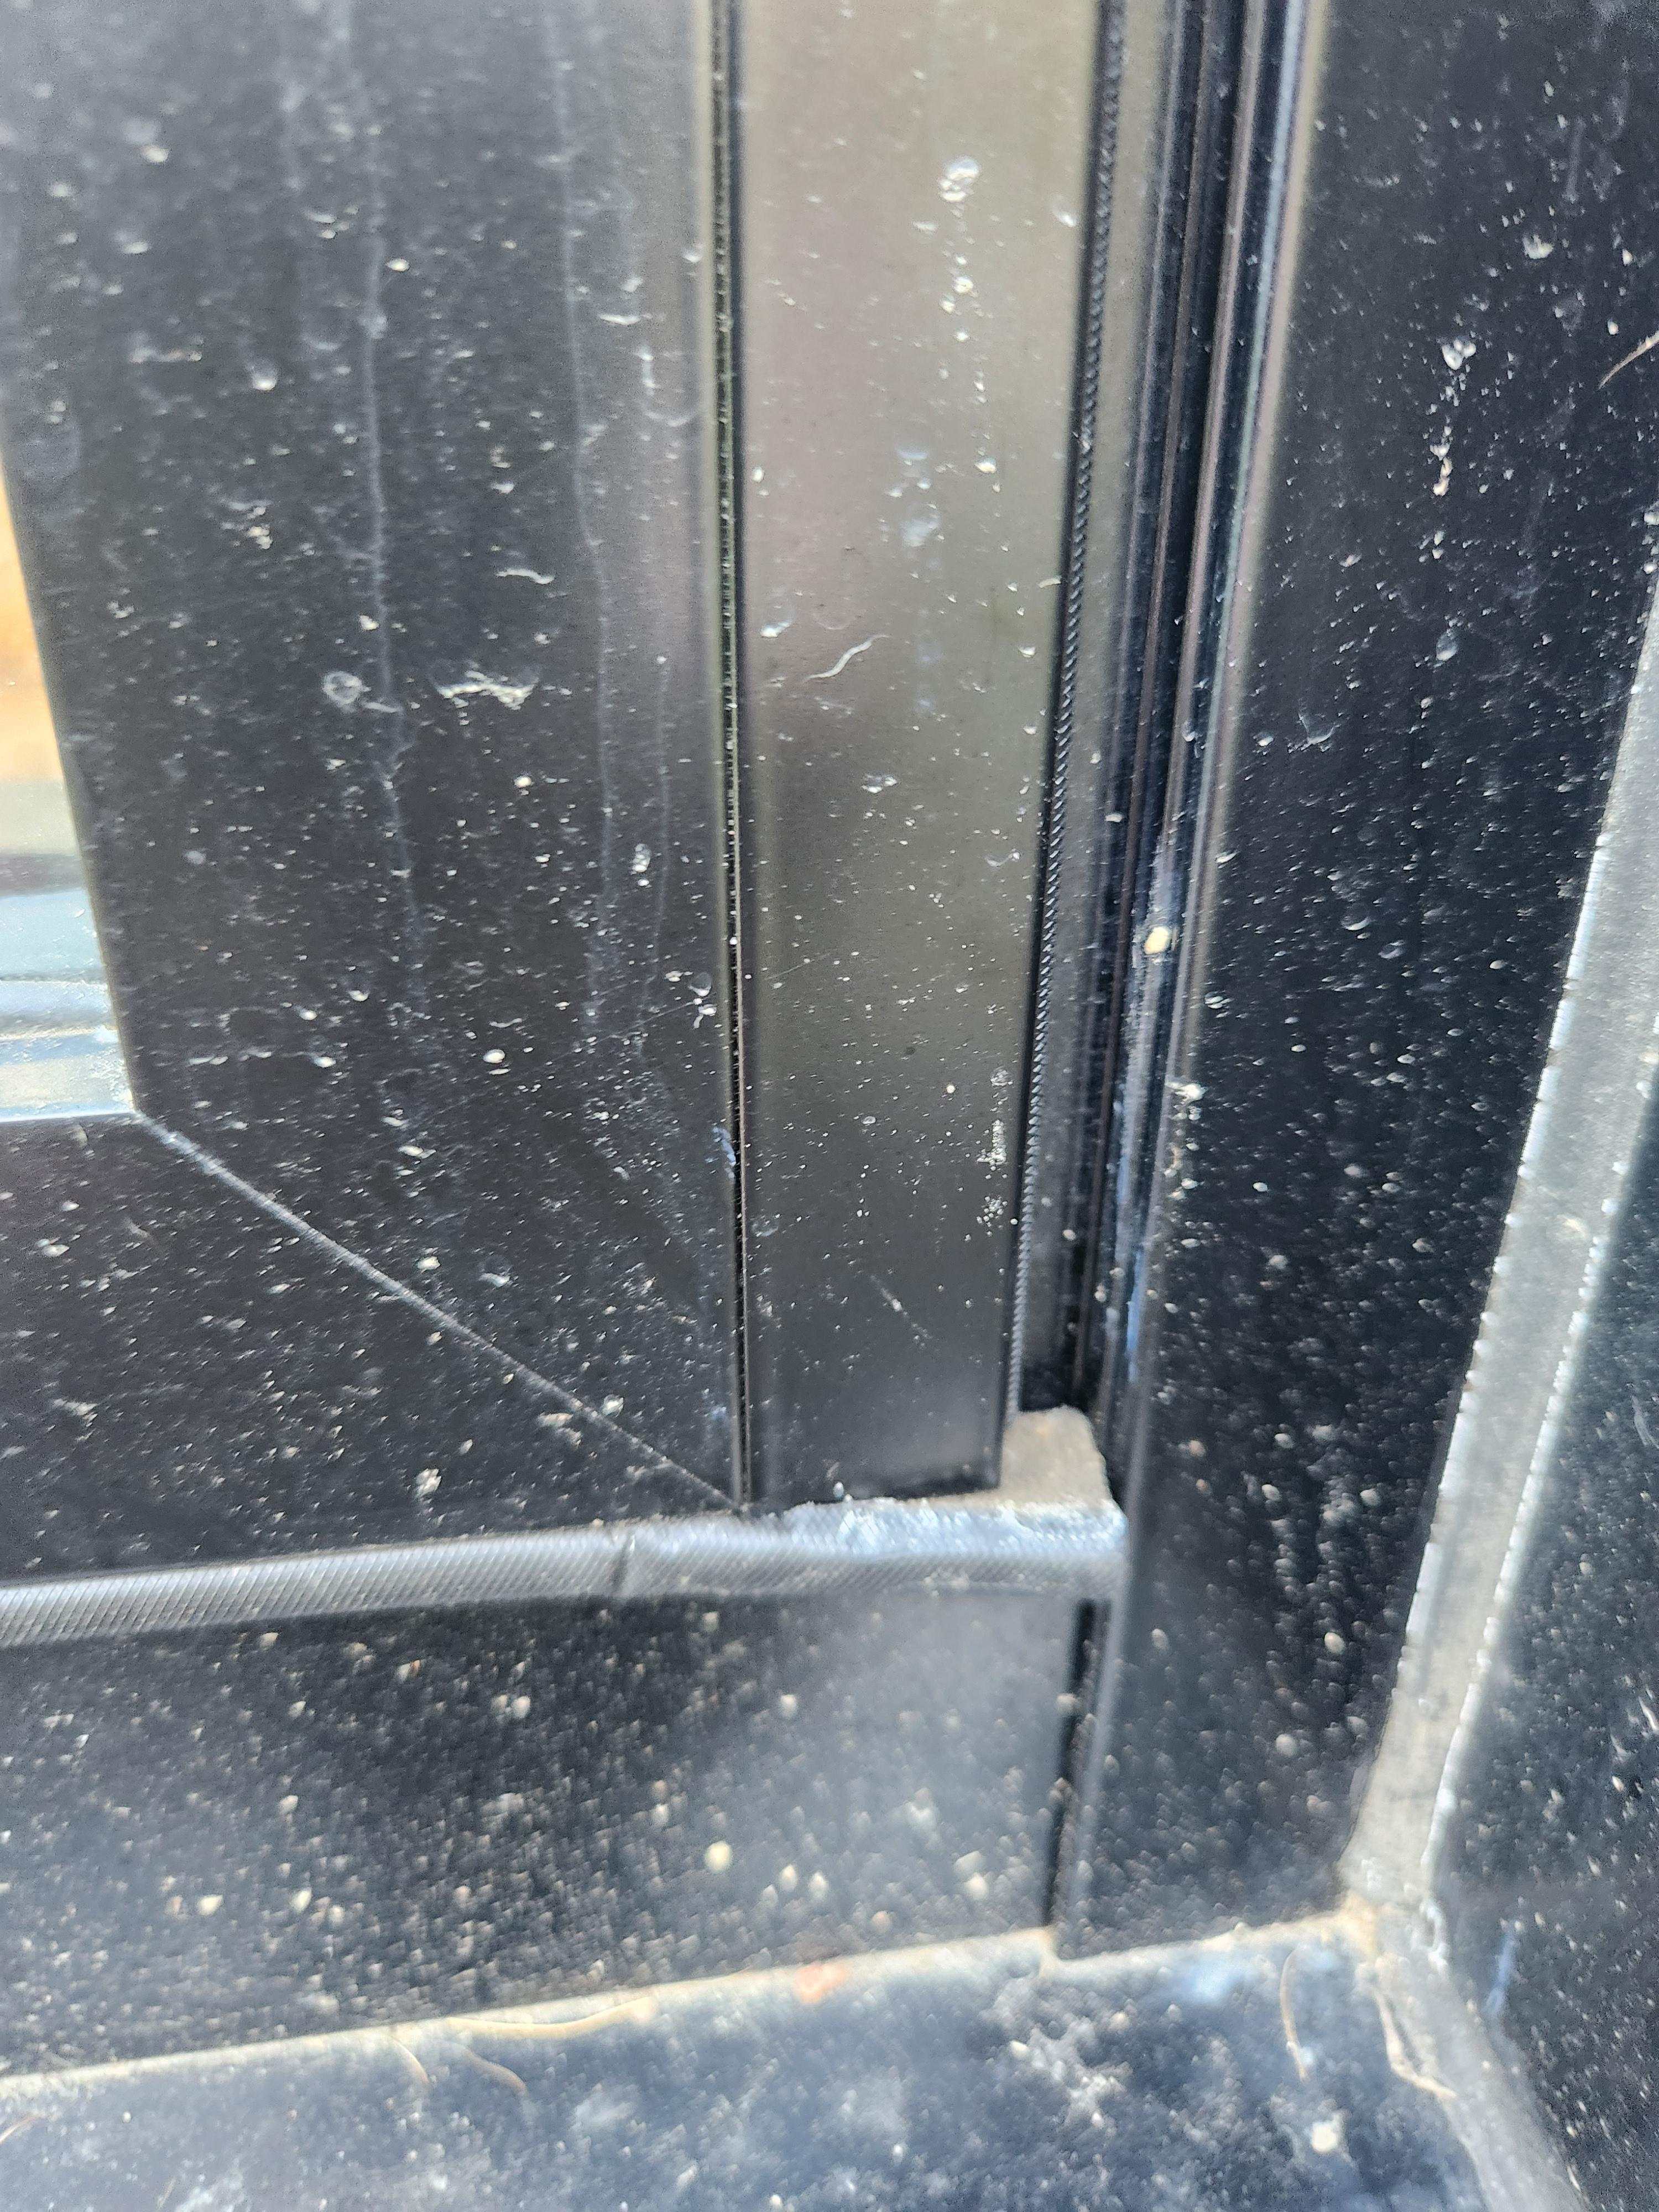
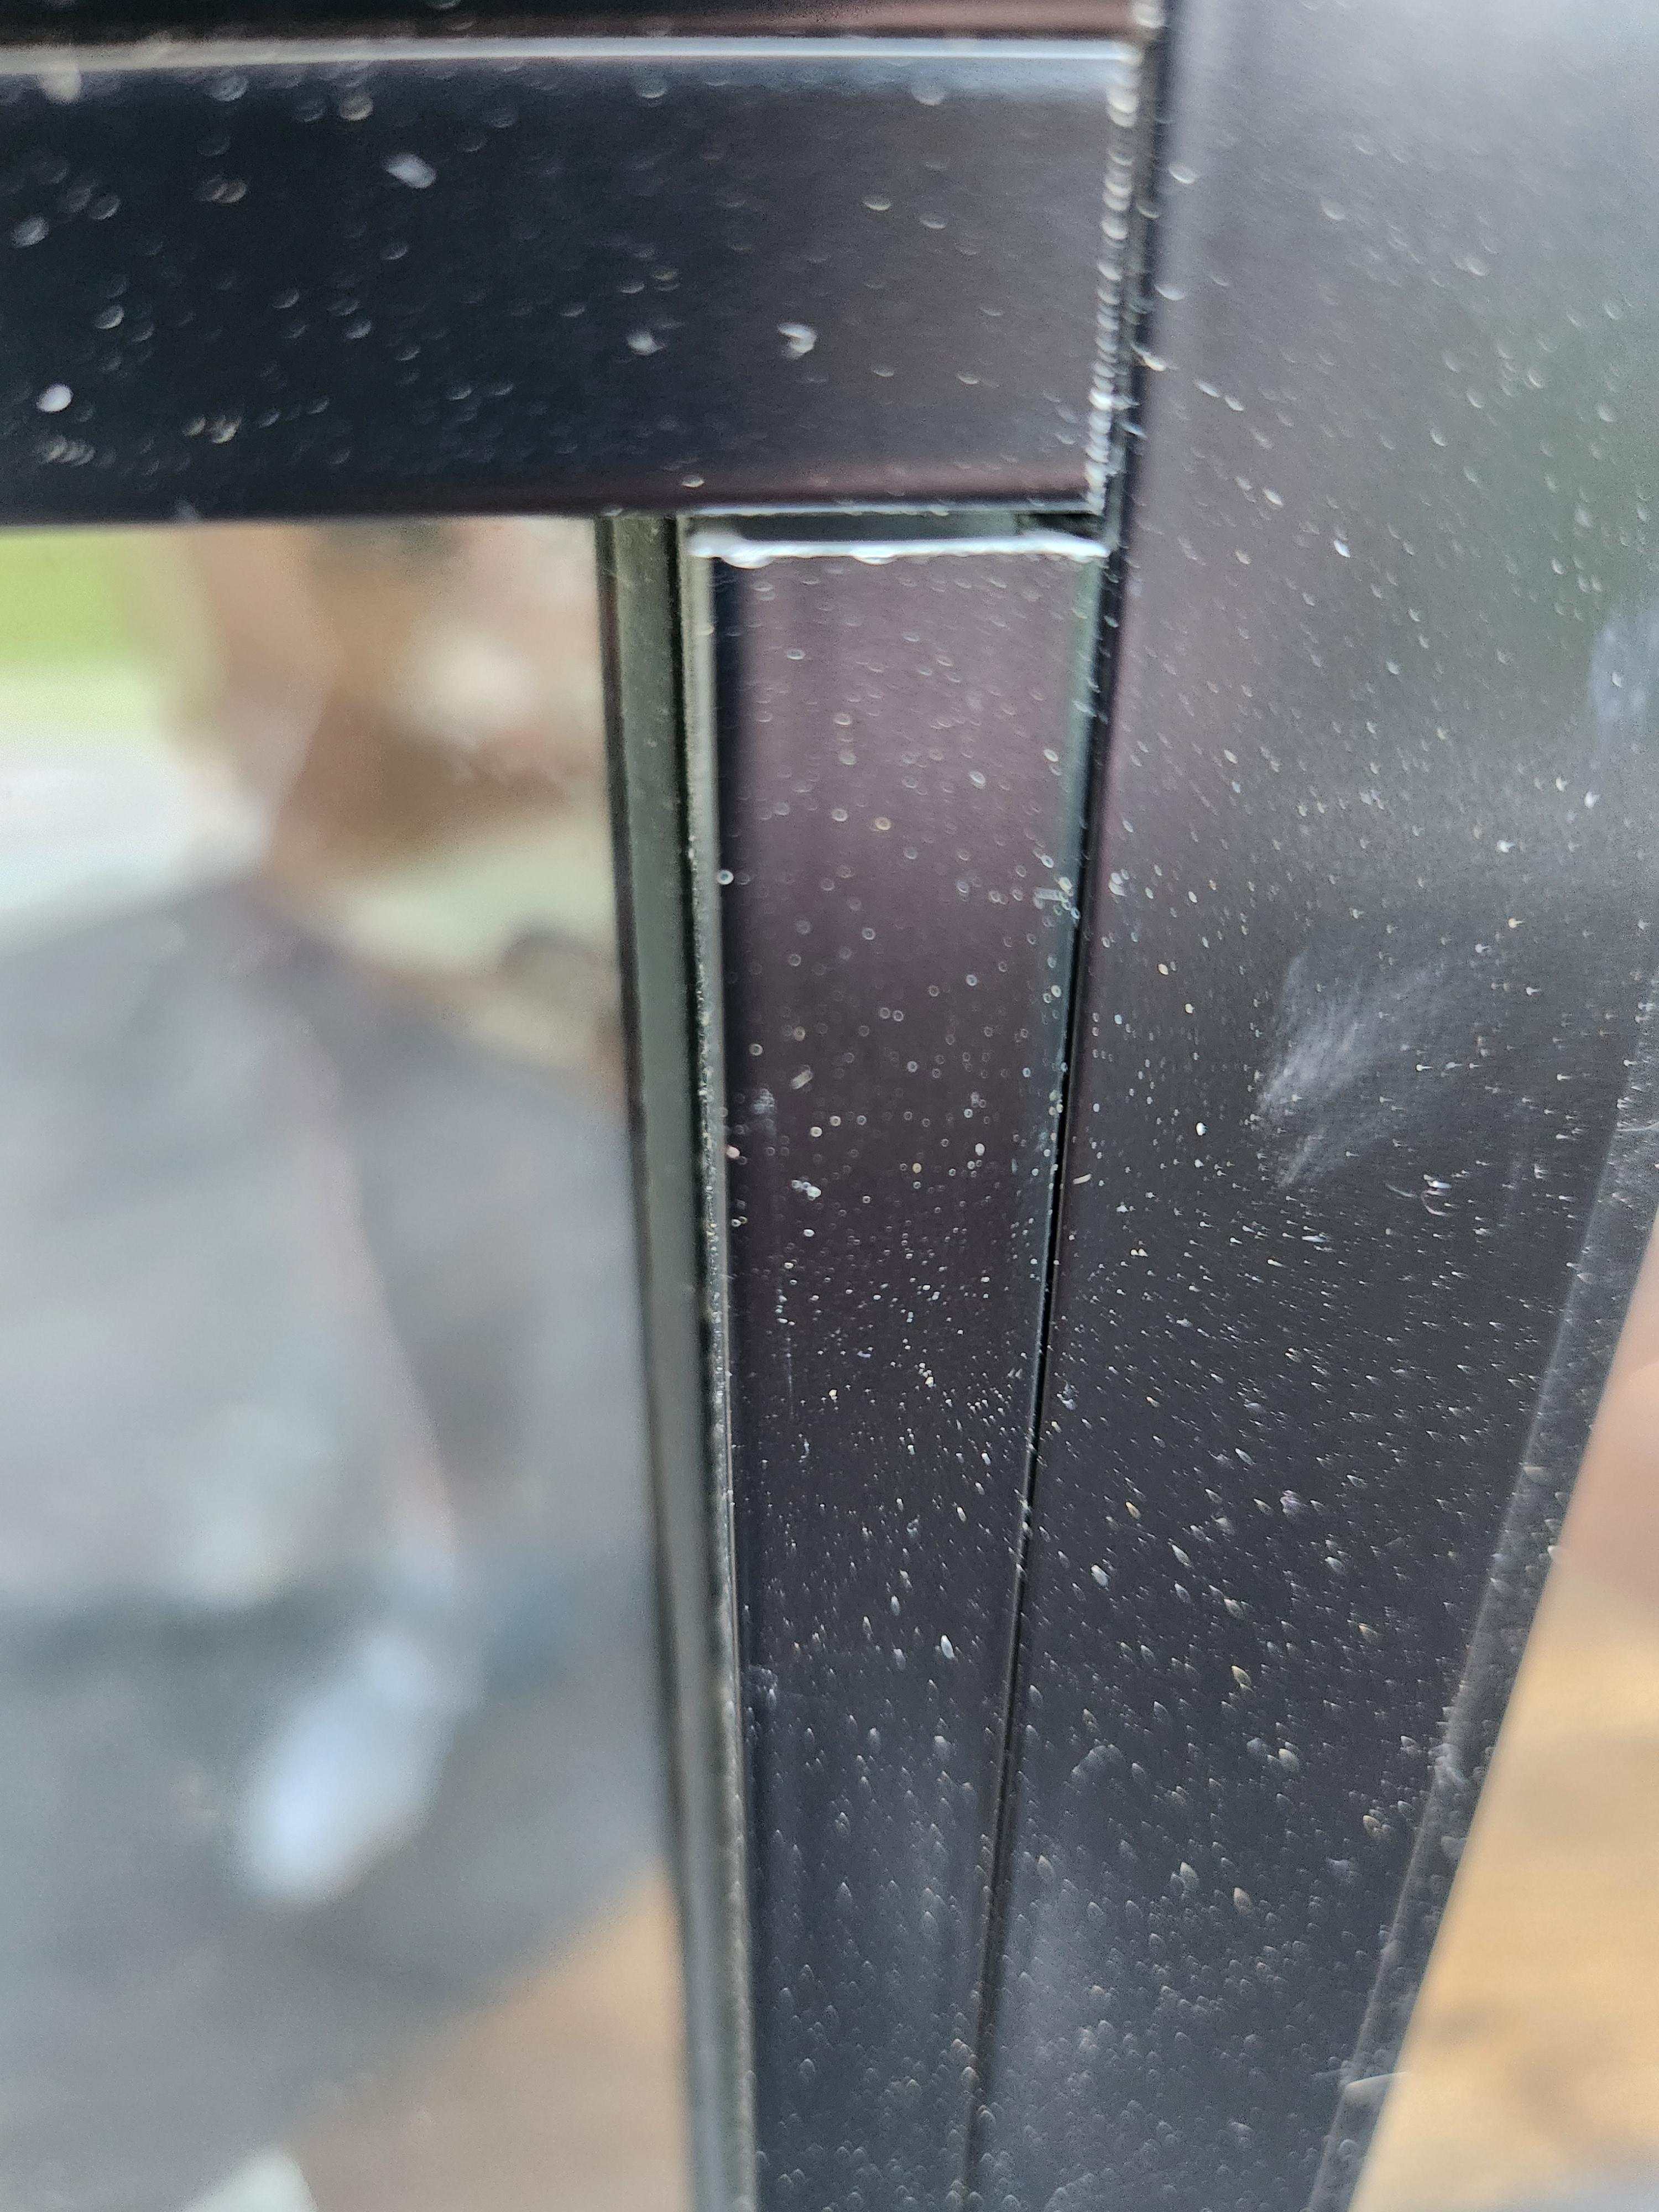
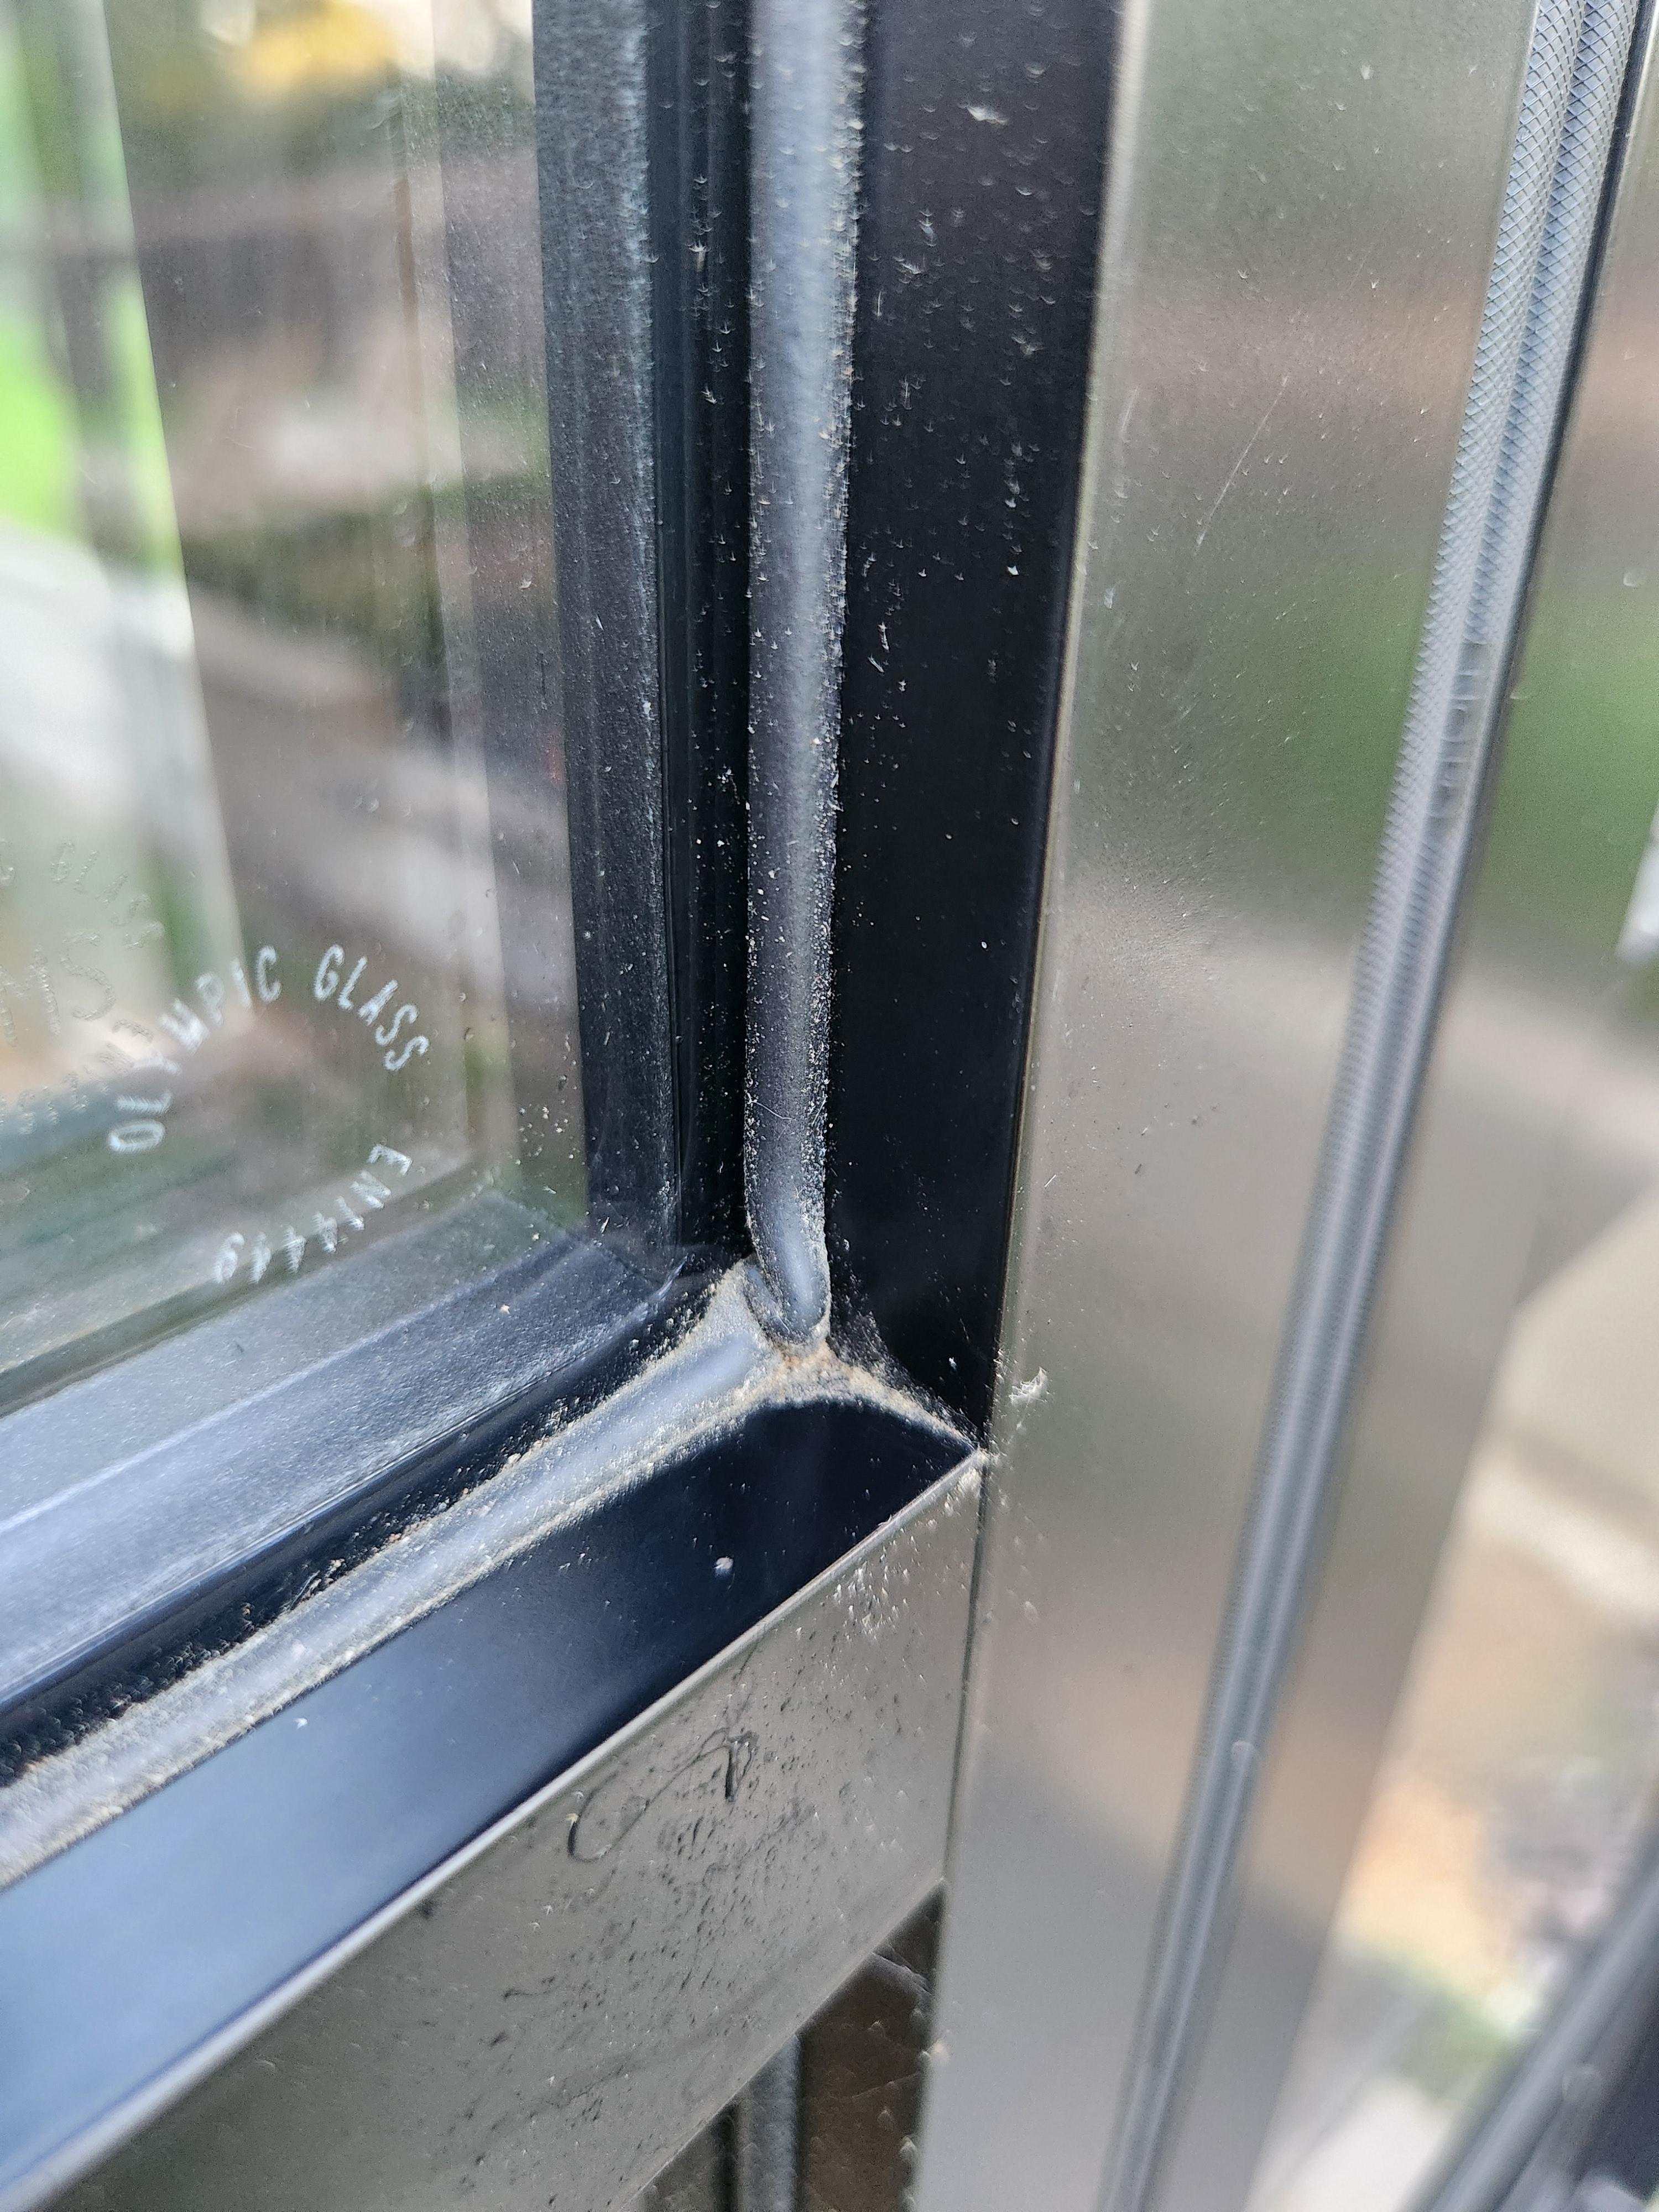
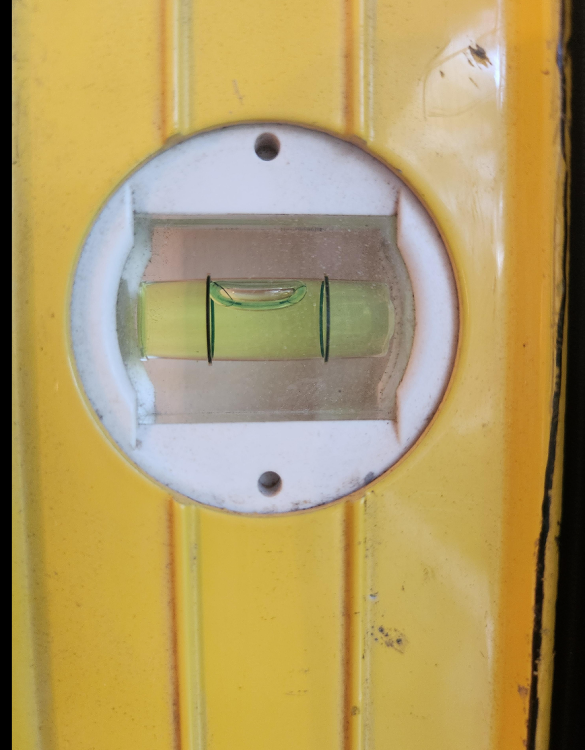
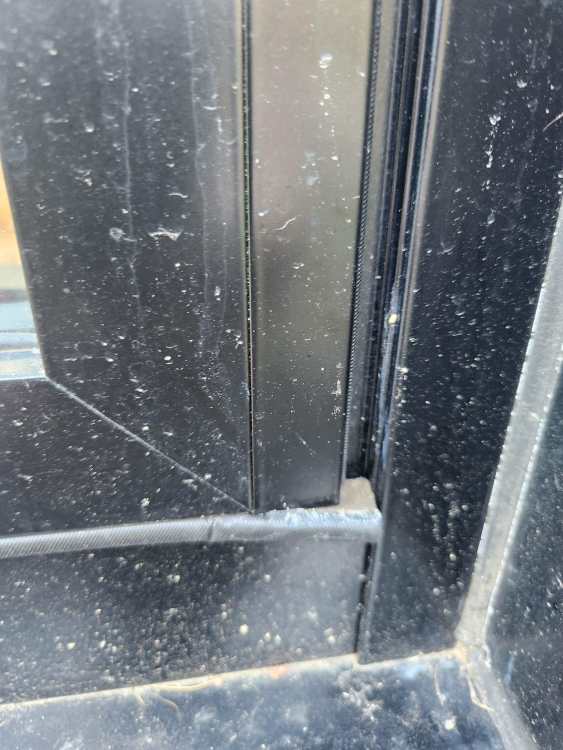
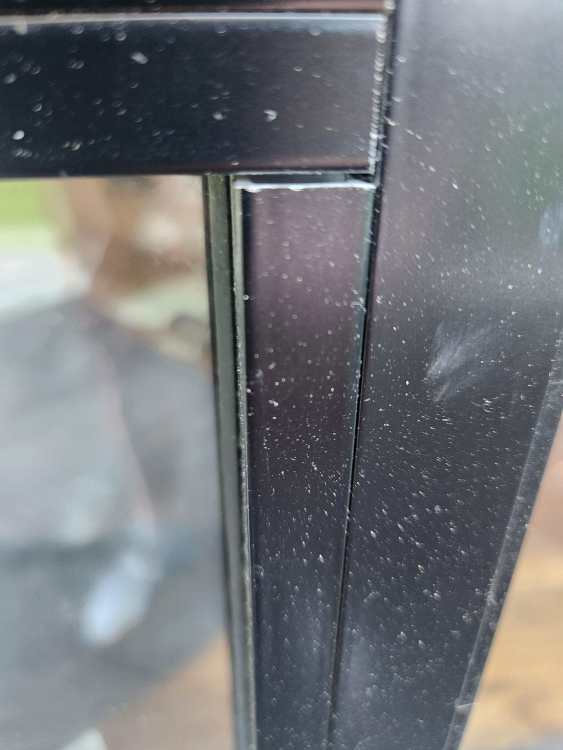
Hi All - I've been fretting about the Origin bifolds I bought last year pretty much since they went it. There were a bunch of issues with how they were originally installed that probably tar how I see the doors and overall I've been incredibly disappointed with the doors vs what I was expecting. That said before I go back to the company that I got them from I wanted a view as to whether I am being too particular about them and this is just fine. I've attached some pics below. The primary issues I have are. 1. One of the door leans over when opened by about 10mm. This messes with my flush'ish threshold. I can work around it but the bigger concern is that the doors are so large and heavy that they are pulling on the frame. The door was not installed plumb (see pic). 2. When opening the door I was given strict rules that the door must be open and set back fully onto its magnetic catch before attempting to open the rest of the bifold. That if I didn't do this the doors WILL scrape against the bottom of the frame and could pull out altogether. 3. Exposed unpainted aluminium cuts. This problem is pretty much everywhere, every time I look at them I spot a new unfinished cut. This just feels really low quality to me. I can't understand why the cut sections couldn't have just been sprayed when they were cut. 4. Gaskets and seals - I don't know all the names of the parts but essentially some of the external seals are hanging out. Again seems low quality finish that was cut after by the fitters. The gaskets that hold the glass in have issues where they appear ot be bent and don't have a clean finish. Not sure if this really makes a difference to the weather protection? Would appreciate any views on whether I just leave it now. Thanks, Paul
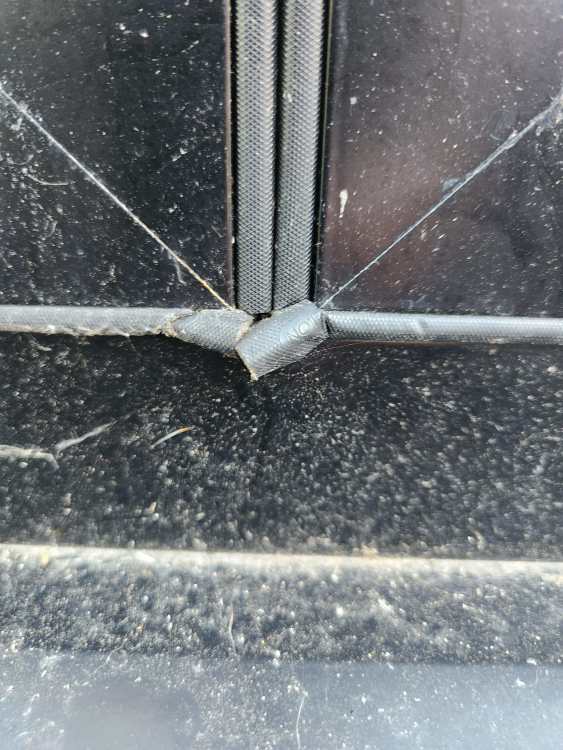
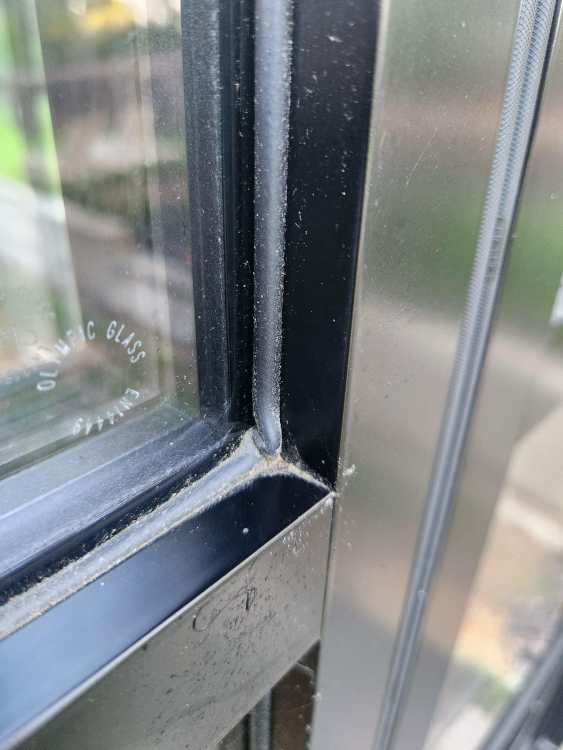

-
It didn't occur to me to try and cast something directly onto the cill I like that, thanks. Torre - Thanks for the drain link. I couldn't find anything that reasonably priced for a shallow depth.
-
Thanks for this. Had a good look over the last few days. The only issue I think there could be is the cantilever overhang for the cill of the bifold. Unless I can sit the slab on a batten or something I don't think there is a bracket available to accomdate the extra 100mm overhang. Found a Robin Clevett video on YT the the other day doing exactly what I need with decking. I'm not that keen on decking but at least this would be a method I can be sure will work.
-
I really like the look of that as it's something I could actually do. (I'm for any job that doesn't have a clock on it for materials drying). The only issue I see with that other than maybe height of the floor is that I have a manhole in the middle of the space. I need to think about how I fix something down on the cill at the right height to provide that edge support. Thanks.
-
If anyone knows of a channel drain that can fit into a 47mm gap under the door I'm all ears. The only thing I can find is somehting that's £210 p/m plus crazy corner prices https://www.aquabocci.co.uk/products/a30-low-profile-drain-120mm-wide-x-35mm-deep Another reason to add to the long list of why I regret buying these overpriced hunks of aluminum.
-
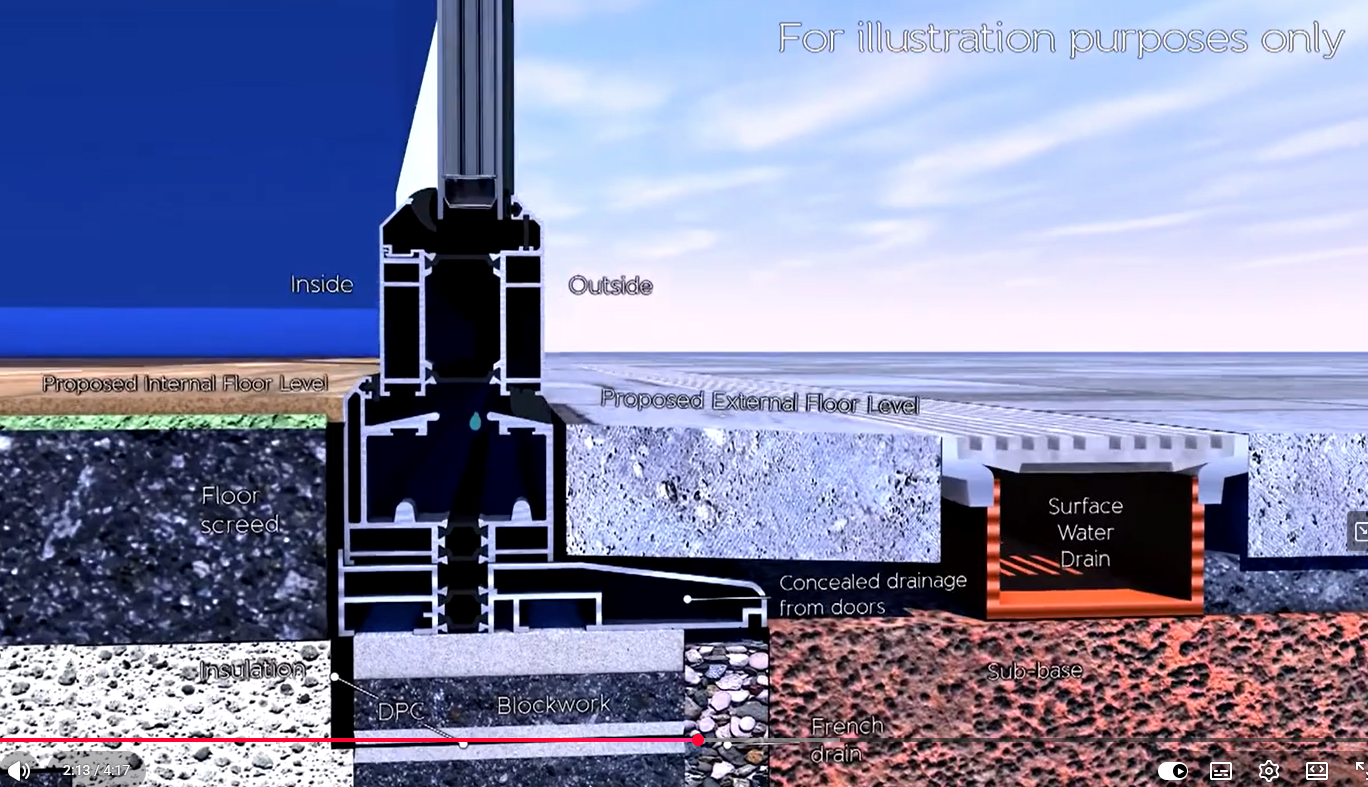
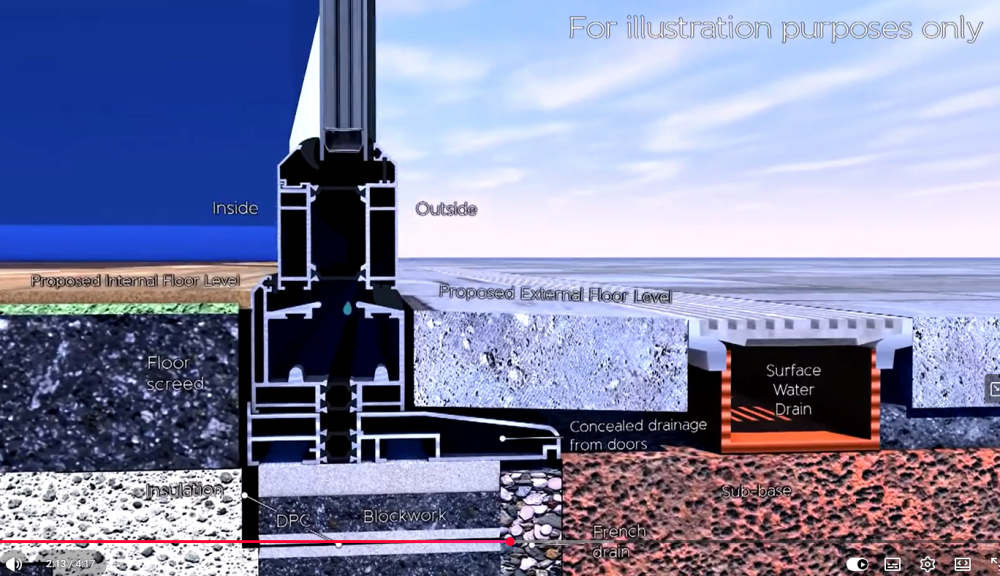
That makes a lot more sense, thanks. This is screenshot from the origin windows video that I watched originally. It always seemed a bit suff to just lay onto the cill. Now need to find a cill that fits. Origin vid
-
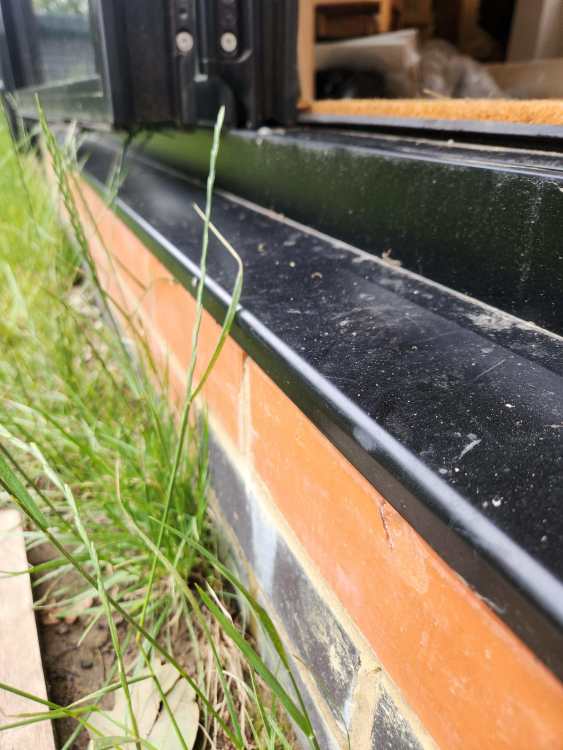
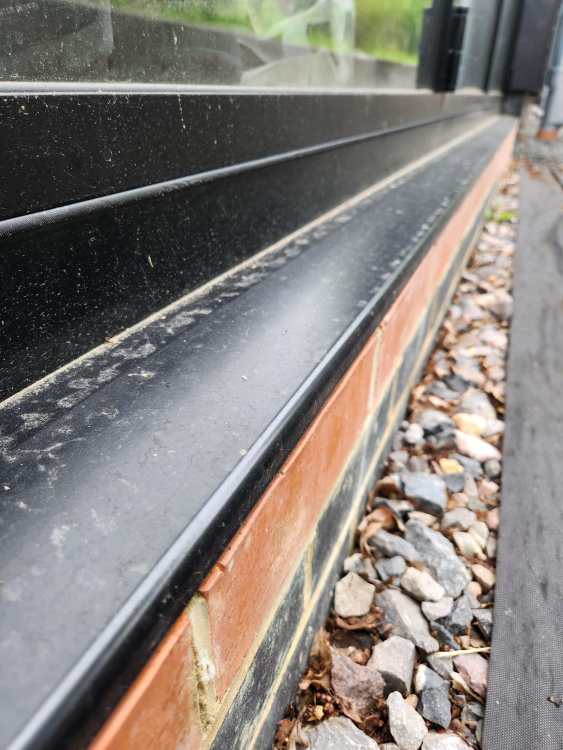
Hi All - I need to tackle the patio behind the extension in the next few weeks and am looking for some advice on how something is usually done. The origin site shows you just laying a paver directly onto the cill which I cannot believe it an okay way to do this. There is supposed to be a weathered threshold between the internal and external floor with about 10mm difference. I am going to come down a bit more than that, say, 15mm to make sure the riddculously oversized doors don't have any clearance issues. What is the right method to bring the slabs right up to the door frame over the cill here please? Not sure if heat related expansion and contraction needs to be considered for the aluminum cill as well. Planning to use large format porcelain pavers. Any advice welcome. Thanks, Paul
-
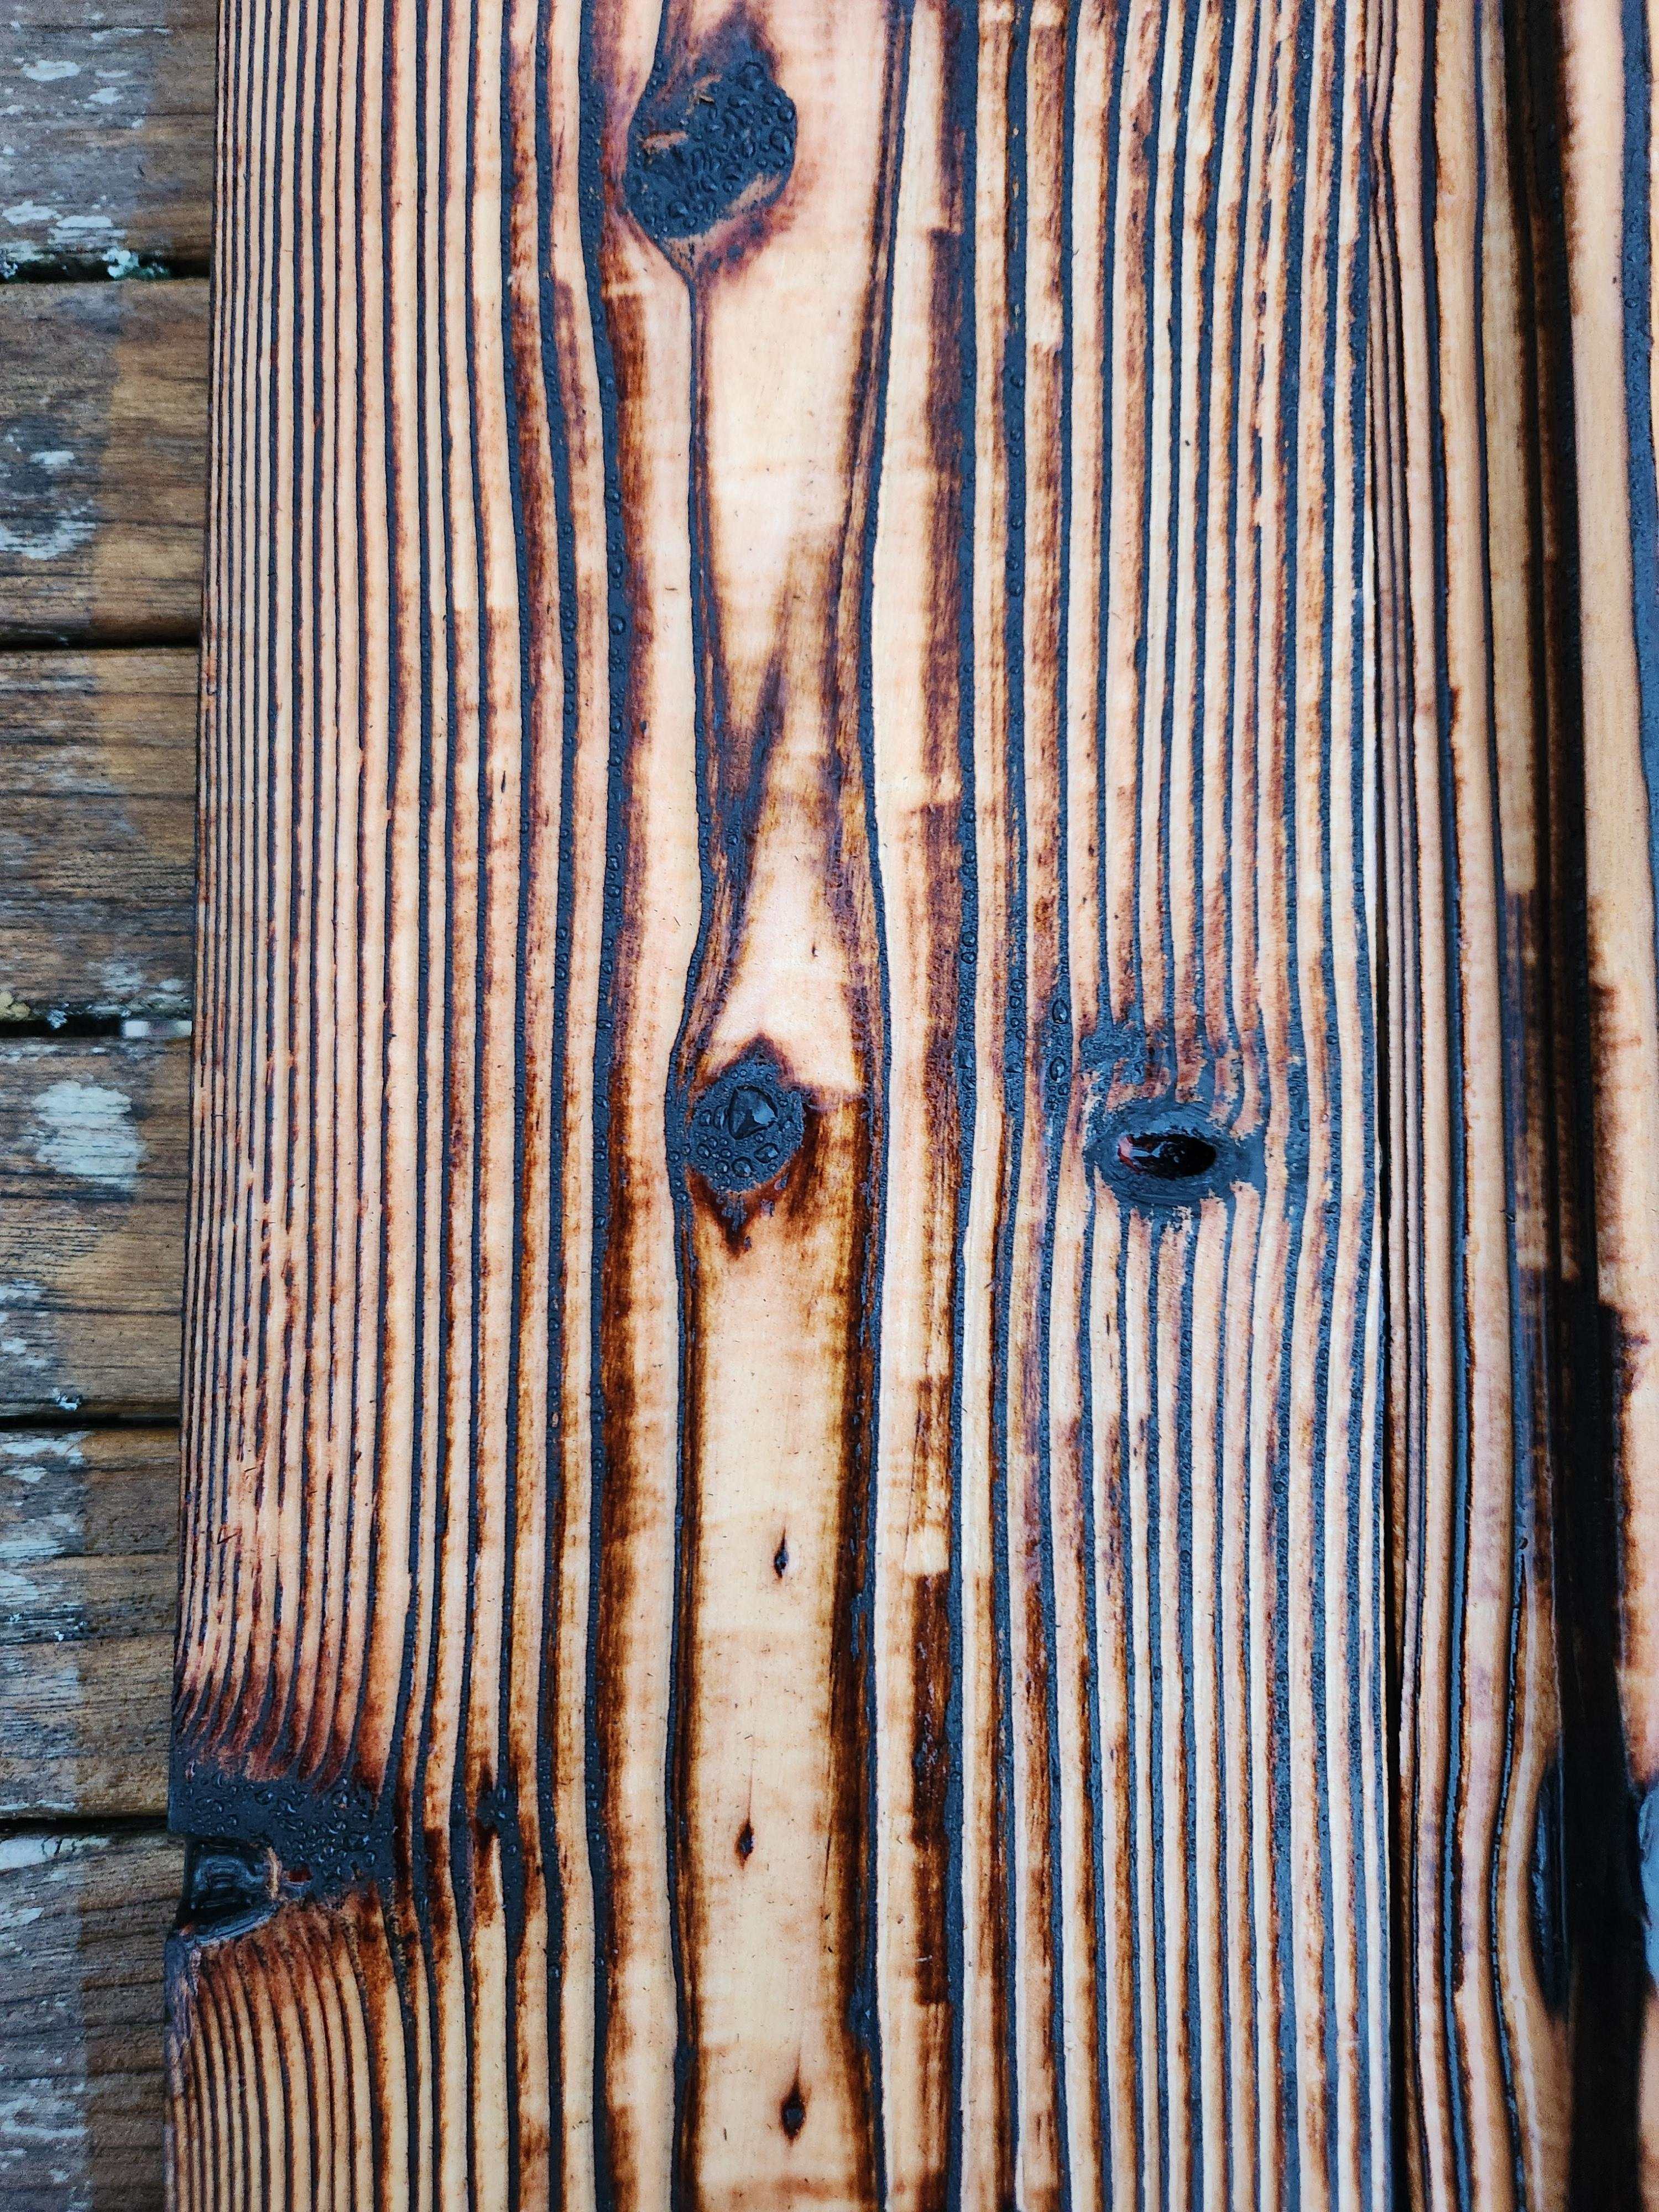
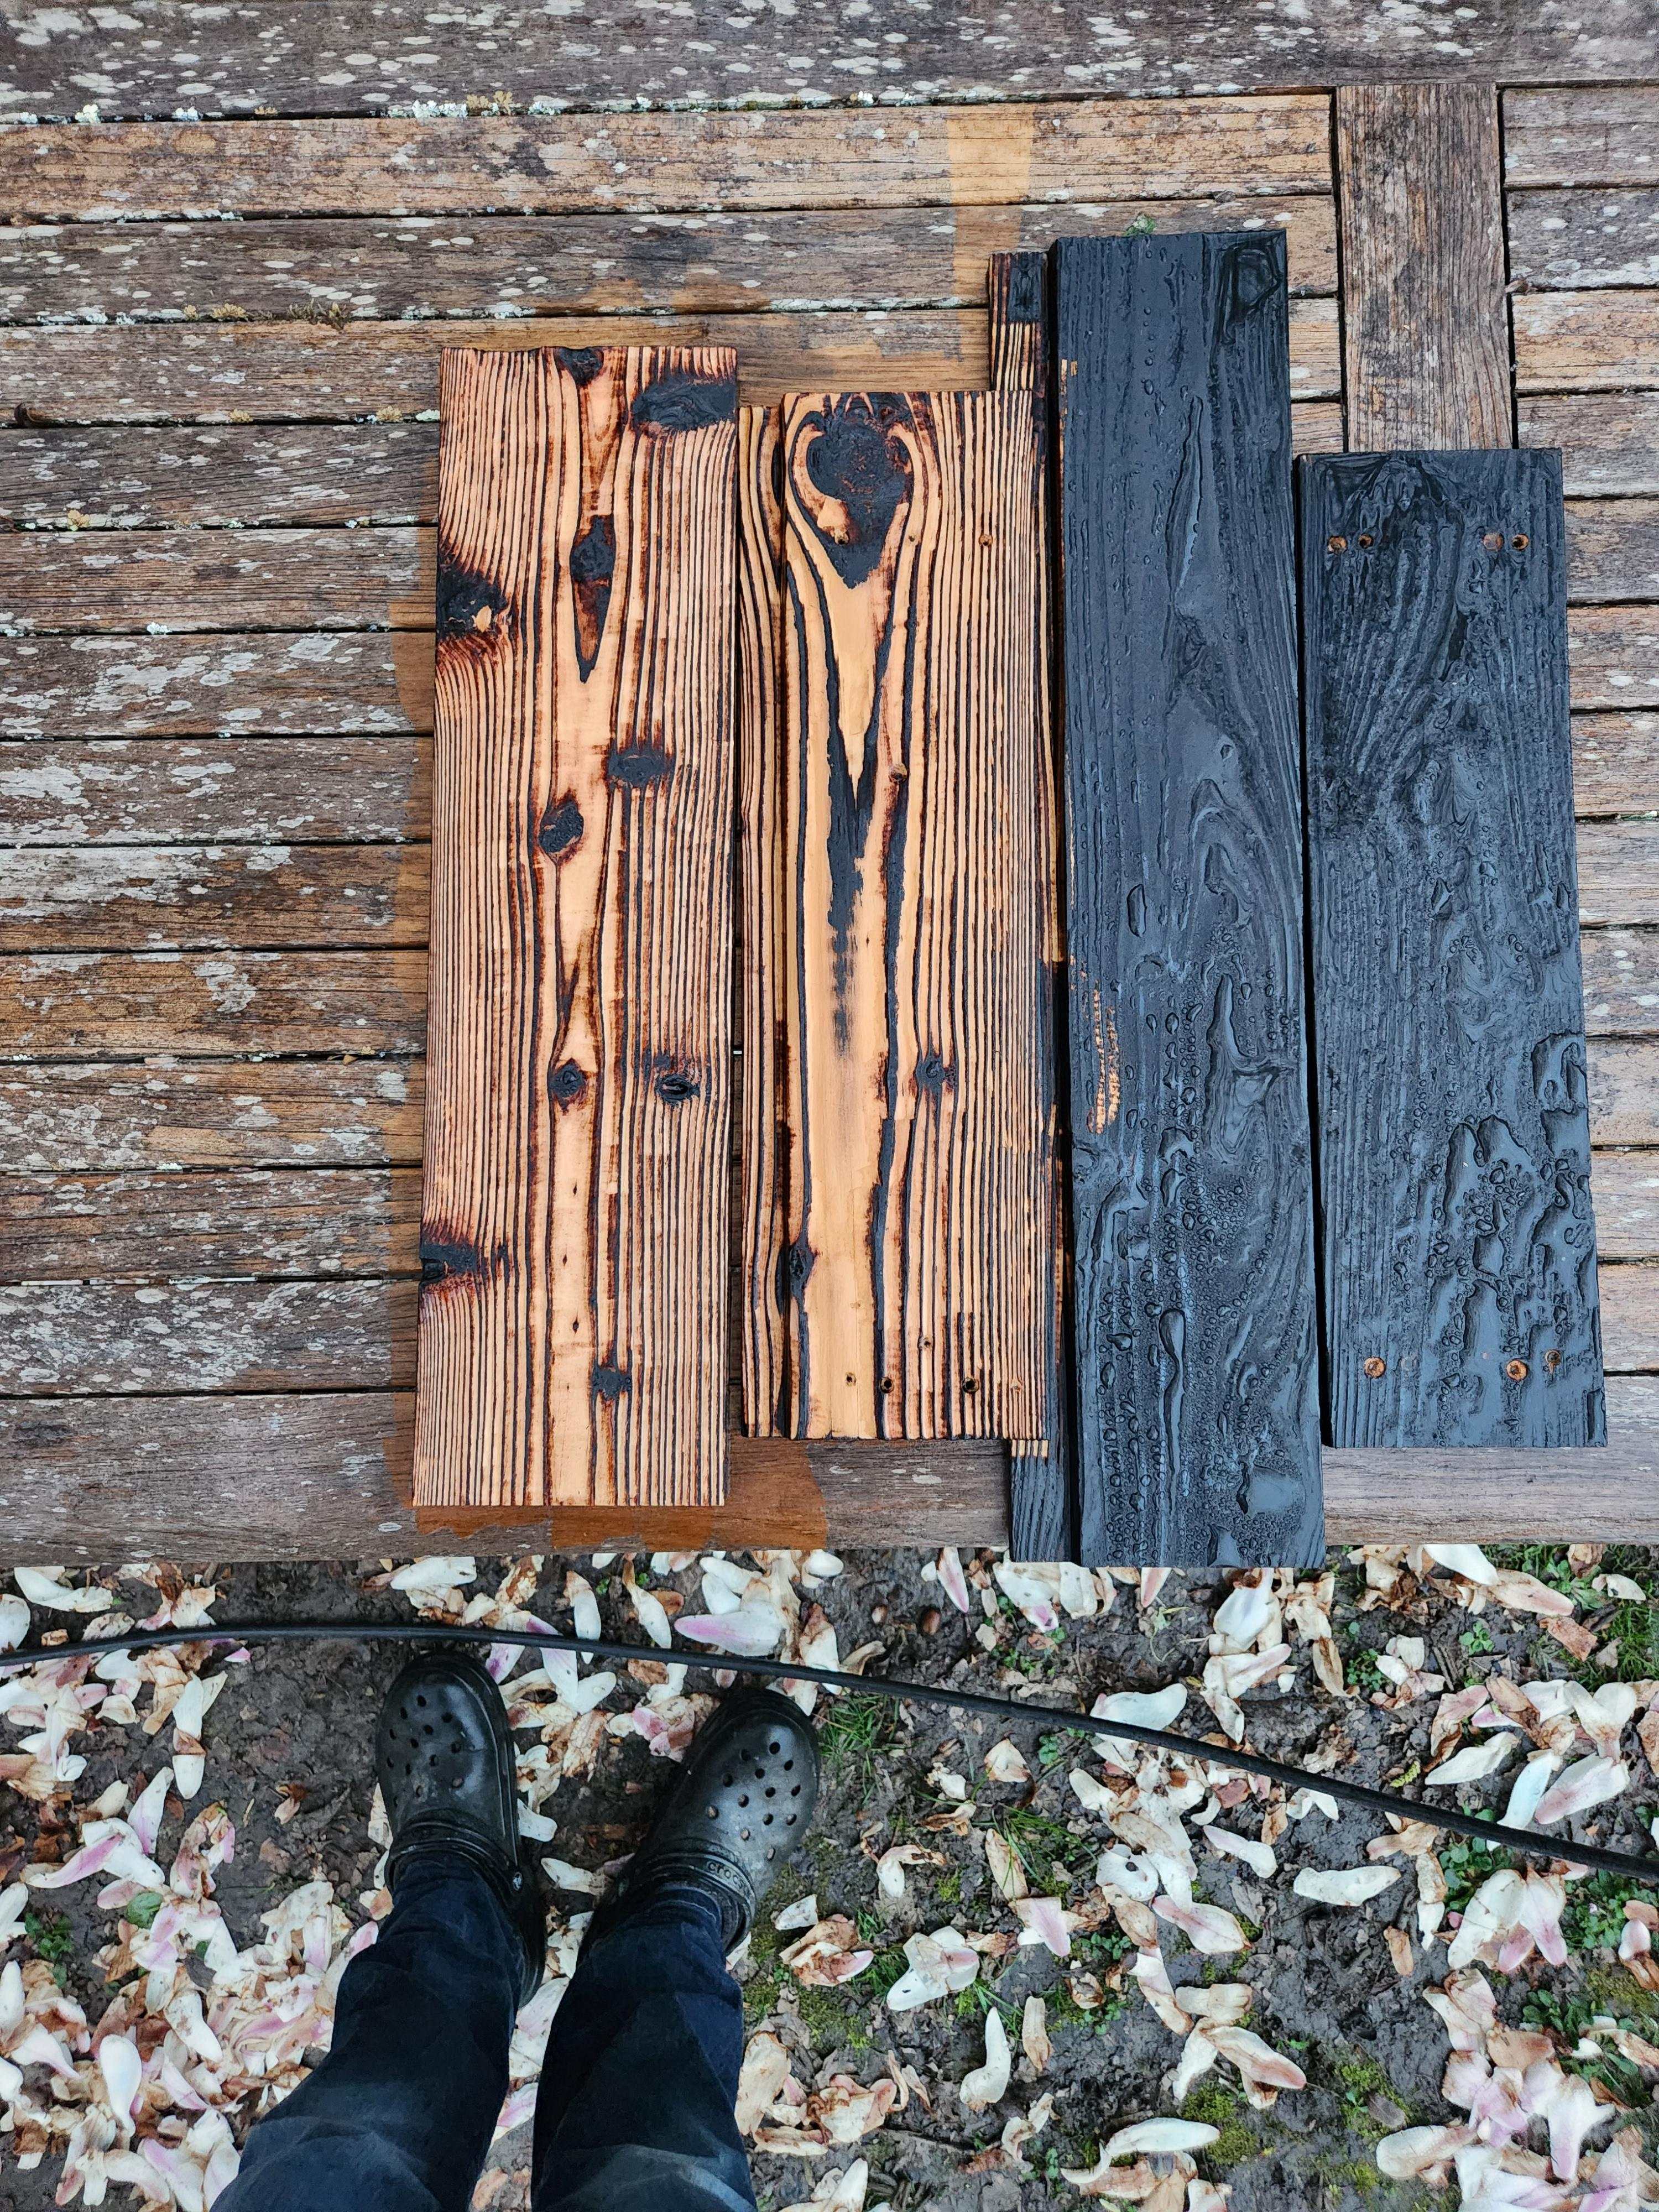
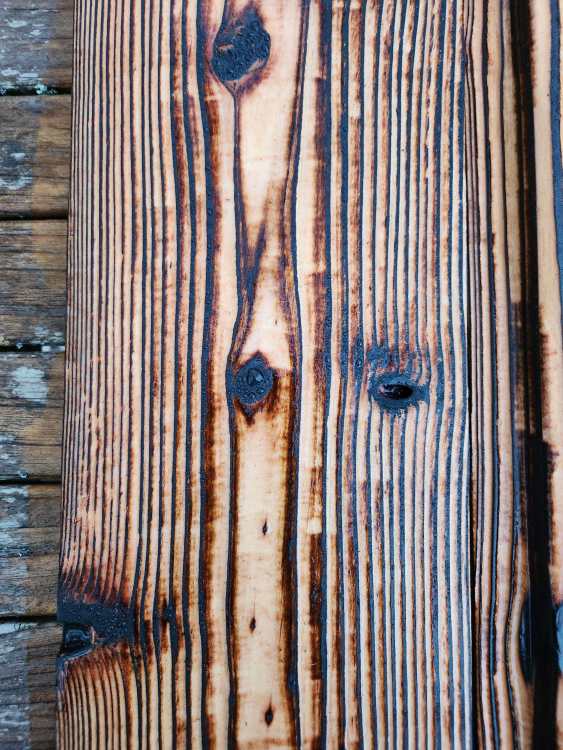
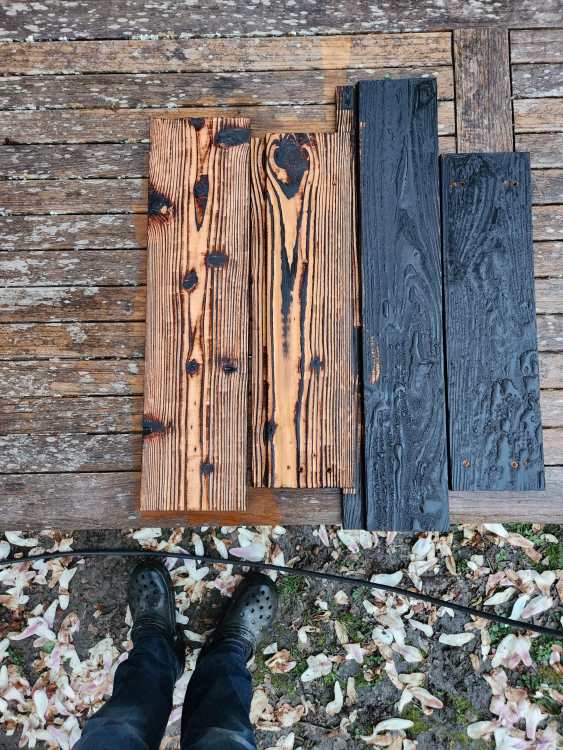
So looks like the jet spray test was a good shout. The coating won't be tough enough to withstand foot traffic. I quite like the raised grain effect it leaves behind, but the finish is too inconsistent to be useable. It's a shame as this is really nice timber.
-
Thanks. These were the concerns I had. The cladding I bought was pre-charred but with a square edge (didn't realise when buying, doh!) so to get the look I wanted I had to route off a chamfered overlap and char the edges. Whilst I prefer the look of my charring on the edges (crocodile look) I have no doubt that it wouldn't stand up to much poking and prodding, even with a sealer. The IRO stuff I bought does seem to be more hardy and the finish seems to have been scrubbed before they coated it. I'll give the jet spray a good go over the weekend and report back
-
Hi All - I was wondering if anyone has used or had expereince of using charred timber for decking. I've used it to clad my extension and am very happy with it. I've never liked the standard fluted look and out of principle am not going to pay millboard prices. I am not worried about slippage as I think that is a universal issue regardless and comes down to good maintenance. Cheers, Paul
-
What is this made of? Ceiling wood fibre board type stuff
paro replied to paro's topic in Building Materials
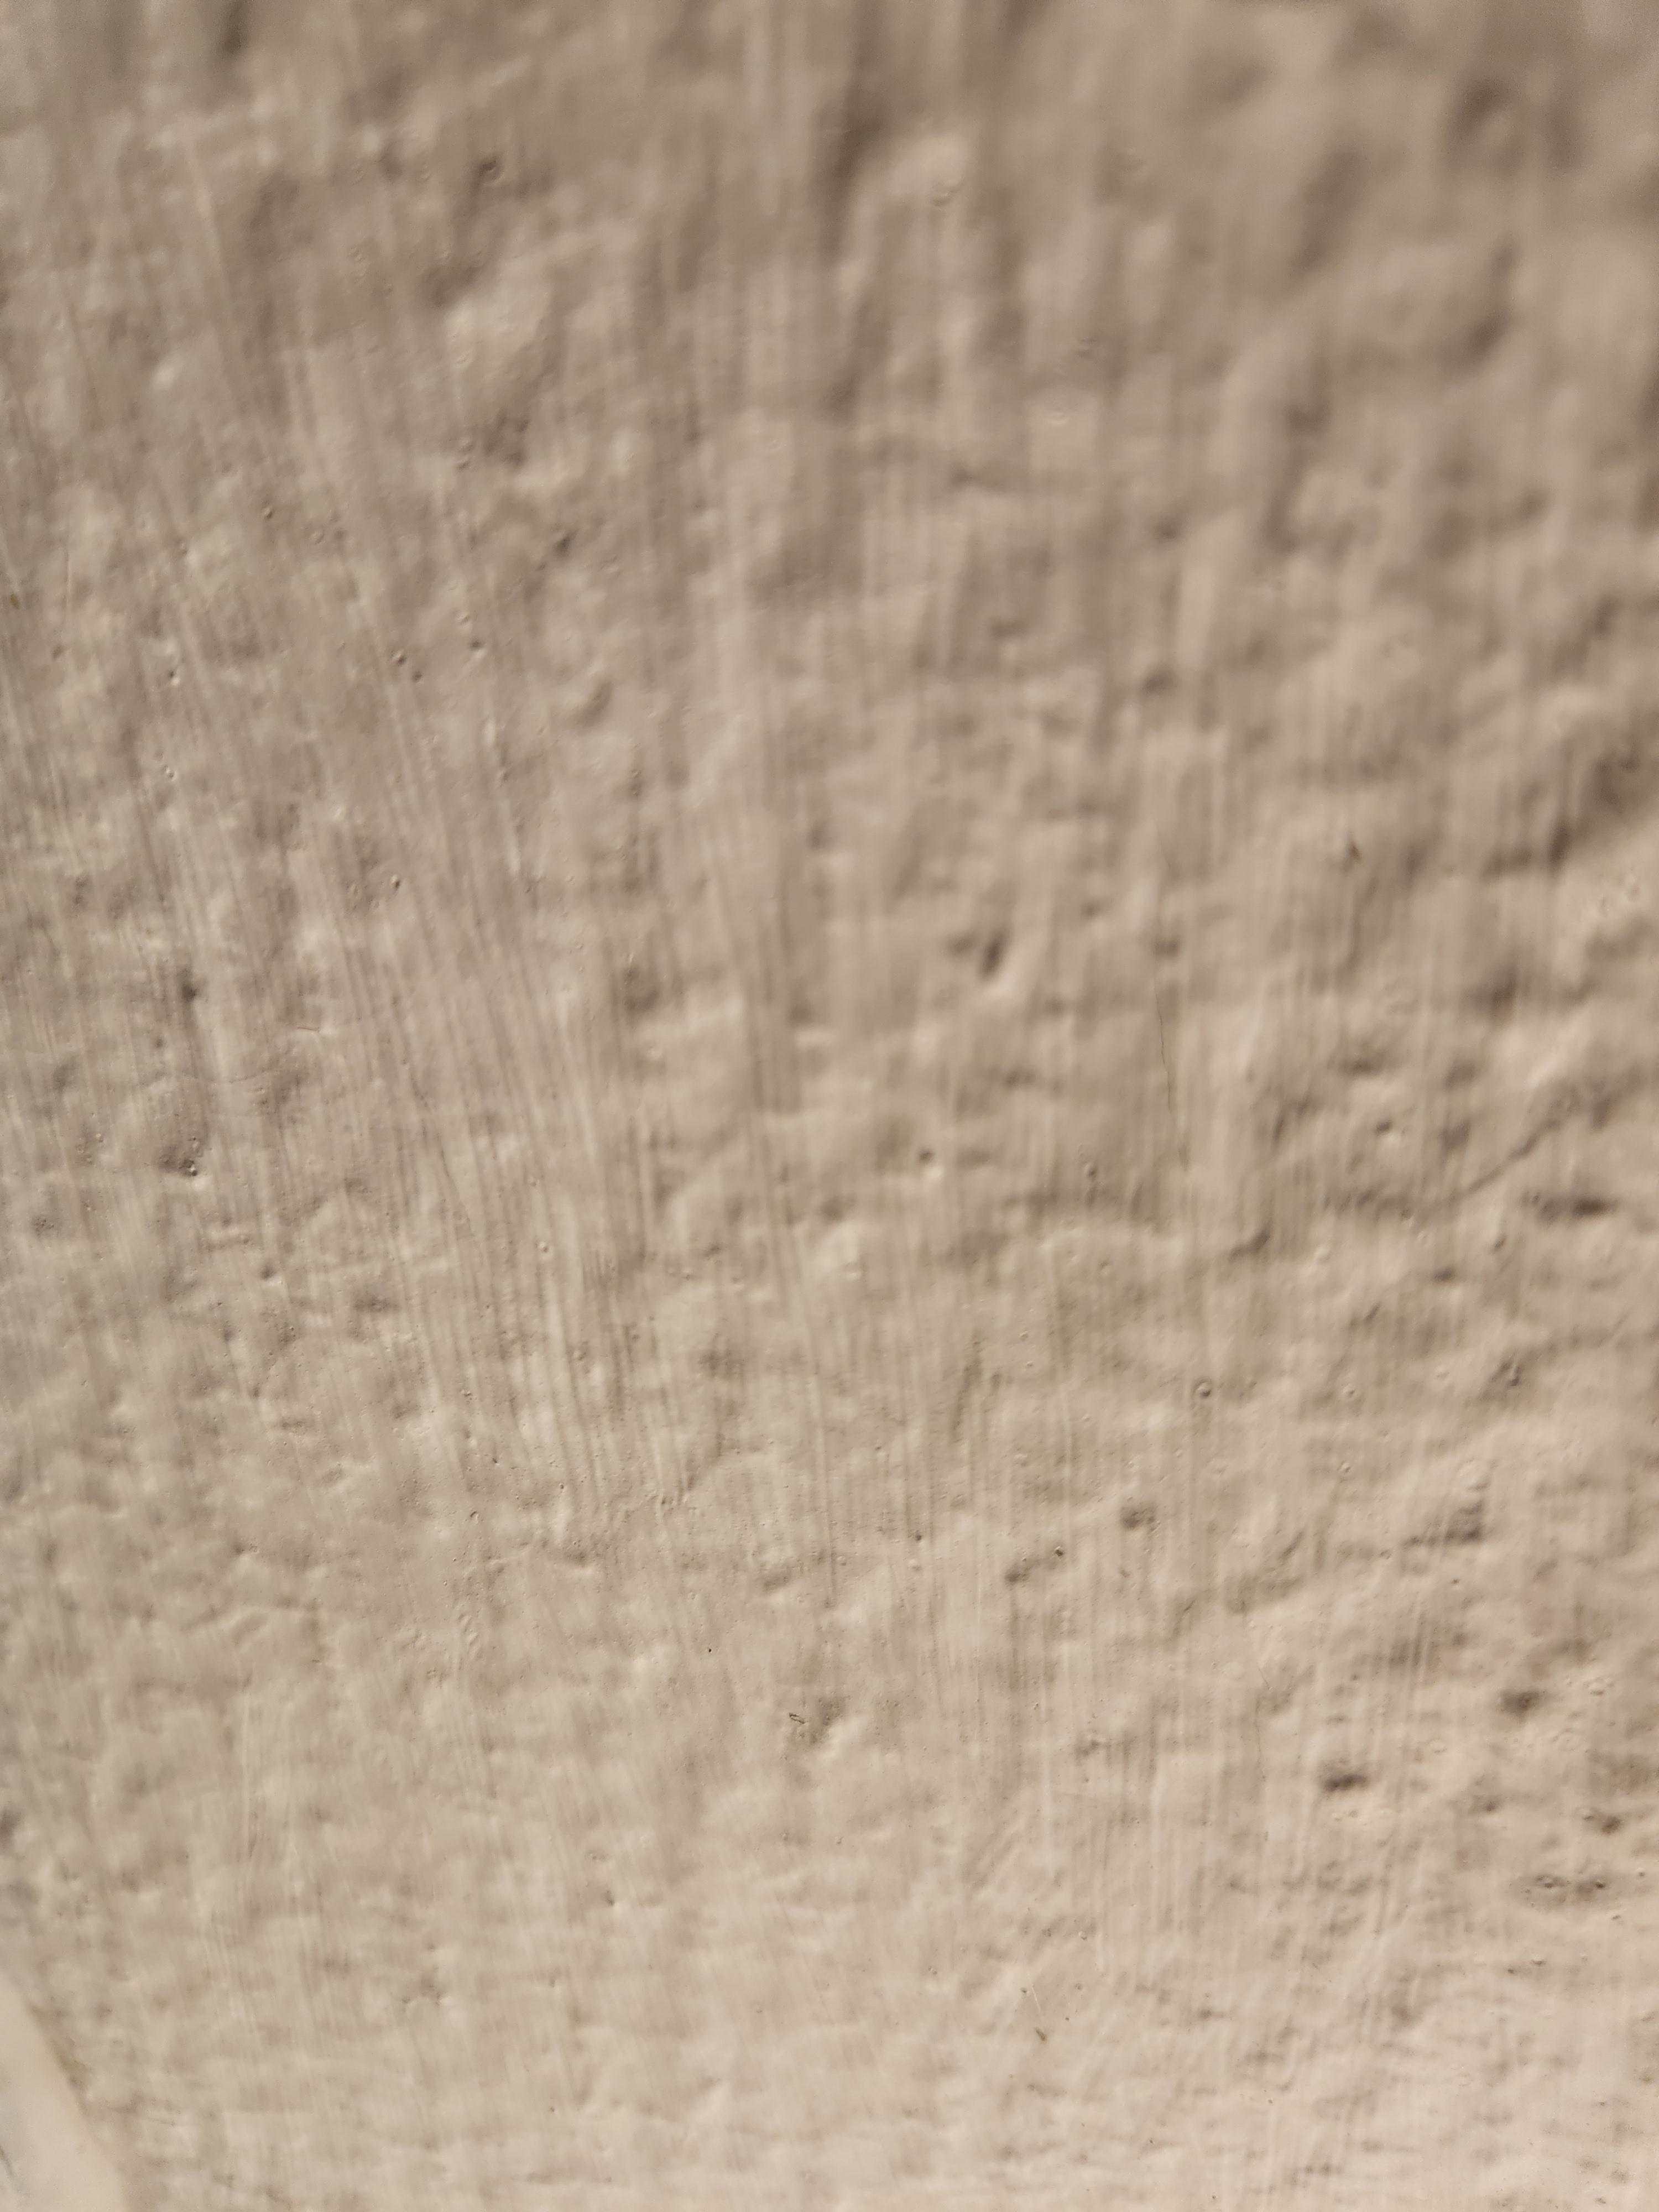
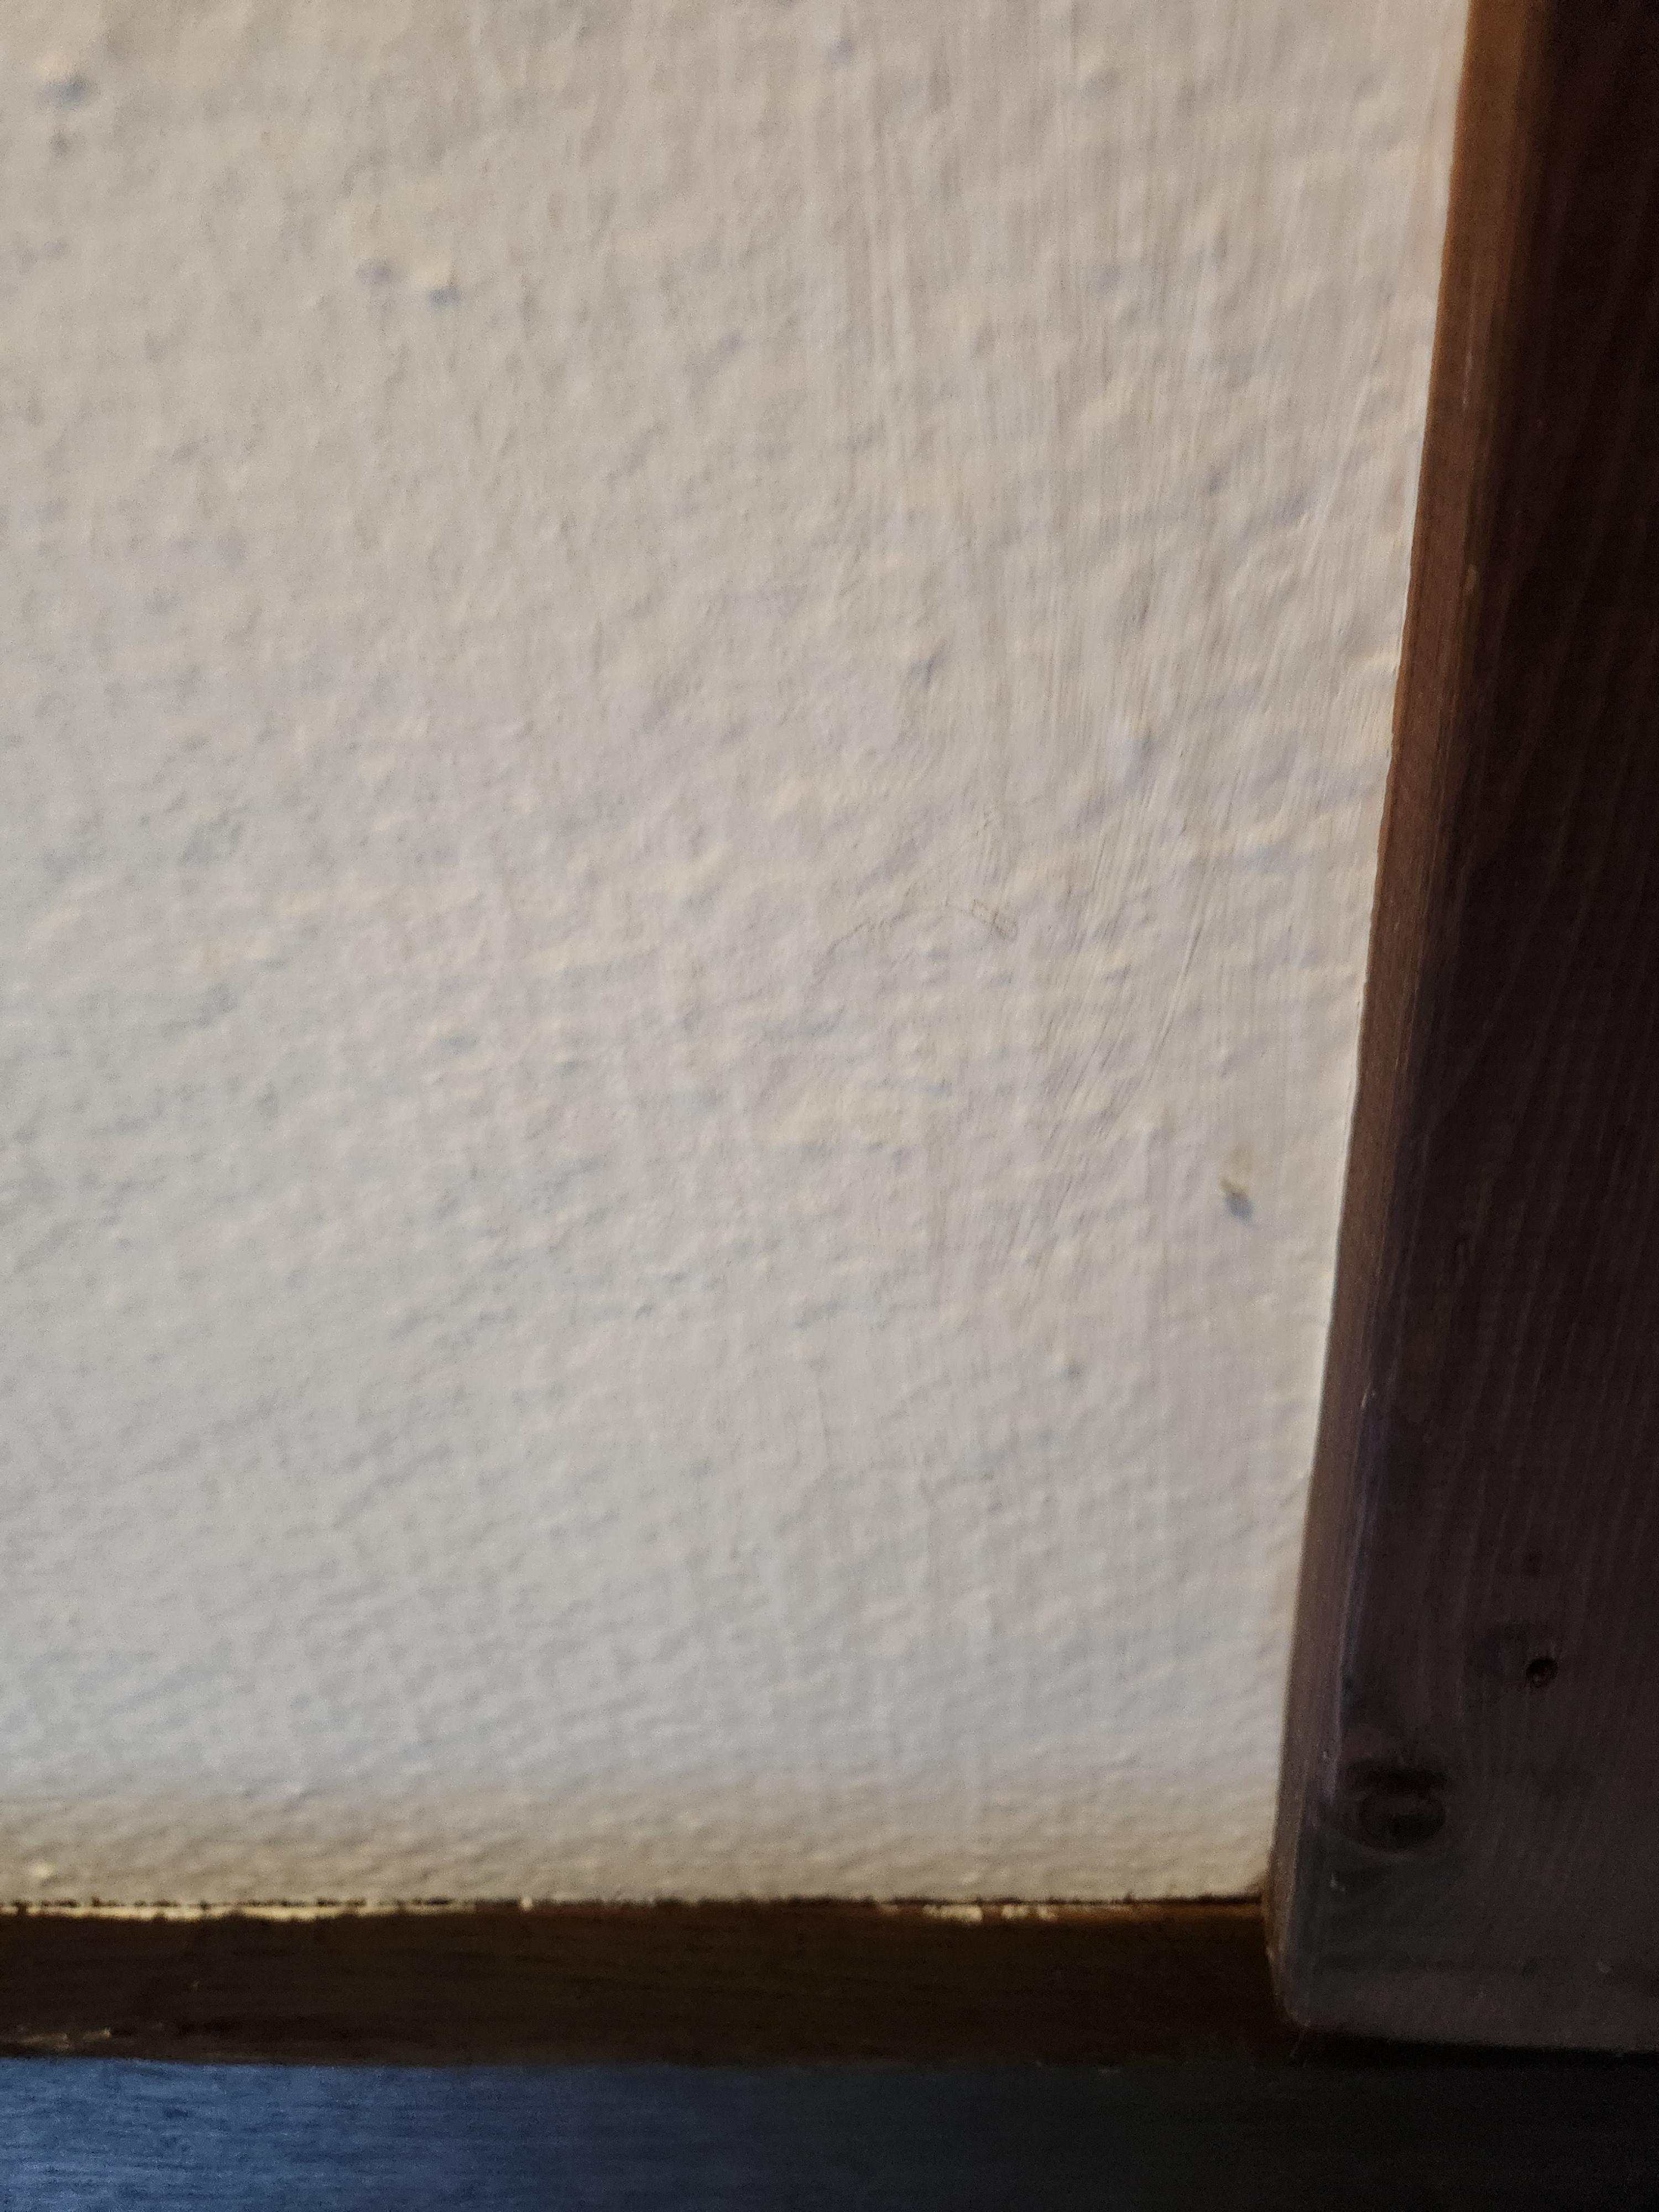
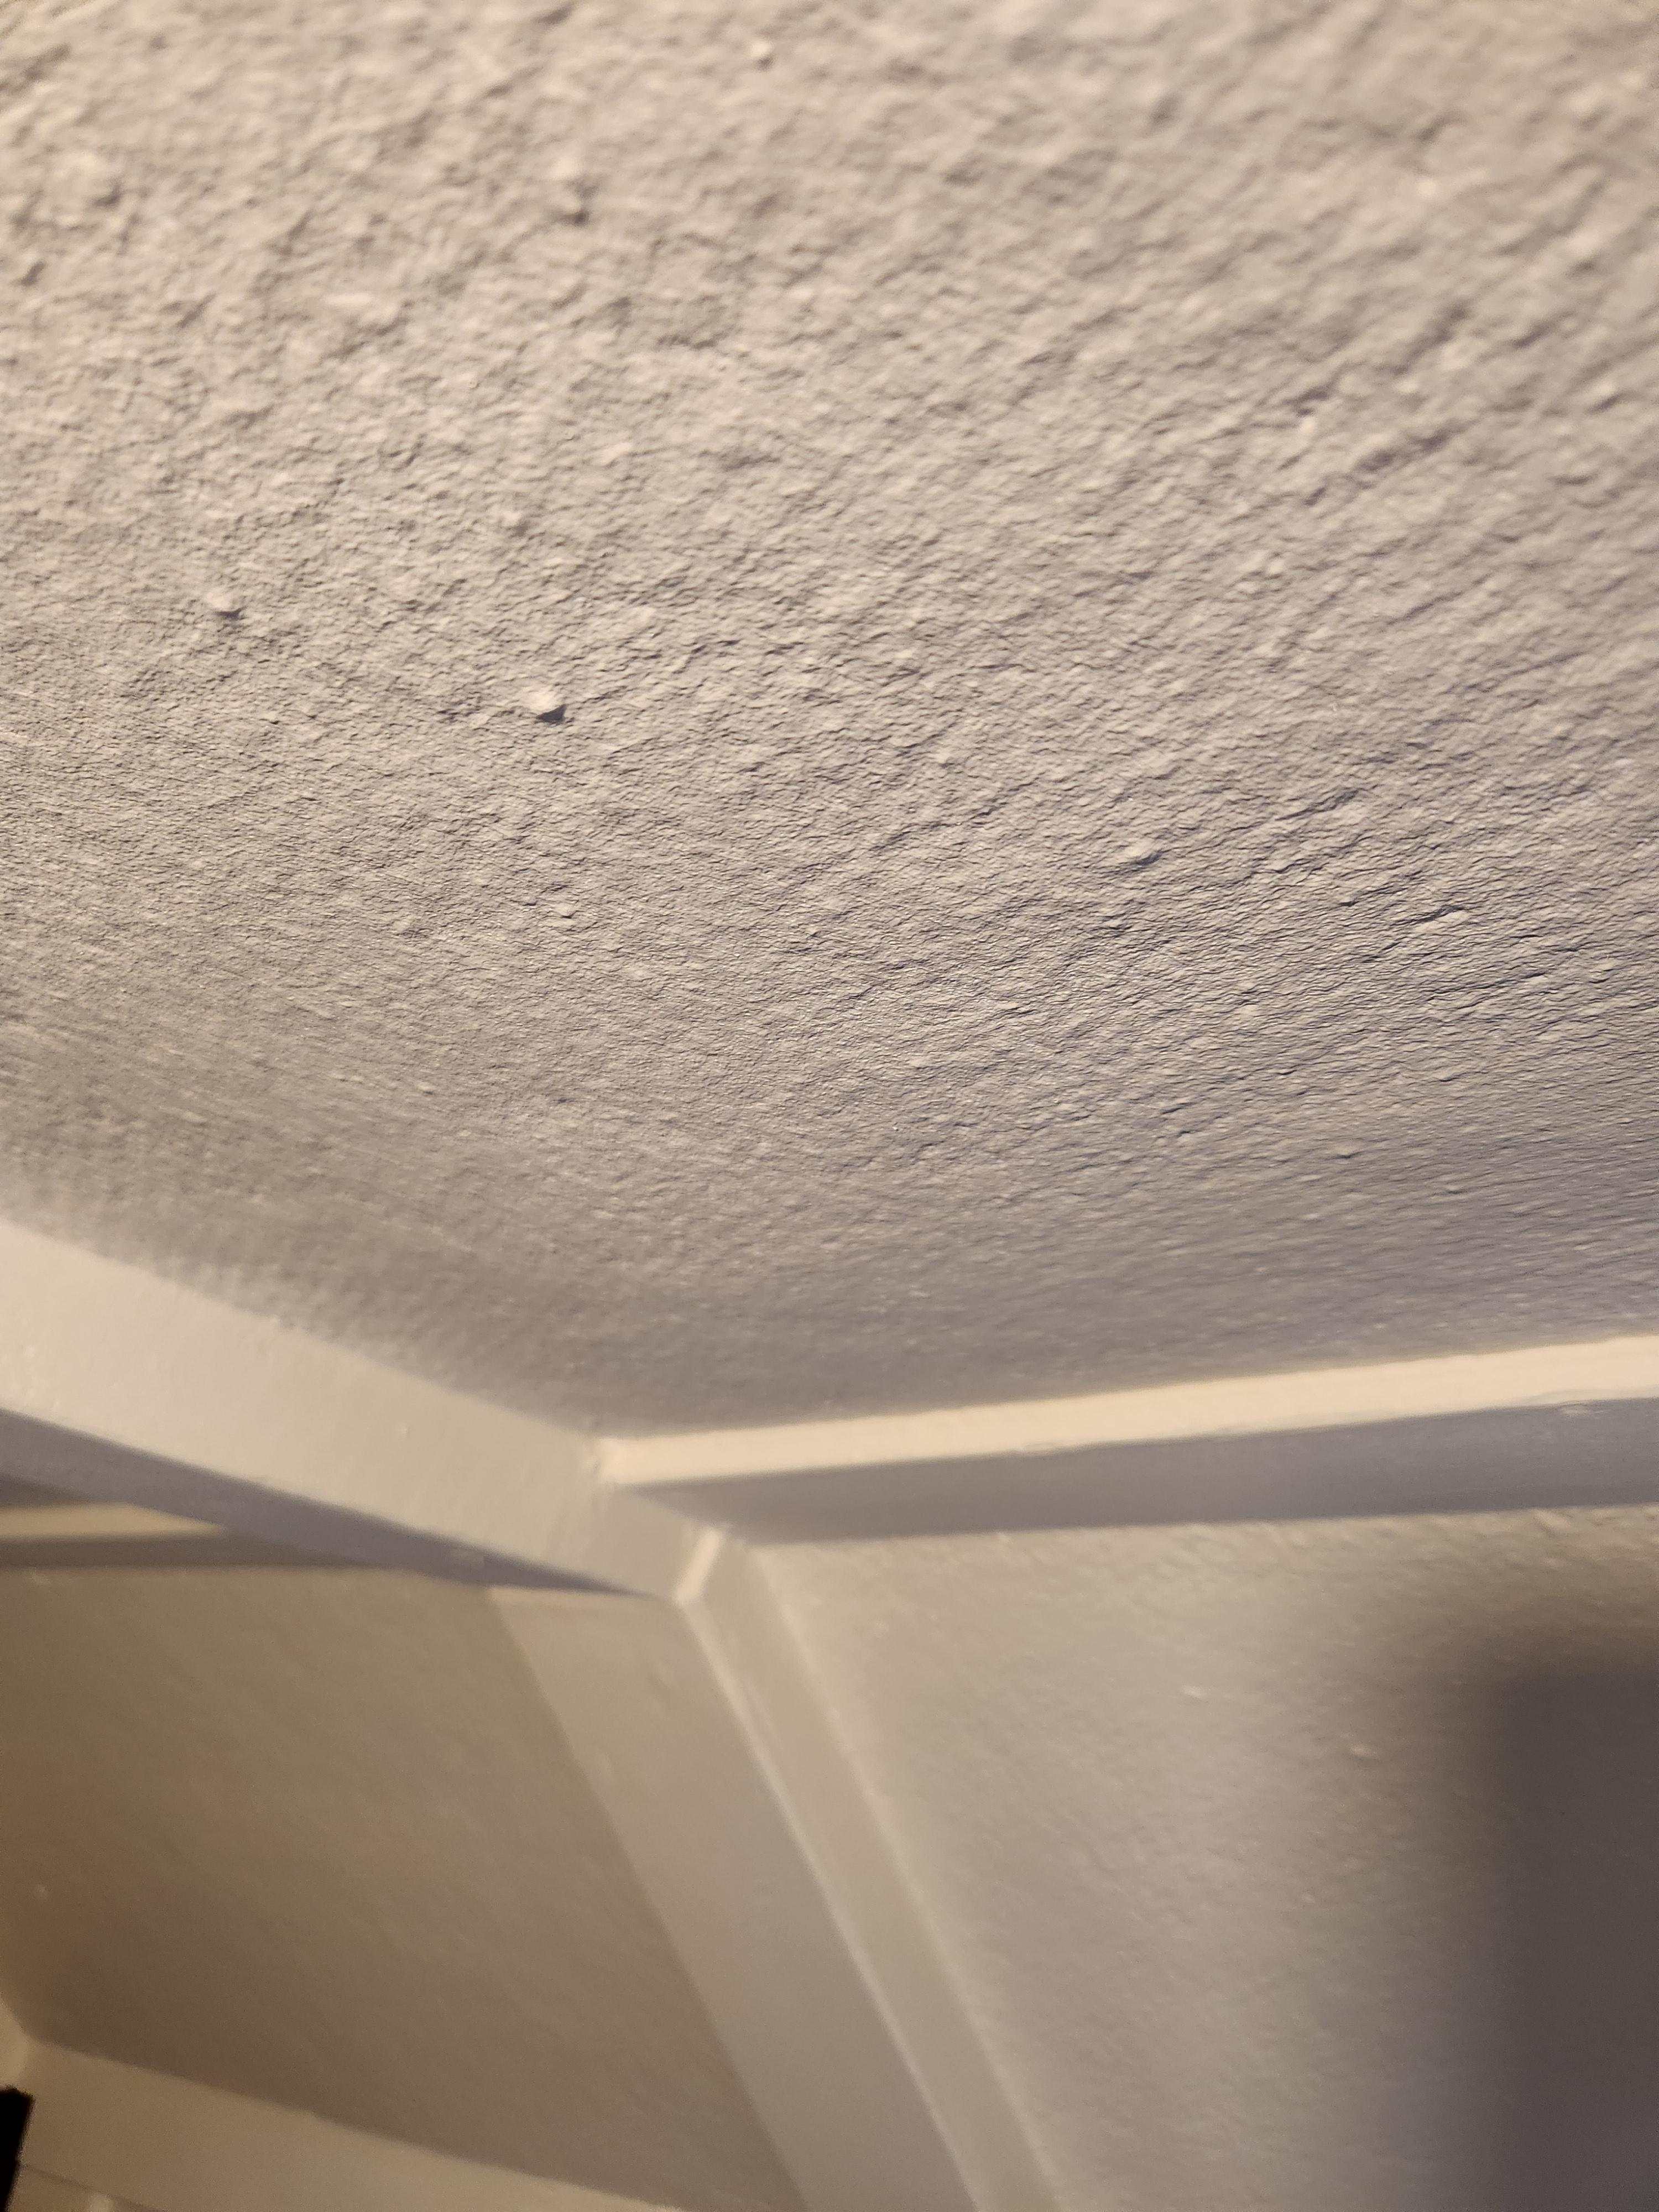
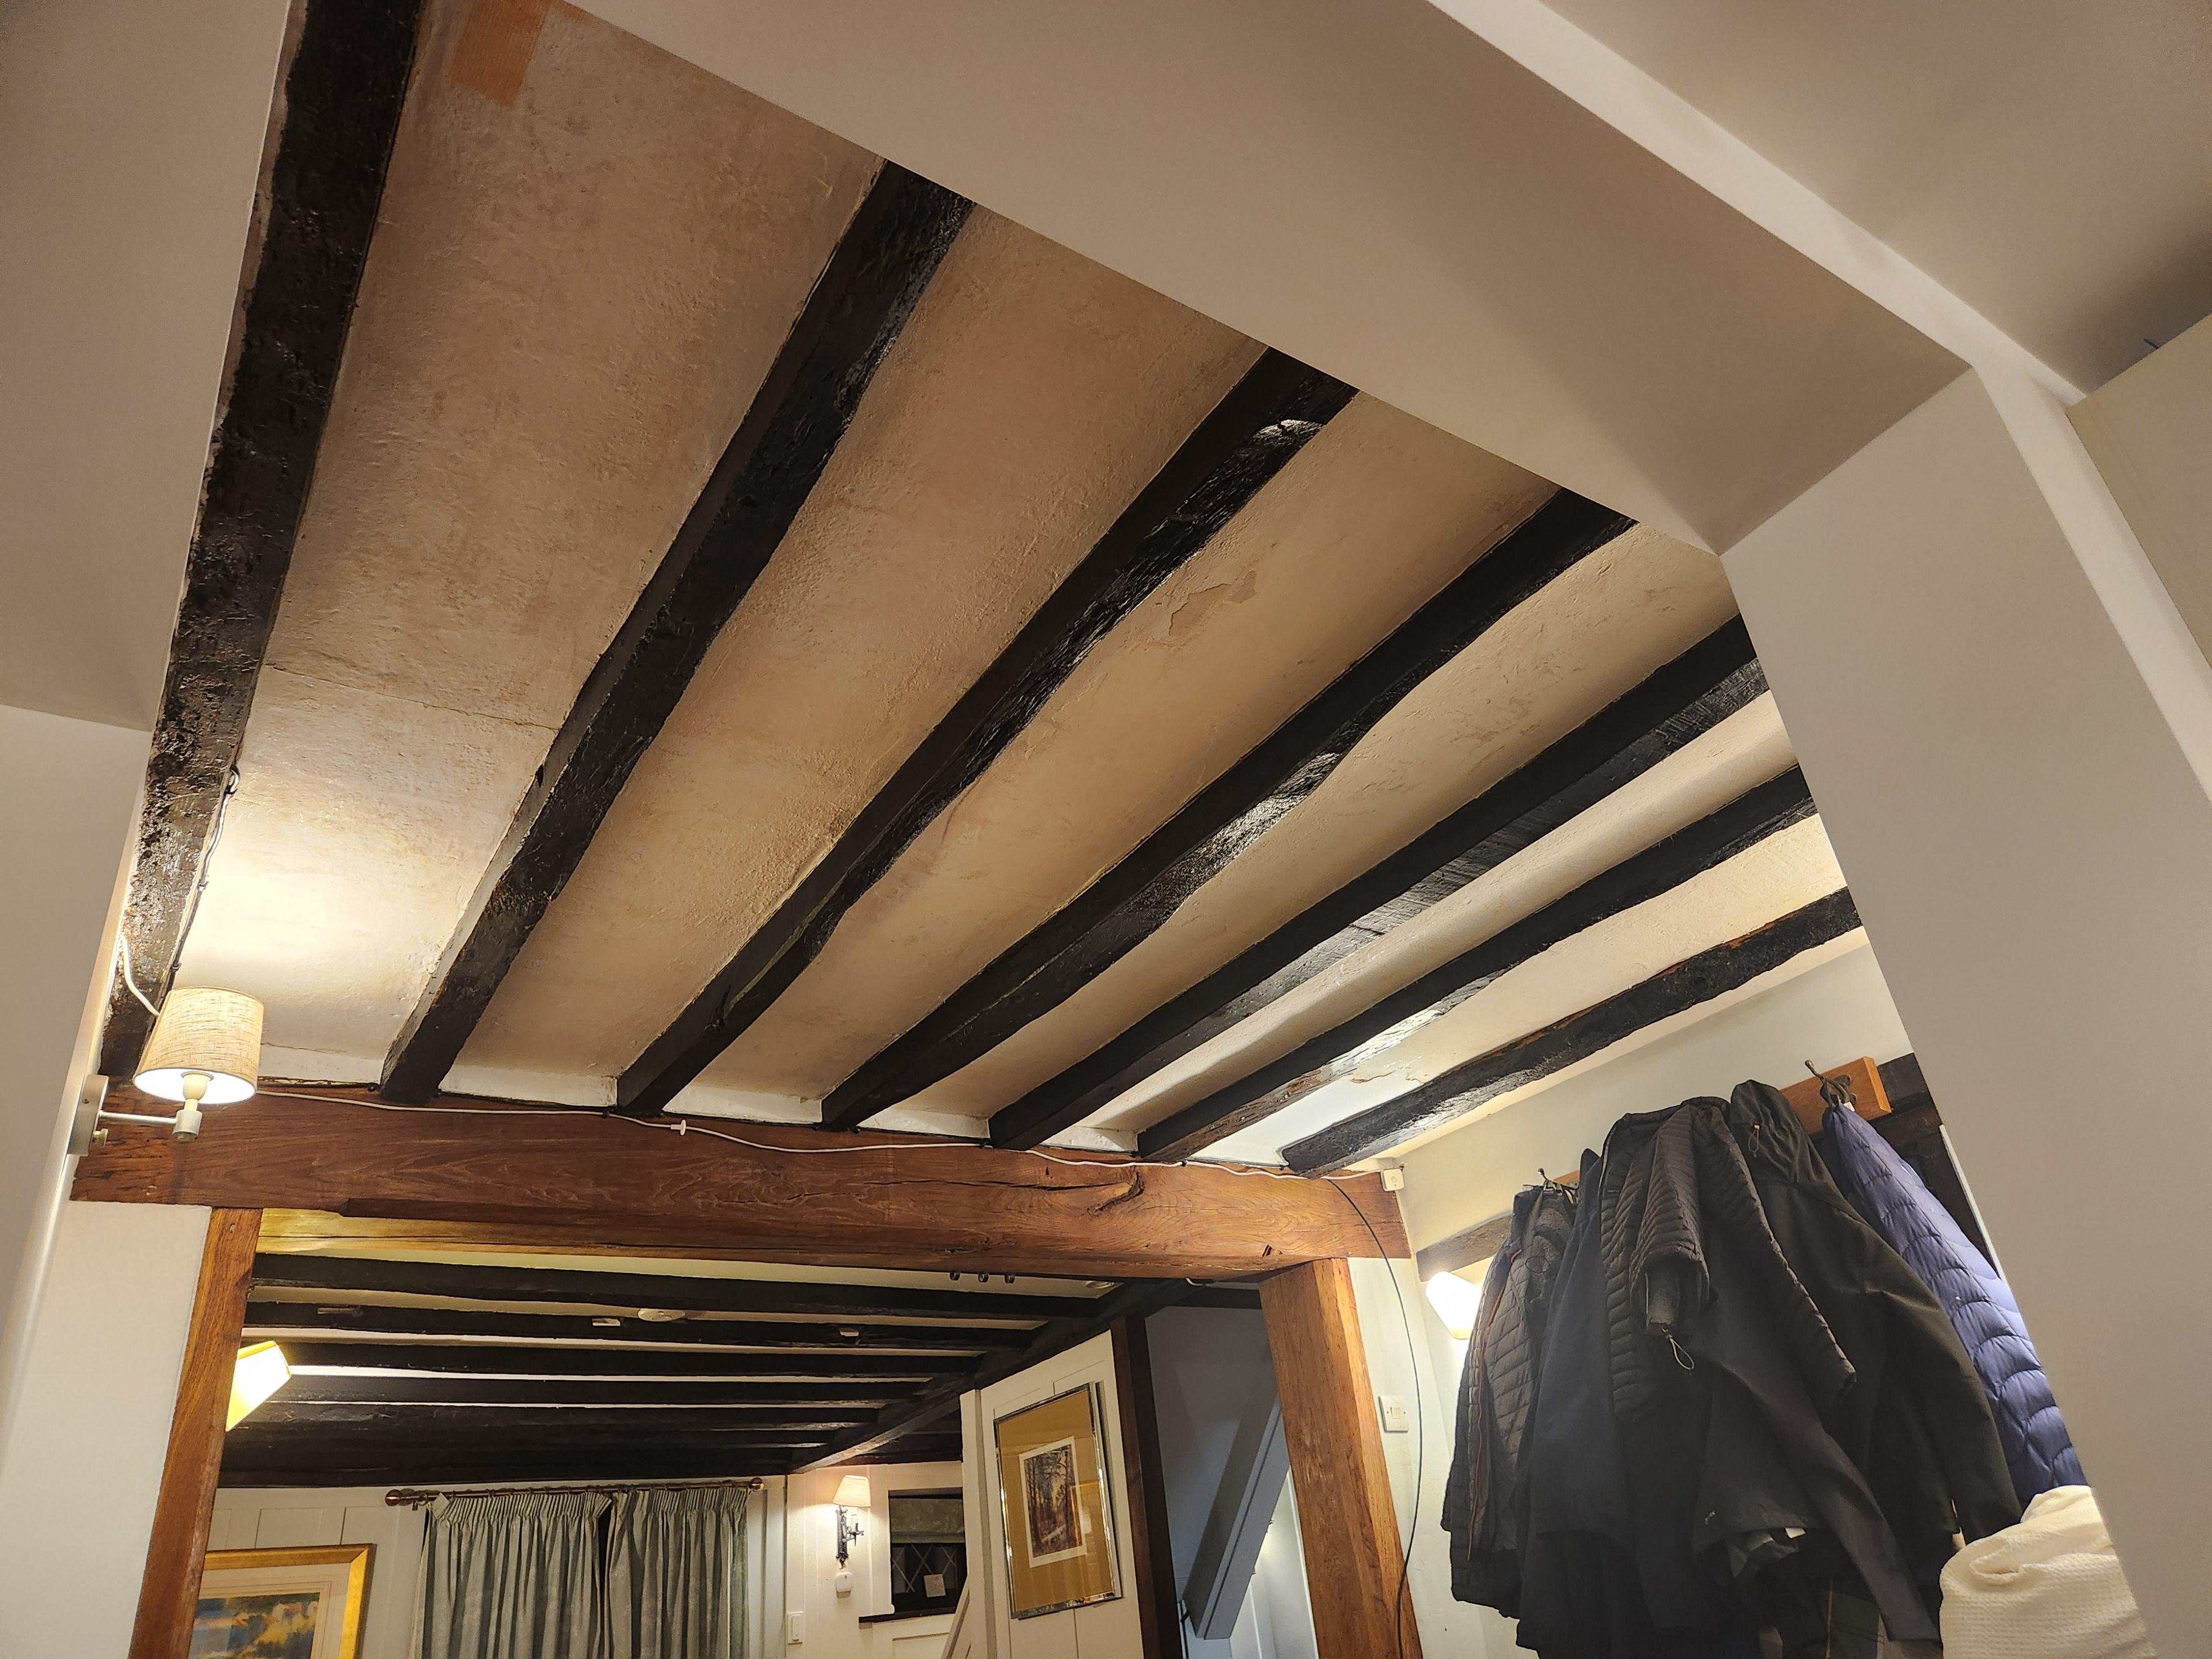
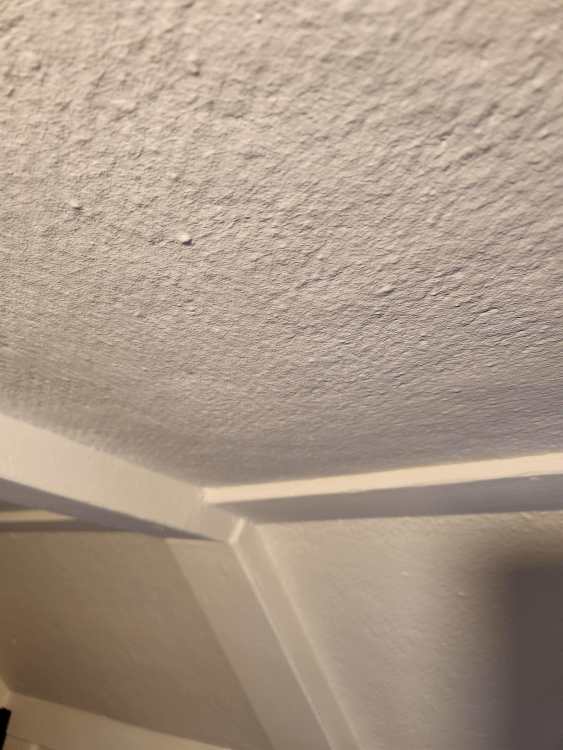
Thanks. It really was a nightmare to start with. I am most impressed that I didn't managed to put my size 13's through any of it. I would say they are relatively soft. There is a lot of sag in them now, to the point now where some are beginning to give way. Artex actually makes sense as the pattern is not consistent throughout. If that's the case I can potentially just replace with equivalent thickness of ply and try to replicate the pattern. -
What is this made of? Ceiling wood fibre board type stuff
paro replied to paro's topic in Building Materials
I did for a change I reckon I pulled out at least a couple of hundred dead mice. -
What is this made of? Ceiling wood fibre board type stuff
paro replied to paro's topic in Building Materials
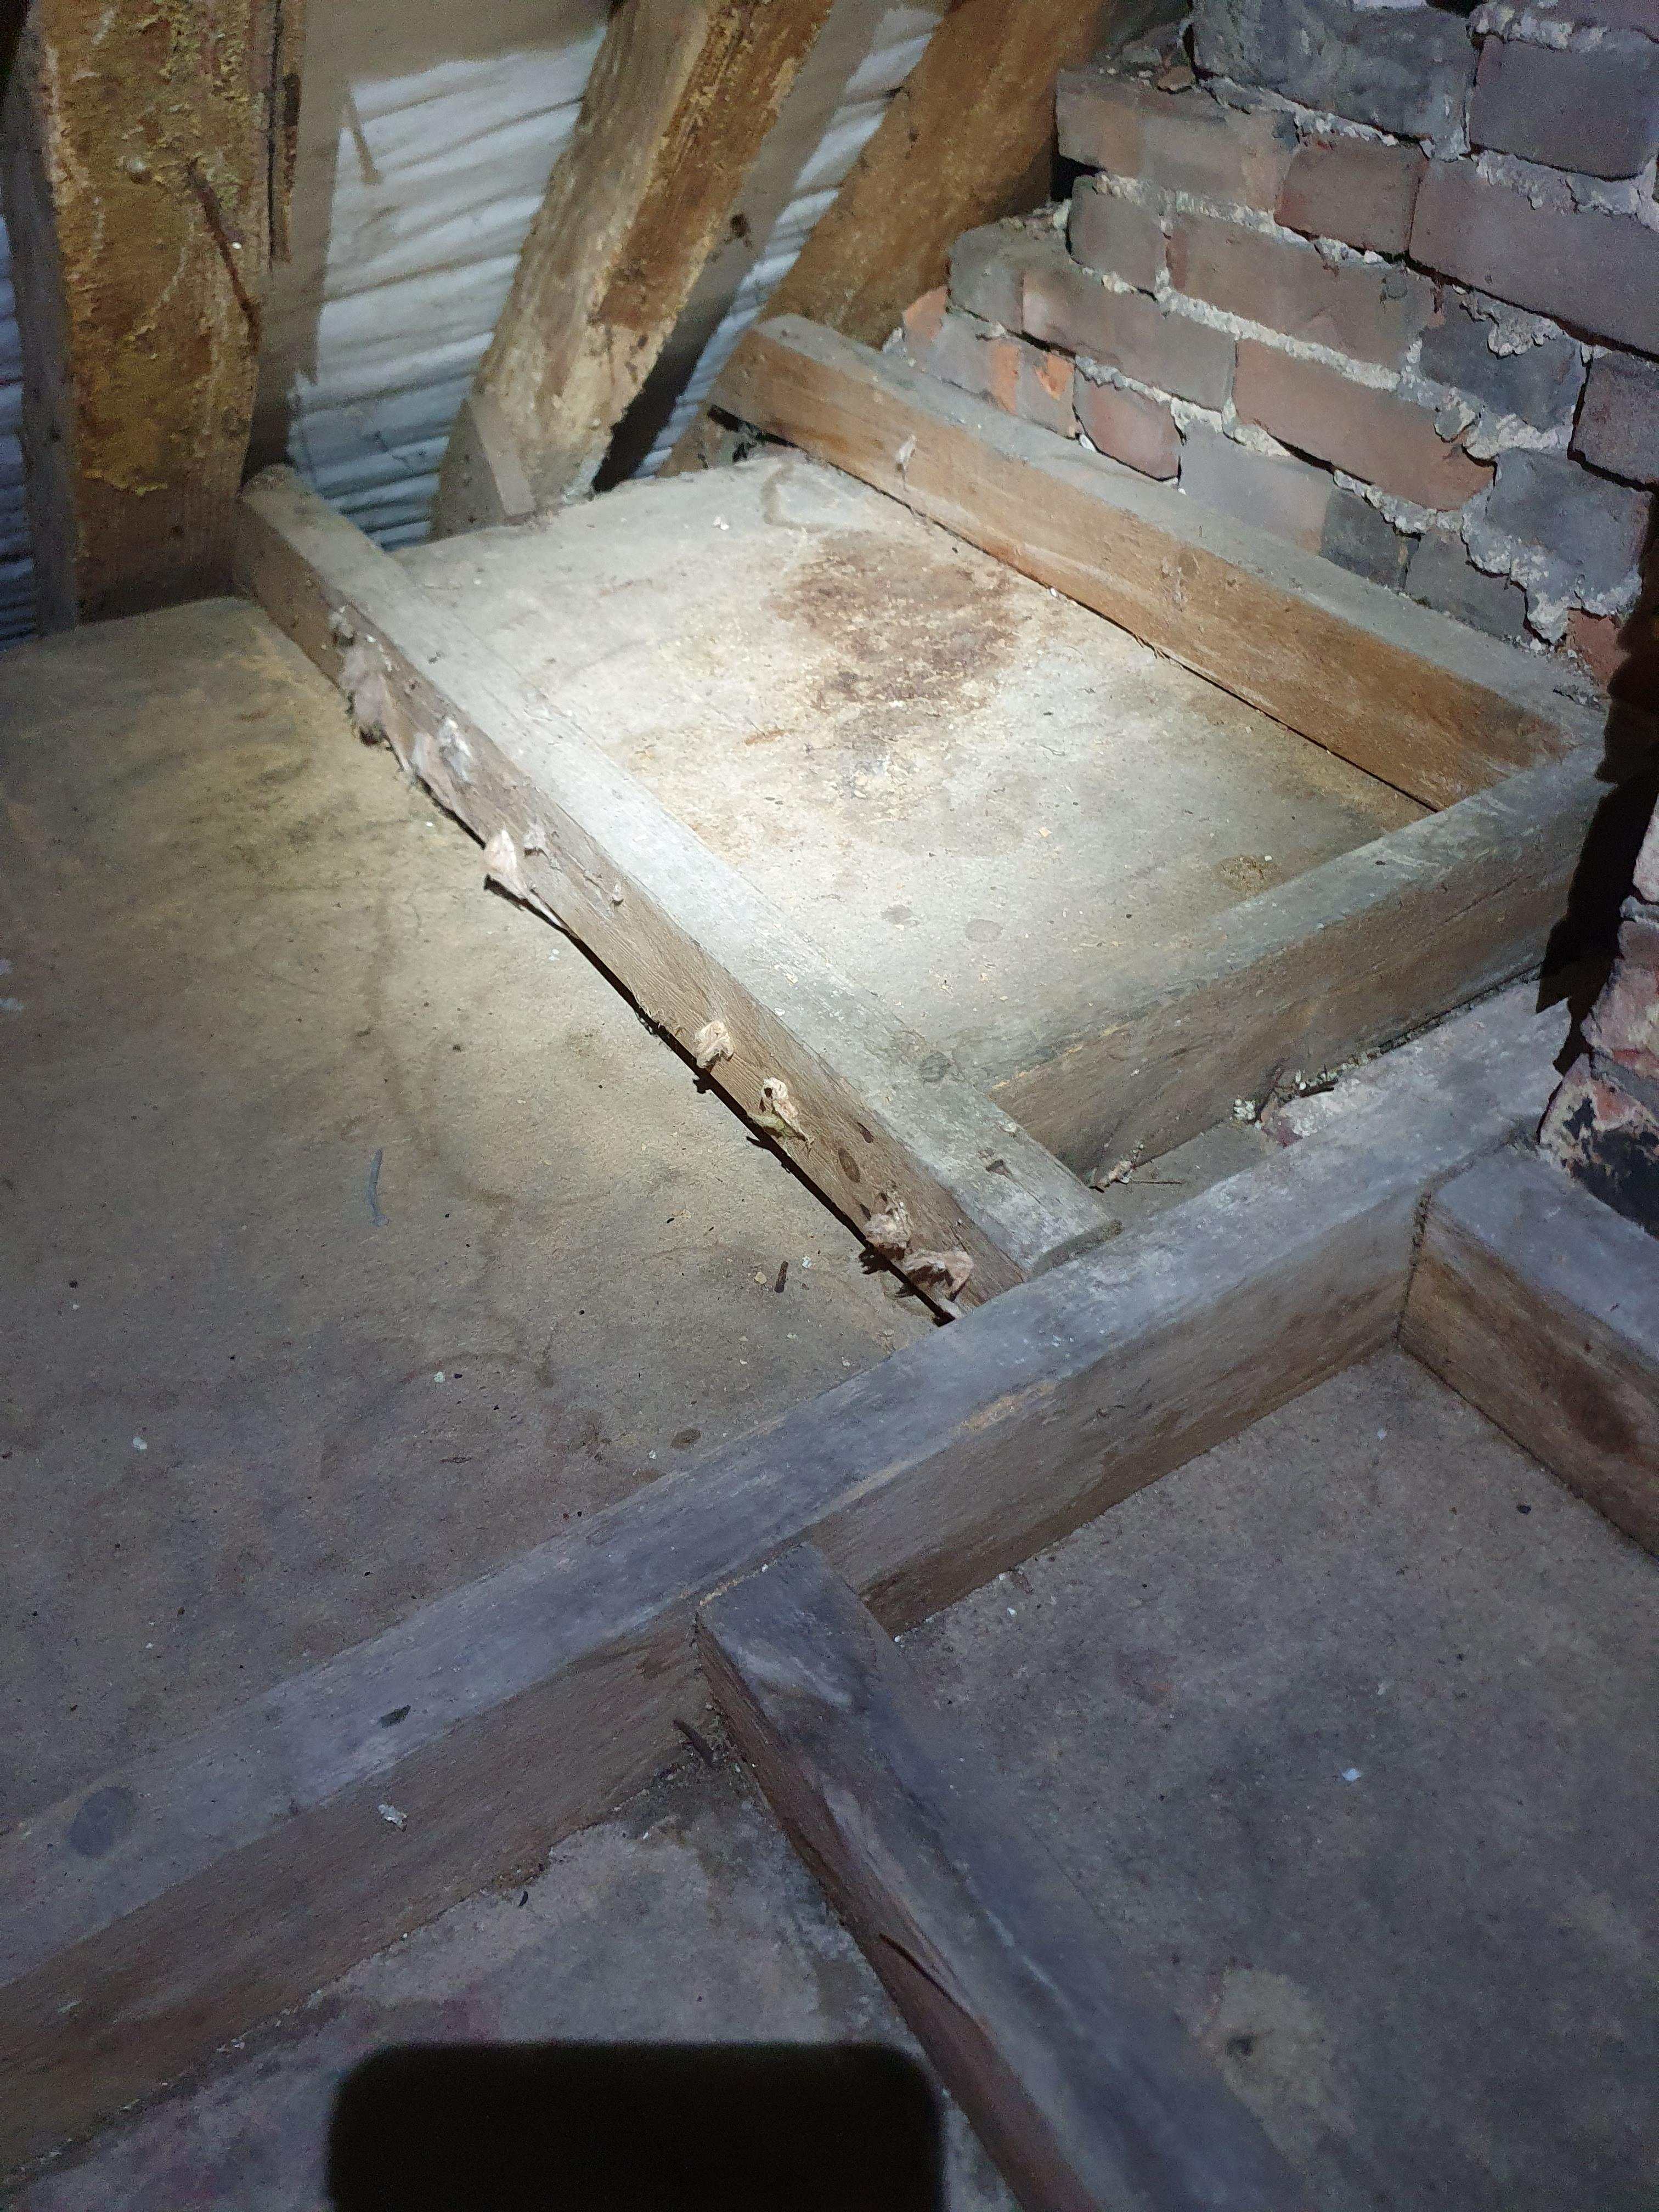
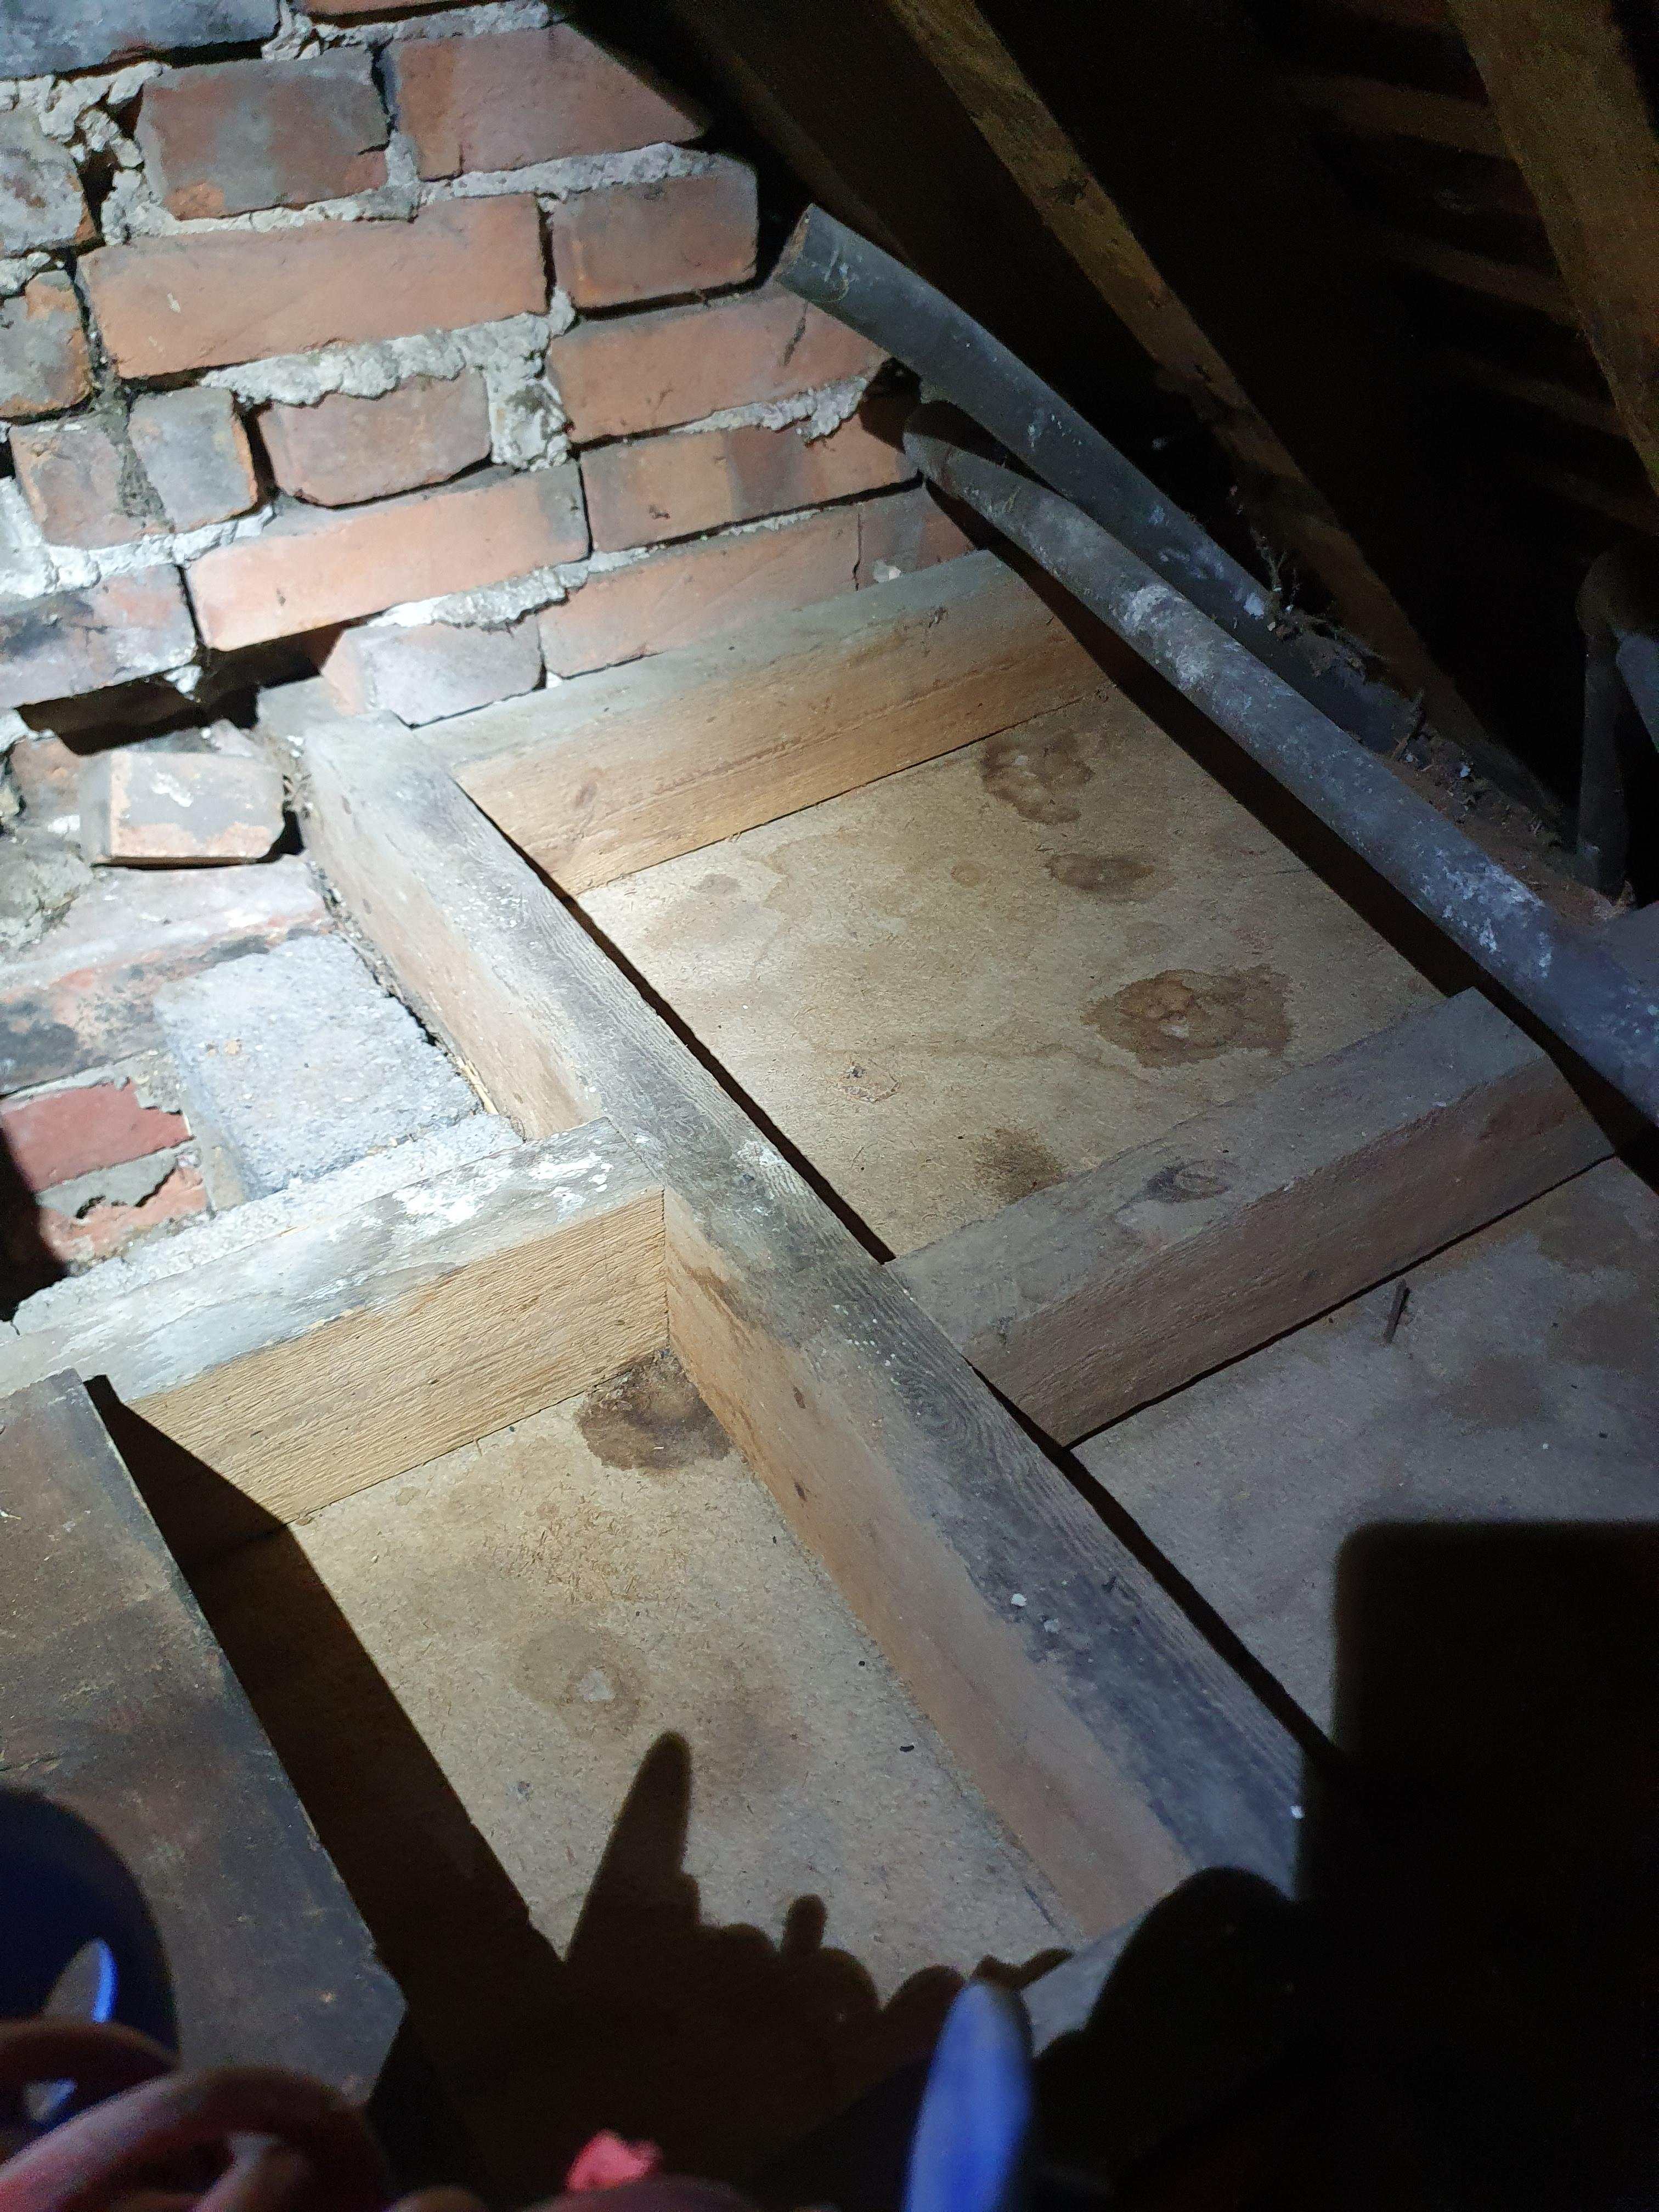
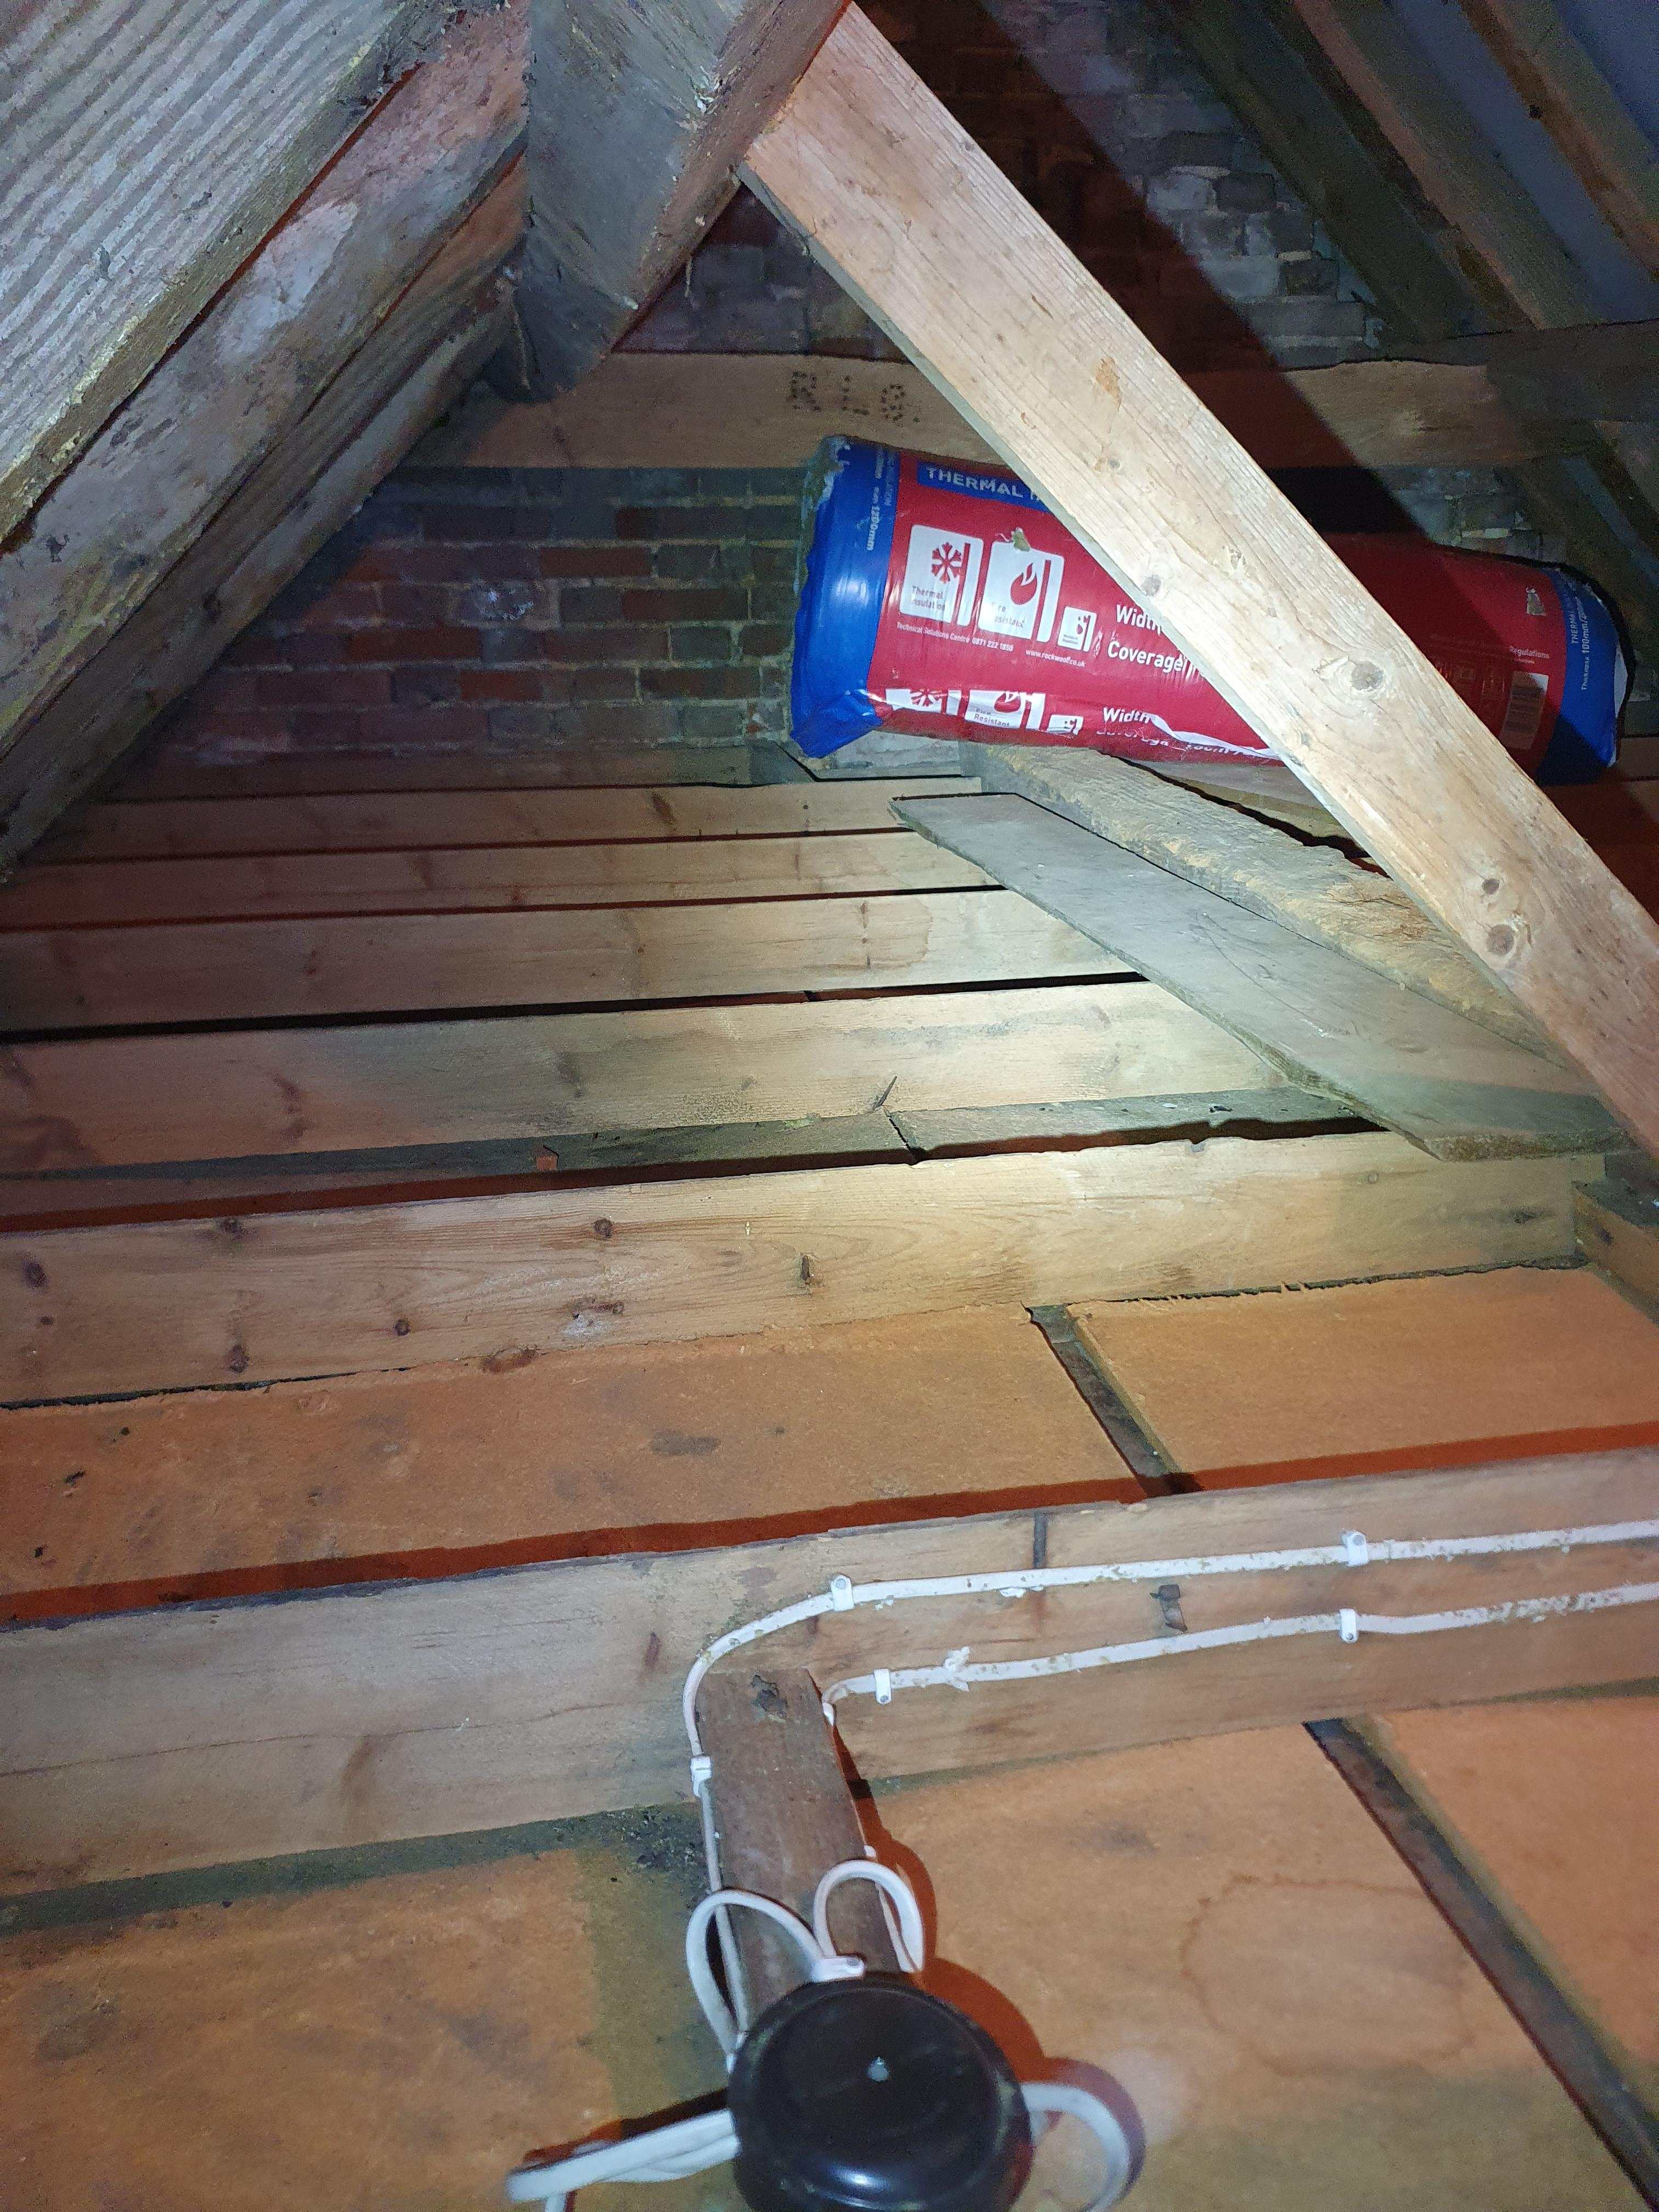
Some pics from when I cleaned things out.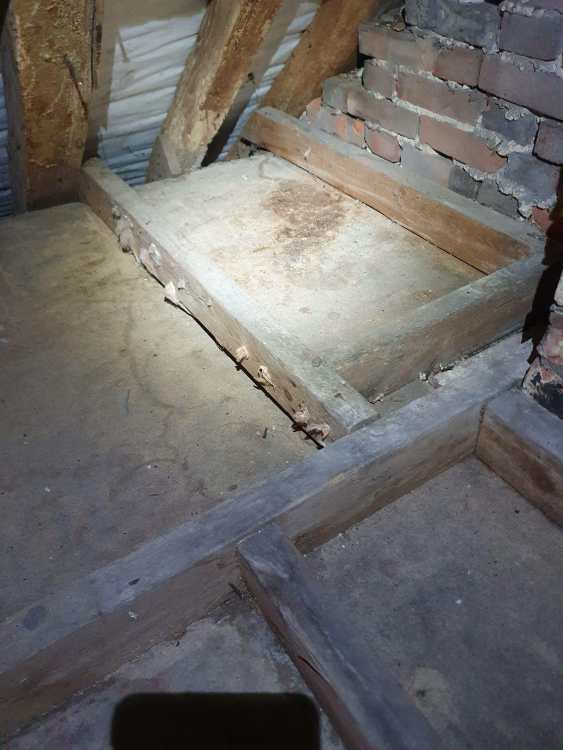
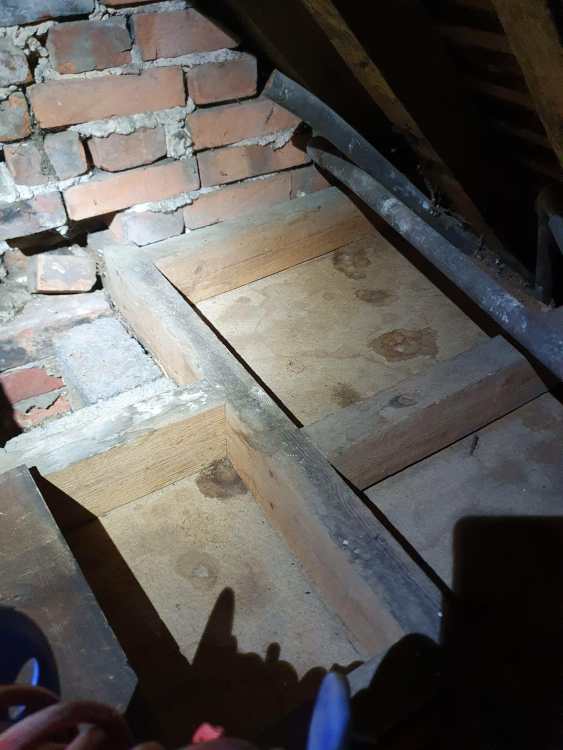
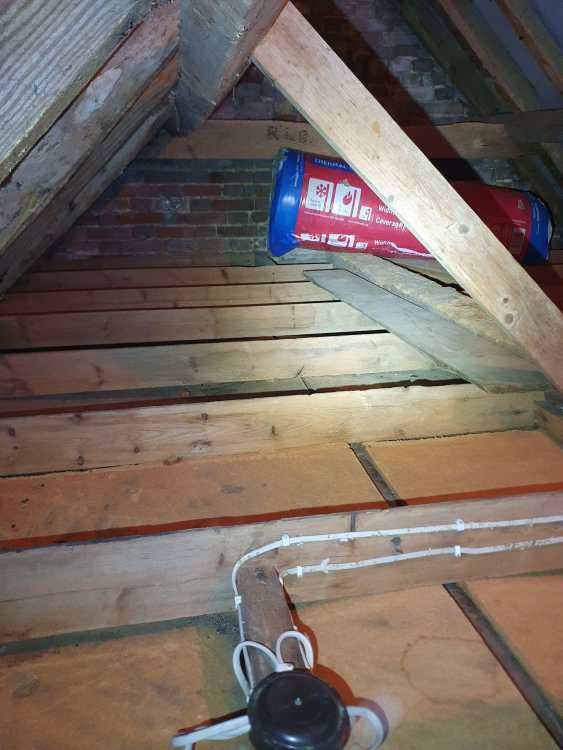
-
What is this made of? Ceiling wood fibre board type stuff
paro replied to paro's topic in Building Materials
You've got me at it now. I've found somewhere I can send samples to for not very much. Doing that today -
What is this made of? Ceiling wood fibre board type stuff
paro replied to paro's topic in Building Materials
It never occured to me that it could contain asbestos. That's not a great thought given I spent a a few weekends up in the roof removing all the old glass fibre and mice. -
Hi All - I am trying to find our what the 1st floor ceiling is made of so I can look to replcace some of the boards that have broken down. Can anyone give me a steer on what this is? It's definetely some kind of wood fibre and is probaly 15ish mm thick. The entire 1st floor ceiling is made of it. I need to try and replace like for like because of the texture. I did put some plywood in as a quick fix but it looks terrible. Thanks, Paul
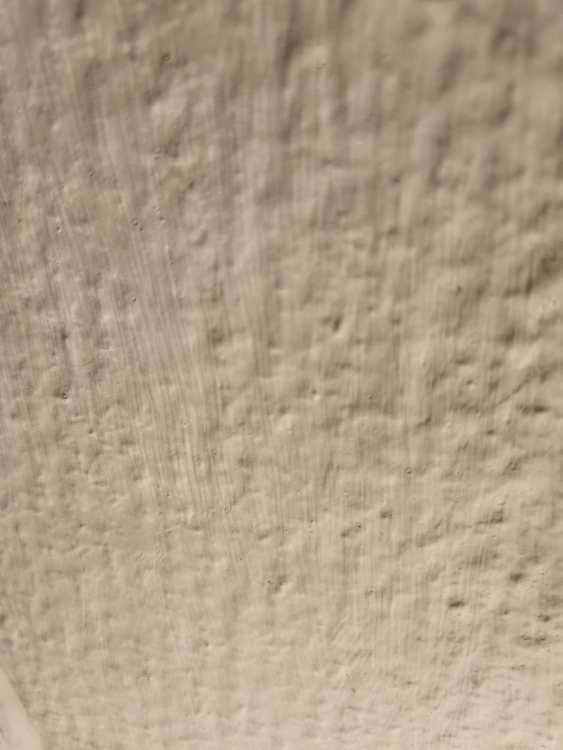
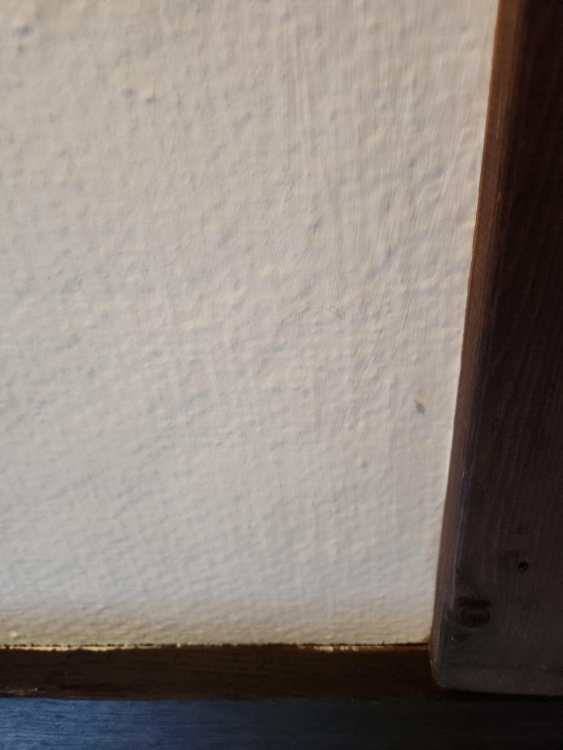
-
Takes me back to my childhood when curtains were the norm and a standalone shower was a luxury. The secret is to push the curtain out and glue it to the sides of the tray with water before you start and hope you haven't picked up too much static on route. I've been using it for the last couple of days to make sure it actually works and have found a nice side benefit in that the water pressure is much better. I tried this on with the fam but they are still insisting on going to the in-laws. Technically the top of the drain hole and the bottom of the waste pipe are the same height so whilst the flex remains full all the time it is still draining. It just needs to survive for a couple of months without anyone stepping on the flex. This is a big improvement over version 1 with a camping shower base which left 2" of water in the bottom. I just wished I'd checked what it was made of before going to collect. Stupidly assumed some kind of fibre glass but not it was about 120kg of porcelain.
-
Repairing or replacing old floorboards to remove bounce
paro replied to paro's topic in General Flooring
I've got 18mm birch ply and some marine the same thickness. This is stronger than structural ply no? I've also got some left over T&G OSB but not sure that is as good as the ply. I've got ring shank nails left over as well but was going to screw down so it can come up again in the future given the electrics running through. -
Repairing or replacing old floorboards to remove bounce
paro replied to paro's topic in General Flooring
Thanks. I do appreciate that it's very old and am trying to do an honest job in restoring things as best as is reasonable. I'll try the ply approach first. I have a some sheets left over from an over order last year, failing that I'll search out some new boards. I don't think this is an issue, with the exception of the one beam they all seem to be doing pretty well. When I bought the property I did pay a bunch of money for a 'proper' inspection just because I knew it was a lot to take on. None of this was flagged. That said the whole report was a bunch of non-committal mealy mouth weasel words that gave me nothing substantive at all. -
Repairing or replacing old floorboards to remove bounce
paro replied to paro's topic in General Flooring
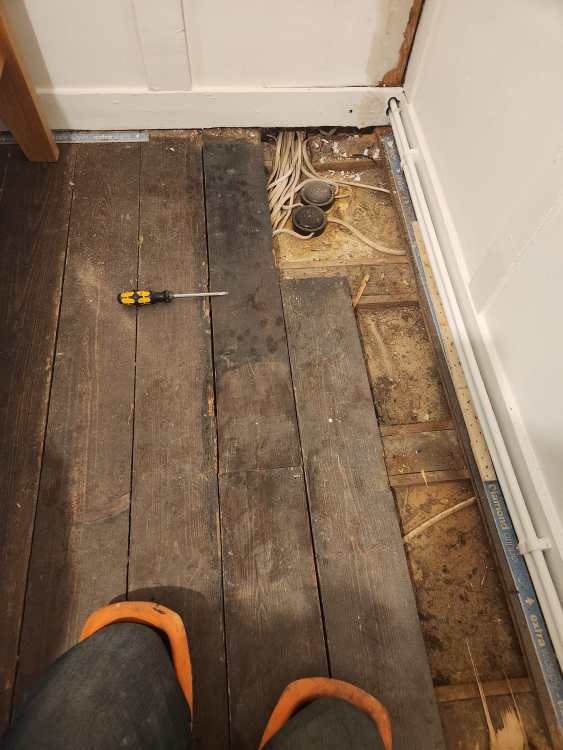
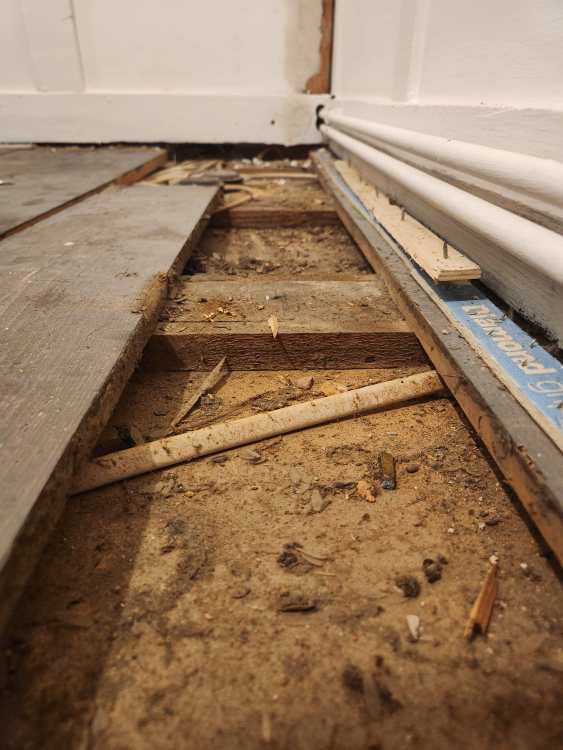
I've been treating everything for woodworm and rot as I've been going round. One of the joists in the far corner is not in great shape and I don't think I'd want to jump up and down on it. Replacing the joists is a non starter though I think. If I try to touch them I will need to get BC involved and pretty sure I won't be able to replace like for like which means I'm either raising the floor or lowering the ceiling. Neither of which I want to go near. Worse case I can just go round and refasten the existing boards. I just wanted to see if replacing with ply would make a better job in terms of the flex / movement. How about some extra dense heavy duty underlay as a half way. There must be something out there with a lot of mass designed to help absorb and spread the impact. -- Mass loaded vinly was what I am thinking of. -
Repairing or replacing old floorboards to remove bounce
paro replied to paro's topic in General Flooring
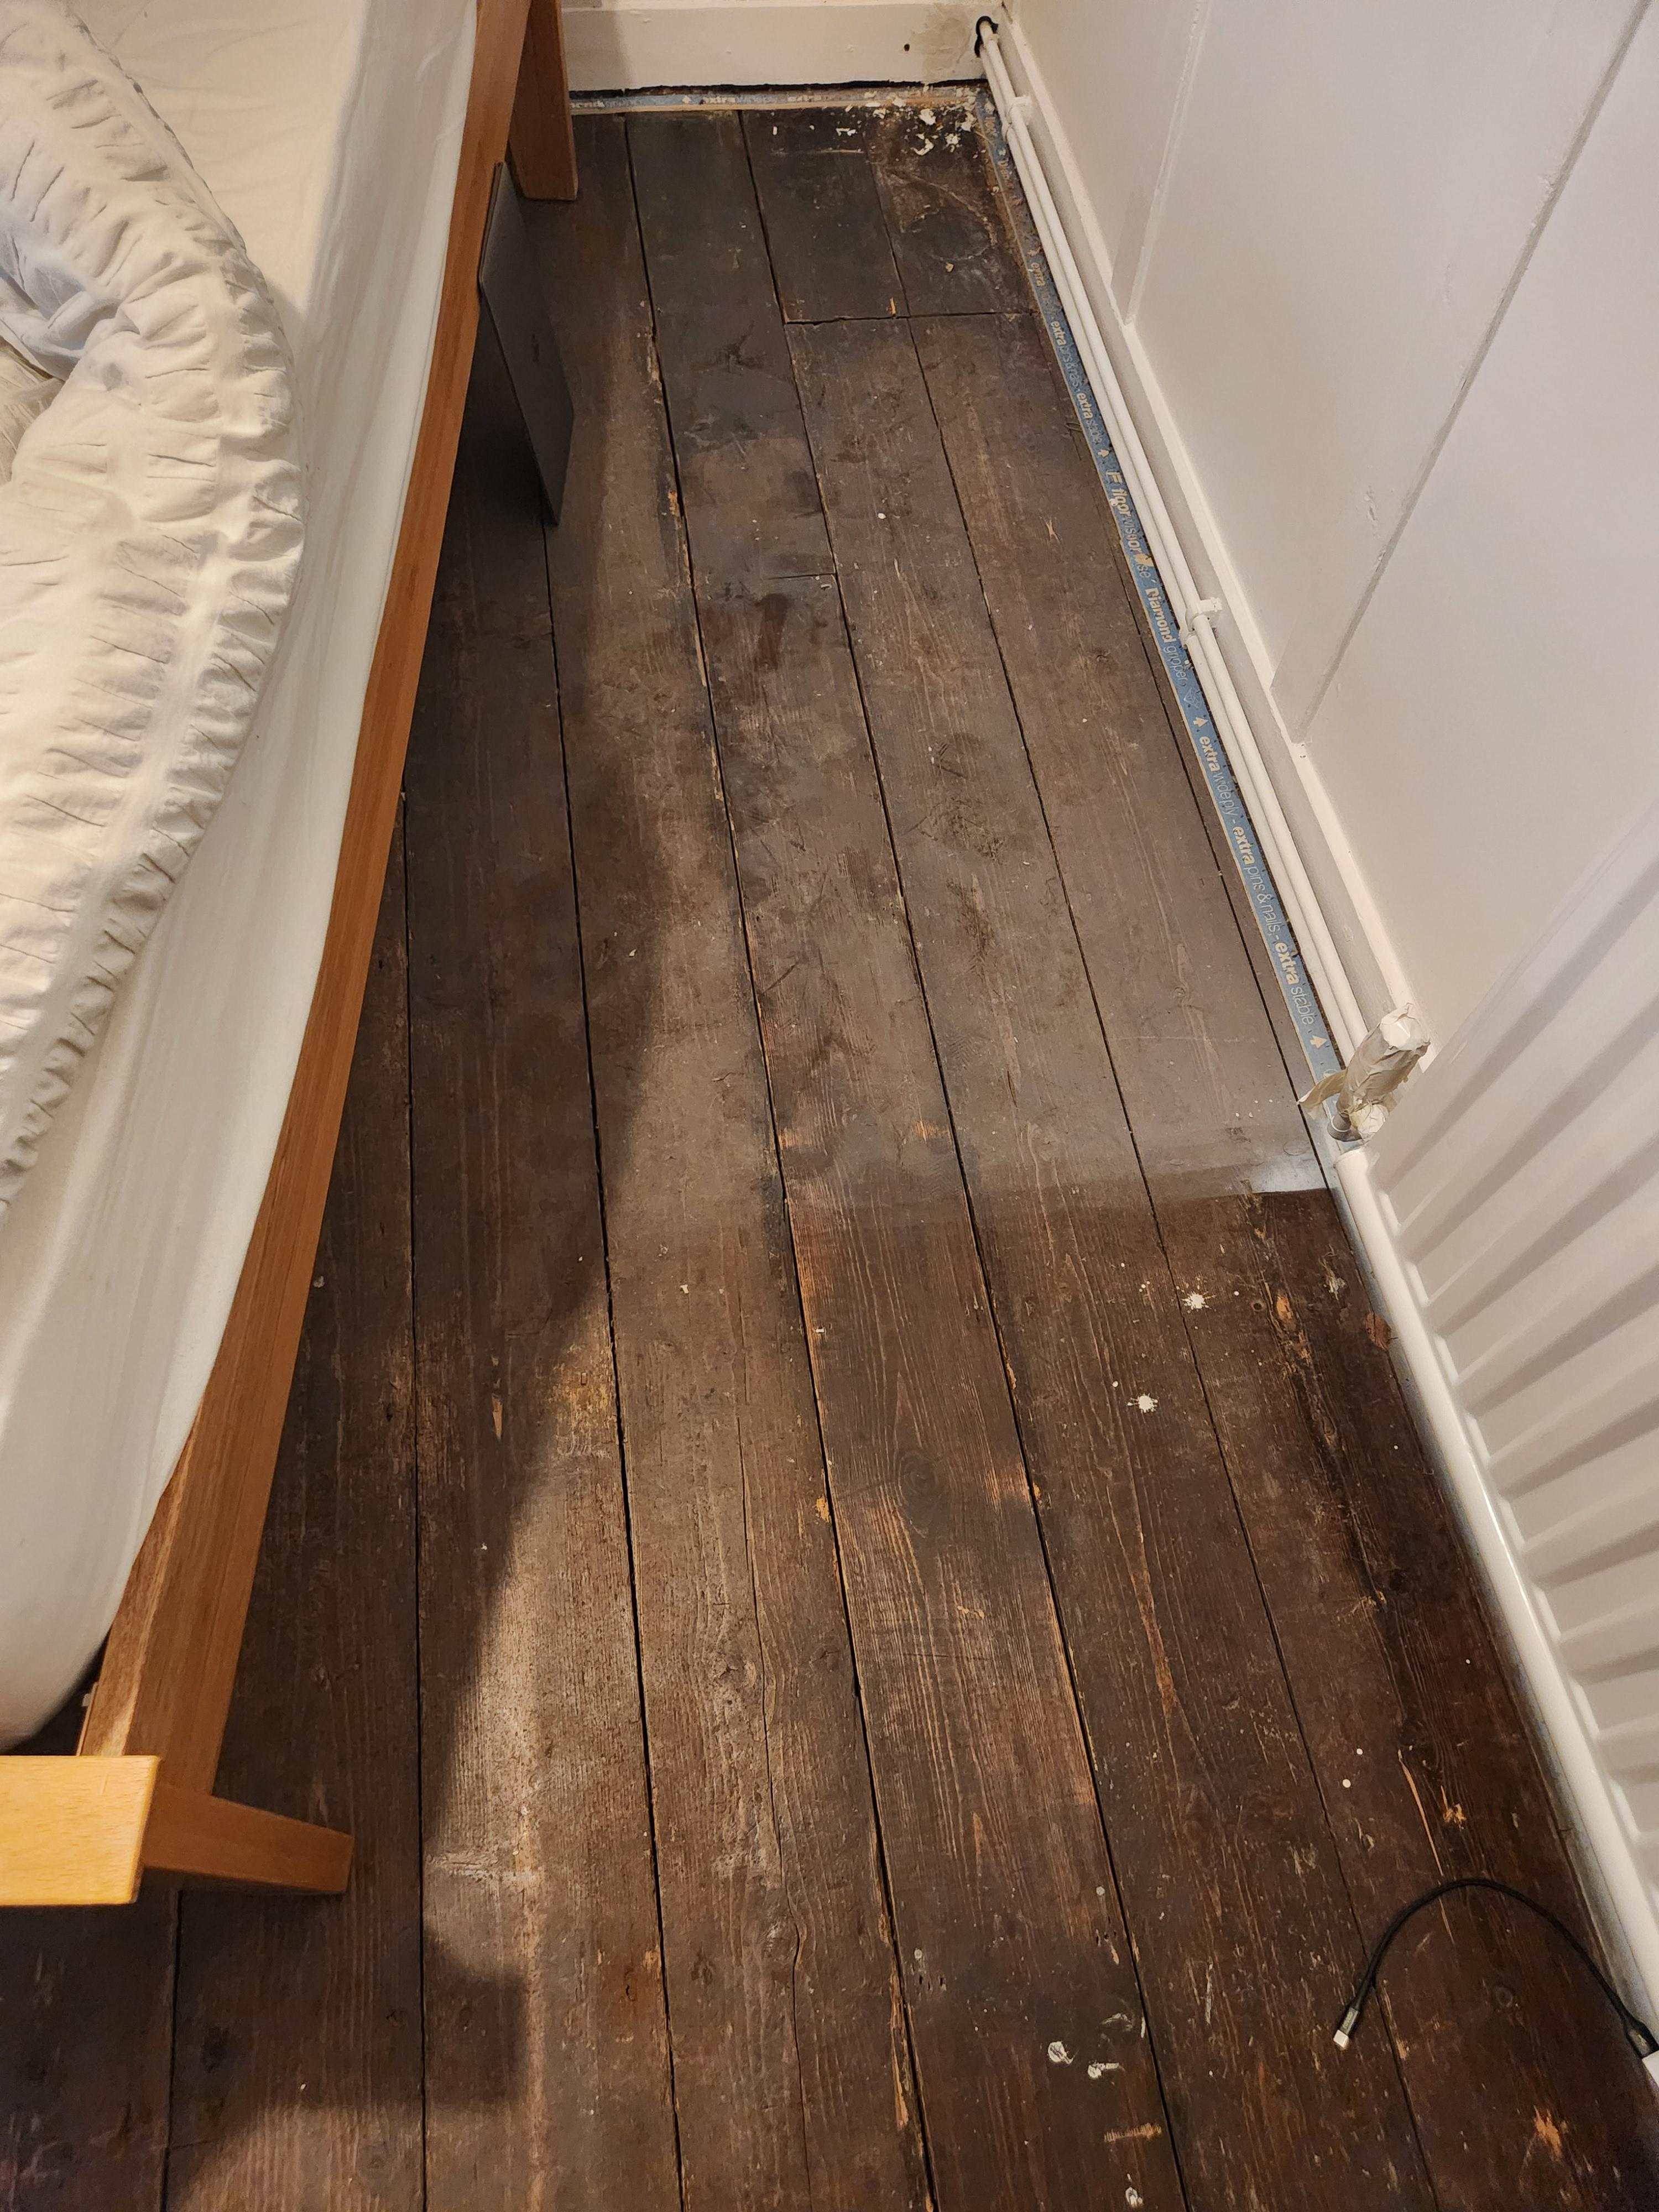
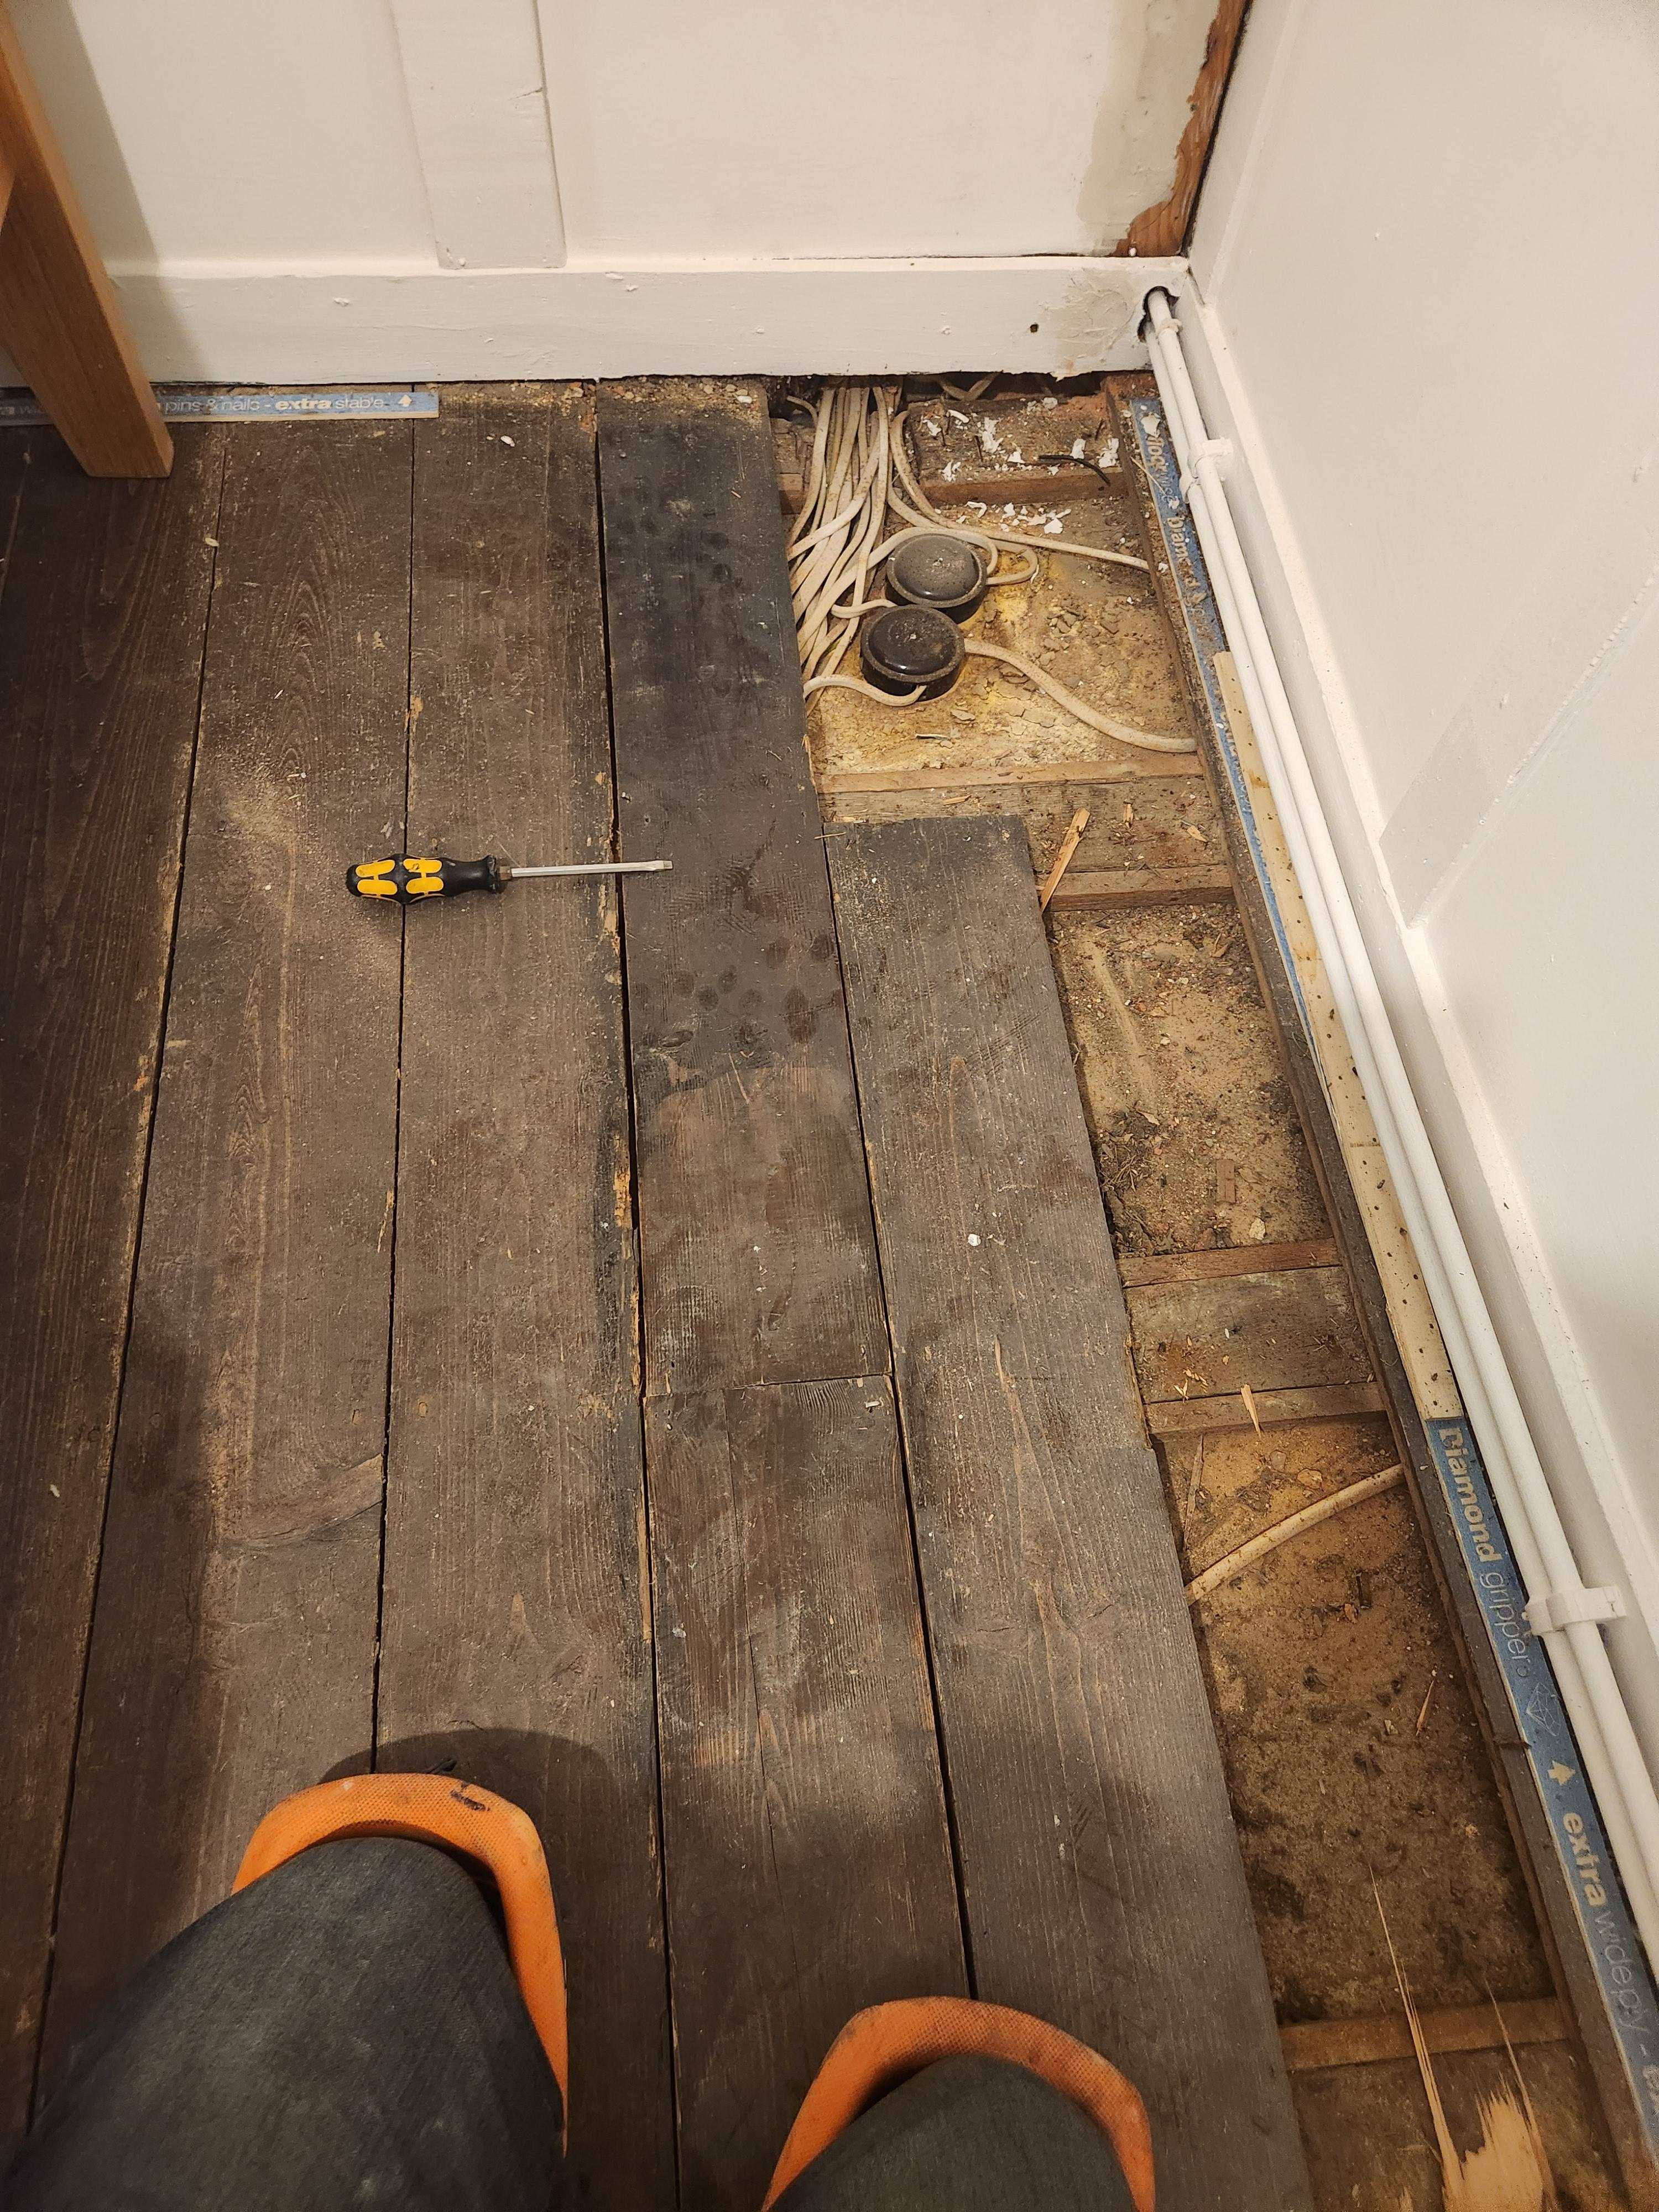
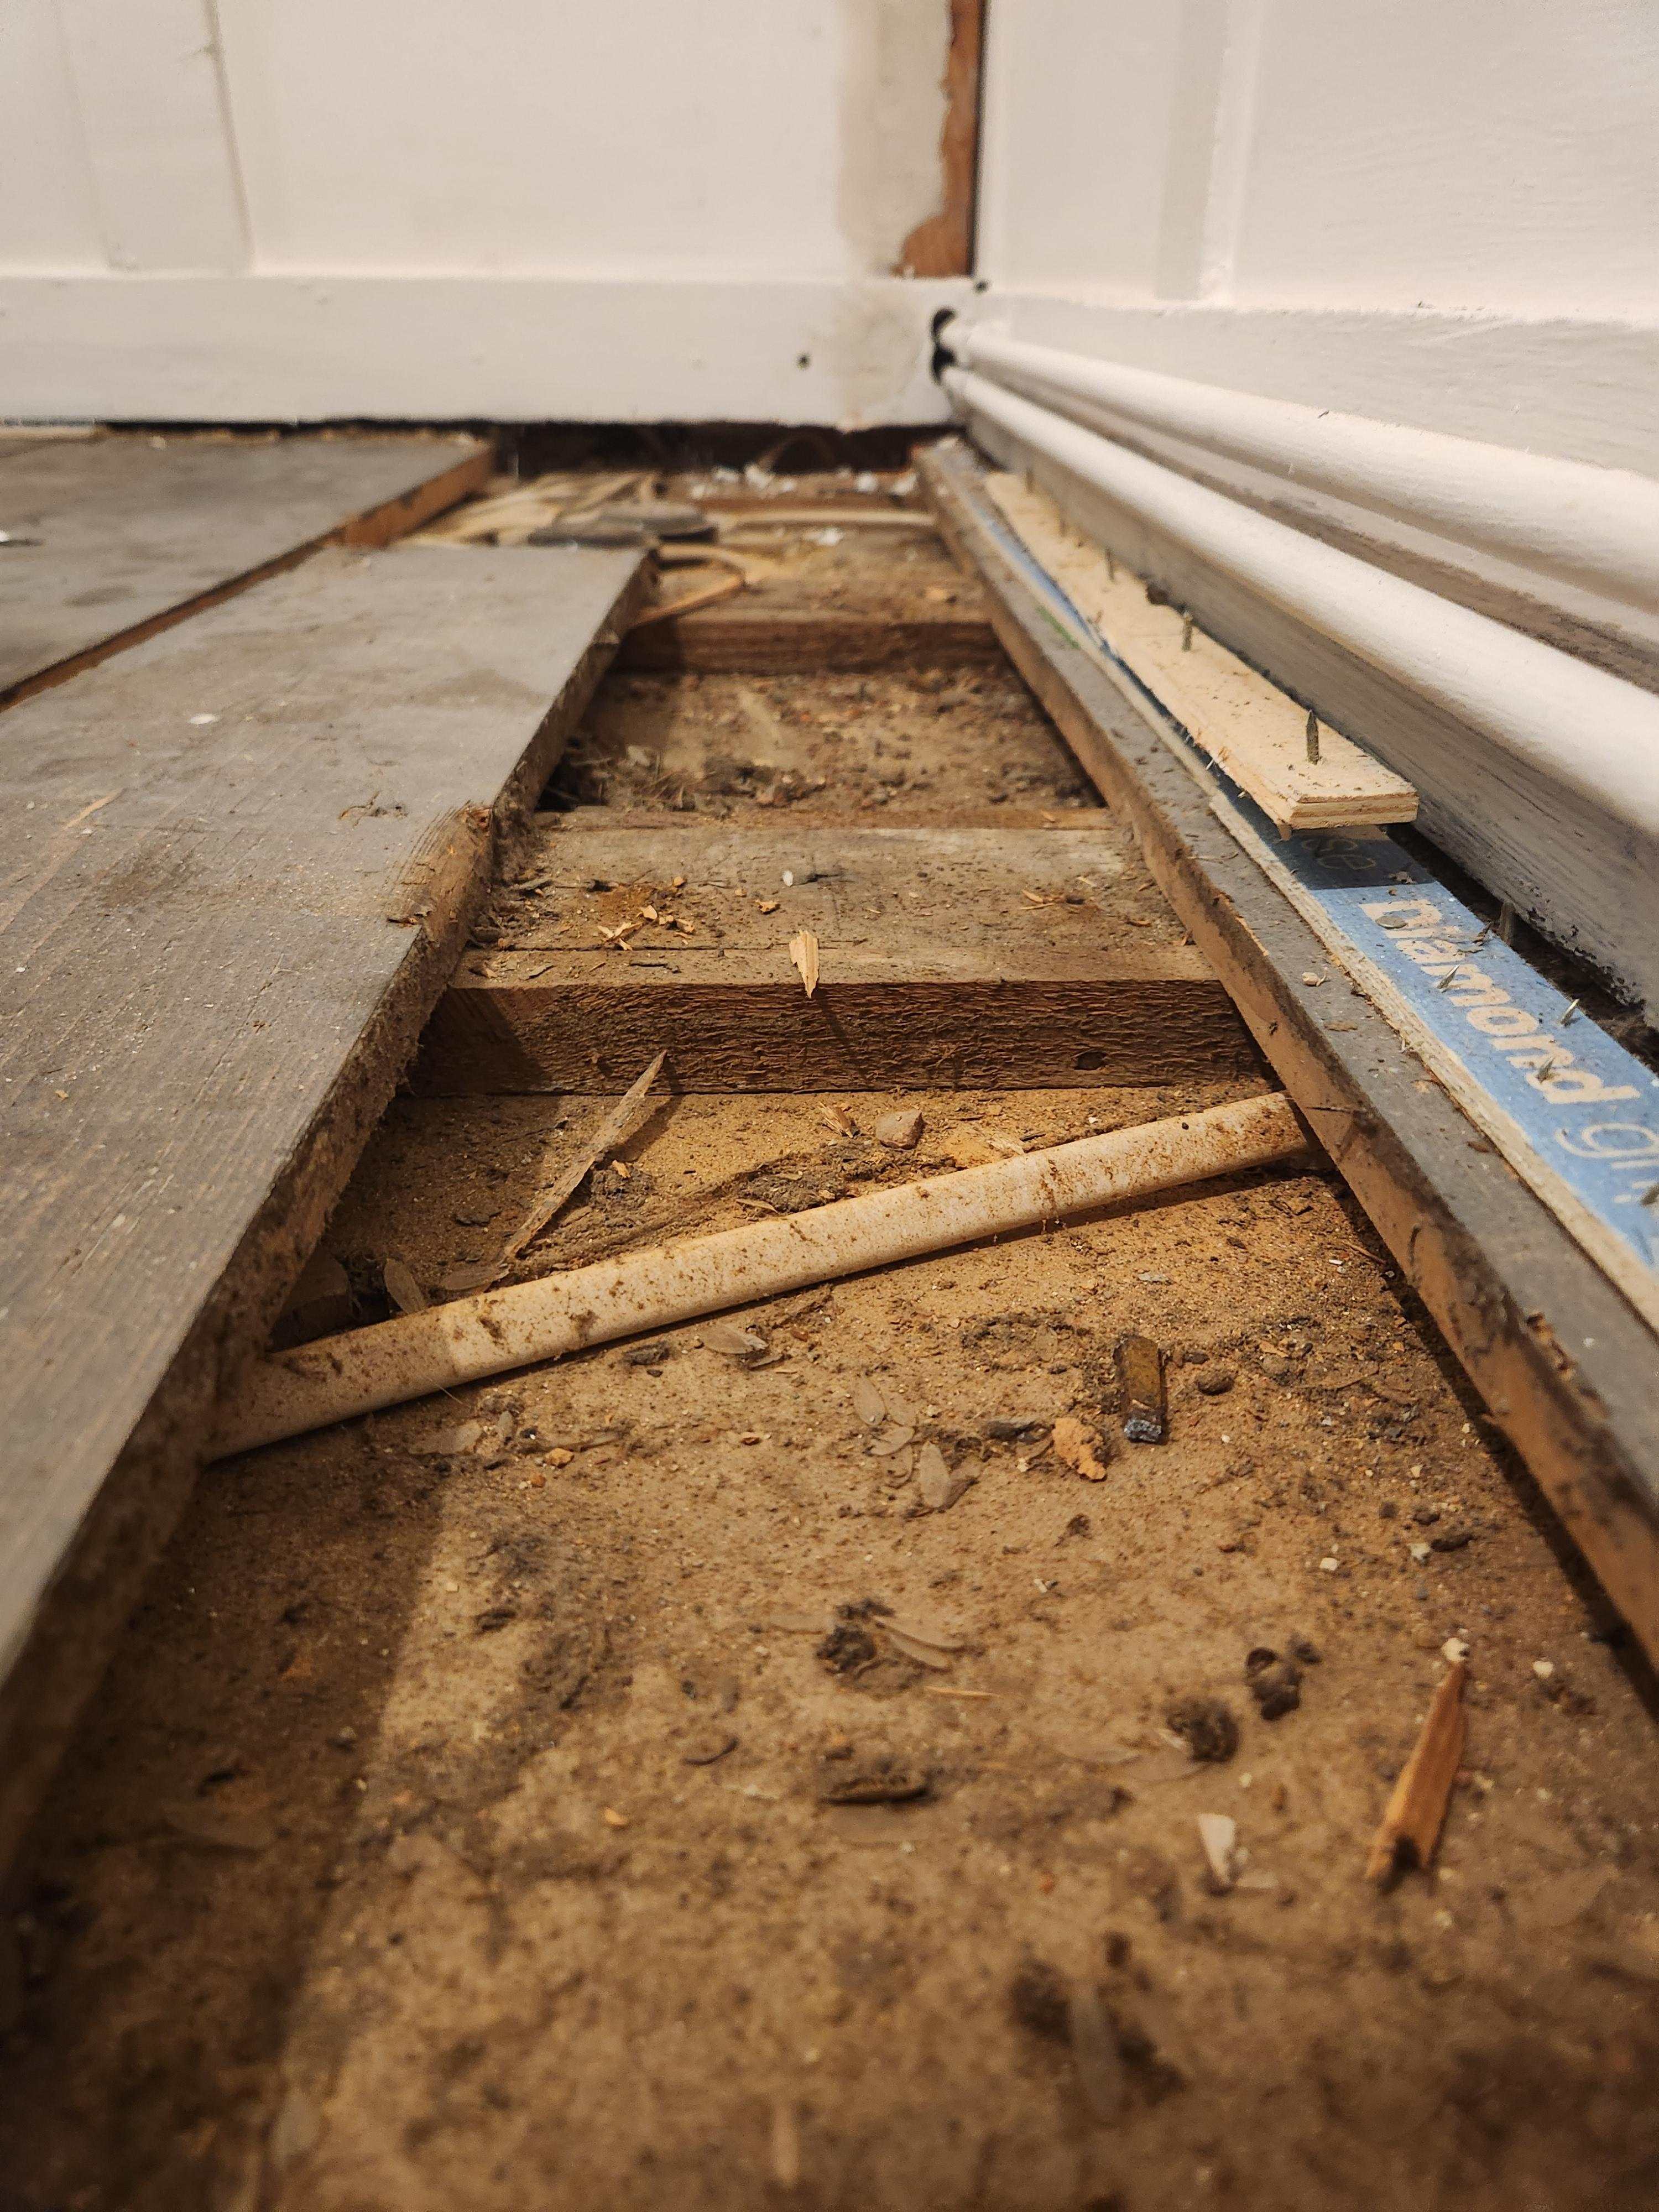
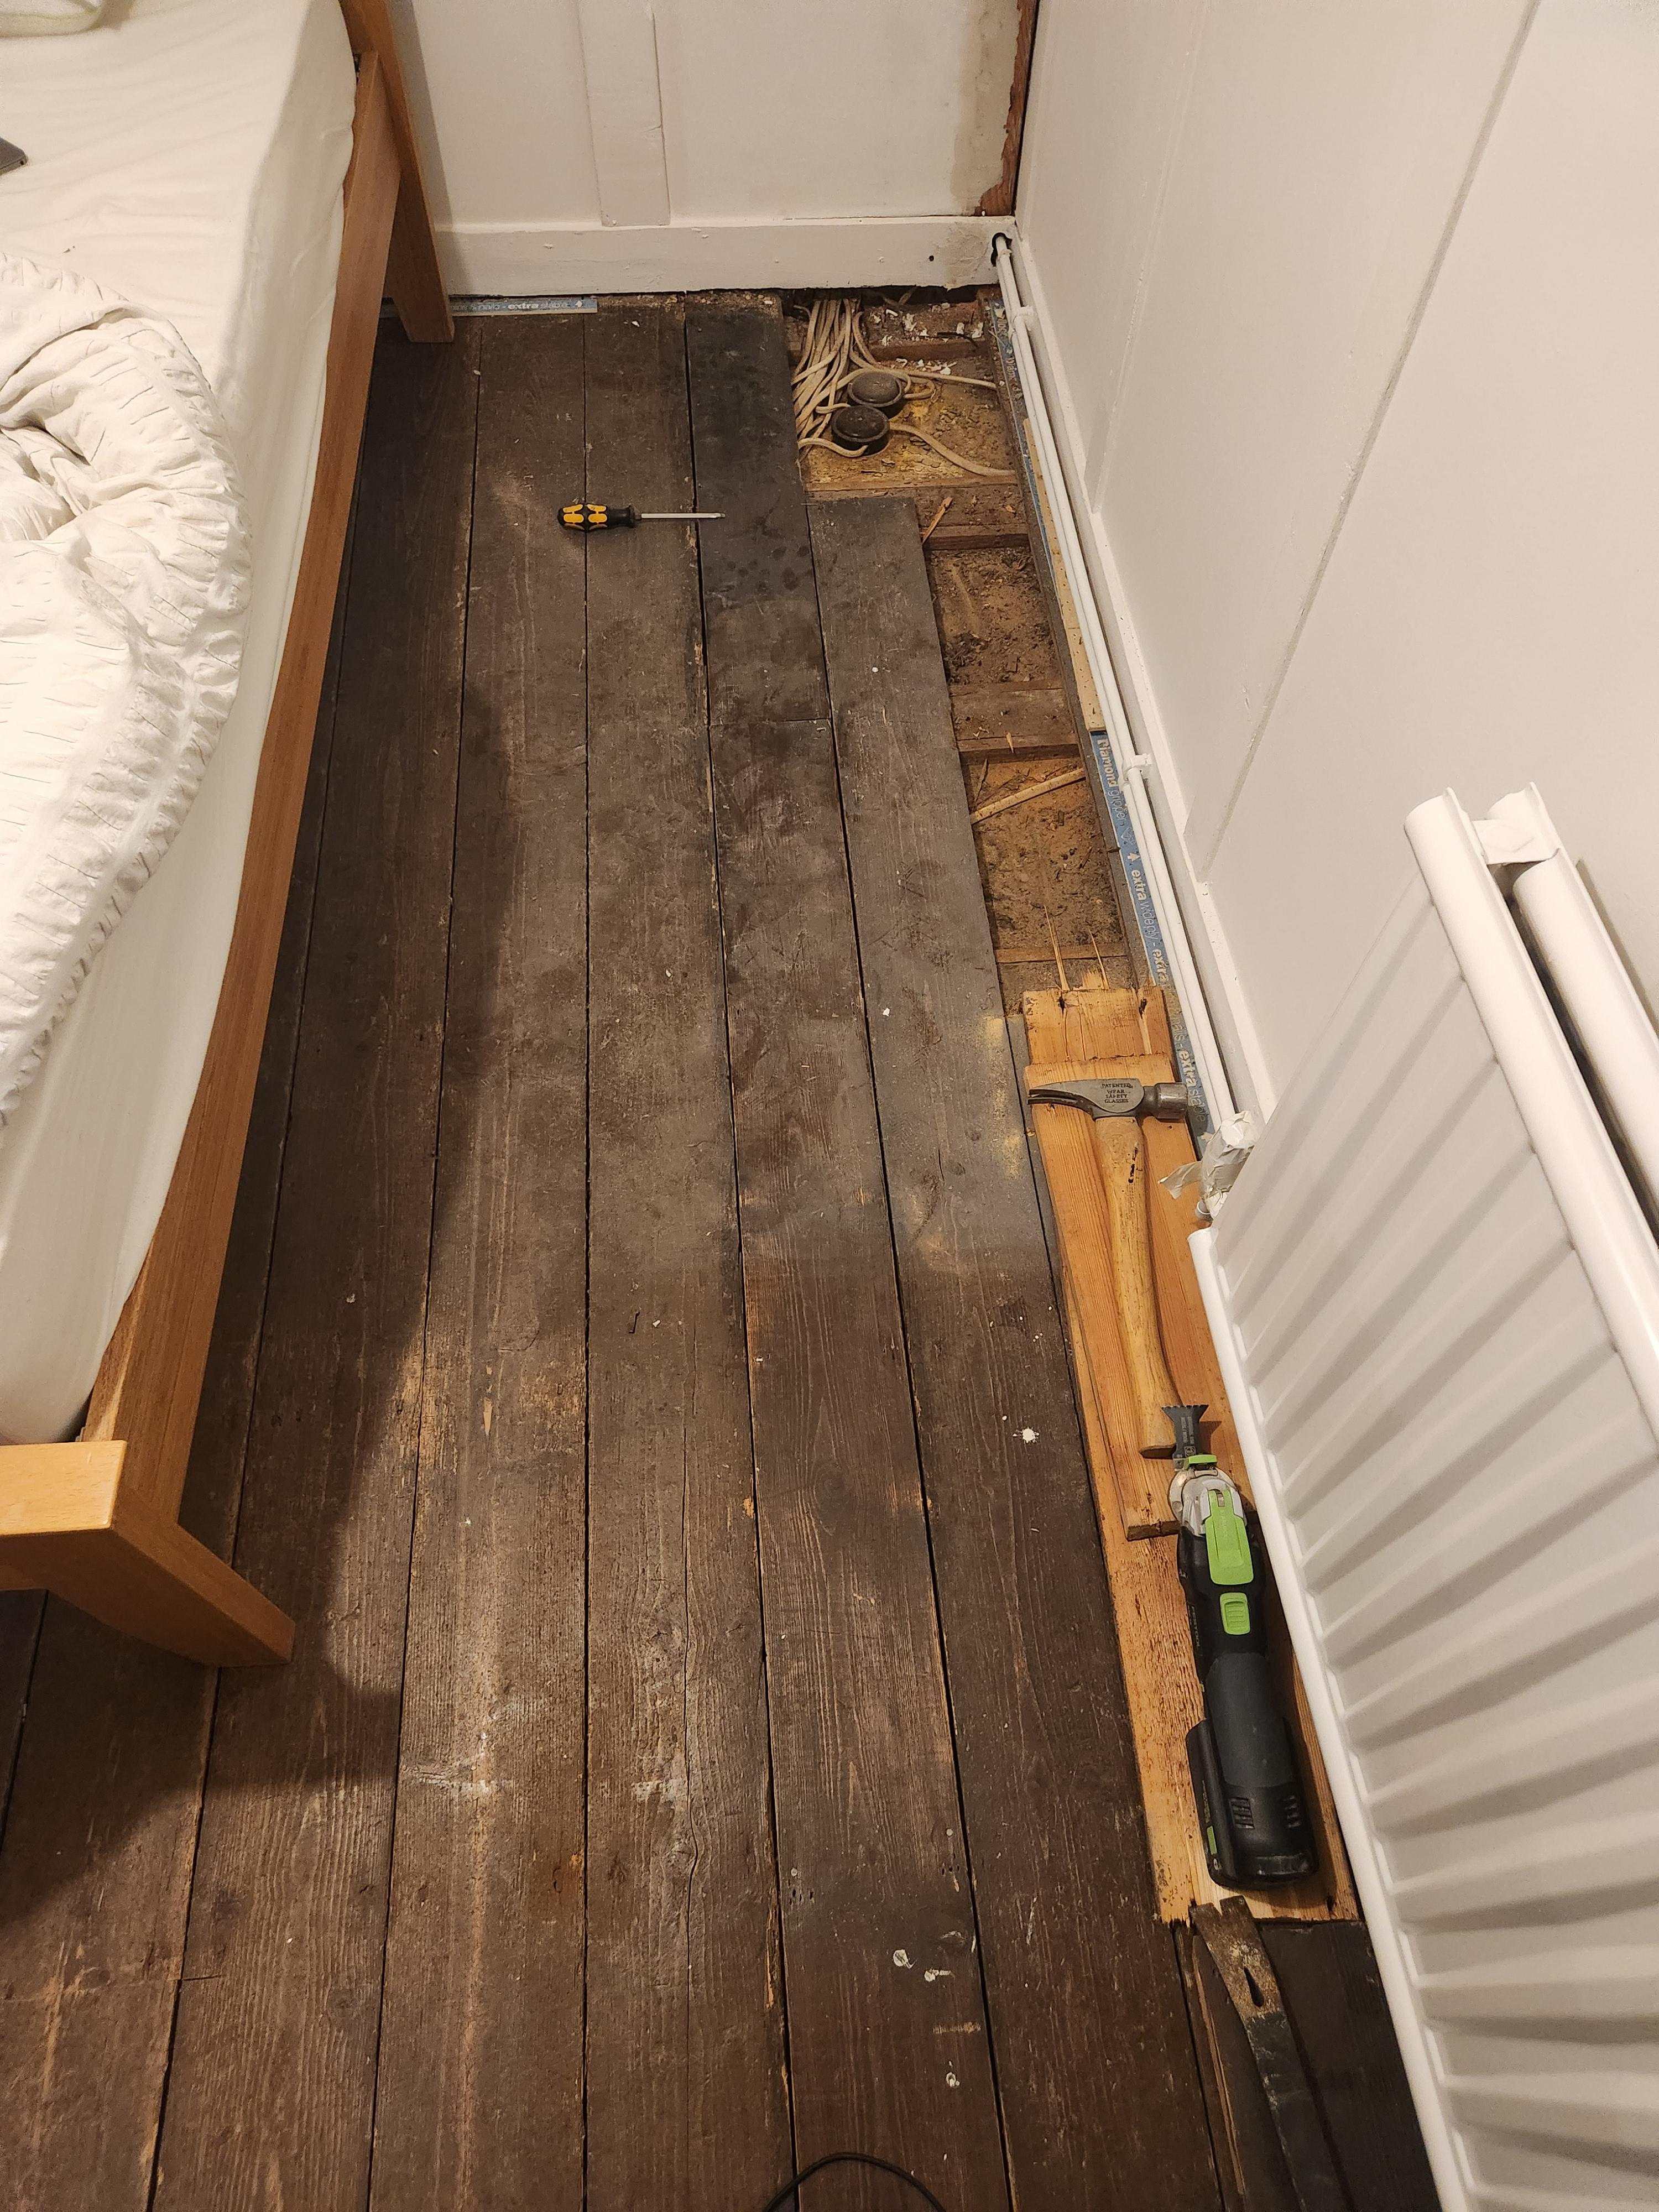
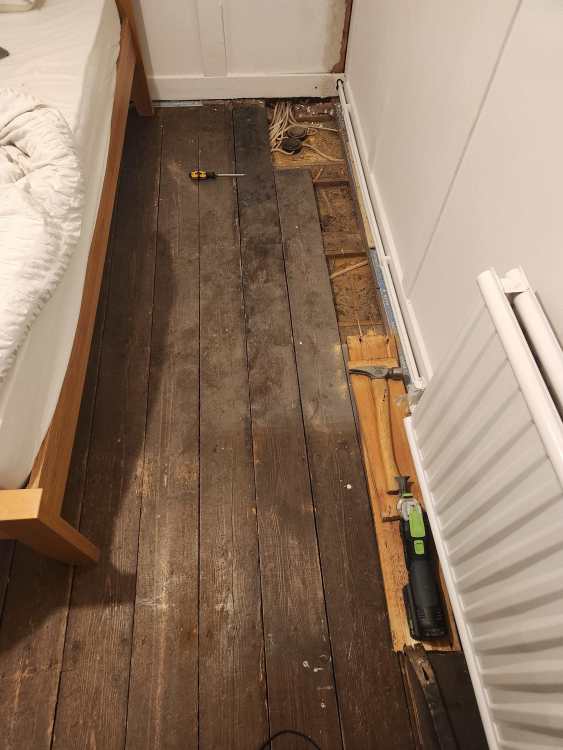
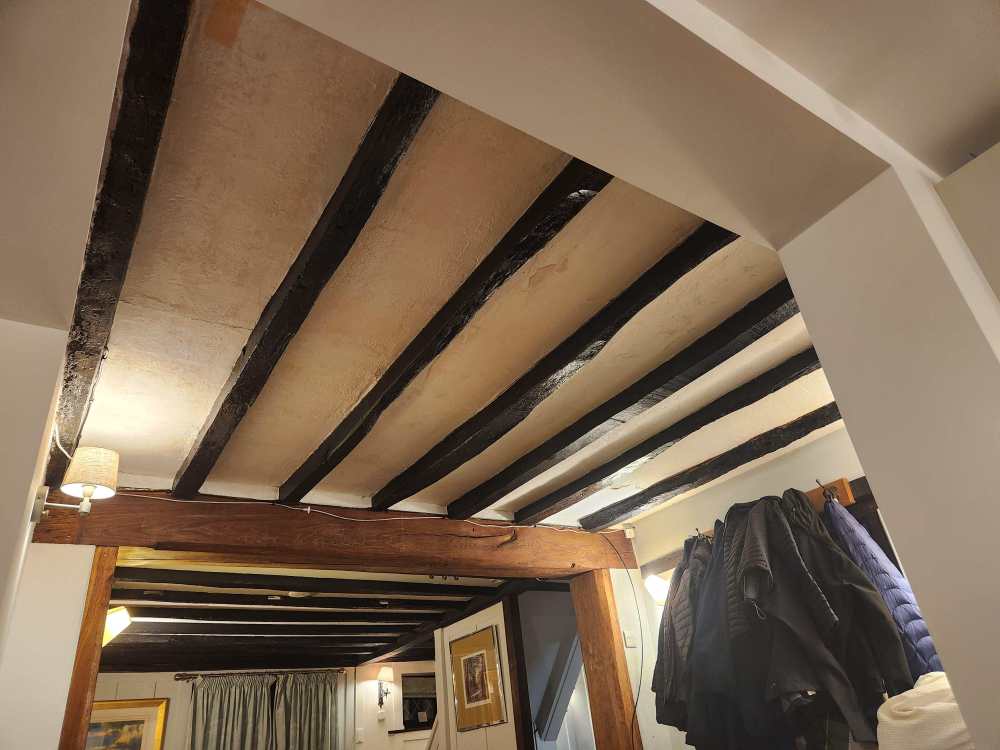
I should have given more info. So supporting joists (oak) are circa 18" apart. Looks like unlike the other room that I decorated a couple of years ago this floor has a differnt construction. Room is approx 3m x 2.5m. The floorboards are laying directly onto the beams shown. The floor has always had a lot of flex/movement. Not in a concenred its not safe way, just more comfort and noise. I think it's a combination of the deflection in the boards and them moving around because they are not as secured to the joists as they once would have been. There are a few damaged ones as well which I am guessing is due to them being lifted over the years for plumbing and eletrcial works which are running through the room. There is no noticeable extra deflection in the middle. I suspect its always been a bit bouncy since that part of the building is going to be a couple of hundred years old at least.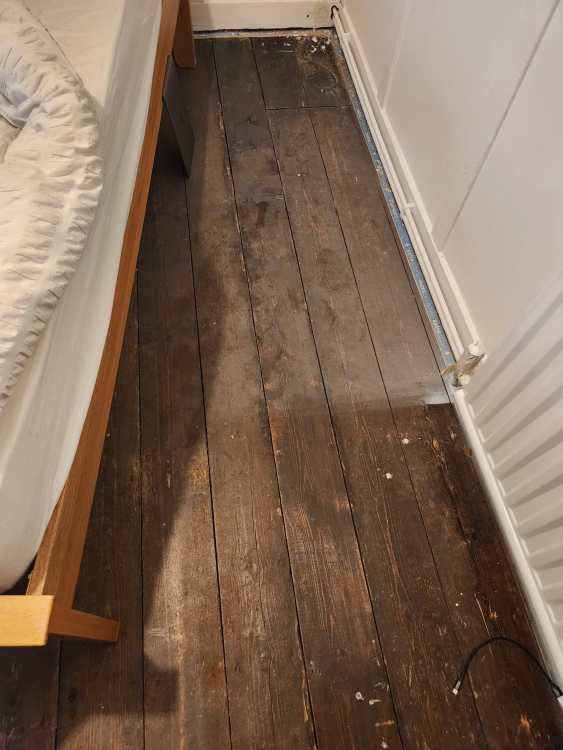
-
Hi All - I am starting to fix up the inside of the old cottage now, nothing too heavy really just sanding painting and carpets really. That said the floors upstairs are in poor shape and was looking at ways to take out some of the flex in them. The first floor sits on top of a mix of flooring (all timber) with the weight bearing on some very old oak beams (probably original given the state of them). The top layer of this hodgepodge of timbers are some newer looking regular looking floor boards. The issue I have is these either have to be replaced or repaired and I'm not sure repair is an option. My current thinking is to rip them out and replace with some 18 or 25mm ply in the hopes that load would be spread out and reduce the flex but having never done this I am not sure what the best way to go is. Thanks, Paul