JamieG1985
-
Posts
7 -
Joined
-
Last visited
JamieG1985's Achievements
New Member (2/5)
0
Reputation
-
Good afternoon all, At the weekend I fitted a bar mixer shower and before securing the compression fittings to the wall, I sealed the gap between the ceramic tiles and the copper pipes coming out for the walls with Dow 785+ acetone silicone sealant. I've recently realised that this type of silicone releases acid when curing which can corrode copper. Annoyingly, I had some CT1 left over from when I sealed around the shower tray and probably should have used this or 785N. Just wondering if I should take it all apart, remove the silicone and use a natural curing silicone instead or am I worrying about nothing and that it won't actually have that much of an effect? I've searched online and not really come across anything relating to silicone causing copper pipe failures so I'm hoping it will be ok.
-
Issues bedding shower tray - advice needed
JamieG1985 replied to JamieG1985's topic in General Plumbing
Thanks for the reply Nick. I was going to use Ultra S1 flexi standard set to give myself a bit of time to set the tray or should I go for S2 rapid set as suggested by my local tile centre? Not sure if either type is more suited to my situation. The house is a timber frame if that would make much difference with movement? So with the advice Marvin has already given... 1. Sbr the plywood again with 3 parts water to 1 part sbr and give it an hour or 2 to dry out. 2. Apply a bed of adhesive to the plywood using a 10mm notched trowel in one direction and apply another bed of adhesive to the back of the tray with a 10mm trowel in the other direction. I presume a 20mm bed would be enough to account for the 5mm run out I have side to side by the time it's pressed down and levelled out? As Marvin suggested after the adhesive is spread on the plywood, I could use a straight edge batten with a 5mm packer screwed on one side and 10mm packer on the other and scrape across the adhesive front to back to level it out. I have already used this method with the mortar mix and it worked well but not sure if it's necessary if applying adhesive to both plywood and underside of the tray? Any ideas how much I can expect the tray to drop from the original 20mm when squashed down? Obviously there's going to be 5mm difference from 1 side to the other. As an alternative, would a 12mm notched bed on the plywood and back buttering the tray be sufficient to keep the adhesive height to a minimum taking into account the 5mm run? 3. Set and level tray and leave adhesive to set for a day or 2. I was going to leave the tray set without any weight as it's a fair weight anyway. I didn't want to introduce any stresses by applying additional weight. 4. Check levels after adhesive is dry and providing its OK, then use ct1 to flood and seal the 3 edges of the tray. I will then tank the area prior to tiling. Anything I've missed or any other suggestions? Sorry for being so thorough. I'm a bit of a perfectionist and want to get it right this time so I can get cracking on the rest of it. There's so much contradicting information on the net I've been going around in circles 🤣. -
Issues bedding shower tray - advice needed
JamieG1985 replied to JamieG1985's topic in General Plumbing
Thanks for the detailed reply. What adhesive do you use out of interest? -
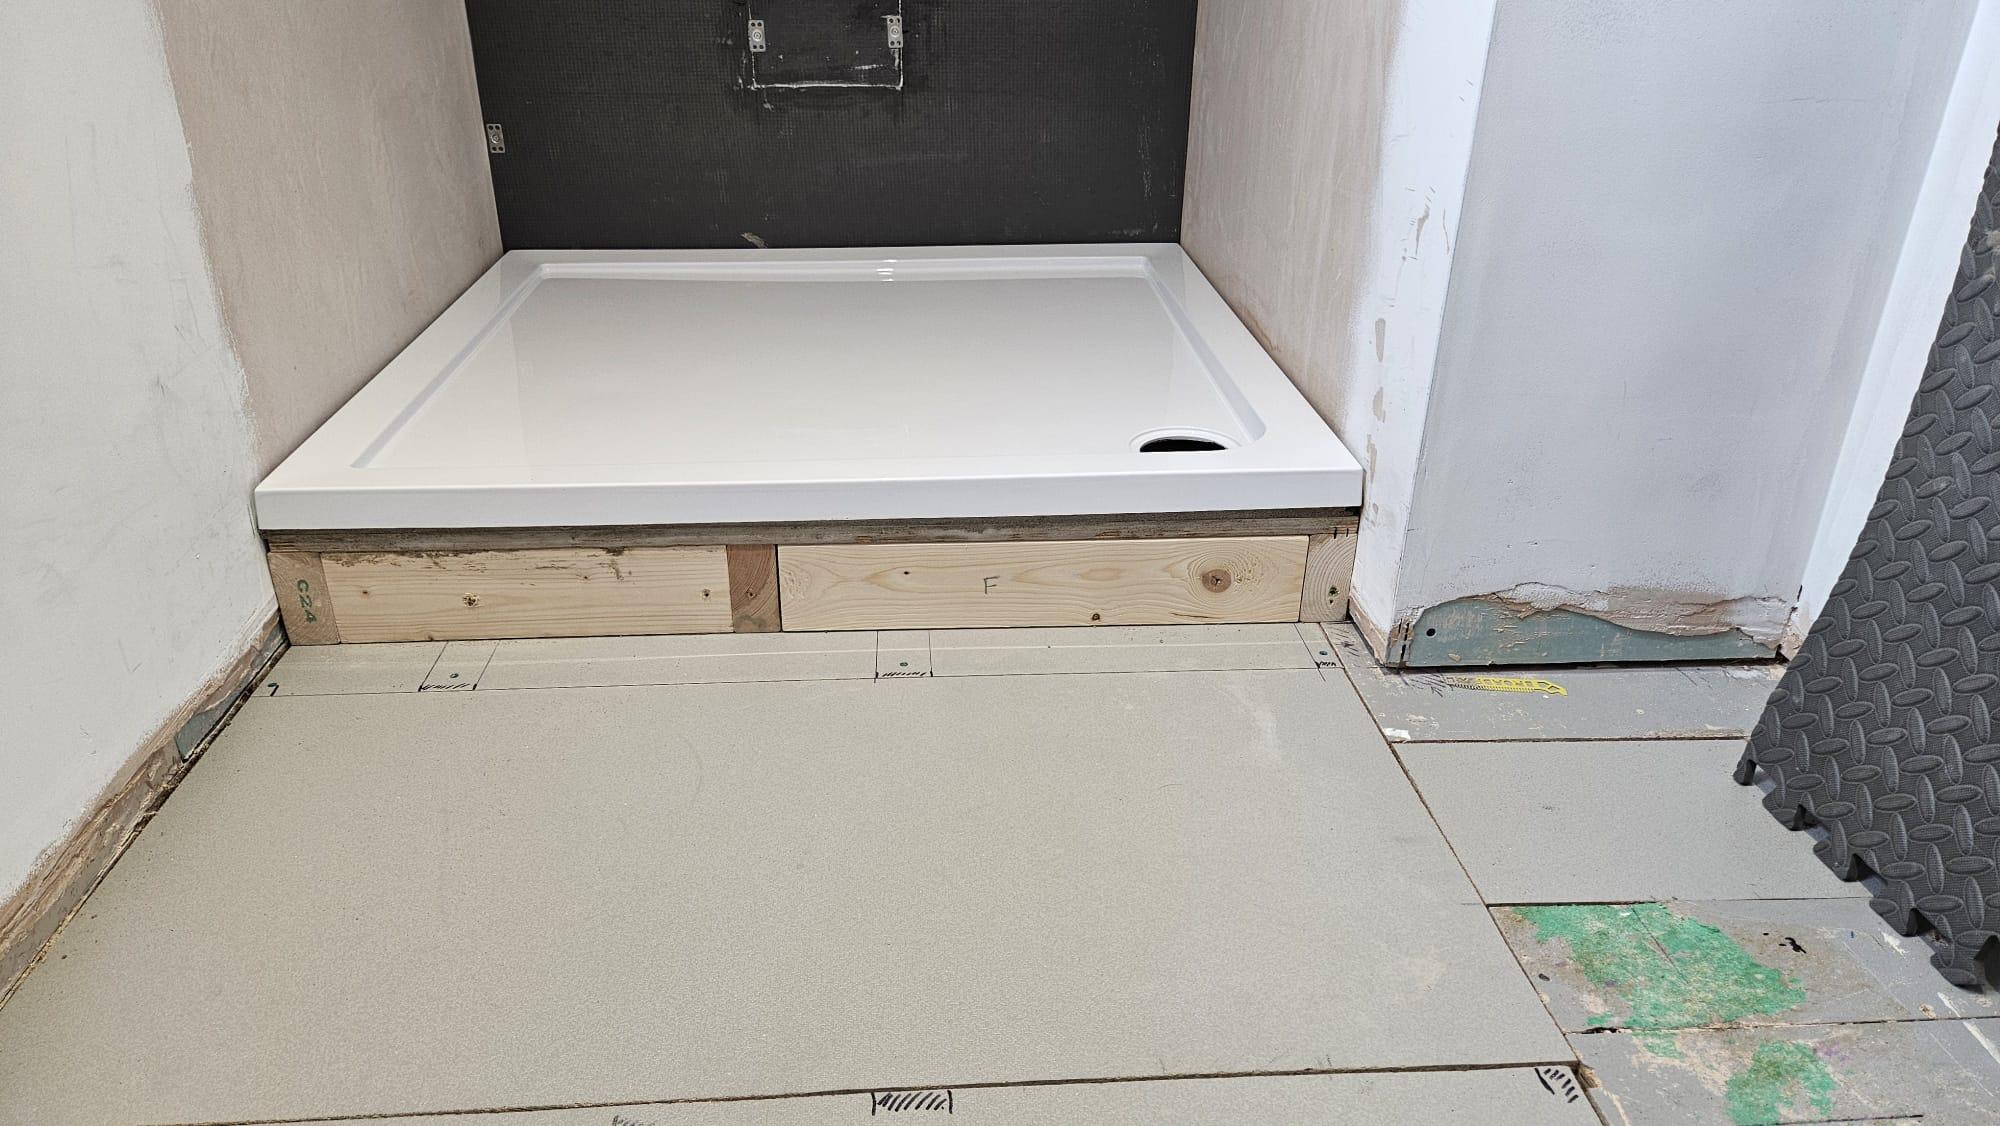
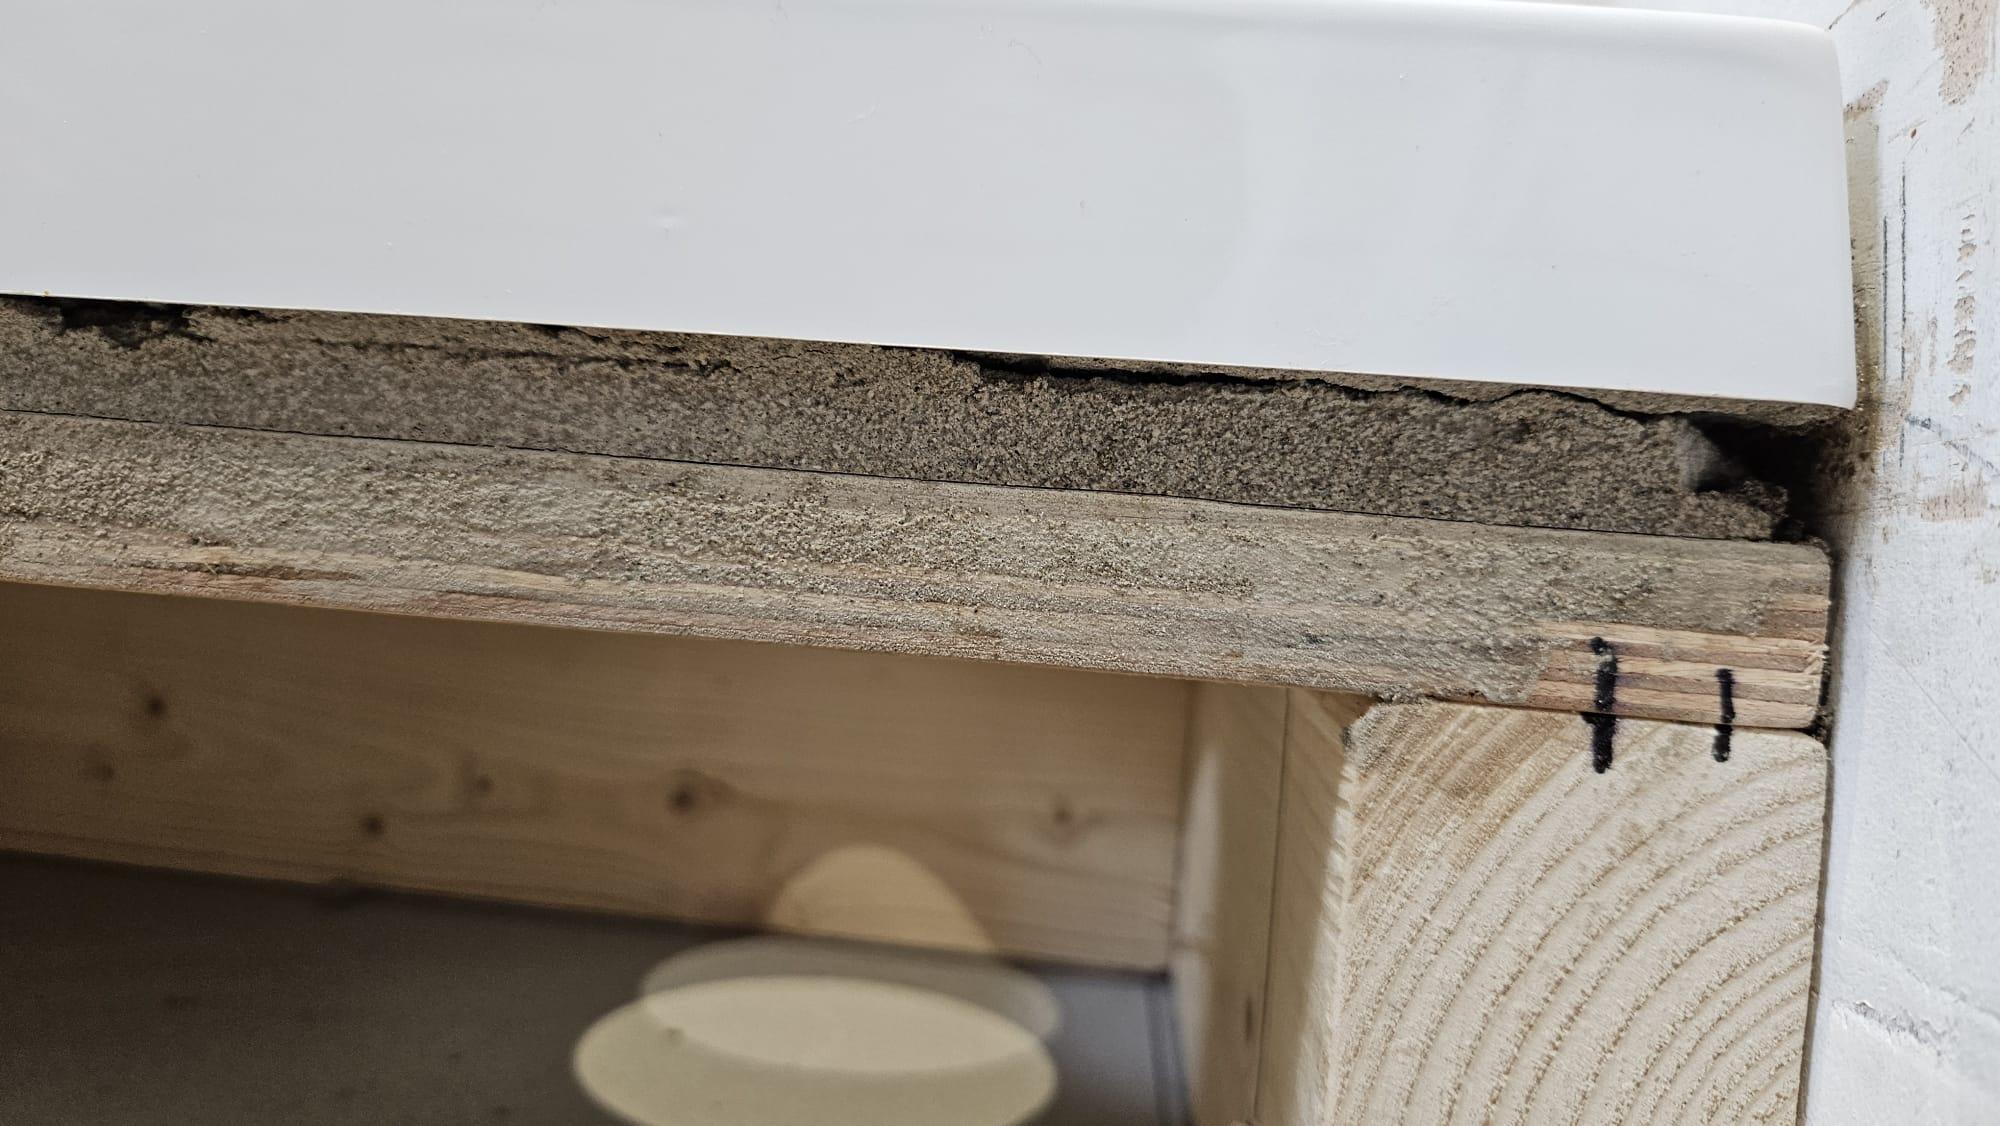
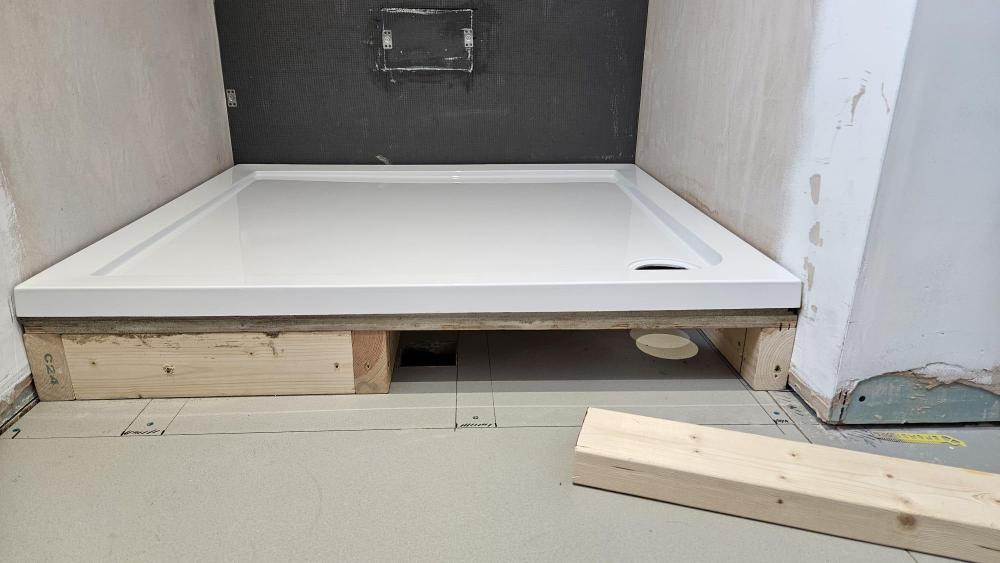
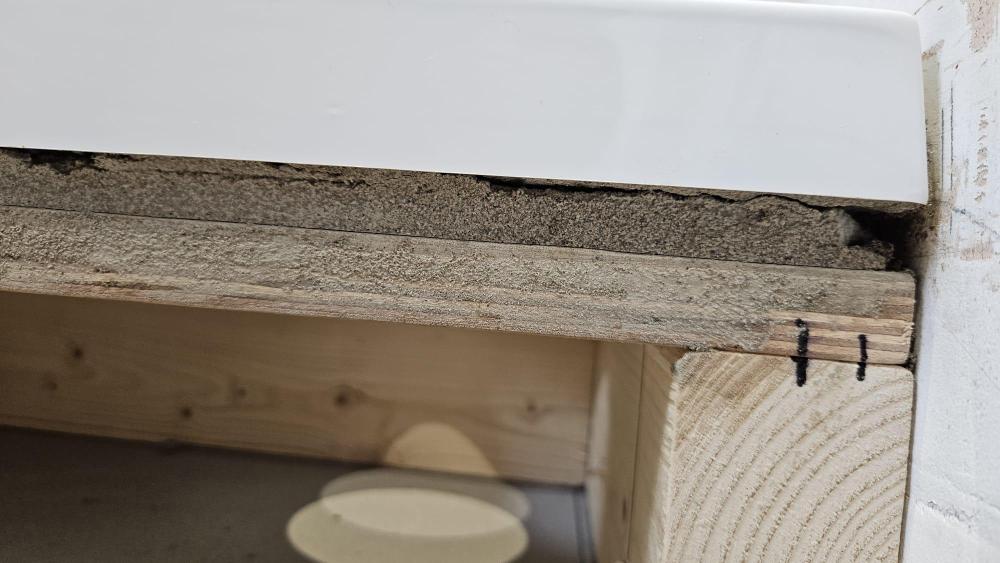
Afternoon all, I'm currently in the middle of refurbishing our ensuite and having some issues bedding a stone resin shower tray on a 5:1 sand cement mix with a bit of plasticiser which is specified in the tray fitting instructions. It is being set on 18mm wbp plywood screwed to a fixed frame with plenty of support which is solid with no movement and is screwed into adjacent stud walls. There is access in the frame to fit the trap but a length of cls will be fixed in the void for full support. I primed the ply with 1:3 sbr/water mix before applying mortar mix. I'm not sure what I am doing wrong but the mortar seems to crack after a few days drying out and leaves a slight movement in the shower tray. This is now my second attempt and the same thing has happened again but not as bad this time, although there is a very slight movement on the corner where the waste is if i push it down. I've not yet sealed around the tray and I'm now convincing myself to rip it out again and just use a flexible tile adhesive which the manufacturer has agreed in an email that I can use as an alternative without voiding warranty. I've enquired about adhesive today and the guy in the shop recommended to use s2 flexible adhesive as opposed to s1 due to it having fibres and can flex more so the adhesive will never crack. I have since read online that s2 does not provide as much support as s1 so I'm just wondering if there is a prefered type to use in my situation. They quoted £30 for a bag of ultra tile s2 which I thought was steep but is available cheaper online. I've read a bit on the forum and I'd just like to check my methods before taking the plunge with tile adhesive... 1. Sbr the tray 1 part sbr 3 part water as per priming instructions on bottle (everbuild sbr bond). Not sure if I need to do the same to the tray, it's a hudson reed pearlstone tray and has a rough finish - photo attached. Also not sure if I should leave sbr to fully dry or apply adhesive when it is still wet. 2. The base is level front to back but there is a run of 5mm across the 1m wide tray. I could have packed frame but I thought it would be better to fix the frame solid against the floor and level out with the original mortar mix instead. With this in mind I was thinking to use a 12mm notch trowel to lay a 12mm bed of adhesive on the ply and also back butter the tray. Would this be a sufficient bed thickness to allow for the 5mm run when levelling out? 3. Fit and level tray. After adhesive has dried out, seal around edges and fit trap and remainder of pipework. Any advice or answers to my queries above are appreciated.


-
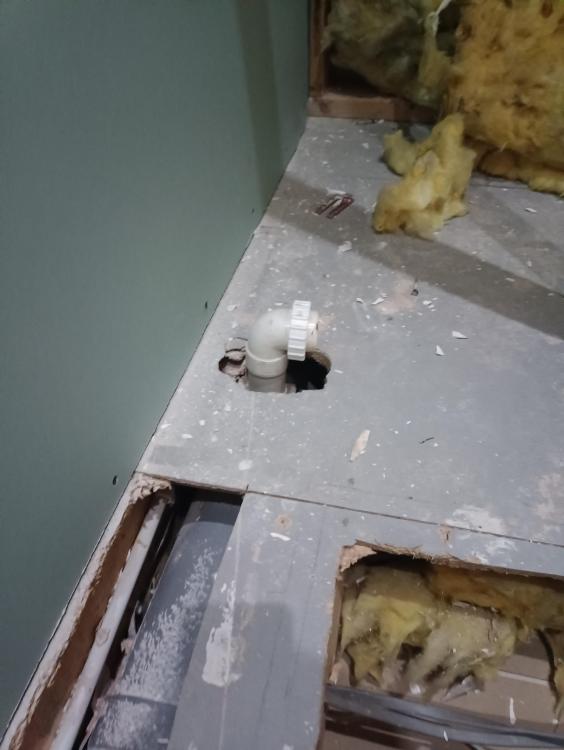
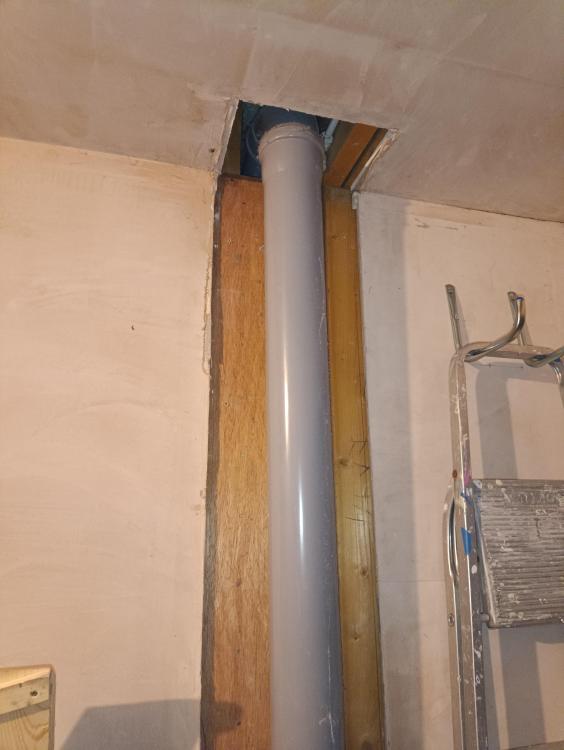
Soil and waste pipe queries for ensuite
JamieG1985 replied to JamieG1985's topic in General Plumbing
-
Soil and waste pipe queries for ensuite
JamieG1985 replied to JamieG1985's topic in General Plumbing


-
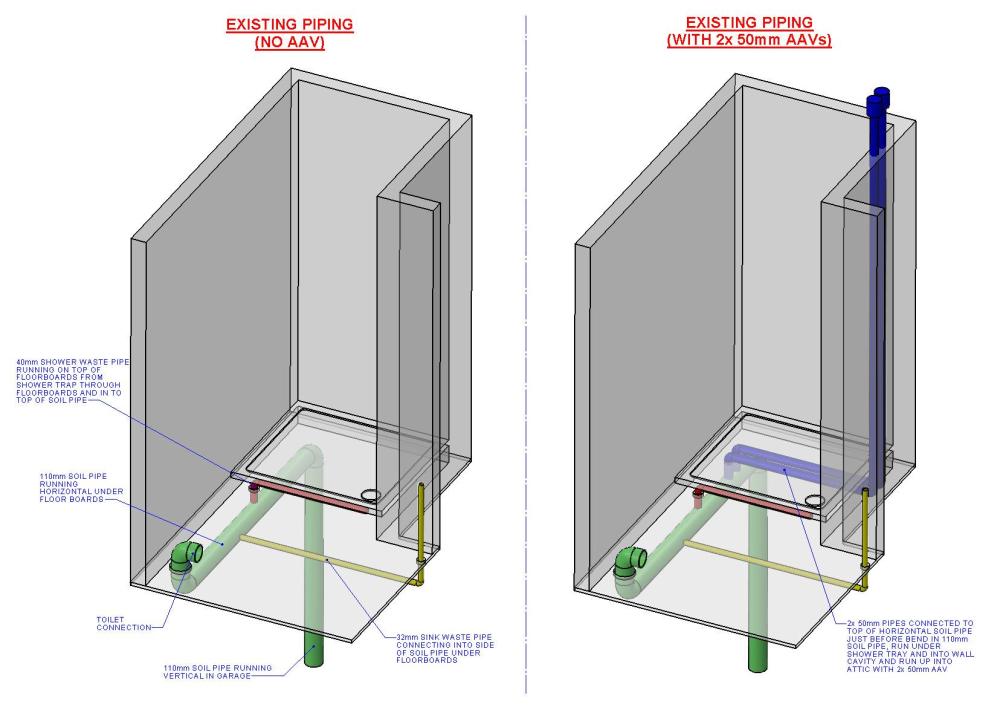
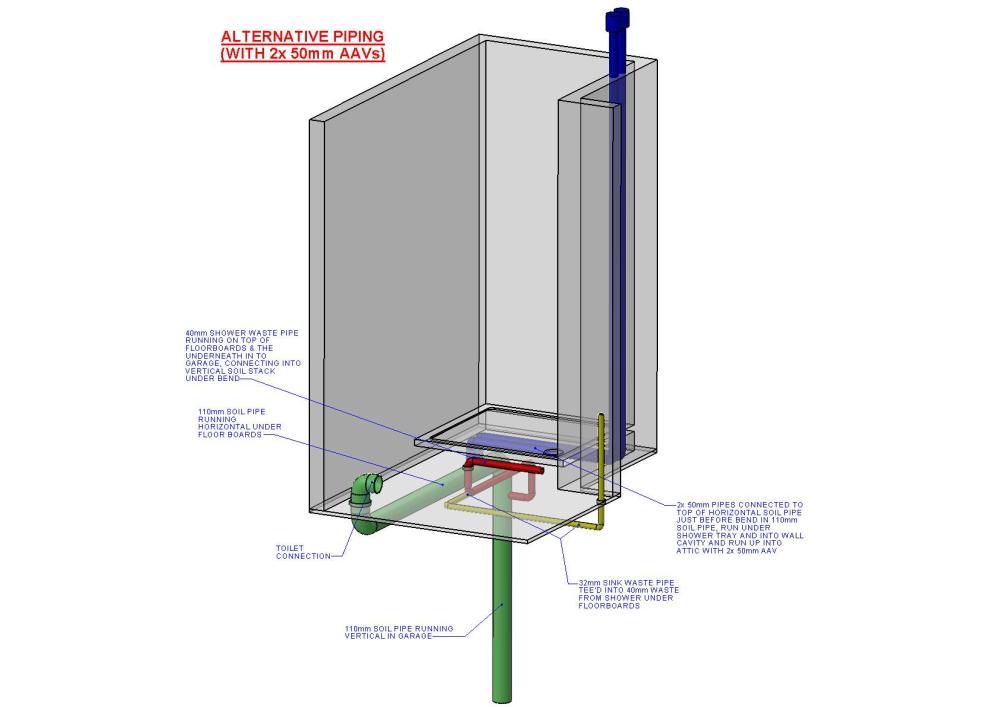
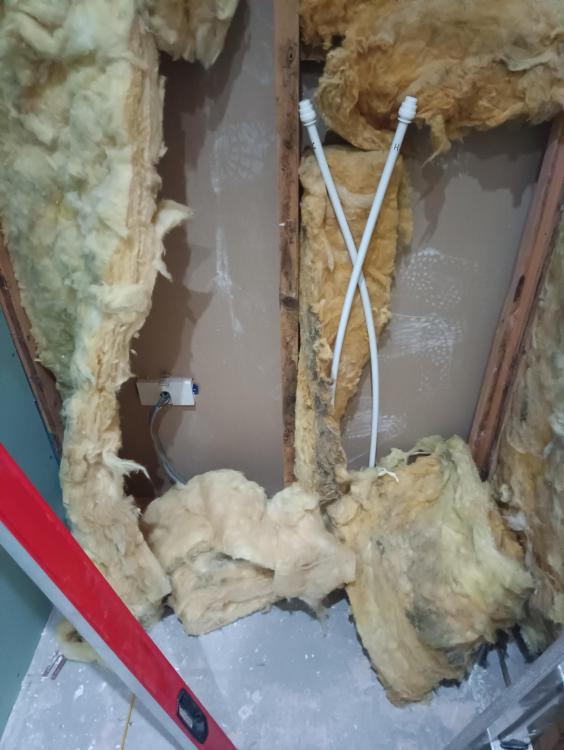
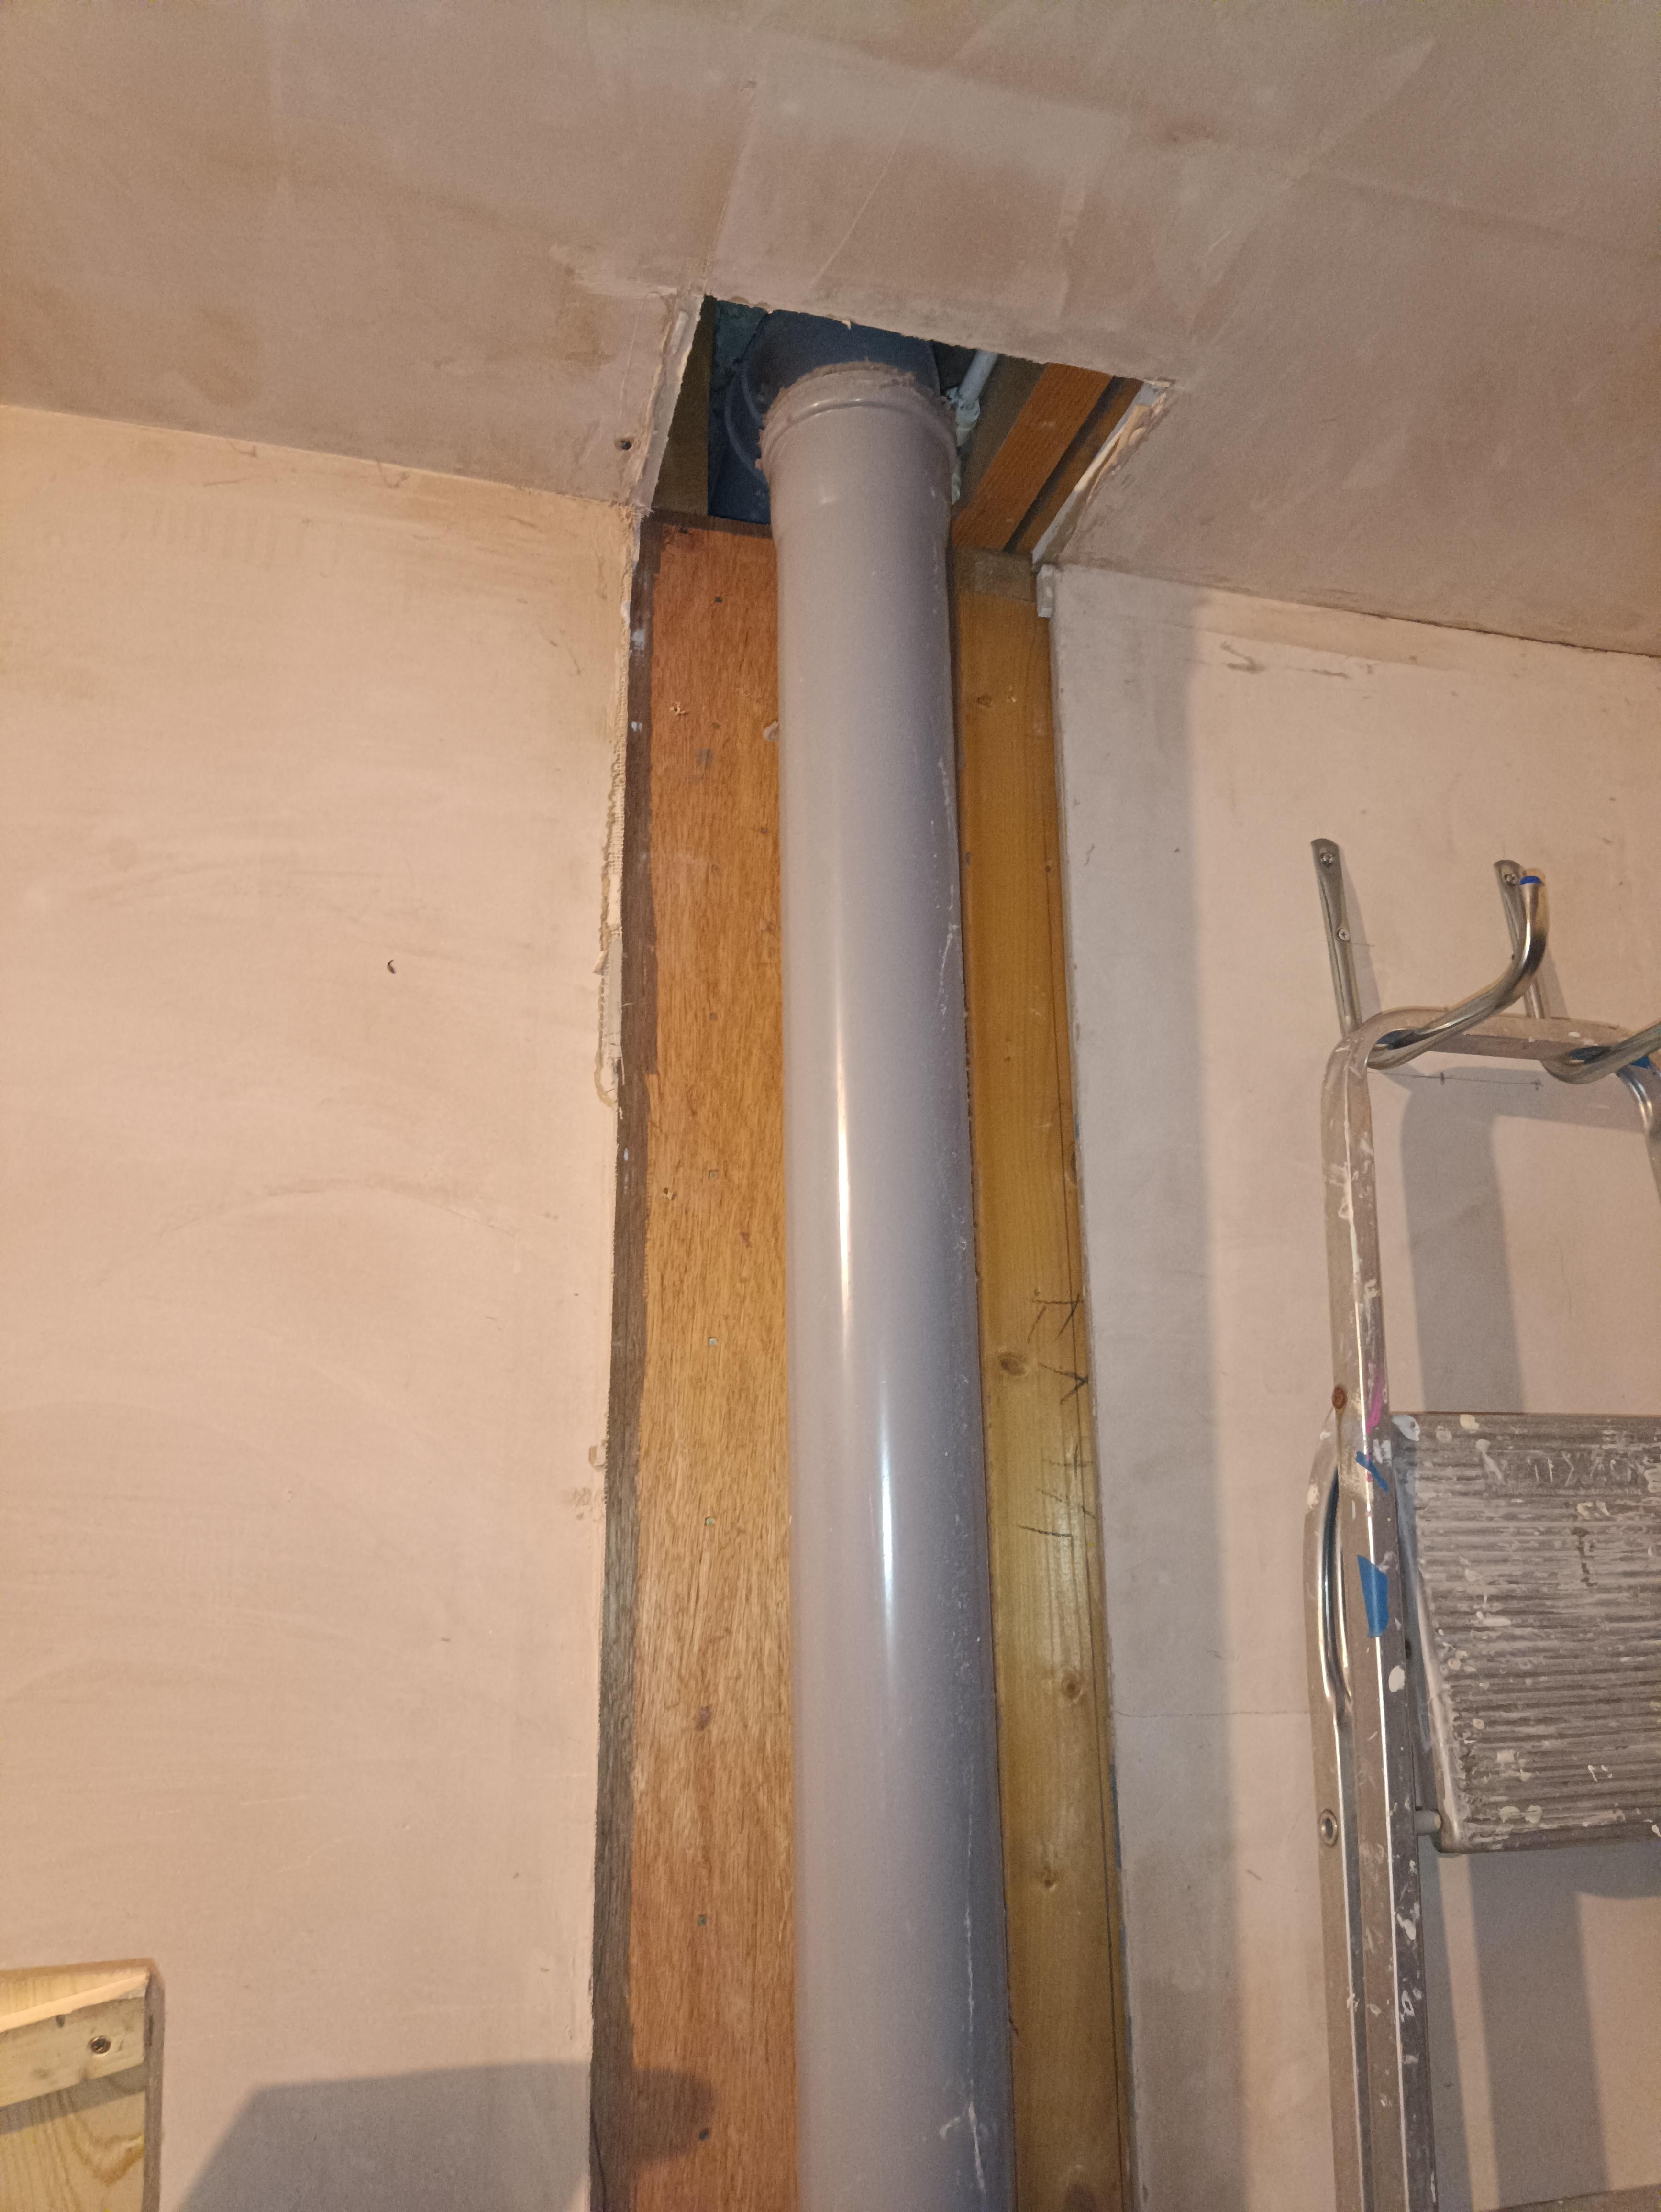
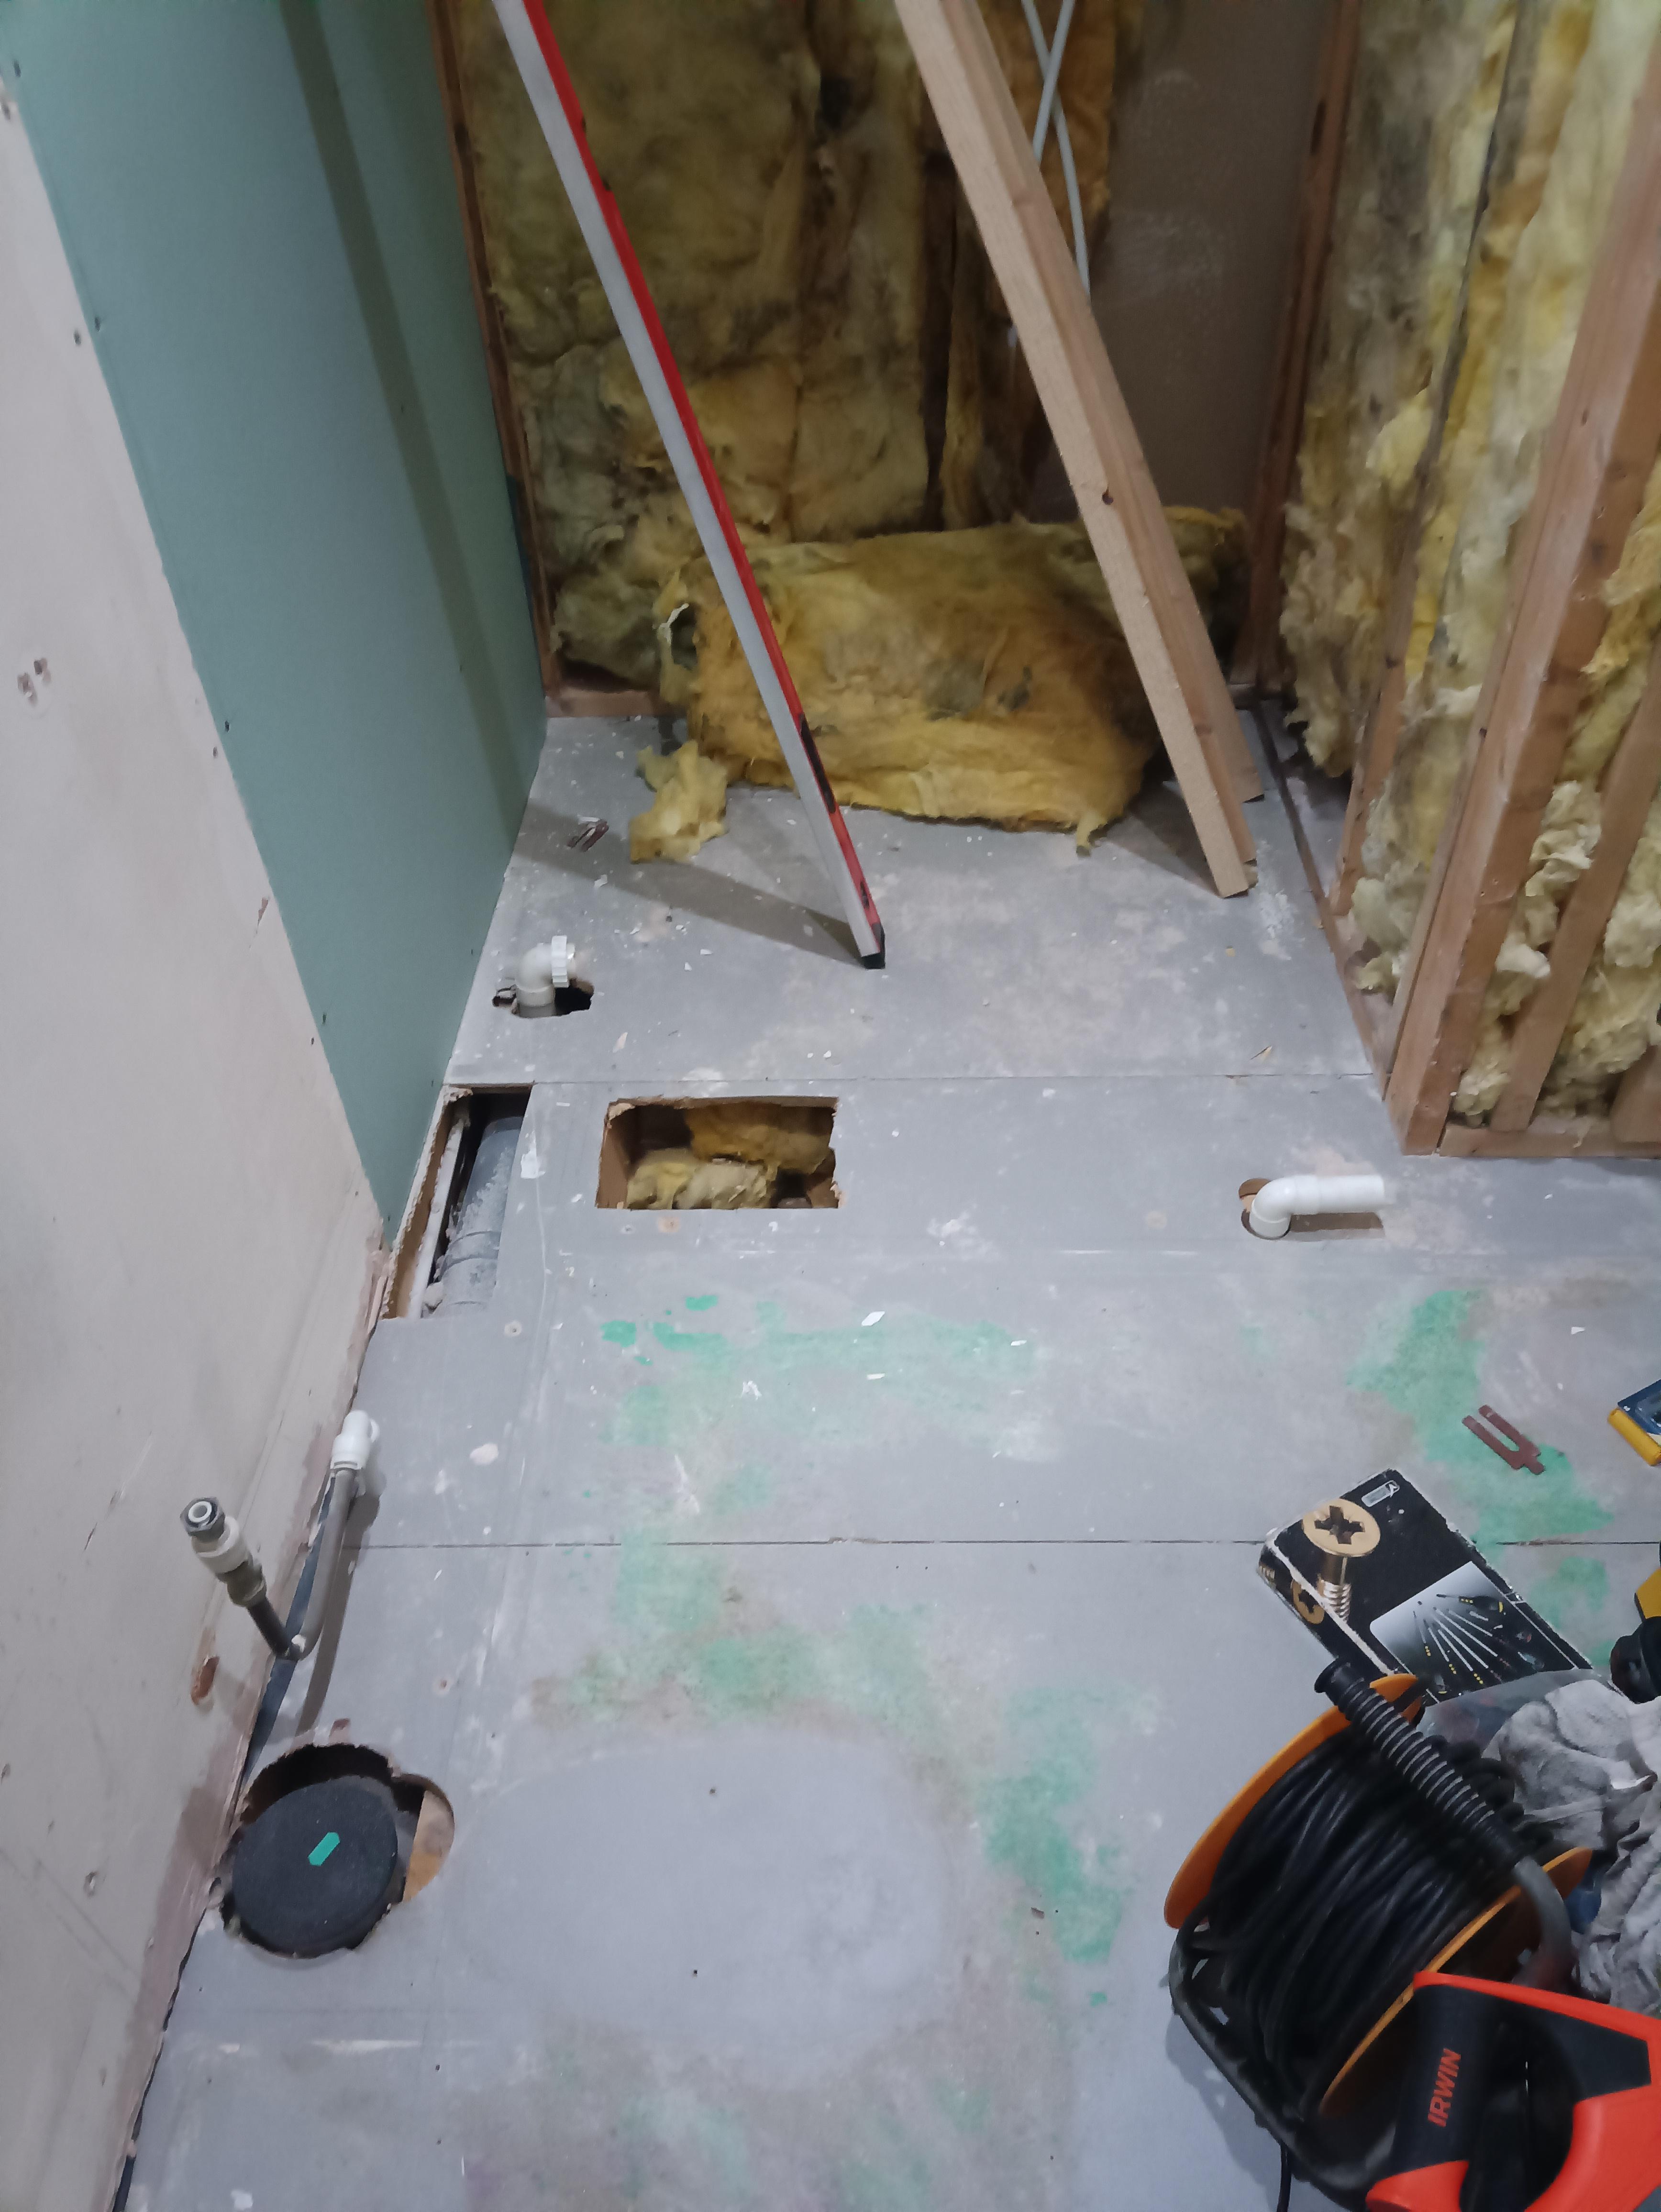
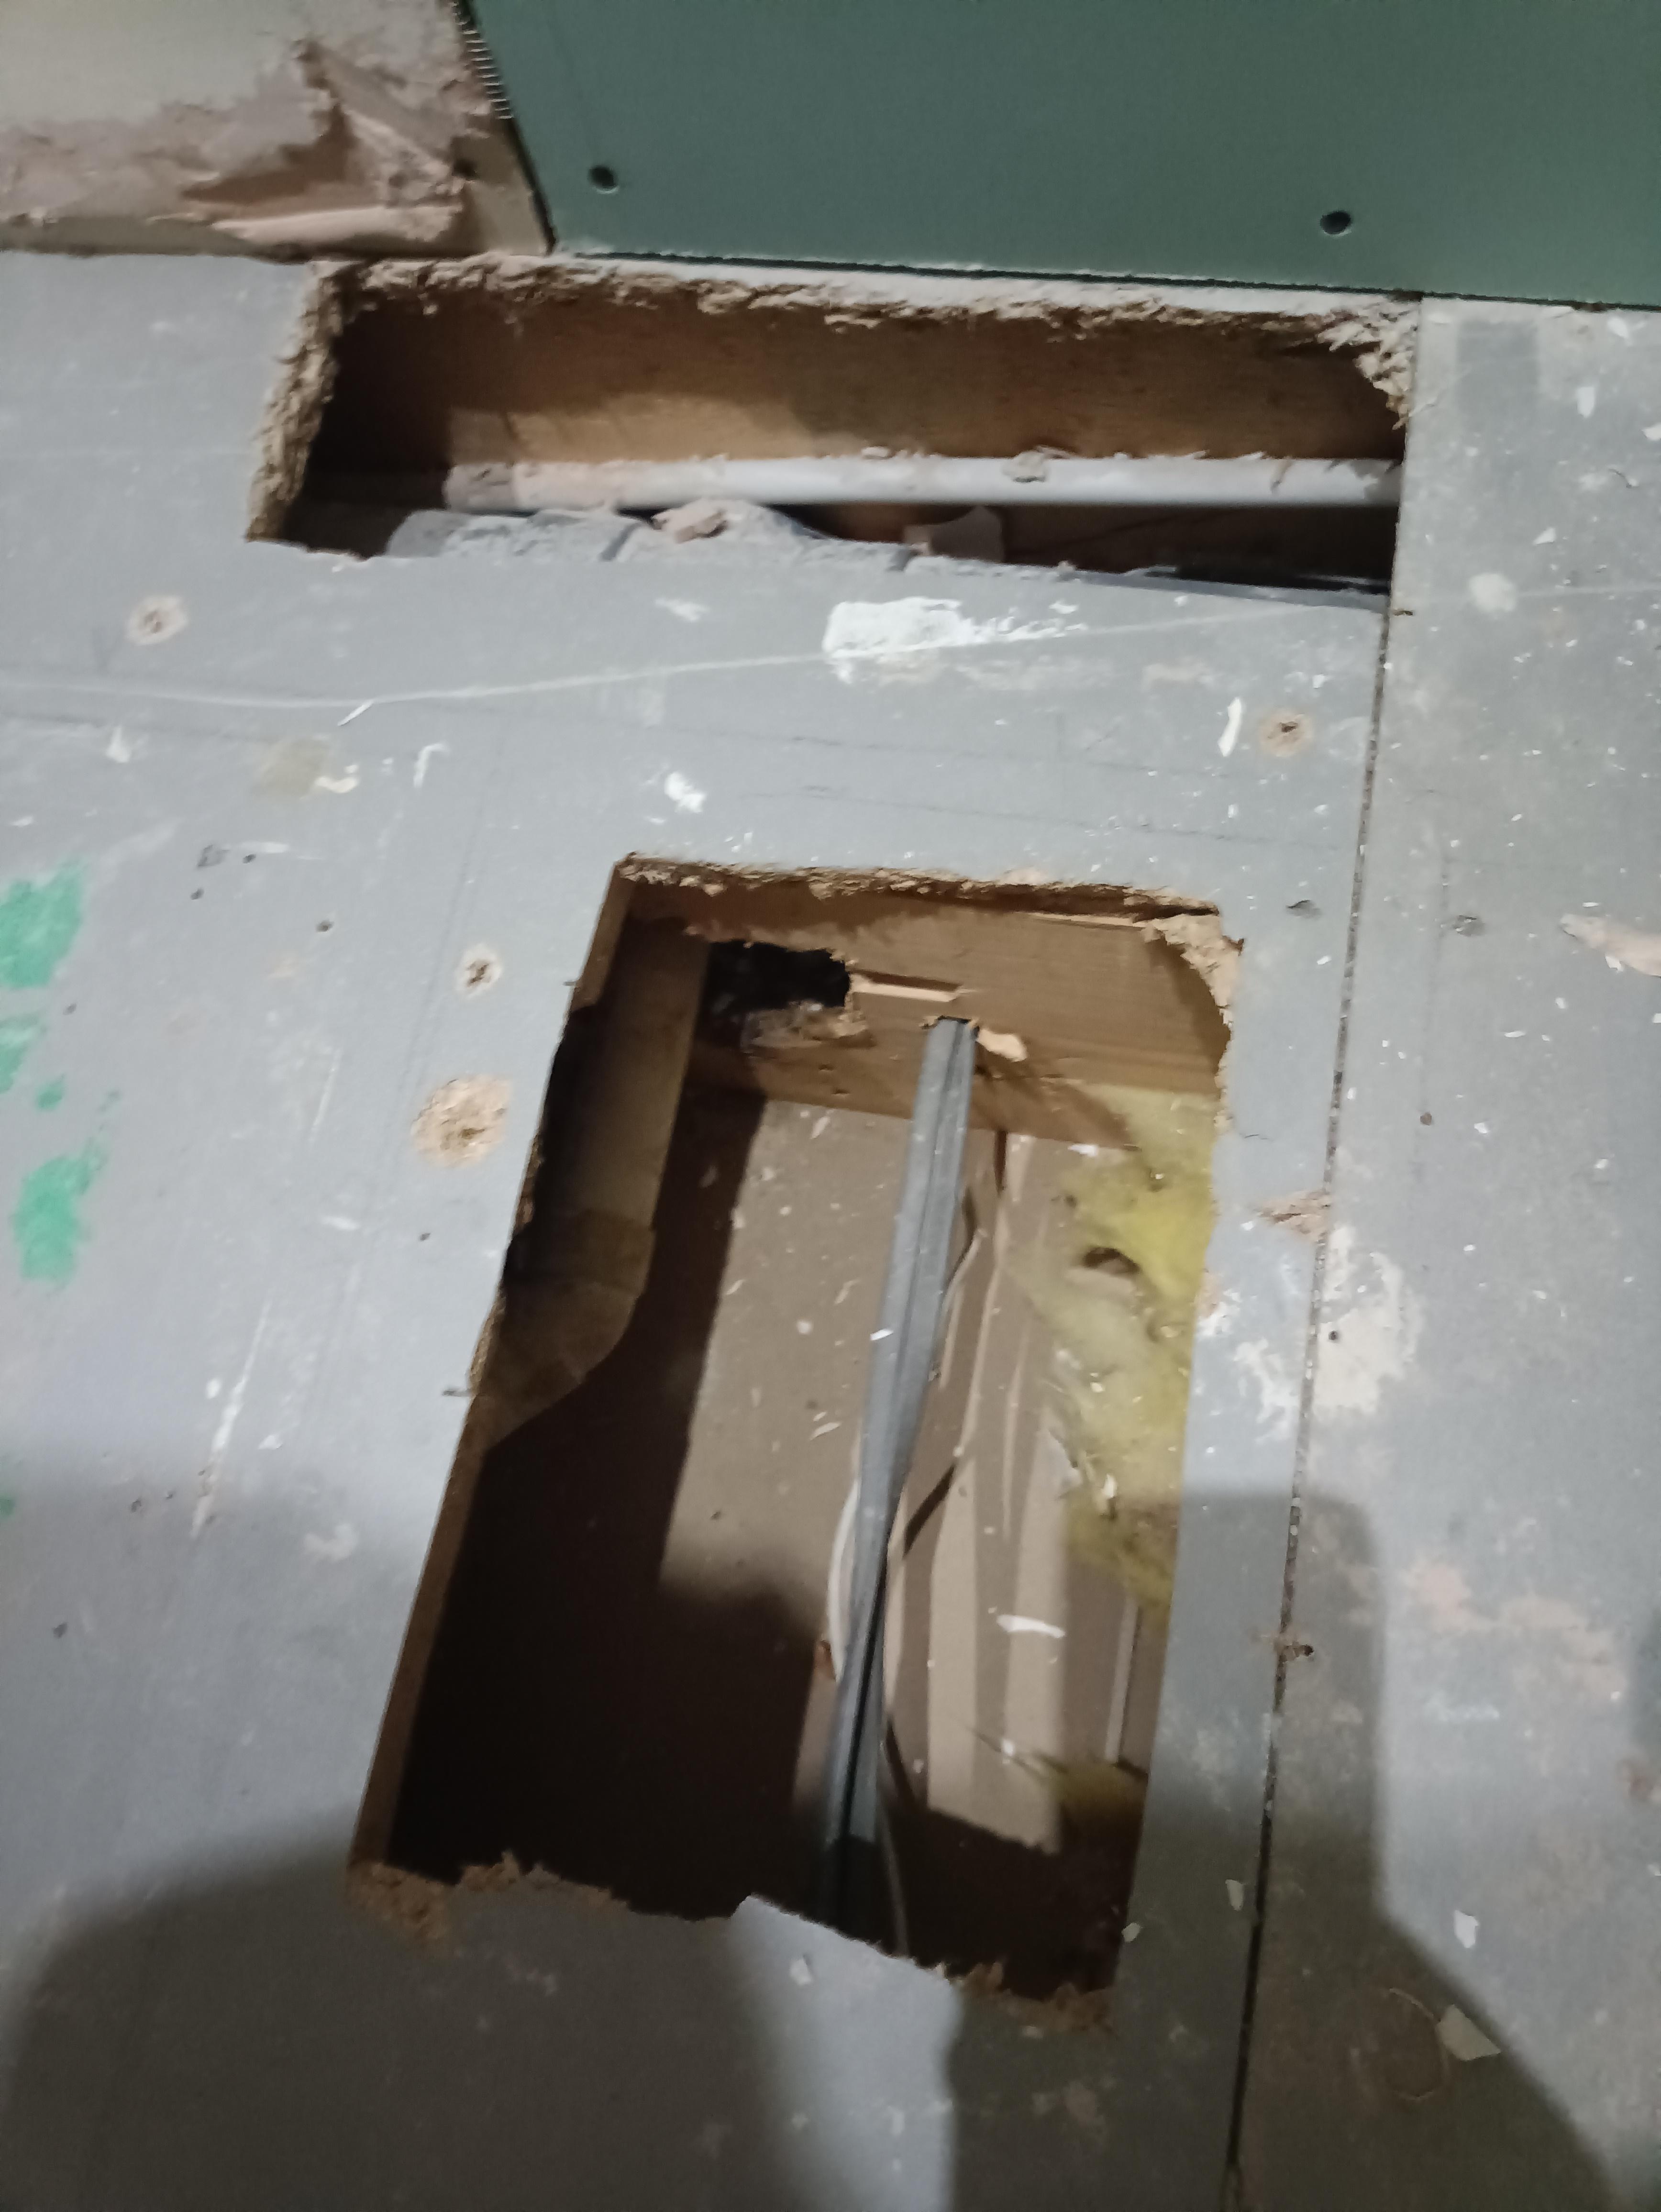
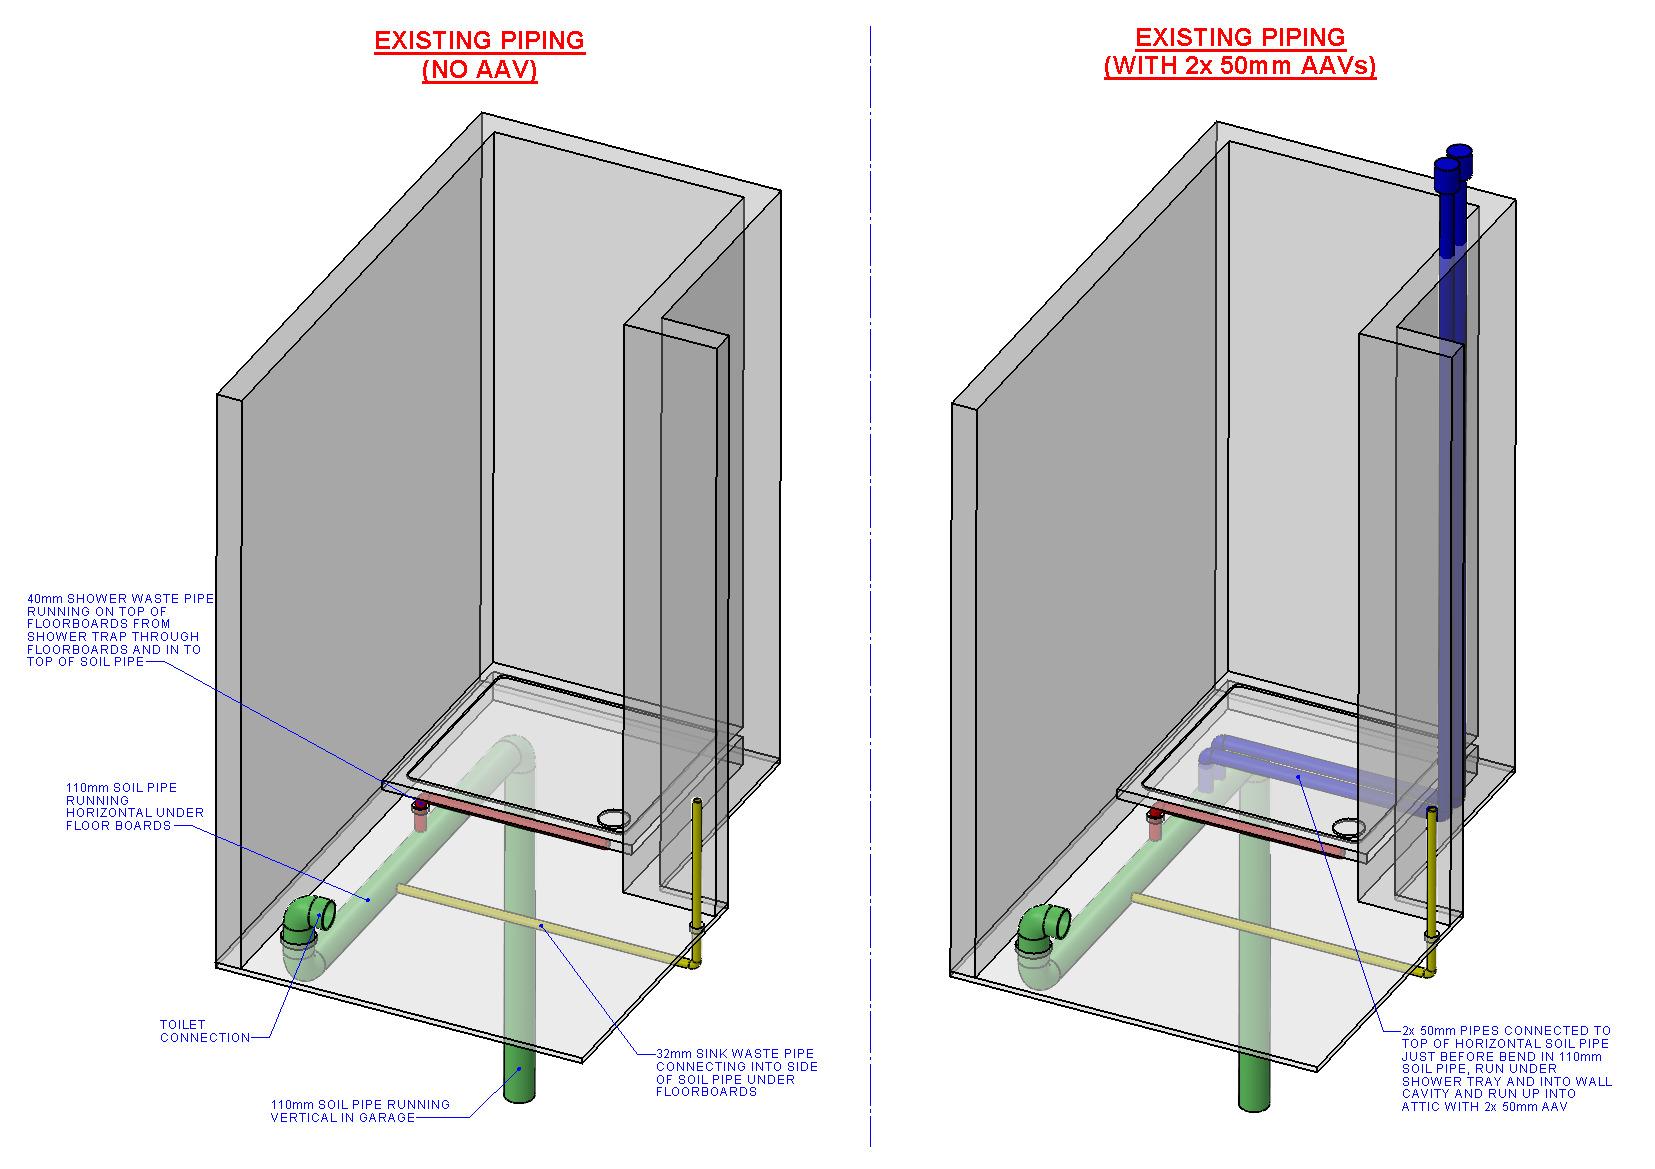
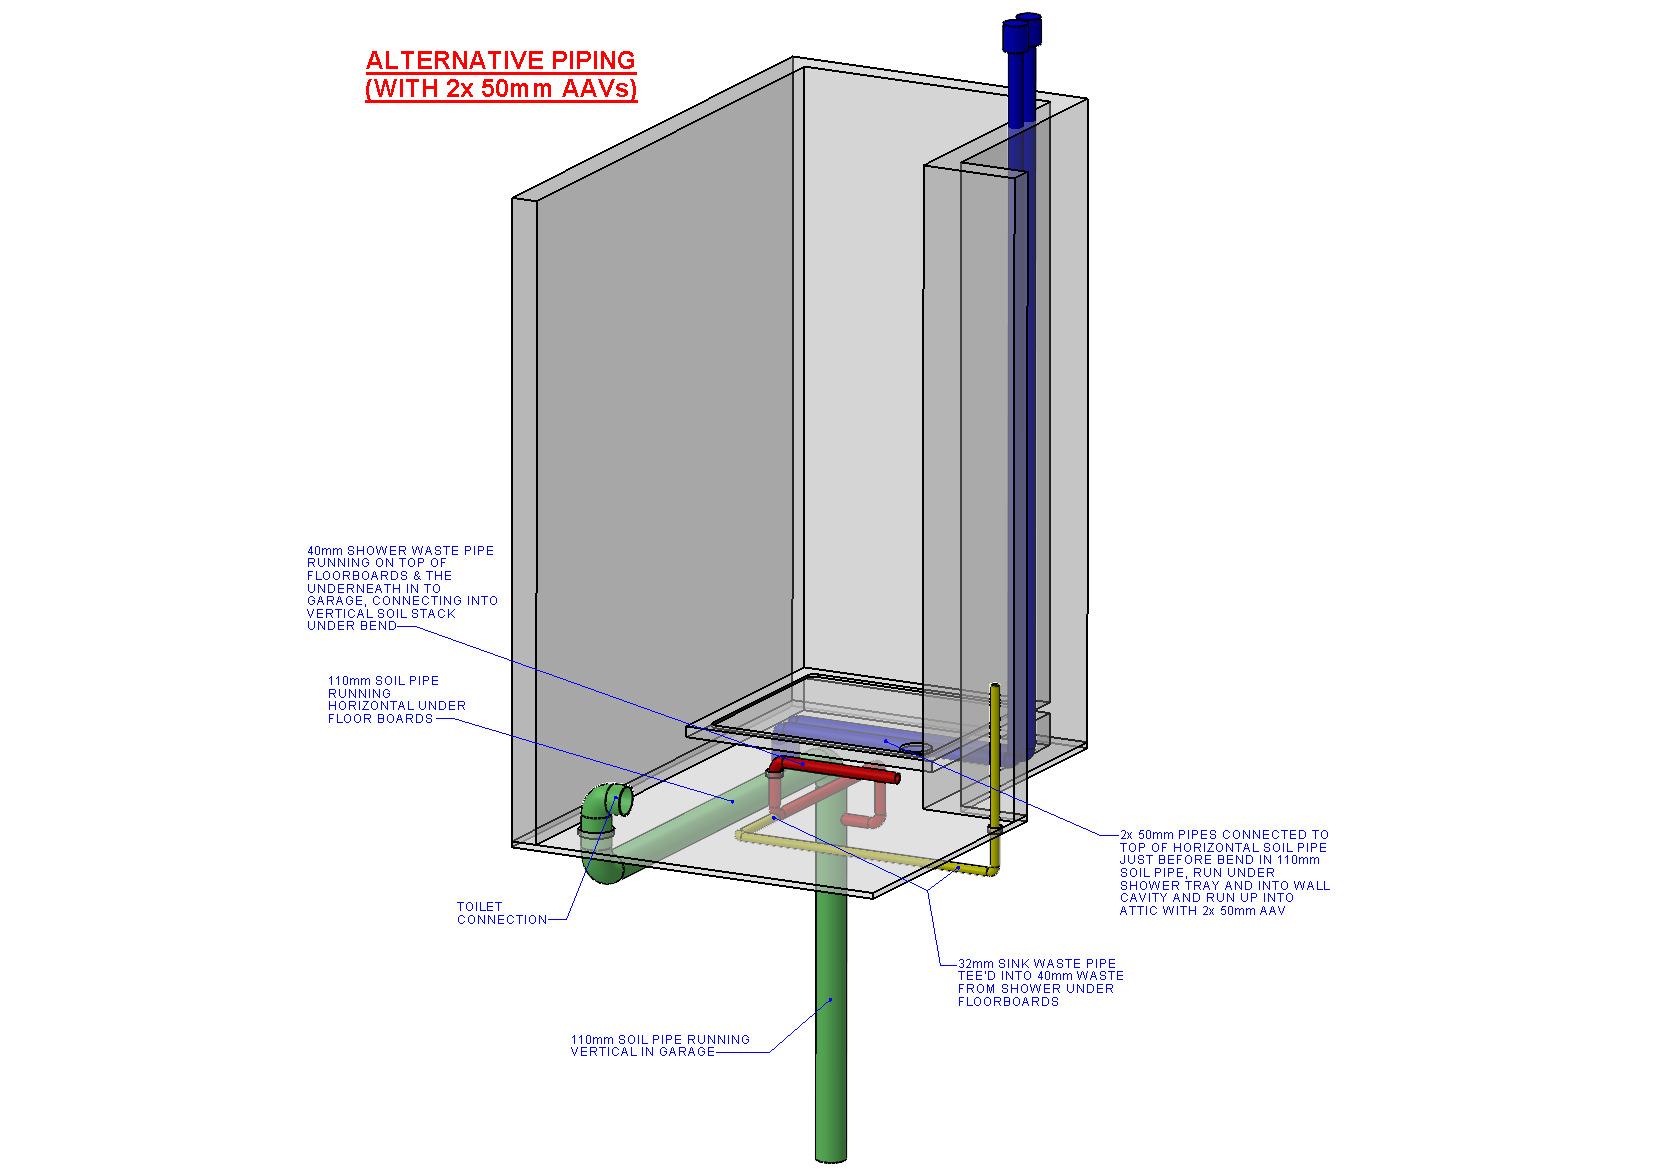
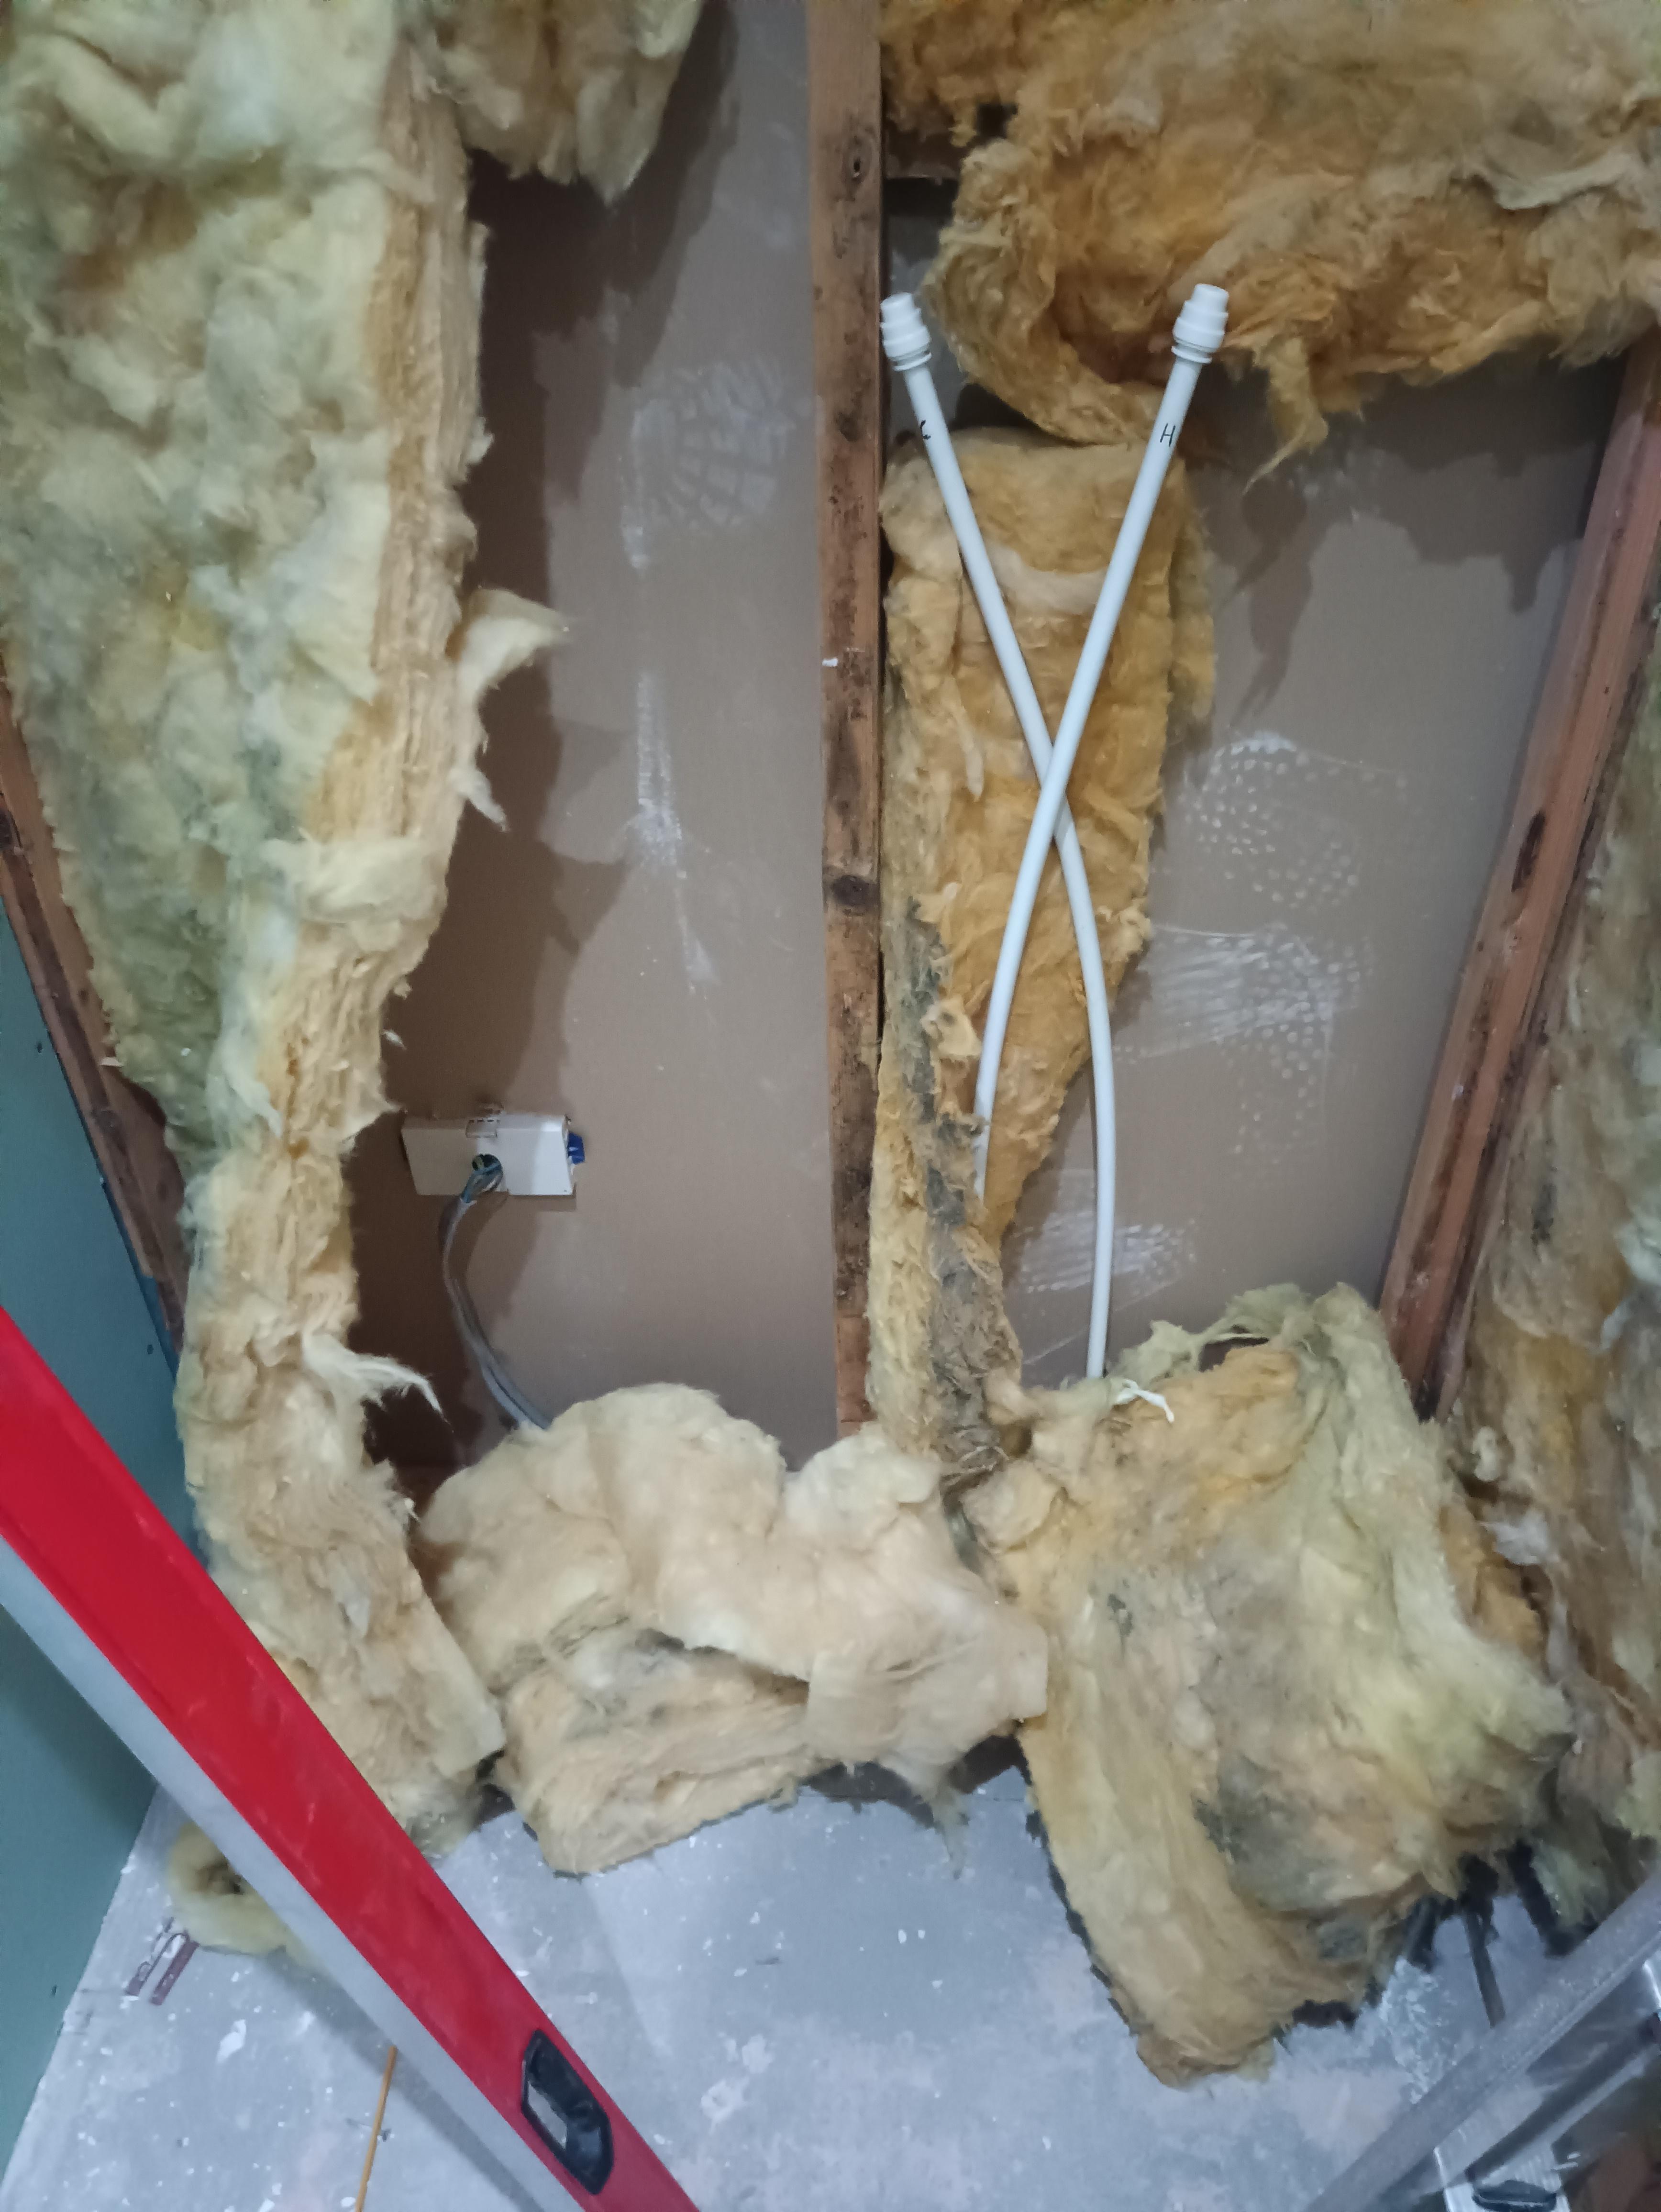
Good evening all, First post from me. I've discovered this forum whilst carrying out some research for an ensuite renovation I have started. I'm a design engineer (toolmaker) by trade so not a plumber by all means but have done quite a bit of DIY on my own house. I like things done right and enjoy having a go myself, hence why I am here for a bit of advice. I'm looking for some guidance in regards to the best method of connecting the pipes for the shower and hand basin into the soil pipe. Currently, there is a horizontal soil pipe in the ensuite running under the floorboards which is connected to an internal vertical soil stack in our garage. The toilet is connected to the end of the run, then a bit further down is a 32mm pipe for sink waste which is connected into the side of the horizontal soil pipe, followed by a 40mm pipe for the shower trap further down again, which enters the horizontal pipe at the top and finally the bend into the vertical stack. There is currently no AAV which I think there should be reading other threads. Please correct me if I am wrong. When we first moved in, the shower in the ensuite wasn't used as there was another one in the main bathroom. Over time the shower started gurgling as I think the water had been sucked out of the trap from flushing the toilet. We refurbished our bathroom a few years ago and replaced the shower in there with bath so we started using the shower in the ensuite again and we never had the issue again and has been ok since. Most probably because we use the shower everyday. I have attached a few diagrams for reference - 1) Current pipe layout (No AAV). 2) current pipe layout with additional 2x 50mm runs with 2x 50mm AAV which will run internally in wall up into attic. 3) Alternative pipe layout with a 32mm pipe run from the sink waste which will tee into the 40mm pipe from the shower and then run into the garage and connect into the vertical stack in the side. I'm not sure if it is possible to do this yet but could be an option if it is. I have a few questions... 1. Is there anything wrong with the current pipe set up with the 32mm waste going into the side of the horizontal soil pipe and 40mm entering the top as this maybe my only option? I have read some conflicting views about connecting into the side rather than the top, so I'm interested in having some feedback. It's never been a problem other than the gurgling we had when we hadn't used the shower for some time and no noticeable foul smell. Just to point out, I have to replace the soil horizontal section as there is a crack in it. I will be using a mcalpine high flow shower trap and an anti syphon bottle trap on the sink. 2. Is an AAV required in my situation? I can't see a way of fitting a 110mm AAV without it becoming unsightly in the room as there is a doorway right next to the toilet. I have read in another thread on here and a work around suggested by @Nickfromwales is to run 2x 50mm individual pipe runs with 2x 50mm AAV which can be fitted before the bend to the vertical soil stack. He explained there is a natural air break in the horizontal section and only creates a vacuum when the water quickly travels down the vertical so the 2x 50mm pipes can be connected just before the bend into the vertical. Is this the same in my case? The shower tray is raised so I could run these under the tray and up through and internal stud wall into the attic so could do this quite easily. @Nickfromwales I would be very grateful for your feedback on this point. 3. I believe it would be better to run the sink and shower waste into the vertical stack via a boss strap but I'm not sure if this is possible yet without lifting the floorboards. Would this be the preferred method if it is possible. 4. My shower mixer controls will be placed centrally on the back wall. The original shower controls and pipes are offset to the right (photo attached) but now the hot pipe will be relocated more to the left and will be close to an electrical socket which is in the room behind. Will this be ok as I'm not sure of the regs. There will be a soldered elbow connection above socket height but to the right of it slightly so will only be an issue if it ever leaks. I could possibly move the socket to the left if required so it's further away from the new pipe position. I will upload some photos of the room as it is for reference. I'd like to point out that the holes in the floor and joists are not my work and were discovered when I removed the boxing in which was purely there as a cover up. I have new boards to go down so it will be all good when I've finished. Any feedback or advice is welcome.