jpadie
-
Posts
184 -
Joined
-
Last visited
jpadie's Achievements
Regular Member (4/5)
7
Reputation
-
Thanks. Currently the earth is TT. The new TNCS earth exists but is not connected to the CU. Having PME solves a headache with exporting SWA but I was uncomfortable not having an earth rod or similar in the event of a PEN fault. When I read 411.4.2 it resonated with what I'd thought was a good idea! I'm happy to be schooled as to why it might not be of course
-
I ask again, why is it a recommendation (likely to become mandatory, if I hear correctly) in reg 411.4.2 if it is, as you say, contraindicated? In non-fault situations this adds a local earth to the PME. In a PEN fault situation (where it might be possible to float at phase to phase PD) there is then a path for fault current. I'd like to understand from a physics perspective where your concern is, please.
-
Because of the recommendation in 411.4.2. Why is it an issue? I think pme max PD is 18v to true earth. Creating an additional true earth reference feels like a sensible thing and also protects against the unlikely event of a lost supply neutral doesn't it?
-
Hello all UKPN have been to increase the house supply to 100A and have installed a PME earth block. The house is currently TT. Am I right in thinking that reg 411.4.2 recommends (impliedly) bonding the existing earth rod to the PME earth block? I assume, if so, the earth cable size for the leg to the earth rod still needs to be 16mm2 if not in conduit? Thanks Justin
-
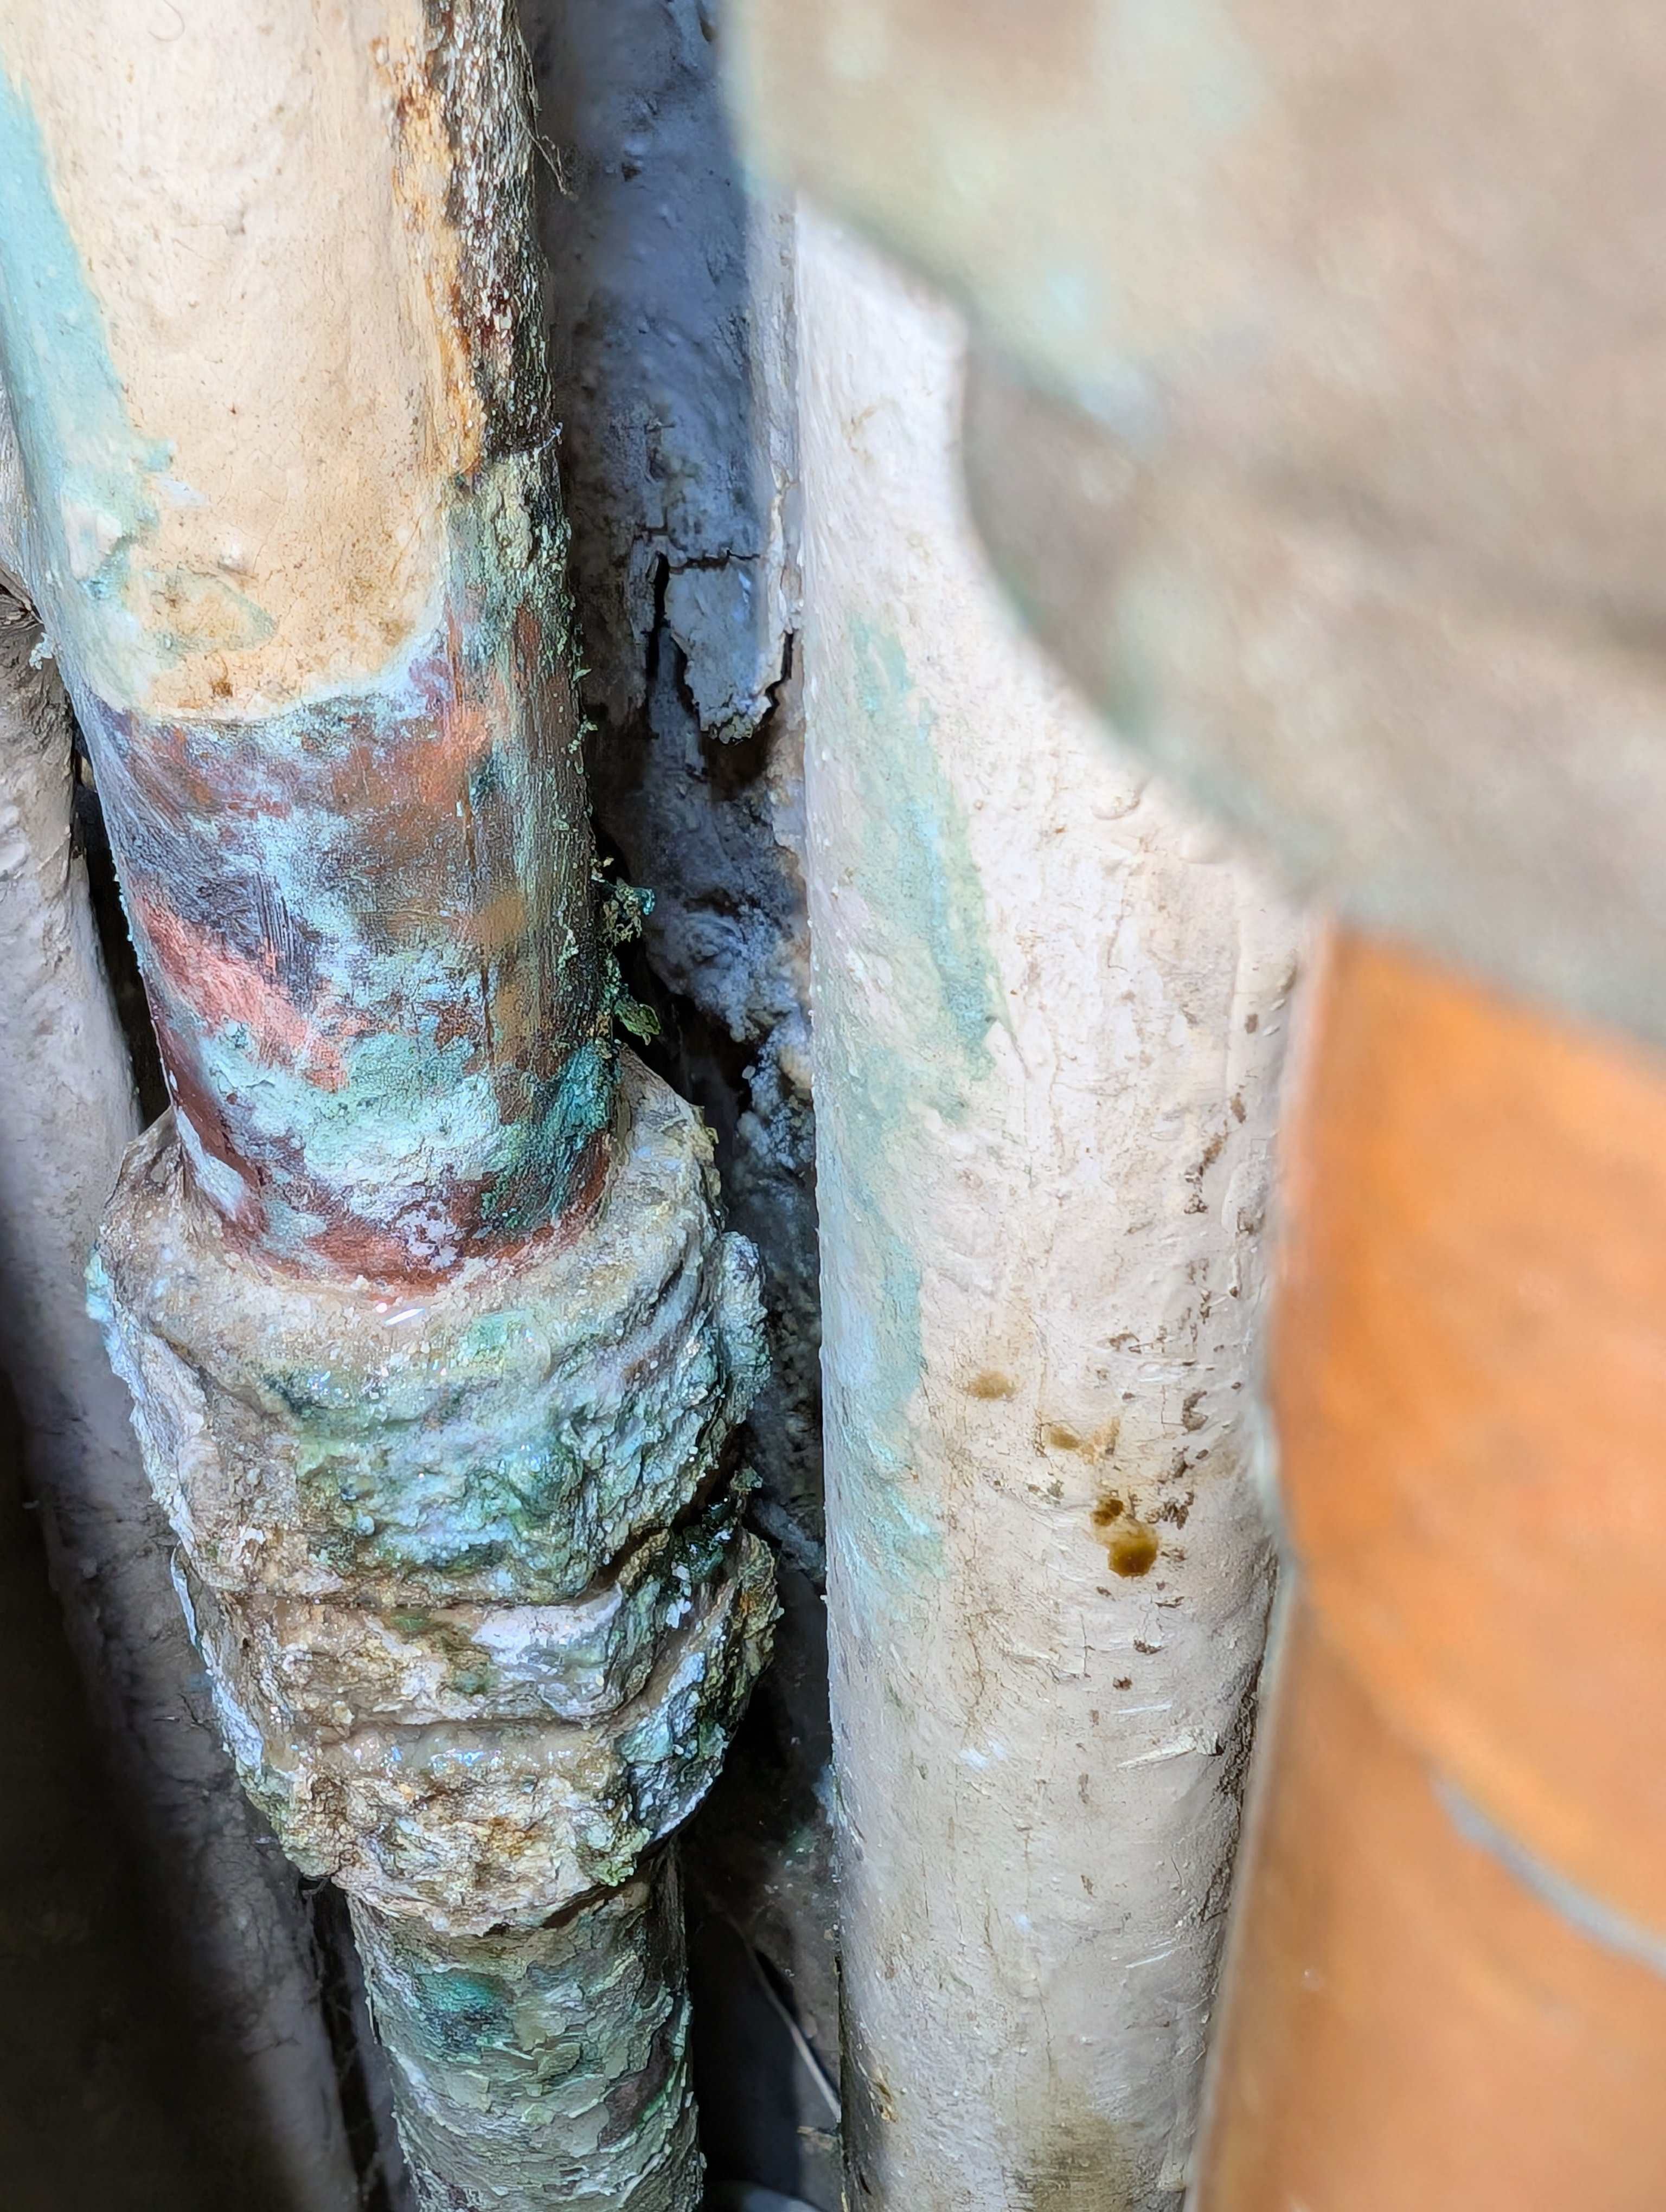
Hello all This joint is leaking and looks like it's done so for a while now. As a result the actuator below it keeps sending mixed signals to the boiler! My question is what causes this? Is it just a badly made original joint/pipe vibrations loosening it or is it the dielectric or brass to copper that is causing an eventual failure (it's possibly been in situ for 50 years now). I think it is the heating flow. I'm planning to hunt for a shut off valve, cut the area out, replace the T (the small pipe behind feeds a radiator in a bathroom behind the wall) and replace with a 15mm coming off the main 22 so that I can add another radiator on the same spur; and replace with soldered connections everywhere It's not great access though! If this is the hot water line (I should know but I don't yet) then it's just replace like for like but with soldered connections. All (on topic) advice welcome!

-
I'm so sorry. I used the wrong words as I was thrown by the Screwfix catalogue This isn't condensate it's the discharge from a tundish. Really sorry to have spent your time on my error.
-
Is there a good way to go from 22mm copper to 40mm solvent weld waste pipe, please? The condensate pipe will be copper for the first 1.5m, with the last 1m being exterior. so I'm not so worried about temperature rating of pipe.
-
Hello all This is for a garden room that has bamboo flooring and skirting. A sort of natural caramel colour. I've fitted pine unpainted door surrounds and wanted to get close to the bamboo colouring (can't get bamboo trims that are long enough to be fitted as door surrounds without a cut). I'm looking for advice on whether there is an easy way to stain or varnish the pine to look close to the bamboo. The various things I've tried have all been jarring so far. Failing that any ideas beyond some white non-offensive paint? The door within the door surrounds will probably be white and the walls behind are a green shade on one side and blue on the other. Thanks in advance Justin
-
Yup. It's a worry but I don't have the fall to install a drain under a vertical downpipe from the gutter and connect back to the mains. Unless I install the drain above ground level. The roof line is not high so may be it's an answer to install a grill over the gutter and clean it manually every couple of months. @ETC Water butt is an idea and and that somewhat solves the fall problem too. But I still have the issue of a trap with a water butt don't I?
-
thanks all I was searching only in the Screwfix catalogue and nothing was popping up. probably as I was using a keyword of boss, hadn't had enough coffee or scraped away enough at the cataracts. If an adapter exists (and actually I think the basic boss-kits from floplast that screwfix sell have an o/d of 68mm) then a downspout connection to the soil stack is the easiest route. re the idea of a soakaway, there is no scope for digging down unfortunately. the reason is a bit bizarre but when I was building the garden room I discovered that just beside the plot there was a cistern buried in the ground. covered up and abandoned since at least the 60s but probably much longer. It's cylindrical, about 4m diameter and 4m deep. It's plumbed but there's no easy way to tell where the plumbing goes to - looks like it might connect to a well in the garden, which in turn was plumbed to something in the next door property (which used to be part of this one). The cistern is quite beautiful inside - tiled much like a victorian sewer with enamelled green tiles. I'd guess it's early 19th century and I suspect that originally it was a soak-away or collector for the entire farm; maybe there used to be a manual pump there. I'd not be surprised to find french drains connecting in to the network either. Whilst it's tempting to plumb into this, I just don't know enough about the original purpose nor the structural integrity of the cistern to want to muck about with it or dig too close.
-
I've got some 112mm half-round guttering from floplast that has a 68mm outlet for a down pipe. I'm wanting to connect this ultimately to the 110mm soil pipe which runs to a sump from which waste, ground water and rain water are pumped to the main sewage (this is both allowed and preferred in my area, at least until a storm water system is provided). The challenge is that I can't find a 68mm boss connector. Am I not looking hard enough or do such things not exist? (by the by, I don't have the fall to be able to go into a drain and then connect with 110mm pipe. I recognise that this may end up causing a leaf blockage problem in the pipe at some point. An alternative is not to bother at all with rain water collection - the roof is on a garden building that's only 4x3 and the run-off is on to the boundary which is planted on both sides. the new building replaced a shed that never had any guttering. any thoughts, please?
-
@Mattg4321, per request for photos here is a Google album with both boards in it https://photos.app.goo.gl/wWMgCdv2KCVN3ABL7 The gap from the top of the cupboard to the cu in the main house is 220mm. I'd need to remove the metal adaptable box to fit anything else in. That just houses the SWA termination for the garden room. The house is listed so there's a general admonition not to remove/damage fabric. Thus most of the wiring is surface mounted.
-
Local electrician said to install an s type RCD in the main CU. Which is what I did. But didn't use manufacturer links (I borrowed conductors from a length of swa to make sure they were adequately sized). Inspector said to change for an MCB or use manufacturer links. He's tonight changed his mind on the mcb. The earth impedance values on all circuits in the garden room have been tested as ok. I will post photos in the morning. The garden room rcbos are all single pole (I have spent the last 20 years in France so was really surprised that things are/were single pole here!). I don't object to the expense of substituting with dual pole rcbos. Not sure whether BG fortress have them in the range but I'd hope so. I guess at worst I can replace the s type RCD and buy a cheap wylex cu to harvest the links. Am typing on a mobile phone. SWA is 16mm2 three core. One core used for exporting the earth (also connected to the armour).
-
Long story which I will try to shorted Main CU with a TT earth Garden room with mains exported from main CU via SWA. Garden room circuits are all RCBO. Local authority didn't like the RCD that was in the main cu protecting the swa because it used 15mm cable that was not manufacturer specific. Said I could change to use manufacturer cable or an MCB with a bus bar. Wylex don't sell separate links so I went the mcv route. Inspector now says he made a mistake and because it's a TT the SWA will need RCD protection. Choices as I see them are 1. Complete replacement of the main cu. Expensive, challenging and will need separate notification 2. Find a 63amp rcbo that can fit. Feels possible. But then both ends will trip. Do I then need to change all the sub main breakers to mcb's? 3. Henley block to split the tails and add a separate cu in the main house. Challenging as there is no space. 4. Find a reason and evidence to challenge the inspector. I e. A. Does the 18th edition really require manufacturer links? B. Is it a requirement to have RCD protection on SWA with a TT? Am feeling aggrieved as it took ages to find a solution to the original non-compliance finding only to be told that it wasn't the whole story!
-
Thanks. All useful thoughts. I wonder whether the fabric of the building needs to stay slightly moist to keep from failing? For more than 500 years it's stood either absorbing or letting pass all the moisture from the straw, animals and humans that have been its denizens. Daub does seem to be a material that can breathe. It's odd that the timbers are exposed too. That's can't have been the original intention of the builders as surely it would reduce the overall longevity and performance. I'd guess they were expected to be rendered/plastered over and at some point perhaps in the 19th century people decided that it looked quaint to see the timbers.