SilverShadow
Members-
Posts
46 -
Joined
-
Last visited
Recent Profile Visitors
The recent visitors block is disabled and is not being shown to other users.
SilverShadow's Achievements

Member (3/5)
1
Reputation
-
Hey there, Thanks for all your help with my previous queries. I have a new one for all you budding builders....😁 This one regards building above a front porchway (for a property we're looking to buy). I only have scant details i'm afraid, but we were wondering if it'd be possible to extend above the porch to make another room of the 1st floor? A few basics: Existing porch is 2 x 2.5m (looks to have been built in last 20 years) Porch has a concrete floor from what i can see Porch materials are brick, with sloping tiled roof Porch exterior is mostly glass (door and 4 x windows), with brick corners (1ft by 1ft) and a brick wall over 0.5m high for walls under windows Apologies if these are daft questions, but i wondered if: Anyone had experience of building over porches & things to consider (eg: foundation depths)? Presumably we'd need concrete or steel lintels to support above the door & windows, to build the upper floor with? Presumably this would not need planning permission? But it would need to meet building regs/been signed off? We'd prefer a pitched roof above it, to join to the existing roof Any yardstick idea of cost/m2? (i've read around £2-3k/m2 when extending both stories, so possibly up to £2k/m2 maybe) Many thanks for your time and help Shadow
-
Thanks guy - looks like I'll get some of those 👍
-
Ps - thanks for the dust removal tips 👍
-
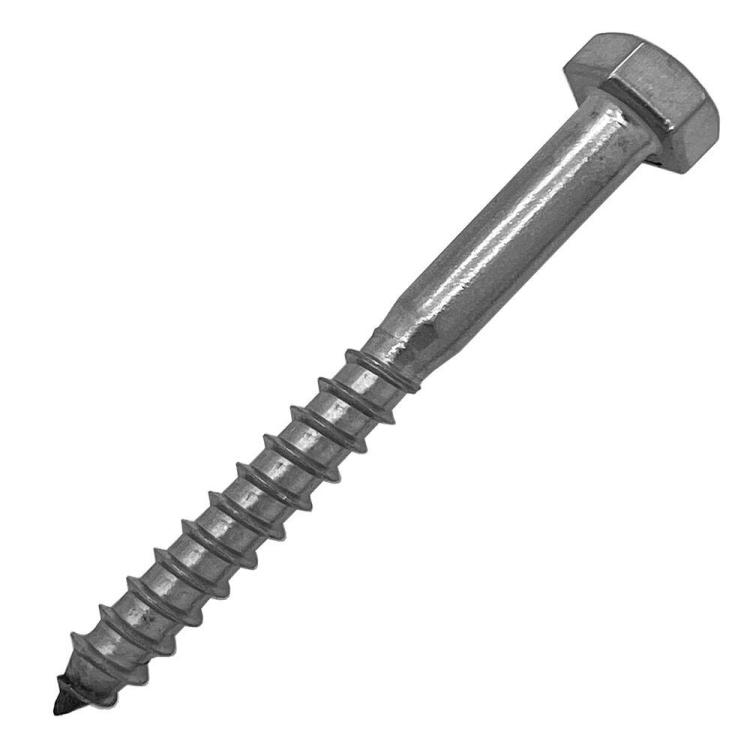
Thanks Stu - that was my original concern. I had wondered whether Coach screws would be a feasible alternative to studs 🤔 Apologies for so many daft questions - I'm just exploring whether its possible to use coach screws, to be able to insert/remove later once the resin had set around the rawplug
-
Thanks again guys 😀 My plan is to clean the new deeper holes of dust, then put some resin in 1st (half fill the drill holes), then push in the raw plugs & let it set, before adding the screws later This way I can screw in afterwards, and check the mountings are aligned and level, then finish off with more resin once I'm happy the radiator fits back on correctly Does this seem sensible? If not then will I be able to remove the screws later (if added at the time of applying the resin) and adjust/rescrew if needed? 🤔
-
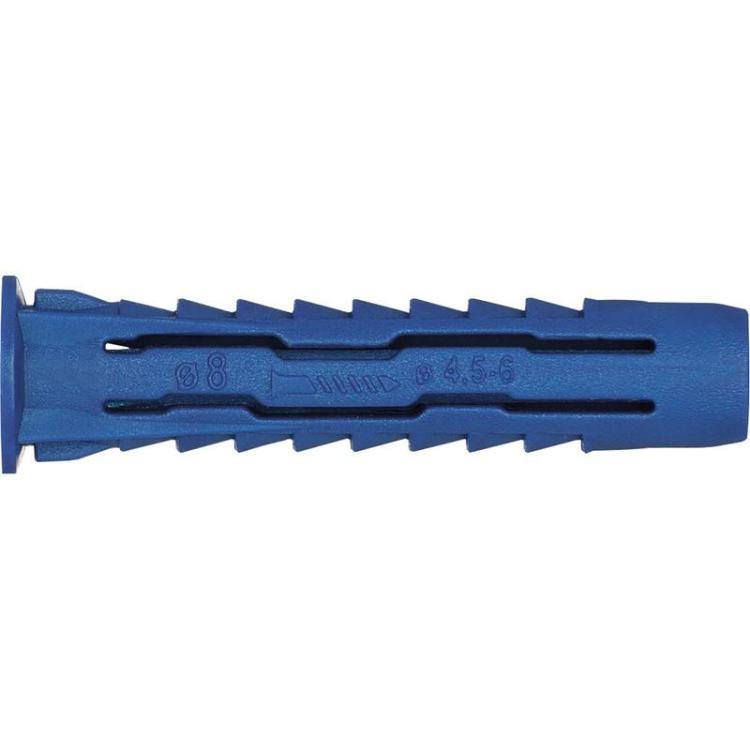
Thanks again guys 😁 I'll look at getting some 80 or 100mm screws & drill the existing holes deeper. The wall is indeed solid brick with 20mm plaster I have these 50mm × 10mm Rawlplugs, & was wondering if they will do the job nicely if pushed down to brick level? Combined with using resin it should hopefully be enough. Or should I try those mesh rawlplugs down to 80 or 100mm as required? Thanks for all your expertise 👍 Shadow
-
Many thanks guys just to clarify if I may. I presume the resin solution comes as a kit with rawplugs & screws, so no need to use my existing replacement rawpligs, or old screws? For fitting, I assume I'd fit the raw plug, fill with resin, cut down the screwed rod to say 60 or 70mm then insert, then add more resin to fill the last 20mm wider hole almost back to wall surface? Then leave to dry of course Many thanks again 👍 Shadow
-
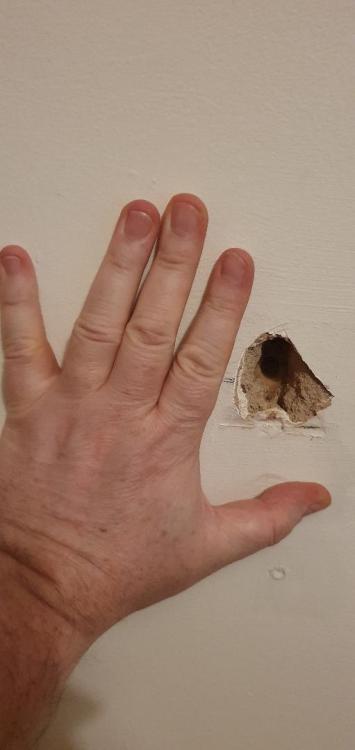
Hey all, Back once again to pick to pick your builders brains and gather sage suggestions Over time the factory provided screws & rawplugs have worn loose, to the point i had to remove the radiator for fear of it falling! The screws provided were 60mm long and solid enough for the job. But the old brickwork/plasterwork is incredibly crumbly and left me with huge holes (see pic below) - i could literally pull them out the wall in the end. the radiator is 46kg weight (i'd assume empty), and has 4 mountings with 2 screws in each - that leave the holes in the pic for each mounting So my conundrum is what to do next. I already have some 10mm wide/60ml long sturdy rawplug replacements, but i can see the 1st 20mm into the hole is just dust & wont hold up Would you guys consider any of the following: Buy 80mm (or longer) screws & drill deeper Fill the 1st 20mm with standard masonry filler (add some sort of rock hard adhesive perhaps?). Any brands/suggestions? Use rawplug resin filler & add the original screws/rawplug replacements into the wall, then cake up around it the 20mm layer with resin when it situ? Use rawplug filler pads that line the hole & bond to that? Make fresh holes 10cm along? Something else? Apologies if it's been asked a dozen times before - i couldn't find it on the forum Many thanks for your time Shadow
-
Recommendations for electric radiator
SilverShadow replied to SilverShadow's topic in Central Heating (Radiators)
Many thanks for your sound advice 😀 We opted against oil filled in case of leaks & preferred to avoid free standing units. We're hoping to sell the house later this year - we wanted something sturdier than just a free wheel oil radiator, but didn't want to break the bank either. Electric rads seemed like the best choice. Great to get your input to help with the decision making 👍 Shadow -
Recommendations for electric radiator
SilverShadow replied to SilverShadow's topic in Central Heating (Radiators)
Am guessing, but contemporary for £300-£350 might be a bit tricky 😉 Tbf, its not space age, but still a long way from the old cast iron rads of yester-century Was there something specific that would meet the price range & just be a wall mountable unit with simple installation? 🤔 -
Recommendations for electric radiator
SilverShadow replied to SilverShadow's topic in Central Heating (Radiators)
Thanks for that. I think I will probably opt for this one - heats a room 50% bigger than ours, so should be fine: https://store.rioheating.com/products/rio-eco-1500w?variant=36968783446080¤cy=GBP&utm_medium=product_sync&utm_source=google&utm_content=sag_organic&utm_campaign=sag_organic&gad=1&gclid=Cj0KCQjwoeemBhCfARIsADR2QCsk1DSYaPooFAGu1PzBzgWtPk8fd9hSeesXyYozzuGJX1t-3hHtnMAaAiIXEALw_wcB -
Best way to cut small porcelain tiles
SilverShadow replied to SilverShadow's topic in Wall Tiles & Tiling
Thanks for that - guess I'll need to invest! 😉 I wasn't sure if an angle grinder would be too ferocious for such a small tile. Best get some strong clamps for the tiles while I'm at it I guess 😀 -
Recommendations for electric radiator
SilverShadow replied to SilverShadow's topic in Central Heating (Radiators)
Good call with cloud services. I know some folks control their heating/lighting with generic 3rd party apps. So was hoping I could use similar -
Best way to cut small porcelain tiles
SilverShadow replied to SilverShadow's topic in Wall Tiles & Tiling
Thanks for that - guess I'll need to invest! 😉 I wasn't sure if an angle grinder would be too ferocious, but I guess the diamon blade will keep cuts nice & clean -
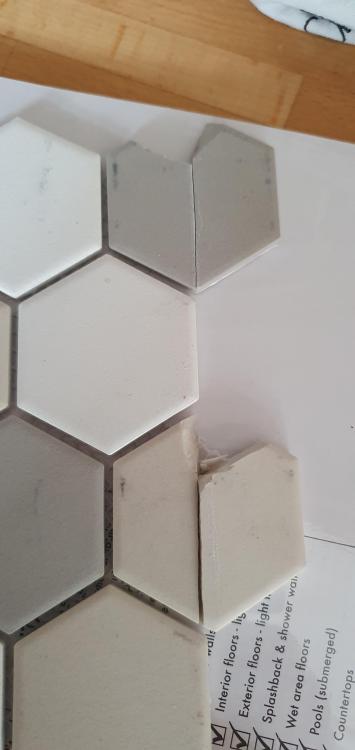
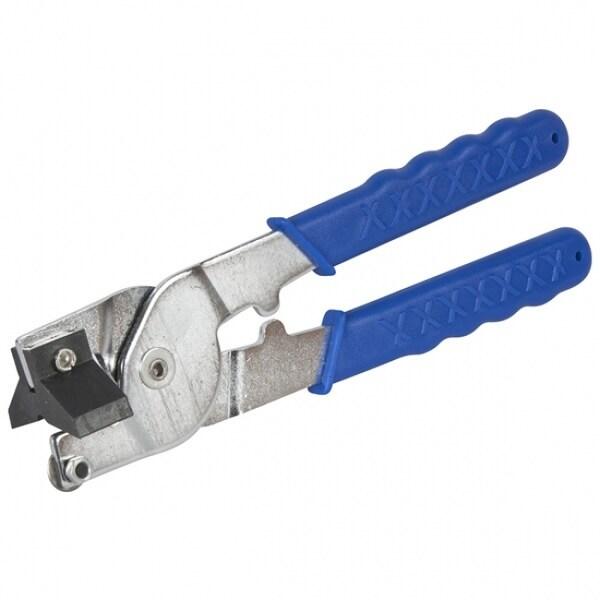
Hello again all, As part of our ongoing home renovation I'm looking to tile the kitchen. I bought some funky small hexagonal porcelain tiles (about 50mm in size) on a matted sheet. They're about 5mm thick I've been trying to cut them, but having no luck using a tile scorer and manual tile cutting tool. Unfortunately I'm just getting cracked and chipped tiles (see pic). I've tried the old score & press down over a pencil, but they're pretty tough suckers I don't have an angle grinder or wet tile cutter to hand, & a jigsaw tile blade did nothing much to it Im guesing tile nippers like in the 2nd pic is the way forward, provided i've scored deeply enough 1st? Keen to try and find the right tool before I end up with a porcelain rubble heap 😉 Many thanks for reading Shadow

