wakewaterblue
-
Posts
13 -
Joined
-
Last visited
Everything posted by wakewaterblue
-
Block paving staining help, not coming off
wakewaterblue replied to wakewaterblue's topic in Bricklaying, Blockwork & Mortar
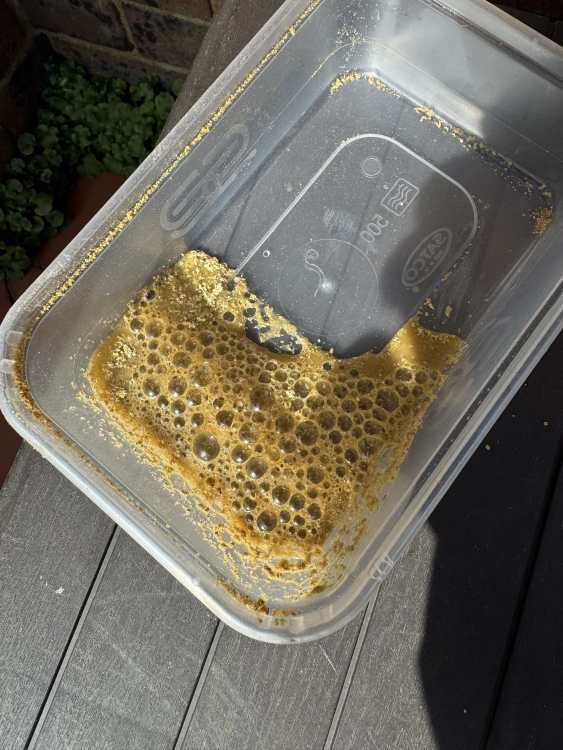
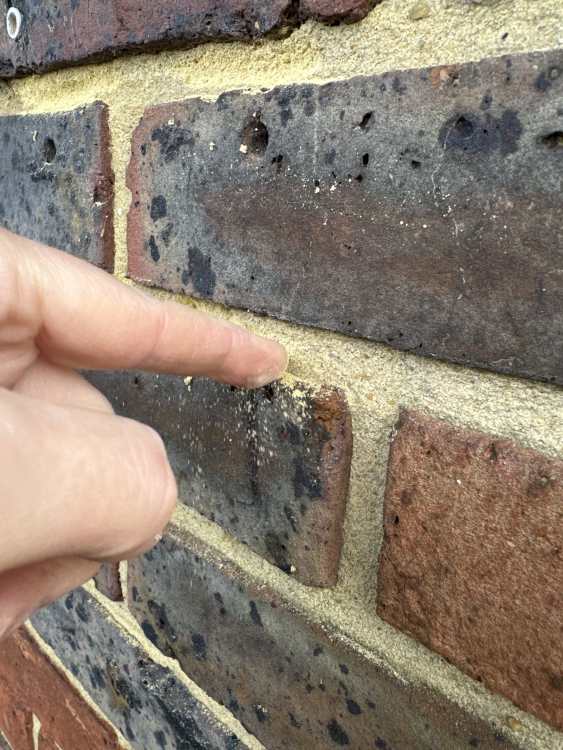
Well solvent remover didn’t work. To be fair I didn’t get the strong stuff as it only came in a massive container and was expensive. So I probably didn’t have strong enough stuff. My friend who did the jet wash, left some rust remover called Smelly Gel Pro which the name suggested, absolutely reeked of rotten eggs! Put it on some rust marks, got most of that off and it turns red when it does its magic. Decided to try that on some of the paving slabs for a go, it started to turn red and I left it but alas no it didn’t work. Thought it was a long shot given what the liquid is designed for. Next step is brick acid! -
Block paving staining help, not coming off
wakewaterblue replied to wakewaterblue's topic in Bricklaying, Blockwork & Mortar
Sadly they are completely different and flat on the other side. Such a shame as that would have solved it -
Block paving staining help, not coming off
wakewaterblue replied to wakewaterblue's topic in Bricklaying, Blockwork & Mortar
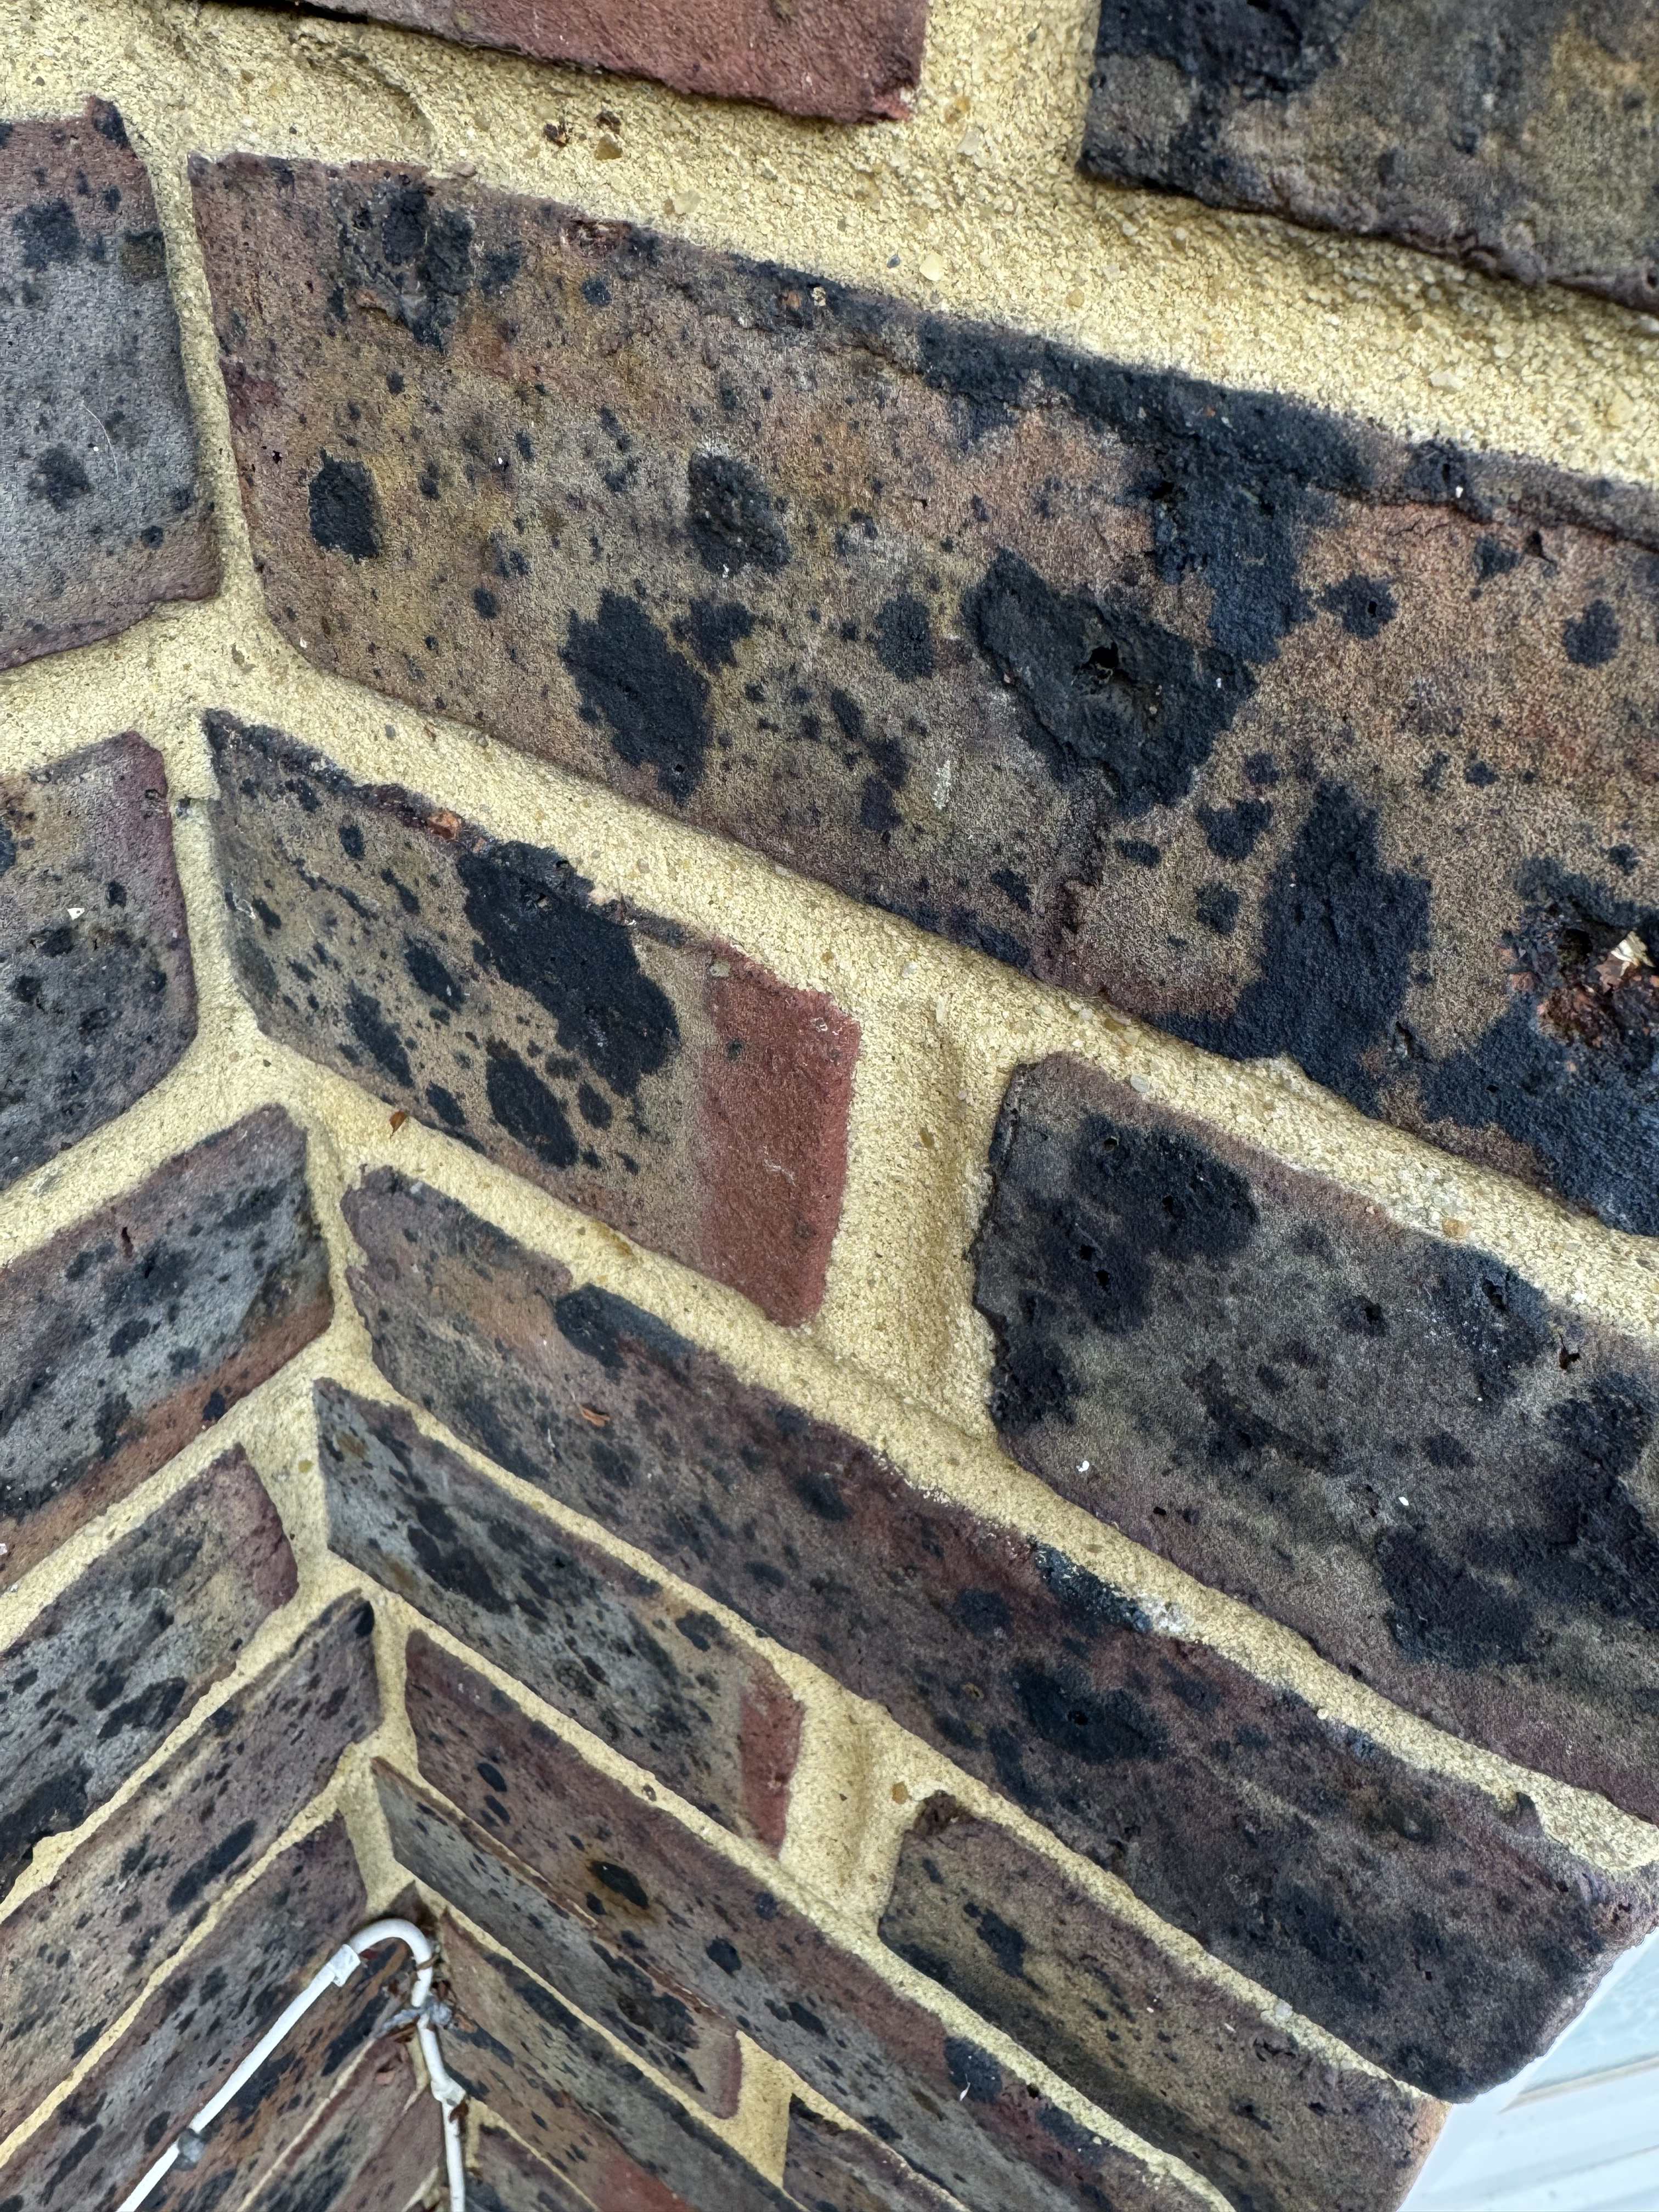
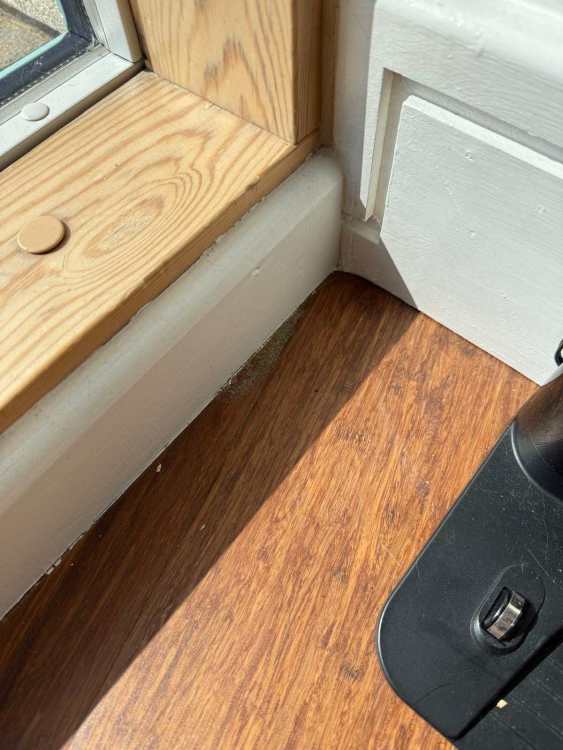
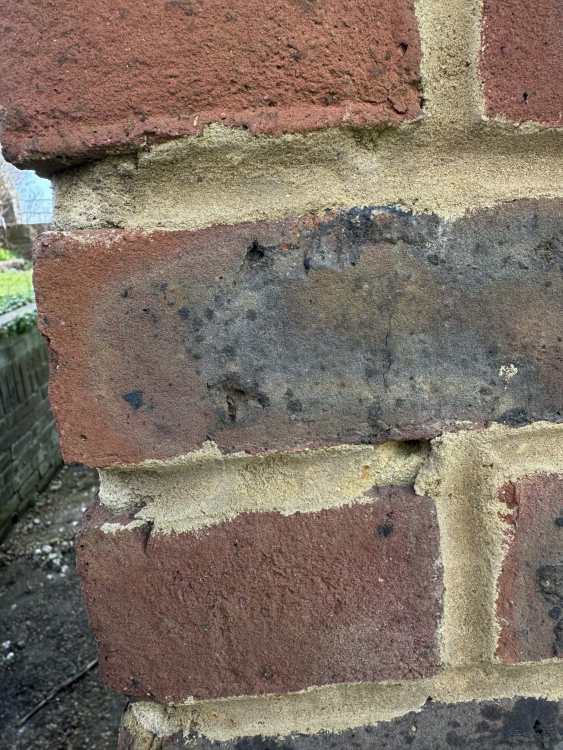
Also on another note. When they jet washed, it must have forced some of what appears to be mortar at the front under the full floor to ceiling window and door, to the other side. Looks like sand has come through under the skirting. I replaced this skirting some years ago as it was MDF which had got wet I think from either outside sneaking in over time or the floor being mopped. When I removed the damaged skirting, I could see a bit of a void under the window door frame so I sprayed some expanding foam filler in, trimmed it up and then put wood skirting back on. What would you say is going on at the front here? I was an apprentice brickie but only did the training so no expert. Seems some sort of mortar, with a damp proof membrane? I believe my building is concrete, a 4 storey block built about 14 years ago. Should I put in more expanding foam from the outside? I’m conscious that will not be attractive from the front and it’s not really what I want to see! Or should I put some mortar in there or something? How should it have been finished?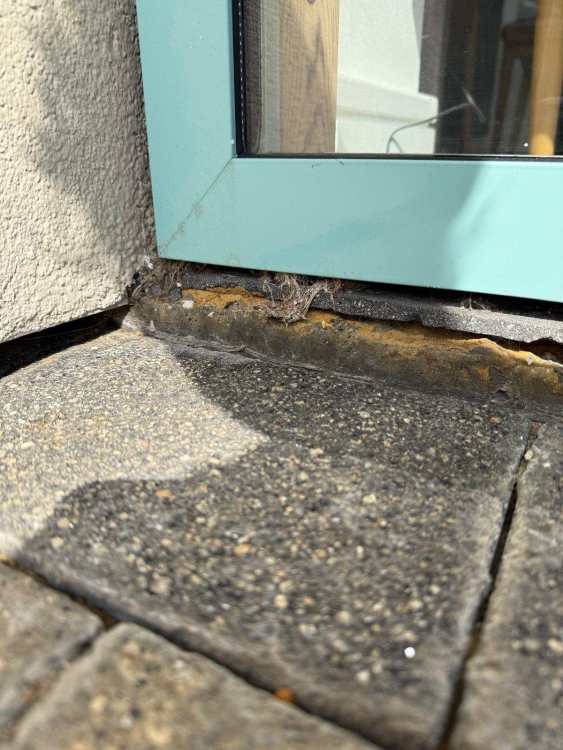
-
Block paving staining help, not coming off
wakewaterblue replied to wakewaterblue's topic in Bricklaying, Blockwork & Mortar
I believe my slabs are from a mixed pack as I have 160x160mm ones mostly, some halves and some rectangle. I will have to see if any merchants sell them loose. I believe them to be smooth and flat on the other side. Otherwise I would do that in a flash! I could swap some around yes but when I actually counted how many were actually affected it was a lot!! I will let you know how I get on with this sealant remover and go from there. -
Block paving staining help, not coming off
wakewaterblue replied to wakewaterblue's topic in Bricklaying, Blockwork & Mortar
I believe my slabs are from a mixed pack as I have 160x160mm ones mostly, some halves and some rectangle. I will have to see if any merchants sell them loose. I believe them to be smooth and flat on the other side. Otherwise I would do that in a flash! I could swap some around yes but when I actually counted how many were actually affected it was a lot!! I will let you know how I get on with this sealant remover and go from there. Thanks all -
Block paving staining help, not coming off
wakewaterblue replied to wakewaterblue's topic in Bricklaying, Blockwork & Mortar
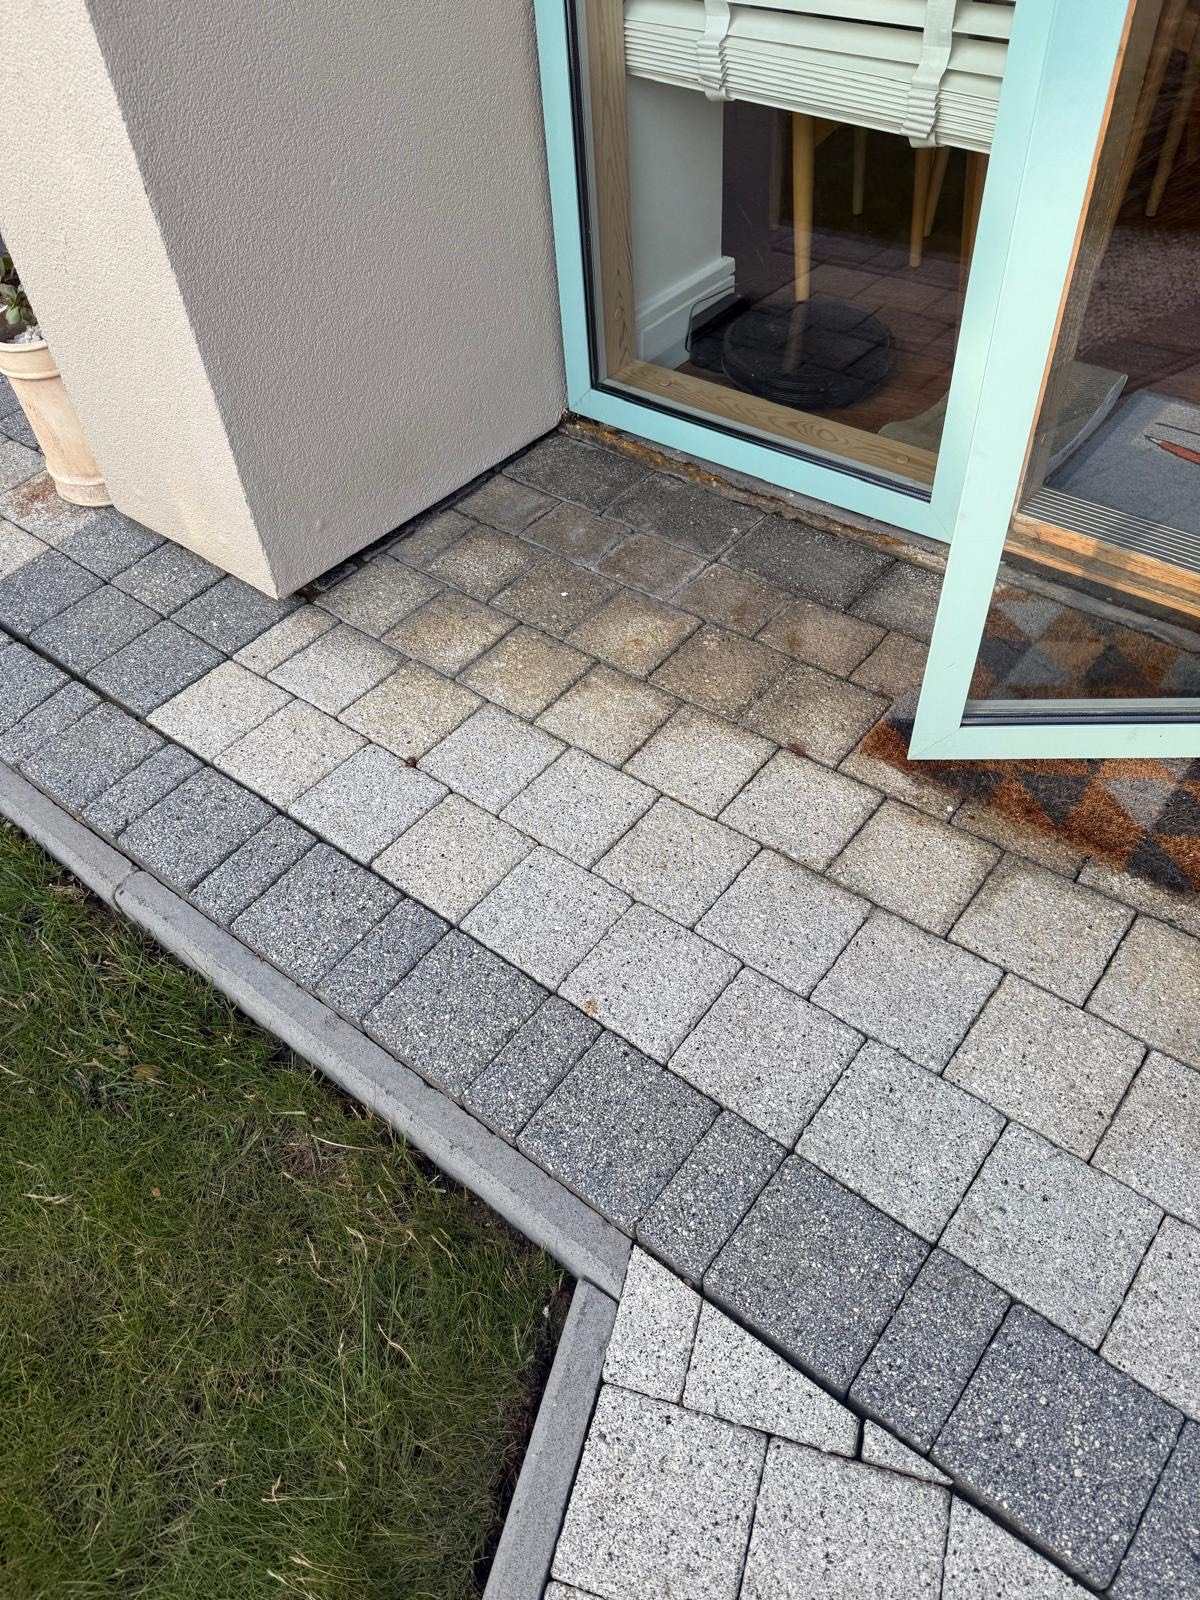
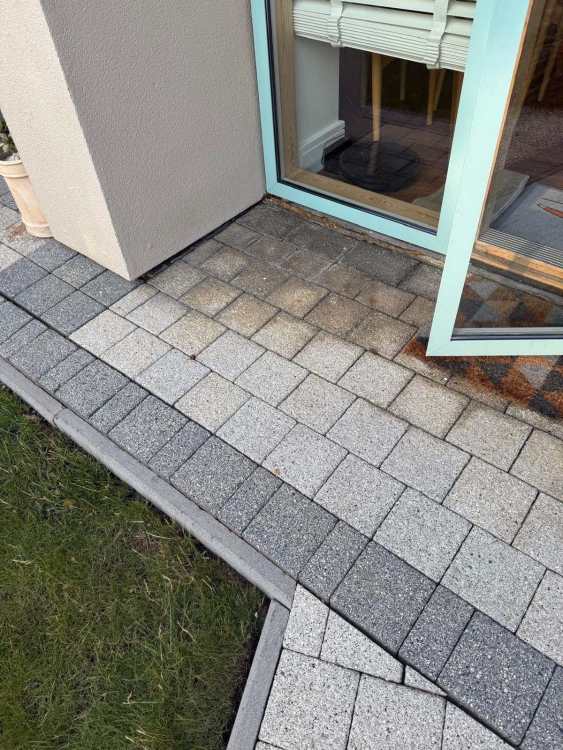
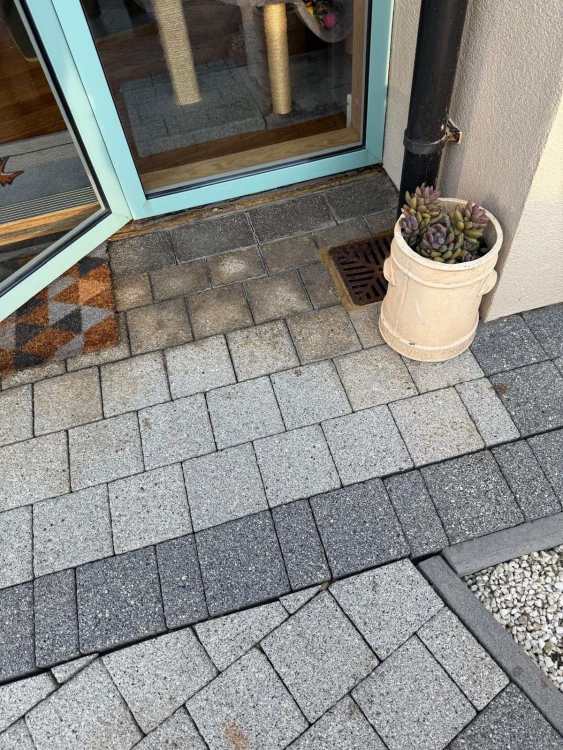
Thank you for your replies. On further investigation the only logical conclusion is that this is some old sealant that has discoloured from UV exposure. It's a bit more sheltered in that area so perhaps it's just degraded slower or perhaps a different type of sealant was put down in that area by the builders. I may never know the answer! I bought this property from new and have never had the paving cleaned or sealed until now, so before it gets sanded and sealed, I will try to sort this. The blocks were likely put down about 14-15 years ago. Hypochlorite was put on it for the jet wash clean and left on for decent time, it was like it was resistant to it and the jet wash power didn't cut through it, like a sealant would behave. I have purchased a special sealant remover for paving, so I will try that on one of the blocks first and see how it comes up and how much effort / time it takes. However, I think you are right in that it might be easier to replace the individual stained blocks! On my research, I think my paving blocks are Marshalls Argent? I know they come in a large mixed pack but I can see there is dark grey along the window edge in rectangles and the rest are the square light grey. Do places sell these blocks individually? Many thanks all -
I have some paving in my garden pathway, made from what I believe to be, Tobermore Sienna block paving as a closest match guess. I have 2 colours of grey and a friend of mine who runs a professional cleaning company, cleaned the paving up using his jetwash setup with hypochlorite. The paving has come up amazing however there is one section which has not cleaned up at all. Before we sand and seal it, we want to try and get this mark off as this is the main area we wanted to sort! Pictures attached. He cannot get the staining off and has asked around to people in his industry but they don't know the answer. It could be some previous sealant used, the gaps seem to be quite hard and I've even scrubbed and scrubbed in the past but nothing changed. It's just odd it's that section alone, it is slightly sheltered compared to the rest of it but I live on the coast and we get battered weather wise, but it's not out of the elements completely. An idea was to turn the blocks over to the fresh aide, however they are different on the other side, smooth and without a curved edge I believe so that isn't possible which is real shame! Any ideas what I can try and use to treat it with? If it's some sort of sealant, what might cut through it? I want to try this first before buying replacements as I will need to cut them to size... I do have an angle grinder but that is a last resort for me. Thanks!
-
Yes I wanted to add a little more aggregate finish to the mortar as I can see on one of the pictures that hasn't got failed mortar, a bucket finish with a light colour mortar and you can see the aggregates in it. So not sure 100% on what mix to do. I was told yellow sand would be a little grittier but is 6:1:1 of yellow sand, cement and hydrated lime the best? I've been advised by 2 repointing brickies to do this mix and with these ingredients. Maybe I could add just a sprinkle of aggregates into the mix as I will only be doing small batches at a time? Maybe I could do 5.5 yellow sand and 0.5 aggregate to make it up to the 6 parts?
-
Really appreciate your reply and time and sorry for my delay in getting back to you. Really interesting information and that you have a 60s home as well. What made you cover it up with EWI in the end? Yes the 60's seemed to be an innovative time, especially for weird and wonderful architecture so I have no doubt just the same was happening with building mechanisms and technology! I've been advised by some bricklayers elsewhere who just do repointing work and are very knowledgeable on old lime work and also cavity properties. They both advised that 6:1:1 Yellow Sand (slightly grittier to match what is there), Cement (one said white cement would give a nice lighter finish) and Hydrated Lime. They said this is what would be ideal and what was likely used back then, perhaps not the white cement, but to lighten the mortar up a little could be a nice touch as the bungalow was built on chalk. There is some history online about the all the bungalows in this street. It was part of a self build scheme. The man in each family that got involved in this scheme, each had a trade and would help each other build their homes at the same time which took about 2 years and all done in their spare time. Must have been exhausting! One person online mentioned as a kid, they remember their dad building their bungalow. They recall helping their dad pick away at the chalk to dig the foundations out, must have been hard going. So I thought it would be nice to lighten the mortar a little to acknowledge the abundance of chalk in this area! Whoever has repointed the back half and side of this bungalow has not raked it out and just done a thin layer of very yellow mortar on time, which is also started to come off in parts and the behind is crumbling! So at some point I will be doing all of that as well. It is also a very exposed windy location on top of hill, so once things are dried out after a week or so, I might even roller on some Storm Dry to help it out for the next 60+ years or so!
-
Thanks for your reply! My friend isn't too bothered about it matching the existing old mortar as such colour wise, but the more recent repointing done by someone else is all over the place in terms of colour, finish and I think just put on top of crumbling mortar, and so at some point in the future they will want me to rake that out and do it again..... so I don't need to match up with that mortar anyway. I think it would be important and right to match as best as possible with the colour and mix that was used in the 1960s so to put some lime in there. So to make it stronger and do a 5:1:1, what sand would you think is best? There are certainly some small stones in the existing mortar, so maybe some type of aggregate as well? It's interesting how different mortar mixes fail at different times, it looks like a lot of the other bungalows built in the same year in the same street have failed as well and it looks like the same person has repointed them really poorly! My parents house is a 1970 build and absolutely no sign of any crumbling or failing so far....
-
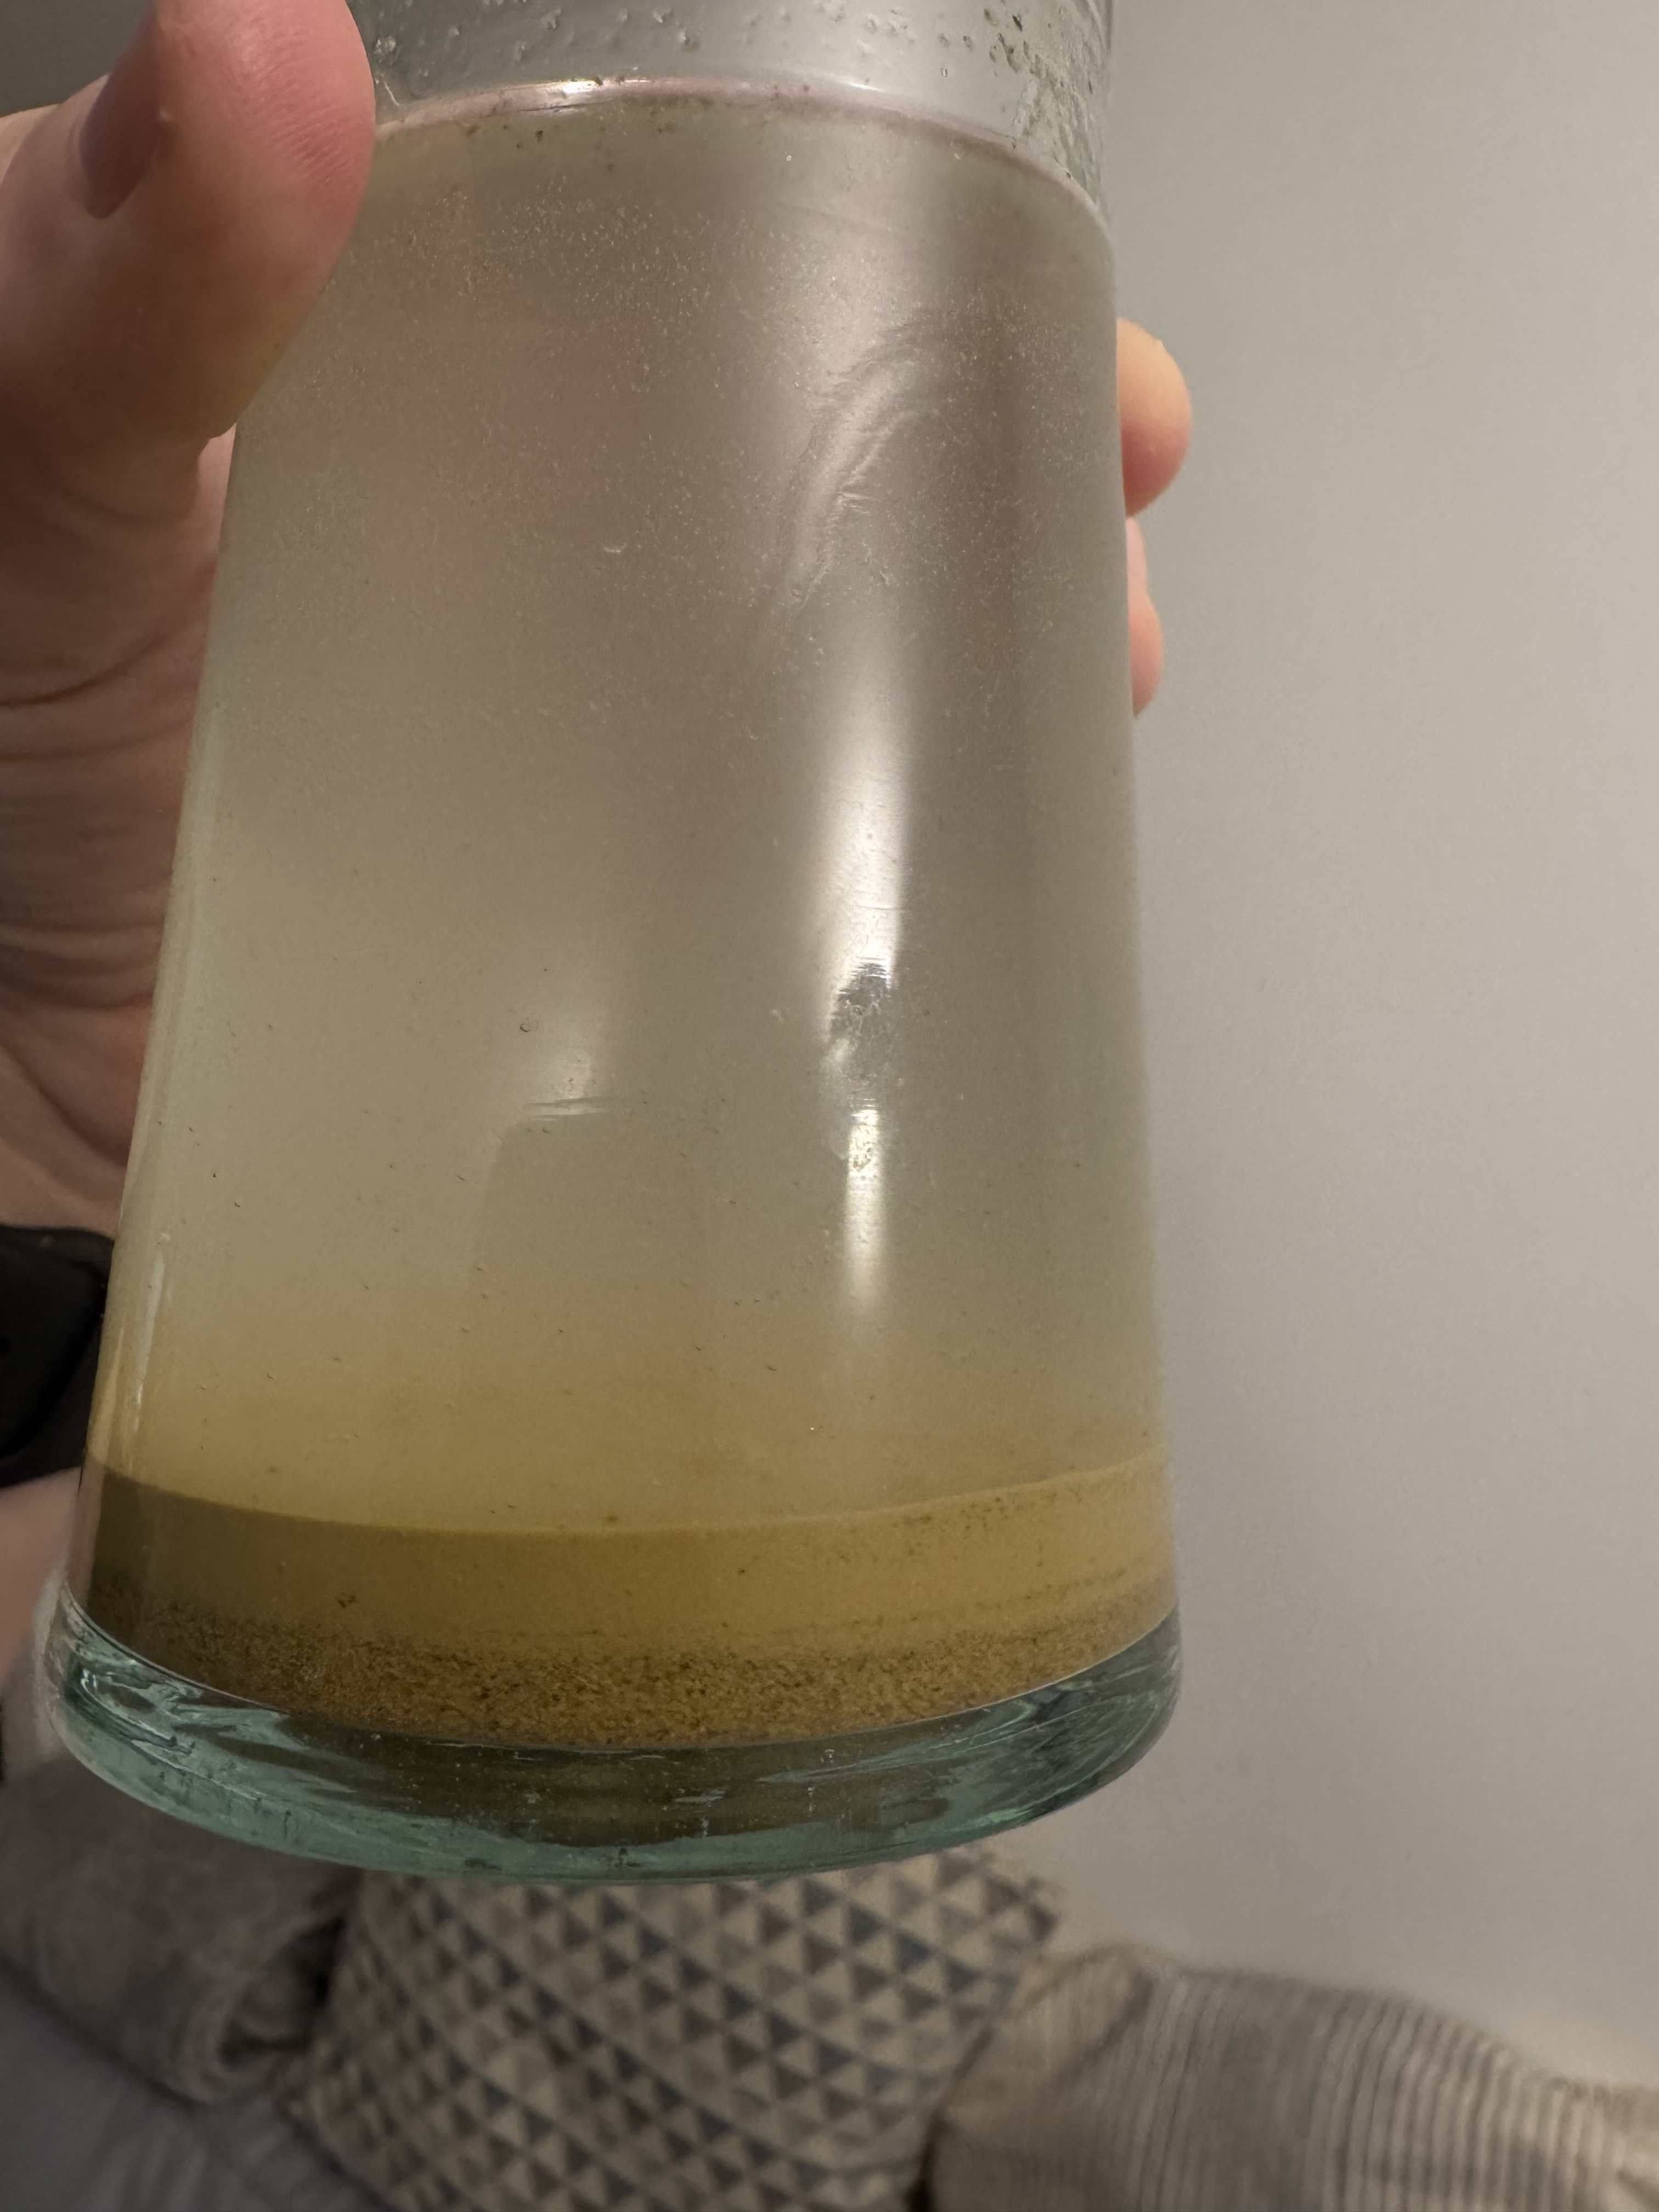
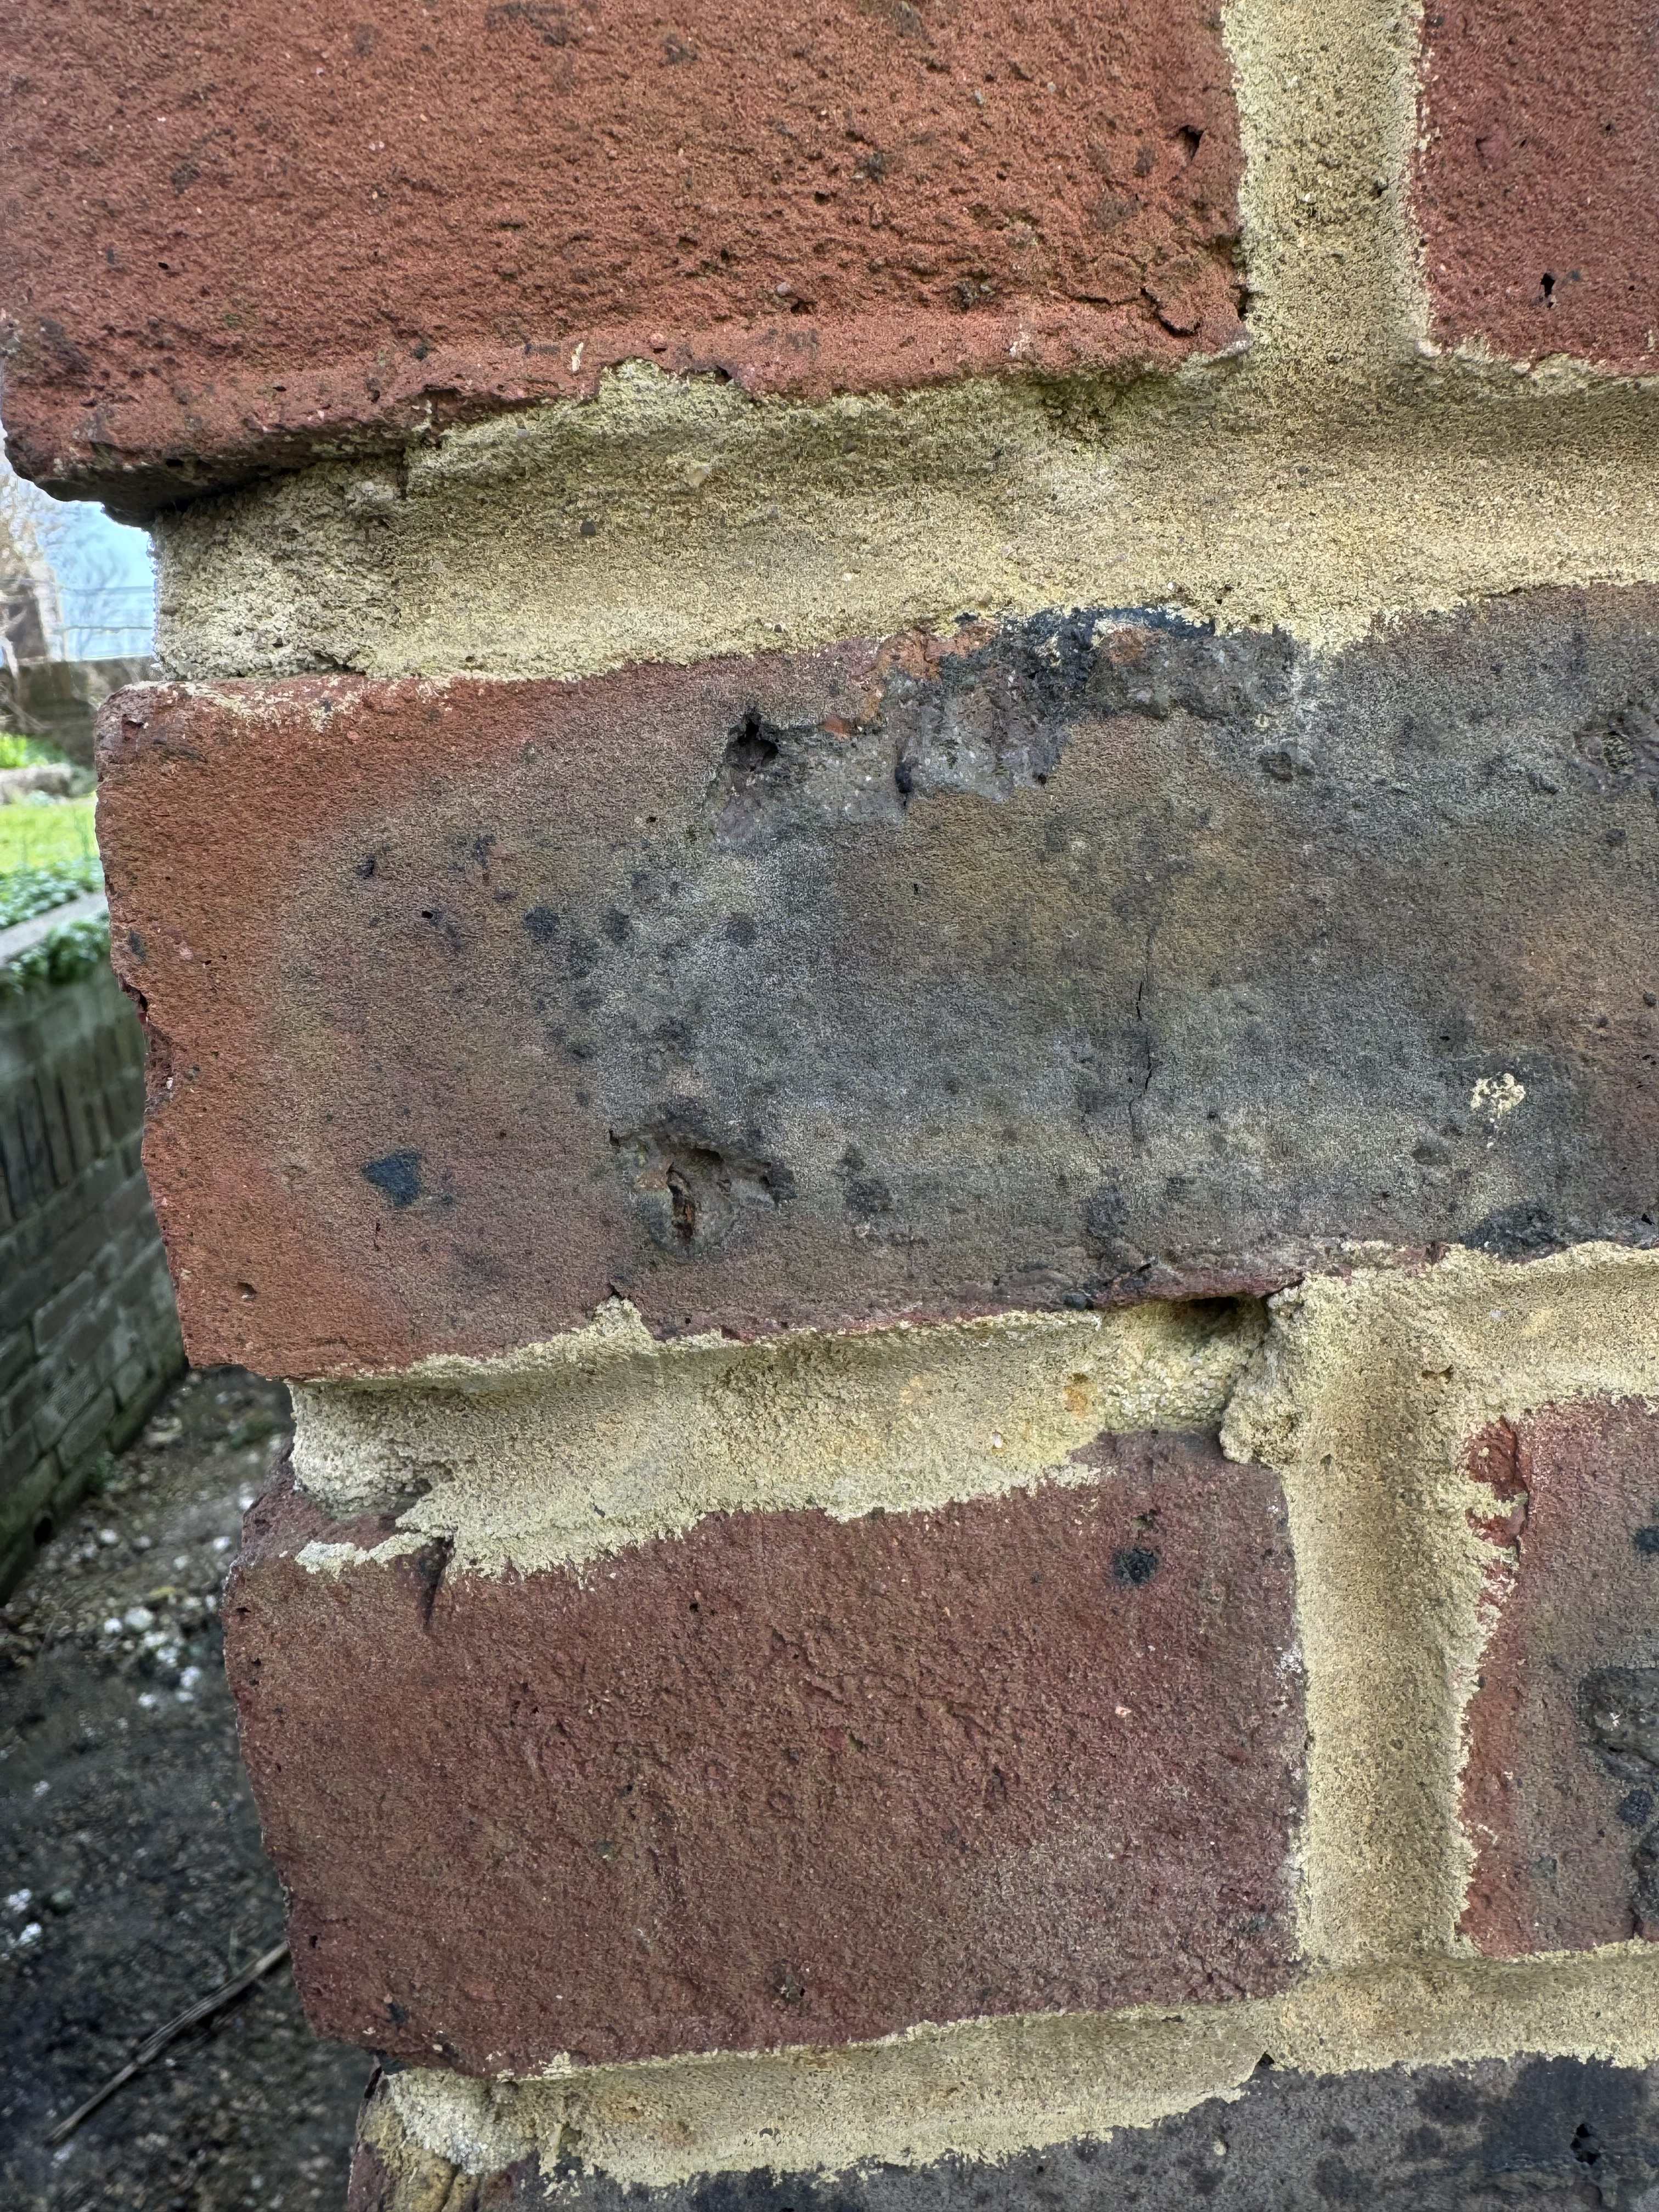
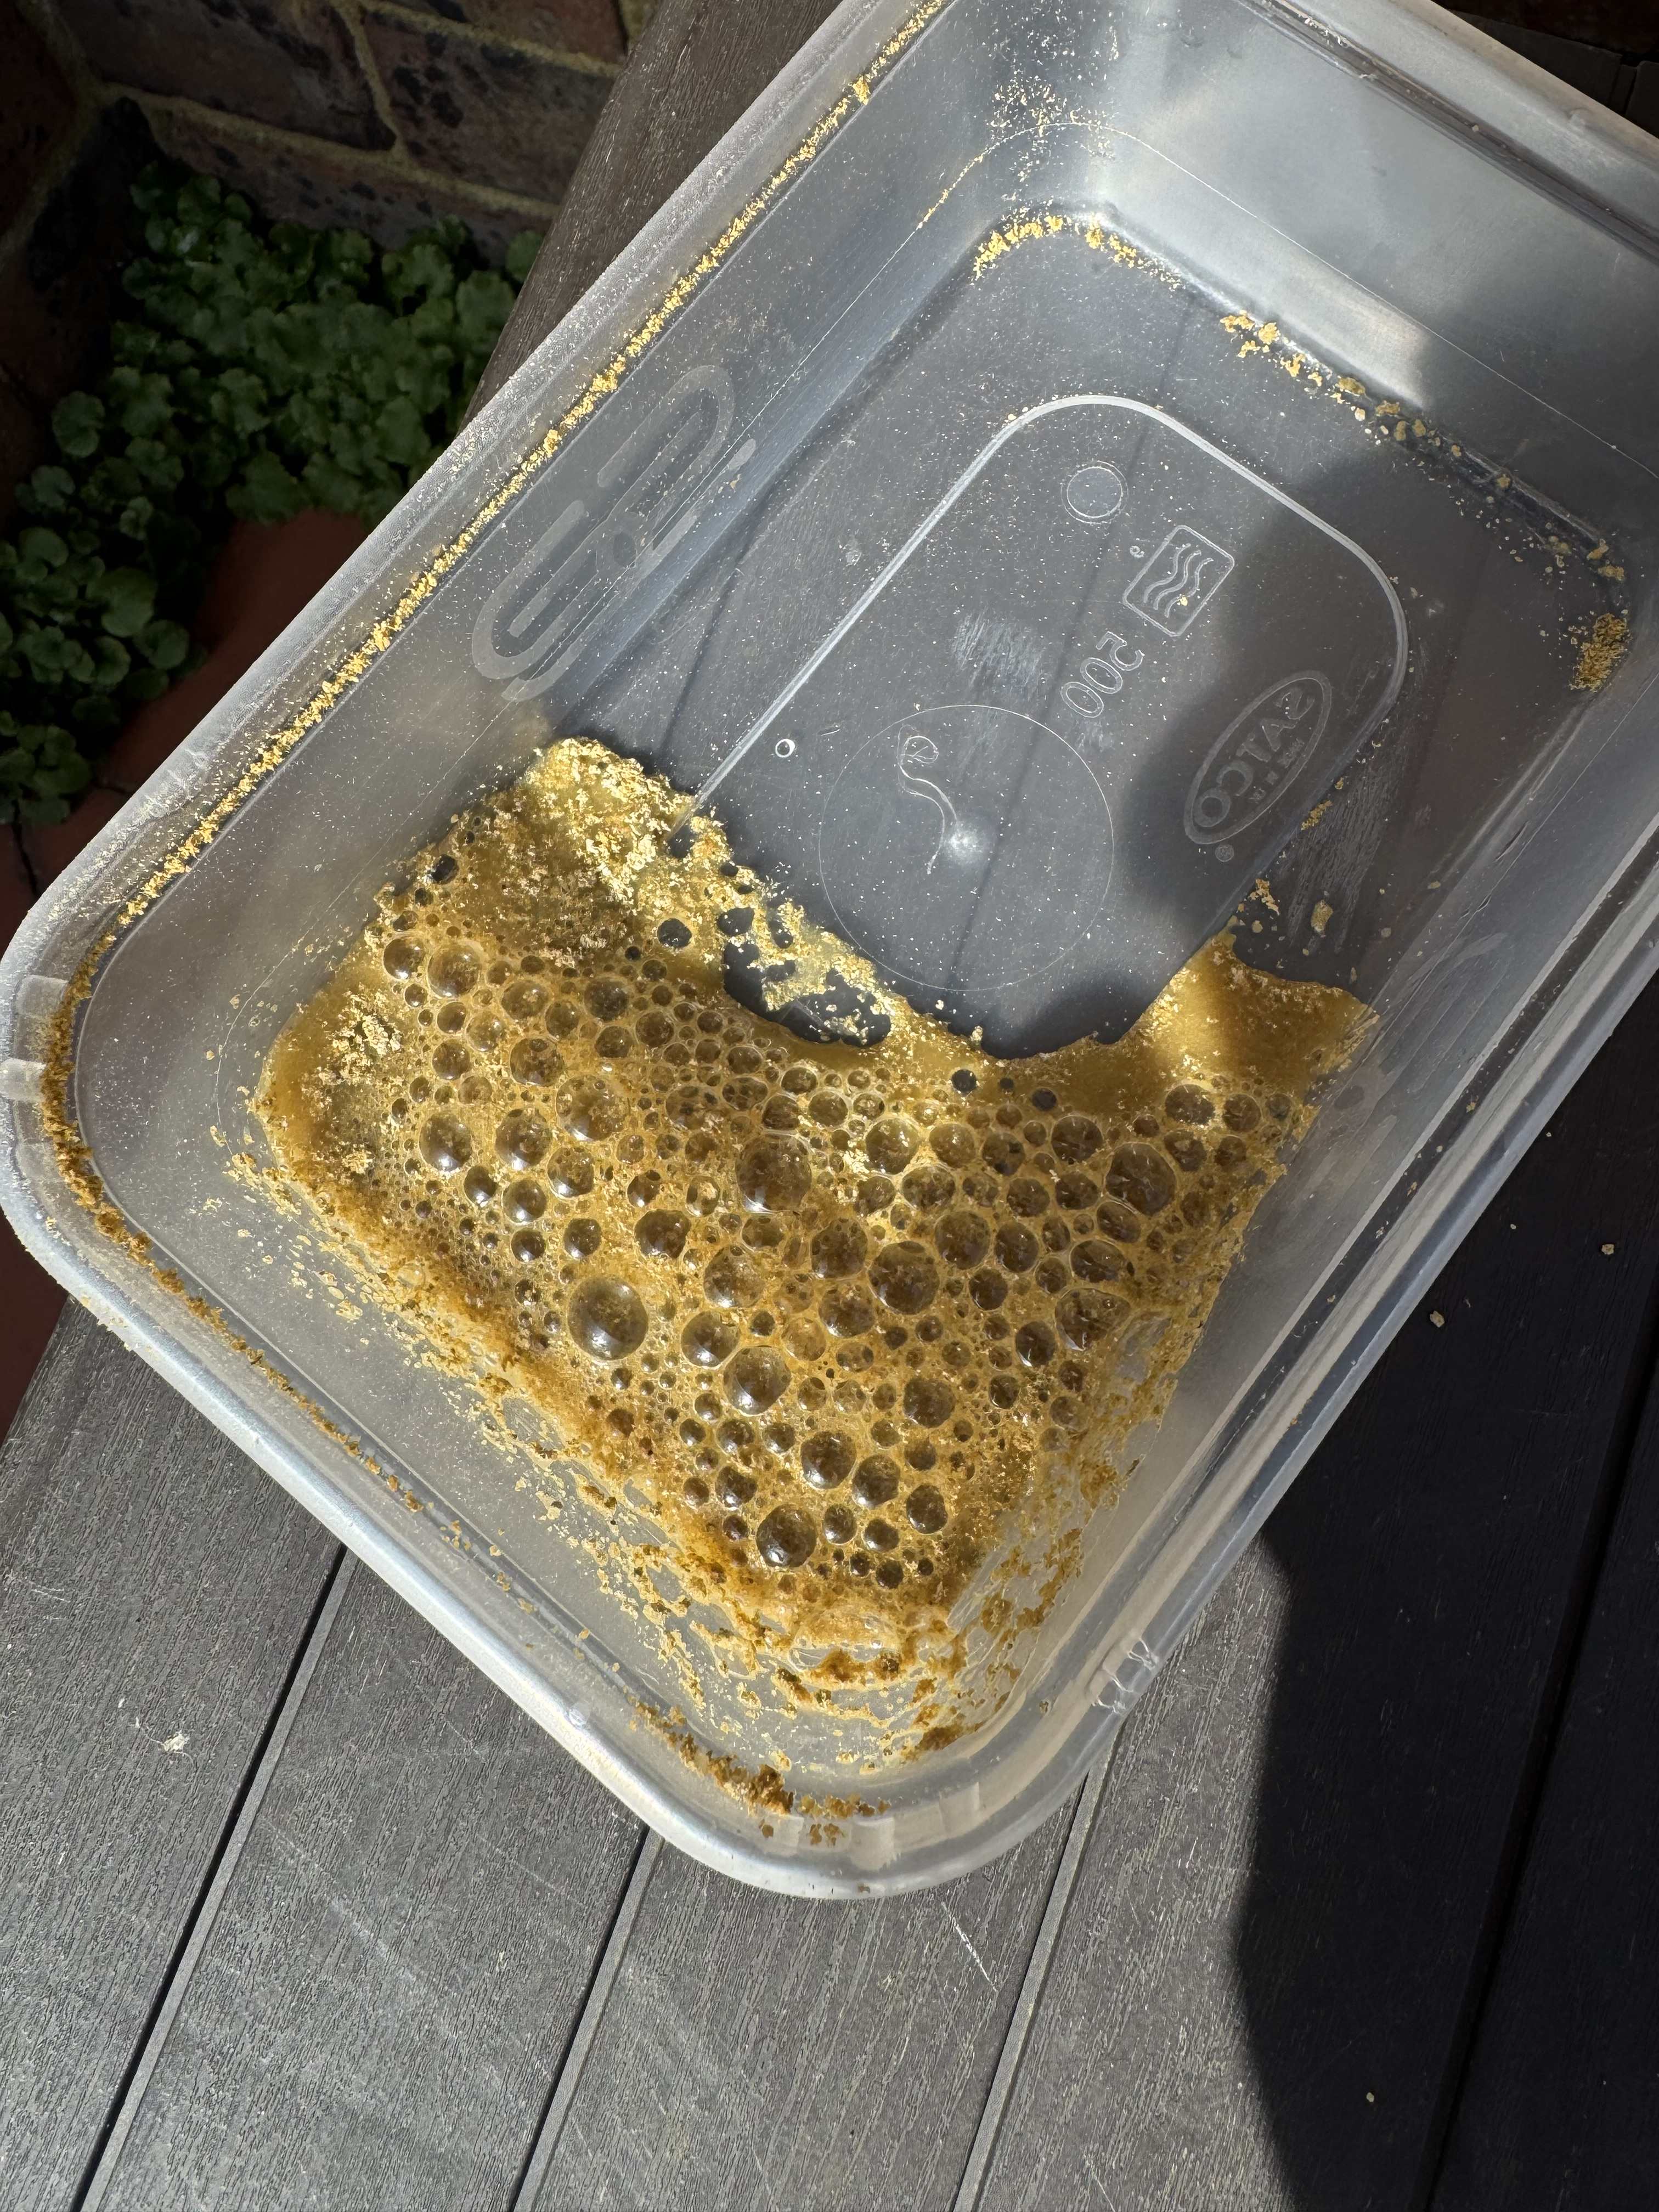
Image 5 - Crumbling mortar just rubbing my finger on it Image 6 - This is a more sheltered corner that shows where the old mortar hasn't failed as much and you can see it was originally bucket joint Image 7 - This is a sample of the mortar mixed into water and left to settle. Am I correct I am seeing a layer of sand and a layer of aggregate and the cloudy part is the lime?


-
Image 3 - The more recent repointing which looks like it's potentially not been raked out and just cement and sand put-on top? Image 4 - Same as above

-
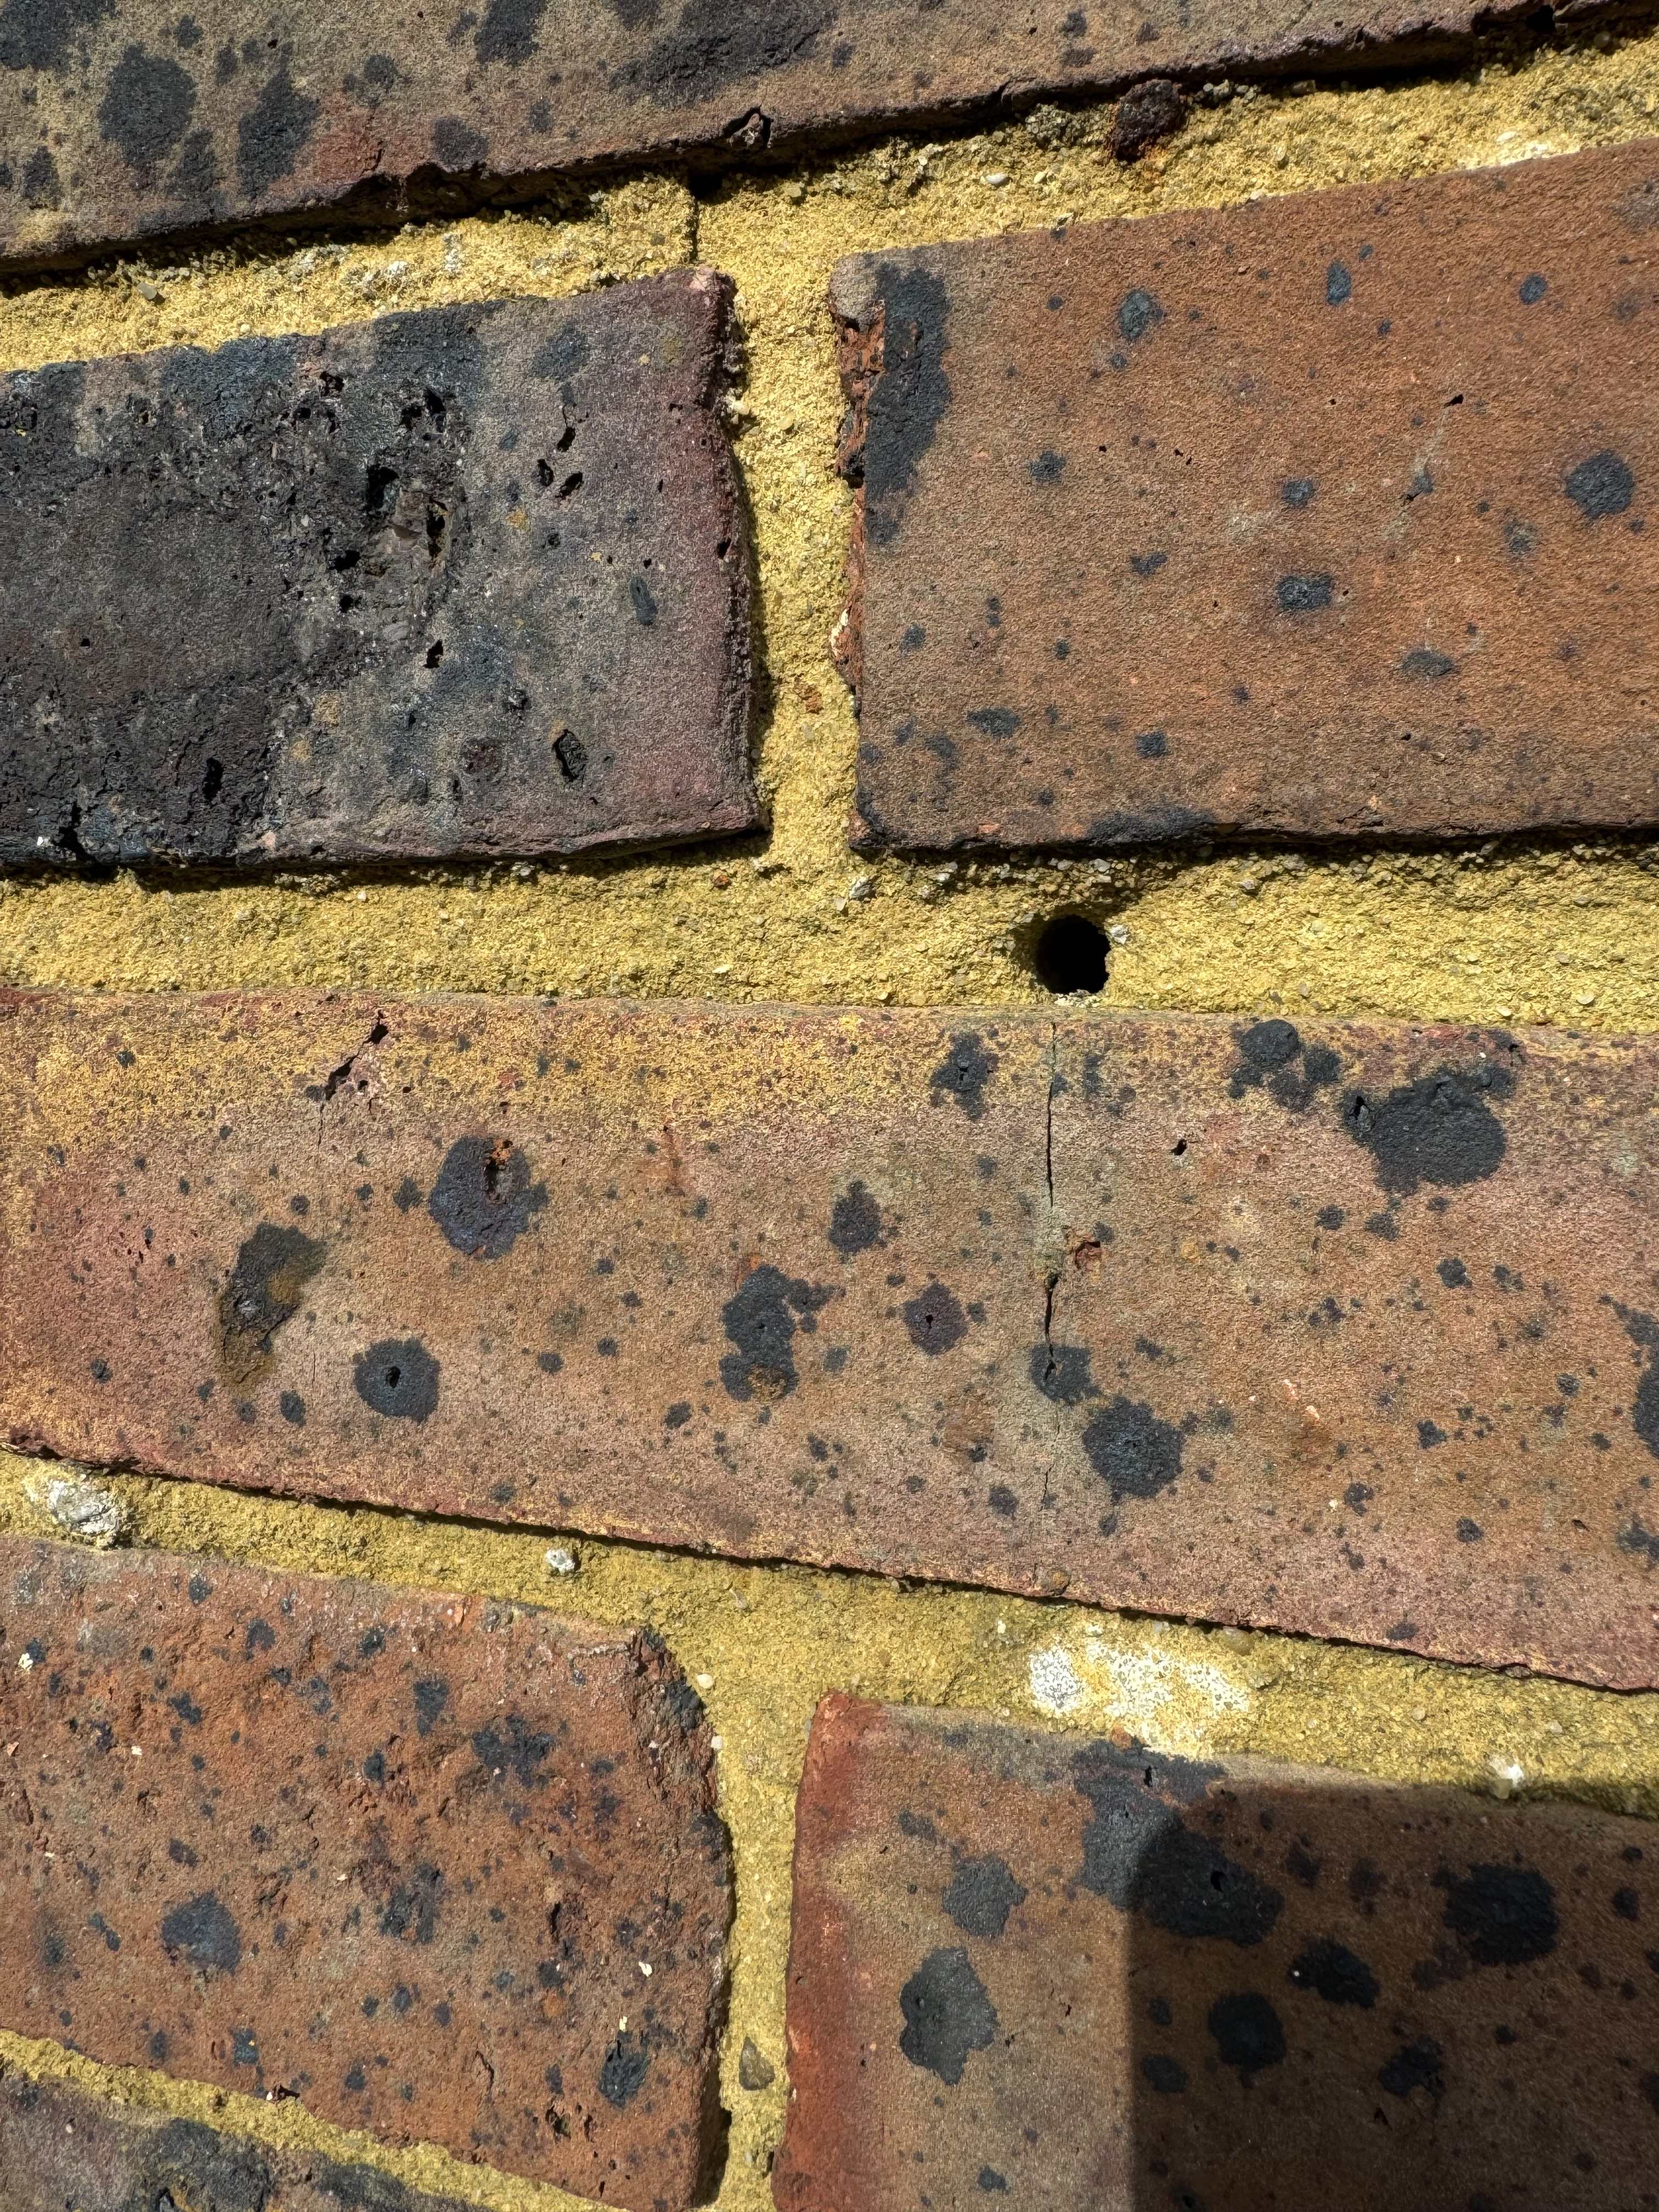
Hi all I'm repointing a friends property in a couple of weeks, a 1960's semi detached bungalow, and this will be my 2nd time doing it, the first time was whilst I was an apprentice bricklayer a couple years back.... (I didn't finish the training so I am not a bricklayer currently!) so this is my first repointing job on my own. I have all the equipment, dust extraction, grinder with raking blade and raker bit etc. The mortar is failing as it's crumbling away. Looks like someone has not too long ago, repointed the back of the property and one side of it, in a bucket joint finish. It's not the neatest work and looks pretty rushed, I'm not convinced they have even raked out the crumbling existing mortar and just pointed sand and cement on top... however the areas that haven't been repointed need sorting. It is crumbling away with various holes and looks recessed as the top layer has just gone. So I took a sample and it fizzed away in white vinegar suggesting lime is present. I also added a sample into some water, shook it up and let it settle to see the different layers to establish ingredients that may have been used. My initial thoughts were to do a mix of 6:1:1 - Sand, Hydrated Lime, Cement. I came across this after some basic research from someone online who said that would have been the likely mix back in the 1960's. Given its a cavity walled property, I know it's not going to be Hydraulic Lime NHL 3.5. However, there seems to be some slightly more course aggregate in the mix upon visual inspection and the sample mixed in the water suggests that perhaps? I have attached some photos to assist and would really appreciate someone's experienced suggestions on the correct mix. I would like to use hydrated lime if it was present before to be in keeping with what is there and to even assist somewhat in a colour match. What type of sand should I use? Thanks everyone! Image 1 - Existing mortar looking pretty recessed and failing! Image 2 - Fizzing mortar in vinegar