andeebee
-
Posts
25 -
Joined
-
Last visited
andeebee's Achievements
Member (3/5)
1
Reputation
-
 I agree and unfortunately this happens at the edge of every window and door Im hoping I can piece in a full height plank later
 -
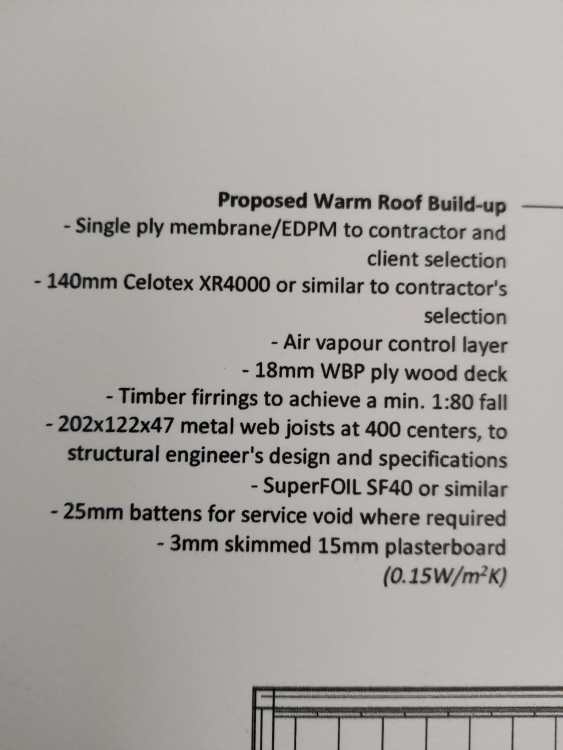
My builder sold me on the idea of Hardie VL Plank as a means to cover my extension, so I went for it as it does seem to give a clean modern look used on many new builds these days. I didnt know they hadnt used the system before, otherwise I probably would have thought twice about my decision, with my house being the training run. I am having the cladding running vertically, my choice. I have an over hang and it was supposed to follow this, however the overhang cladding was wood and it ended up running parallel to the house, but thats another story. Where some of the lengths of plank have been cut, they make a butt joint. My query is , is this an acceptable method for continuing a run. All the brochures of course show seamless runs of continuous planks. I did find a guide on using butt joints and it advised using some flashing underneath. Just curious to your opinion. Also the guides all talk about sealing the cut ends. I have noticed quite a few ends that are not sealed. What is the downside of this if not sealed/painted. Also this section by the door has been ripped out of a plank and then joined with a butt joint. The upper section is not supported by the rail that supports those sections to the left and it meets a not straight rip cut with a butt joint. I dont think its right, but again welcome your opinion and feedback. Also the section on the left under the trim you can see unsealed ends, this continues along this trim, you can see the bare cement through the holes in the trim. Can a section be replaced easily, or does the whole side need to come off to get to the problem board?

-
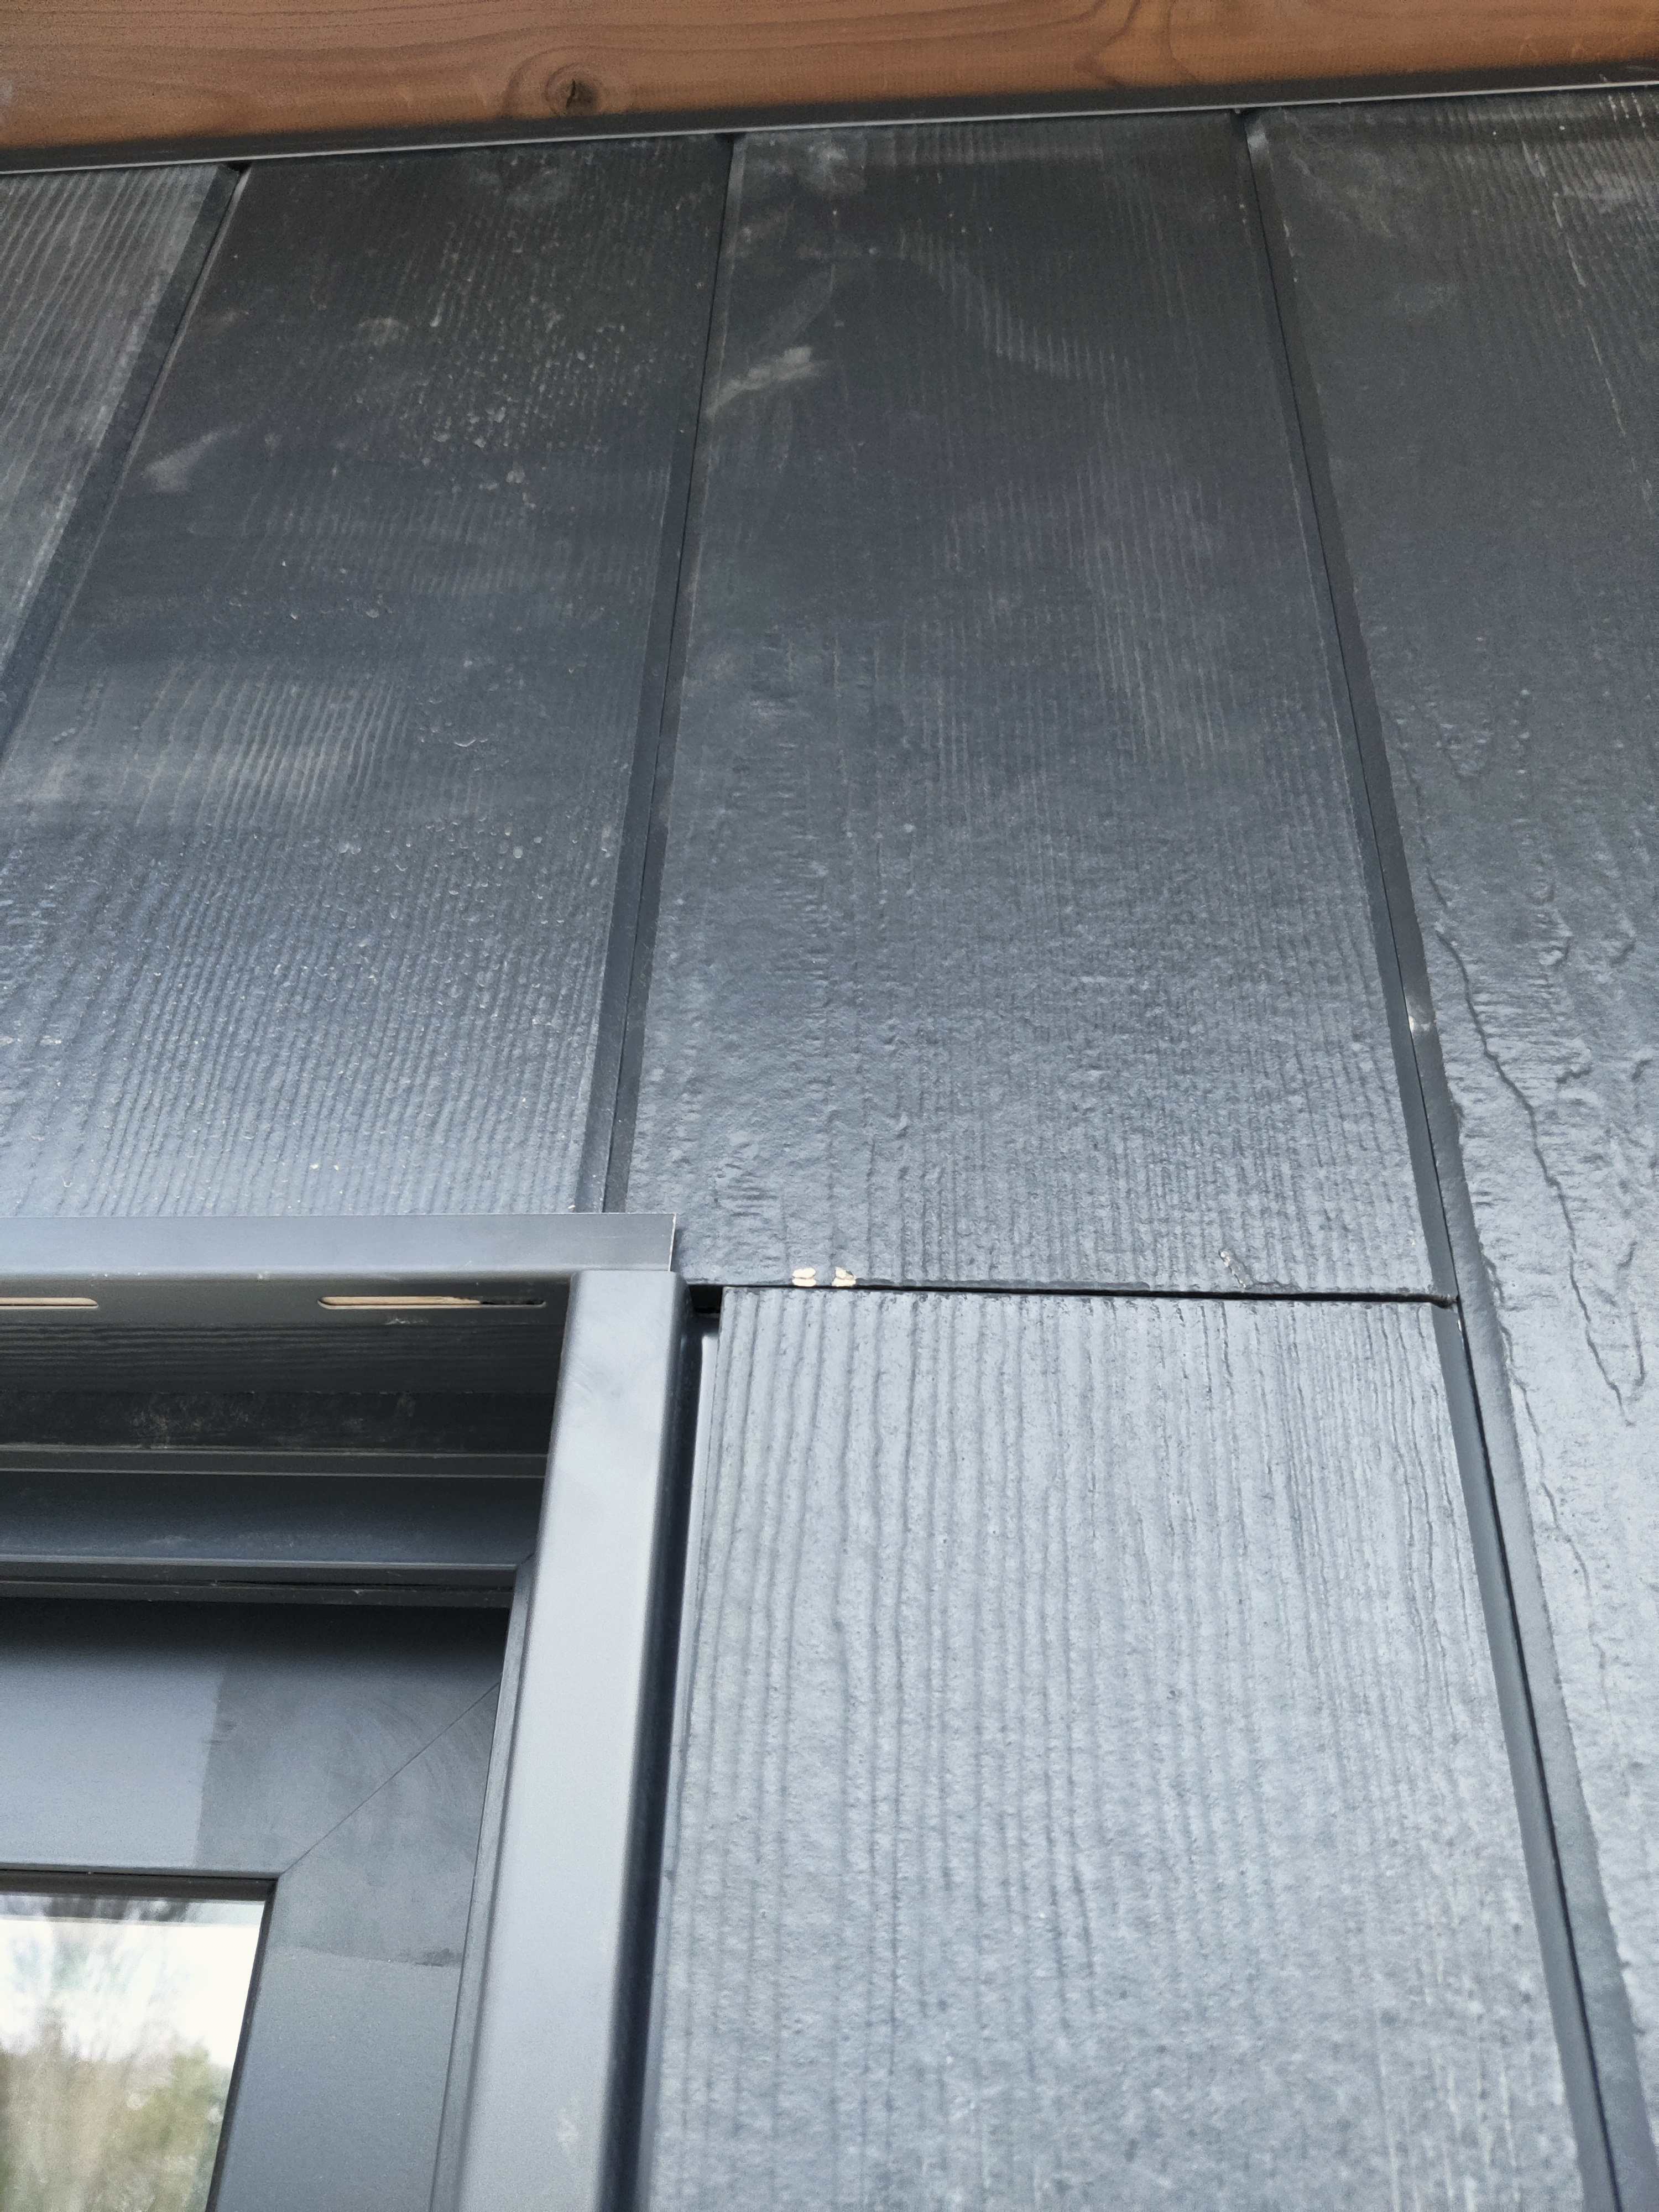
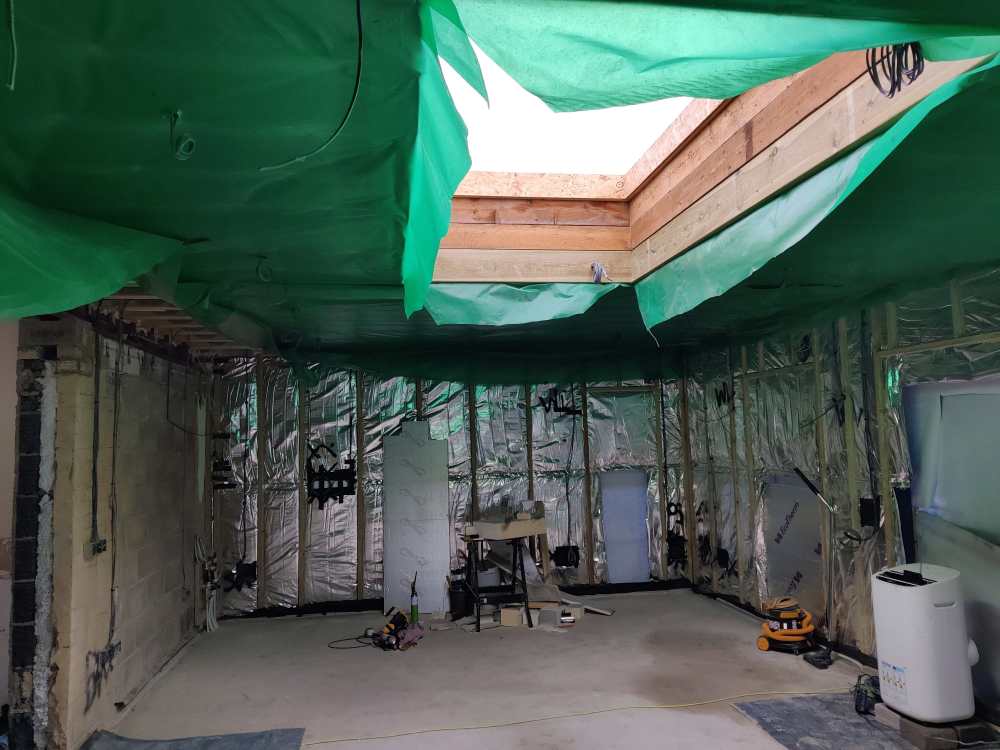
Windows arrive this week This is an element I can control as a. Its a square hole and b. the windows will (hopefully) fit I taped the centre of the timber perimeter of the window aperture over the weekend with Illbruck tape and have some compriband ready for the external seal layer and illbruck airtight foam for the internal sealing I will then tape the external bulding fabric to the window reveal onto the pre applied tape The roof lantern is also being fitted this week. I plan to line the internal reveal around the lantern with intello and tape that to whatever I decide on the with the ceiling fabric
-
Yes, MVHR will be fitted throughout building
-
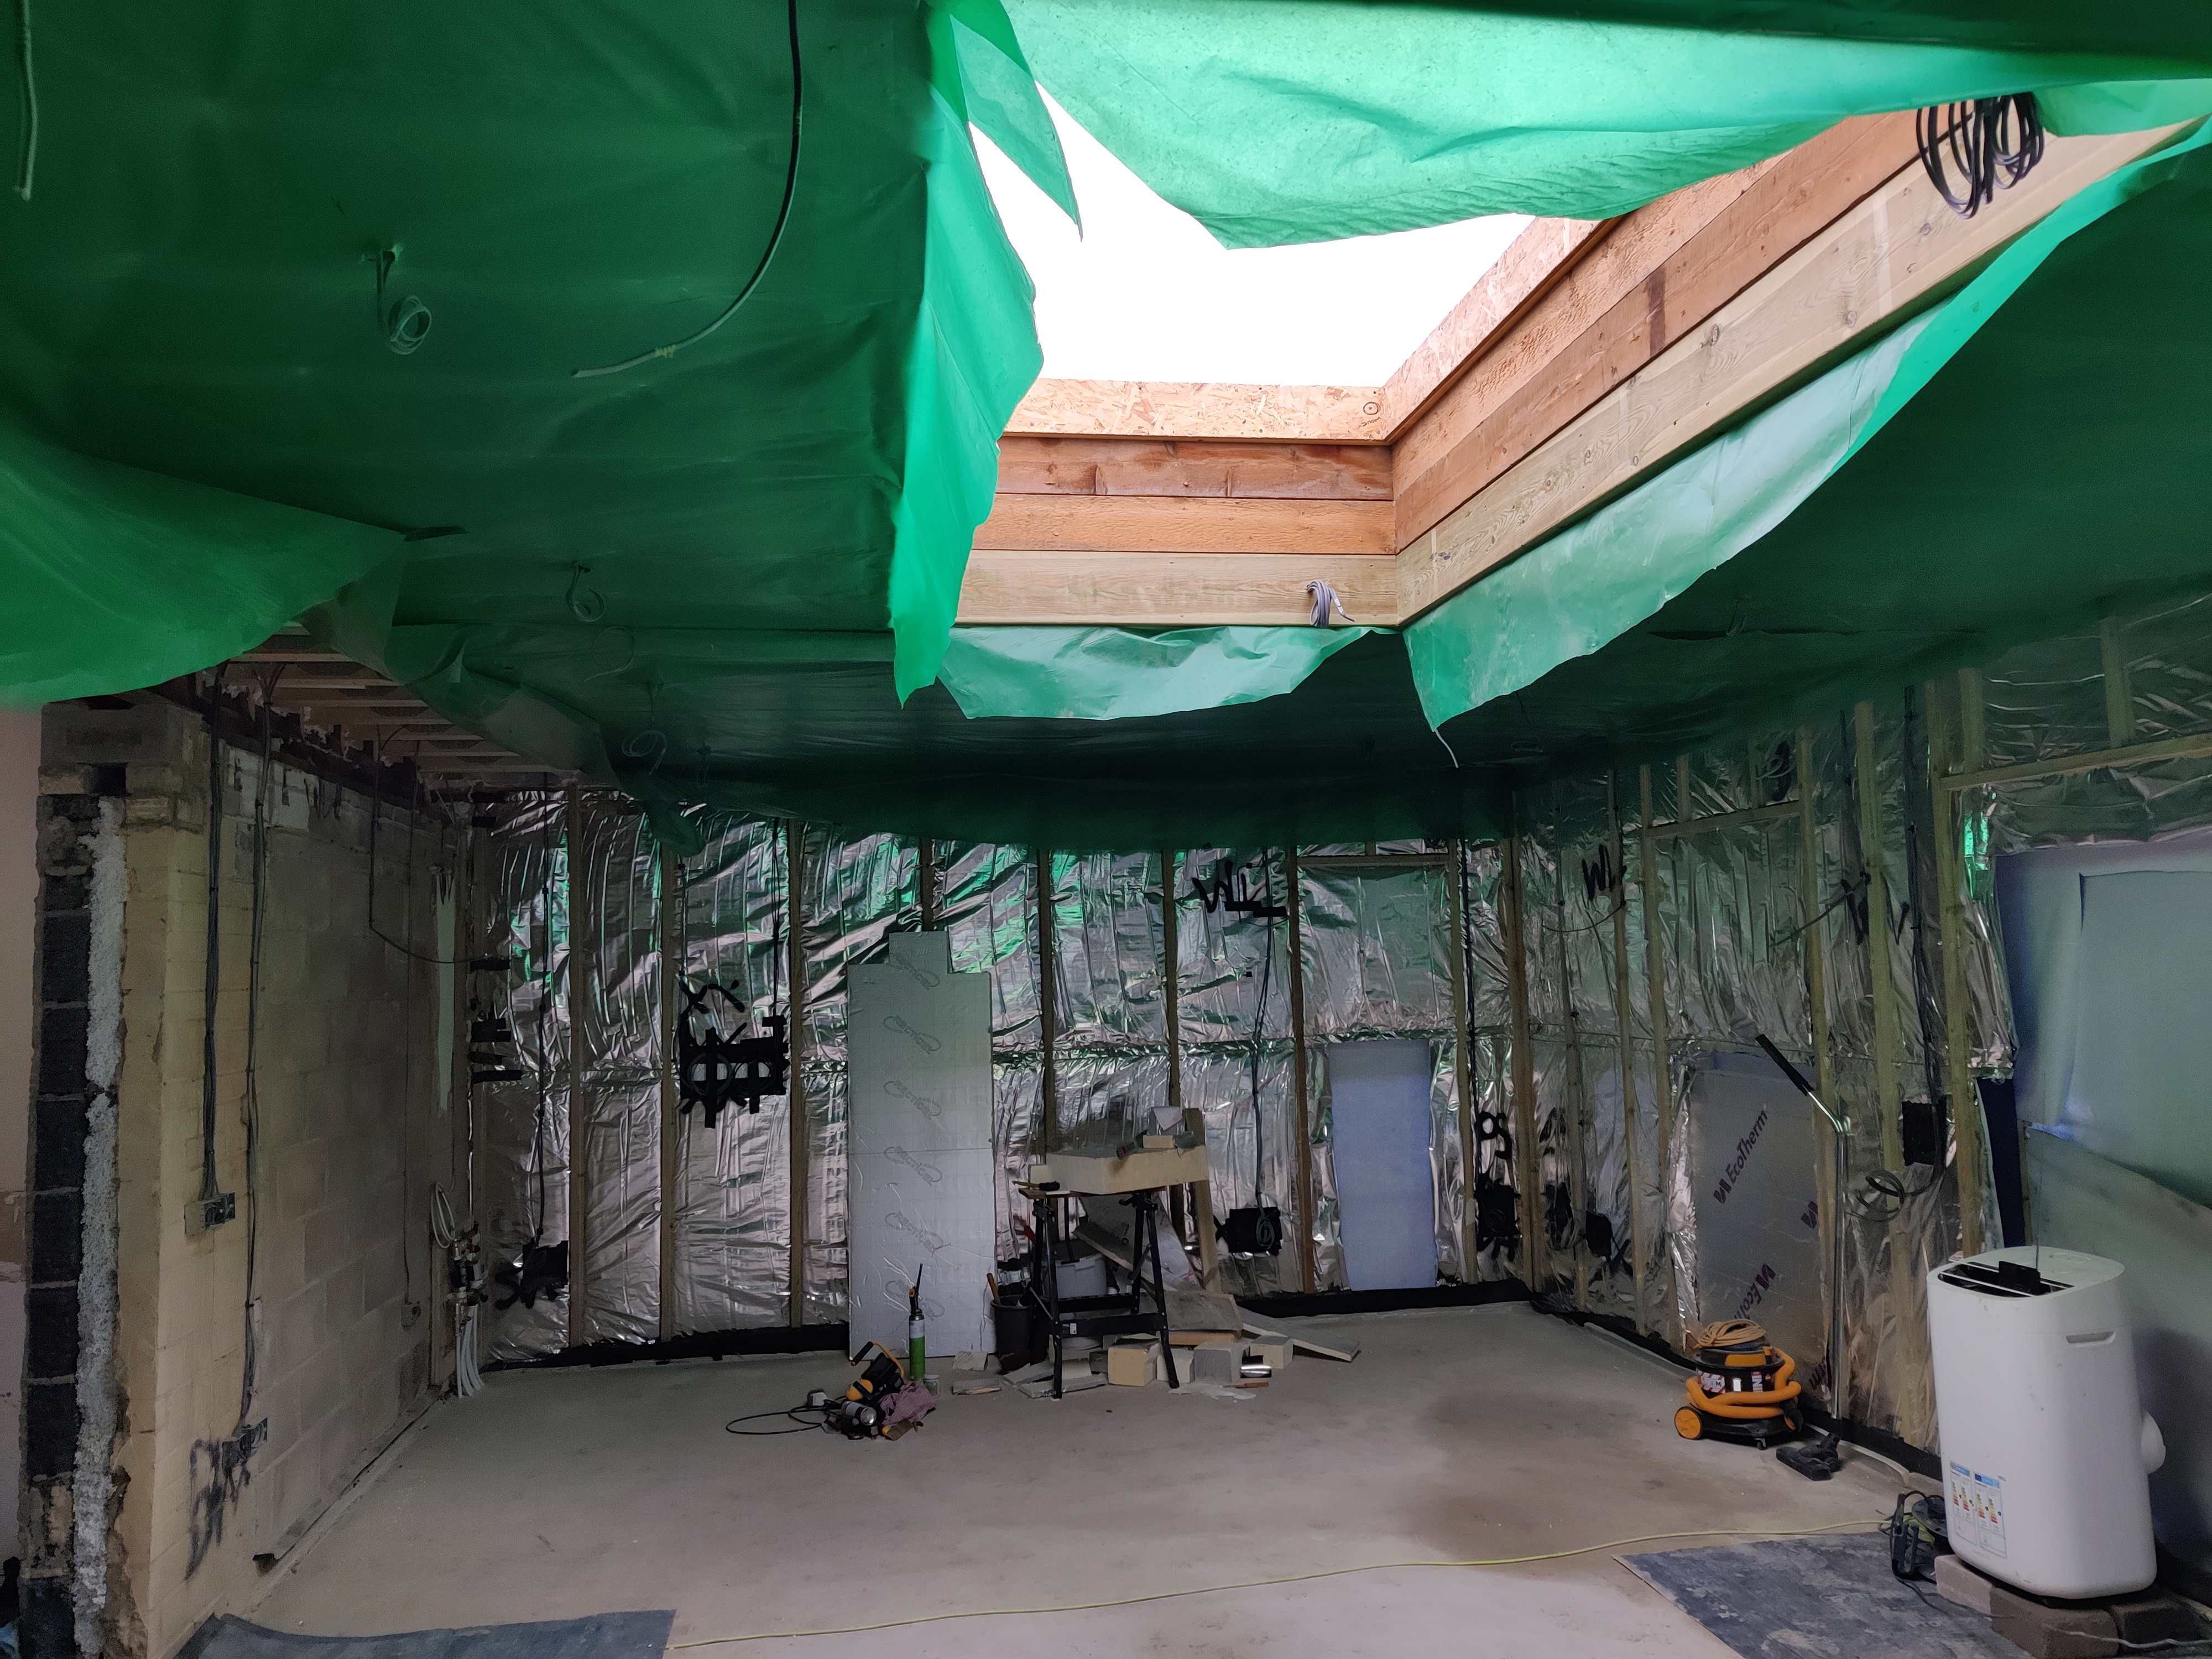
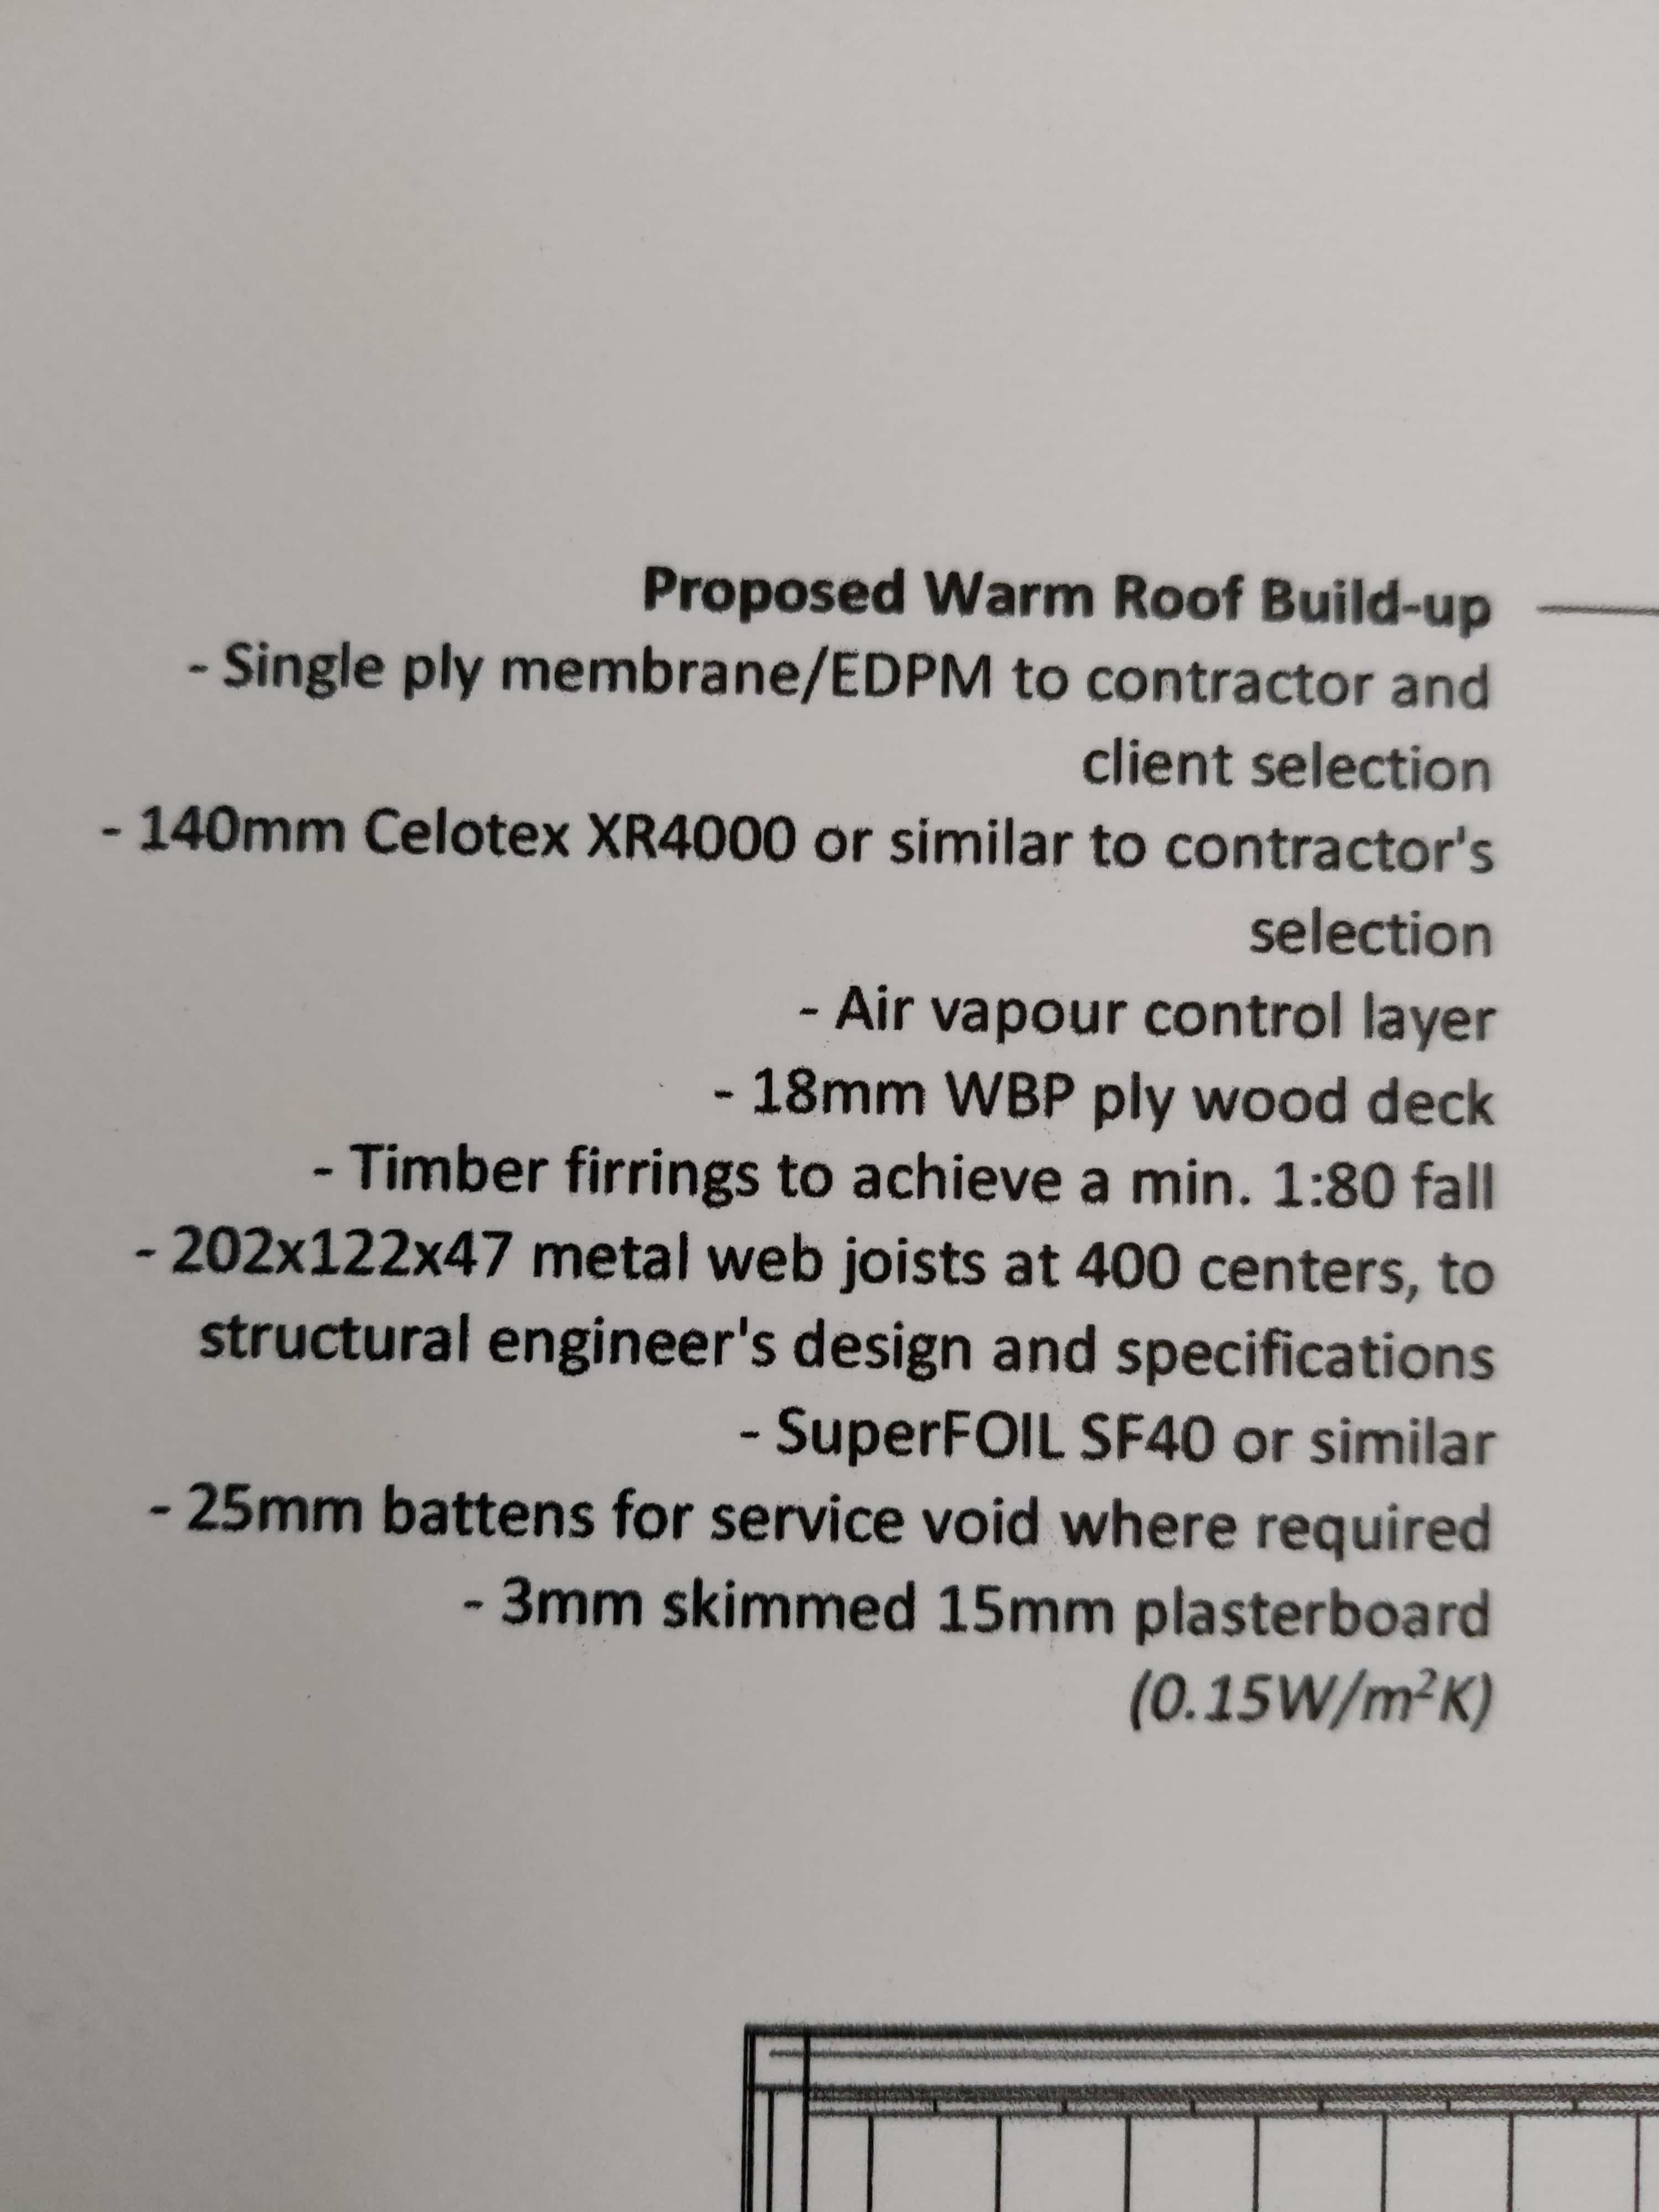
We have removed the superfoil element. It was added as an additional U value factor. I opted to increase the thickness of the PIR on top to 150mm. I guess had the superfoil remained it would have provided the same impermeable layer that the poly is now providing...

-
Nothing additional holding up that top plate across the door. The TF was designed by a structural timber frame consultancy previously used by the architect and builder.
-
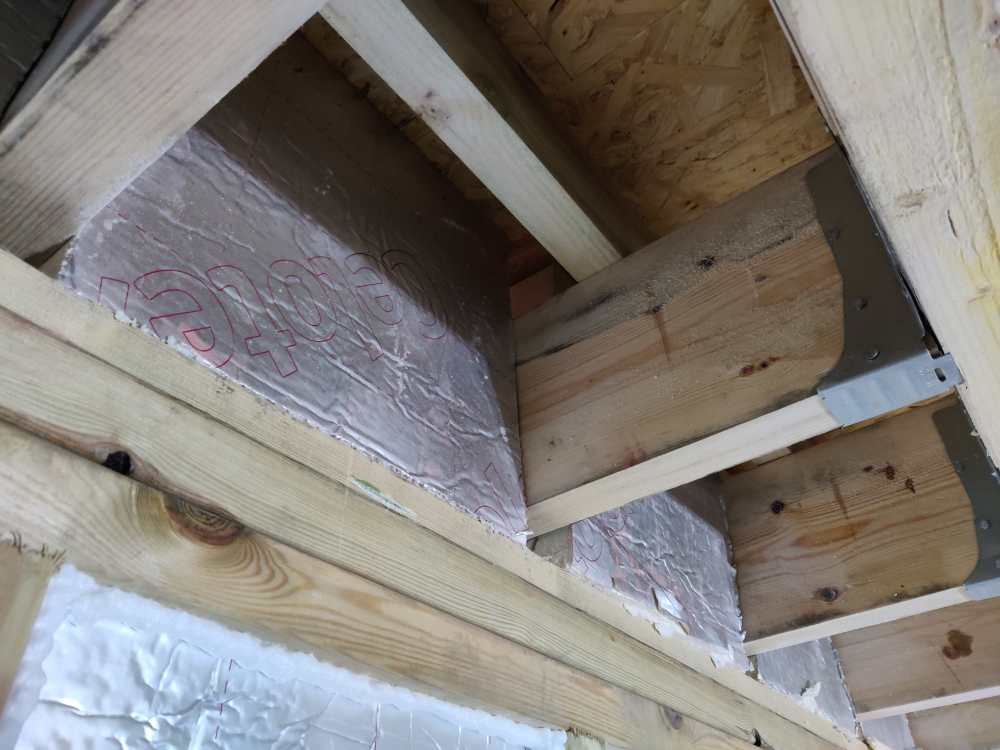
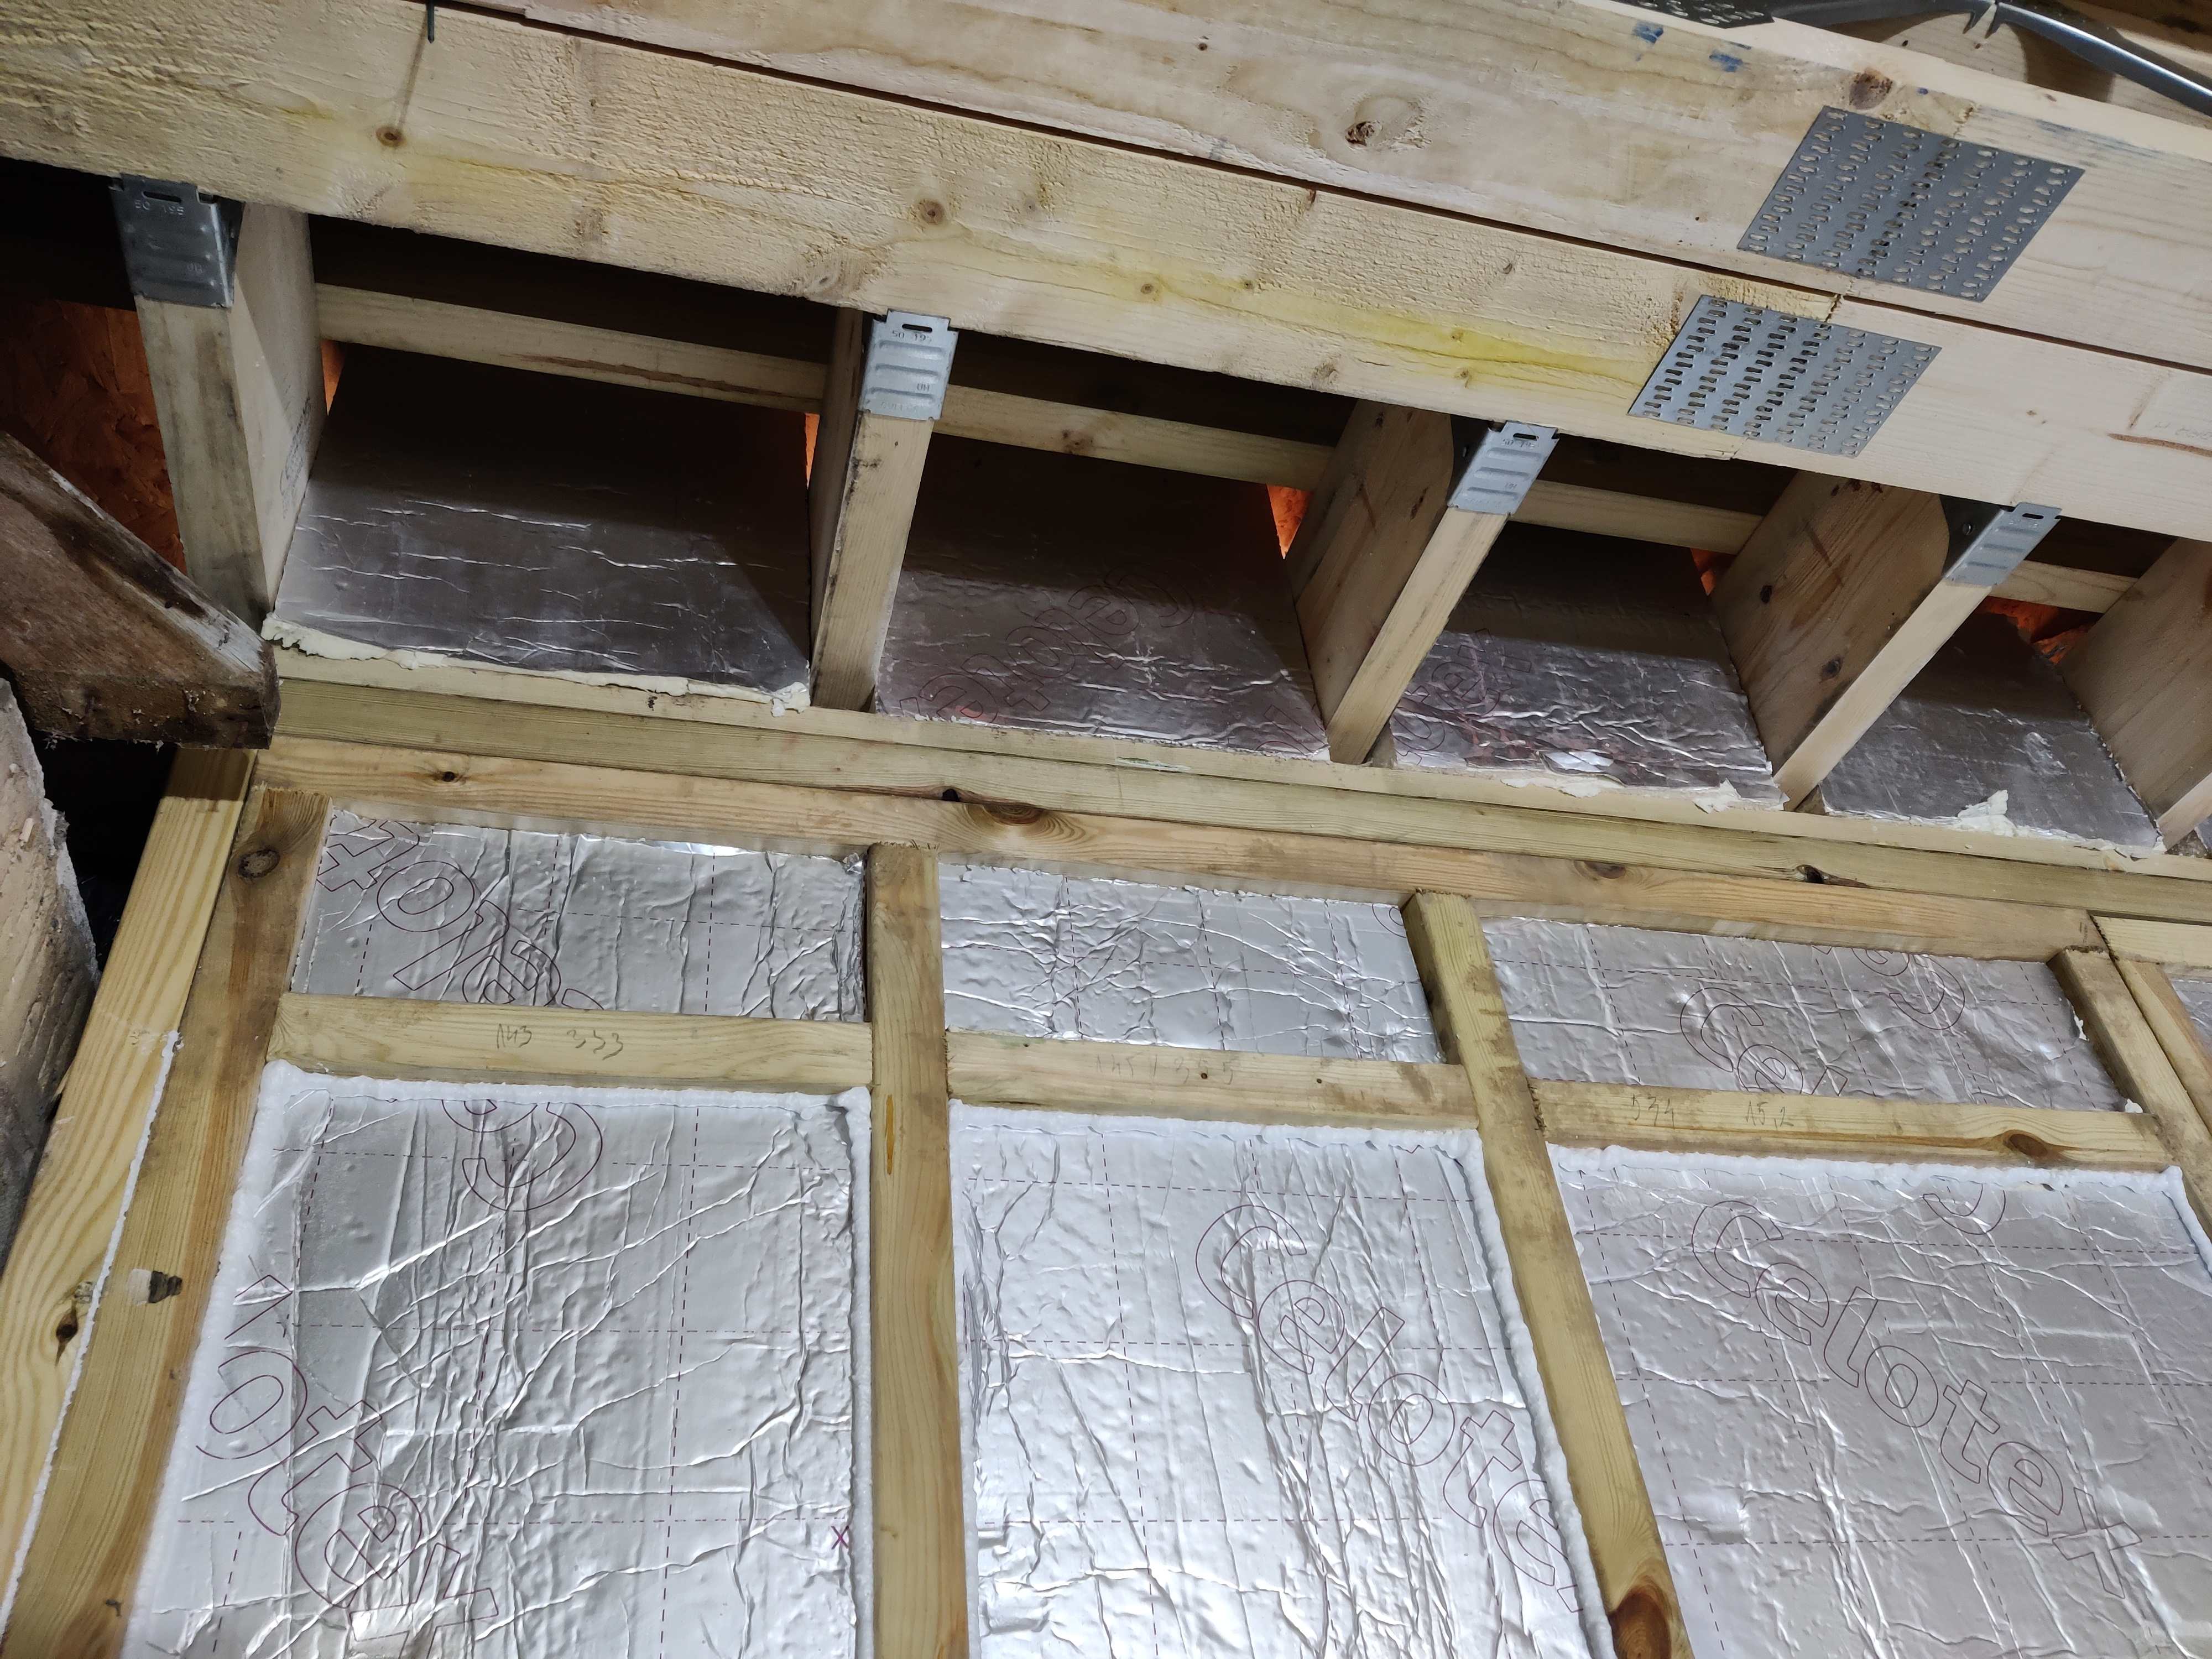
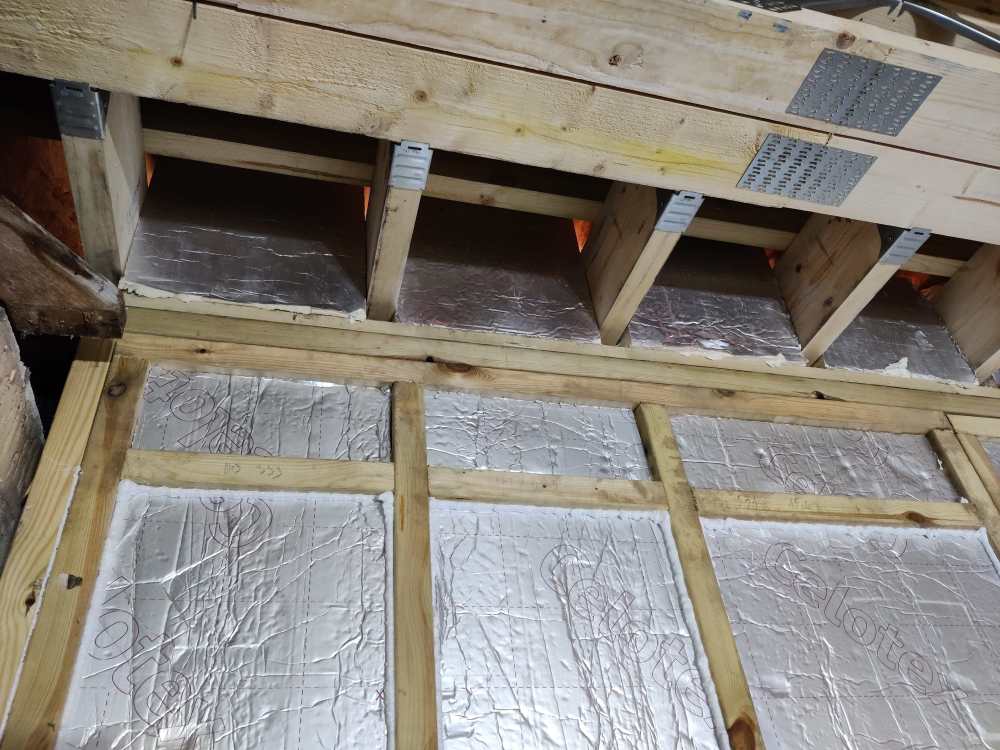
Im still filling these areas. I have 9 to go! The area where the extension meets the house is the worst as the roof joists are also in the mix. I need to fill these areas as the warm roof would meet a ventilated attic space if I dont, thus nullifying my warm roof Having spent considerable time doing this horrible job in the evenings, I have been musing over what could have been done to make it better and the conclusion I came up with it the PIR and foam blocking up should have been done before any OSB sheeting went on top of the newly erected timber walls. This could have been made to be level with the pozi-joists and even a bed of foam of silicone added to the perimeter before the OSB was laid
- 18 replies
-
- 1
-

-
- insulation
- posi-joists
- (and 2 more)
-
Hi all, Would just like some reassurance over a building fabric usd in my renovation / extension. I had originally asked that I wanted to fit a breather membrane like Pro Clima Intello fabric into the extension ceiling space between the living area and the warm roof, the builder replied saying he had some material that was expensive, so I felt reassured that this would be suitable. My extension has had a green poly looking material fitted for some weeks now, which doesnt look like the Intello fabric up close, it looks like poly. Can anyone tell from this photo what has been fitted and whether it is suitable to be fitted in the ceiling? I found a similar looking material listed on ebay as a 'vapour control barrier' in the same green colour, but was to be used under wooden flooring. I have given up trying to get the place airtight now as there are so many holes, but I dont want any problems due to the wrong material being used.
-
I still have the nightmare of the extension to house interface to deal with, have been waiting for the existing house wall and roof to be made good before attempting. This involves roof trusses and floor joists sitting on the wall plate which leads into the depths of a (well) ventilated loft, not helped by sub floor ventilation from open ended floor joists into loft space (Americans call 'Cape Cod' style house) No consideration for bagging the pozijoists was made, until I suggested it (following installation, whilst staring up at the mess). If I can isolate the new extension from the house, I hope to recoup some of my spend on insulation on the extension, otherwise it will be blowing out the other side of the house The stress this is causing is huge, nobody seems to understand the problems I am seeing and how to deal with them. All design problems, that should have been considered up front. How many architects wander round a site during a build thinking 'that doesnt look good, how could I make that better next time...?'
-
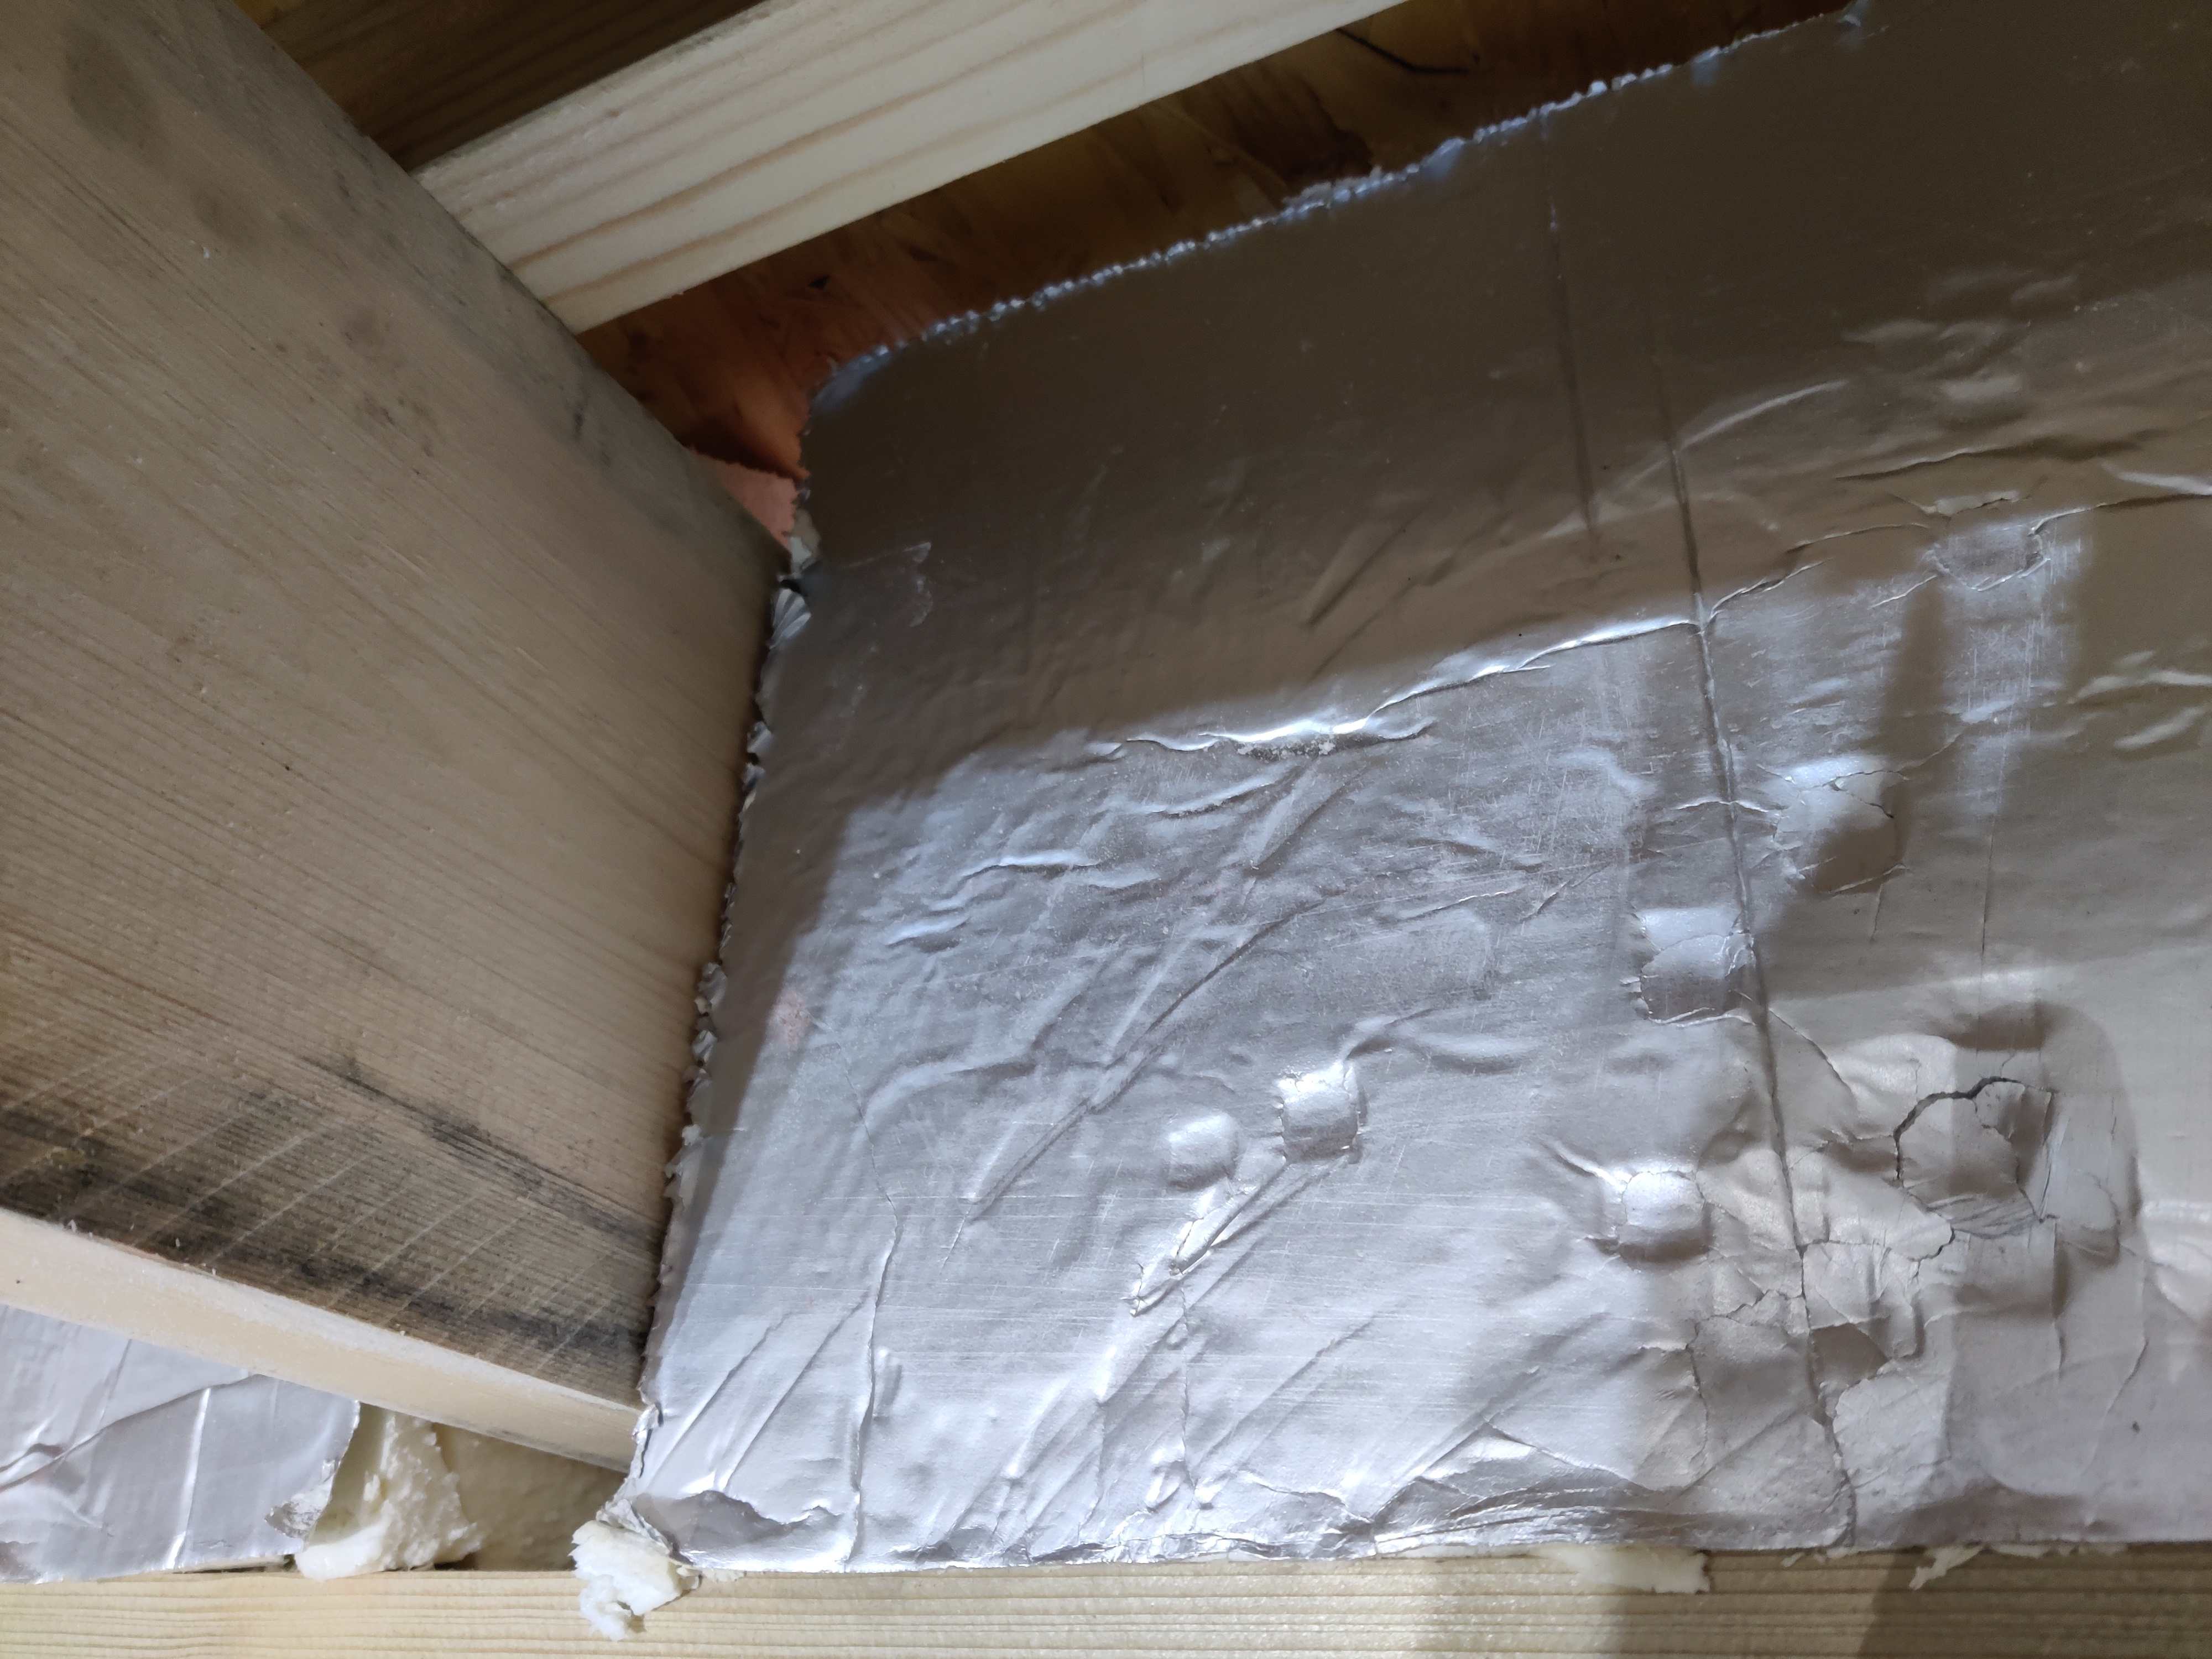
Thanks to all the above comments. I have spent the last few weeks trying to fill the gaps left by the bad fitting warm roof, using PIR cut up into blocks and foaming them in I used a airtight foam on the inside perimeter and a large area 'coverage' based foam on the outside. Still not sure I have got all the gaps, due to the now inaccessible cavities between the outriggers and the roof edge Had many sleepless nights adding up all the area of the blocks I have cut, to literally cover the daylight coming in. Had this not been addressed, at least partially by my efforts, it would have been like leaving a window open continuously. I think the best way to have installed this would have been to fill the gaps between the outriggers, prior to the installation of the roof section, as you would have far more access. The roof could have then been built onto a continuous layer
-
Retrofitting insulation in a dormer/ story and a half house
andeebee replied to woodstream's topic in Heat Insulation
Before my refurb, I used insulation 'batts' on the vertical sections. If you can buy close to the width of the vertical cavities this saves you having to cut up on site/in the crawl space. I then fit a second layer going in the opposite direction and then wrap the lot in a windtight fabic as suggested above, to prevent wind wash Also consider the exposed loft floor in the crawl space also appears uninsulated , so I would use standard fibreglass insulation here to around 300mm to keep the rooms below warm -
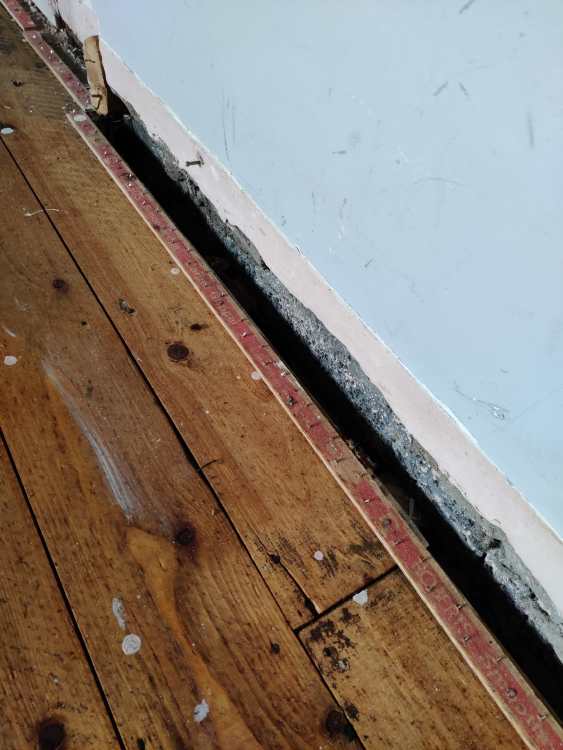
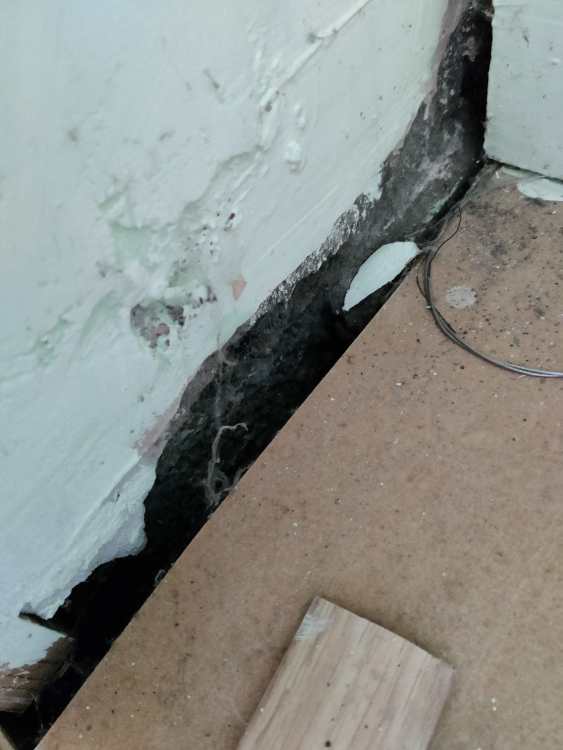
My 1960's dormer bungalow is also incredibly cold in the winter which is worse when the wind is blowing Having recently removed the skirting in all the ground floor rooms, I found gaps you could fit your hand in, straight into the ventilated sub floor The sub floor timbers were in perfect condition! I would check your rooms for air leakage points, as I imagine, like mine , some of your heated air is being drawn through the house and into the sub floor Beyond that, but more intrusive, is insulating below the floorboards as others have mentioned
-
The gaps around the outriggers are due to added packing required to bring the roof deck level due to the discrepancy from the interface with existing building
-
More images...
-
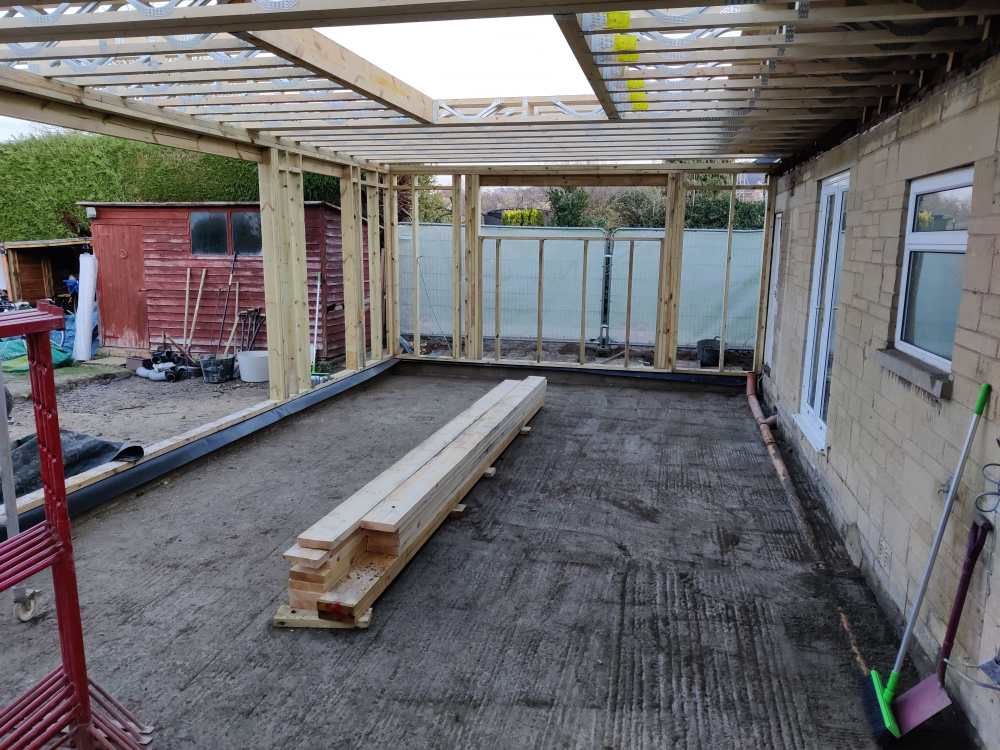
I am mid way through an extension and house refurb The extension is a timber frame using a warm roof on pozi joists and I am increasingly worried about the separation of the roof insulation layer from the conditioned space below due to the difficulty in sealing up the gaps between the pj and the top layer of the walls with PIR To further compound the problems, I wanted an overhang around the extension. Whilst the PJ's facilitate this structure naturally on the one face, the two sides are forming the overhang using outriggers Combine the outriggers, packing and the roof fall angle and you can currently fly a drone through some of the gaps between the roof deck and the walls Whilst air tightness could be achieved using a vcl, heat loss from the break in insulation continuation cannot and I don't understand how we have got here Possible solutions I have considered are commercial spray foam sealing from the outside of the roof cassette and the inside or my latest idea to fill the area below the roof deck with blown in insulation. Please share your thoughts and possible solutions