junglejim
-
Posts
266 -
Joined
-
Last visited
junglejim's Achievements
Regular Member (4/5)
5
Reputation
-
Thanks @JohnMo any recommendations on where to source manifolds for this in uk? I can find lots of ufh manifolds but struggling with domestic water distribution. Thanks
-
I’m currently planning my hot and cold water layout. I like the idea of the ‘home run’ setup with pex runs from a central manifold. Its a lot of pipe though and I’m thinking a smart spring might be to zone the house and run zones from the manifold then tee off from the zone to the appliances. my logic for home run is that we’re doing timber frame build and I don’t want joints in inaccessible locations. The home run setup doesn’t seem so common in the uk as it does in Europe so wondering what folks think? thanks
-
Thanks that’s really interesting. I’ll take a look.
-
Thanks. Building is 15x10m with upstarts in roof space so total floor area approx 300m2 so not massive. That’s really interesting to know what you’re using in Scotland.
-
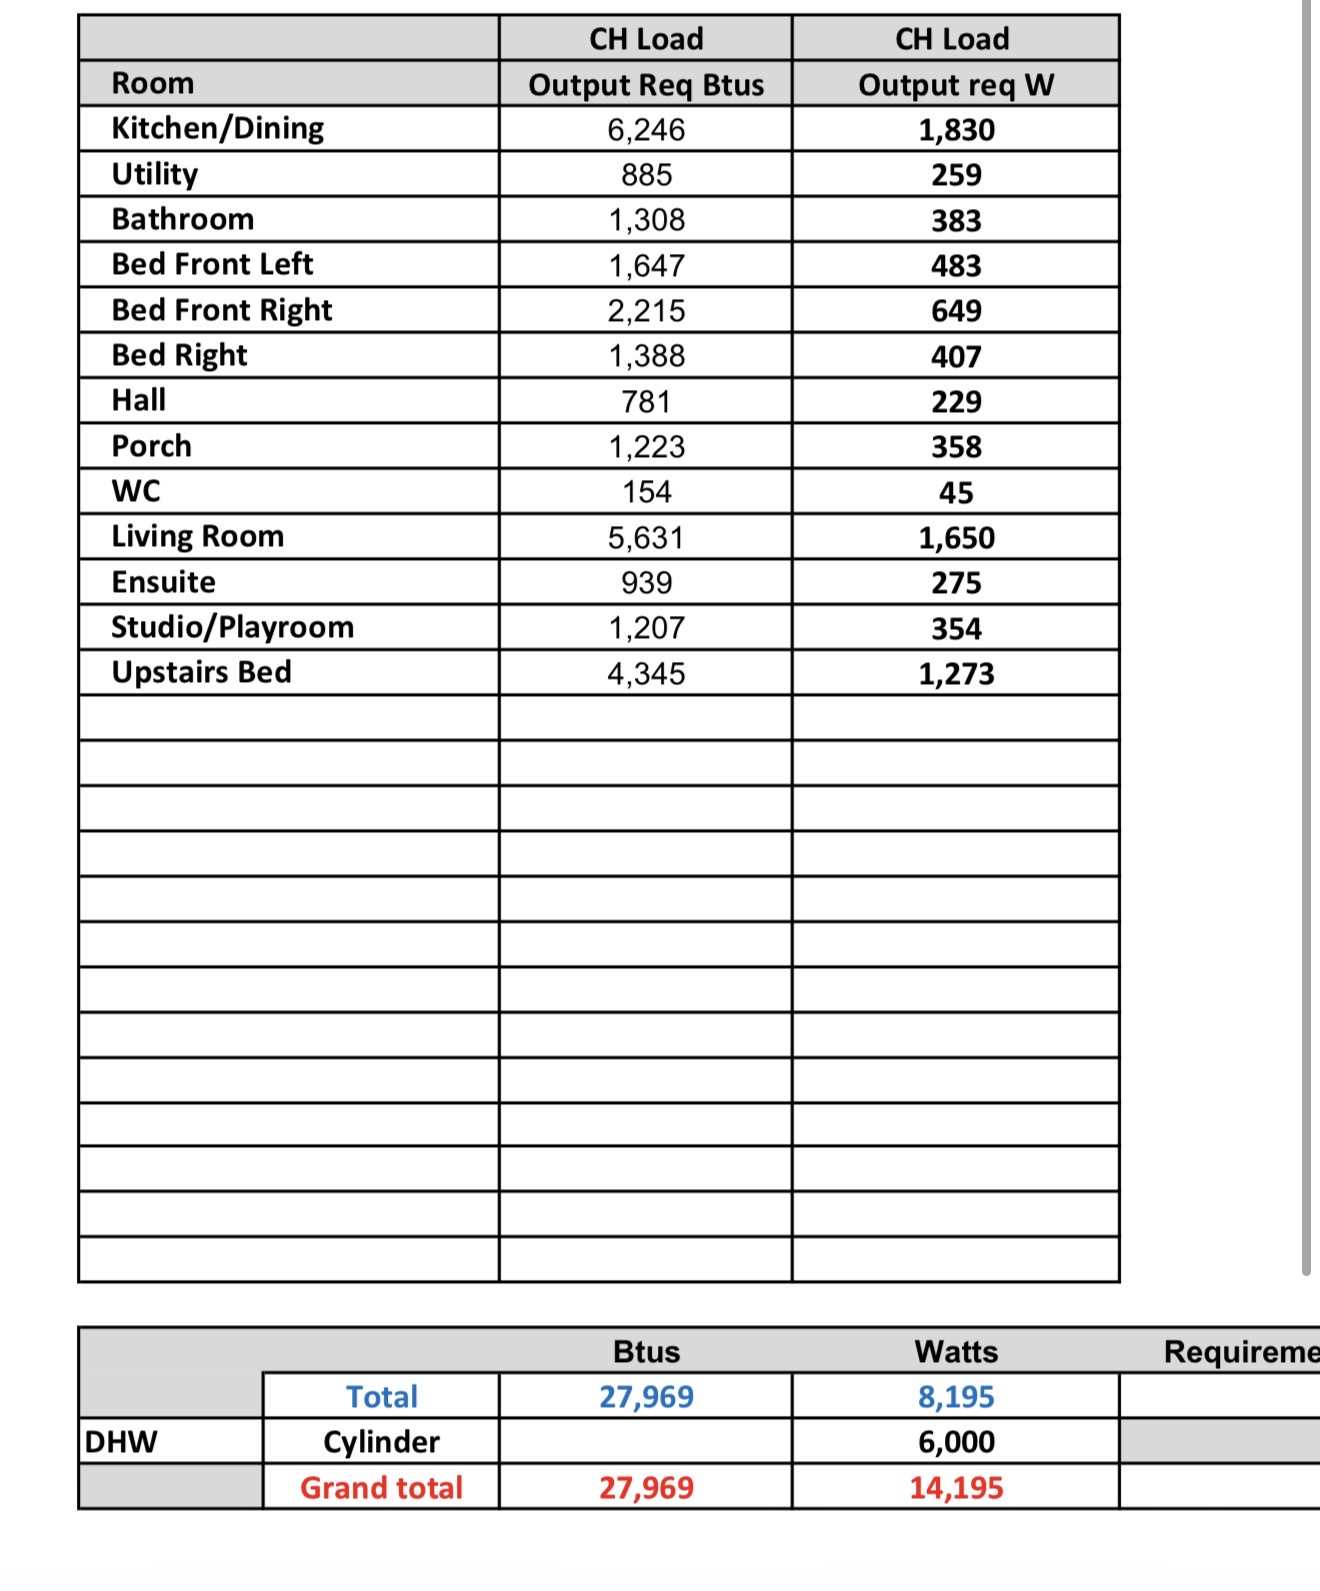
Thanks for all the help. Clearly have a lot of homework to do! I was hoping the plumbing company would help with this. Here’s the heat calcs they’ve run but I’m not sure they have factored in the efficiency of the build and other aspects such as MVHR. Im not sure where to start in terms of doing calcs myself so any help really appreciated. ps. Location is Guernsey so no extremes in temperature.
-
I’m trying to get my head around heating design. We are building close to passive house timber frame. I have ufh downstairs and want provision for radiators upstairs. I’d like the ashp to part heat dhw if possible so presumably unvented indirect cylinder. A plumbing company locally have shared suggested design but is generic and what I’ve read is that low loss headers are not best with passive house. Any advice welcome as Would like to meet with them to talk through. Thanks Proposed ASHP Layout - Charmaine.pdf
-
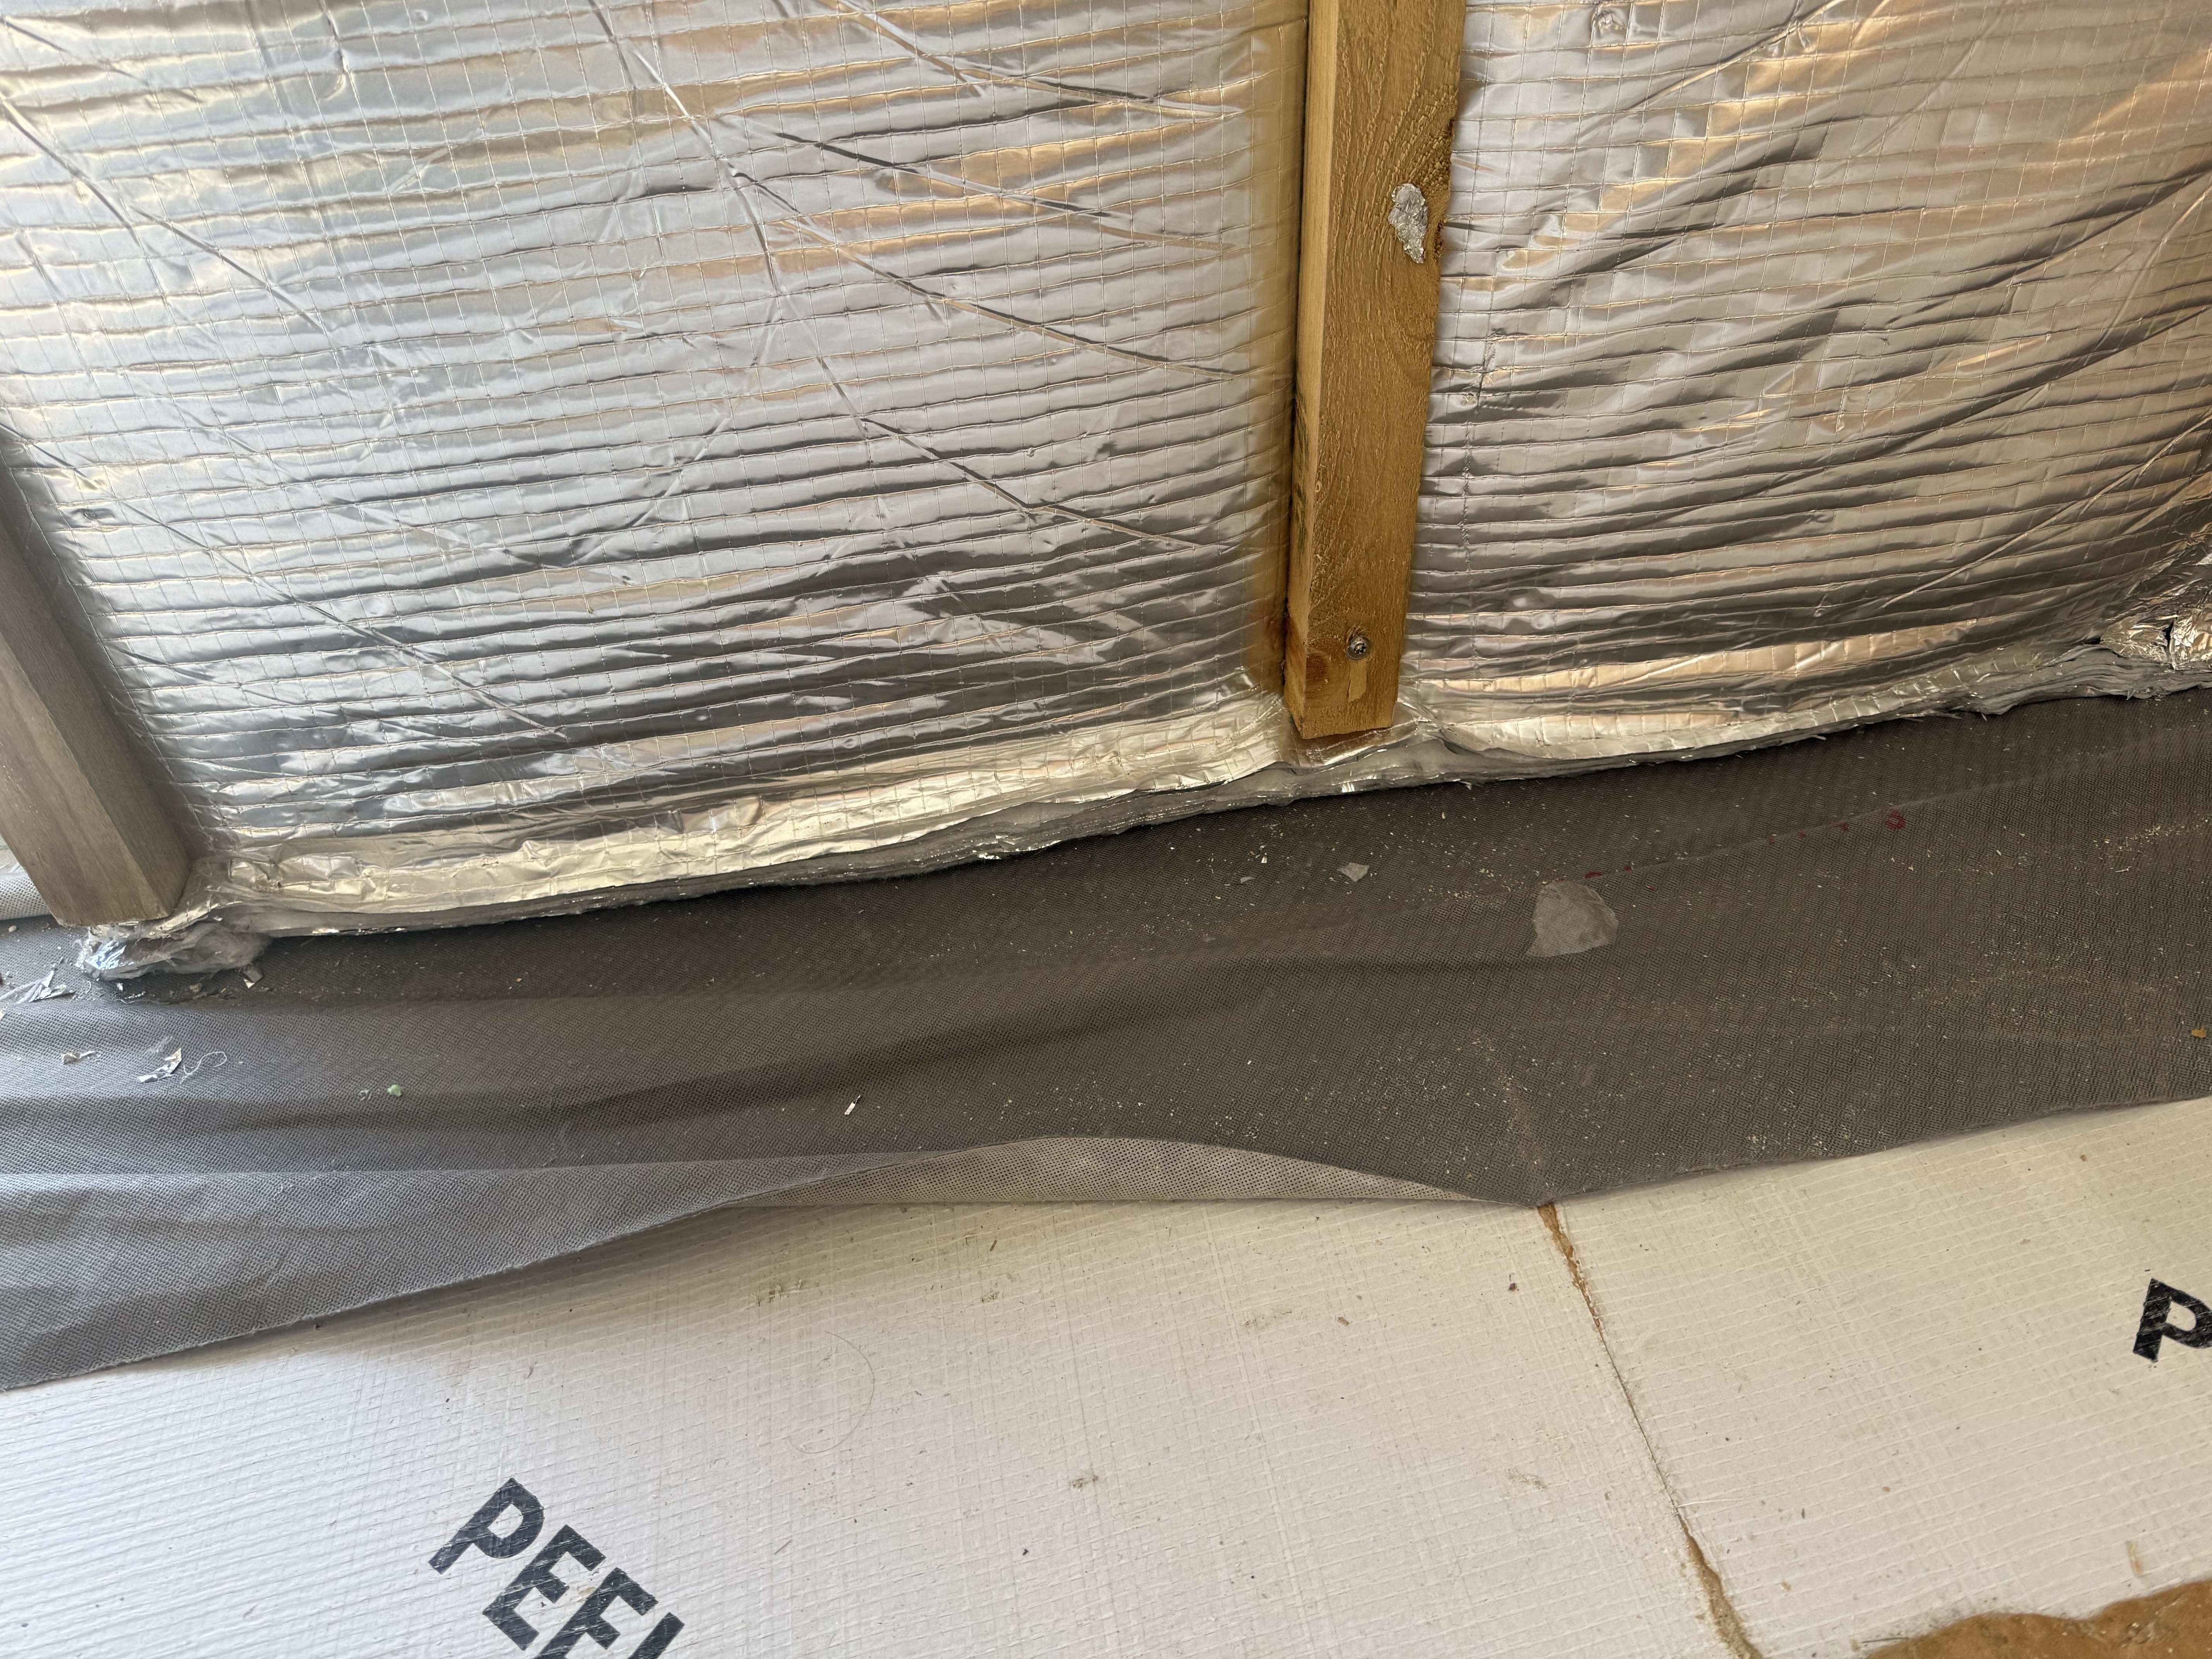
Thanks. Does it matter how much overlap there is. The battens are about 60mm off the floor so could tuck underneath and tape the overlap without lifting the battens.
-
On most walls there’s enough space to lap up underneath by about 7cm without removing battens. But presumably would still need taping regardless so not sure if there’s any advantage to that.
-
Yes prefabbed. Came like that with vertical battens
-
Just working out best way to tape this junction. The vcl is lapped around the cassette from bottom floor to top. Should I trim and lap under the ybs and then tape or just tape direct to the ybs as it is… seems like there’s no gain in folding and extra work. any thoughts? Thanks

-
No I have PIR between studs then ybs super quilt over the top and battened in place
-
Yes good point… I was planning on lapping up under the ybs superquilt and taping together so would need to do that before adding horizontal batten presumably.
-
Yes cross section of ground floor to first floor junction
-
Thanks that’s helpful…. Another job the TF sub contractor was supposed to have done but didn’t 🙄
-
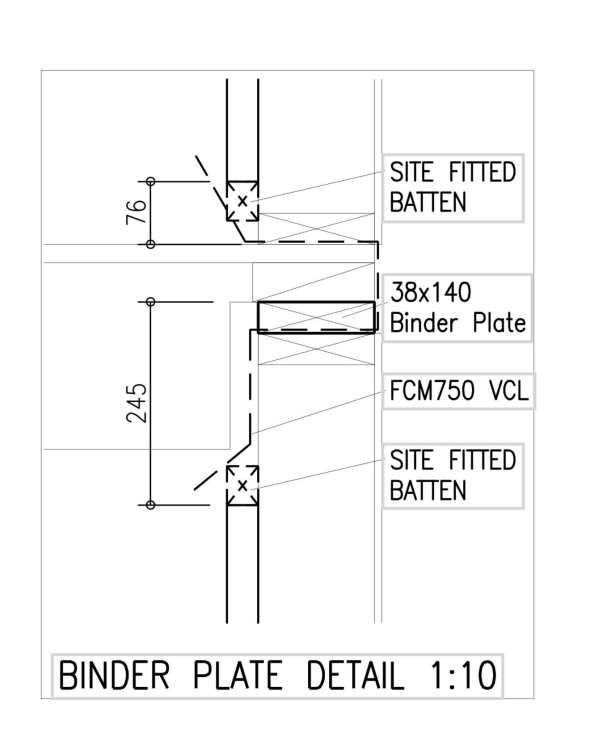
I’m looking at this detail in the drawings and noticed the ‘site fitted batten’ I can’t see this but also wonder if it’s necessary as looks horizontal which would surely block the service cavity created by the vertical battens. Given it’s in the eaves I may not need the service cavity. What’s not shown in the drawing is the ybs super quilt under the vertical battens. I’m probably missing something obvious 🙄 Sorry I haven’t got any actual photos as not on site at the moment.