
eros_poli
-
Posts
28 -
Joined
-
Last visited
eros_poli's Achievements
Member (3/5)
2
Reputation
-
Unused chimney, approved engineers design and approved by building control. any suggestions for timber protection in this environment welcome
-
Hey We’ve got a small Glulam sitting on a padstone in our chimney, as a ridge beam. I’m wondering how best to protect the end of the beam that sits within the brick work, as it’s a chimney with all the associated things: sooty/tarry bricks, condensation etc. Any advice? Treatments? Oils? Wraps? Thanks
-
Steel column in foundation wall; Ties? Concrete?
eros_poli replied to eros_poli's topic in RSJs, Lintels & Steelwork
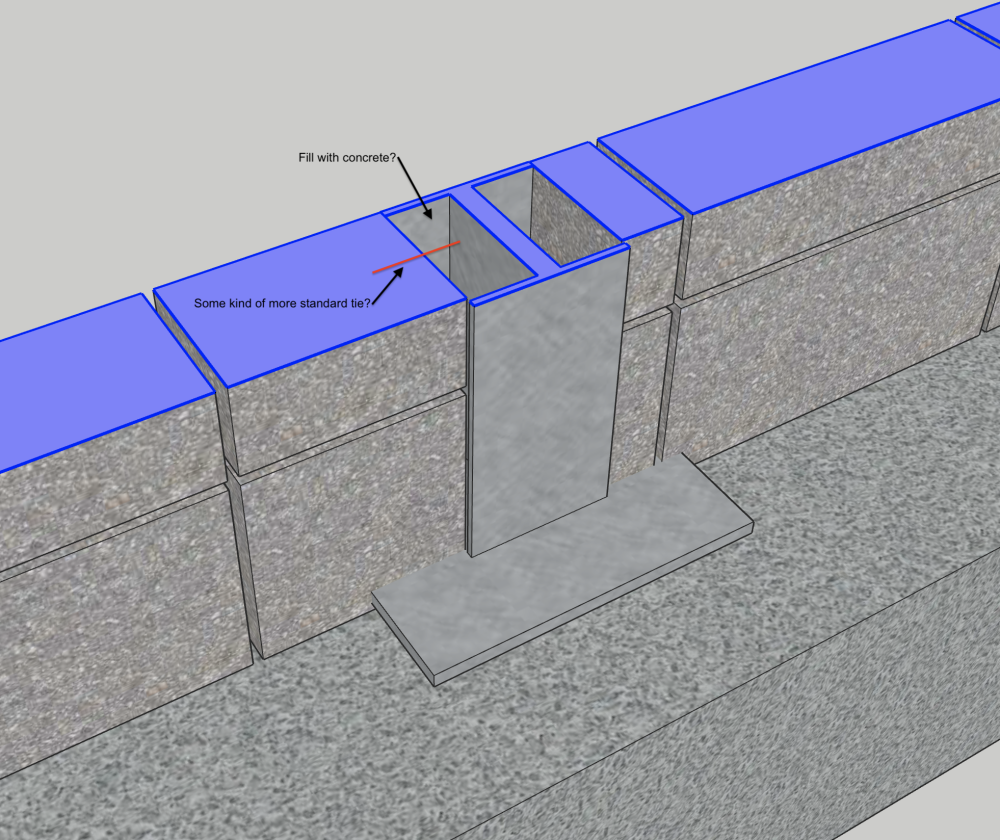
Good idea trimming the blocks so they nest easier. And no, SE hasn’t specified this detail. -
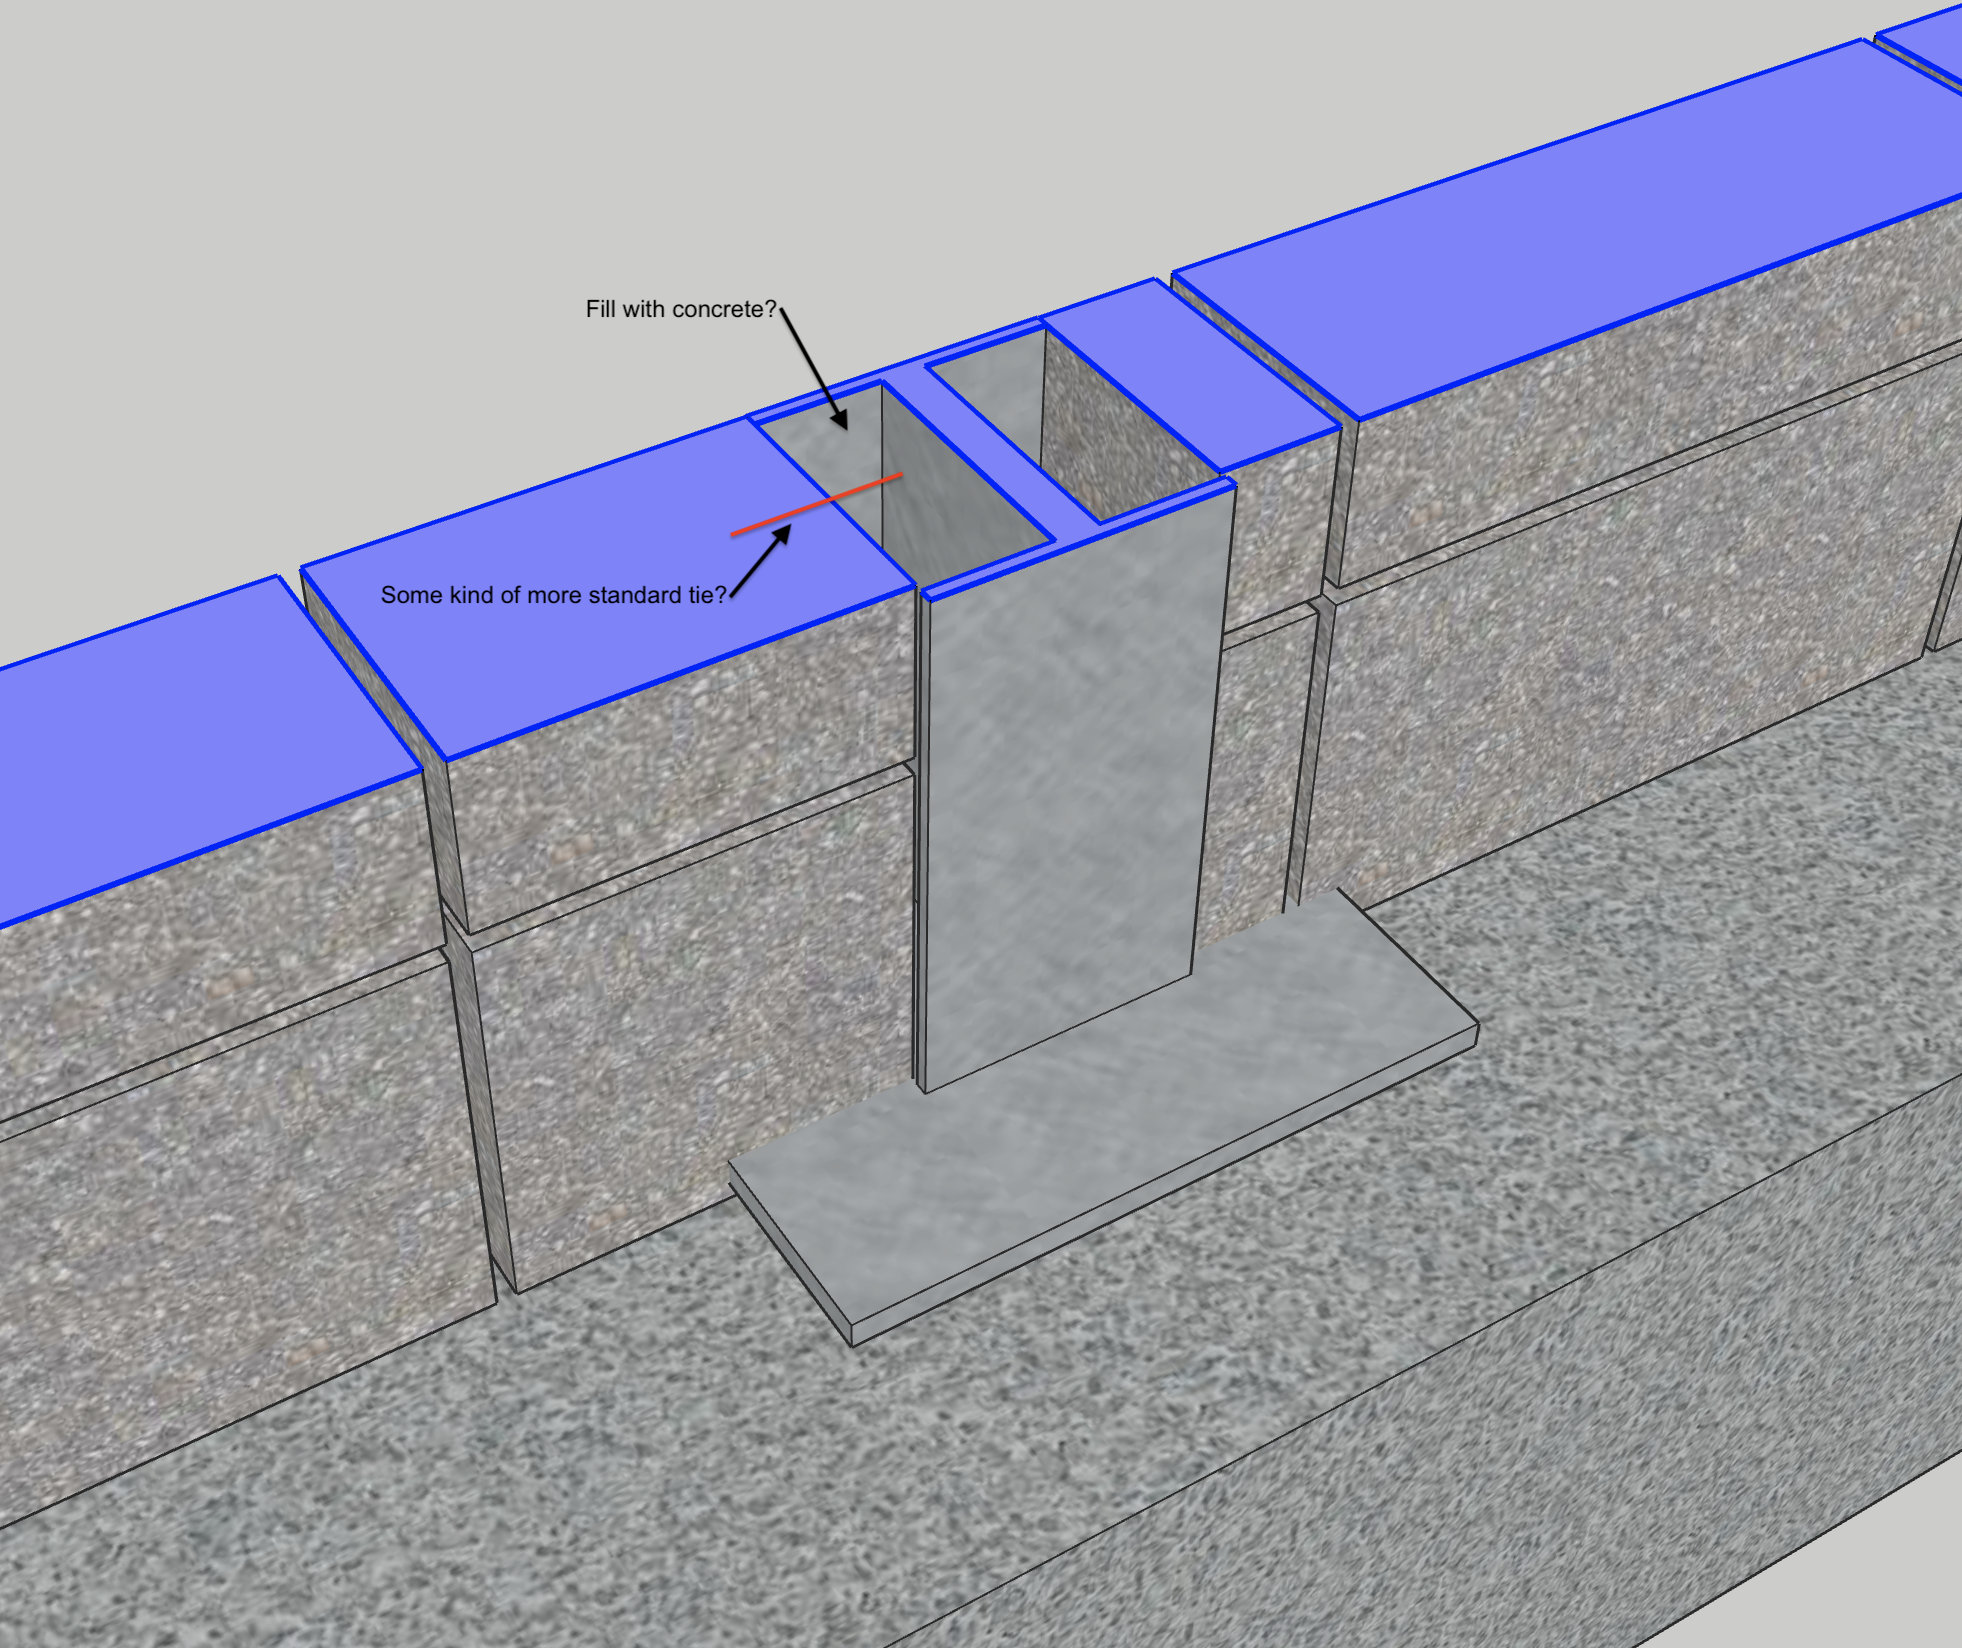
Hi everyone 👋 I'm trying to detail an element of our build and need a hand. This is a timber frame construction, coming off a 140mm block wall on strip foundations. Within the wall on the gable ends are two 152x152 UC30 columns, fixed to the founds, running through the height of the block wall, up through the timber frame to the ridge. The block-work is 140mm. If my maths is correct, those blocks won't neatly slot into the open side of the UCs. So, how best to tie these blocks to the columns? I can't seem to find a supplier of the relevant Ancon ties (Non-Standard Internal Column Tie or Hammer on Tie). Could I use a more standard tie, which sits within the void of the UC, then fill the void of the steel with concrete, to the depth of DPC/top of the foundation wall? This would help with thermal mass too... I've attached a section of one wall, the the steel oriented as designed by the engineer. Pretty sure the blocks won't fit inside the opening (138.8mm) Any advice welcome! Joe
-
Anyone have RAL 6011 windows?
eros_poli replied to eros_poli's topic in New House & Self Build Design
Thanks @Blooda, but the little sample books just don't do the job - good idea about painting something else with some mixed up paint though. And I mean other RAL's, just not the greens we're interested in Mostly they're all grey! -
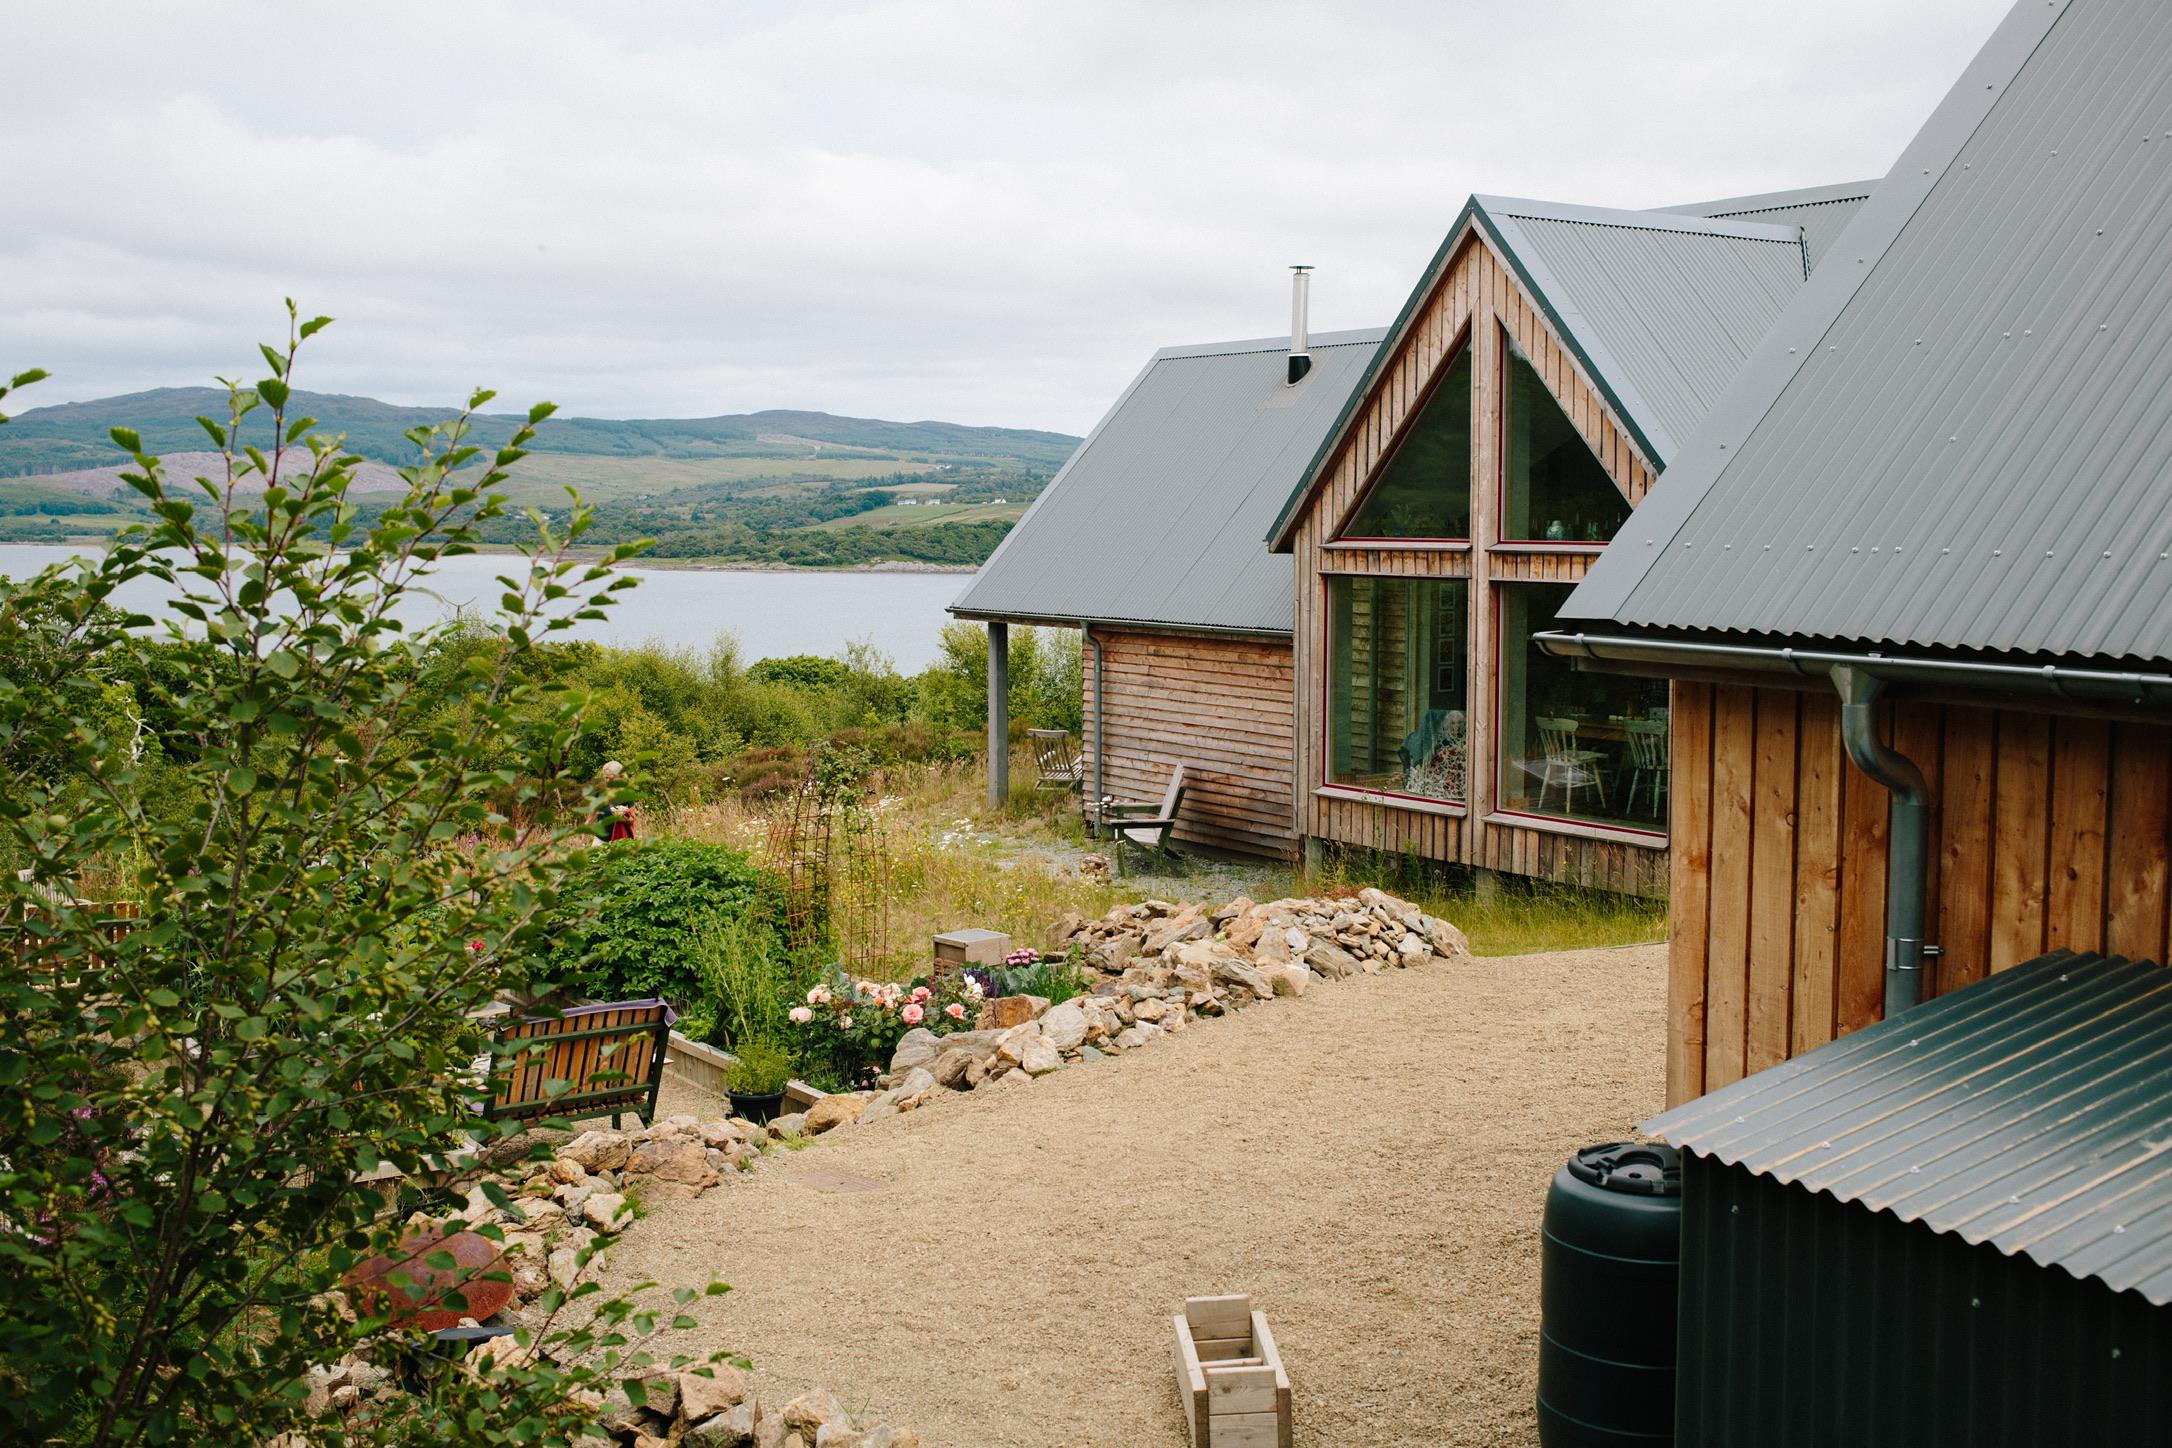
I'm trying to decide on final window colour for our larch clad extension, and we're pretty set on RAL 6011, but it's really hard to find examples, especially with timber cladding. Samples from suppliers are tiny paper swatches, and more real world examples are different colours. Anyone out there with 6011 who'd be happy to share some images? Cheers!
-
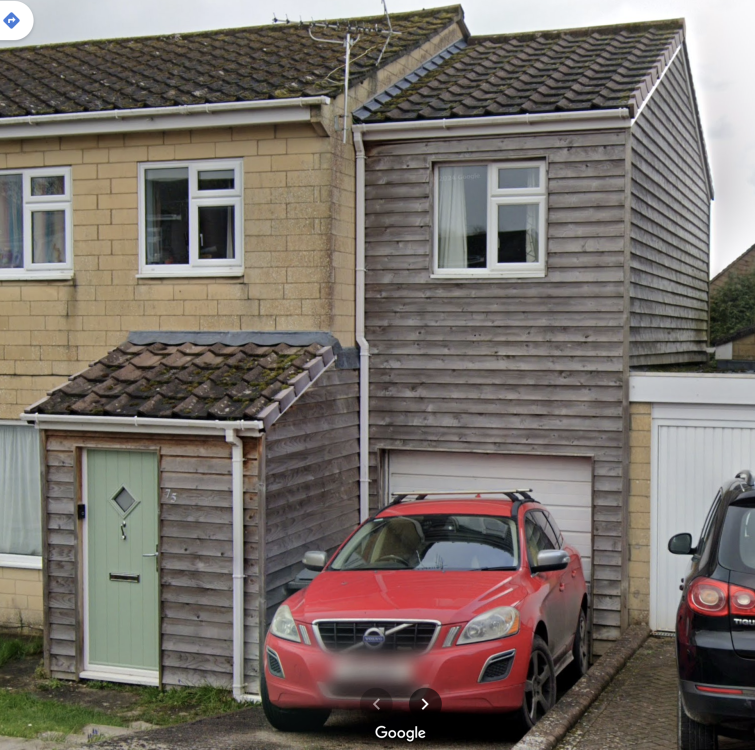
Aye - it's the only full height timber building within a few streets, so might use it as an example if it comes to it. I don't really dislike the render option that's been approved, it just doesn't seem necessary and I'd rather one material. At worst we just do that when it comes to it!
-
@ETC Yeah they may have just cracked on without it, I can't see the plans online anywhere.
-
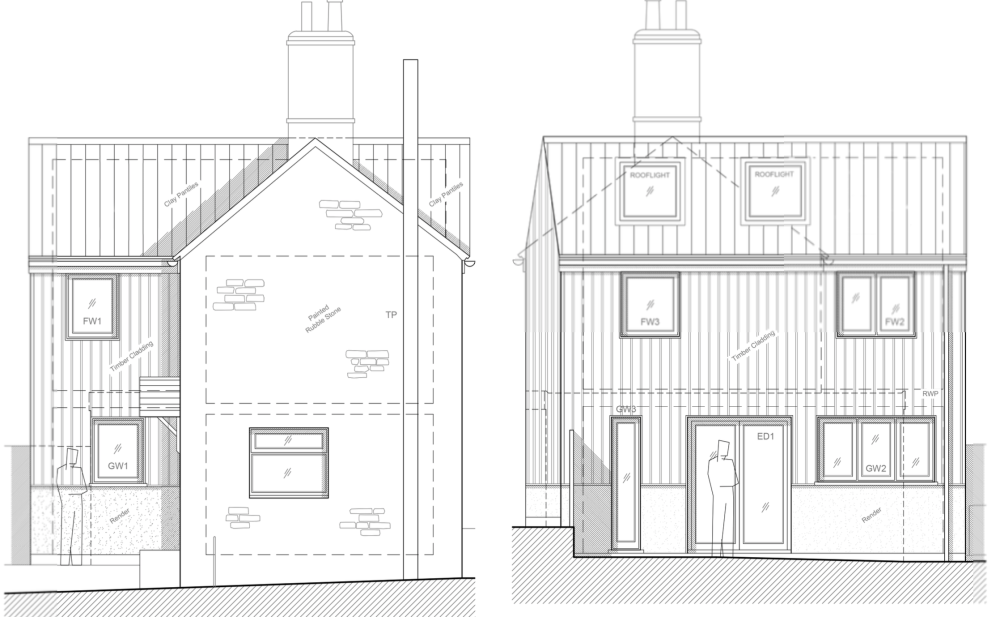
Hi people. We're in Wiltshire, had our planning approved late 2024. Timber clad extension attached to painted stone cottage. Planners insisted on a level of render to the base of the ground floor windows. Still not sure why this was a necessity.. We would love timber cladding all the way down. Simpler, neater, lots of reasons. Is there a process to try again, stating that only a small percentage of the total walls are visible from the street, there's no render on the original property whatsoever, and there is a building up the road that has a floor to roof timber clad extension? (Screenshot of plan, and said building up the road for context). Thanks in advance. Joe
-
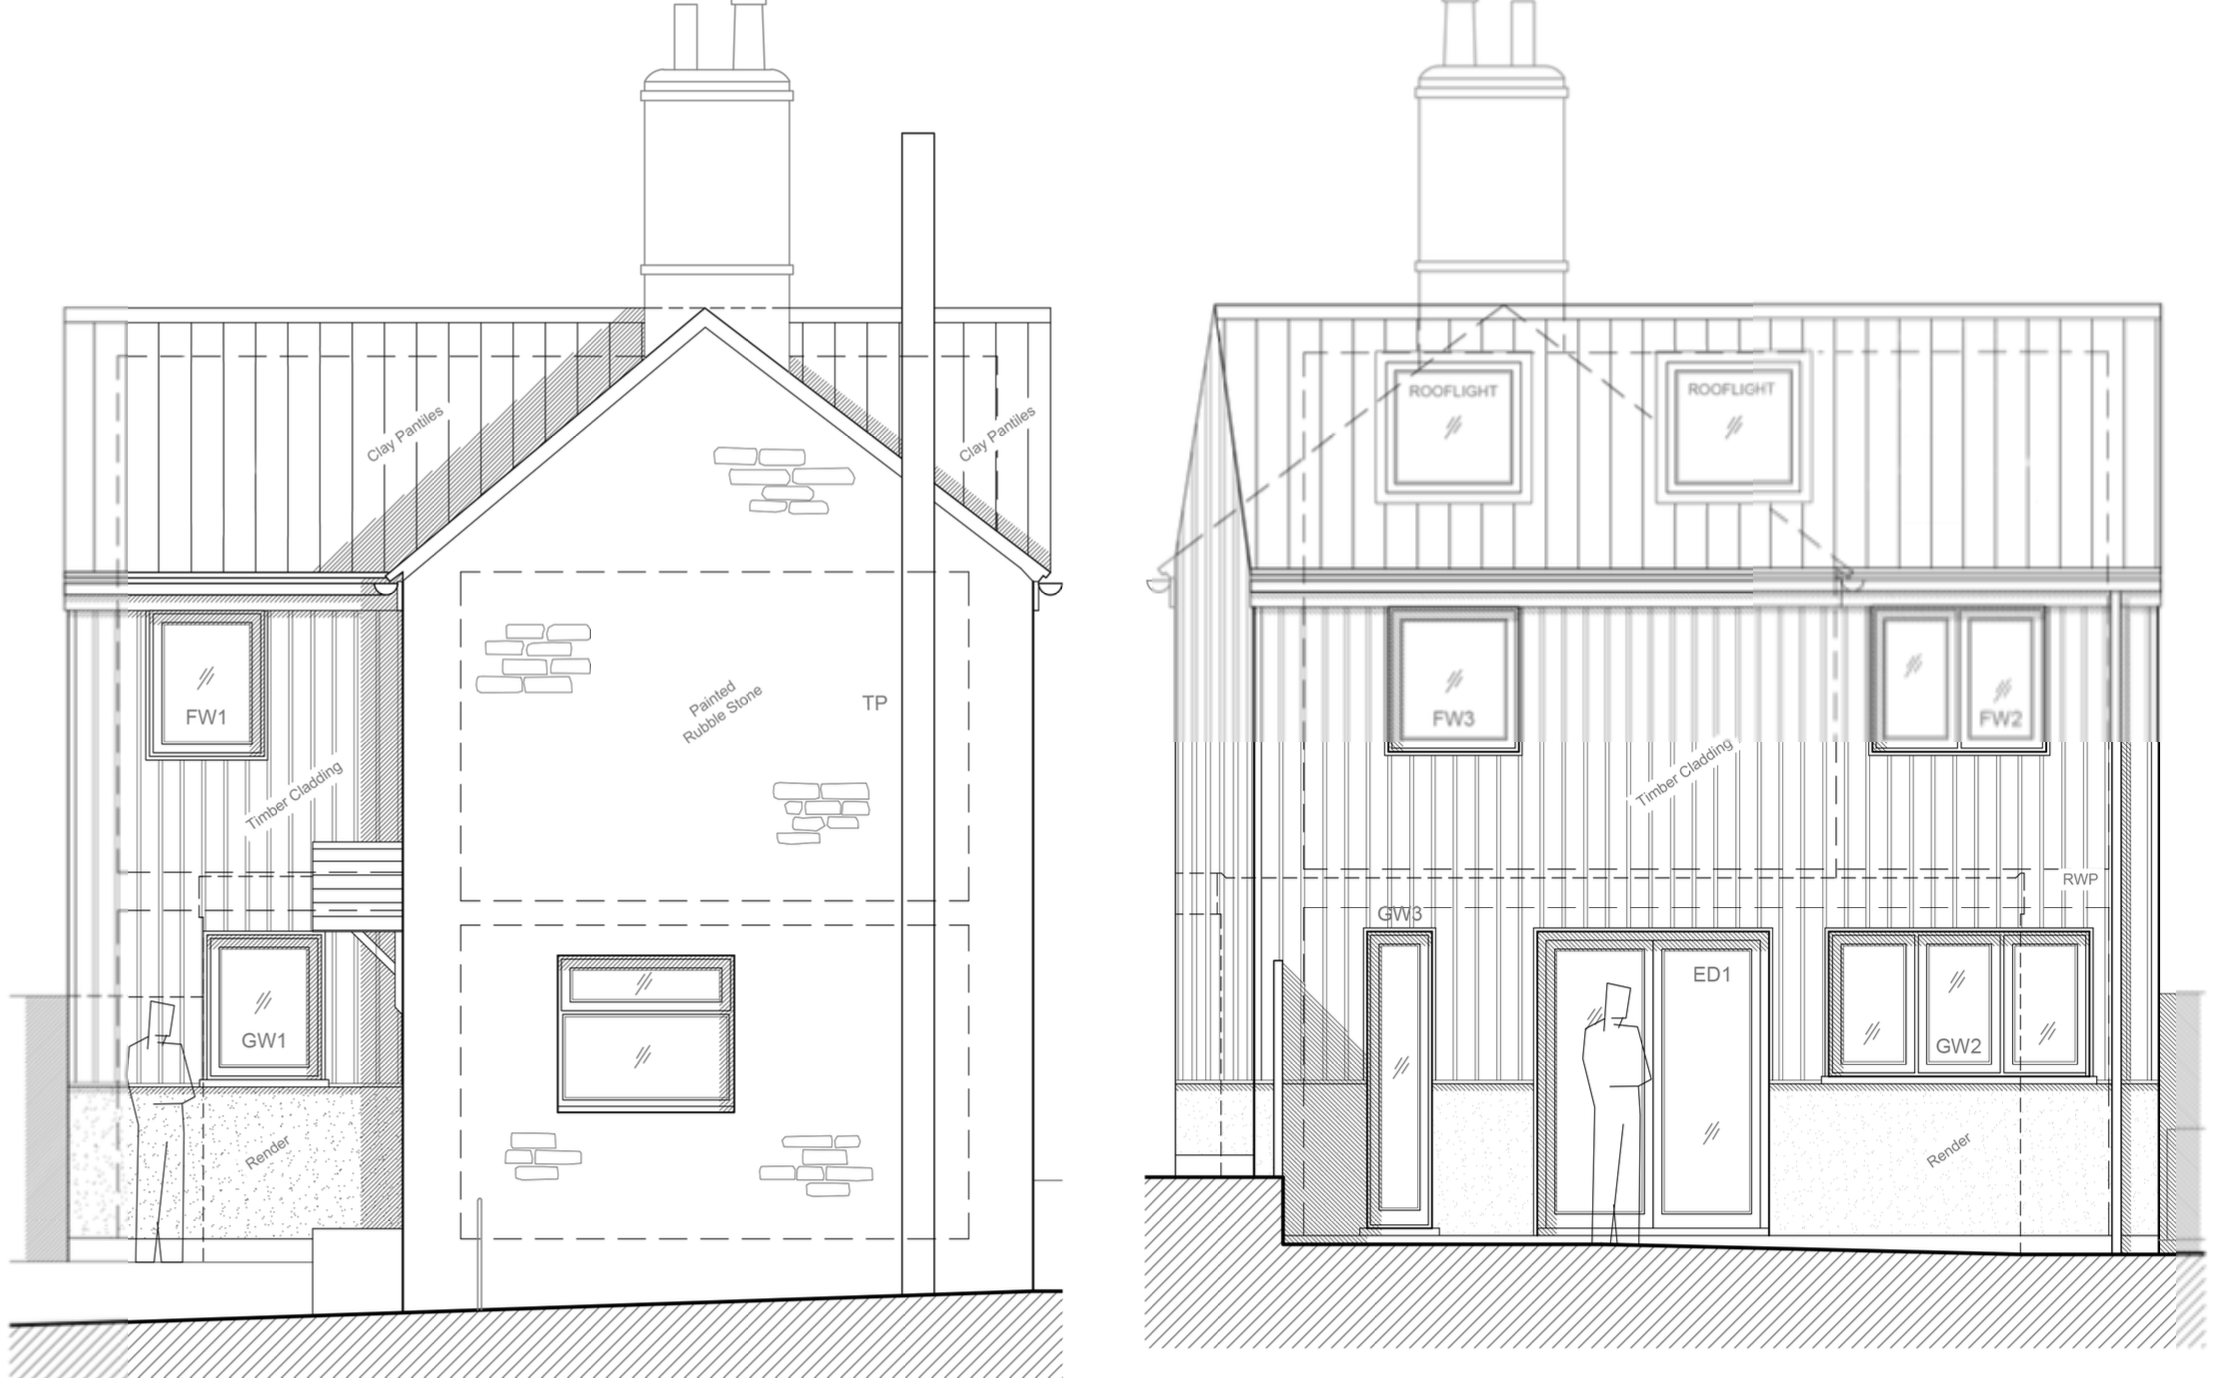
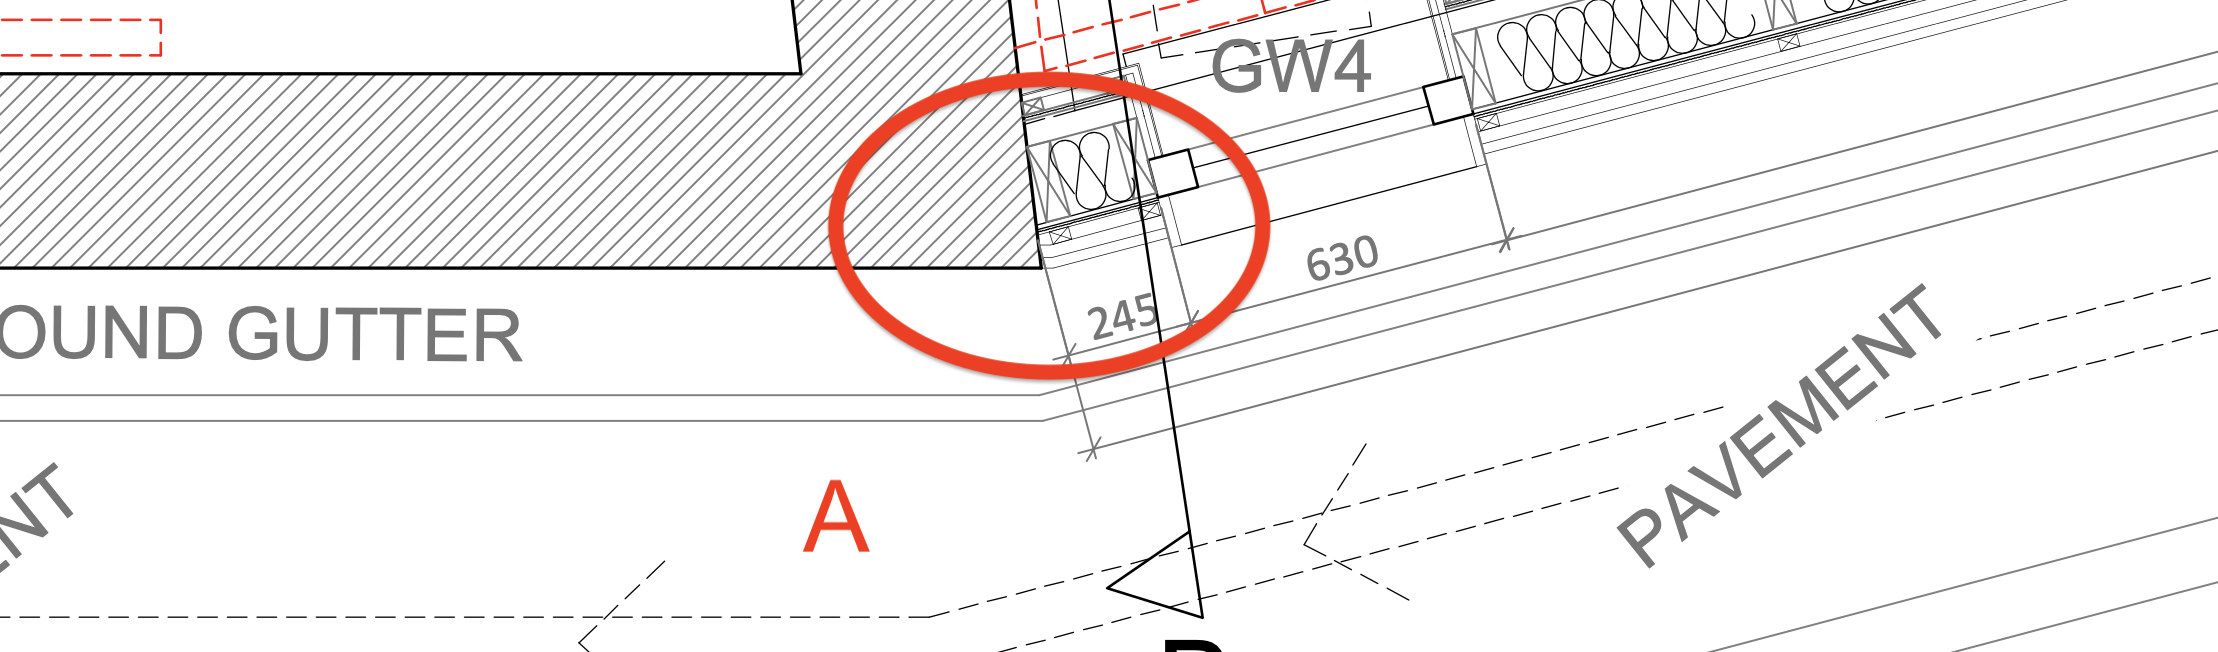
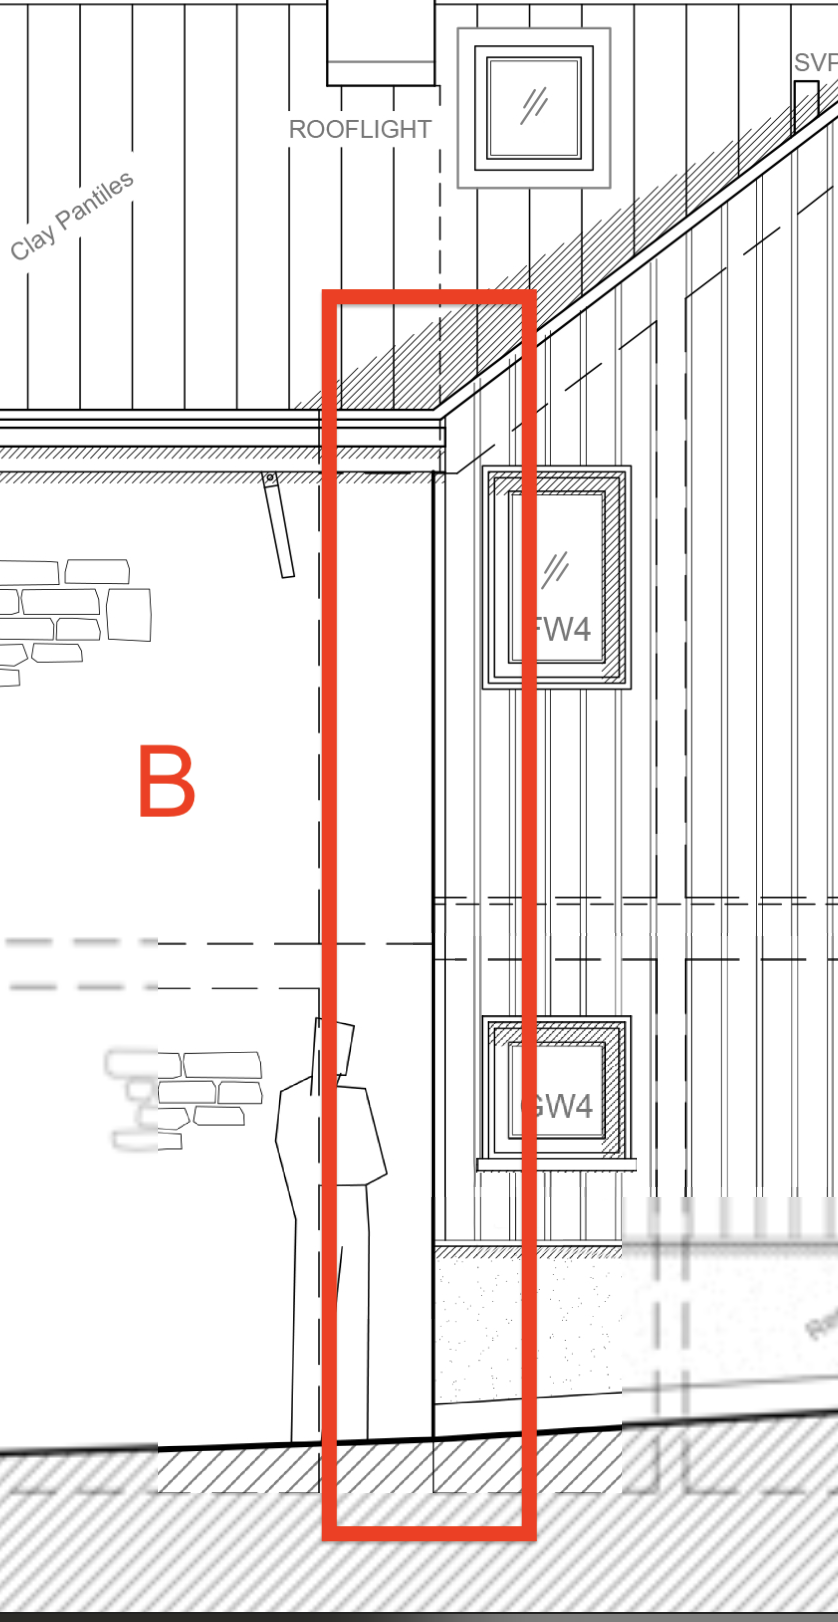
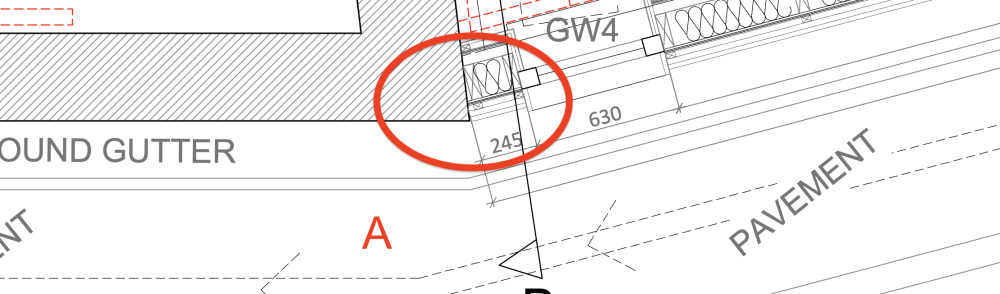
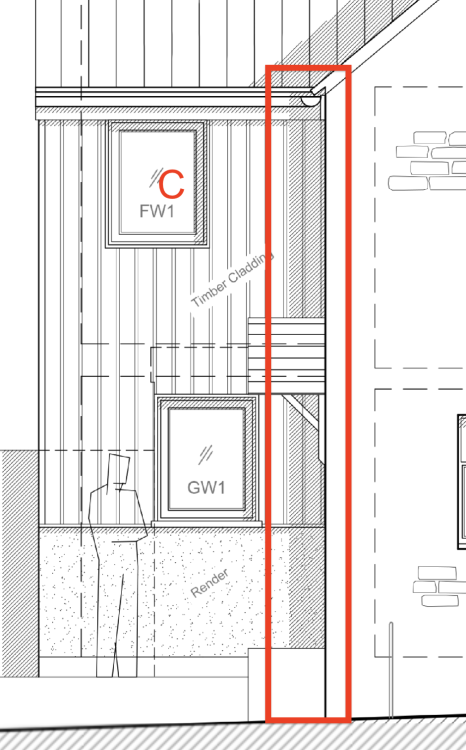
Hi all, We have planning, building regs approval, and begin works in March. Almost all details and head-scratchers ironed out, apart from the topic of this post! We're extending off a gable end of a rubble-stone cottage, with a timber frame, timber clad extension. On two parts, the frame/cladding will need to fix to the existing cottage. I'm still scratching my head on how to best do this, in a neat and weather-tight way. I've attached some screenshots of the plans which show the joins: A: This shows the more complicated join, where the old cottage and the new extension come together at an angle. The join ideally needs to be flush(ish) rather than cladding lapped over the cottage. The secondary head-scratcher here is that we have to (thanks planners) render the new timber frame to the level of the bottom of the ground floor windows. This render will sit approx 40mm shallower than the timber cladding above. B: This shows the same as A, but from the side. C; This shows the simpler connection on the other side of the house, where the connection is an internal 90º. For this we can but the frame up to the house, lap tape/dpc whatever we need around timbers and battens and then carefully cut the last boards to fit the cottage. Any thoughts on methods of how to connect these in a good, neat, weather-appropriate manner (ideally with first hand experience/photos/drawings would be greatly received!! Please no comments on "why is your window that size" or "why doesn't this line up with that?" 🙏 Thanks! Joe

-
Velux sizes: logic vs their recommendation??
eros_poli replied to eros_poli's topic in New House & Self Build Design
Thanks for the comments @DevilDamo and @torre Think we'll go some some smaller units as the room should be plenty bright enough. Torre yes the additional stud work was added by the chap who did the drawings, we're very much going to embrace the odd angles and not box anything out. It's linked to a very wonky old cottage which has no straight lines! @DevilDamo all has been thought through in great detail already, thanks for the thoughts -
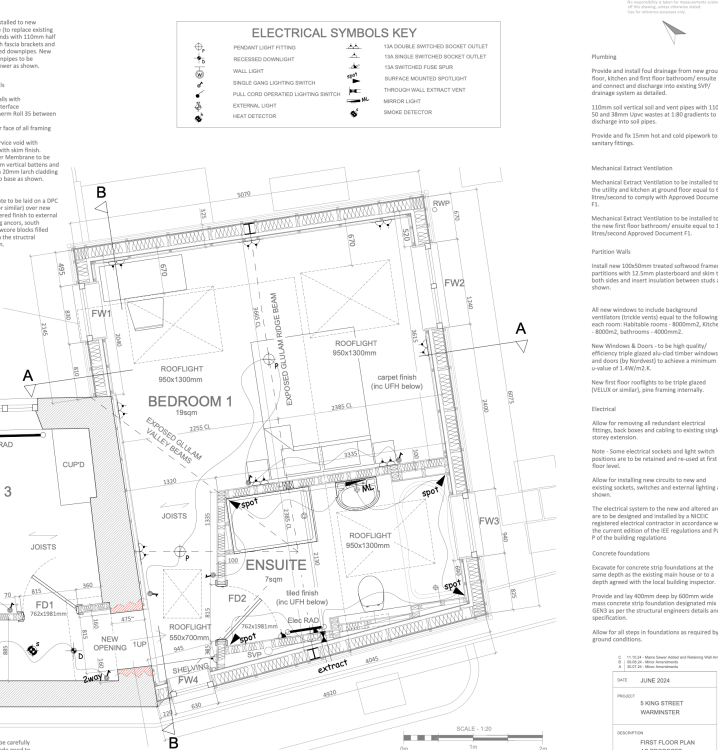
Hey We're planning (and nearly ready to build) a two storey extension. The top floor will be vaulted ceiling, two velux's, two windows, open plan. Velux recommend "In general, we recommend that the size of your roof window should be at least 20% of your room's floor area." This would put our two Velux's at 1.9m2 each (closest size being UK08, 1.34m x 1.4m) - those seem enormous when taping them out.... The room (plan attached) will have a window on the NE side, and a window on the NW side, as well as light coming from a small window and small velux in a semi-hallway on the SSW side. The room is approx 19m2. Any thoughts? We can save a chunk of cash down sizing these units (MK06 for example, 78cm x 1.18m, which still seem very large). Thanks Joe
-
NorDan window positioning in timber frame + cill depth
eros_poli replied to eros_poli's topic in Windows & Glazing
Thanks @Kelvin, looks good. Yes as it stands if I placed the windows inline with the outer edge of the timber frame, we’d have 135mm internally to the edge of the plasterboard, so not a massive space for a windowsill. The windows themselves are 105mm, so not enormously deep, and we're not going passivhaus standard or anything, so our frame isn't the thickest in the world either. Are your frames flush with the outside edge of your frame, or do they protrude slightly with the cill connection being in line? If that makes sense... If not I've attached a marked up drawing. Cill connection in red, edge of frame in green, blue is outer edge of timber frame. Joe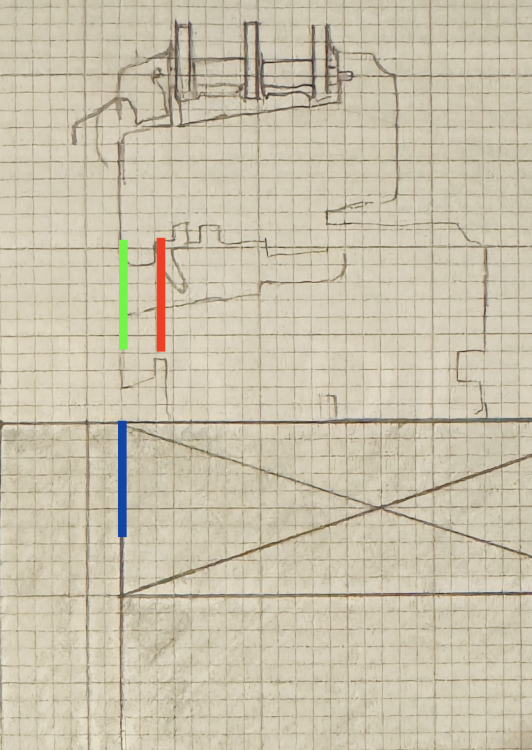
-
NorDan window positioning in timber frame + cill depth
eros_poli replied to eros_poli's topic in Windows & Glazing
@Kelvin photos would be great thanks - any context is great. -
NorDan window positioning in timber frame + cill depth
eros_poli replied to eros_poli's topic in Windows & Glazing
@Mr Punter The response has been the following: I'm trying to figure out if that 20mm is included or excluded in that 107.9mm. Perhaps I can move the window out-bound by 20mm, so the cill attachment is protruding from the timber frame, but the main window frame is still within the frame/insulated area. Joe