


nmh
-
Posts
40 -
Joined
-
Last visited
Everything posted by nmh
-
Really appreciate all the help and advice. Given me lots to consider. Basically the original builder bodged the EPDM around the roof light. I'll look for an expert to sort. Any recommendations in the SE22 area of London (East Dulwich)?
-
Roof only about 18 months old. New rear extension with roof lights. Water came through ceiling light this weekend and I took pictures shown. Looks like builder didn’t lay EPDM up to lantern correctly. I worry that the wood behind is moist and covered in old adhesive stuck there. Builder awol. Sent pictures to a roofer who said only thing that will take is cutting EPDM back 100mm and laying felt fascia onto the wood with bitumen. That’s ‘only thing wood would take’. More mastic would just come away. Instinctively didn’t think felt and EPDM went together but I’m not a pro. And advice much appreciated… IMG_5114.mov


-
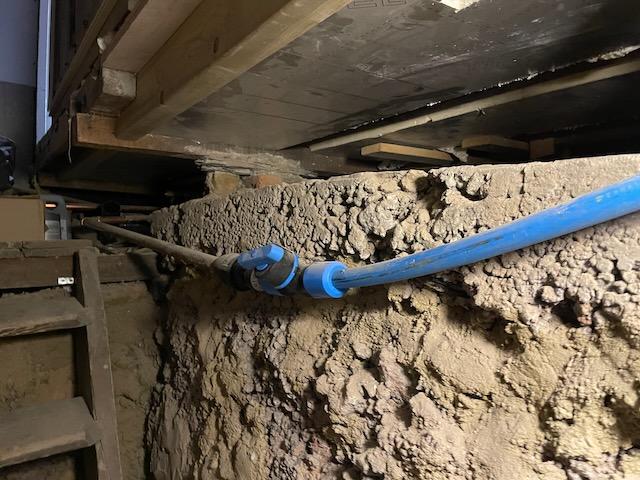
Pretty sure the blue and red pipes are cold and hot water pipes
-
I know. Breaks my heart
-
Thanks for this - yes we can often hear some water hammer in the pipes above the kitchen ceiling for the bathroom up there - but they're now covered. Can this be remedied without pulling floors up??
-
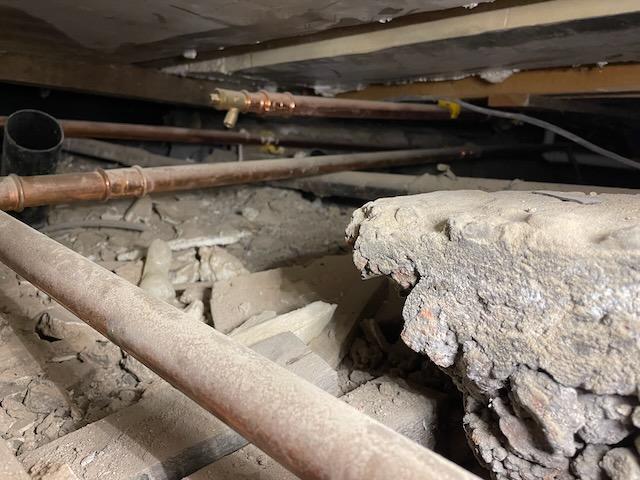
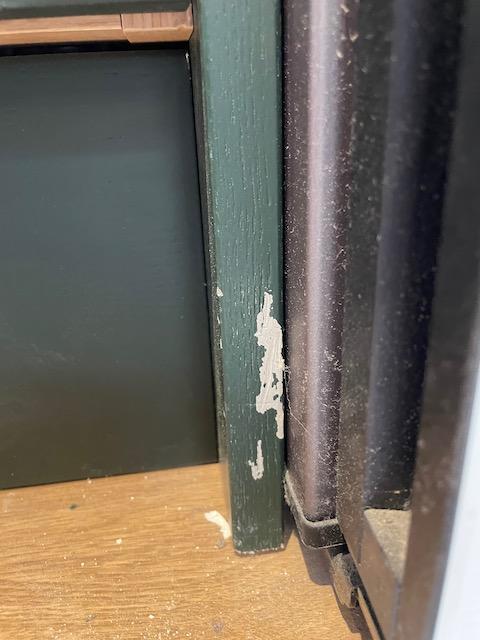
Finished major renovation on a Victorian semi. These pictures show the mains water pipe (new in blue and attached to new copper piping) and some of the new copper piping under the ground floor. Photos taken from stairs into cellar - so these are the lowest pipes in the house. Some are in 'hangers' - but some look to be unsupported - especially longer copper pipes. Is this ok? Or is this a very lazy builder causing me issues later down the track? Any help much appreciated.

-
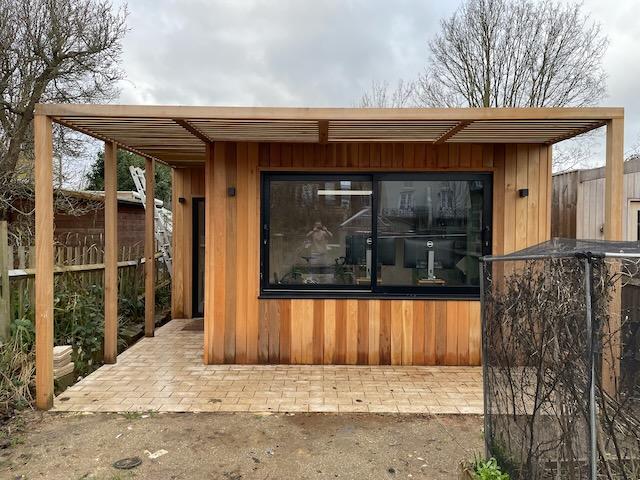
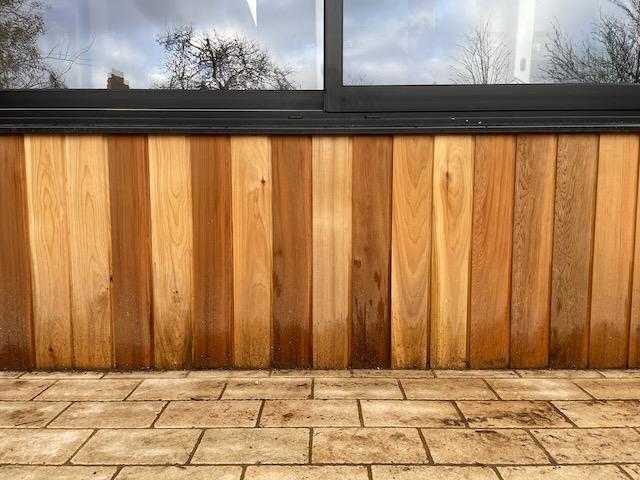
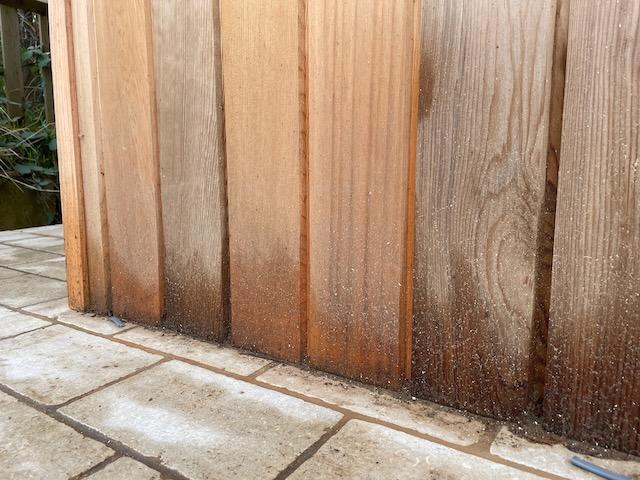
Is this exterior cedar cladding installed properly on garden office?
nmh replied to nmh's topic in Garages & Workshops
Thanks for the feedback. Hmm. I better get this sorted. Haven't treated the wood with anything because I heard cedar goes a natural silver colour and doesn't need chemical treatment. Is that correct? -
Have recently had this garden office built. I bought the cedar cladding but wondering if builder's installed it correctly. When it rains, water seems to absorb up the bottom of the cladding. Should I worry about this? Maybe water isn't an issue with cedar but might this lead to the wood rotting? Should there have been a gap between the limestone paving and the cladding - like an expansion gap? Or a gap to stop the water soaking directly into the wood? I've also noted some black spots on the brise-soleil slats (Siberian larch) - is this an issue? Many thanks for any help/advice.


-
Yes - both switch and build are LED dimmable compatible
-
OK - TLC Direct - here I come for a Knightsbridge refund! Shame - I liked their matt finish. But meaningless if they don’t work.
-
One faceplate controlling 2 x circuits yes. Could well be poor wiring. I’ll change bulbs to see if it’s the dimmer
-
Recently done a huge refurbishment of our Victorian semi and builder has done the electrics (could be the issue right there)! We’ve put a lot of dimmer modules in from TLC https://www.tlc-direct.co.uk/Products/SF2182MW.html and the builder has put 2 gang 2 way dimmer modules into rooms that only control the pendent/wall light with one switch. We have Astro and Pooky light fittings and they flicker. 90% of the pendant LED bulbs flicker and in some cases even blow. Builder says dimmer modules just make lights flicker! We’re using a lot of these pendant kits with the dimmer module above: https://www.pooky.com/products/classic-pendant-light-kit-in-antiqued-brass?gad_source=1&gclid=EAIaIQobChMI2NLrzs_EgwMVQ_N3Ch3GKALLEAQYASABEgKKKvD_BwE We’ve tried about 3 x variants of LED bulbs and they still flicker. Interestingly on the ground floor we’re using G&H modules and they have worked without flickering bulbs: https://socketstore.co.uk/product/flat-polished-brass-unlacquered-led-dimmer-3-gang-419434 Any ideas what on earth might be going on - we’re at our wits end!!!????
-
GypCeiling noise issue using Gypframe MF9 Connecting Clips
nmh replied to nmh's topic in Sound Insulation
Thanks so much for this. Excuse my ignorance but do you mean just spray a foam around the clip? What sort of foam? Many thanks -
I think I've made a boob by using the Gypframe MF9 Connecting Clips instead of screwing the MF5 to the MF7 beams. It means whenever I open my son's room door, the ceiling squeaks! See attached video with sound. Hard to use screws now because I don't have access from below because the new ceiling is in place. Can anyone think of a work around? Some rubber between clip and metal MF7 baton? Any help hugely appreciated. Think this is the issue https://youtu.be/hhX4n7RT8Uo?feature=shared MF9 clip 2.mov
-
I think I should have used wafer head jack-point screws to connect the MF5 bars to the MF7 bars as in the video link here. https://youtu.be/hhX4n7RT8Uo?feature=shared I used Gypframe MF9 Connecting Clips and when you walk on the floor above, or open and close the door, the ceiling squeaks a lot! Anyone else had an issue with this and know of a solution. I can't easily use screws now the ceiling below is up. Can I screw them in from above? Or use some rubber insulation between the clips and the MF7? Many thanks MF9 clip 2.mov
-
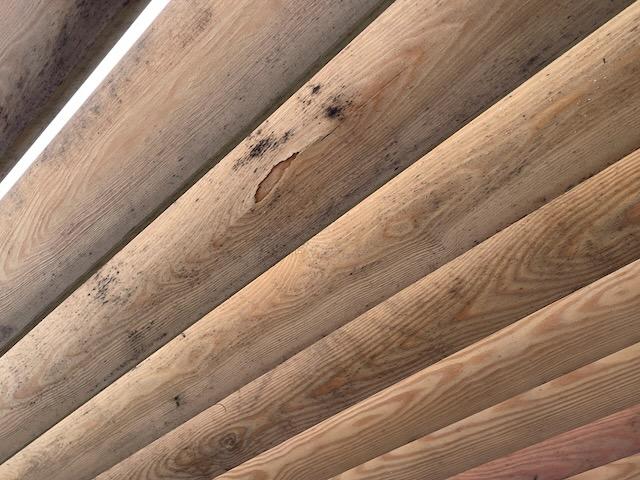
Proper loft conversion. Think the joists are solid.
-
Thanks for this. I’ll get on it. It’s like a trampoline up there!
-
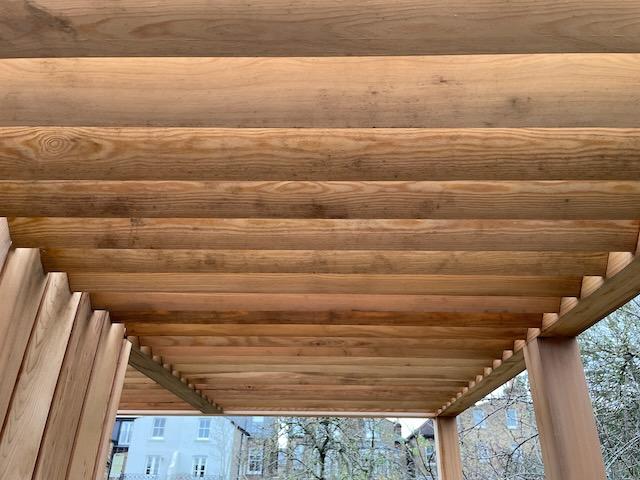
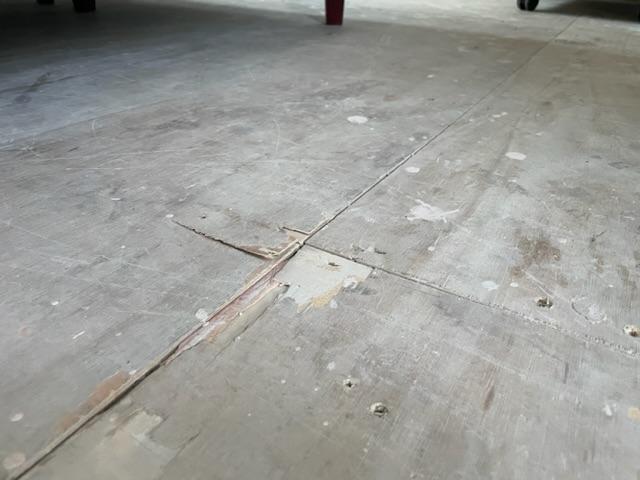
Just done a major renovation throughout the house but the flooring laid for the top (loft) floor is creaky when you walk over them and seem to spring more than I’d like. See the pictures attached. Is this ply board the builder has put down? It looks @12mm to me. Rest of house is ok because he’s put down 18mm chipboard. We’re carpeting throughout. Any thoughts much appreciated. Thx


-
Technical help needed re repainting Magnet kitchen doors and panels
nmh replied to nmh's topic in Decorating
The guys that did the spray are saying '...The doors were keyed, they had - 1 x under coat. 2 x top coat. Under coat was: industrial.sherwin-williams.com/emeai/gb/en/industrial-wood/catalog/product/industrial-wood-coatings/products-by-industry.14502508/care-primer-df1324.15112256.html Top coat was: www.hmgpaint.com/products/wood-finish/topcoat/477/acid-cat-mb-colours On the 2nd coat we got bad reactions with the paint cracking. Some doors then needed sanding right back and having extra duster coats to help stop the reaction. Sometimes in the past this has happened with finished doors. Some off the shelf doors are cured in ovens with ultra violet lights for speed, this process can make it hard to overcoat no matter how you prepare the surface...' Does this make sense to anyone? -
Technical help needed re repainting Magnet kitchen doors and panels
nmh posted a topic in Decorating
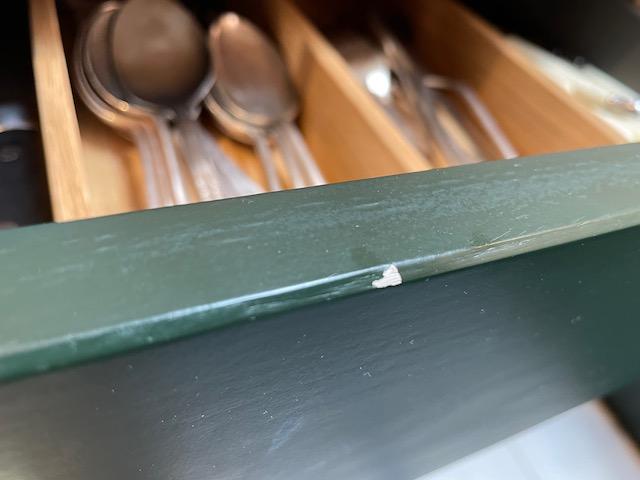
Recently bought a Magnet Ludow kitchen where the doors are crafted using a '5mm ash - veneered chipboard centre panel to provide a visible woodgrain that feels raised to the touch...this highly durable door has a thickness of 20mm...and is made from largely responsibly sourced materials...' We used a very reputable firm to respray the doors, drawers and panels RAL6009 (Fir green). They arrived back looking great but started to chip quite easily and after 3 months when we came to decorate, the decorators removed their 'delicate surface low tack Frogtape' and huge patches of the resprayed green came off. Resprayers say they roughed the original doors up with a 180 sand paper, added a coloured primer and then applied 3x coats of the new RAL. They've been super helpful and say they'll sort the issue but not sure they know how to stop it happening again. They say some of these Magnet kitchens are fired 'too hot or too quick' and this can cause issues when respraying. Everyone I speak to has a different approach but surely there's a best way to do this so the doors actually hold their colour and don't chip so easily. These doors are no doubt sealed when they come out of the factory (rather than oiled)? Is it the lacquer coming off too easily and this takes the sprayed paint with it? Someone else tells me sprayers can get their lacquer mixes easily wrong etc. Another potential painter told me '...sand through and spray lacquer and fill imperfections with an epoxy resin filler. Then apply Otex adhesive primer tinted to match colour and then 2 x full coats of a mixed finish in Tikkurilla semi furniture paint...' This would be a hand painted option. But I genuinely can't see the wood for the trees and don't know what advice to follow. Anyone know the best route through this? Photos attached. Many thanks.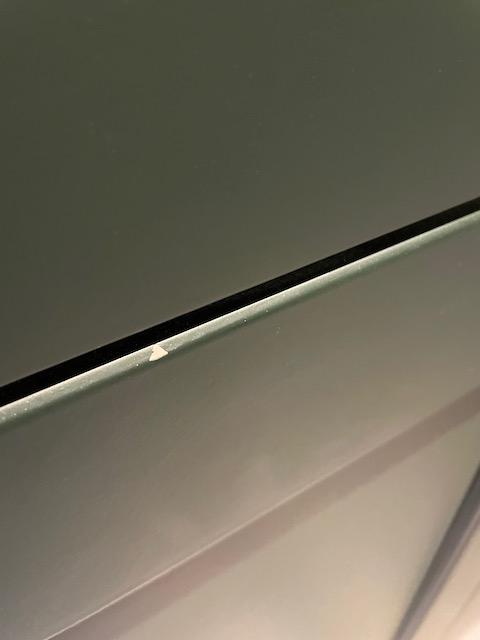
-
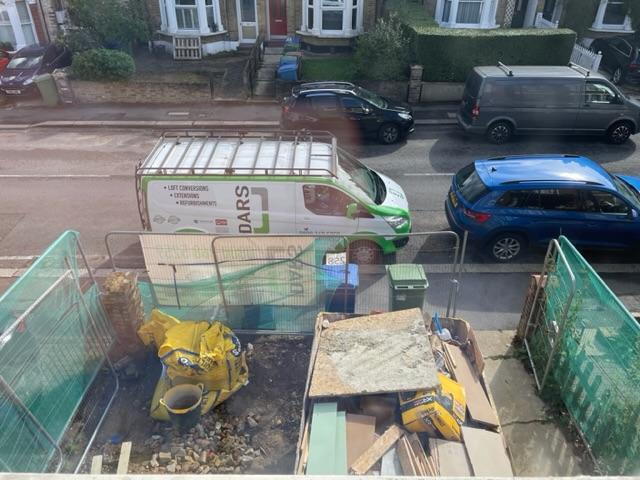
We’ve a Victorian semi in SE London and are clearing the ‘front garden’ for a car parking space. Southwark will drop the kerb if we meet the various requirements (permeability etc). We are, believe it or not, keen gardeners and would like to keep as much ‘greenery’ in the driveway as possible. Wondered if anyone had any experience of something like: https://www.pavingdirect.com/grasspark-permeable-paving-grid Have read on here that the plastic grid systems can chip and wear easily - any truth in this? Any thoughts, experience, advice much appreciated. Shot of site attached for reference (currently housing a skip)!
-
Thanks - we have been told sealing them is helpful. Is this the same as varnishing? The Lithofin feels more like a sealant than varnish?
-
Thanks so much for this - their instructions say drying could take days or a few 'weeks'?! If we used a sponge to clean them, would a few days (esp in this heat) suffice? Do they dry to the touch/eye?
-
Have just bought some natural limestone at quite an expense for the outside patio. But I'm baffled by all the prep instructions from the company (Quorn Stone) - see below. We've some fantastic builders but the idea of them lovingly cleaning, drying and buffing each limestone slab just isn't going to happen. I've bought Lithofin Stain Stop W as a sealant but what's the best 'real world' way of applying this? How much prep does the stone really need? PH washes etc??! We also bought the Kerakoll grout on their advice https://www.tilingsuppliesdirect.co.uk/product/kerakoll-fugabella-color-grout Are we overthinking things? Any advise great appreciated! COMPACTED HARDCORE BASE The sub-base must be made up of a well compacted layer of MOT type 1 to a minimum depth of 100mm. This should be compacted at 50mm intervals which will ensure maximum solidity and aid with achieving an even level. Following this, a thin layer of washed sharp sand can be compacted to the surface of the compacted MOT type 1. Ensure a fall of 1:60 has been accurately set within the subbase to allow for adequate drainage away from the building. The pavers must be installed onto a full bed of mortar made from 5 parts washed sharp sand and 1 part cement, mixed to a workable consistency. Prior to laying onto the mortar we advise coating the back of the paver with an SBR slurry mix made from 5 parts cement, 1 part SBR and 1 part water which will improve the bond strength to the mortar. It is best practice to gauge out the mortar bed and manoeuvre the paver into position rather than strike heavily with a mallet as this can lead to breakages, should there be any natural weak points. Pavers must be installed onto a full bed of mortar as per BS7533 – under no circumstances should they be spot or ribbon fixed. During the laying process it is advisable to clean away any spots of mortar or slurry as soon as possible as they can be difficult to clean when dry. After the pavers have been laid the area must not be walked on for at least 36 hours. CONCRETE BASE Ensure a fall of 1:60 has been accurately set within the substrate to allow for adequate drainage away from the building. If installing onto a solid cement substrate the minimum curing time is 28 days before installation can commence. Please note this timeframe will vary depending on site conditions and thickness of concrete. The method for laying exterior pavers onto a concrete subbase is very similar to installing tiles internally. First the substrate must be clean and dust free as a this can impair the bond strength and could lead to failure. Please note the installation must be carried out in dry conditions. Pavers should be back buttered with a thin coat of exterior grade flexible white adhesive and laid onto a full bed of trowelled adhesive using a 10mm notched spreader. Ensure the paver is pushed into place to collapse the ridges from the notched trowel, this will provide full coverage beneath the paver and allow maximum strength for the finished patio. Under no circumstances should any of the pavers be spot fixed. Please note uncalibrated pavers should be graded prior to install and will require more adhesive in some areas SEALANT - FIRST APPLICATION Sealant should only be applied once the tiles are clean, fully dry and released of all moisture. Please note the drying time of the adhesive does not indicate the floor is released of all moisture. This can take days and in some cases weeks - your professional installer will be able to guide you. Prior to sealing, the pavers must be fully cleaned and dried so as not to seal in any contaminants from installation. We recommend using Lithofin Stain Stop. Apply generously using a sponge, whilst constantly moving the product around the area for 15 minutes, applying more product if necessary. It is always advisable to work in small sections to avoid application marks. Tilt the sponge at a 45-degree angle over the edge to protect the edges of the tile - take care to not flood the grout joints. Ensure all excess sealant is removed by buffing the stone touch dry with a white towel.
-
Hi - novice here but am doing a big kitchen renovation (not myself)! But I'm ordering things. We have a large amount of wall to ceiling Magnet kitchen cabinets and a peninsular. Ordering engineered oak for the floor which isn't cheap. So do we run this oak flooring under everything? Or just partially so just the front of the kitchen cabinets go on top? But how would the back of the cabinets lay even? many thanks
