Search the Community
Showing results for tags 'mbc'.
Found 18 results
-
 HI. We have an MBC insulated raft foundation. We are on heavy clay and the house is on a slight slope. We need to landscape when the weather is better but we need to back fill the trench around the house. What did everyone else use? Architect is saying shingle! but this isn't stable. 'Normal' houses wouldn't have this and they would be surrounded by the earth that surrounds the foundation so do we put that back in? Its quite claggy and lumpy though. We were thinking type 1 with some French drains. Any advice welcome. W did out own groundworks so I have no one to ask. Thanks for any help.
 -
Hello, I'm new to this forum. I've designed a four bed house which I've been discussing with Scandia-Hus, who are local to me. During the process, I've realised their thermal performance isn't as I'd hoped, so I'm now considering MBC, but I've no experience of them. We watched a Scandia-Hus being built near us a few years ago, and it seems to be a well built house. Another has recently gone up, a variation on one of their catalogue houses. Again, it's been a fast efficient build. I'm here in the first instance to find out any comments / experience other members have of Scandia-Hus and MBC thermal efficiency. As I can't see a straight line, we'll be opting for a main contractor option. Thank you.
-
We are experiencing lots of teeth sucking regarding render and timber frames, which is a bit of a worry as we planned on the ground floor of our timber frame new build being rendered. We've had comments from numerous individuals which sum up to something like "you shouldn't render on a timber frame, far too much movement'" etc. Looking through BH it looks like there are plenty of MBC frames out there with render, is it lasting well? Is there a preferred system that will look crisp and smart for decades and can you invisibly repair it should the need arise? Is there a system to avoid at all costs?
-
So, I just remembered that I actually had this blog. I'm killing time waiting for a phonecall, so, updates! Over a year later! Stuff has happened. Lots of stuff. Lots of money. Many tears. Some moments of "FFS, what?!", many moments of "HOW MUCH?" and "how the feck does this bloody shower fit together?" and a few, rare, beautiful moments of "woah, that looks awesome". The last entry ended on a lovely "woah" moment of the successful pouring of our beautiful concrete floor throughout the ground floor plan. It pissed down the next day, obviously. Then MBC went away, laden with cakes, pies and phone numbers of eligible single ladies from the area. A week later, they came back. My new job is a long commute away, and I had to work that day. On my way to the station (hideously early), I saw a truck drive past, laden with bits of house. "That's our house", I thought to myself, I just knew it. I text my husband to share the momentous culmination of our wonderful joint enterprise and was mercilessly mocked that it probably wasn't our house, as it was far too early. Ha! How I laughed when the driver called him approximately 10 minutes later to say he was stuck in the narrow road outside our site, couldn't turn the lorry sharp enough to get into the access point and was blocking every single (extremely angry) person in our medieval town from getting to work. That was a brisk drive to site for him. There were many people in hi-viz, a lot of shouting and gesturing, a lot of sharp intakes of breath, a few calls to the police to track down owners of badly parked cars and a huge amount of car horn tooting. Oh, and a LOT of apologising. But, the truck made it into the site. Just. To the never-ending delight of my small son, there was also an absolutely ENORMOUS crane. I was later informed this in fact this is an embarrassingly tiny crane, the smallest one that you can possibly hire and really hardly worth the bother. I feel like the driver may have had some adequacy issues with his crane size. So, whilst I was in a meeting, they just wacked the house together. At lunchtime, I called for a catchup FaceTime and the ground floor was pretty much finished! I mean, WHAT? The speed was insane. By the time I got to site later that evening (about 7.30pm), all the ground floor panels and internal partitions were in. My husband and I just walked around rooms, giggling insanely to ourselves at the ridiculousness of the whole thing. The next day, second storey on. Unbelievable. By the end of the week (in fact, I don't even think it was full week) the whole frame was up. We were a little shellshocked, to be honest. There was a lot of head scratching about how to run the falls on the roof. This had been discussed and obviously designed in, but our roofer had some input whilst MBC were on site. They were very good and spent a lot of time working out the best way to make it work for what we needed (singly ply membrane roof, adequate falls, hidden box gutters) and did a lot of extra work in conjunction with the other trades. Our roofer also risked the wrath of his wife by coming to a site meeting on a saturday and was subsequently late for a family BBQ oops. Oddly, once the frame was up and see could feel the room sizes in 3D, they suddenly felt absolutely massive again. Such a convincing illusion - it's very hard to visualise 3D space from a 2D footprint. Next up? The joys of roofing and zinc cladding And winter
-
That's alot of insulation - over 600 bags of the stuff. They cut a load of holes in the MBC vapour layer ply. More holes than we ever imagined. Then they pump the insulation into the holes to fill up the walls (300mm deep) and ceilings (400mm deep). Some of it escapes. Easy to vacuum up though. Then they put the ply discs back in and tape over the holes. They have left us with some patches for areas of the ceiling they can't reach and for any they might have missed. Only found one so far. Sean and his firm - works subcontracted for MBC for alot of the pumped cellulose insulation for them - was fantastic. The house is definitely warmer inside now, and the echo is now deadened. It is so quiet in there. Can't wait to move in........
-
The slab team from MBC arrived on site this morning. It's like having the building version of whirling dervishes who've just dropped a few speedballs. My word, they make progress! The team is headed up by Harry and he has 3 others in his team, but this will fluctuate a little over the course of the job with Harry needing to have a look at another job for most of tomorrow then the younger lad taking some leave to go to a music festival. Tsk, the youth of today! He worked like a machine, though, apart from the bit where he nearly rolled over one of the piles as he was looking in awed astonishment as a rather attractive young lady farmer drove past on the nearby track in a JCB that was most definitely bigger than the roller machine he was on. I don't think it was the vehicle that caught his attention so much as the driver. Sniggers all round. I arrived just after 8 am this morning and the first lot of hardcore had already been delivered. In total, there were 4 loads of type 1, but I piggybacked onto this and ordered an additional load (paid for by me) which the team will then spread and roller for me in the area beyond the bucket in the above photo, which will create a nice level area for the crane when it arrives to bring in the timber frame. I've had really good luck with the weather so far and hope it continues, but if it rains between now the completion of the timber frame, the site will turn to mud PDQ and slow things down horribly. Once the hardcore was going down and getting compacted, the piles were cut off to the correct height, leaving the rebar in position, ready to be tied into the beams. I have no idea what you call the digger thingy that they are using to move the stone around the site, but it's an impressive beast. It looks a lot like the bottom of a tank with its caterpillar tracks and then something a bit more transformers-like with its swivelly cab and arm. Either way, it was mechanical poetry in motion when driven by someone who clearly knew what they were doing. The team will have been working till 7pm this evening, so they will have got all the hardcore down and compacted and were going to start on the sand, if they had the time. The first load of sand arrived about 4.30 this afternoon, more to follow on tomorrow morning. As well as working 12 hour days, Harry has already had a chat with the neighbours to let them know that they will be working over the weekend, too, on both days. The insulation is due for delivery tomorrow and they will be putting the pipes that carry the service cables into this, along with the UFH pipes. I'm not sure when the steels will arrive, but that must be also imminent as the piles will need to be tied in before the concrete is poured. The building inspector is coming on Monday to check out everything before the pour. For interested parties, THE CONCRETE POUR IS CURRENTLY SCHEDULED FOR TUESDAY. I've read a couple of horror stories and some not-quite-horror-but-not-very-nice-stories about uneven slabs, so I've told Harry that before they leave site, I need him to demonstrate with a laser that everywhere that a wall rests is absolutely level and within tolerance. Harry is a man of few words and he didn't quite bat an eyelid, but I explained that I would much rather that something like that is demonstrated rather than just verbally assured. He seemed fine with it. So, one final picture of the hardcore going down, from the garage side of the house. More blow-by-blow action to follow tomorrow.
-
Using a timber frame company (such as MBC) made the frame erection stage of self building quite satisfying. It only took two weeks to build something that truly looked like a real house. We did spend more than 7 months in dialogue with MBC over all the little details. And still we made some quite clanging errors. More of that in my next post. It was glorious weather back in July. [How I wish we weren't in rainy autumn now - we are still not watertight......] Anyway, the first week passed by in a blur of unloading lorries and the ground floor going up. And then we went on holiday......
-
I wasn't going to visit the site today, but we've had heavy rain showers today in Dorset and I thought that would be an ideal opportunity to see how level the slab looks after its late night power floating. My reasoning was that whilst I can't identify any high spots by eye, it would be easy to look for the low ones by where the puddles were lying. Here's a photo taken from a slightly elevated viewpoint (the top of a pile of wood chippings!), looking from the south east corner where the snug will be, over towards the north west corner, where the main living area will be. Most of the puddles that you can see are barely a couple of millimetres. I'm not sure how long it had been since the shower that caused these, but it was a breezy day and not hot. The next is taken from the other end of the right hand side of the property, as seen above. Between the brown foul waste pipe and the white UFH pipes, you can just about see that there is a hole in the slab. This is meant to be there right now, but is due to a mishap yesterday. As the concrete was being transferred in the digger and poured from the bucket, the digger rocked slightly and the bucket bounced on the exposed UFH pipes. Harry from MBC reckoned that one of the pipes has been damaged as a result, and so the area around the punctured pipe has been left uncovered. My trusty plumber/UFH person will be coming early next week to fix the damaged section of pipe and make good on the concrete floor, and MBC will be covering the cost of this. Once I have the bill for the repair, I will pay it and MBC will deduct the amount from my next stage payment. This was all agreed this morning without any arguments or quibbles. So far, all the puddles in the photos have only been a couple of mm deep. The deepest is on the far north west corner of the living area, shown below. It's not easy to guage the depth of this area, but I think it's about 4mm at the deepest. The thingies are a couple of end caps that get put on the pile rebar, but the wind was blowing them towards me. You can see how they are tilting. Here's another view of the same: I don't recall the exact tolerance that the slab needs to be within off the top of my head, and I'm not going hunting for it right now as I'm one g&t into Friday evening with a couple more to follow, so no point now. However, the figure of 5mm is scratching away in the deepest recesses of my grey cells, so I think this should be acceptable. If anyone knows otherwise, please speak up! The finish on the surface overall is very nice. I had a walk over the whole thing and couldn't see anything obvious, but then apart from squishy concrete under my boots, I wouldn't know quite what to look for anyone. To my unpracticed eye, it looks pretty good. One very good think that came about from all that excess concrete being dumped all over the place yesterday is that the team spread it all out between the hard standing and the slab, so I now have an even more level and sturdy surface for the crane when it arrives with the timber frame:
- 5 comments
-
- 2
-

-
- power float
- powerfloat
- (and 4 more)
-
Hi there - newbie here and apologies if I am repeating and reviving a discussion that's been done to death. Just about to start the first fix plumbing in an MBC passive house with the smart ply air tight board on the twin stud walls. I am impressing on everyone the need to not compromise the airtight layer and wondering what the best approach is going to be with clipping pipes (and cables) on the walls in the service void to avoid holes in the air tight board. If indeed we need to worry - presumably if we have neatly seated screws in each hole the sealing is pretty effective and screws ups should be redone with holes taped? Any suggestions gratefully received.
-
MBC are currently scheduled to pour my slab next Tuesday, no idea what time yet. If anyone would like to come along, let me know. There are details on my BH blog of today's work on the slab with some photos of progress.
-
We are looking for some help from anyone with experience of MBC slabs. Its the order of doing things that is confusing us. We believe we need a land drain. We will also have surface water drainage. We have been advised by a drainage contractor to do the drainage (foul and surface inc soakaways) after MBC put the frame up, so probably after the roof is on and the rainwater pipes in place? Maybe before the render because of dirt? So is the best order broadly as follows? Dig foundations, compact hardcore MBC slab MBC frame Roof / windows Drainage (foul, surface, soakaways) plus other service trenches Render / cladding Where does the land drain fit into all this? It seemingly is supposed to go where the hardcore is around the slab. So do we dig that out again (when we do the other drainage) or do we put it in at the same time as compacting the hardcore. Opinions please. And thank you.
-
I'm getting a few quotes in on PV systems for the roof of my MBC build and I have a slightly tricky issue of how to route the DC cabling from the array, underneath the tiles on a south facing 35° inclination roof, over the ridge and down the north facing side, into the single storey flat-roof garage where the inverter will live. I'd like it all sealed and tucked away where it won't have anything nasty done to it by local rodents or birds, but it's whether there is enough clearance for the cabling and all its protection. Any suggestions, please?
-
The first big money was spent today - I signed my contract with MBC and paid the deposit. I think I could use a menopausal hot flush about now, to counteract the cold sweat that comes over me at the thought of spending all that money. I haven't been idle since getting our planning permission through, either, as I know that the clock is ticking on loads of things that would be done later due to the type of build. Stuff like how the cabling from the internet satellite dish will run into the house. I rang the ISP and asked them how they would normally approach things - "well, we will just drill a hole through the wall". Oh no, you won't! I'm waiting for them to call me back to have a chat about cabling requirements. I also found out exactly where the water meter is and the route of the supply pipe. I have been known to be lacking in powers of observation for things I'm not interested in, and a water meter would definitely fall into that category. However, I have specifically looked for it a few times but not succeeded and I found out why today - it's a few hundred metres down the lane, outside someone else's house in what the water company described as 'a large chamber'. All very gothic, but at least I know where to look now. The architect is moving at his usual glacial pace with things, so I have my rockets ready to be inserted in strategic places to make sure he keeps up with everyone else rather than slow things down as I think will happen if left to his own devices. The glowing taper is approaching the blue touch paper. Currently waiting calls back from: Wessex Water Architect His preferred BCO (for a quote and a chat about the house build) Highways management (what we need to do when creating the new vehicular access to the garage) Planning case officer (about the bats and our roof, to agree timing on removal) Time to go and do some paid work now. Sigh.
-
Hi all, Just starting planning our second (last) build of a place for our retirement. Have been reading the excellent Harris blog and am intrigued by a) the lack of a 'traditional ' heat store and the use of a buffer and Sunamp. Has anyone else tried this ? and how helpful with the design might Sunamp be? We have good electrical but would appreciate recommendations for plumbing/ME, both design and install. The house will be a rooms in roof bungalow approx 290 M2 of which 180 will be on the GF. Underfloor only of the GF tiny electric radiators upstair. Passiv from MBC looks likely , yet to choose windows so any views appreciated. MVHR and solar PV will be fitted. Thanks Sloco
-
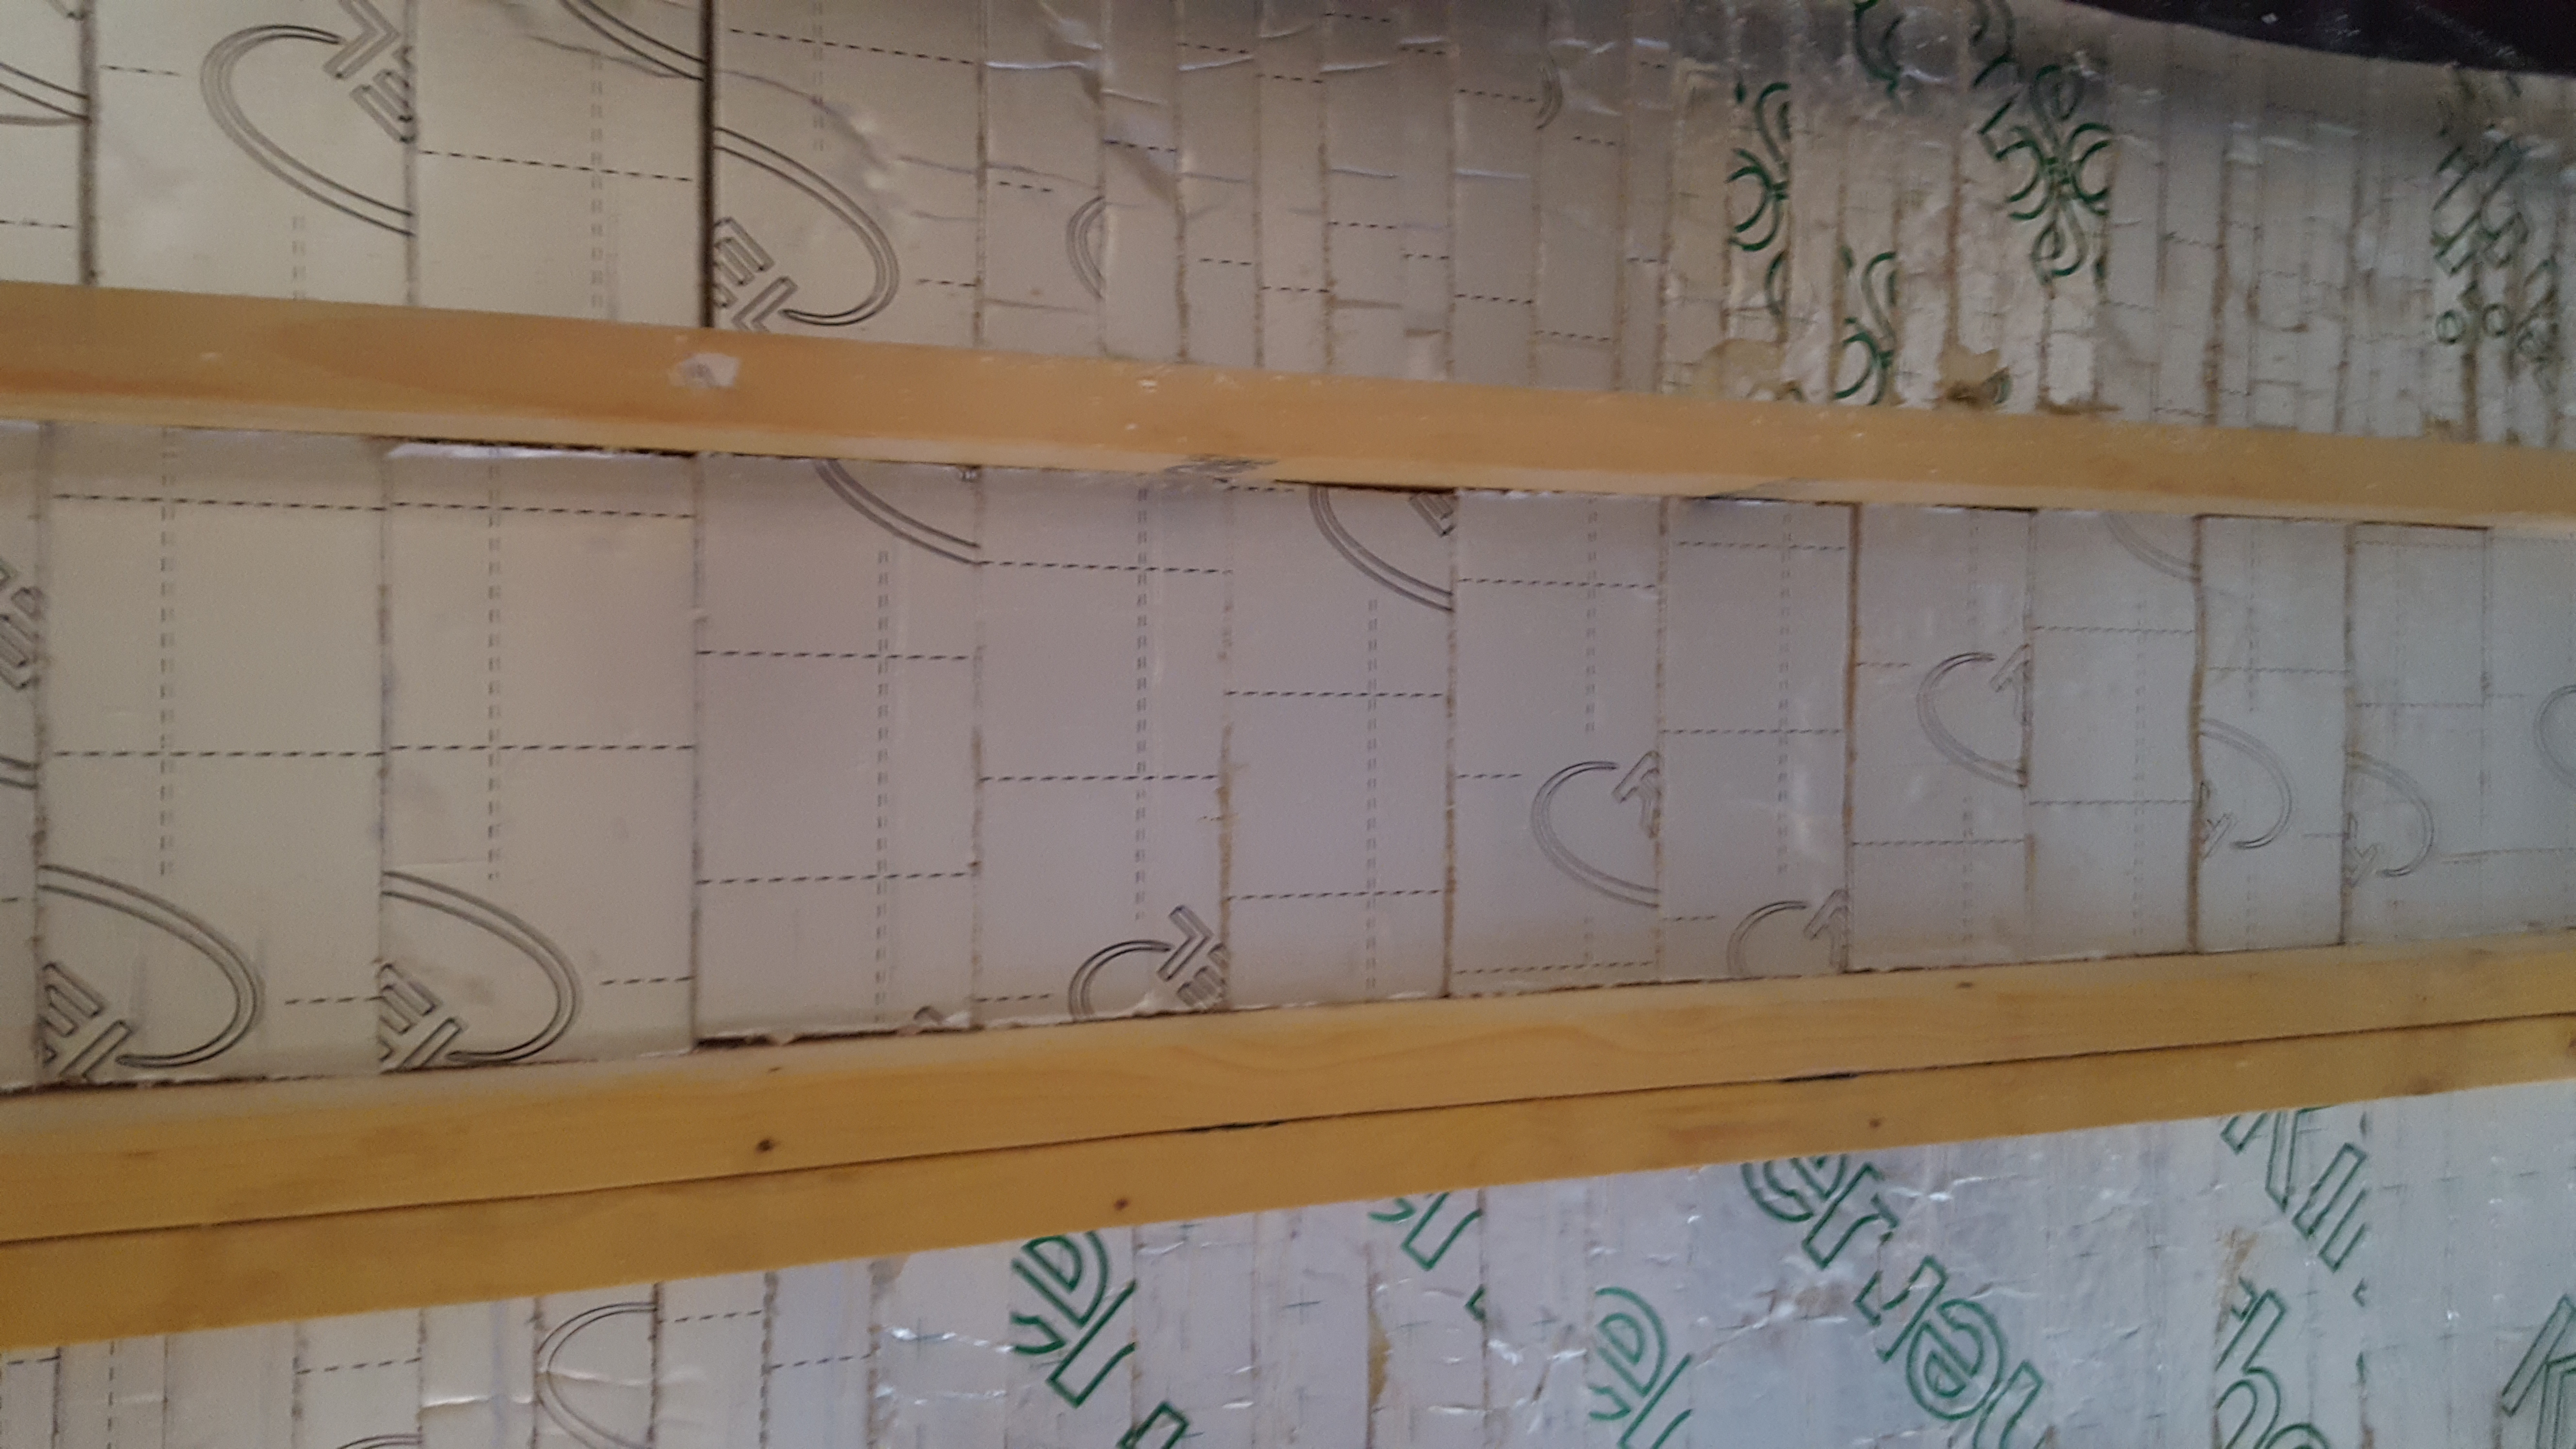
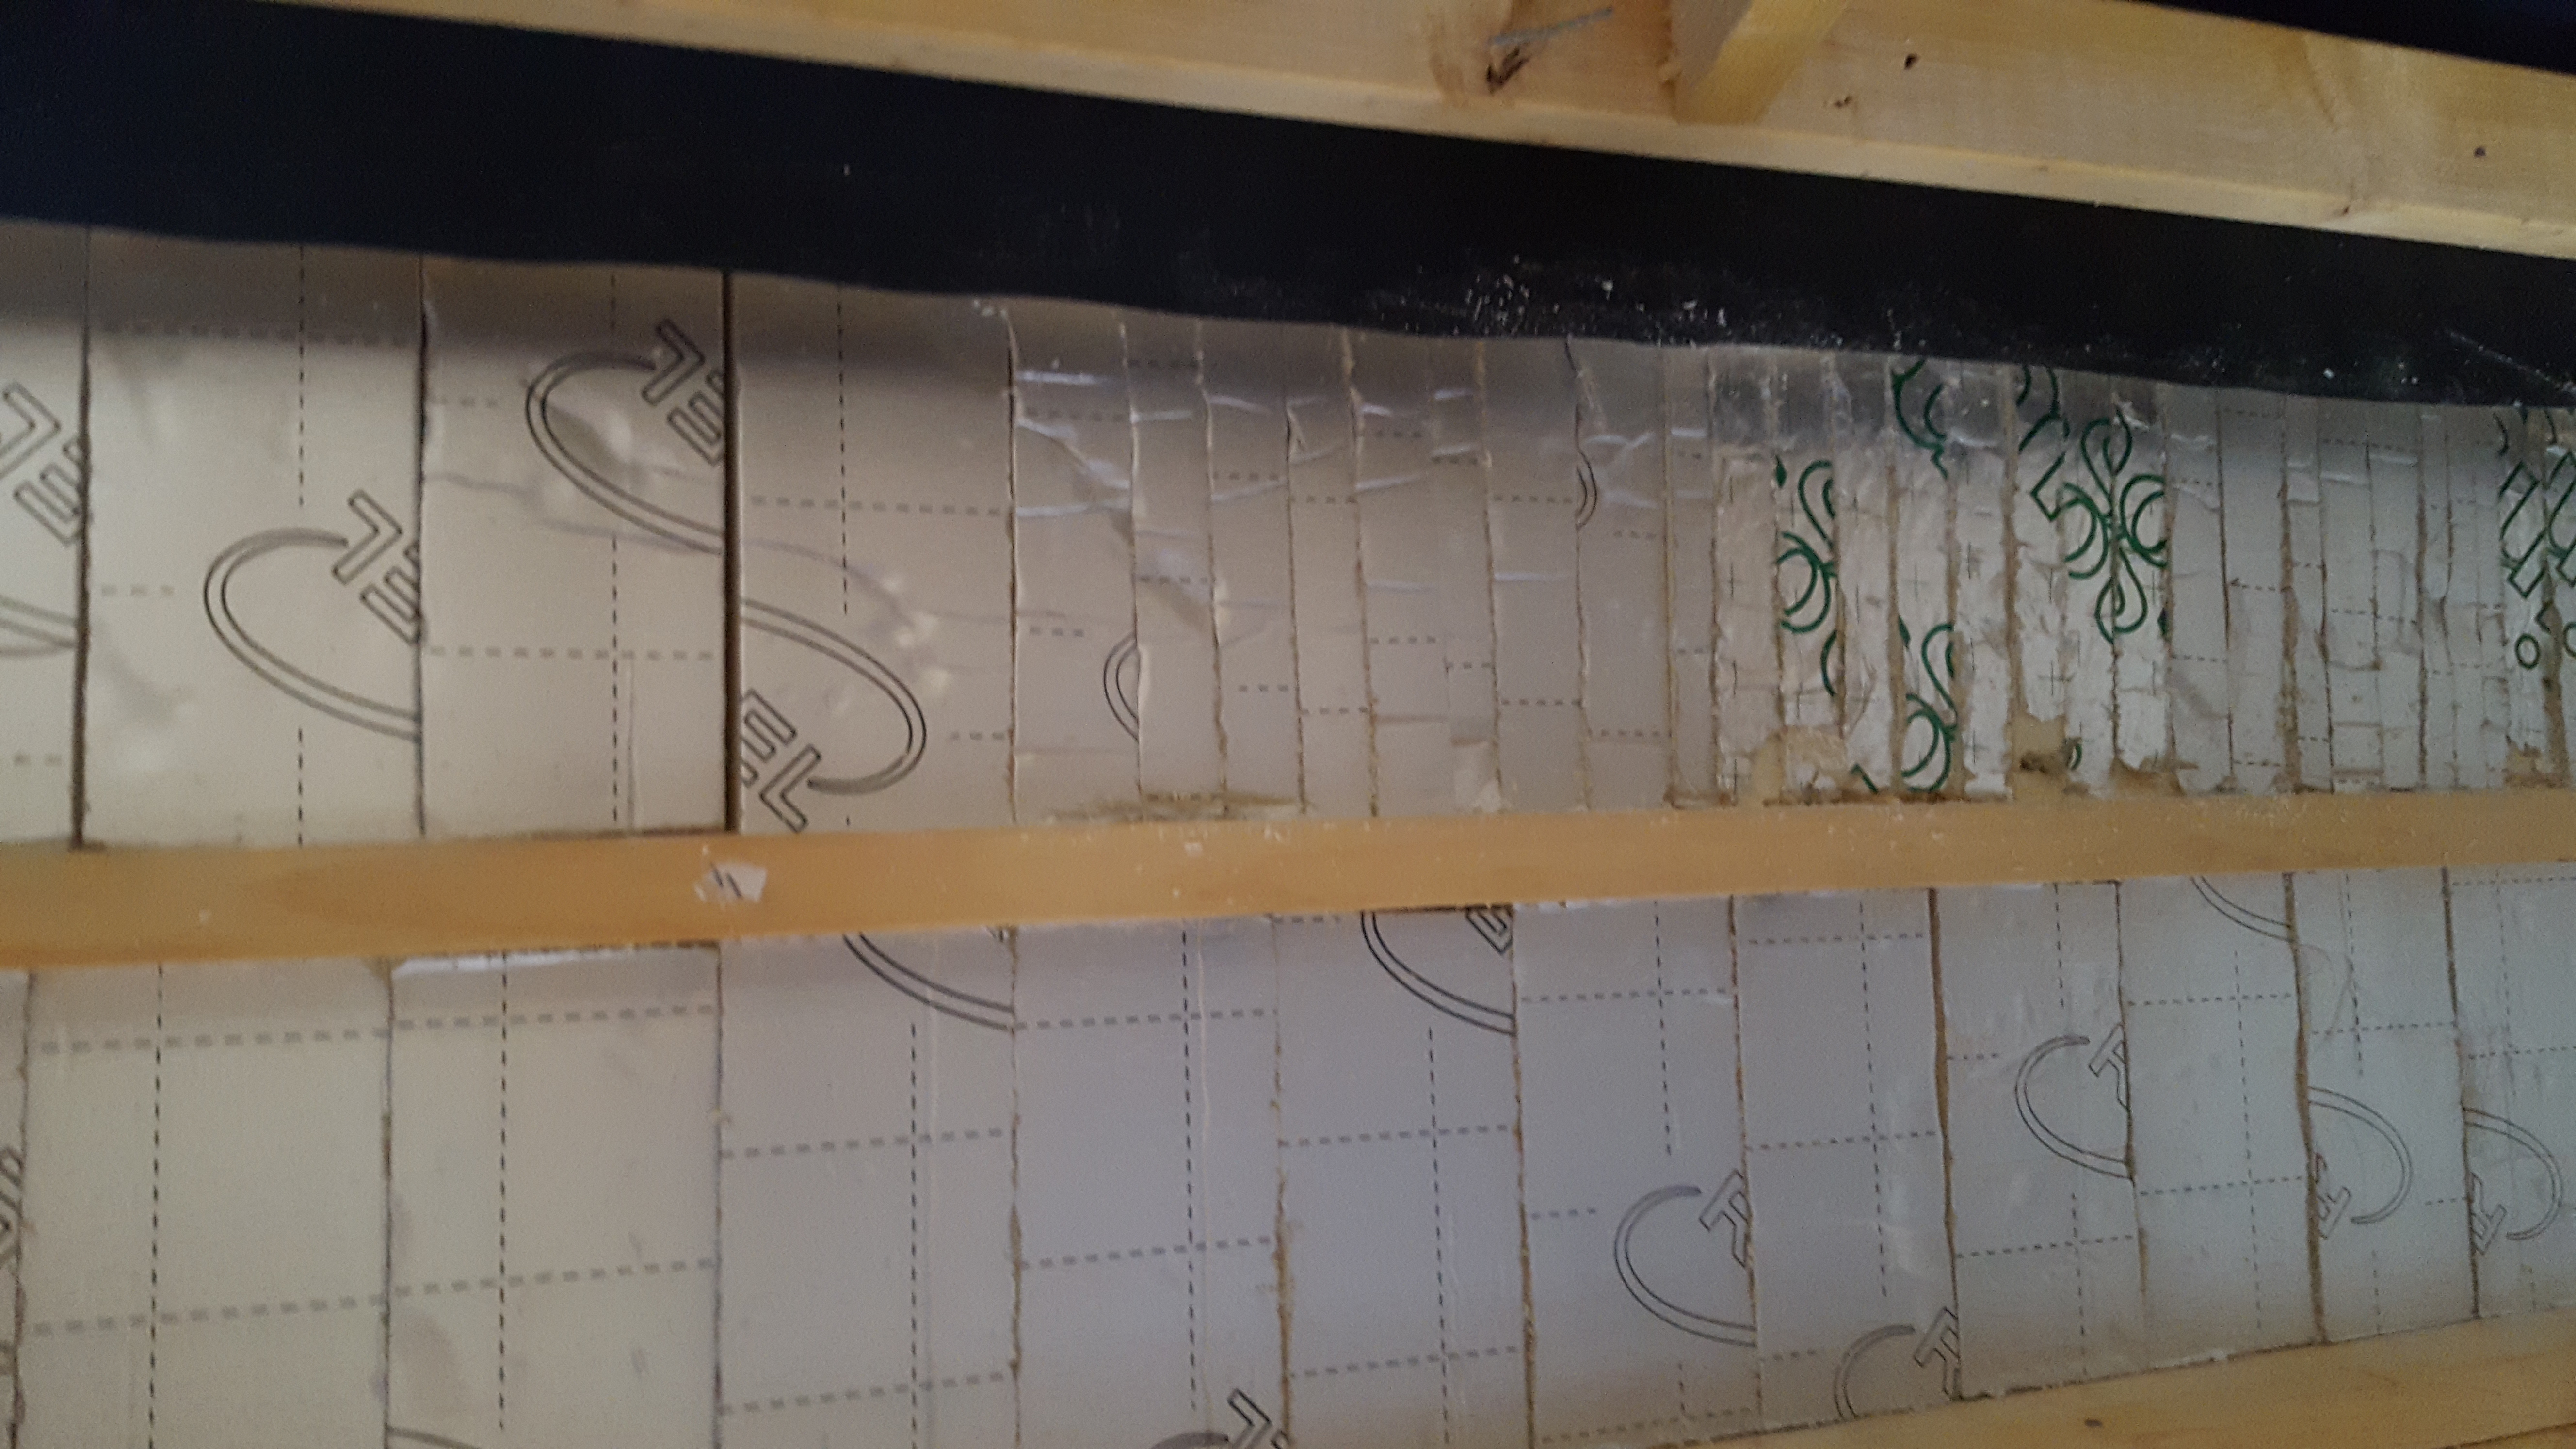
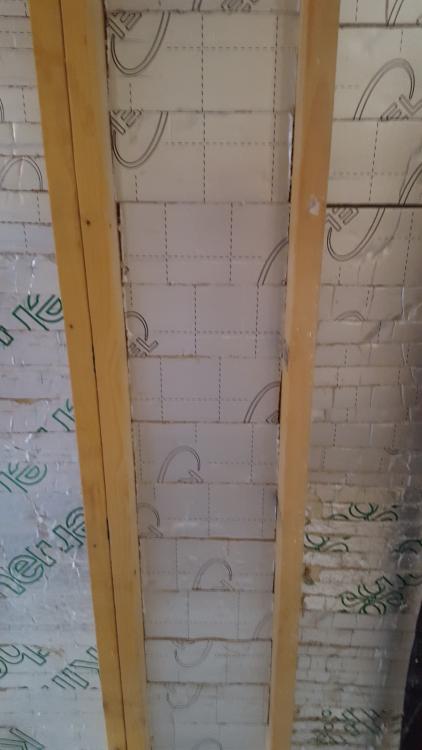
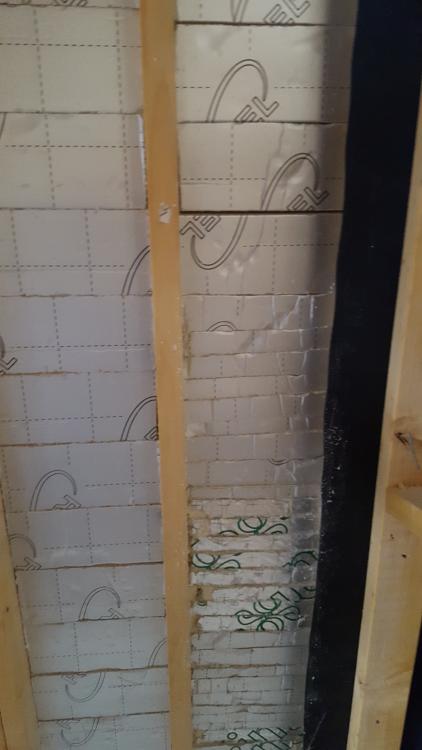
So I visited site today and found this. This is one of two layer of PIR insulation being fitted between timber studs. The height between studs is around 2.6m so it is inevitable that there is atleast one join and perhaps sections where 3 or 4 pieces make up the insulation but 20-25 pieces doesnt sit well with me. Your thoughts?
-
I have a MBC timber frame which part will be clad in stone but with the sure cav (50mm) between stone and timber frame having difficulty in finding lintels deep enough. Anyone know of standard timber frame lintels larger than the standard 100mm size?
-
Latest time lapse of timber frame foundations and frame build in Wales scaffold Frame Build
-
Hello all, as complete newbies, we started our Berkshire build last August after over a year of devouring e-build for advice. We're a fairly standard MBC passive house above ground with a passive basement below which is apparently a first. Now at the plastering stage so plenty of experience under our belt to share and still plenty of advice required! It's good to be back, Mumsnet was not doing it for me.