
Leaderboard


Popular Content
Showing content with the highest reputation since 04/12/24 in all areas
-
I see a few mentions of the expense of MVHR. I self installed a simple system complete for less then £1500 in a 260m2 house. It has no sensors just manual boost which we use occasionally, otherwise it stays on trickle rate 24/7, even when some doors and windows are open. Really happy with the air quality (which I monitor with sensors), best value for money in the whole project and a no brainer in a new house IMO.6 points
-
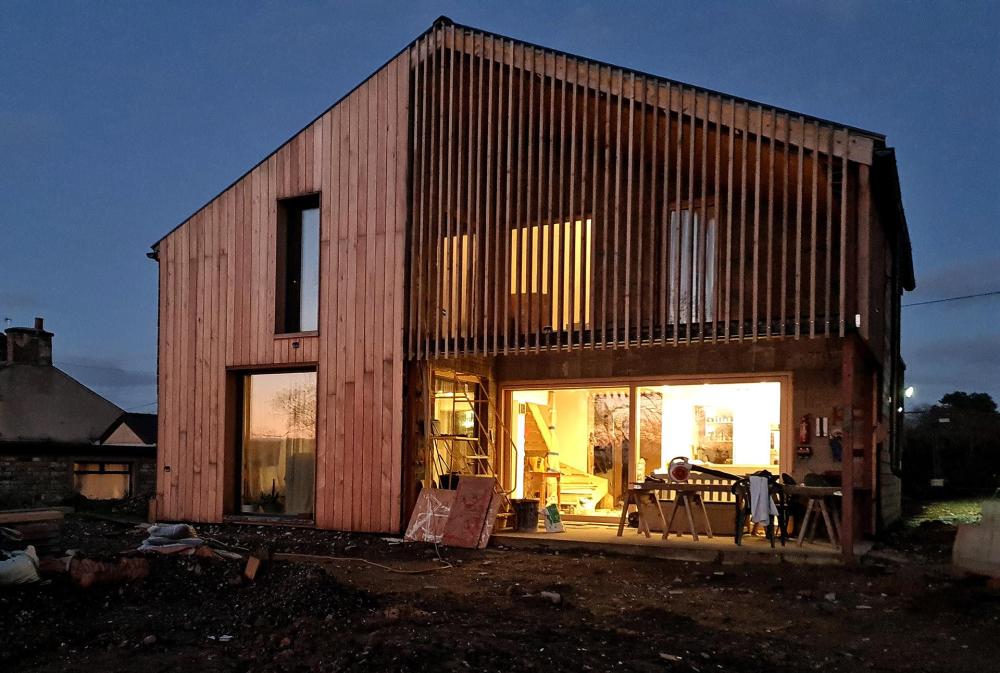
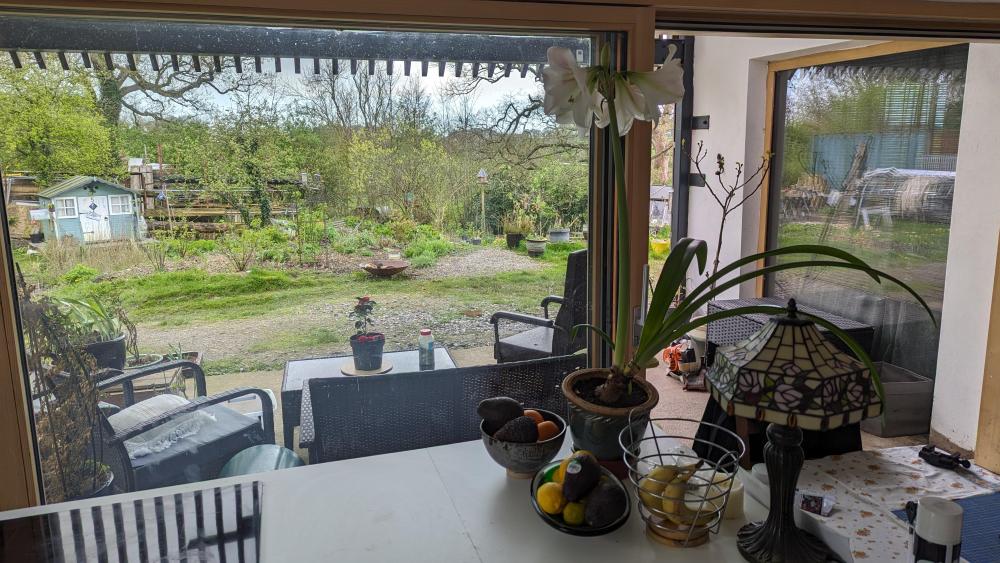
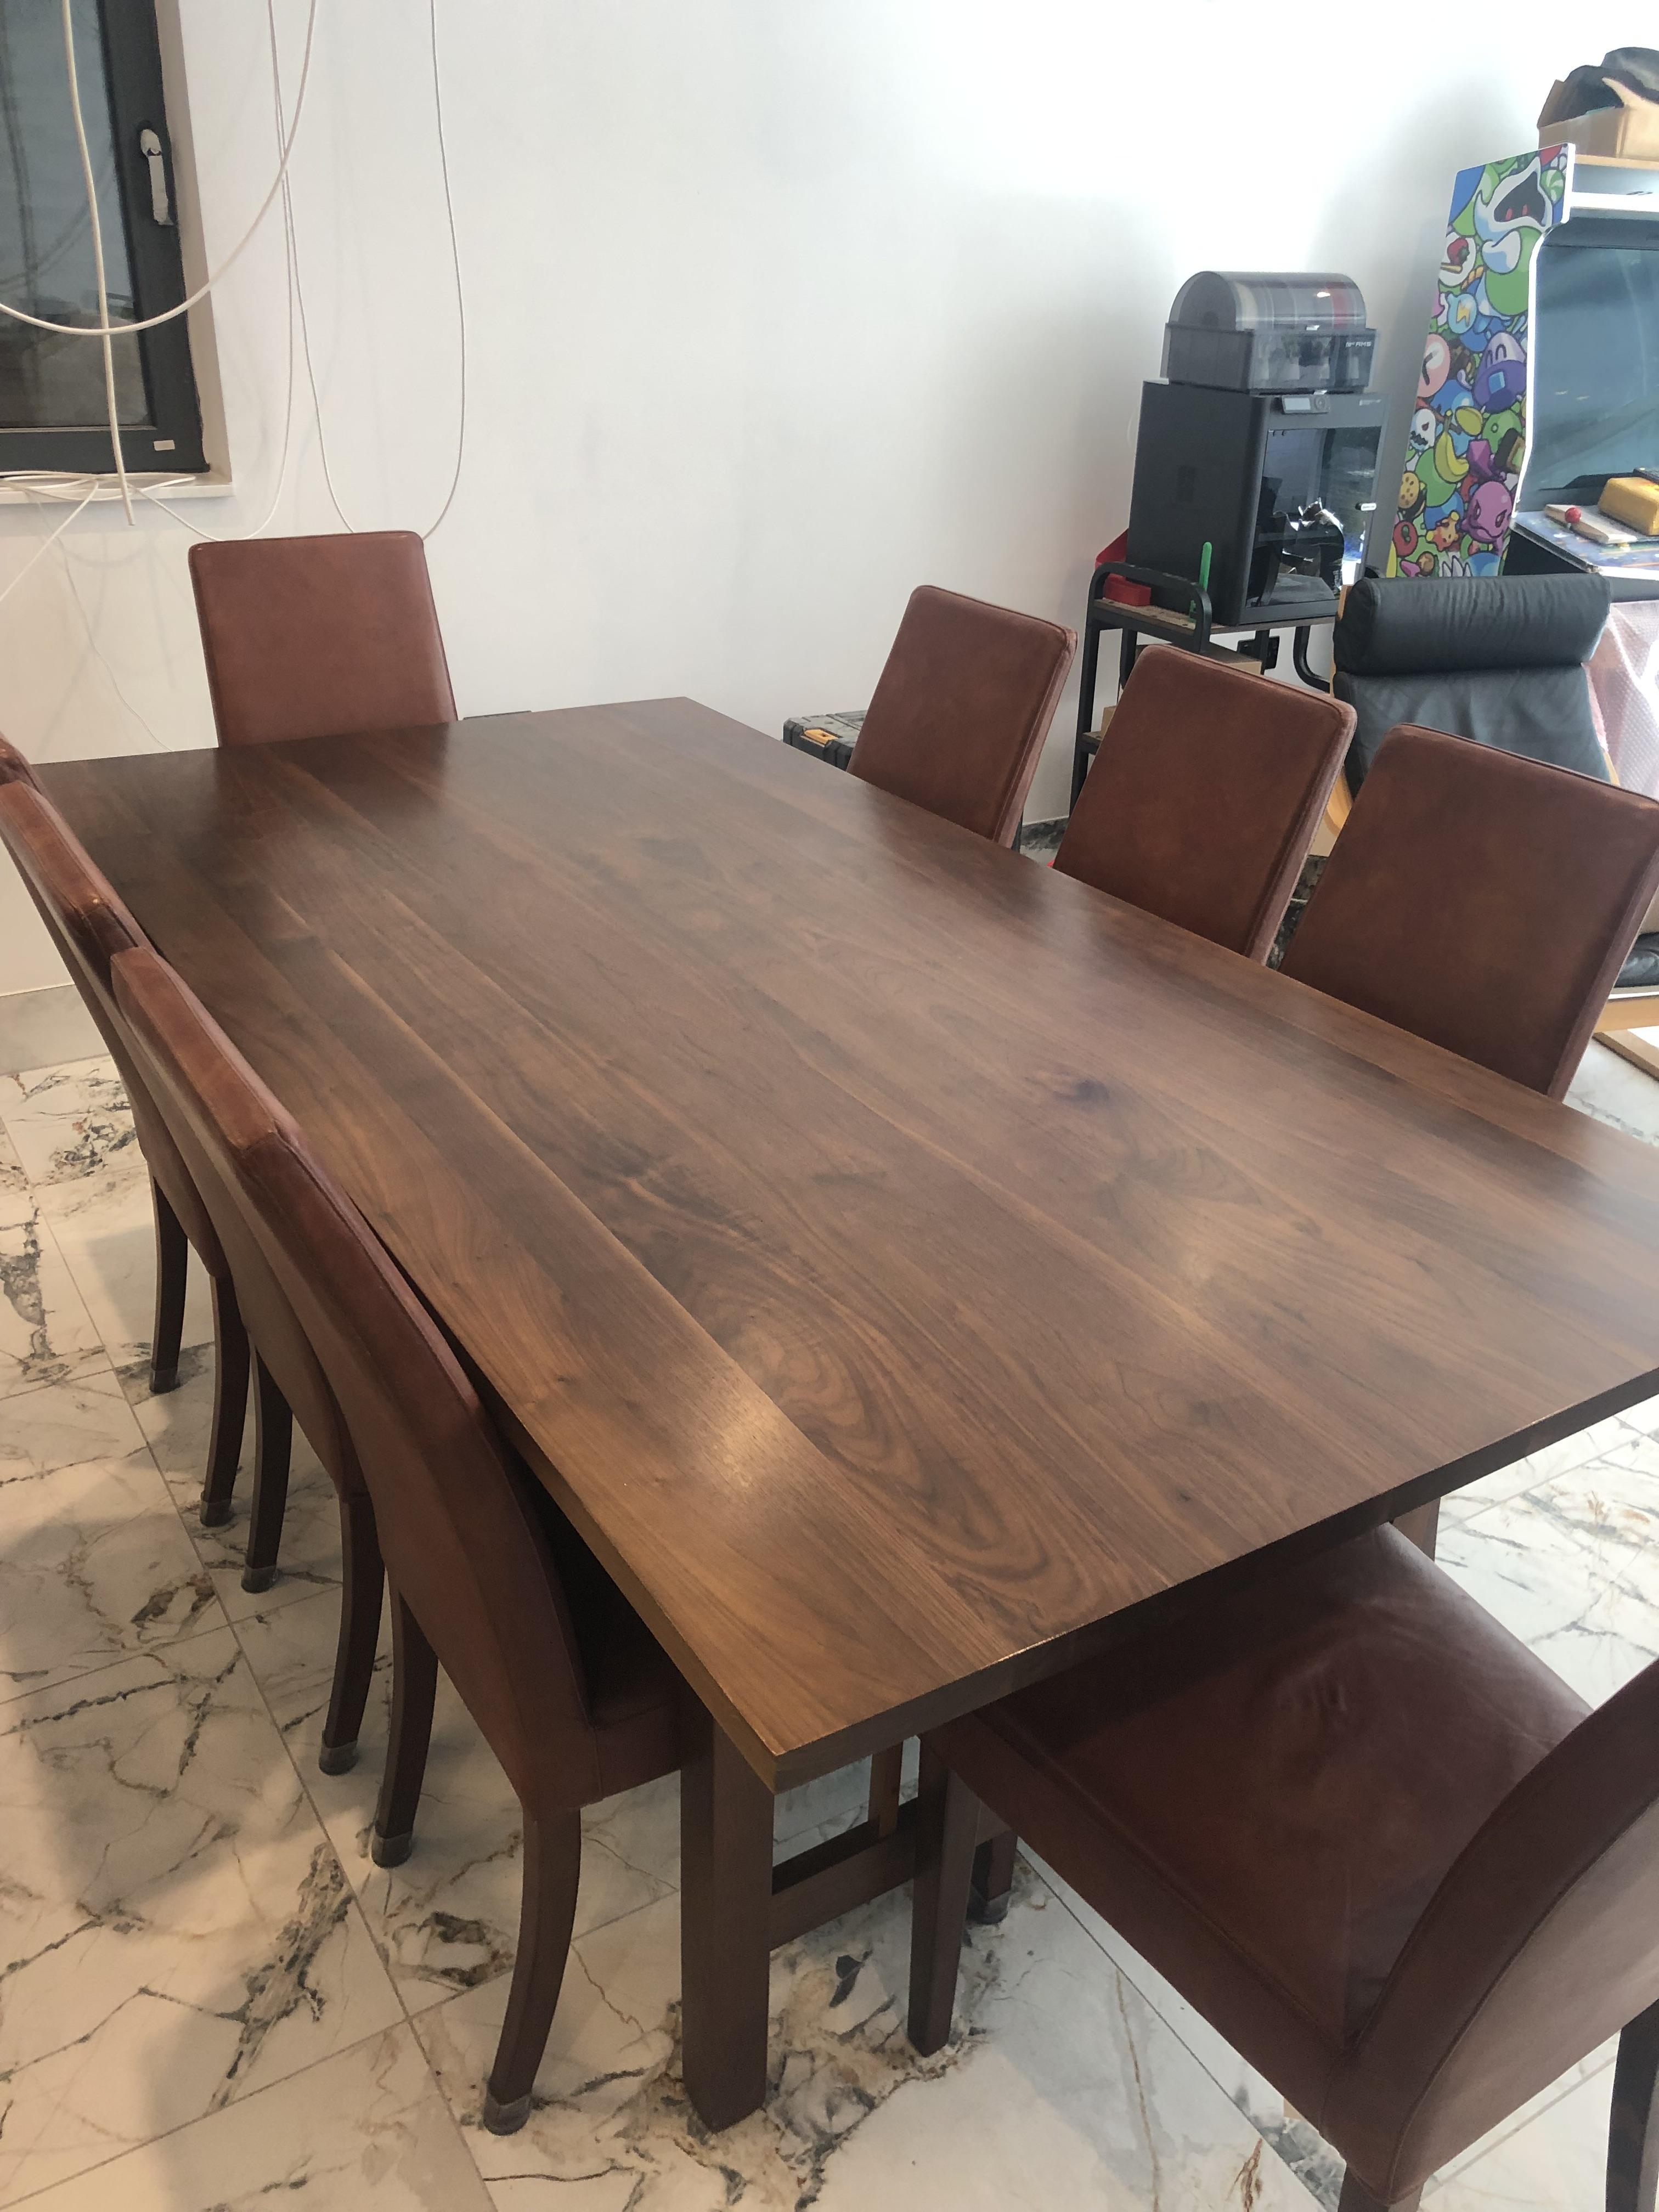
I thought these photos might interest you ..... the first one taken a few minutes ago The slider in the kitchen has been open all morning - right hand side of the image is to the North, and thus the Winter Garden is in wind shadow (wind NW) , but in full sun (it was raining when I took the photo) There is a 2.5 meter overhang for a 'veranda' shown here earlier in the build. We call it a Winter Garden - yet to have anything in it , but won't be long now. SWMBO intends to fill it with - knowing her - a jungle or as close to that as she can get. There's one episode of Grand Designs where Kevin WotHisFace showed a similar design, but he calls the area a Breeze Corridor. The look of triumph on Debbie's face was a picture. First time she'd ever been 'on trend' she remarked.
 5 points
 -
We leave the window in our bedroom for much of the summer. I support we could turn the MVHR off but it's so cheap to run and as it guarantees fresh air regardless we don't bother. Despite my statz-esque approach to kids leaving the entrance door open I try to remember a house is there entirely for our benefit and and enjoyment and not as a science project.5 points
-
Hunted down some bits and diy ‘d it

 4 points
 -
I don't mean to be harsh, but don't you think you kinda brought this second mess on yourself? You actively chose to get back a tradesperson who you already know made a potentially life-threatening mistake and he wasn't even able to fix it when told about it originally! What made you think his second-fix plumbing in your bathroom would be any better? If he didn't provide a quote, what did he agree to? What do you have in writing? Did you take detailed photographic evidence of his mistakes before you fixed them? If you've got pics, ask him for an itemised bill, and then you can prove that he didn't actually fulfill those things properly and therefore you're not paying. But to be brutally honest, I think you partially brought this on yourself and might need to chalk it up as not-too-expensive life lesson.4 points
-
Sorry but I can't see ANYTHING in that kitchen that will make it £55K. Howdens could replicate that, or any other kitchen supplier for that matter. Choose the best of their range, and fit yourself, Get good stone worktops and splashbacks, and buy the same top end ovens and hobs and other appliances as the German supplier is proposing. (yes this is an answer from a man)4 points
-
Go to band p eps, they are a manufacturer not a re seller, save a fortune they will cut what thickness you want so you could go 100mm eps 90eps 80mm traditional sand and cement screed. good thickness to keep the ufh pipes well covered and a good lump to use as a big radiator.3 points
-
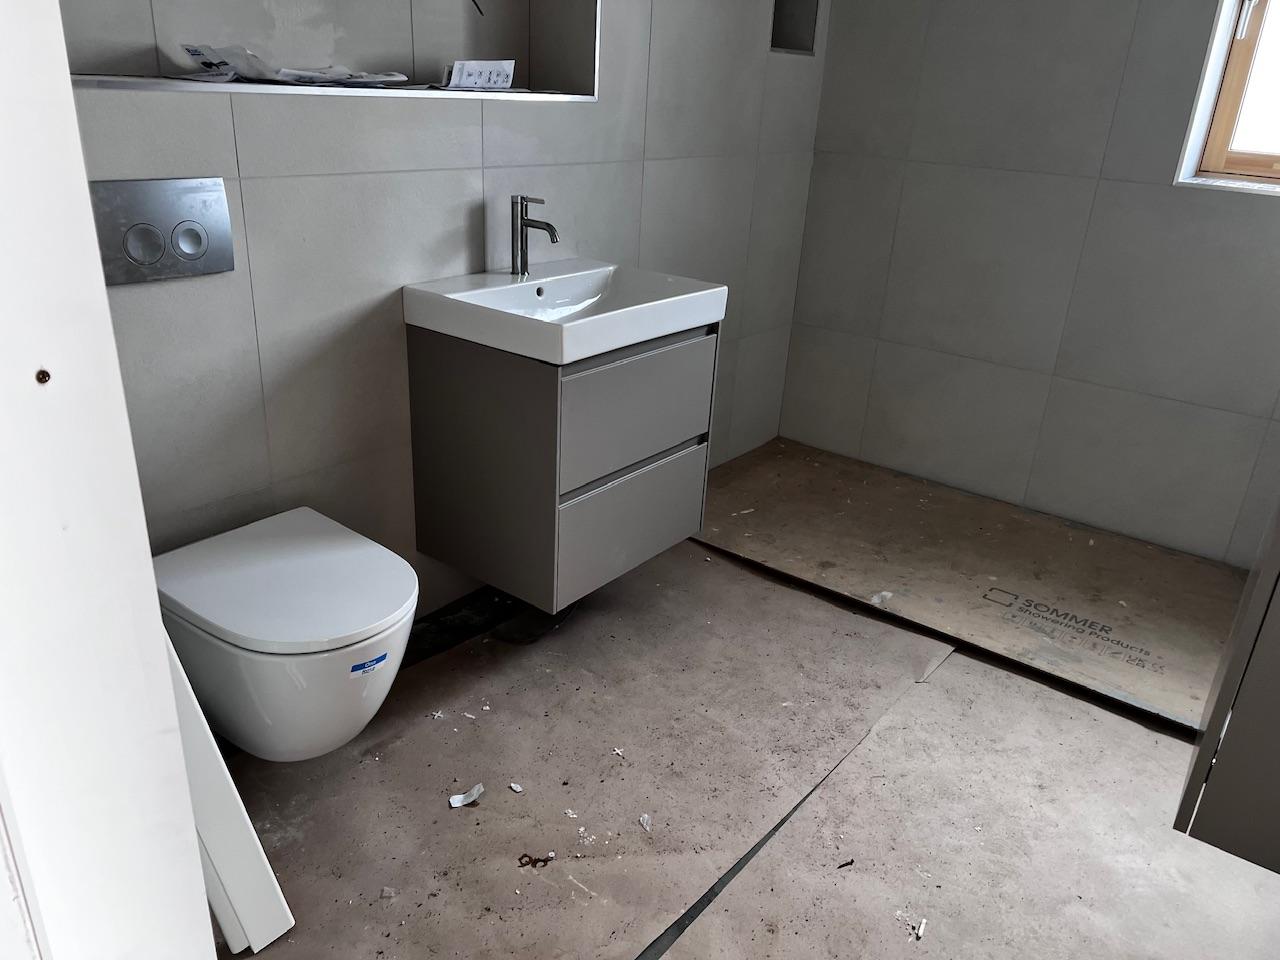
We finally have a flushing loo that isn’t a fly ridden blue plastic box. I claimed the right of jus primae. Shower next so we’ll have one working bathroom. Doors will be finished this week too so we can move in at the end of the month.
 3 points
 -
Why are you doing it that way? I'm assuming it's PIR insualtion on top of a concrete slab? Pumped liquid screed would be around £2k.3 points
-
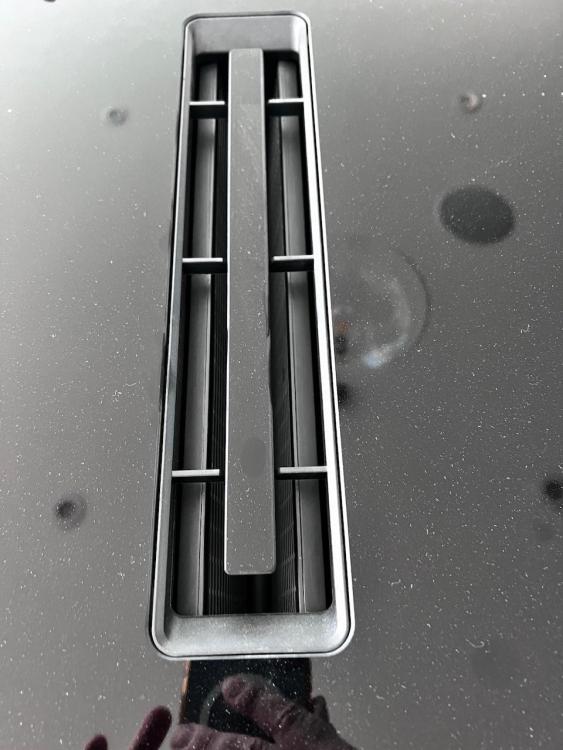
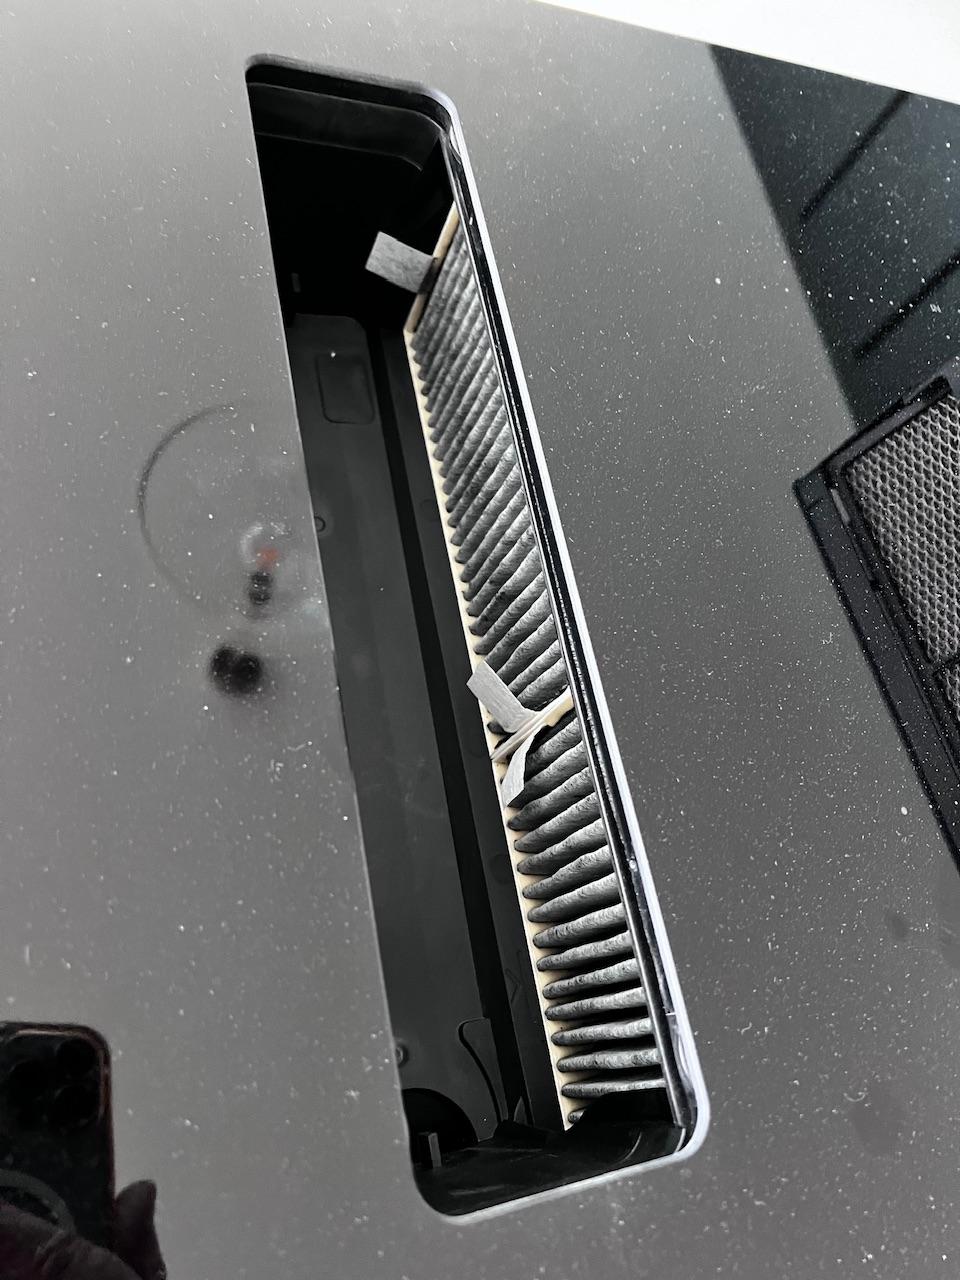
For completeness it extracts to a duct that attaches to the back of the hob and runs down behind and underneath the cabinet. This was a fiddly thing to put together. A bit like the scene from Apollo 13 where they have to make a CO2 filter out of bits that don’t quite fit. The duct doesn’t come with the hob though so you need to buy that separately and they do different types to suit different installations.3 points
-
Ultra / Mapei / Bal etc are all fine and usually on the shelf in most decent outlets. Been installing bathrooms for over 30 years with all of them, never missed a beat . My 2 cents, do not use silicone for fundamental sealing, just use it as a cosmetic seal; I don't EVER use silicone to seal trays before tiling, instead use CT1 as it is a completely different product without the short service life that silicone(s) tend to have.3 points
-
We're not passive, but pretty well insulated and achieved 1.6 on the air test. We have had our MVHR running 24/7/365 for over 6 years now (except when changing filters). We have one program for winter, and one for summer, and we occasionally put the boost on (to clear cooking smells a little faster). We never open windows. Doors are for going through and closed immediately. Excellent air quality was the primary goal, and that's exactly what we have. What's more, not only have we never had a musty smell, never mind any mould, but the house stays virtually dust (and allergen) free. Best of all, and despite a degenerative lung condition, my wife is still enjoying better health than she did prior to living here. We wouldn't, and she probably couldn't, live in a home without MVHR ever again.3 points
-
You could make the same point about the central heating. Is that as valid? We fitted our MVHR ourselves. It cost us less than £3K, IIRC. When I did the heating calcs the air recirc losses on the top 2 floors meant that we would have definitely needed some form of central heating solution for these upper floors without it. This would have cost us a lot more than the install cost of the MVHR. We just leave ours running 24 × 365. The running cost is in the noise compared to the heat recovery energy savings during net heating days. And as @dpmiller points out: fresh air and no damp year-round. And yes, in the summer we open windows as and when desired or needed. The MVHR still keeps the wet rooms and unused bedrooms fresh.3 points
-
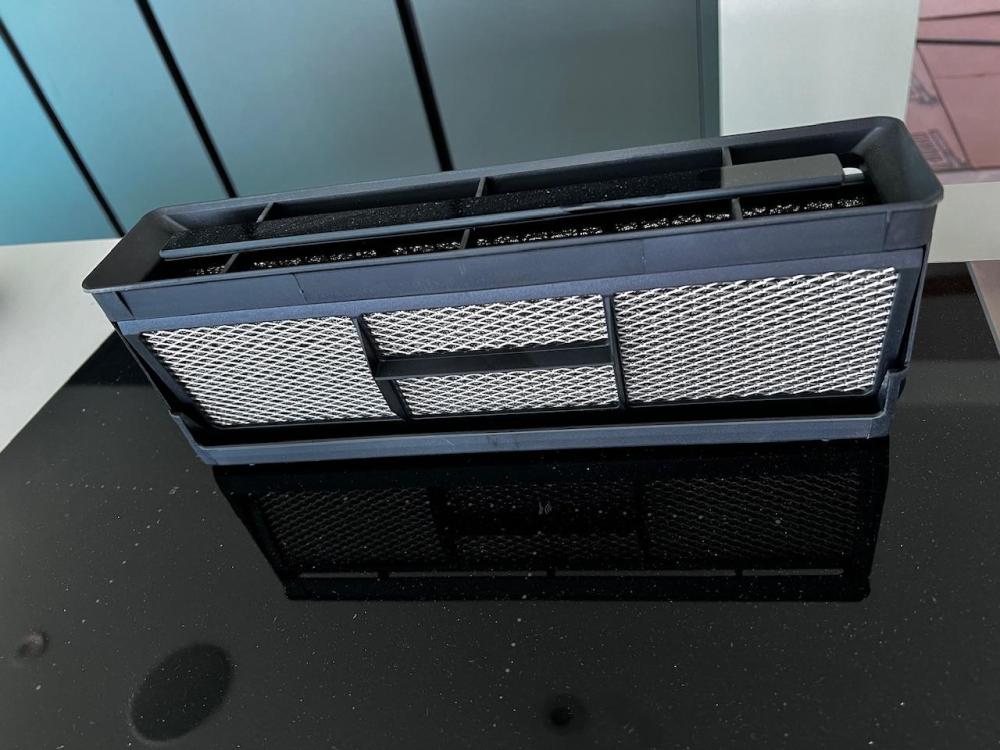
@saveasteading the two removable grease filters are in this caddy. The four replaceable carbon filters are in the second picture with two either side. The third picture shows the grease filter caddy/holder in place. Excuse the dust.

 3 points
 -
I installed 1 row of tiles at the eaves, and used fake lead flashing under the tray to the top of this row, it looked a better option than the panels into the gutter. I mentioned some of it in This blog, but I'll look later if I have any pictures of this flashing detail.3 points
-
I disagree. I think it's a knowingly unpopular move led by clear science on particulate emissions. But let's just agree to disagree on this.3 points
-
I think you are into a case "ask 100 engineers and you get 100 right answers". What you need to do, initially, is break it down into important parts i.e. structural forces, thermal properties, looks, easy of construction, price etc. Then analysis each part and how they go together. Some construction methods have developed over millennia and it is only in the last 250 years that post rationalisation has happened. An example of this is one of my favourite discussions about lime versus Portland Cements. They are both interesting and do their jobs well, but many think that the traditional lime mixes are better 'because the Romans used them' (even though the Egyptians beat them to it by a 1000 years at least). Another example is, as you have found out, is to do with cavities. These are a relatively late development and were originally just a rain screen over a solid structural wall. Trial and error, plus improvements in materials and manufacturing processes, the simple wall has changed to a two walls, tied together, with some being single load bearing, other both load bearing, and sometimes filled with insulation. The designs are used differently for different purposes, sometimes it is just decorative, other times it is structurally important. Another area you will soon find out about is the thermal performance, again, there are many different opinions. Some say that you need the insulation on the inside, other say on the outside, this is because while mathematically the U-Value of a wall is the same in both directions, the energy inputs may not be i.e. a heated house may be putting 5W.m-2 though a wall at night, but when hit by bright sunlight it may go to 100 W.m-2. Totally different regimes for the same structure. Then there is air and water tightness. Traditional masonry walls are inherently 'leaky', so putting insulation in a cavity may cause thermal bypass problems or the insulation type may absorb water. This is why internal insulation (on the room side of both cavities) can give a better performance than the same amount of insulation value within the cavity. The same may be true for external insulation, but could be harder to fit because of roof overhangs and window reveals, but is often easier to install because there are no joists or wires to move (this is more about retro fitting than new builds) So basically, it is hard say if there is a best system, it is a case of 'it depends'. All systems can work well if designed right, just as all systems can fail if executed badly (by twat builders). The main things to keep in mind are: Will it be strong enough Will it keep the weather out Will it look right Will it last Is it affordable (the space station is strong, thermally brilliant and air tight) Can it be repaired and modified That is enough to be going on with I think.3 points
-
If you don't use a prepared for- or installed- MVHR how do you deal with humidity and "odours" in the wetrooms?3 points
-
The other "trust the theory" thing, is from the experience of others, I believed my house would be well insulated enough not to need any heating upstairs. So I didn't for any in the bedrooms. Instead I fitted an electric point on the wall of each bedroom for a panel heater if they proved to be too cold. I have never needed to fit those panel heaters and the points for them remain unused.3 points
-
Another point, I stayed in a passive house many years ago before I knew much about them. And like you, thought it was stuffy. The house was empty and we were offered it as workers accommodation for a few days. It was well into the stay that we realised the mvhr unit was turned off, probably because the house was empty before we were given the keys.3 points
-
Thanks to the relatively mild weather this winter i decided to start chipping away at the bathroom project, which is being extended into part of the extension which was finished over a year ago. This gave me the opportunity to install the bath, sink and toilet in the new bit, at which time I’d totally disconnected the old bathroom allowing me to strip it out and that’s worked really well for my as I struggle to do more than 4hours in a single day so I could keep doing a bit and stopping when I’d had enough. didn’t fancy tackling the ceiling for plastering in the new bit so got a pro in to do this bit for me, all done in a couple of hours which was nice. and made the most of the space and got the painting done after putting a layer of 10mm marmox board down ready to accept the underfloor heating mat Next job was to start making a frame to hold the toilet frame and the sink and cabinet Decided on making my own cabinet rather than paying silly money for an MFC one, got pine furniture boards, a pocket hole jig and a new router and came out with this which I’m pretty happy with that all got painted and the sink installed, wall mounted tap and the wet room panels that I’m using both for this and for the walk in shower area all installed. got to work cutting the OSB backing and wet room panel for the toilet in prep for the final big push to disconnect the old and commission the new, that was a hard days work! And then bath and toilet all installed once the shower area is complete the bath will be disconnected again to lay the underfloor heating, self leveller and the flooring before being put back in place, and eventually building the wall and plastering it. Made a start on stripping the old bathroom out Next job is to patch up the loft insulation where the old spotlights were, new wiring in place for a single light fitting this time, airtight membrane adhered to the walls and then battens before reboarding it ready for plastering. Floor is coming up also to be replaced with 22mm chipboard to match new bit.3 points
-
I used my theodolite’s optical plumb to sight over my corner markers and help get my strings in position. 3D printed some adjustable string holders to move the strings into position easily. Now I’ve transferred the points to strings it’s time to strip the top soil and add the type 3.

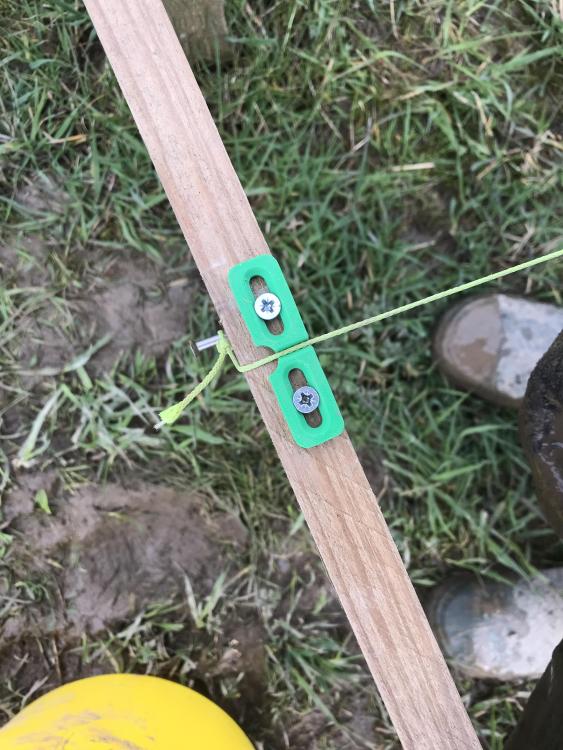
 3 points
 -
1,000,000%, defo use tile adhesive.2 points
-
Hessian bags will soon rot and the soil will ‘flow’ down the slope until it settles at its angle of repose - this will be greater / steeper depending on the type and amount of vegetation present when the hessian rots.2 points
-
OK. A virtual pint is what the doctor prefers. Gravel in a gravel grid catches any oil drips over their large surface area and exposes them to bacteria. and the oil gets consumed. But what if you have a major spill? Most will stick to the gravel and the rest to the membrane beneath it, which wont allow oil through. In extremis it then washes down to the side where you collect it to a storage area. As long as your catchment is on the surface like a ditch or lagoon, and not connected to springs or soakaways, then it will rise to the top and you can skim it off if the plants don't consume it first. Phew. Or you could add a small weir / catchment between pipes and lagoon, so that water goes through a half height pipe and oil stays on top. £300 instead of thousands but that's still excessive. This is to be preferred to a hidden oil interceptor where oil gathers unseen until it washes through. This is all provable somewhere but I can't remember where. Anyway I've done it loads of times for schools and offices ( 40 spaces or so) , and has always been approved. and I know it works. You must state it all with utter confidence as a complete strategy. Block pavers with gaps for drainage also work, if you have open stone beneath. but the gaps clog quite quickly.2 points
-
Consider this from the Permitted Devlopment order: Permitted development A. The enlargement, improvement or other alteration of a dwellinghouse. As well as under minor operations: Permitted development C. The painting of the exterior of any building or work. So if you can paint the exterior walls of your house vivid purple, the improvement from white to grey windows shouldn't get your "neighbour" upset!2 points
-
If it’s not listed or in a conservation area then it’s your decision what colour you want your windows, door, curtains etc. 10 doors away isn’t a neighbour either.2 points
-
If you have treated mains water into an unvented tank. there should be no bacteria in the incoming water and no way for any to get in, so several people have concluded it is pointless to heat it hotter once a week. Private water or vented cylinder, yes you do need to do it.2 points
-
The pex-al stuff is crazy hardy tbf, and most UFH installs I do on heated constructional slabs have either us or follow-on trades walking on them, sometimes for days, without any detriment. Damage to this type of pipe has to be near malicious for this to leak.2 points
-
I've done it on a large scale, twice I think, and it was fine. Just a bit of a risk if there were any leaks (breaking out a structural slab) or of a concretor walking on pipes and damaging them. Structurally it isn't any issue at all. More important is whether you want the slab to be thick and act as a heat sink, or be thin and more responsive. My preference is the latter: a thin concrete screed covered in lots of insulation then a top screed as your finished surface. Says who, if not your SE?2 points
-
I have just been away since Thursday visiting. Was like a breath of fresh coming home, light, fresh airy feel, as soon as you walk in the door. Good old MVHR.2 points
-
Hi all. Twenty years ago I bought a derelict bungalow dating back to the early 1900's, more or less knocked it down to the foundations and rebuilt it myself, learning to DIY in a truly epic and clueless Grand Designs "living in a caravan over winter with a pregnant wife" type way. Before I finally finished this place and got the skirting boards on, my family out grew it. We couldn't afford to buy a more suitable, bigger house so started looking at other options. After half a year I managed to buy a massive, half converted, derelict 200 year old Chapel... I guess this is the start of another journey of self discovery, madness and potential financial ruin for me2 points
-
If you use a 50 mil metal stud You will be about £18 m2 all in Upto a height of 2.4 for freestanding add 20% for any higher up-to 3000 freestanding2 points
-
But no two houses/builds react the same to “weather/temps” as no two “people” react to the conditions the same. I remember Jeremy going into minute detail of local weather patterns, designing his own weather curves etc etc But in the end he scrapped it and fitted a single room stat but he still found he needed more cooling than heating which nothing predicted for him. I liked the MVHR I fitted and the house had an airy feel even with all the windows shut, however during warm weather and doors and windows open I would switch it off. I wanted to run it on a CO (is that right Nick?) monitor to detect stale air but was told they are expensive and not that reliable so I ran it on a humidity sensor.2 points
-
This post says a tremendous amount. Passive standard gives fairly random number. The complete purist who wants only to heat their house to exactly 20⁰ with a MVHR post heater doesn't exist in reality. Most of us are happier a little colder or warmer in reality. Passivhaus ignores this. Copying someone else who has done all the hard work and arrived at the best solution is a trait that should be applauded. It's a great use of brain power. Cheap ASHPs make perfect sense. A low cost insurance of UFH pipes for the "just in case" is well worth it. Also despite best planning and hopes life changes sometimes. It's only a house in the end, don't worry too much about it.2 points
-
It is not difficult. I put all the details of my house into Jeremy's heat loss spreadsheet, and it told me at +20 inside and -10 outside my house needed a little over 2kW of heat input. That was not exactly difficult therefore to specify a 5kW ASHP, about the smallest generally available. And it is working fine. Before actually buying the ASHP I ran a convector heater for a week, plotting inside and outside temperature and that confirmed the heat loss was in line with the calculations.2 points
-
Also worth knowing that there is an official rating for how well hoods filter the grease, from A (>95%) to G (> or = to 45%). You may have to dig to find it - some manufacturers don't seem keen to make it easy to find in their literature.2 points
-
Further... Leave the the SBR to dry out. No need to do the underside of the tray with sealant. Its all about stopping the moisture from being sucked into the timber causing the adhesive to shrink... I use spacers in the corners on a dry run and work out how deep I need to be where to make the tray level. Then after sealing but before coating the floor I re fit the spacers. Then when coating the floor I use timbers or straight edges to scrape the coat of adhesive on the floor to the required level before removing the spacers. then notch the adhesive to the underside of the shower tray. If the spacers are where I can remove them later, I leave them in to help. I still sit the tray down and lift it up again to ensure an even bonding. Sometimes the trays are not flat and as long as there is a fall to the drain hole I ensure the shower tray edge that the shower enclosure sits on is always level which sometimes mean the wall sides are not so level. If your not going to put the trap in until later make sure the area is free of adhesive ( most of my shower trays are fitted on to the floor, not raised so has to be done at the same time. Here's a shower room I did last month. Hope this helps M
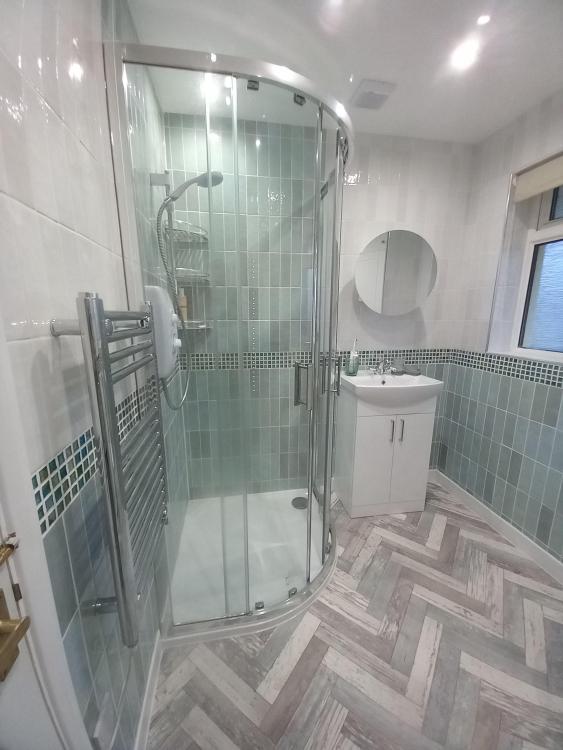 2 points
 -
+1 To be honest I never use the flexible tile adhesive but I do always use the tile adhesive for shower areas. I run the waste pipe and trap to the correct level for the trap base to be level with the underside of the tray before starting. I always seal the floor area before using adhesive on it. (PVA or wood glue watered down or Acrylic primer). This helps to stop the adhesive from drying out too quickly. I use a big notched trowel and trowel the mix on the floor 1 way, trowel on the underside of the tray the other. Lay the tray gently down and lift it up again to see if there's any places where the crossing adhesive doesn't touch. Adjust the adhesive as required to make the bond uniform. The final push is when I check the tray is level, silicone both sides of the rubber ring between the trap base and insert, silicone the underside of the part of the trap to be screwed in from above, and fit all these together and tighten, and clean off all the mess I have created. Checking the tray stays level I usually place some tubs in the tray or a couple of boxes of tiles Once set - usually one to two days I silicone between the edges of the shower tray and the walls squeezing the silicone so it is not proud of the top of the tray before tiling. (If installing a quadrant shower tray the same as above.) Once the adhesive has gone off, with the silicone, in your case, to 3 walls/sides. It isn't going anywhere. Especially after being tiled in and sealed again with the shower door in as well. Good luck M2 points
-
It shouldn't feel stuffy at all. If this is the case then it hasn't been commissioned correctly IMHO. A CO2 reading is the quickest way to confirm this. Every home should have one.
 2 points
 -
Aw thanks, life’s better now thanks in my little Forest cottage STRESS FREE!!,!2 points
-
We don't weather watch, everything just controls itself with the magic of thermostats. We often have our bedroom window open, we like a cool bedroom. No issues.2 points
-
Don't get hung up on the density of insulation for sound proofing. The main job of fluffy insulation is to dampen the reverberations or "drum effect" in a cavity. Concentrate on sealing each and every air path. Perimeter, board to board, wiring holes. Downlights are a disaster. The add some fluffy insulation for reverberation. Then add mass. Denser insulation of course helps but it's an expensive way to add those extra kgs. Standard plasterboard, soundbloc and OSB are all about the same price per kg and mug cheaper than insulation. If you're feeling really cheap sand in bags or plasterboard off cuts will all help if shoved between joists above the ceiling. Finally decouple the floors although this is more important for impact noises. Strips of carpet or rubber above the joists and resilient bars underneath.2 points
-
Yes - this is what we are doing for a stone barn conversion too. The reason we chose it was similar to your thoughts in that with every quote there were so many caveats and exclusions due to the age and complexity of the project. It doesn't stop you worrying about how you are going to afford it but it does give you a high degree of transparency. For the conversion of an old barn, no matter how detailed and careful you are in estimating or how brilliant a group of engineers and architects are in creating the original tender document, on my current experience there is absolutely no way that any estimate could capture the variables that we are seeing in this build. For example we surveyed the roof and timbers and estimated that 30% might need replacing - In reality the roof timbers were in far worse shape than the original survey suggested and we had to replace and repair a huge amount more than was planned. All in all, the roof finally came in at 125% of the highest estimate range (including the 25% contingency we used) which whilst not great, at least this was not 'an extra cost' over and above the tender quotes that we would have had and we did have some choice in the way things were done. I don't for a minute think that the cost+ is a perfect model, particularly as the contractor is not incentivised to find the cheapest materials so I do tend to get involved with larger purchases. As i see it, I am employing the contractor to build a property not manage my expenditure, and I do get a little concerned that the model relies on the accurate reporting of the teams time on site. We live in a cottage on site so we are able to be involved in making any and all key decisions and this also plays to what works for us. I would rather be over-asked than under-asked and with the cost+ everything is double checked2 points
-
Passive and high bills seams to be a bit of a contradiction2 points
-
I noticed that too. While the U values are good the air tightness is still poor.2 points
-
@minty Sorry I think I(we) might have git a bit bogged down here in an effort to assist. Shortest answer I have to solve your problem. 1. Stop any water leaks from outside or inside. ( Roofs, windows, doors, pipes, shower trays, washing machines etc etc) 2. Replace the bathroom fan with this. You can DIY it or pay an electrician. 3. Make the house hotter by leaving the rads on. 4. Give it time.
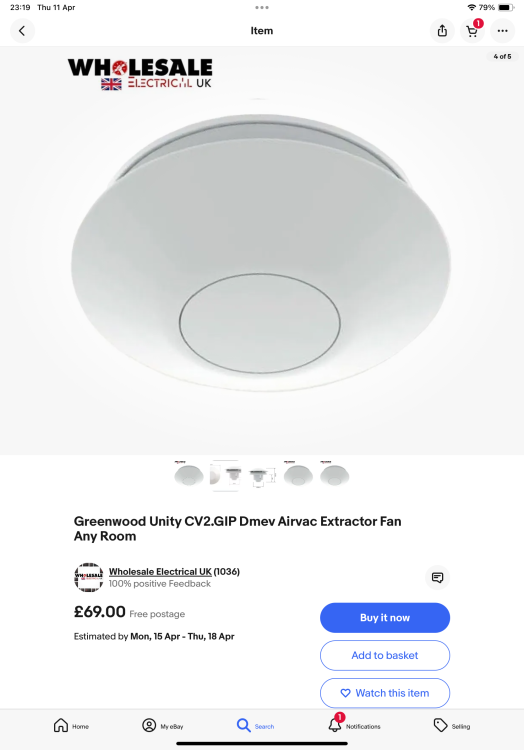 2 points
 -
I did this, got a lovely warm floor! Things to reflect on - I went mineral wool over the hemp they specified and used the Pro-Clima membranes and tapes etc. The Pro-Clima membranes are amazing, but they’re a bit over-kill for the application in my opinion looking back. Get standard breather membrane (windtightness) and vapour membranes (airtightness) and you’ll be fine. However the Pro-clima tapes and membranes were worth the money and I’d highly recommend them regardless.
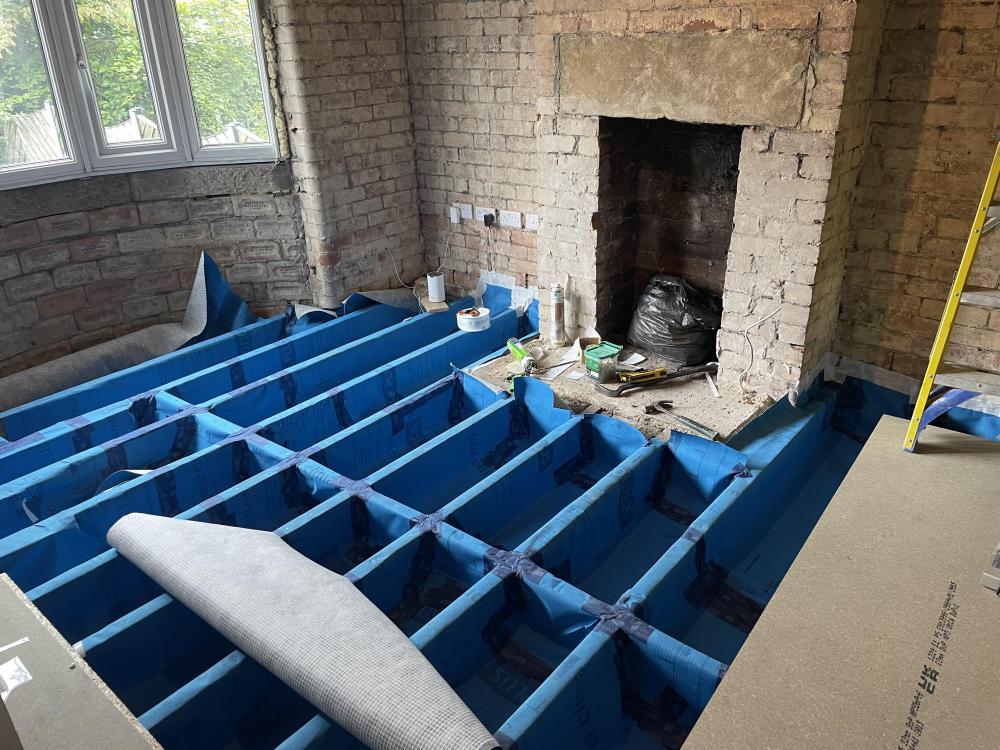 2 points
 -
Our previous build and hopefully this one is very well insulated and cheap to heat via a gas boiler and hopefully the HP will work out the same or a little bit more expensive What I don’t understand on here Is people installing UFH in the bedrooms on the upper floors While we have small rads in the bedrooms We have never needed to use them A well insulated home shouldn’t need much heating2 points
-
If you're running cable then go for wired PoE APs instead of a wireless mesh. You will usually get better coverage, bandwidth, reliability and it can be cheaper. Run CAT6 to the ceiling voids of each major room in the house. You don't have to actually use it all at this time. Wherever you end up needing an AP, you just pop a hole in the ceiling, mount the AP, and hook it up at the other end under the stairs. If you're hoping for a fttp connection in the future, think about how you'll get the cable into the property. Some people like to try and preemptively install a duct so it can be pulled through under the walls without breaching airtightness etc (although I think ISPs can be fussy about what they allow for this).2 points


This leaderboard is set to London/GMT+01:00