
Leaderboard


Popular Content
Showing content with the highest reputation since 05/20/16 in all areas
-
The BuildHub forum was founded by the Forum Foundation Group (FFG) in 2016, following the closure of a large UK-based self-build forum. The forum has continued to grow significantly and we currently have over 8000 registered users, and that number continues to rise daily. To date, BuildHub has been managed on a private and voluntary basis by a small group of members known as the Forum Management Group (FMG). The FMG looks after BuildHub's day-to-day running, including hosting and maintaining the forum software, moderating member posts, and managing membership applications. The FMG was originally constituted as a Members Association for the purpose of forum governance and ownership. While this was the quickest and easiest way to get the forum up and running, it has the disadvantage of not having an associated legal entity. The absence of a legal entity means that many suppliers will not contract directly with Buildhub. The result is that BuildHub contracts and assets such as forum software licences, server space, and URL ownership remain in the names of FMG members, which places a large legal burden on those members, and also involves risk to BuildHub. To address this ongoing issue, the FMG recently approved motions to: Form a Private Company Limited by Guarantee; and On an agreed date, dissolve the Members Association known as the Forum Management Group, and transfer its assets, including ownership of the forum, to the new company. To this end, Buildhub Forum Management Limited has been formed as a not-for-profit company, limited by guarantee. The company will operate the BuildHub forum website, provide a limited liability structure to own and operate the forum, and ensure that the forum software licences, server space and URL ownership are no longer subject to a single point of failure or irrecoverable circumstances. The company directors are not remunerated, and the costs for operating the forum and its support will be kept to those essential to run and operate the service. The date of handover was 30th April 2021, and this is the formal notification that it has been completed. BuildHub has always operated on a strictly non-commercial basis and will continue to do so. Advertising is not allowed and members may not offer services to other members via the public forum. This policy will remain under the new structure. Similarly, BuildHub intends to continue with its periodic donation funding model. Day-to-day operations will continue to be run by volunteers giving freely of their time and expertise in much the same way as it is now. This group will be known as the Operational Management Committee (OMC). Information about how you can get involved in the running of the forum will be posted shortly. In practice, your experience of using the BuildHub forum should be unchanged. As chair, and on behalf of the members of the now-dissolved Forum Management Group, I would like to express my thanks for your support of BuildHub since its creation. We look forward to the continued growth and improvement of BuildHub under this new and long-term sustainable structure.43 points
-
It’s true ! ? Not complete ( of course ) but after 7 years we actually move in tomorrow. What have i learnt ? . With infinite support and help from this forum you can build a non standard house built by an unskilled non standard human ? . I always felt my journey was a testament to this forum . If I were a plumber , joiner , brickie etc. then that would be a distinct natural advantage. Yet I am an ex software engineer who builds his house bit by bit ( had to get that joke in , sorry ! ) There have been mistakes a plenty ( not all mine ) - many wft moments . The build literally consists of blood , sweat , tears and indeed other bodily fluids . So thank you to all that offer help and advice . Those that tolerate seemingly stupid questions ( usually are stupid actually ) . But most of all to give time to help someone achieve more than they are capable of . This is the power of buildhub . I will now post some witty comments elsewhere ; or some obscenity that will get me a naughty boy badge .27 points
-
Well, folks, that's it. The last nail in the last joist. Its been hammered in HARD. Here's why. For reasons only known to the inexperienced self-builder, I put the floor joists up working from both ends of the room to the middle. 400 centers. That makes a gap between joists of about 328ml. The middle three joist are longer than the others - they had to be inserted closer than the others: 310ish. Tight. Well tight if you are my size. Arms and head above the top chord of the joist - beer gut wedged firmly between the POSIs, but swinging the hammer now like a demon (900 nails down and just a few more to go - all because of you @Pete). Easy Peasy Lemon Squeezy. Well yeah, until it came to turning round to reach that sodding wedge to help nudge the top chord a mil or two higher. Christ this is tight. Turned a few degrees. Couldn't reach the wedge. Bugger - - Hand in my pocket - - maybe there's a spare wedge in there? Nope. By this time there is a semi painful wedgie though.? Dropped the hammer. "Foxtrot Uniform Charlie Kilo" Stumped, and firmly wedged, I realise I am going to have to wriggle out of this. Up? No way Jose. Not strong enough to overcome the effects of the beer years. Starting to sweat a bit now. More from annoyance than anything. Down? No choice. Only way . Now, those of us whose work trousers 'need' braces because our trousers have half a ton of tools hanging off them (all lies girls, just lies) will realise that descending through a really tight space has an inevitable effect on your braces. That partially painful wedgie now got worse. A lot worse. You see the back clip of my braces caught fast on the bottom chord of the joist. The front of my work trousers started to pull hard. My eyes started to water I think. By this time, my hands were in the air, and my head altogether too close to the gap between the joists. And suddenly with one bound (as it were) I was free. PING - THUMP The clip of the braces parted company with the waist band - shot up inside my clothing and hit the bottom of my shoulder. No wedgie pain now, just shoulder pain instead. All of this was happening dear reader at the same time as my T shirt, gillet and windproof were slowly making their way past my beer gut on the way to my my head. Couldn't see a thing. But sure as Hell, I could feel my shoulder. A few seconds later, there I was topless on the scaffold boards. Cold? No. Furiously hot. Just a matter now of jumping down to the floor. Yep, I suspect you are ahead of me......... The jump was elegant. Feet and knees together (just like I wuz taught) Thump. I stopped. My trousers didn't. Normally that wouldn't matter. No need to fuss over a small thing like that. Standing in the doorway way my best friends wife with a grin from ear to ear. I wouldn't have minded but her dog went mad.27 points
-
We bought our plot over 6 years ago and it took until just a few weeks before the first lockdown to actually break ground. It's been an absolute pig of a time but and we are finally in the house, albeit with still a fair bit to do. Thanks for all the help and advice, going right back to the previous incarnation of the forum. I'll no doubt need more in the coming months.
 26 points
 -
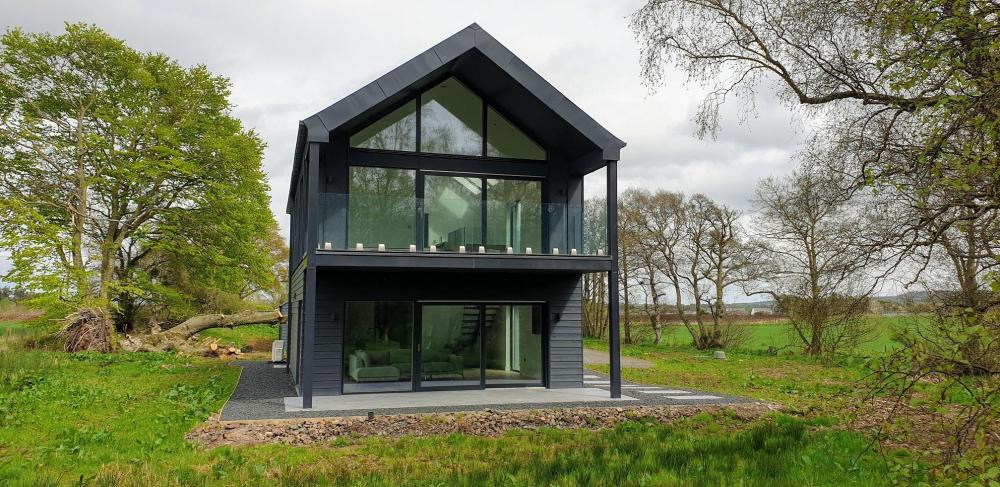
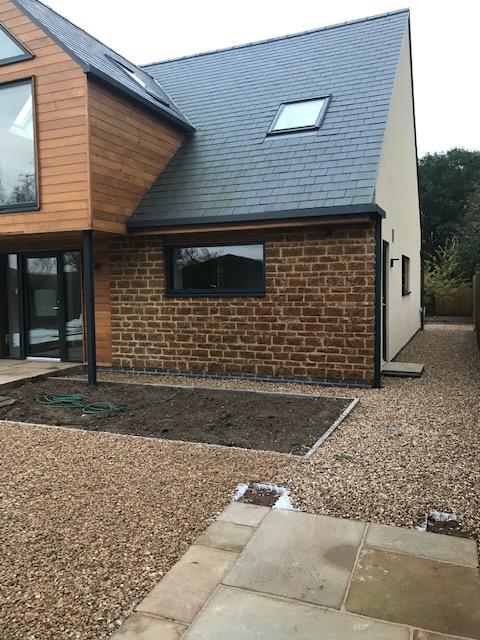
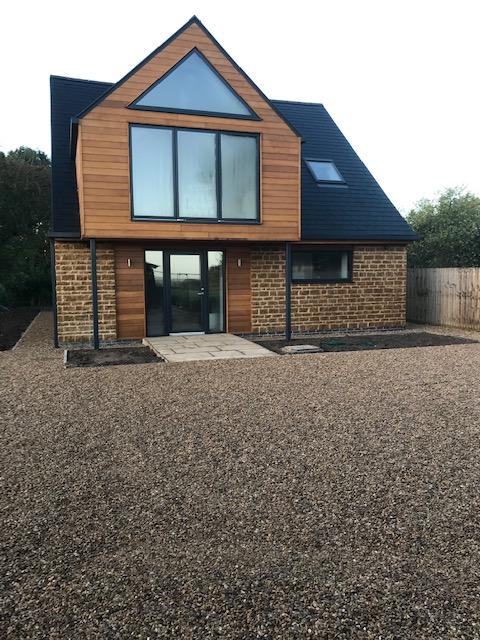
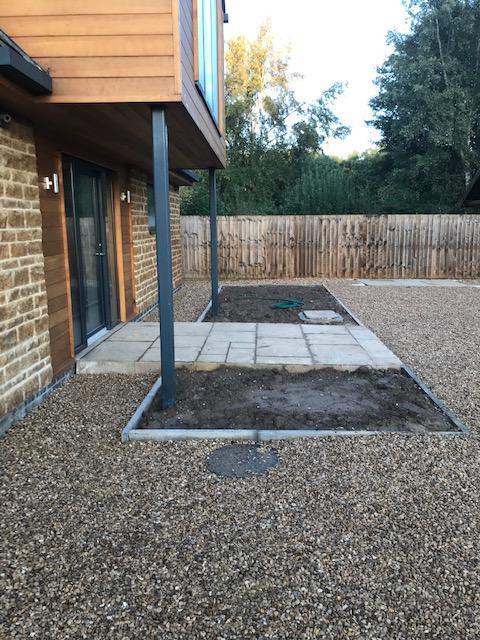
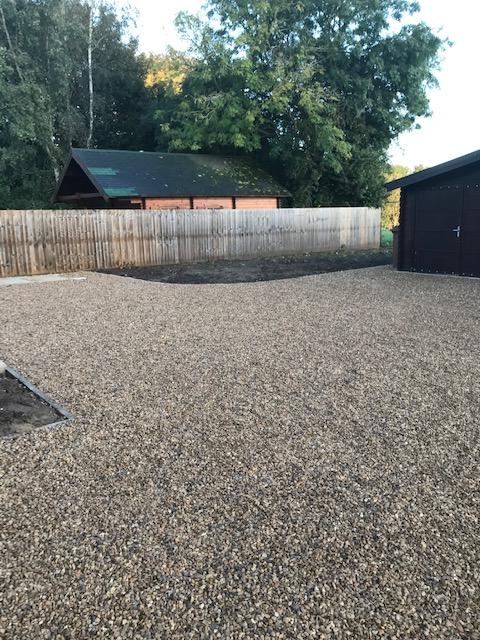
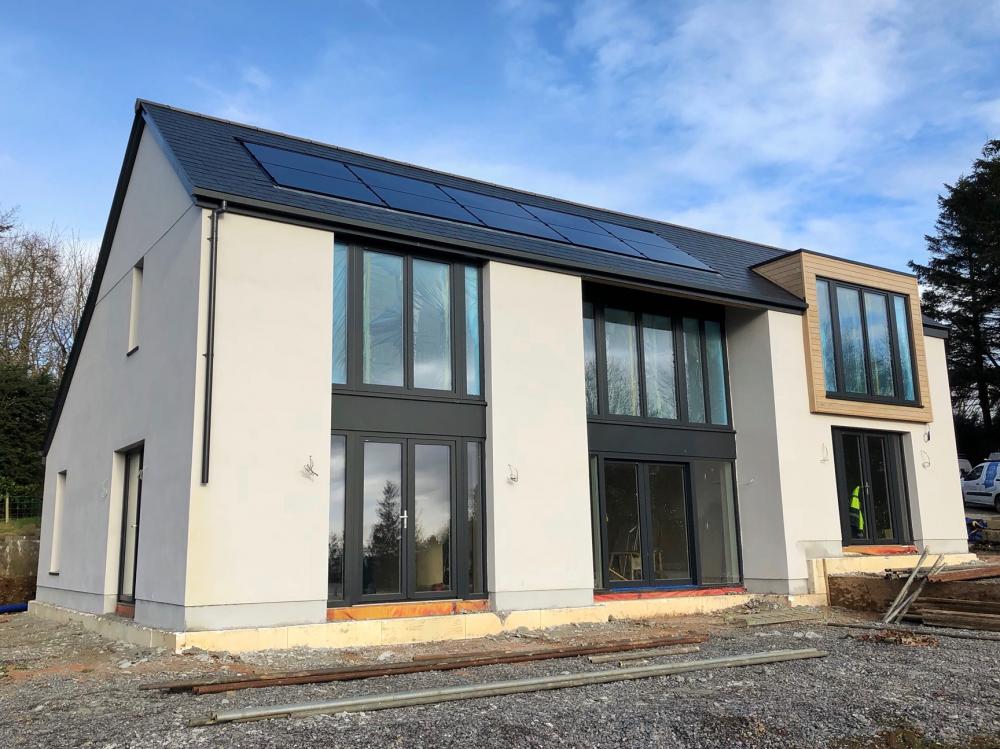
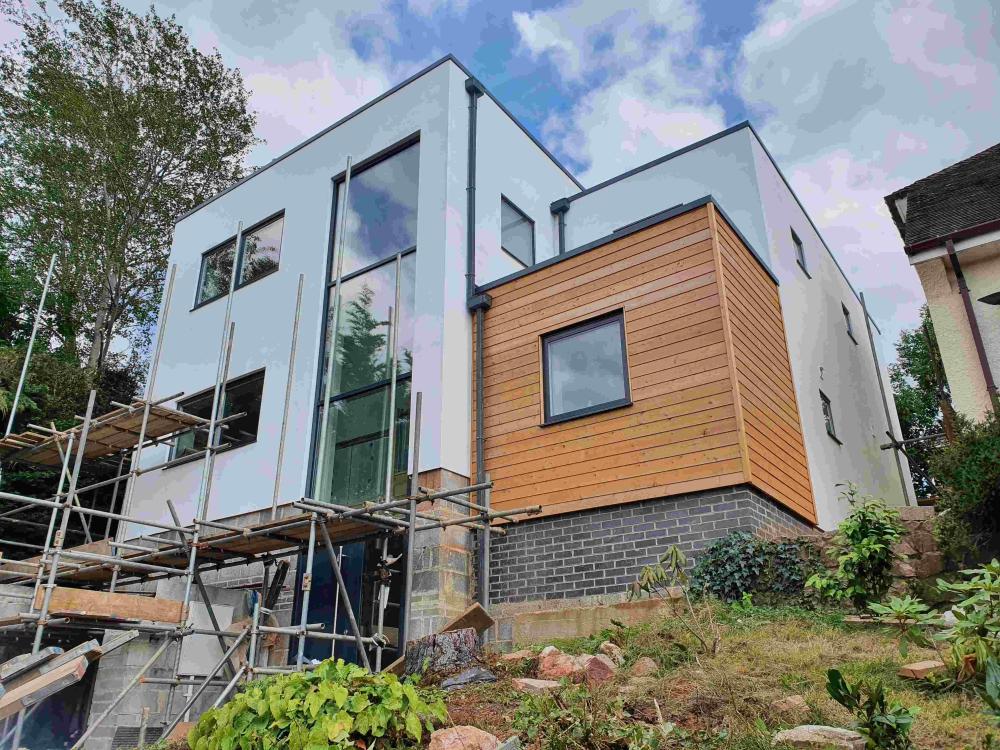
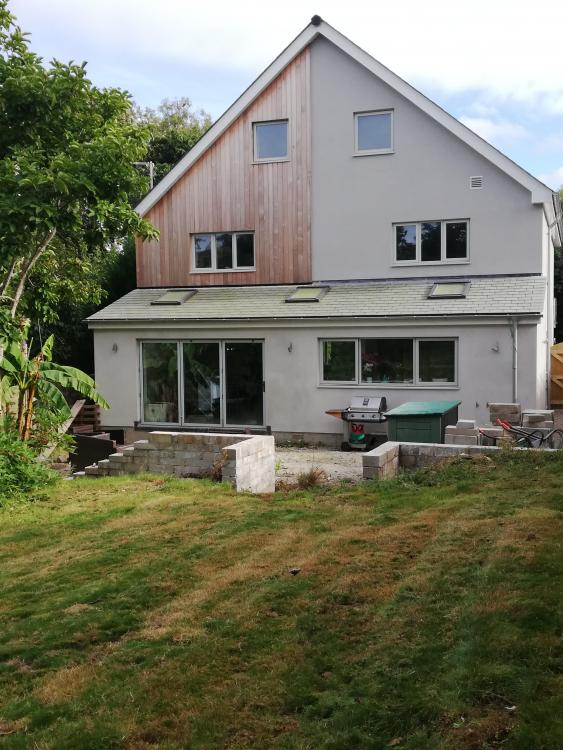
Over the last four years or so, we have had our fair share of ups and downs. But this is an up. And now, GCNs are very welcome. From a twinkle in our eyes in the little local-stone built cottage (to the left of the photo) to a contemporary orange (coloured) box... which will be silvery grey in a while. Like my receding hair. Lots more to do, but hey! SWMBO reminds me we started when POTUS was being sworn-in , and just moved in by the time he had been sworn at long enough to be kicked out. Is there a lesson there? Probably not.?
 23 points
 -
For everyone who has been asking, I gave Jeremy a call yesterday. The good news is he has recovered from his injury and having to take rather unpleasant medication alongside that. On the Buildhub front, Jeremy was undertaking a lot of the day to day background admin work of the forum prior to his injury. Having been away from it, he has been less inclined to get back involved and has various other interests which occupy his time. His missing blog is simply down to the EU domain being shut down. Unfortunately, that's where his back up was hosted as well so what's here on Buildhub is it, unless he can dig out a hard back up copy (which he thinks he has). That's all there is. Hopefully he will return at some point in the future.23 points
-
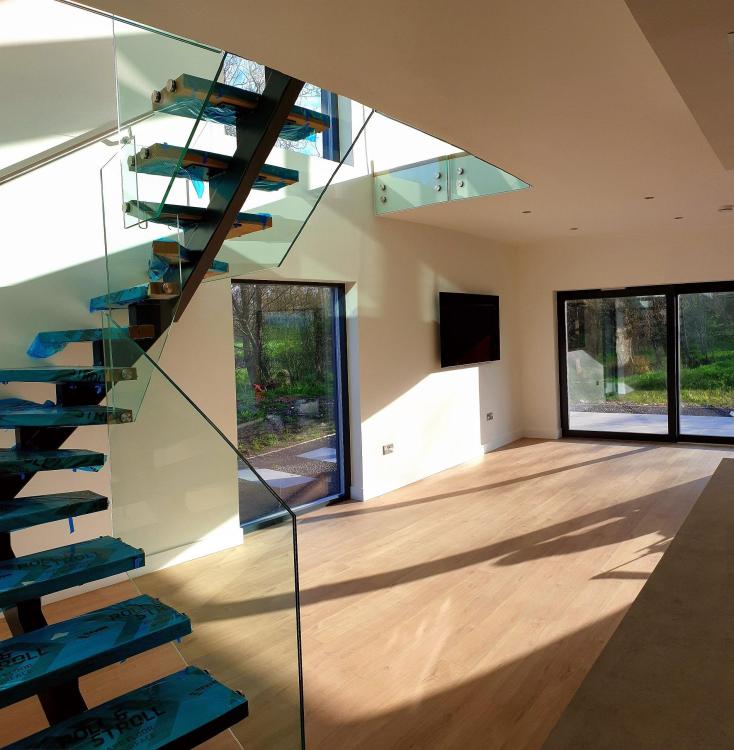
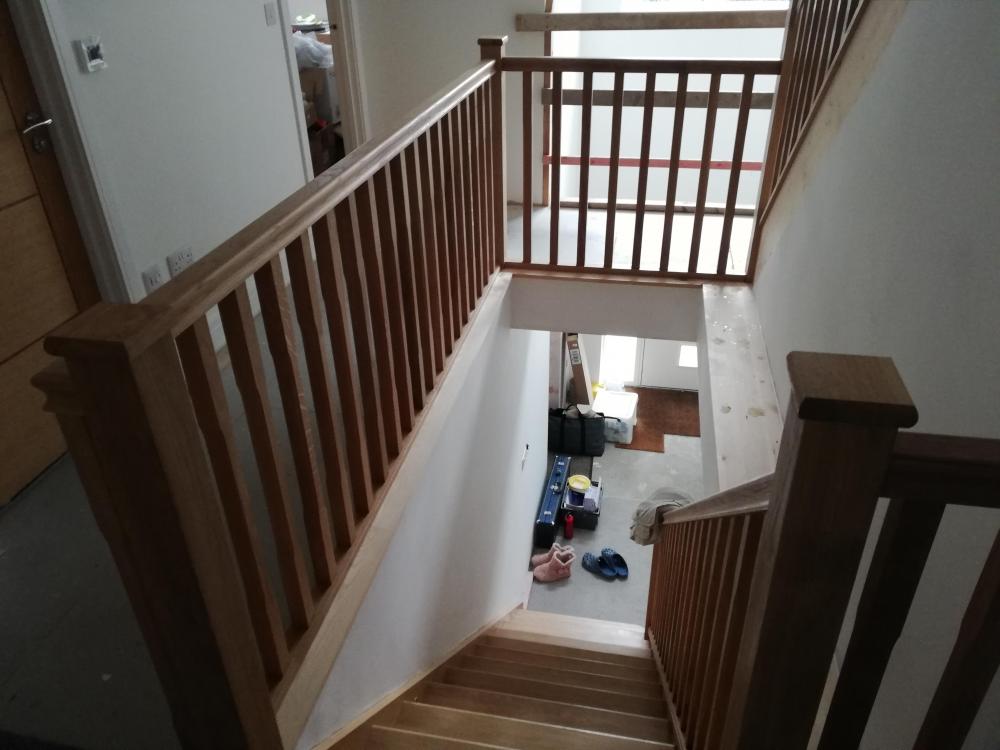
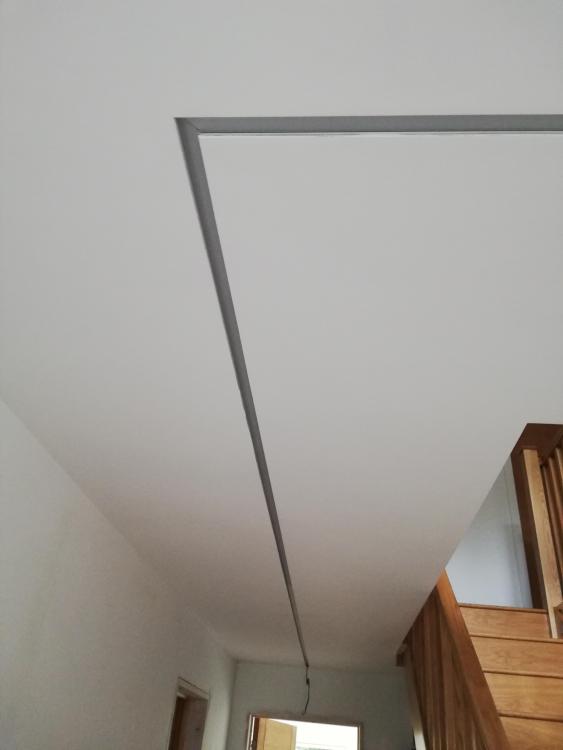
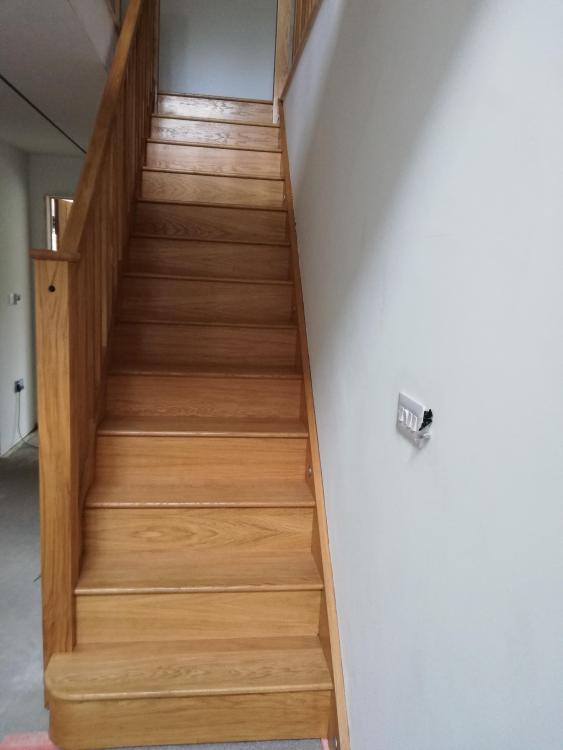
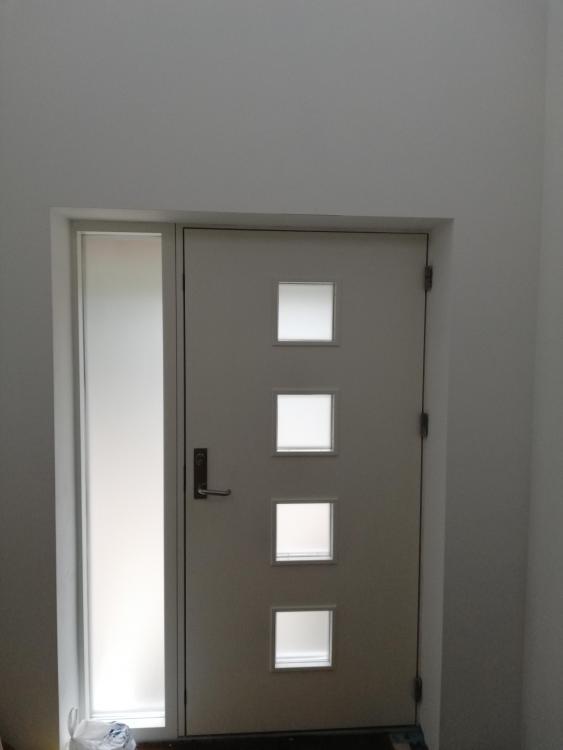
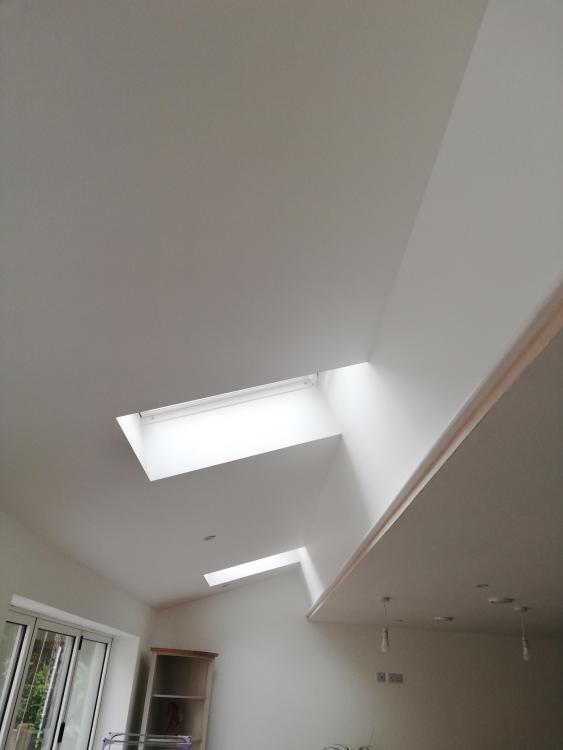
We had our final inspection yesterday and building control were happy with the house. Just awaiting on an EPC certificate and we should have our completion certificate next week. We had a little tidy up before the inspector arrived so probably the ideal time to upload a few pictures. Landing and upstairs - not posted much here as this was covered in a earlier blog entry. Considering we put in outline planning in 2009 when we were 23 it's been a long time coming and a great relief to know it's nearly all over. I intend to post a couple more entries with the last bits of outside work and one about the costing/finance. Thanks for all those who commented over the years and answered odd queries, much appreciated. The to do list of actual jobs is getting short now. Proper downpipes – ordered Gravel - ordered, coming on Monday22 points
-
This will be the last entry for our self build blog. Our plan We originally commenced a self build as there was no affordable housing for us to get on the housing ladder. The approach for the self build, was whether we could build a better-quality house than what we could purchase from a developer for the same cost. This was later refined to achieving a lower mortgage if possible. For the self build we decided to split the project into three chunks. 1. Obtain outline planning, purchase of site – this allowed us to know that a build was possible. 2. Put in services, access, design – this was the first actual work and made an area of croft ground into a valuable plot for lending purposes. Commence the build over two years - using subcontractors and our own materials to eliminate any margins and ensure tight control over the specification. Doing this would allow us to complete the project and prevent us being stuck unable to finish it. What did it cost? The total cost for the project was just over £196,000 (net of VAT). This includes the land, services, professional fees, overheads and the actual build costs. I’ve summarised all of my costs into a pie chart below. How was it funded? · A small electricity grant £1,550 · We obtained a croft house grant for £38,000 · The final mortgage of £74,500 · The remaining balance of £81,950 was funded by savings from employment, which started when we were 23 and finished when we moved into the house in July 20 at 33. · Most of the work we carried out was decorating and general labouring, therefore contributed a small amount of sweat equity to the project. What is the final result? The surveyor provided a valuation back to the building society of £265,000. This was pleasing as sometimes self builds can be more expensive then the total project costs or just about breakeven. Prior to building we were aware of building cost being measured per m2. However, during the build process I realised that this method of reviewing the financial performance of a self build had room for error, as the calculation could be skewed depending on the quality of the finish. For the purposes of our project this would be £1,420 or £1,230 excluding (land, professional fees and overheads). I came to the conclusion that the best method for us is calculating the final cost per month (mortgage, utilities, council tax, insurance) to live in the house. I set a target of £500 per month and I am pleased that we have been able to achieve this. I feel this is a good measure as I wouldn’t want to live in an expensive house that has a huge mortgage. Often at the end of Grand Designs and other tv shows, the presenter asks whether they would do it again? For us I would say, yes, of course. When I look around, every single item in the house was researched, compared, purchased and gradually put together. The thought, time and energy that we have put into this build has created a much deeper connection to the property. Our blood, sweat and tears are in the very fabric of the house. The hardest part of the process was when we were focussing on saving as much of our income as possible to ensuring a low mortgage. We made many sacrifices to ensure we reached this end goal, but we knew these relatively short term sacrifices would have long term gains for our family. For the actual building of the house, we chose a two year build schedule from starting on the foundations. This allowed us planning time between build stages and made the build process more manageable. It also allowed us time to do some jobs ourselves such as fitting insulation, interior decorating etc. We enjoyed taking time to do the jobs we were confident in doing well ourselves. Perhaps we could have taken on the more tasks, but I’ve come to the conclusion that it made more sense to work a bit of overtime and pay a contractor to do the work well, rather than us doing a job slowly and at a reduced quality. In the future, we would consider another self-build, perhaps in thirty years when I will be semi or hopefully fully retired. So until then… See you next time and thanks for reading.20 points
-
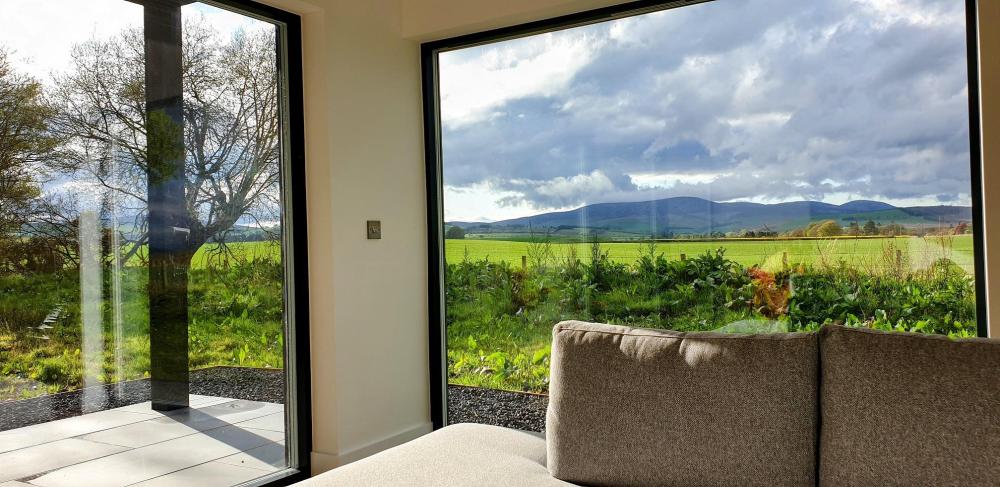
There was not much in the way of progress from the last entry as we were already close to moving in. The plumbing was completed in the last entry and connecting some final electrical fittings was done soon after. After a decade since putting in outline planning it was time. Our furniture delivery has taken longer than anticipated and we are living with a bean bag for the living room seating and a mattress on the floor for our bed. But we are here. The first few days were spend getting used to living in a new space. As a family four we had spent the last six years living in a relatively small space, it is now great to have a room for each of our children and an extra bathroom. I am pleased with how the house is performing from an energy use point of view. We don’t typically get really high temperatures here and the external average temperature has been about 12c over the last few weeks, the house temperature has remained a comfortable 20c. I have been monitoring our electricity units on a daily basis and we are using between 9 to 10kw which is promising as my hope is that we can go six months or so in the year without heating. The real test will come in the winter as the electricity usage will probably be double, but we plan to make good use of our centrally placed wood burning stove. Once we are furnished, I’ll post some more photos. For the moment just enjoying the new house with the family. The next jobs are: - Ordering decking for a small decked area and for our access ramp - Spreading gravel around the house site - Gardening - Putting more material on the access road - Order some down pipes Thanks for reading.20 points
-
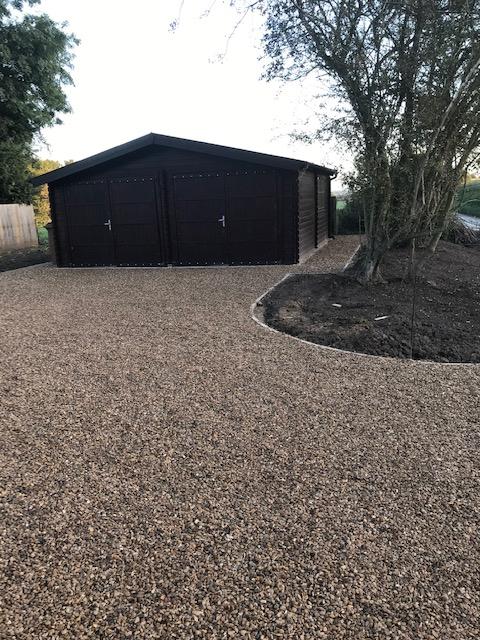
No longer a muddy building site after nearly 3 1/2 years, Hooray. Landscaping just finished during the wettest 2 weeks of the year. Never mind, it is done. Used the plastic honeycomb gravel crates with the weed membrane on the back. Lawn & wild flower meadow to sow, fencing & planting to be done, so still a long way to go, but at least some progress.
 20 points
 -
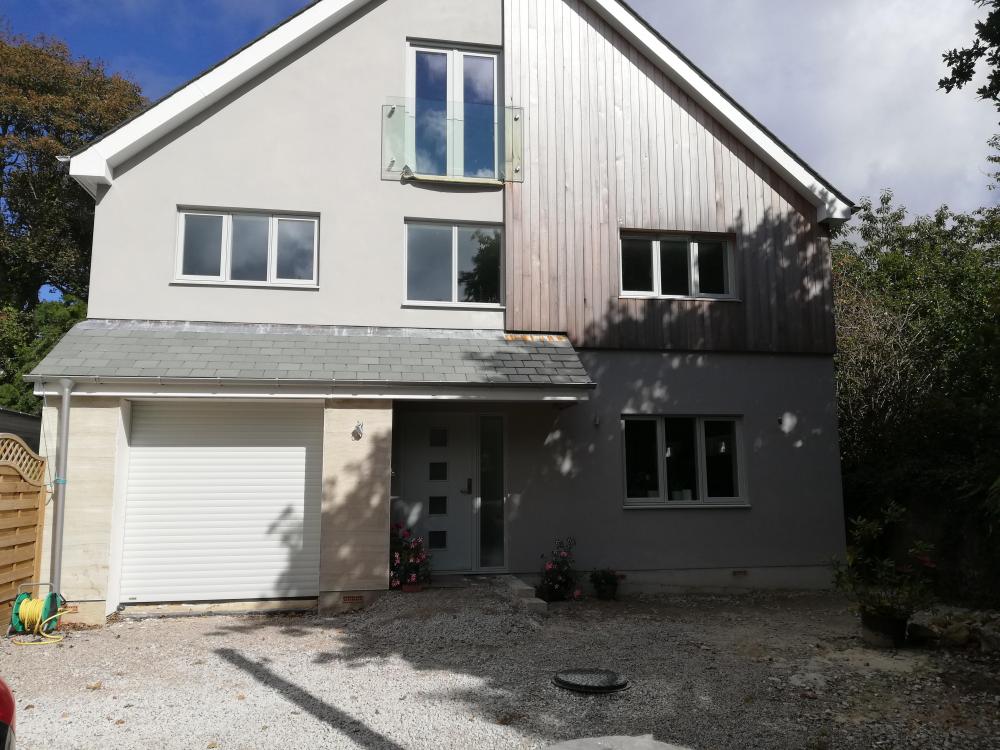
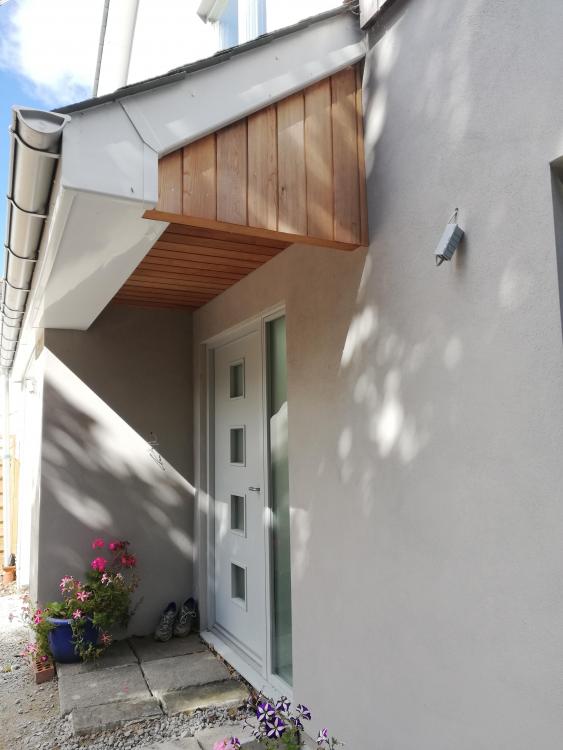
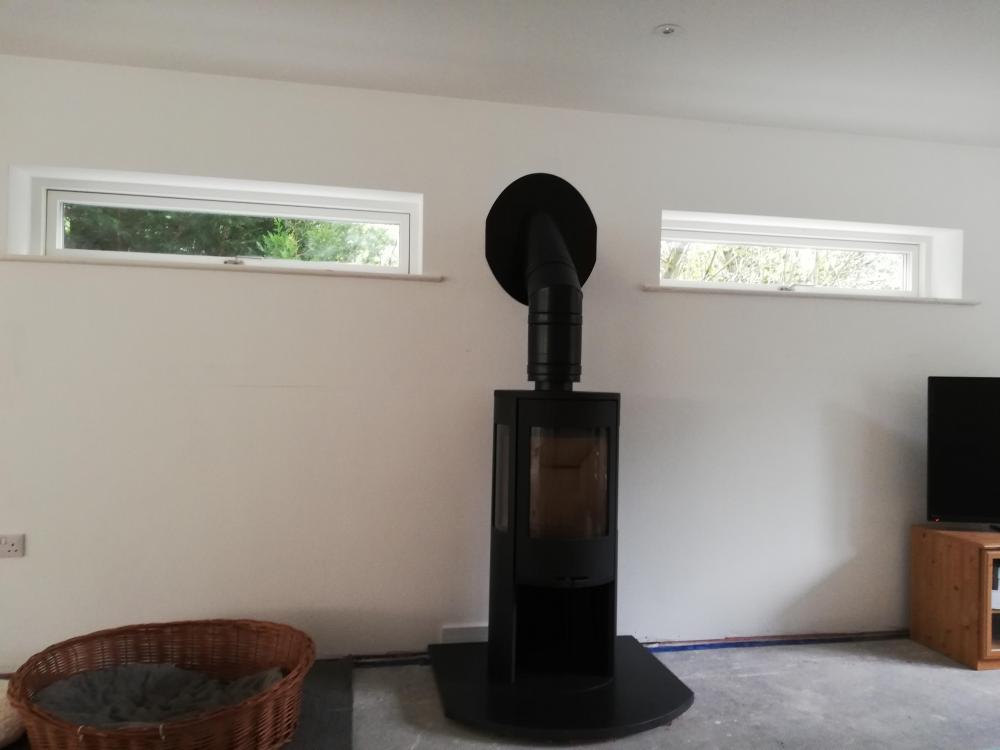
So after a month or so in the house, the time has provided us with an opportunity to reflect on what we have achieved and what if anything, we would change or could have done differently. In truth there is very little if anything that we would change. The rooms flow, the doors open in the right direction and the lights can be switched on and off in the appropriate places. Even the WBS has proven to be a worry that wasn't worth worrying about, as it's position within the hearth is no longer an issue due to it being vented through the back as opposed to the top. Some jobs have been completed such as the down pipes and a few jobs remain outstanding but nothing that has an impact upon our daily lives. One such job is the porch that needs to be slated. Thankfully I still have some financial leverage over those various trades so I know they will return. Our satisfaction I suppose, has to be routed in the preparation work, the research and being a member of this superb forum. None of these elements should be underestimated. Therefore I would like to sign off this blog with a heartfelt thanks to all those who have contributed, not only to my issues over the past couple of years, but to all the other threads, as they too are just as relevant / enlightening. I have also attached some images which complete the project, namely the WBS chimney installation and the erection of the much mentioned porch. For a final time, thanks for reading, and given the date, seasons greetings to you all. Paul.19 points
-
I thought I would put a post together for those that are looking for windows, replacement or new build. As someone who deals with final order placing / final quote discussions. One of the things that crosses my desk on regular basis, is that the "other supplier" is more cost effective. Which leads me to ask myself "more cost effective against what" are you comparing apples for apples? When I ask people to compare, what we generally explain is to look at the following (see below) if they are not willing to supply a copy of the quote without prices. Product - is the product similar. For example are you comparing a Timber Aluminium cladded window with a Timber Aluminium cladded window? Glazing - Is the glazing on offer from both suppliers comparable? Is it double glazed v's triple glazed for example or is it float glass v's toughened or laminate? Check that doors have toughened/laminated glazing Check that windows within 300mm of a door have toughened/laminated glazing Check that windows below 800mm from the finish floor have toughened/laminated glazing Check that windows that are 1400mm in height or above for toughened/laminated glazing. Most suppliers will start to consider toughened / laminated from 1400mm onwards, some will still be float glass. Check triple glazed glass units. Some suppliers will only toughen the inner and outer panes and leave the middle pane as float glass, others will toughen all 3 panes (I recommend all 3 panes as toughened) when required. Why? quick example is from experience, a customer in the north west of Scotland had the middle pane as float glass in french doors, the doors are recessed with wall on either side. It effectively became a wind tunnel. What happened is during high winds, the door sashes had that much wind pressure constantnly, that the door sash was pushed away from the frame slightly and a rattle effect occurred (only thing I could think would cause this to happen). As a result the middle pane (float glass) shattered. This required the whole sash to be replaced, as the glass was glued into the frame on that particular product. Timber - Is the timber comparable, are both using spruce/larch/oak/pine etc.? Are any of the products finger jointed as standard (which is more cost effective versus fixed timber, but not as aesphetically pleasing). Is the timber cut from from one section of wood or is it individually glue laminated timber? Ug values - A 0.5Ug can be quoted by suppliers but the costs vary dramatically. One of the reasons for this can be the glass make up and the gas that is being used. Some quotes won't tell the gas being used but it's safe to assume that if it's 48mm glazing it is Argon. Pay attention to the spacer distance also, not for cost but if the spacer is above 18mm, convection can occur of the gas filling (gas moves around in the unit). Hinging - Are the hinges concealed or are they exposed? Door Hinging - Pay close attention as suppliers will have quoted standard framing on doors, others may have increased the widths of the jambs to increase the space available at the hinging for plastering behind. RAL Colours externally - are the quoted RAL colours the same? Internal colours - have they quoted the same? Some will offer the standard colours such as a clear lacquer, others will have them painted - does this have any impact on price comparison. Sizes - have any of the units been split, due to not being able to achieve the size required? Some suppliers will not be able to do large sizes, others will be. Look out for compromises. Don't always look at the end figure and immediately reject a quote as being to high, compared to the others. Most suppliers will have the supply price first, then additional items such as window cills, compriband, membrane, installation etc. which are optional to the quote and not necessarily required but may be included in the total cost at the end. Most self builders like to take on the mantra of doing the whole build, others would like to leave this to the supplier or builder and or source their own materials if supply only. What is being offered with the installation service, are the installation options / costs comparible to each other? Who takes responsibility for the windows upon arrival? Generally speaking most suppliers who are installing, should be taken responsibility from the moment the windows leave the factory, to the moment the windows/doors have been installed, sign off. If supply only, the responsibilitygenerally passes to the client once the offload commences. So it is important to document the windows before offload, during offload and once offloaded. The manufacturer will normally have documentation / pictures before departing the factory, it makes life easier on whether a claim with the haulage company or whether a claim with the supplier is required (both should go to the supplier who should deal with it). Warranty - how long is the warranty, what does it cover? Last but not least, is the quote comparible? Have the suppliers referenced things the same way or are have the drawings been scaled and then referenced by the supplier (this happens a lot when no window schedule exists)? A lot of architects don't create window schedules for some reason (one the major parts of a build and most costly aspects) and problems of missing windows can be encountered, due to the elevations not always showing "hidden" windows which can be seen on floor plans. Some suppliers can miss this, which then impacts that quote. Hopefully some people find this useful, of not apologies for the long read19 points
-
Big day today. Scaffold finally down. I’ve still got a few outside jobs which I’m going to have to do off my tower, just couldn’t justify any more weeks hire! Still soooooo much to do
 18 points
 -
Following on from the last entry we had our final inspection and were on the cusp of getting our completion certificate. A few final documents were uploaded and a certificate was received from building control. We had built a house. A few final jobs were completed following the last blog entry. I order 20 tonnes of gravel from a quarry on Skye and then barrowed it down the access and spread it around the house. I also had enough to put some at the top of the access as well and fill a couple of bulk bags. The last job for the joiner was fitting the downpipes. We used the cast iron effect ones as these provide a bit more of a decorative look compared to the standard glossy pipes. We seeded the ground at the start of lockdown and now after a summer of growing the grass is coming on nicely. The grass seed cost very little money. It cost us around £15 to do all around the house. We are pleased with how the house fits into its surroundings. Our pallet wood shelter was finished and I’m currently building up the wood stocks. I am also storing fresh cut wood for the future years. These old CUPA slates crates are useful for this. As we are now heading into colder times of the year, we have had an opportunity to have a few burns from the stove. I’m really pleased with how well it is performing. The stove is bang in the middle of house surrounded by thick concrete block with a lime render. It heats the entire house and the increase in room temperature can be felt twelve hours or so after the last log goes on. I wouldn’t however recommend fitting a stove in a self-build unless you put some serious planning into how you will actually use it. Even a small stove could easily over power the heating need for a living room. Solar gains produce our base heating, keeping the temperatures to around 20c and the daily electricity usage at 10kw. We don’t have any underflooring heating or radiators. If we reach a long cold spot and need a quick boost, I plan to wheel out an oil electric heater or use the towel heaters. . What’s next. I need to crunch the final numbers. I also need to put a final layer on the access road but might put this off until the winter. Thanks for reading.17 points
-
Hi, As a small step towards repaying the valuable advice I have received on this forum I thought I'd share the attached document, which I hope will be useful and/or interesting to forum users. I am a planner by trade, working in local authority. My SB is on a relatively small, highly inaccessible plot neighboured by mature trees, and tightly bordered by existing houses. The plot was a 'detached' back garden of sorts that came as part of the deal (and something of an afterthought) when we bought our current house. Nobody had ever even considered the prospect that it could be a building plot, and for many years I discounted the idea myself due to the restrictions listed above. Five years ago, having outgrown our house and exhausted other options, I decided to at least try to self build on the plot. I obtained permission at the first time of asking (albeit not quickly and not without having to make a tweak or two). Everyone, without exception, from family to neighbours to building tradesmen to delivery drivers to other planners, have commented on how 'well' I've done to get permission. Some of them probably thought I'd made a mistake, or that the Council did, or that there was some old pals act involved because I am a planner myself (even though I don't work in the borough where I am building, and it really, really doesn't work that way anyway). They are all wrong. I obtained permission because I did the thing that planners spend their working lives telling others to do - I read the relevant planning policies, designed a development that was in line with them, then demonstrated as much in the application. That is what the attached statement does, it goes from global to national to regional to local policy, then explains the thought process behind my design, in that context. I cannot tell you how many architects, developers and would-be planning consultants fail to design development proposals specifically to meet planning policies, and then spend ages moaning, appealing, resubmitting, and generally wasting time. I can't promise that if you follow the thought process in my document you'll certainly get planning permission, but I hope you find it a useful insight into how a planner approached self-build, and specifically the matter of seeking planning permission on a plot that the rest of the world had discounted. Cheers 647910914_DesignandAccessStatementRedacted.pdf17 points
-
Some of you will know that we've recently completed our build and moved in. What you may not know is why we built the house we have, and why it is quite literally proving to be a breath of fresh air. Mrs NSS has had various health issues all her life, not least chronic asthma, but a little over 4 years ago things got a whole lot worse. Cumulative damage from the asthma had left the lower third of both lungs in shit shape, and this had led to a 6-weekly cycle of chest infections and antibiotic courses. This vicious circle eventually resulted in hospital admissions for pneumonia and pleurisy, and a diagnosis of Bronchiectasis, a degenerative lung disease for which we were told there was no treatment/cure. My first and only question to the clinician was, "Okay, so what can we do to slow the progression?" The answer, "in an ideal world, live in a hermetically sealed bubble". Essentially, eliminate as many of the irritants (airborne particles and allergens) to her condition as possible, and that's what I set out to achieve from our new home - not so much building the dream as building the bubble. Four years on, plot found, research conducted, house designed and built, and the news is so far so good. We've been in for about two months now and the difference has been remarkable with her reliance on inhalers significantly reduced, and sleeping much better due to reduced congestion. This week she had her regular respiratory check up and her breathing was found to be the best it has been for several years. Yes, it's early days, but if this house enables me and Mrs NSS to enjoy quality time together for longer than may otherwise have been the case, then it will have been worth every sleepless night, every bead of sweat, and every single penny. Whatever your motivation to self build, take a deep breath and go for it - you won't regret it.17 points
-
So after 14 months of stress and worry we were granted full consent, for a replacement dwelling on our plot. A couple of years ago we where told we would not get planning full stop, so being a bit of an awkward bloke I decided to go for it. We have had to jump through plenty of hoops and spent a big chunk of cash but it’s done, PASSED. I would like to thank @JSHarris for his encouragement in making a scale model, I think this shocked our planning officer to the detail we had put into our application, I think he was also shocked when I produced photos from the 60s showing our plot and our neighbours house. so the moral to this is don’t give up if you feel you are right and also supply as much supporting evidence as you can. Im going to add up all the bills and see what it has cost us, if anybody is interested I will put them up. Thanks to anybody who offered advice or encouragement. Russell and Lorraine Griffiths.17 points
-
I've been gone for some time, around 9 weeks. I'd had a stroke back in August whilst at our caravan, getting us ready to move in 2 weeks later. For the technical people (everyone on here!) I had a dissect of the artery in my cerebellum. Artery opened for a few seconds, which caused a clot and then caused a stroke. The change was instant and I spent 5 weeks in hospital, however home now (well was home for a week now in the caravan, which im very happy about). Its affected me physically on my right side. 9 weeks I couldn't walk, but now I can so very happy. It's just one of those things, I wasn't doing too much (even though I was doing a lot) sometimes it can be caused by trauma, but well never know the answer to that. I was only 39 (now 40!) , fit and healthy, as above its just one of those things. I'll make a full recovery, and no more likely to have a dissect than others are which is low so all good. I've been positive throughout and intend to be, just another hurdle which is no problem.16 points
-
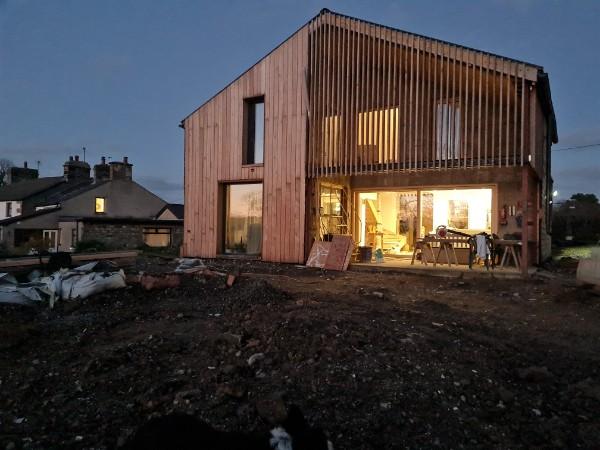
House is far from finished, but it is habitable so after 2.5yrs of van life we've upped sticks and occupied the house. Very surreal! Been lurking on this forum since 2018 now I think. The standard of my build is a direct function of the 'knowledge repository' that this forum is and the assistance of various members. Thank you one and all. Now for the next 2.5yrs of my build - garage, landscape, drive....the list is endless, should probably start with getting a shower room functioning though??♂️?16 points
-
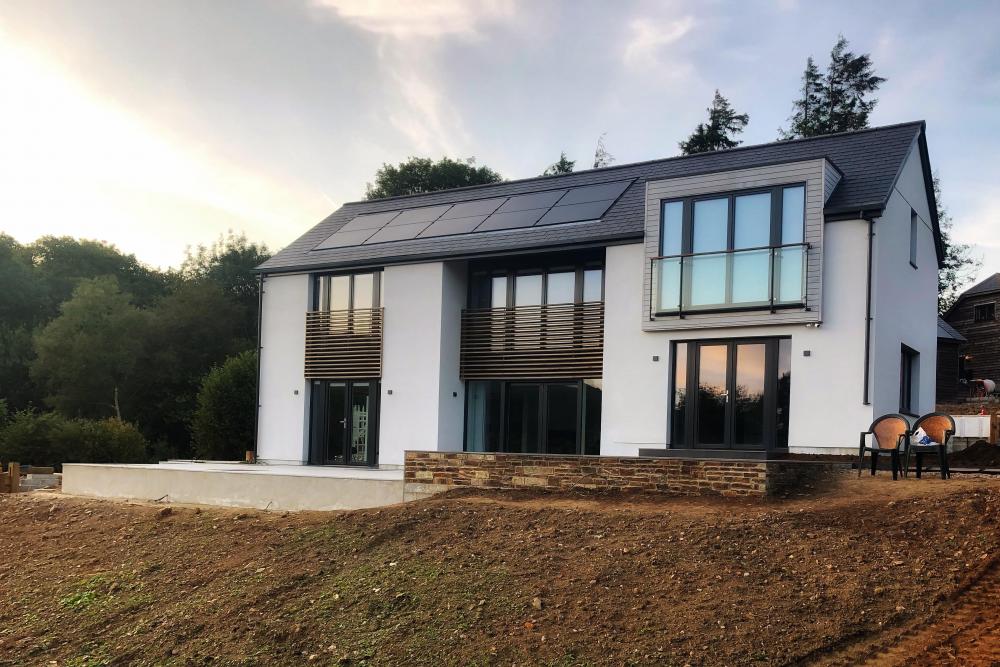
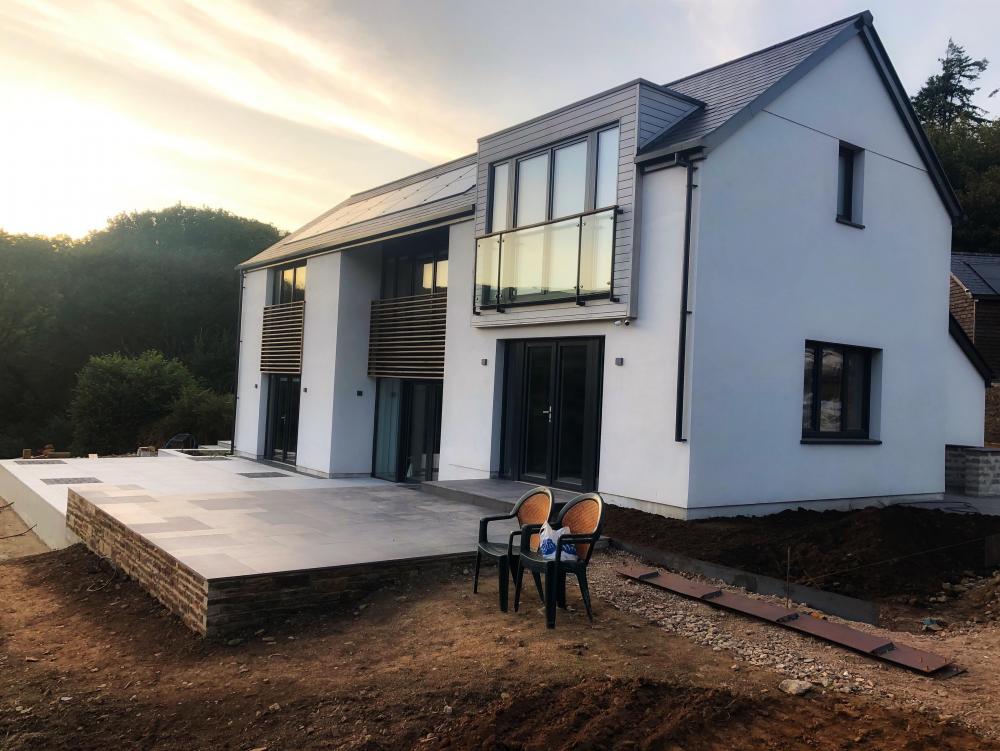
So it’s almost 5 years since I bought my little corner of the national park and for the first time this evening after another weekend of slog I looked back at the house and thought.......shit......it’s actually beginning to look close to being finished. Then I remembered that tomorrow sees the delivery of another 120 tonnes of top soil (that’s over 500 tonnes now!) and the landscaping needs another month of graft. Oh and then there’s seeding and planting, the culvert needs building, driveway....OK just loads still to do ? But for just a brief moment in the evening sun I could see the finish line in the distance.
 16 points
 -
Will be leaving the technical speak to@Nickfromwales and @PeterW From my perspective: heating working in all rooms - tick! solar working - tick! rooms heating rapidly (as opposed to taking 24-36 hours to increase the temp by about 3 degrees) - tick! enough hot water to fill a bath / shower - (even the big bath) tick! extension connected up - tick! able to run hot water without the heating being on - tick! TS not emptying itself of hot water within about 30 mins without the boiler being on constantly - tick! Plus everything has been labelled to within an inch of its life. A magnaclean filter has been fitted, various new pumps etc have been installed. I have a new outside tap, the loo in bed 4 now works and various other things have been done, including them sorting through the endless pile of shite here helping me understand what I should keep vs things to throw away. Massive massive thanks to @PeterW and @Nickfromwales, and @PeterW‘s mini-me Will (who consumed his body weight in Tunnock’s tea cakes). I can’t believe that Nick and Peter have never met before as they seemed like guys who had worked together for years. These guys put in more hours to fix the things here than I could have imagined possible, fuelled by bacon, beer and coffee, and some good humour, with lots of banter. 7am and they are already up swapping some things over when they didn’t finish until gone midnight last night. And Will is going to come up again to finish the other bits and pieces here when I will finally be able to say that my build is completely finished. It’s been a pretty long haul after everything that happened here. Buildhub rocks! I could never have imagined when I initially posted about my vat claim 2 months ago that it would also be the key to sorting my heating woes and other unfinished bits and pieces.16 points
-
The majority of the scaffolding is down. A long way to go still
 15 points
 -
Our architect asked if we would talk to a journalist in the local paper for a bit of publicity. I said yes as they have been very good and I was happy to do them a favour. It turned into a full feature with photos and much more quotes from me than I anticipated. I cringe a bit reading it but if you are interested it's here https://www.thecourier.co.uk/fp/lifestyle/property/3974146/inside-black-fox-barn-a-stunning-new-build-woodland-home-in-angus/ There is a paywall wall but just hit the blue x on the bottom banner and you can access it.15 points
-
Well, it’s been quite a while since my last blog post but we’ve not been idle but I do admit to having been slack in updating the blog. At the end of the last blog we had a superstructure and the roofer was about to begin his journey up the scaffolding. This is where that tale begins….. ’Twas a sunny November morning when all was quiet that a white van man arrived at our site to felt, batten and slate our sloping roofs. And he wasted no time at all in cracking on with it after the site orientation was complete. With his dad along to help with the battening it didn’t take long for the membrane (or ‘felt’ if you’re a roofer) and battens and counter battens to be done. After discussions with our BCO it was decided that we would fully fill our rafters and use a breathable membrane (Proctor Roofshield) attached to the roof trusses and then 25mm x 50mm counter battens and then slate battens which gave us 50mm ventilation. This allows us to not need soffit vents (or indeed soffits) which fitted in to the design of the house better and also meant we don’t have to worry about creepy crawlies living in the soffits. We started with the southern elevation so that the solar PV array could be installed and the roofer (Chris) fitted the first few rows of slates and some flashing leaving it ready for the solar team to arrive before moving on to the northern elevation So while Chris was busy working on the north side of the house the solar installers arrived and fitted our GSE trays. Once done they started to fit the panels. But it was then discovered that the company who did the ordering ordered the wrong size GSE trays and the panels wouldn’t fit. So the solar installers took all the trays down and left site after wasting a day’s work. Meanwhile the flat roofers attended site to single-ply membrane our flat roofs and balcony. A great bunch of guys from a company recommended to me by Chris so I had every confidence of them doing a great job, and they didn’t disappoint. DPM, PIR, OSB then single-ply membrane. First roof which will have a wildflower green roof being overlooked by our bedroom balcony Second roof above our utility room which links the house to the garage which will have a sedum roof They will return a little later on in the blog to install the green roofs. Meanwhile the solar installers returned after the correctly sized GSE trays had been delivered and managed to fit it all in a day. We think it looks brilliant. 28 x 375W LG panels, each with Solaredge optimisers as we have lots of trees around us. And when they’d finished each panel was giving out 1V and was confirmed each was working by being shown the 14V on each string in the loft. Job done for now until we get electrics first fix done and they can come back and fit the inverter. The only real issue we had with the solar is that the panels were resting on the slates making them lift up in places. I created a thread about them (https://forum.buildhub.org.uk/topic/24530-slate-tiles-lifted/) and after much discussion and deliberation I decided to simply use black CT1 to stick them down which worked nicely. A bit of a bodge but you can’t tell from the ground and a lot less disruption to timelines than other solutions. While all of that was going on Chris was busy slating the northern elevation and it was all coming along nicely. During that I had another discussion with the BCO about vent pipes. I asked if I could have one by the STP but she was adamant that I had to have one through the roof. When I mentioned I didn’t want a pipe sticking out the top of the roof she said that they do slate vents. A quick google search revealed what she was talking about and I purchased the item and it was installed. Looks fab and from the ground you can barely notice it which is just what I wanted. And now the solar PV install was finished he could move on to the southern elevation. But while he was doing that the flat roofers came back and installed our green roofs. The wildflower material So that’s those finished although we were still waiting on a Velux roof light for one of the roofs which was delayed but the flat roofers came back to install that for me and finish off that roof a bit later. They also installed our patio paving slabs which we think look ace. So, back to Chris and he’d now finished the main house roof slating and it finished off around the PV panels nicely. He did make a start on the garage roof but as we were still waiting on Velux windows he couldn’t finish that so he left site and would return once the Velux’s were delivered. During that period our windows and doors arrived! We used Norrsken for these and went for alu-clad triple glazed windows and sliders. The majority of our windows are fixed and we had quite a small profile for the frame which means more glass. The installers, Elite Installations Nationwide (https://www.eliteinstalls.co.uk) were brilliant and Jim and his team were a joy to have on site. They brought their spider crane with them which made lifting our windows up to the first floor a breeze for them. We decided to be bold and went for a red front door. We love it. As the window install was done the week of Christmas the installers couldn’t finish them all in time before the Christmas break so we wished them a safe trip back to York and would see them in the new year. Happy new year!! (Belated). With the new year came the return of Jim and his team to finish off all our windows and doors. Once they were installed it made the house feel so much more like a house. Closing the front door had a feel of shutting out the outside world and we were (almost) water tight at last. We also eventually received our Velux roof light and sloping and vertical windows. So the flat roof was finally completed and so was the garage roof. So we are very nicely watertight at this point. All that’s left now is the time-lapse video for this period of time. Sadly our camera only shows the south side of the building so we only get footage for stuff that happens on that side but it still makes for an interesting watch and I hope you enjoy it. Until next time.15 points
-
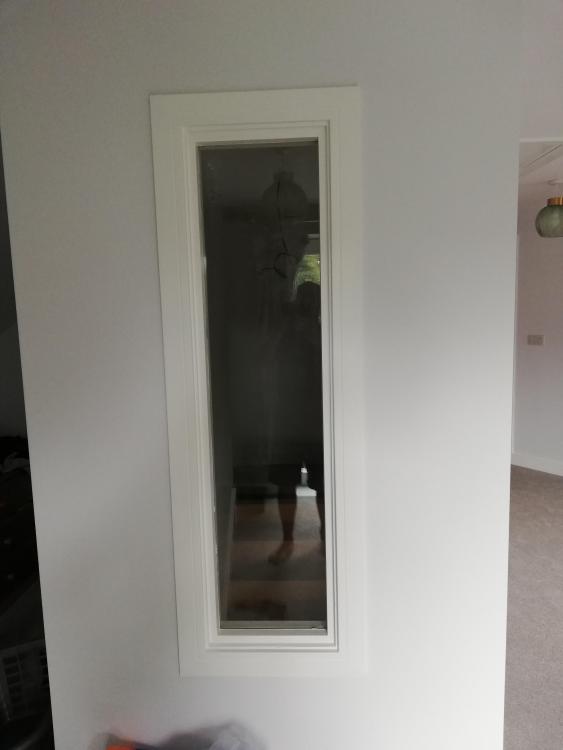
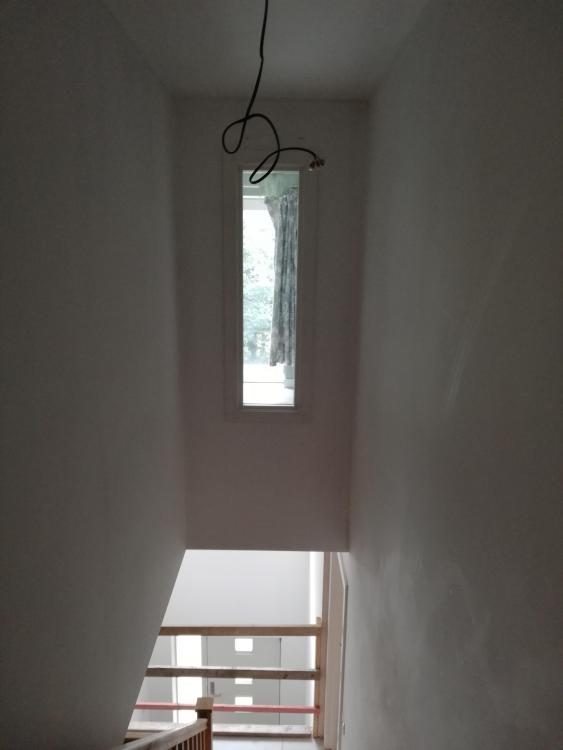
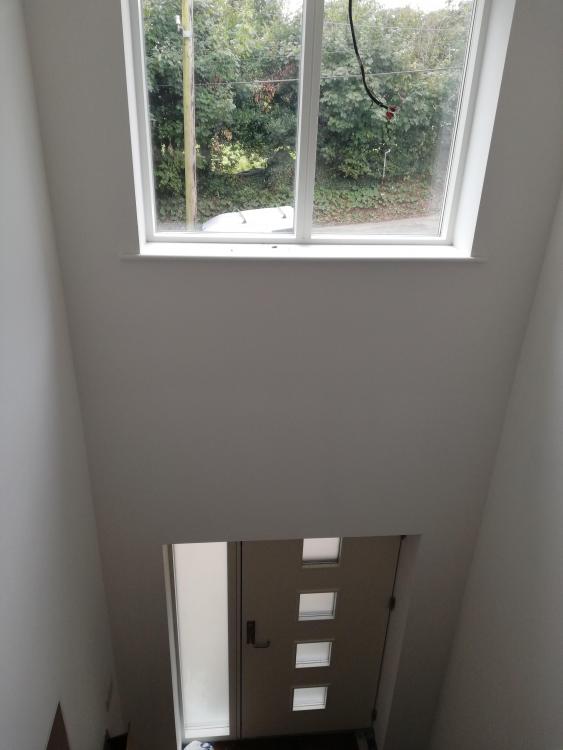
Those that know of our build will know it's been going on, slowly, for 5 years now. It's had it's fair share of obstacles along the way, mostly caused by financial issues which means for much of the time it has been a slow "build as you earn" with the savings pot running on vapour. And 2020 threw it's share of obstacles at us, delayed supply of materials (I am just about calming down about Jewsons holding our multipanel hostage for 12 weeks) as well as difficulty getting trades etc. But the good news is, all bar sticking the last few bits of skirting board on (SWMBO is oiling them as i type) the main part of the house is FINISHED. And the icing on the cake is building control recently issued a Certificate of Temporary Habitation. So where from here? The next project is the sun room, the single storey room at the back of the house that has been a boarded up shell for several years, though it does have a proper roof on it. No 1 job in the new year is the VAT reclaim. Assuming they are not totally shut down and we can at least get a proportion of that (as they seem to be doing) then that, and the remaining dregs in the savings pot should give us enough to order the windows. Ordering and getting the windows is another unknown of course which may throw up it's own issues in the current climate. Then there is the Landing window. The plan had been to have a stained glass window here. This is proving extraordinarily difficult and complicated. So when we order the sun room windows we will be ordering a plain glass 3G glass unit for this window, and if we do push ahead with the stained glass idea later on, it will be as a stand alone unit to go inside the window rather than as the middle of a 3G pane. With those done, only one thing will hold up completion and that is the balcony. We are minded to "abandon" the balcony and BC have indicated they will accept that as long as there is a barrier across the door. So by fitting that barrier we could get completion sign off and still leave the option of building the balcony later when the finances have recovered a bit. There will still be post completion jobs like a car port and more work on the garden so I will still be working on this for another couple of years......15 points
-
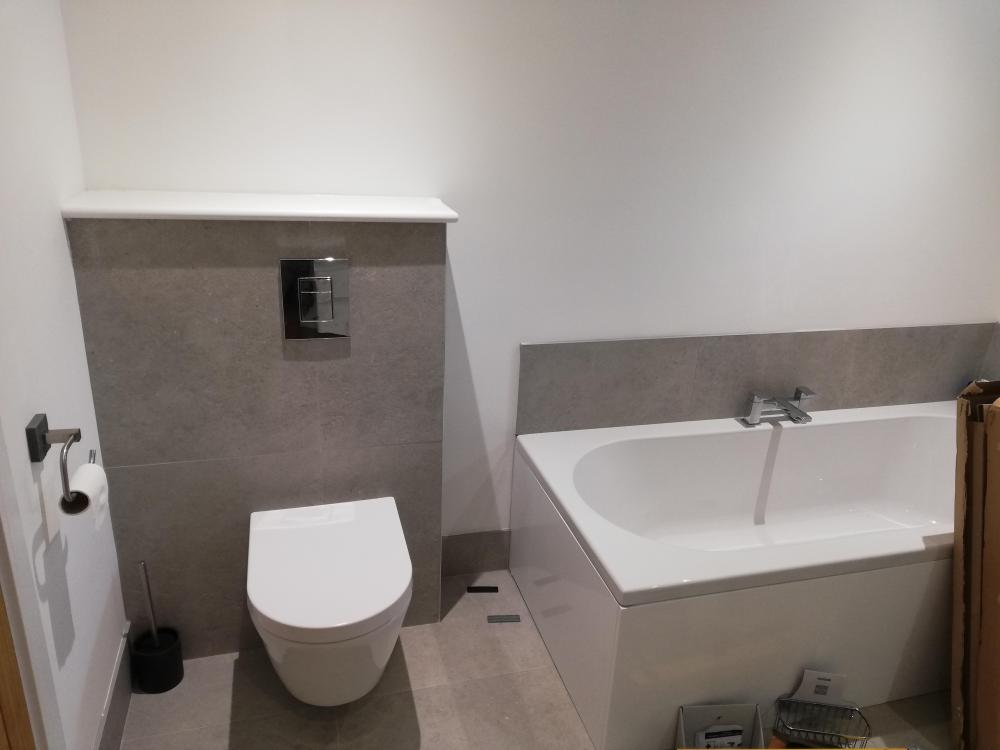
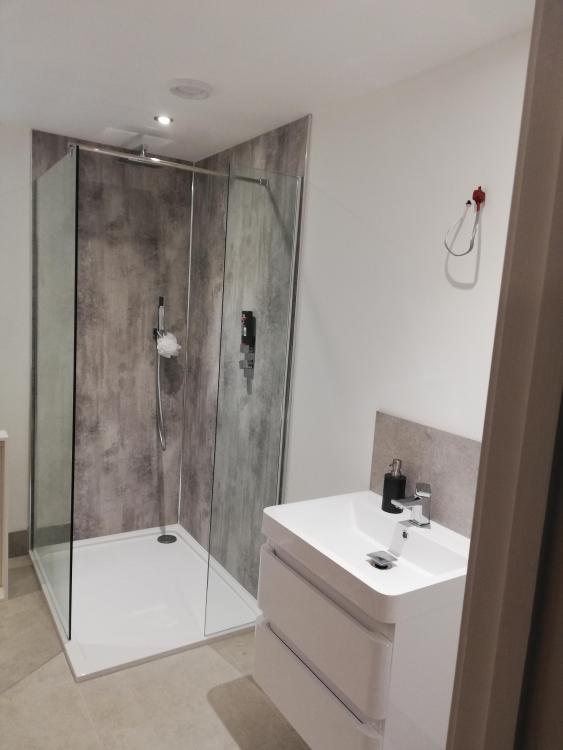
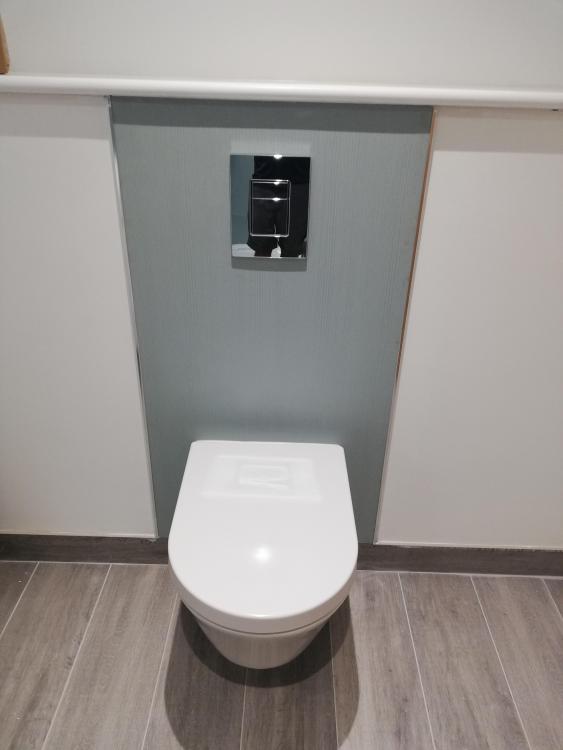
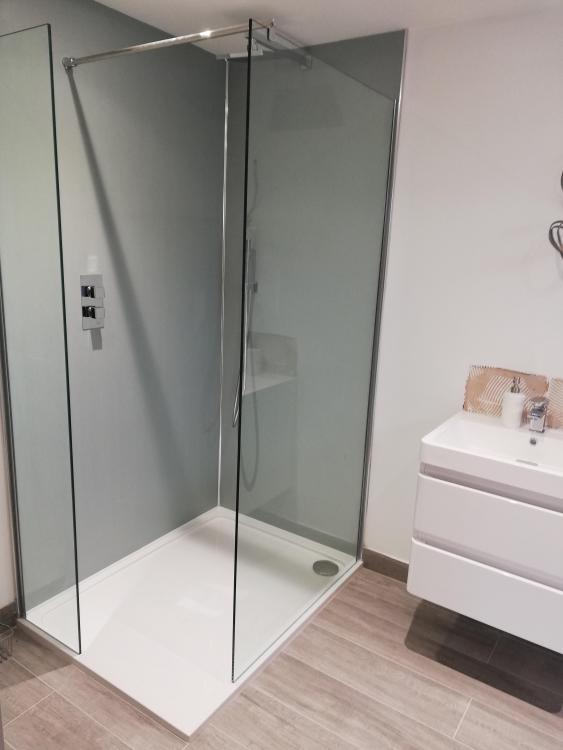
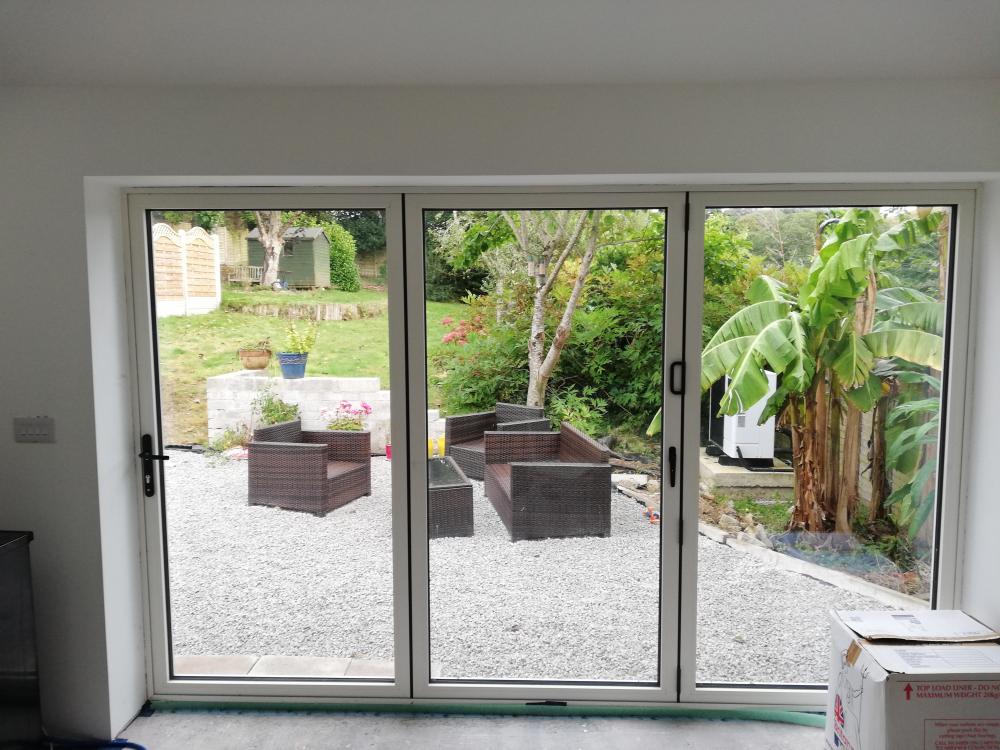
Hi Some pictures of various parts of the house, with a little bit left to do Kitchen and flooring to be bought and fitted John
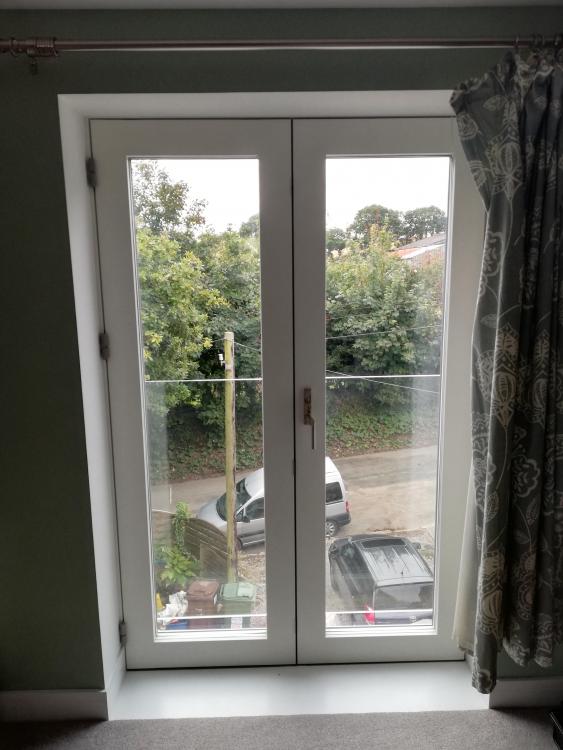

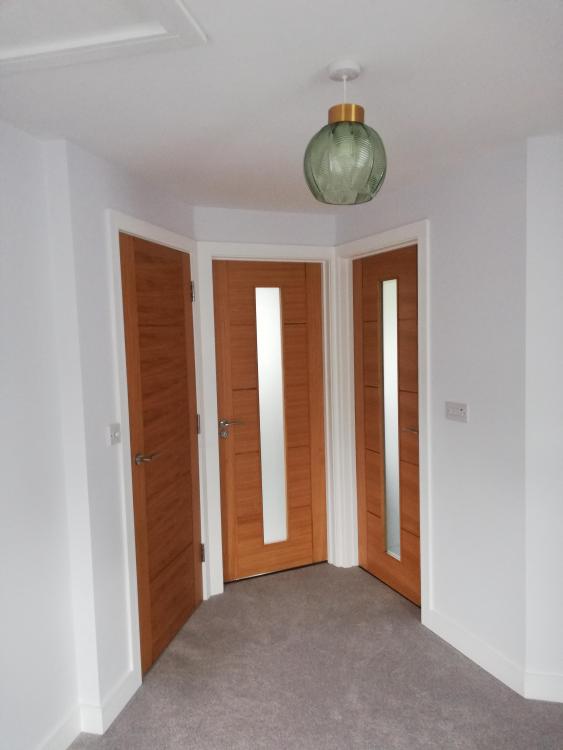
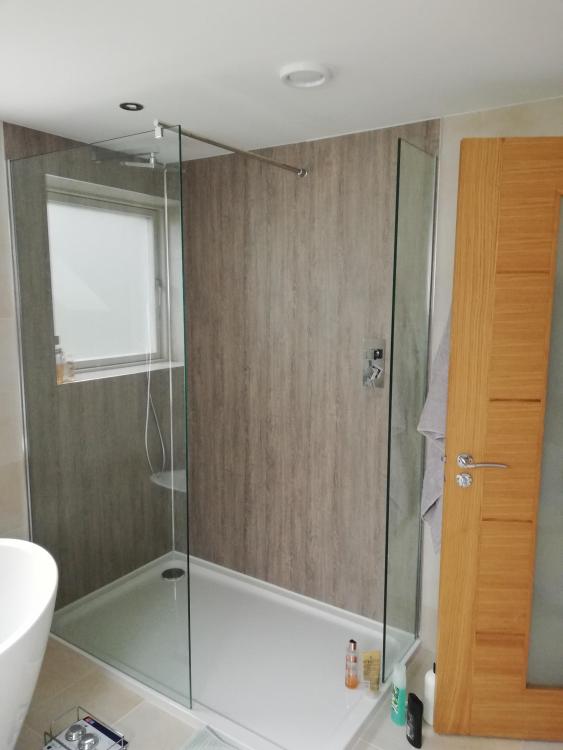
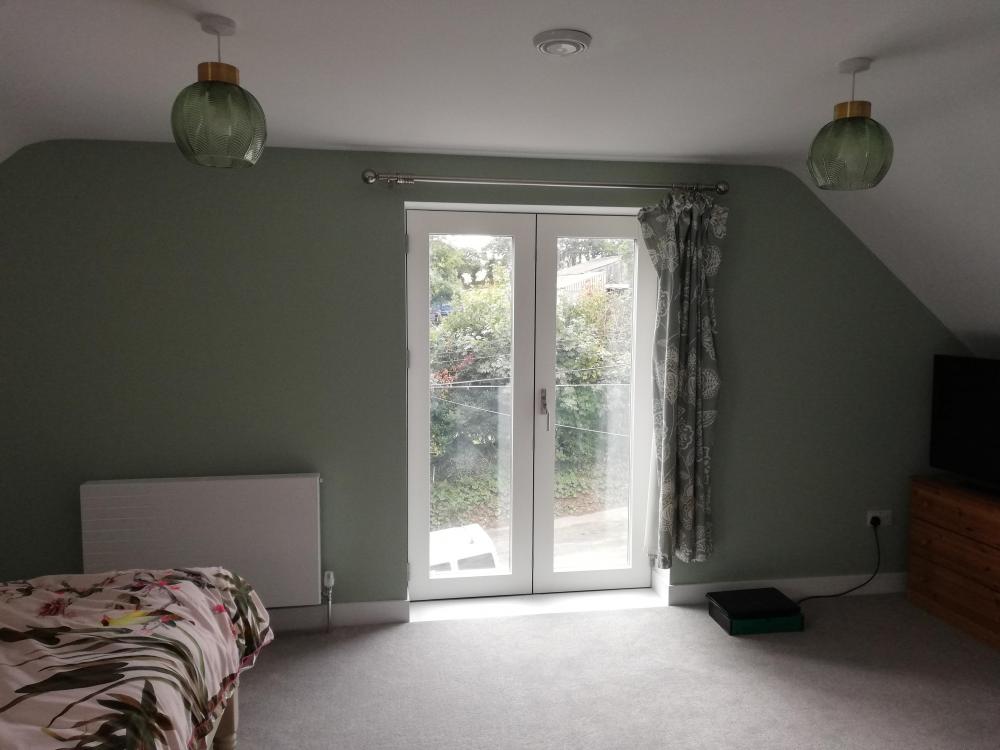
 15 points
 -
Good news! I today obtained planning permission and so I am starting my build blog. Thanks to everyone on BuildHub for your help and support so far. I have already learnt so much from this forum, all the way from questions when I was viewing the plot and every stage since. And an especial thanks to all the Buidlhubers that I have had the pleasure to visit so far. You have all been warm and welcoming and your advice and inspiration has been invaluable. Thank you! Thank you! My plot is in Cambridge, quite central, near the banks of the river Cam, just behind a row of college boathouses. It is opposite an ancient common and in a Conservation Zone. It is a garden plot that constituted the end of the long garden of a large late Victorian villa. Access is from a narrow access road (not owned by anyone) which runs behind the the boathouses. The plot itself sits behind a mature horse chestnut tree, whose roots I must preserve. The plot is is about 300 m² and is in flood zone 2. The dwelling will be a modern bungalow, 2-bedrooms, near passive house, with a green roof and clad in buff brick slips. Here is the timeline until today: 10/3/18, first visited the plot, advertised in Rightmove as a house. 13/4/18, my offer to buy it was accepted. 24/4/18, I made my first visit to BuildHuber to start my long learning journey 29/4/18, visited my second Buildhuber 31/5/18, the plot already had planning approval but before buying it I started a process for a re-design with the seller 4/7/18, visited my third Buildhuber 26/7/18, visited my fourth Buildhuber (and watched her build, with five additional visits to date) 19/8/18, visited my fifth Buildhuber 6/9/18, I finalised price negotiations with the vendor 18/9/18, plot topographic survey 26/11/18, submitted for planning permission 17/12/18, completed on the purchase of the plot 7/1/19, planning application formally accepted by council 11/2/19, visited my sixth Buildhuber 26/2/19, consultations revealed I needed to redesign the pitched roof to be a flat green roof to meet SUDS requirements 12/3/19, met the tree officer with my arboriculturalist on site 30/3/19, taking advantage of a neighbouring development having the road open, I installed a temporary electricity supply to the plot 2/4/19, engineers supplied drainage calculations including green roof 6/6/19, vendor approved the revised design with flat roof (deed's required it) 20/6/19, visited my seventh Buildhuber 29/7/19, visited my eighth Buildhuber 23/8/19, visited my ninth Buildhuber 19/9/19, council advised that my application is scheduled for the 2 October planning meeting 24/9/9, council advise that my application was bumped to the 6 November planning meeting 6/11/19, planning application approved unanimously, with two councillors choosing to comment that they particularly liked the design. One objector spoke against. Next step: build a house …15 points
-
A busy November saw all the trades coming good, albeit some were cutting it fine for the moving in day – 30th November – However, we have moved in with all the services up and running. Having said that, BT and Openreach have missed the deadlines and as a result we are without any internet, phone line or TV for at least a week! Also the master bedroom built in wardrobes are still be fitted. The landscapers have finished their work, providing us with a patio area and a driveway area which will see plenty of activity. Look closely and you should see the hedging that has been planted. 330 separate plants in all. This was a planning condition and the hedges are a mixture of Hawthorn, Beech, Holly and Maple. Locally referred to as native hedging. The turf will be laid next Spring. Our Air Tightness test was conducted by a guy from Perth - a good couple of hours away. We never set out to achieve such low levels because we didn’t want the capital outlay of such a system as well as the infrastructure it requires. Our score was 4.9 which in our eyes is very good. There are a number of minor jobs which I need to do such as touching up the paint work here and there; re-oiling some wood in places but all that can wait until we have given the whole place a deep clean. The main external jobs outstanding are the erection of the oak framed porch and the downpipes. Both of which should be completed within the next 10 days or so. Anyway, this was not a self build in the true sense of the words but it was project managed by myself and built using a main contractor and sub contractors after the TF had been erected. I hope you have not only enjoyed reading about our project but have found some useful bits of information within the blogs in order to assist yourselves with your projects, whatever that may be. Overall my experience has been a good one. It hasn’t been without its difficulties, such as additional unforeseen expenditure and additional expenditure as a result of our mistakes, or due to us changing our minds! Such examples include ordering the wrong door frame - we failed to realise we hadn't ordered a threshold suitable for level access - a mistake that cost us £1k. Changing our minds over the 3 toilets we had ordered. They simply looked lost in their respective environments so 3 new ones were ordered at an additional cost of £850. A failure to get a full grip of the scaffolding cost an additional £1k and a failure to budget correctly for the foundations and dwarf wall for the carport cost an additional £4k. Final facts and figures - Build schedule – 6 months from the day the TF arrived. Cost per sq metre - £1850 – includes everything, and I mean everything - from the scaffolding through to the landscaping and it includes the car port and porch [ still to be erected] but not the land or fees. Only two skips were used throughout the build – everything else was removed by us to the local dump or burnt on site – best investment was a £25 oil drum which we used as an incinerator. Thanks for reading - Paul.15 points
-
We have just finished a self-build and as we went along I made notes of the things I had learnt during the process. What follows are those notes and I hope they will be of some use to people who are just starting out on their projects. I must of course add the caveat that all that follows is only my personal opinion. Although I now have some experience I am no expert and it is of course up to everyone building their own home to seek professional advice about their project. RED'S ADVICE FOR SELF-BUILDERS 9th September 2018 GENERAL 1. Try to work with everyone on your project via email as much as possible so that you have an audit trail of what has been said to people. If you must have a meeting, confirm everything in writing, right from the start. 2. You are about to be on the receiving end of a lot of documents, mostly in electronic form. I kept all ours and it amounted to 1,132 files (in 169 folders) consuming 2.8 Gb of data. Decide early on how and where you are going to store your documentation (electronic and paper) and stick to whatever system you are using. DESIGN 3. Make sure the house is of a specification that is appropriate to the size/type of home you are building. A big expensive house must have a high specification or else you may find its value is disproportionately affected when you come to sell it. 4. Check the local vernacular for design ideas – it can be nice to reflect local building techniques or features and you will get fewer objections from the local community and council. Imposing your personal taste on an area is unlikely to make your life easier. 5. Keep basement walls as simple as possible – they don’t have to exactly reflect the above-ground level walls. Angles and corners increase cost, sometimes unnecessarily. 6. From the design phase onwards, ask that ALL drawings of plans and elevations include a metre scale so that when measuring things you can see how big they are. Sounds obvious but they were not included on ours. 7. Drainage issues can present huge problems in the future if you’re not careful. Look at your plans and see how close your sinks, baths, showers and toilets are going to be away from the soil and vent pipes (probably in the perimeter walls). The longer the distance the more difficult things get and the more likely you are to be plagued by blocked drains in the future. Additionally, be aware that the higher the volume of water, the steeper the gradient of the pipe and the larger its diameter should be. Otherwise you can end up with gurgling sounds, low water exit flow and blockages. This is all in BS5572 and is not that difficult to understand. In short, if you possibly can, keep plugs close to soil and vent pipes and make sure you can access/rod the pipework when it gets blocked! 8. Think twice before selecting fancy plug fittings for sinks. Ask yourself “How is anyone going to be able to fix this when it’s installed and covered in limescale/dirt/etc?" 9. With all fittings/equipment that may need servicing at some point in the future, will you know who the manufacturer was and will you be able to get spares? 10. Decide early on what type of cupboards you are going to have – don’t leave it until later on in the build. Ikea do a great range of cupboard carcases. If you want to go for these cheaper, pre-made type then the rooms can be sized to accommodate the standard sizes these units come in. 11. Be prepared for the fact that contractors involved in the building process rarely have any visibility of or interest in innovation. You may hear them say that that have been in the business for x years and have a wealth of experience but the problem is that what they actually have is a lot of experience doing the same thing over and over again – they tend not to be interested in new products, techniques or materials. Although it’s boring, the more standard your design is the easier your build will be. 12. In your design pay attention to the direction doors open and the positioning of light switches. 13. Ask how your architect/designer/builder wants you to provide information on the locations for items in rooms, e.g. sockets, switches, lights, etc. What symbol scheme should you use? 14. Check that the sanitary ware works together properly. Our toilet flush buttons are (annoyingly) hidden by the seat when it’s up. 15. A good rule for exterior tile and brick colours is ‘dark at the top, lighter at the bottom’. 16. Don’t use small stones on the driveway – it gets picked up on shoes and taken into the house. 17. Wood-effect porcelain floor tiles are very good – very hard-wearing and they look realistic. 18. If you're running water supply pipes some distance from the road, pay a bit extra and have the largest diameter fitted (63mm outside diameter?). Whilst static pressure may not be affected by narrow pipes when the water is not flowing, the pressure may drop substantially once flow starts. Trying to fix poor water pressure is expensive - fitting a large diameter pipe is cheap. Note that the connection to the main at the road will be a 'standard' size and will certainly be smaller than 63mm! PLANNING PERMISSION 19. The planning process is not nearly as hard as it sounds. Consider doing it yourself – don’t pay someone to do it if you feel you can. 20. If there are any trees that need to be cut down for your development, do it before you apply for planning permission but of course ensure that there are no Tree Preservation Orders (TPOs) or other restrictions in place. 21. Check that there are no restrictive covenants covering your property. You can check this to some degree of certainty by ordering the electronics deeds to your property (you can download them from the web for a few pounds). You can get restrictive covenant protection insurance just in case someone surprises you! It is reasonably cheap. All covenants are for the benefit of someone – and it is these people who can make a claim against you if you break the terms of the covenant. 22. Try to work with your local planning department rather than against them. Their aim is to build as many houses as possible (to meet government targets). Believe it or not they are on your side but they have the local residents at their throats trying to stop any building in their area. Give them reasons to allow your development. 23. Make your design a little bigger than you want and negotiate down. 24. During the planning process, all the documents that you submit to the council are likely to be published on their website. This in turn will be indexed by Google and other search engines. If you have submitted electronic copies this will mean that details such as your name and address will be instantly retrievable by anyone in the world. Therefore, if you want to retain some degree of privacy, always try to submit paper, hand-written copies of all documentation. 25. Keep records of everything that appears on the Council website – particularly the letters written by local residents. They will probably get deleted after a few months but having them in your possession can be extremely useful. 26. Planning departments express opinions on planning decisions to be made by councillors based on local and national policy. Highways departments do not have opinions – they have rules which allow them to provide planners with information about the way that a scheme will or will not meet Highways requirements. However, note that planners are allowed to ignore this guidance if they wish. 27. Back up everything you agree in person or on the phone with the planners with an email. PROJECT PRICE 28. Your project is going to cost you a lot more than you thought. There are several reasons for this: - Your contractors will not be motivated to watch your costs as closely as their own and so will find that things are more expensive than they thought they would be; - Contractors are not necessarily perfect at planning – they may be genuinely unaware of costs that emerge during the build and this ends up costing you money; - Prices tend to rise rather than fall; - You can’t remember everything and there will be things that you decide you want that you hadn’t budgeted for. 29. We found that ‘PC Sums’ (see Explanatory Note below), i.e. the non-fixed sums that amount to whatever the builder has to pay, were nearly always over the estimate, between 20-60% (and that’s without any extravagance!). If you decide that you want a more expensive option than a ‘normal’ item which would represent ‘par’ for the project then it is fair that you should pay more. However, on a fixed-price job, make sure you agree that PC sums are not allowed to escalate when you only want the ‘standard’ level of item. My recommendation here is: - Try to get rid of as many PC sums as possible. - Obtain some sort of agreement that the PC sums will remain within control. It is very important that they have some focus on giving you a REALISTIC idea of what your costs are likely to be rather than just minimum figures. Note that it not in their interests: -- to price up to a reasonable amount for PC sums (because it reduces the chance of getting the contract) -- to expend work to reduce over-spends on PC sums. - Set default prices for items of the most basic specification which could be installed for the PC sum if you have run out of money. For example, ask for a price for a specific fireplace that you would be happy with if you were running out of money. - Make a rule with your builder that whenever an item is quoted for against a ‘Prime Cost’ (or PC) sum item, that the PC sum is also given, otherwise you end up being asked “Is x thousand pounds ok to pay for item y?” when you don’t know how much the PC cost was for that item. 30. For an expensive product which is relatively easy to specify, get lots of quotes. This is more difficult with a custom-designed object like a staircase – you are really buying into the company that will design and make it for you and this may be a long process. 31. Ask your builder if they intend to charge an additional sum for some amount they have to pay to the builders’ association or something similar. This can occur if you ask them for a more expensive item, e.g. a better roof, and the cost of installing it is higher than you expect because the builder has to pay a premium to an association based on costs. 32. A significant cost will be the various charges and levies that the council will make against your project. Planning permission will be granted subject to the council receiving this money. 33. Check to make sure that ALL the costs are included in the price. We had to pay thousands of pounds extra for things like fitting a new gas connection, air circulation system and digging up the road for the water main. Make sure there are no (predictable) hidden costs. 34. Ask what the contractors will add on for anything that they buy (often 10%). You might be able to save money by ordering some things yourself. ARCHITECTS 35. Undoubtedly architects can assist a self-builder but we didn’t use one. There were several reasons for this: - We knew pretty much exactly what design of house we wanted - Architects are generally VERY expensive - They often have their own vision of the house which they try to impose on the client. A frequent complaint from clients is that they feel that they have had to persuade their architect to give them what they want! - By having a contractor and a separate architect you run the risk of being caught in the middle of disputes between the two. If there is only one contractor then everything is down to them. In hindsight I am very pleased we didn’t use an architect (we created our own drawings and an architectural technician drew them up for us ready for the structural engineers). SELECTING CONTRACTORS 36. When selecting a builder, ask them to bring all the process documents and templates that you would be expected to be involved in or provided with to a meeting. If they bluster and make excuses about ‘working on an individual basis with each customer’ you know that they don’t have any processes. This is NOT good and it means they will probably repeat all the mistakes they made on the last job on yours. 37. Have your house built on the basis of a contract with your builders for which they are responsible for EVERYTHING. If you allow a situation to arise where a builder can blame someone you hired then you are heading for problems. 38. If you are planning to specify a particular company to perform a special task in the build, make sure right from the outset that they are prepared to meet any associated contractors on site and go through the plan, stating who will do what and when. Make sure that the overall project manager will take responsibility for co-ordinating the various parties. 39. Make sure that concrete form-worker contractors are chosen with care and ensure you know exactly what they are promising in terms of quality before you start. 40. Avoid situations where two or more contractors are responsible to you for the delivery of an item. 41. Above all, when you build a house, the selection of the main contractor will create a relationship where you have to place a lot of trust in them so you must convince yourself that they are worth that trust. I think we were very lucky to have our builders. BEFORE THE BUILD 42. Satisfy yourselves that you understand who is liable if something goes wrong with your house. For example, if an architect specifies some material to cover a wall, what happens if it falls off? The architect may blame the builder for not using the correct adhesive, the builder may then claim that he did or that he wasn’t told. In cases like this, who pays to have it fixed? What happens if a foundation shifts due to ground movement? Whose responsibility is it to fix it and pay for it? 43. Before the build starts state explicitly what trees, etc. that you don’t want damaged. Digger drivers must be briefed on what to avoid. Sensitive areas MUST be taped off at least. If it can possibly be damaged it will be – watch Grand Designs! 44. Agree a length of time that you must be given to make a decision from first hearing about it. You don’t want to walk on site one day and be asked how big the window sills have got to be with an answer to be given within hours. 45. Agree a process for dealing with serious issues. Note that an issue which is serious to you may not seem serious to your builder and vice versa. This could lead to accusations of either over- or under-reacting to a perceived problem. If you agree a process before you start the build this should not be a problem. 46. There are guides for good practice in the building industry. For example, the LABC have an excellent manual and there are British Standards such as BS5572 (Code of Practice for Sanitary Pipework). The problem is that the British Standards documents can be expensive to buy (e.g. over £200) but they are often available for free on the Internet as PDFs. Ask to see the standards to which the tradesmen are working. Seek assurance that a) the tradesmen have a copy of the relevant standards and b) will stick to them. If you have a copy of the standards it isn’t difficult to go around and check simple things. 47. Make sure that your contractors agree that any concrete surfaces or steps will have a slight slope on them so that water will run off them and that they will fix any which don’t, no matter how difficult. 48. Ask your builders (in writing) if they have any interests in/relationships with any suppliers. This is not necessarily a bad thing – it may work to your advantage. Anyway, it’s worth knowing what the relationships are. 49. Agree what happens to materials that leave the site, e.g. waste wood. Will it be sold? 50. Ask yourself where you are going to store the things you buy for your house along the way, e.g. taps, electrical equipment, etc. Consider buying a small, secure container and putting it on site for the duration of the build (you can easily sell it again on eBay) or ask your builder if they can provide you with storage. 51. If your builder hires a contractor such as a painter or architect to work on your build then (unless they provide a transferable guarantee of some kind) they are not answerable to you at all – they are only responsible to the builder. Keep this in mind in terms of your agreement with your builder and any guarantees or indemnity that you may in future rely on. 52. Regarding stage payments, it would be good to agree that if faults are found in a stage that has already been paid for, then an amount from the next stage payment is withheld until the problem is fixed. If you don’t do this, there is no real incentive to fix problems when they arise. 53. Agree in writing with your builder that they will tell you if an item that you are deciding upon has any criticalities – e.g. will the flooring have to be less than a certain thickness, does a fireplace have to be of a certain type, etc.? Also agree that they will not allow you to drift into a situation where you get the blame for something like this. 54. Plan for the fact that concrete screed can take months to dry to the point where wooden flooring can safely be laid on top. 55. Make sure the builders are signed up to pay for any heating and electricity that they use prior to you moving in. Our bills for electricity and gas came to nearly £1,000! If they won’t agree to this, make them agree to cap the spend at a fixed amount. 56. Tell your contractor that you want all of the documentation for every item that is installed into your house. It is best to get it as you go along – when the house is finished all the people working on it will evaporate and the last thing on their priority list will be finding the paperwork that came with your shower mixers. DURING THE BUILD 57. Builders are not always right. Keep checking what they are doing! 58. Watch for quality issues involving techniques that your builders aren’t experts in. This will be anything that is slightly out of the ordinary. With us it was (surprisingly) the concrete basement. They didn’t know what to look for in good concrete or what standard to demand from the concrete suppliers. I was surprised to see unmixed concrete coming out of the lorry so I videoed it. Our supplier denied that there was a problem until they saw the evidence. In the end, several areas of bad concrete had to be hammered out of the walls and redone. Keep an eye out for this sort of thing if you can. Incidentally, the reason the concrete wasn’t mixed very well was probably because the concrete plant was only a couple of miles from our site and the materials hadn’t had enough 'spinning' on the journey to properly mix them. 59. If you have valuable items of your own on site, make sure there is adequate security and that rules for the site are established and adhered to, e.g. keeping gates locked. In my experience builders are not very good at shutting gates. 60. Be prepared to make decisions. I know this sounds obvious but there will be thousands. Ask for a decision schedule and stay ahead of it. Work hardest on the big decisions – floors, bricks, windows, tiles. Don’t get overwhelmed – just start working your way through it and you’ll get there in the end. 61. One often hears builders complain that the client doesn’t know what they want or that they won’t make a decision. However, this isn’t always the whole story and knowing what you want isn’t always enough. If the contractors shrug their shoulders and say that they’ve no experience of some product or technique that you want they may not show much interest in finding out. This can make choosing features/fixtures difficult. 62. Keep looking – or have someone you trust with an engineering background to look – at the important parts of the structure and be satisfied that they ‘look right’. Amongst several serious faults that we noticed we averted an extremely dangerous, possibly fatal structural error when we discovered that a load-bearing element had been mounted on a non-load-bearing support. This was a genuine mistake but it showed that another set of eyes can reveal all sorts of things that the builders may have missed. I was also amazed (and very thankful) for what others spotted that we missed. 63. It is possible (for reasons that are not foreseeable) that a change may be necessary to the design/spec of the building and that new prices will have to be obtained. For example, if electric garage doors were specified but these cannot be fitted for some reason and ordinary garage doors have to be fitted instead. A quote will have to be obtained for the ordinary garage doors and the difference between that cost and the cost of the (more expensive) electric ones should be removed from the amount you will be paying for. You should agree with your builder that prior to obtaining the quote for the new doors, that the actual cost for the original ones is disclosed so that you are sure to get a proper rebate. 64. Be prepared for the fact that the suppliers of building materials have not moved with the times when it comes to quality control. In fact in some cases, technologies that have been with us since before Roman times seem to have advanced little! Take for example bricks – you cannot pick brick colours from a board of brick ‘slip’ samples and then expect to get the same colours delivered. Ask any bricklayer. The only way to guarantee colours is to go down to the brick yard, select the ones you want and take them away with you. The same applies to exterior tiles. The quality control is nowhere near the standard applied to other areas of modern production (e.g. farm produce at supermarkets). The quality of concrete is incredibly variable in both consistency and mix. If you are looking for ‘fair-faced’ concrete surfaces, i.e. ones that are good enough to be visible, it may be a good idea to have a back-up plan in case it goes wrong. Note that the choice of concrete is often limited to those plants that are nearby – your builders may have little choice on which one they can use. 65. If you are working from samples then keep the samples of the things that you used to make choices and make it clear that the colours shown are the ones you expect to see delivered. If the supplier can’t guarantee that then pick another supplier. 66. Take lots of photographs of everything, no matter how boring. When the structure is finished and you need to know what’s behind a wall you’ll be grateful. Particularly useful is where pipes and other services are running behind walls and under floors. 67. Make sure that you decide and say where you need wood behind the plasterboard to support pictures, curtain rails and televisions, cupboards, etc. and then take photographs of where it is before the plasterboard is put on. 68. Keep a VERY close eye on what you are paying out. It’s a very good idea to create a spreadsheet which documents all the costs and then when they have been paid. AND FINALLY SOME OTHER NOTES… 69. In my experience professional bodies such as the Chartered Institute of Engineers are only there to protect their members, not the public. In my experience they will always maintain that their members are right and you are wrong – the member is the one paying them – not you. Always have in the back of your mind that you cannot rely on any professional body to protect you from their members. 70. Don’t expect the Local Government Ombudsman to uphold any complaint you make against the local authority. In my experience they rarely take any complaint seriously. Take a look at their website and try to find a dispute that has ended up in the resident’s favour. Even those labelled as ‘upheld’ often don’t force the local authority to do anything to rectify the matter. 71. If you are using a home automation system which controls the lights, make sure you put an ordinary light switch in the cupboard/room where system is. If it goes wrong you’ll need some light to fix it! Also, think carefully before using mechanical retractive light switches. For a simple on/off they should be fine but for special uses (e.g. double tapping for switching a light scene off) they are not very easy to use. Consider the touch-sensitive (capacitative) type - they are far easier to use. 72. Don't allow things which will need replacement or servicing to be boxed in with decorative panels, etc. Make sure it is easily accessible. 73. If you're building a basement in impermeable ground (e.g. clay) remember that basements can easily 'float out', i.e. rainwater can flow down the sides of the concrete, collect under it and then cause the basement to float. Yes, it sounds incredible and yes, basements are very heavy but so are battleships and the Archimedes' principle holds true for both of them. Make certain that a) that your builders have spoken to the engineer about this and fully understand and will mitigate the risks, b) that there is adequate drainage from the bottom of the basement during the build to prevent water collecting around the concrete 'ship' and c) obtain written confirmation from your engineer, backed up by his professional insurance, to confirm that the weight of the house's structure above will be sufficient to keep the house firmly in the ground when the project is finished. 74. I started with this but I’ll say it again – get all decisions in writing. If you make a decision verbally with anyone, back it up with an email. Explanatory Note: A PC Sum (Prime Cost Sum) is an allowance made by an architect or a builder in the price for a specialist contractor or specialist supplier. In most cases a PC Sum is allowed for electrics, plumbing, heating, kitchens, windows, etc. It is allowed on a lump sum provisional basis and the client is responsible for the actual end cost of the item plus a small percentage for the main contractor. It is in the contractor’s interest in the tender process to keep this figure as low as possible as it makes his overall figure lower even if it is well known that the provisional cost is insufficient.15 points
-
Thought I'd do a short blog on the Polycarbonate tunnel we built. Our big field suffered with no storage, and location meant containers were very expensive to transport. so one option was to build a polytunnel, which we have planning permission for. again due to location, 500m from the coast 73M AMSL I wanted something sturdy. so looked at off the shelf packages. in the Highlands and Islands the PolyCrub is seen as the mecca. Designed in the Shetland isles, guaranteed to withstand 100MPH winds etc etc. due to the ability to get CROFT grant assistance on these, the price is, IMHO, artificially high CIRC 6K for 4M *6M.. this wasn't going to happen, so after looking at many photos I designed my own.. Basic principle is hoops of MDPE pipe secured to posts in the ground, then 3*2 timber used as horizontal support, with Polycarbonate sheets secured to this timber. the bottom sides are then clad. My design was to use 65mm Black MDPE pipe, and secure the timber with coach bolts and penny washers through the pipe. this way I get a guaranteed fixing that won't pull out , and it still allows for flex in the whole structure. 4m wide x 6M long, but this can be extended. My ground has bed rock close to the surface, 300-500mm below ground, so just knocking in post wasn't going to be secure enough to withstand the winds, also where I was sighting the tunnel its on sloping ground, so I couldn't get it level. I cleared the area to removed the top vegetation and a bit of the top soil. and dug 14 holes. then due to rock levels I then core drilled the rock to allow for the post to be deeper. We then set these in concrete, (at the same time as doing the slabs for the cabins.) The next day we had a look and I wasn't too happy with the security of the posts, so slight change of plan, we created a plinth. basically I used some 6x2 either side of the posts, with a slight angle, then filled this with concrete (again we used ready mix at the same time as back filling the treatment plant) this added about 300kg of concrete to each side, and joined all the posts together, and gave us a solid plinth at the side. No Photos of the next stage but we cut 7M lengths of 63mm pipe, this when placed over the posts gives approx. 500mm dwarf walls and a 6M polycarbonate sheet, giving a head height of around 2.3M. we used a plumb bob to get the centre line on each hoop and drilled an 8mm hole through the pipe and secured the top 3x2 treated timber to al the hoops. One thing we found was that the MDPE did not bend uniformly, this may have been due to slight errors with the posts being plumb. The resultant timber (which was not very straight), snaked from hoop to hoop. after head scratching and re thinking. I decided it was a poly tunnel and to get on with it. we used 7 lengths of timber jointed with half lap joints to extend the length to 6.5M. if using a clock analogy the timber was placed at 9,10,11,12,1,2,3 positions, with the 9 & 3 o'clock being 500mm off the ground, also ensuring the 9 & 3 o'clock timbers were approx. 5.8M apart circumferentially. Then it was a case of securing the polycarbonate sheets to the timber. each sheet is joined with some soffit H joint strip. (you can buy a clear joining strip for the sheets but for a 6M length it was around £65. the H strips proved extremely difficult to connect the two sheets together, or should I say impossible. so I cut off the back edge on one side and used some glazing sealant. this way we could attach the strip to the polycarbonate prior to bending over the tunnel. and each sheet 'H' strip basically lapped over the previously installed sheet. day 2 we had the basic structure. It was noticeable that the curve was not symmetrical, so putting the door frame header in by securing to timbers at 11 and 1 o'clock was not level. I overcome this by using a ratchet strap attached to the 11, and 3 o'clock timbers and tightening until timbers at 11&1 o'clock were level. I then put the two door jambs in (concreted at the base) and cut to the length required and secured to the header. This worked and the tunnel was now more cylindrical. I framed the rear by baring 3x2's off the horizontal timbers. Last steps were to clad the base, I used 4*1 treated timbers that were screwed into the MDPE pipe and wooden posts. then used strips of visqueen to create a more sealed dwarf wall, this will help prevent driven rain from the winds getting inside. over this I used Larch timber backs* to create a vertical cladding All in with hardware, polycarbonate, timber, concrete the project cost £1200. not cheap, but its solid as a rock. It withstood the first Autumnal storms this week with winds hitting 50MPH. Its also very warm inside, even now as the temperature is falling. Larch timber backs are the offcuts from the saw mills and are reasonably priced as scrap. we purchased a pack of timber backs, approx.40 lengths of larch timber with bark in 4.8M lengths for £100. these are not uniform and taper etc, but as i only needed 500mm lengths it was straight forward to make it work.14 points
-
It's been a while since my last blog, but we've not stopped, the days are shorter and the weather skipped autumn🍂 and dived into winter with a few storms and loads of rain. Our windows are budget friendly triple glazed UPVC, and composite doors. The external EPS was sealed at the cill with EPDM airtight tape, the tape has reinforcement in it and can be moulded, it does crease but creates a water tight junction and sticks like the proverbial to the EPS. We created a cheek reveal with an additional layer of 50mm EPS and sealed the upvc frames against this, I then ran a bead of sealant against the face and edge of the EPS giving two seals. Then when clad a third seal. I used soudal air tight foam and I thinks it's LMA sealant, soudal's airtight solution. The winds gave good opportunity to test for air leaks when had several days of 35mph winds. This proved a good test with a smoke pen. The internal frame was sealed with soudal sf40 which adheres very well to the upvc and timber blocking, when cured it is like rubber. The cladding is larch boards in 2 widths 150mm for the bottom layer and 100mm for the top. We finished the top of the windows with a custom palistol coated drip The bottom of the EPS footing was finished with reclaimed slate. Inside we are having a cold roof. We needed to add 25mm pir under the truss cord to satisfy the tightened regulations in Scotland. We tapped the foil boards with foil tape, and the perimeter boards were pushed to touch the wall plate. Then used airtight foam between the PIR and internal IFC wall creating a seal. Under the PIR I used plastic membrane that I spray glued to the PIR, and this draped down the perimeter walls. The under ceiling was battened and counter battened, this created a service void for the cables and not penetrating the loft. The plastic was jointed with EPDM airtight tape on joins and walls. Cables were put inside Flexi conduit that was cut into grooves in the ICF. (All water pipes were run under the slab.) This picture shows the detail for the airtightness and the service void. MVHR ducts (7 plenums ) were run in the loft, and under 400mm of loft roll. The manifolds are also under the loft insulation. I made these airtight using the same EPDM tape. I made gaskets out of the plastic with a circle cutter and stretched it over the plenums, then air tight tape to seal everything to the plastic/ PIR. The walls also needed some IWI to meet the tighter regs, so decided to go with 25mm PIR. This also added another seal for the plastic airtight layer and walls. The poly steel ICF has these metal plates at 150mm ctrs that allow the cladding battens to be secured externally and the plasterboard internally, we used self tapping drywall screws and insulation discs to hold the PIR in place before installing the plasterboard. Picture for detail below. At this stage we've got a large airtight box. Now it's a case of installing the stud work. I lined the plant room with pre painted 12mm OSB, and the bathroom with 18mm OSB ( a Scottish building regs requirement needing the ability for future hand rails etc) Electrics are simple, a few Ethernet points and sockets and spotlights. One pendant over the dining( and if I get my way, and budget allows pool table). The only penetrations from the loft are a light, PV cables, TV aerial, and 4g antenna cables. These are in conduit and sealed both ends. All other cables run in the ceiling void or stud work. I've put a few sensors in the studwork for future Arduino projects to accompany the in slab sensors. The plant room is compact, and work in progress. The PV is up and running and to date produced just shy of 300KwH in 5 winter weeks With the first fix complete it was time to plasterboard, we got 80 boards delivered Wednesday midday, just as storm Babet hit, it was too windy to bring them in, I tried, I failed so it had to stay outside 😭, covered in plastic, tarpaulins, scaffold boards and the obligatory ratchet straps. 3 days of constant 35mph gusting 50mph gave opportunities to check for airtightness. I managed to install the flush shower tray during this downtime. Once the storm blew though we got the boards inside and cracked on, the open plan lounge, diner, kitchen was boarded first and as soon as it was complete I skimmed the ceiling, 11 boards was too big for me and my tennis elbow, that coupled with not plastering anything for several years. I split the room in two and used several layers of scrim tape to plaster up to, then remove the scrim tape and skim the 2nd part. It worked well, and it's painted and the join is seamless. The next few days we mixed it up skimming in the morning and boarding in the afternoon for the next day. Today is day 182 of the build, this is basically from the cleared site that was down to rock with the pecking already done. Currently the house is fully skimmed, most of the ceilings have been primed and painted white and we started the kitchen install today. All the bathroom is here waiting to be installed, and some appliances are here most arriving this week. This has been pretty much 7 days a week, with only around 12 to 18 days off to earn some money and pay off some labour debts. We're hoping to move in, in 2 weeks with a working bathroom and kitchen 🤞, the static has now reverted to ice box during the night🥶14 points
-
When we purchased our plot in early 2020, I decided to do the conveyancing myself (as I'm basically a tight-arse). I didn't want to pay a solicitor to take months to do something I could easily do myself. Having completed that successfully, the purchase was finalised, and I then filled in the SDLT form and sent off a cheque for the tax that I believed was due. At that point, being aware that this was a second property, I calculated that we owed SDLT at the higher rate, so £5,000 on a plot purchased for £150,000. Skip forward to September 2022, perusing on Buildhub I discover that a building plot is not necessarily a residential property for the purposes of tax. News to me! I went back to HMRC's website, and learned that if the plot was non-residential, then the tax I owed would have been £0 (as the threshold starts at £150,001). As the plot we bought had previously been an agricultural field, prior to the vendor having obtained planning consent, then it was indeed non-residential for tax purposes. I contacted HMRC's helpline to discuss, and the chap I spoke to kindly explained that I could write in and ask them to repay me. I'm not sure whether he was aware or not, but at that point there was actually 0% chance of HMRC repaying us. The rules said that I had only 12 months from the date of completion (June 2020) to revise my SLDT submission. After that, tough luck. Any incorrectly paid tax would not be repaid. HMRC replied to my first letter, rejecting my request on the grounds that I had not quoted the piece of law I was relying on to ask for it. I then spent an entire weekend researching caselaw on situations such as mine. What an exercise in disappointment that was, to put it mildly. I read every single published judgement on SDLT cases for the previous 5 years, as well as the relevant regulations themselves, and concluded that there was simply no basis for me to persuade HMRC to repay us. I was crestfallen, and had to admit to HWMBO that I had gifted £5k to the Treasury out of my own ignorance, and my unwillingness to pay legal fees. Still, I decided that it was worth one final try, and I sat down in January to write the mother of all letters to try to persuade HMRC to repay us. I explained my mistake, cited the regulations, and asked if they could exercise discretion to allow a late amendment to the SDLT1 form on the grounds that they had themselves checked the form at the time and had not identified my error, despite there having been enough information on the form for them to have reasonably suspected that the property was not residential. I said that if they would not do that, would they please consider opening an enforcement case against us so that they could review whether we had paid the right amount of tax, and calculate for themselves what we owed (which was the only legal route that would allow them to revise the SLDT1 form beyond the time limit). Then I went for the heartstrings, saying that we really couldn't afford to gift this money to the Treasury, and if they could please see their way to reimburse us, we would be eternally grateful. A couple of weeks ago HWMBO found a credit in his bank account of £5089.00 with a reference of 'HMRC SDLT'. They had not only repaid us, but added interest for the time they had had the money. They haven't written to us to say why they decided to do this, so I've no idea which part of the letter was effective, but it feels churlish to question it. A very salutary lesson in there for me. And perhaps for some of you too.14 points
-
This banner is here as part of the Keyfob offer, supporting young enterprise and the forum. You can find out more about HERE. BuildHub is a non-profit, self-funding forum, run by volunteers. We've grown steadily over the years to become the UK's largest (and certainly best!) self-building and renovation forum. While the unpaid contributions of our volunteer managers, administrators and moderators help reduce our running costs, we still have unavoidable direct expenses, such as software and hosting. Unusually for a forum of our size - we recently registered our 14,000th member - BuildHub does not accept sponsorship or run ads as a way of covering our outgoings. We therefore occasionally turn to you, BuildHub's wonderful members, to ask for donations. If you are able to make a financial contribution at this time, it would be very much appreciated. There is no minimum or suggested donation amount, and even a small donation will have a positive impact. Donations via PayPal can be made to the following email address. Please remember to select 'gift' / Friends & Family or Paypal will charge fees. fundtheforum@buildhub.org.uk You can also request the forums bank details, please PM @newhome for those details and let her know of your donation. We'll post again once we've received sufficient donations to cover expenses due in the foreseeable future. BuildHub's Treasurer, @newhome, manages our funding account. Could anyone wishing to make a donation please send her a PM with your email, username, and the amount that you have pledged so she can confirm receipt of the funds and log your donation accordingly? All donations will be treated as confidential. If you can offer any skills that may assist with the support of the forum, please contact either Herb (@HerbJ) or Mike (@MikeSharp01) for details about how you can help. Accountancy and Technical skills, such as Linux or forum software administration, experience would be particularly valued or if you would just like to help more generally please feel free to get in contact. Thank you, as always, for your ongoing support.14 points
-
Air test today, had one done on the unfinished house to get an idea if anything was wrong before I start plaster boarding. Final test figure 0.28. Which I think is rather spiffing. I would like to thank my team. The wife for support and finance ralf and woody the wonder dogs,for guard duties and @Nickfromwales for the cakes and singing. .14 points
-
Now that the main part of our house is finished, I sat down and added up the build cost, excluding land cost, design, planning legal and professional fees. Total cost £141K House floor area 147 square metres So that's a cost of £959 per square metre. Well chuffed to just get in under £1k /m2 That is just the main part of the house. The sun room is yet to be completed (though that cost above does include the shell and the roof of the sun room) and there is still outside work to complete like decking, driveway to finish etc.14 points
-
Completion certificate received. I guess it's no longer a dream.....14 points
-
Well my “ Discount offer of the week” has been my best score yet, as some of you will know I am doing my build on a rock bottom, empty barrel budget, it’s just the way things are and I’m ok with it, but it has made me develop lots of contacts for getting materials as cheap as possible and recycling / up-cycling wherever I can. One of my local builders merchants has undergone a radical management and staff changeover and cutting a long story short after introducing myself and showing them photos of my project the new management have offered me a substantial amount of materials for my project for free.... today I have started the long job of collecting pallets of paving bricks, they have just gifted me a minimum of 15 full pallets of brand new but old stock pavers in a variety of colours. It’s an unbelievably generous offer and I am over the moon, though I am not ready just yet to go crazy with my paving it will in the future make my property look totally amazing. Really overjoyed that there are still some incredibly friendly and generous people out there who are happy to help out a stranger doing a budget build. Living in my remote location with a small ferry ride and two miles of steep dirt track and restricted to only being able to carry 2.5 tons means I am going to be very busy next week hauling all my plunder back !14 points
-
Sorry for the delay since the last blog. Things have been very hectic keeping a track of everything that is going on with the build and holding a job down ! As we approach end of January and move into February there are lots of things going on simultaneously on site including battening the roof in preparation for the roofers, finishing of fitting the smartply in preparation for blowing in the insulation and fitting the windows and doors. The first window goes in on 30th January. Many of the side reveals to the windows have splays to help spread the light from the window. We are using Green Building Store Progressions windows and Green Building Store Ultra doors. The Progression windows are expensive, but the narrow sight-lines give a lovely contemporary look and very little of the frame is visible outside, so it should be as maintenance free as you can get and seems like a good investment. The Ultra doors look very similar to the Progression doors and are of a similar thermal performance but are more cost effective to purchase. From the 12th - 15th February, the Warmcell insulation is blown into the frame. I hadn't realised, but you can do this before all of the windows are fitted, as long as the boarding out is completed inside and out. By 21st February all windows and doors are fitted. A lot of time has gone into ensuring the windows are fitted properly and are as airtight as possible. In parallel, the brick plinth is built. Whilst you won't see all of this once the ground levels are built up, I am really pleased with the quality of the job. Next job is and fitting the Aquapanel in preparation for the rendering. The roofer we had lined up pulled out at the last minute, but we are able to get a local firm with a good reputation to take their place at short notice. We took a lot of trouble selecting the roof tiles and we are particularly looking forward to seeing the tiles laid. The roofers are on site beginning of March after a small delay due to rain to do the counter-battening and lay the tiles. The roof is a pretty simple shape so the roofers make quick progress. We are using plain clay smooth machine-made tiles made by Dreadnought tiles and supplied by Ashbrook Roofing. We found out about them at a self build show we attended and have had great support from both Dreadnought and Ashbrook. We are using two colours - 70% staffordshire blue and 30% blue brindle mixed randomly. Before you know it, the roof is in place. Big Day on 8th March as it is our first Air Test. We'd put 0.3 air changes per hour (ach) @ 50pa into phpp so we were hoping for something similar or better. Results were: 0.08 ach @ 50 pa 0.11 m3/hr/m2 @50 pa Absolutely delighted with the results. Given building regs are 10 m3/hr/m2 @50 pa and Passivhaus standard is 0.6 ach @ 50 pa, this is over 90 times better than building regs and over 7 times better than Passivhaus standards and a great testament to the attention to detail shown by the build team. Flashings between the wood cladding and the render are fitted. These were made by a Herefordshire based fabricator. Work continues fitting the cladding. We are using Douglas Fir, supplied by Ransford which is literally 5 minutes down the road. Once the roof has been laid and the weather allows, the rendering starts. We are using the Weber system, with a base coat applied first followed by a thin silicon based top coat which will be sprayed on. The roof and detailing around the dormer window are completed Once the cladding is complete and before the scaffolding comes down, we need to treat the cladding. The gable ends need a fireproof coating due the proximity of other houses, so it's one coat of primer, two of Envirograf and two of Osmo. The front and back of the house get one coat primer and two of Osmo. It's one of those jobs that costs more and takes longer than expected. We hadn't planned on having to to apply so many coats of product and in my naiveity I thought it would be a layer or two of fireproof coating on each gable. The wood looks a little orange at the moment but that is typical when new and it does weather down nicely which is what I plan to allow the wood to do. Hopefully to osmo will help even out the weathering but I have no plans to keep on applying it. The guttering is attached whilst the scaffolding is still up (Lindab galvanised) The scaffolding on the house comes down and goes up on the garage to allow the roof to be completed on the garage. The second coat of render is sprayed on and the shell of the house is now complete.14 points
-
And so almost another month has gone by but progress is still being made on the build and, just as importantly, hubby and I got away for a week's holiday in northern France just as the warm weather hit. After our abject failure at R&R over Christmas, it was wonderful to have a really relaxing break without illness or stress and come back refreshed for the final push on the build, which is just as well as there's a busy time to be had over the coming weeks. In the last blog entry, I detailed some of the painting and kitchen fitting that had been going on and there's been more of this recently. I've been getting the colour coats onto the walls upstairs but haven't managed to complete a room yet apart from the kitchen, but I'm generally pleased with the neutral colour choice. I say generally, though, because in the lounge, the different light in there makes the wall colour bring out the warm tones of the internal window frame finish which makes them look a slightly odd peach colour. It's not awful and I'm not going to change it now, but if we ever redecorate (hah!) it will be something I check before committing. For the more vertiginously challenged amongst you, you may wish to look away now, as here's a view from the top of my internal scaffold tower when I was putting the colour coat on up to the vaulted ceiling above the gable window in the guest bedroom. And here are the colour choices. The purple will be on one wall only. It looks a bit garish at the moment but once the room has its furniture and soft furnishings in, it should tone well and add a bit of life to the room. Cutting in and painting up to the high vault was a bit of a challenge, but I got there. I really didn't want to get any colour spatter onto the white ceiling so opted to use paint pads rather than a roller and I was pleased with the outcome. They give a good finish over the sprayed mist coat and are far less physically demanding than a roller. I was painting upstairs as the flooring guys were in downstairs putting in the karndean (same choice as upstairs) and it kept me productive but out of the way. Given all the work that went into making the dropped section of the ceiling in the lounge area, I wanted the floor to echo this but not in too obvious a fashion and so the team took a laser reference from the inner square of the lounge feature and reversed the direction of the planks, using a feature strip to create a subtle border. First, though, they had to screed the floor with a latex self levelling compound. In preparation for this, I needed to turn off the UFH a few days before they arrived to make sure the screed didn't go off too quickly due to the heat of the slab. I turned it off on a Friday afternoon and they started work on the following Tuesday and it was just about perfect. Once the screed was down, the floor was scraped to make sure it was completely level and then primed. After the priming, the planks were put down. Here is the snug - I went in the weekend before the flooring guys arrived to get the mist coats and ceiling painted as it's far easier to do when you only have to mask the windows and not worry about any other area. Here's the long view of the kitchen/lounge area: And here's a close up of the feature border underneath the ceiling feature: Moving on from the flooring and painting, my joiner, Harry has been busy at work on the kitchen. In particular, he was working on the large walnut work surface for the island. I decided months ago that I wanted solid walnut for the island but then, as I'm sure happens to many, I had a last minute dither and started looking at other materials instead. In the end, I decided that granite or other stones really didn't give the colour tones that I wanted and laminates weren't wide enough. I sourced the walnut from Worktop Express as they were very competitively priced for what I wanted, and delivery was quick. I looked at using their online template service, but it was just too tricky to get the different profiles right and, in the end, decided to get Harry to make up the island top on site. It was absolutely the right choice as he's done a lovely job on it. Here's a photo of the finished top with the induction hob surface mounted into it. A word on the hob. You can recess the work surface so that the hob is flush, but I preferred it to be surface mounted, sitting proud of the walnut, purely from a cleaning point of view and so I don't have to spend ages digging out crumbs and bits of food debris from around a flush recess. These are the two worktops as they arrived from the supplier, waiting to be joined together. Harry routed along their length, used a biscuit join and then glued and clamped. The worktops being clamped. They look and, indeed, are lighter in shade than the first photo as they come treated with one coat of Danish oil. Harry put a further two coats on once he had sanded the finished surface. The area where there appears to be a base unit missing and where the surface projects beyond is intended as a breakfast bar area. There will be a supporting leg on the near right hand corner. Because the kitchen and island are large, I didn't want anything to be too matchy-matchy and wanted to break up any monotonous areas. Also, I didn't fancy walnut as the worksurface leading off the sink as I think that's asking for trouble in the long run. So, I went hunting through laminate choices. Way back when I was first considering the kitchen, I had been thinking about using large format tiles with a metallic type finish as the splashback, but it was proving to be a gruelling and not very fruitful search. When I eventually revisited this part of the kitchen a couple of months ago, I came across some laminates with exactly that type of finish, nice long runs (I need a 4m run for the back work surface) and with matching splashbacks. I also wanted to line the recessed area under the island with the same material to make it more durable and give a contrast in materials and textures. I sourced the laminates from a firm called Rearo and dealt with their Newport branch. They were lovely to deal with and very helpful. Here's the splashback applied to the breakfast bar recess. Harry beefed it up and packed it out with some ply and then put the laminate edging onto the ends to give a substantial look. Whilst we were away on holiday, my splendid general builder and neighbour, Drew, got on with putting the rainwater goods up. I'd ordered in soffits and fascias from Fascia.com as they had the width I needed in anthracite grey to match the slates and windows, as well as vented soffits, which save a lot of bother and look much neater. The guttering is all deepflow and was mounted onto black fascia board. I looked at other colours of guttering, but none of them were quite right and black guttering is so ubiquitous that the eye kind of slides past it. Having it mounted on the fascia board also reduces the visual impact of the brackets that can look a bit clunky. Whilst he was up there, Drew also mounted our swift boxes and bat boxes. We were required as part of our bat licence conditions to put a bat box somewhere on site, but this is something that we had planned to do all along. Also, there has been a dramatic loss of habitat for swifts that migrate to the UK to breed in the summer and we wanted to make provision for these too, in the hope that we're lucky enough to attract them to our site. These fabulous birds migrate 6,000 miles to reach their summer breeding grounds and are the fastest birds in level flight. Once they have fledged, the only time they ever land again is to sleep and recover from their migration flight and to feed their young. They are the most fabulous birds and I would urge anyone to make provision for them wherever possible. If anyone wants details of where to buy some brilliant swift boxes, PM me and I'll send you the details. Here are the boxes, all sited on the western corner of the north facing wall. Finally, today marked a milestone in the house progress - the scaffolding is coming down. Our foul and surface water drainage works start on Wednesday and the site needs to be clear to allow access for that. Any remaining work at height can be done from ladders apart from the cladding, but I will hire a separate mobile tower of some sort for that work once I've had a chance to identify what will be most suitable. The stone cladding arrived a couple of weeks ago, ready to go up once the drainage work is done, more details of which will follow in the next post. Here's the south face gradually being revealed. The crates to the right of the picture are the stone cladding. Here's the east face slowly coming into view. And another view of the same. Work planned for this week is more plastering, more painting (if I get the chance as I'm the plasterer's labourer this week), groundworks and starting to move some young trees to the site that we've been nursing in pots at home for 12 months. Next week, the en-suite bathroom will be started, the kitchen finished and the utility room kitted out. Plenty to do yet. TTFN.14 points
-
Well, finally an update. We won the appeal. The inspector pretty much confirmed what we were saying all along about "overdevelopment" and visibility ("intent observer" wouldn't be able to compare the houses in the row due to vegetation) and the neighbour's houses not being the limit the plot can take. Happy days. Big thanks to everybody for the support and advice during this process. On the back of a recent post by @Big Jimbo and following a quick conversation with Mr Luxton at one of the shows I am seriously considering putting in another application that utilises space behind the existing attached garage to form a gym (ground floor only). I do want to bully the bastards who pretty much stole a year of our time - if I can. More questions to follow :-)14 points
-
Hi all, Been a bit quiet here recently as been focussed on getting a temporary Habitation Certificate and ready to move in. We moved in yesterday - and what a gorgeous day for it. Building Control visited two weeks ago for the final drains pressure test, something i was dreading - I could get it up to pressure but it didn't hold for long enough. I filled the system to floor level and the water never budged, so there was no obvious leak - maybe an AAV or trap somewhere? I explained this to the BCO and he was fine with the water level test and suggested maybe air is leaking up through a trap under pressure. I had a problem with the bath trap - a shallow one but actually, doesn't function as a trap at all, so I'm currently trying to find one I can retrofit as access is limited. There's a bit of a story to that (to make @pocsterfeel better) but that's for another thread. We have one bathroom to finish (planning doing that next week), some carpets and flooring to go down and lots of small internal bits to finish. Then over summer lots of external details need completed (window trims, reveals, proper downpipes, coping etc etc), the garage finished and driveway put in. First night way lovely apart from a minor disaster that I've only just recovered. Can't wait to enjoy the house over the summer, watch the wildlife come and go, hopefully get some honey from our bees (they survived the winter), start working on my cars again once I get my ramp and just enjoying the finer things a bit more. It's been a great experience, and one we both agree we would do again at some point. Not as big as this one tho, but this is likely to be our forever home. We've been building pretty much for three years non stop, it all seems a bit odd now as we recount all the different stages. Needless to say, we would have struggled a lot without this forum - thank you everyone - there is such a wealth of information here that almost every question can be answered, or nearly, and if not, it's only a few button presses and hours away, so thank you everyone - more often than not it's the basic questions that have been most useful. Back to work for me next Monday - I finished in December to focus on the house so back to Mon-Fri 9-5!

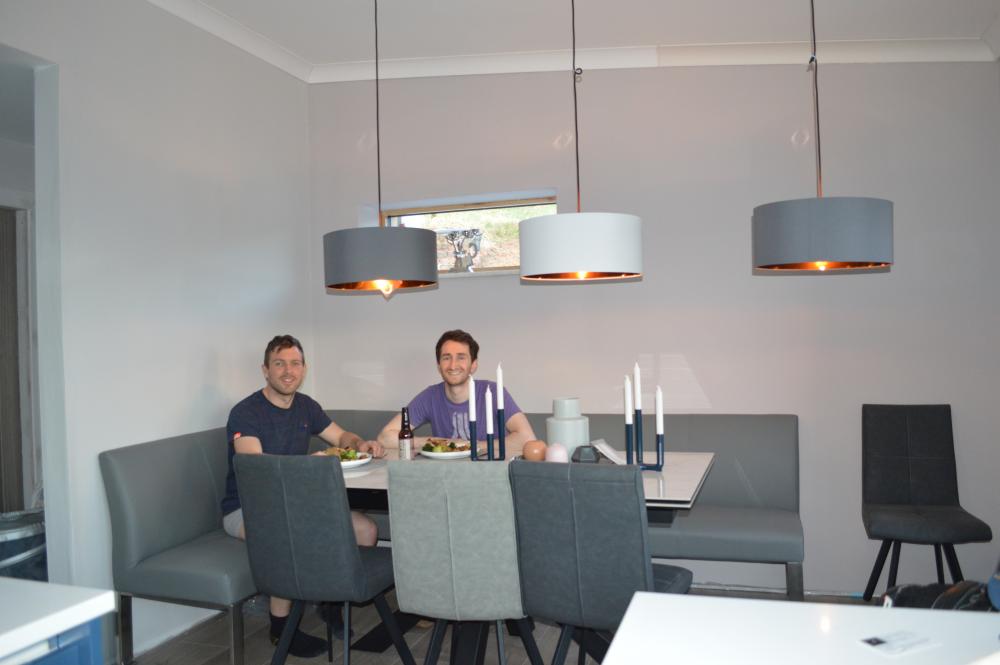
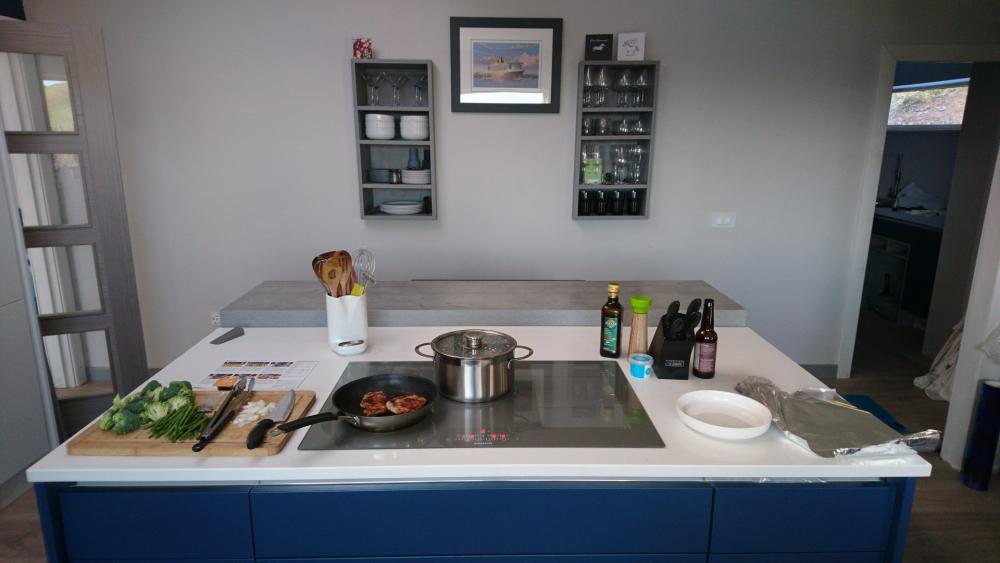
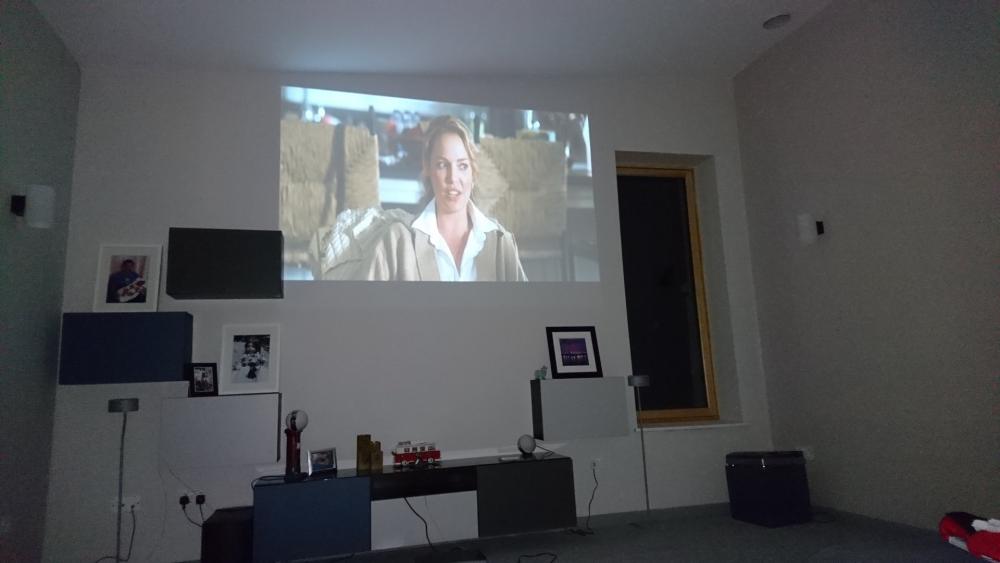
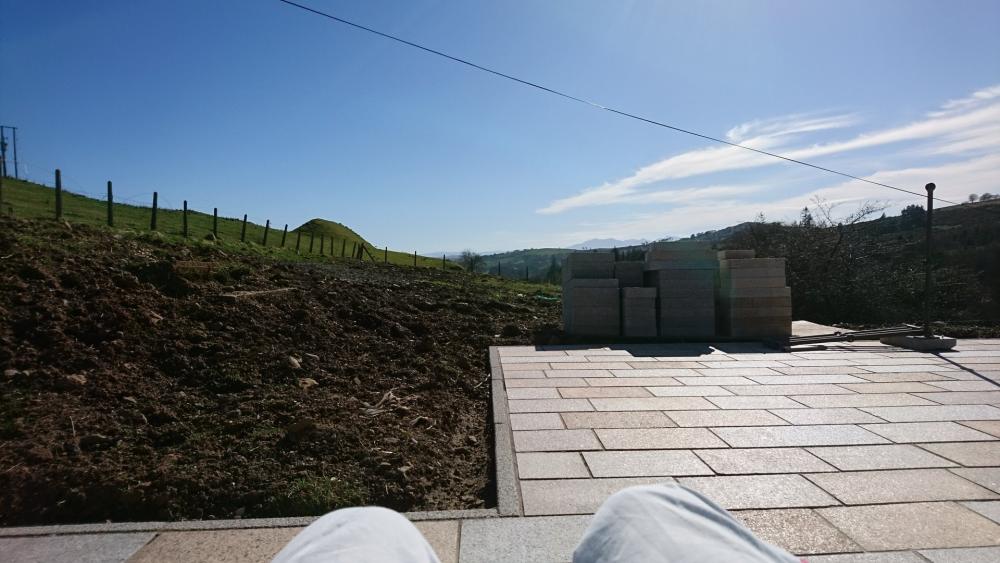 14 points
 -
Check this out, bit chuffed with this, never used a bender before.
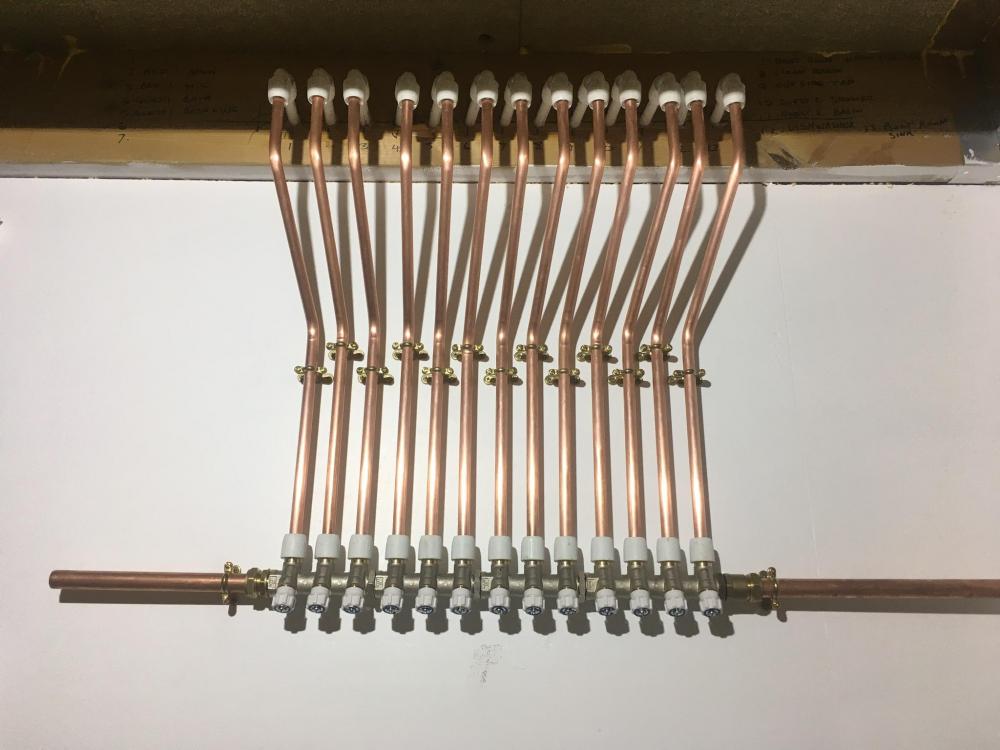 13 points
 -
First all my apologies as this blog entry is about about a year late given that we moved in August 2019, but better late than never as they say ! Moving on from finishing the shell, we moved onto completing the inside. We knew from previous experience this would be the most intensive part of the build and had tried to make as many decisions up front as we could regarding bathrooms, kitchens and flooring, nevertheless there were still a lot of decisions to make. Everything went broadly to plan with the electricians, plumber, carpenters and decorator all working well round each other and coordinated by the builder who had put up the shell. There was an awful lot of work ordering everything and making sure that material was on-site at the right time. There was the occasionally thing that didn't go to plan, most notably the kitchen where i had the bad luck to have my kitchen delivered with many missing and damaged components and a supplier who took 8 weeks to sort everything out. The trades were proactive and happy to suggest how we might achieve what we were looking for which was a great help, but by the end of the project we were both fit to drop. Self build is a very rewarding but exhausting business. Here are some pictures of the finished house. There is still a little bit of landscaping work, the fencing and some furniture to sort out and I guess at some stage we will sort out some blinds to replace the high-tech cardboard that is doing the job at the moment. Following the build, we sorted out the VAT refund - 500+ invoices and a £32,000 refund for VAT. I ordered just about everything and given the number of invoices I got someone to prepare the submission to HMRC this for me which was money well spent. The electrical certificate, certificate for the unvented cylinder, building certificate and warranty were sorted out and finally the last submission for the CIL exception was made. The Dog seems to like her new home ! Still a bit of work to do in the garden View from the study window13 points
-
Had the air tightness test & EPC done this week. Not really ready but had to do it to meet the deadline for the FIT. House nowhere near finished, just plastered, have 2nd fix to do & MVHR not on yet. Air test result was 0.41 & EPC A rated at 99. (Of course if I fit solar thermal at a cost of £4000 it could score 101 & save £64 a year. What nonsense.) Huge relief. My husband would have been so chuffed.13 points
-
One final push today saw all the furniture and curtains put in place- a big group effort with much input from the in-laws. I'm very fortunate to have a MiL who is an ace seamstress and who has a bit of a thing about Harris Tweed. To say I'm chuffed is a bit of an understatement. It's been over four years since the concept of this project first appeared, and three years since work began in earnest. Today we finally saw the culmination of all that effort as the building site was transformed into a home. It's exactly what I imagined: cosy, welcoming, stylish. We'll be listing it on the booking websites tomorrow (most likely a combination of AirBnB and Booking.com) so that will give me the impetus needed to tackle the lengthy snagging list and major outstanding jobs, most of which are on the outside. Some of the cladding details (corners and window reveals) aren't finished yet, the soffets need to be completed, and the biggest job of all is the decking. There's also the creature comforts of WiFi and TV to sort out. I know people come to Skye to get away from it all, but I bet the first thing they will ask for is a WiFi password Once again, huge thanks to everyone in the BuildHub community who has held my hand throughout this whole project. It's a lot smaller than many other builds, but it's been exceptionally hands on with me personally tackling almost every trade, from drafting the plans to building the kit; I even got an excuse to do some digger driving a couple of weeks ago.13 points


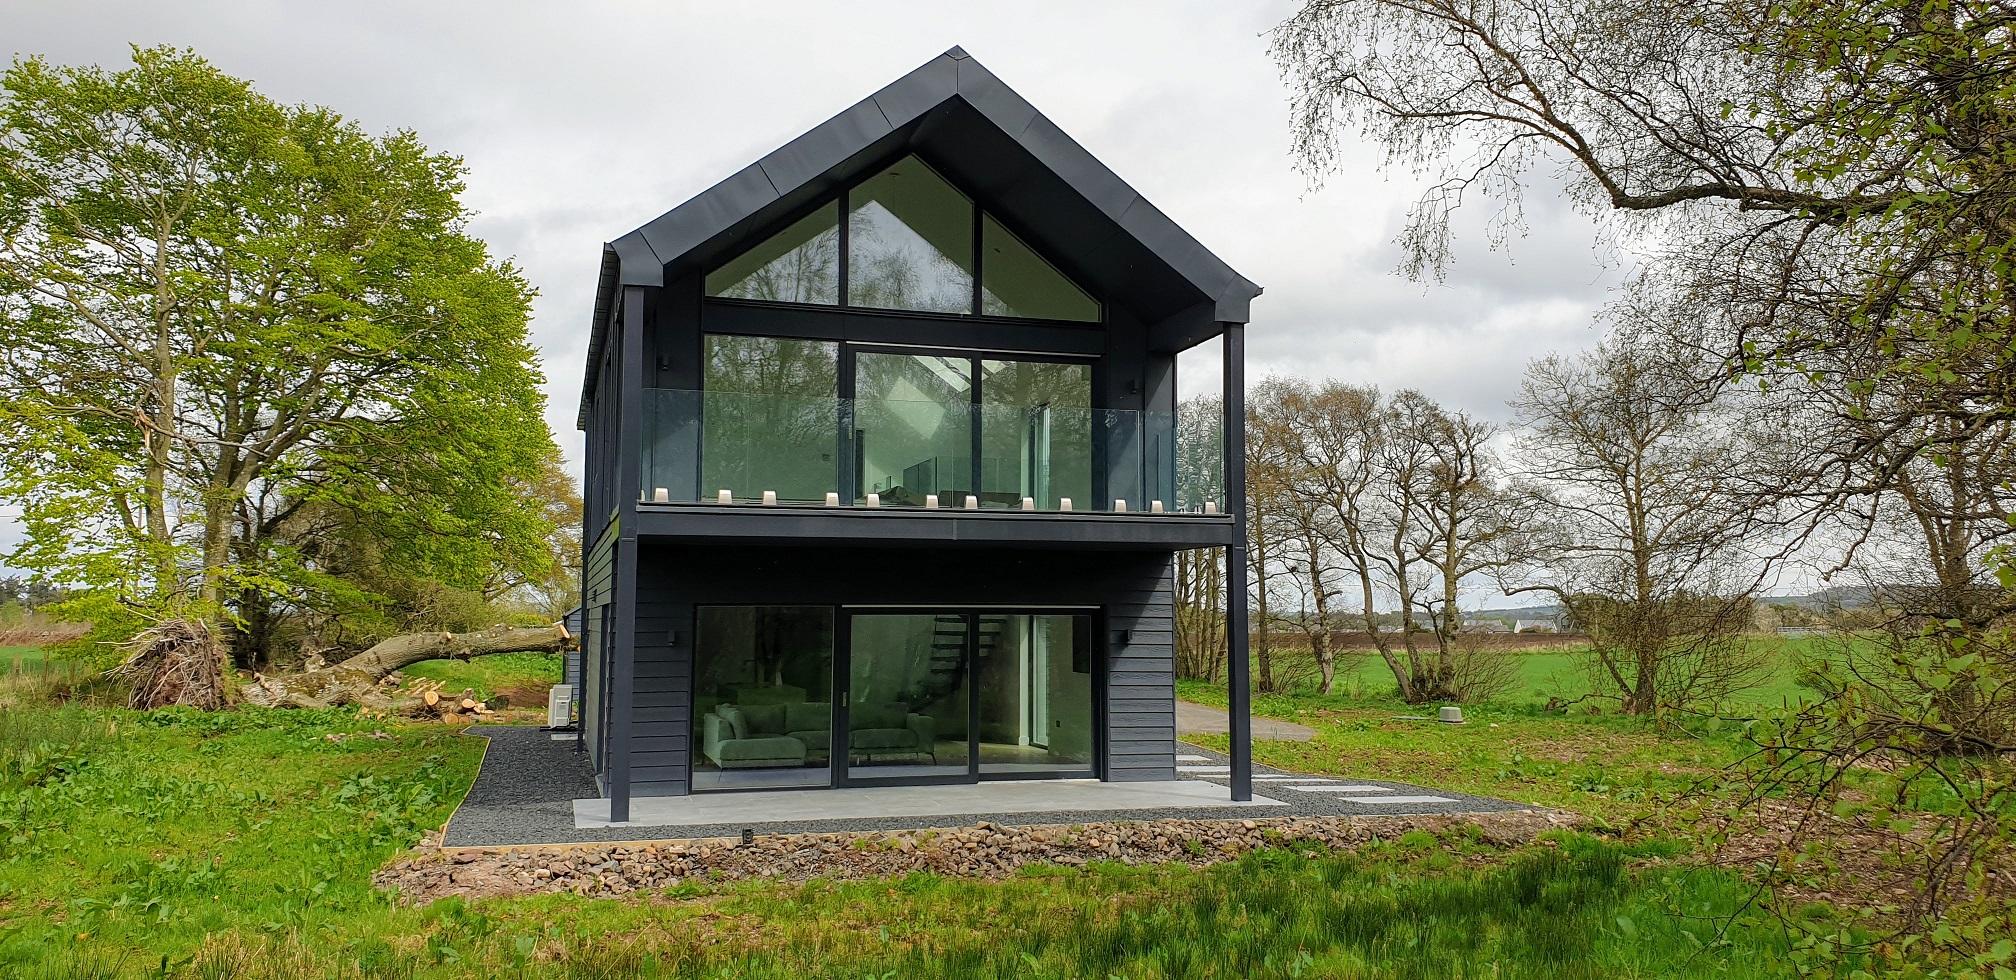


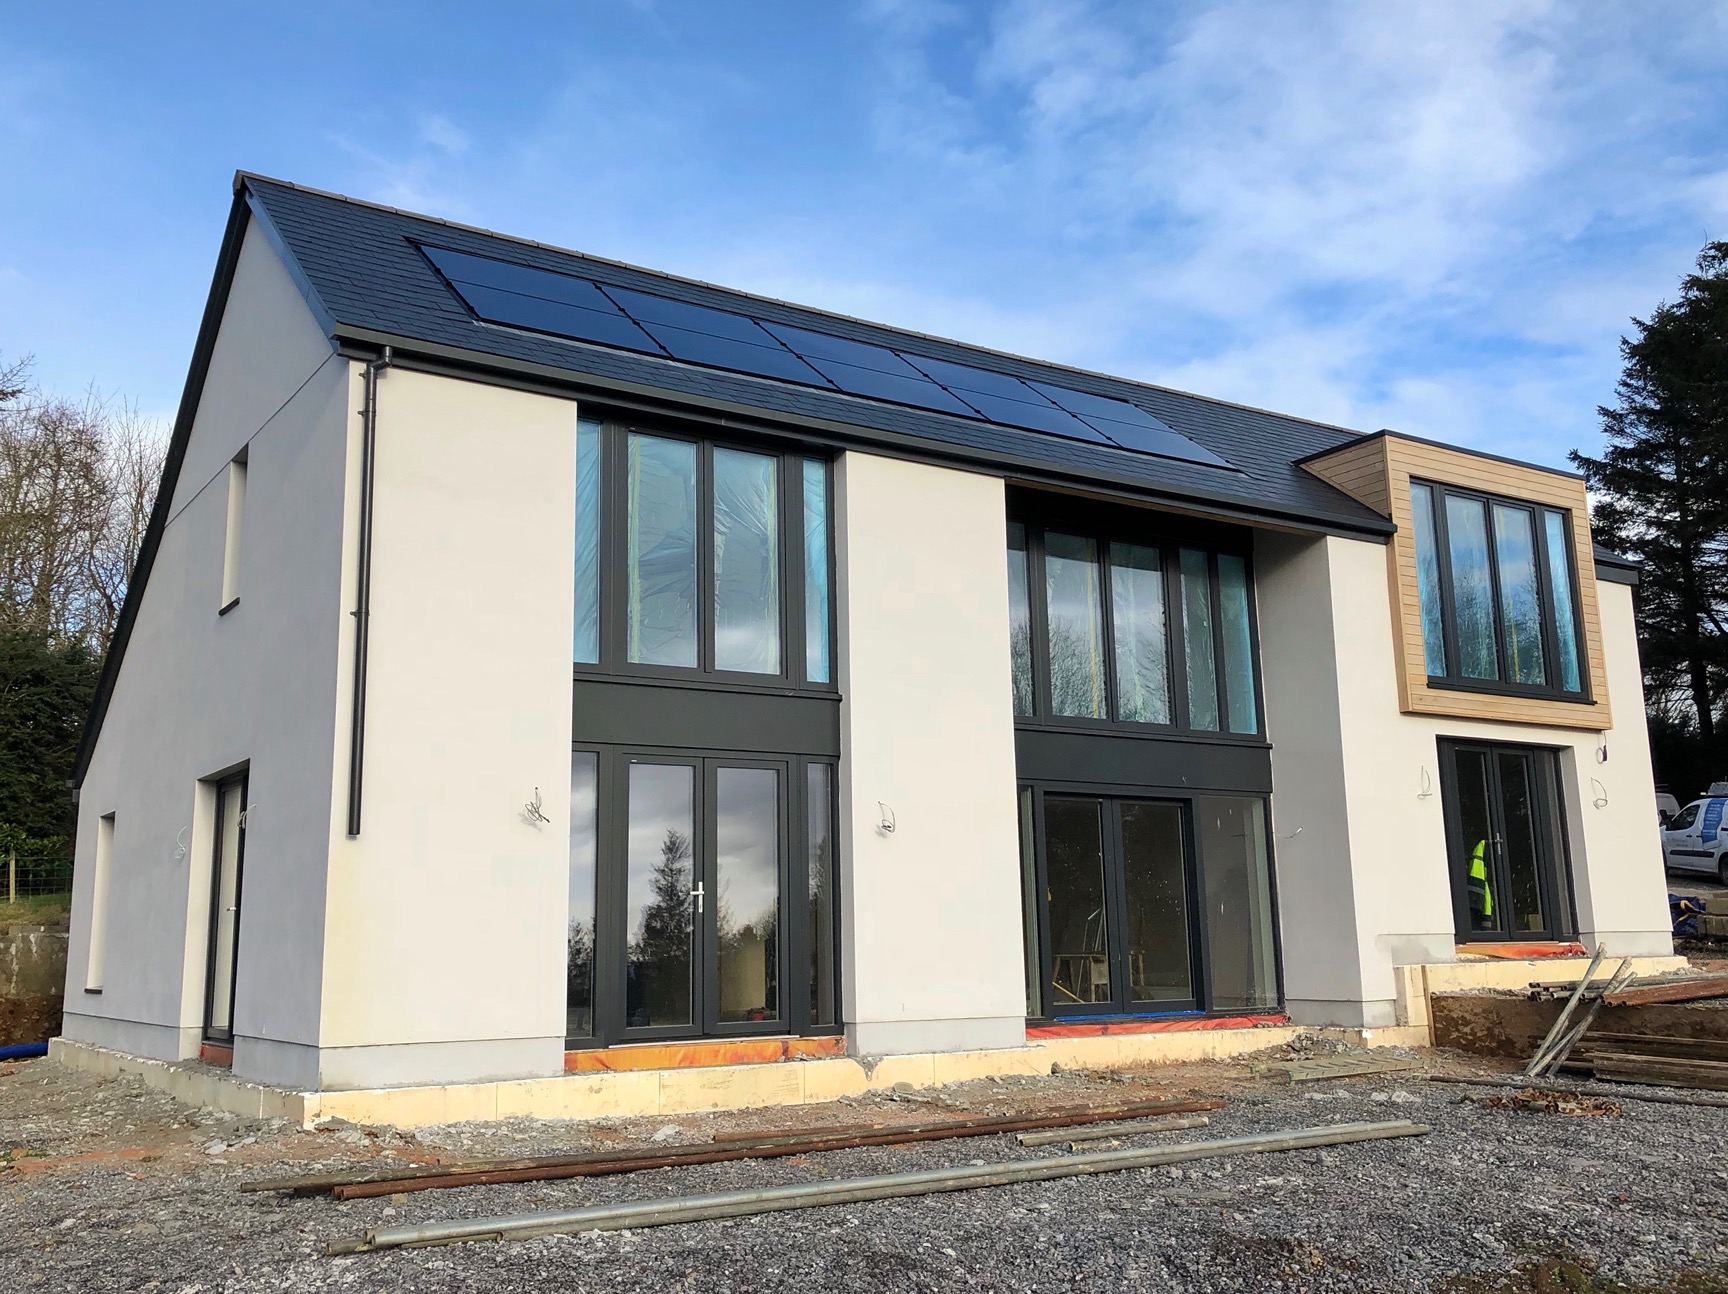


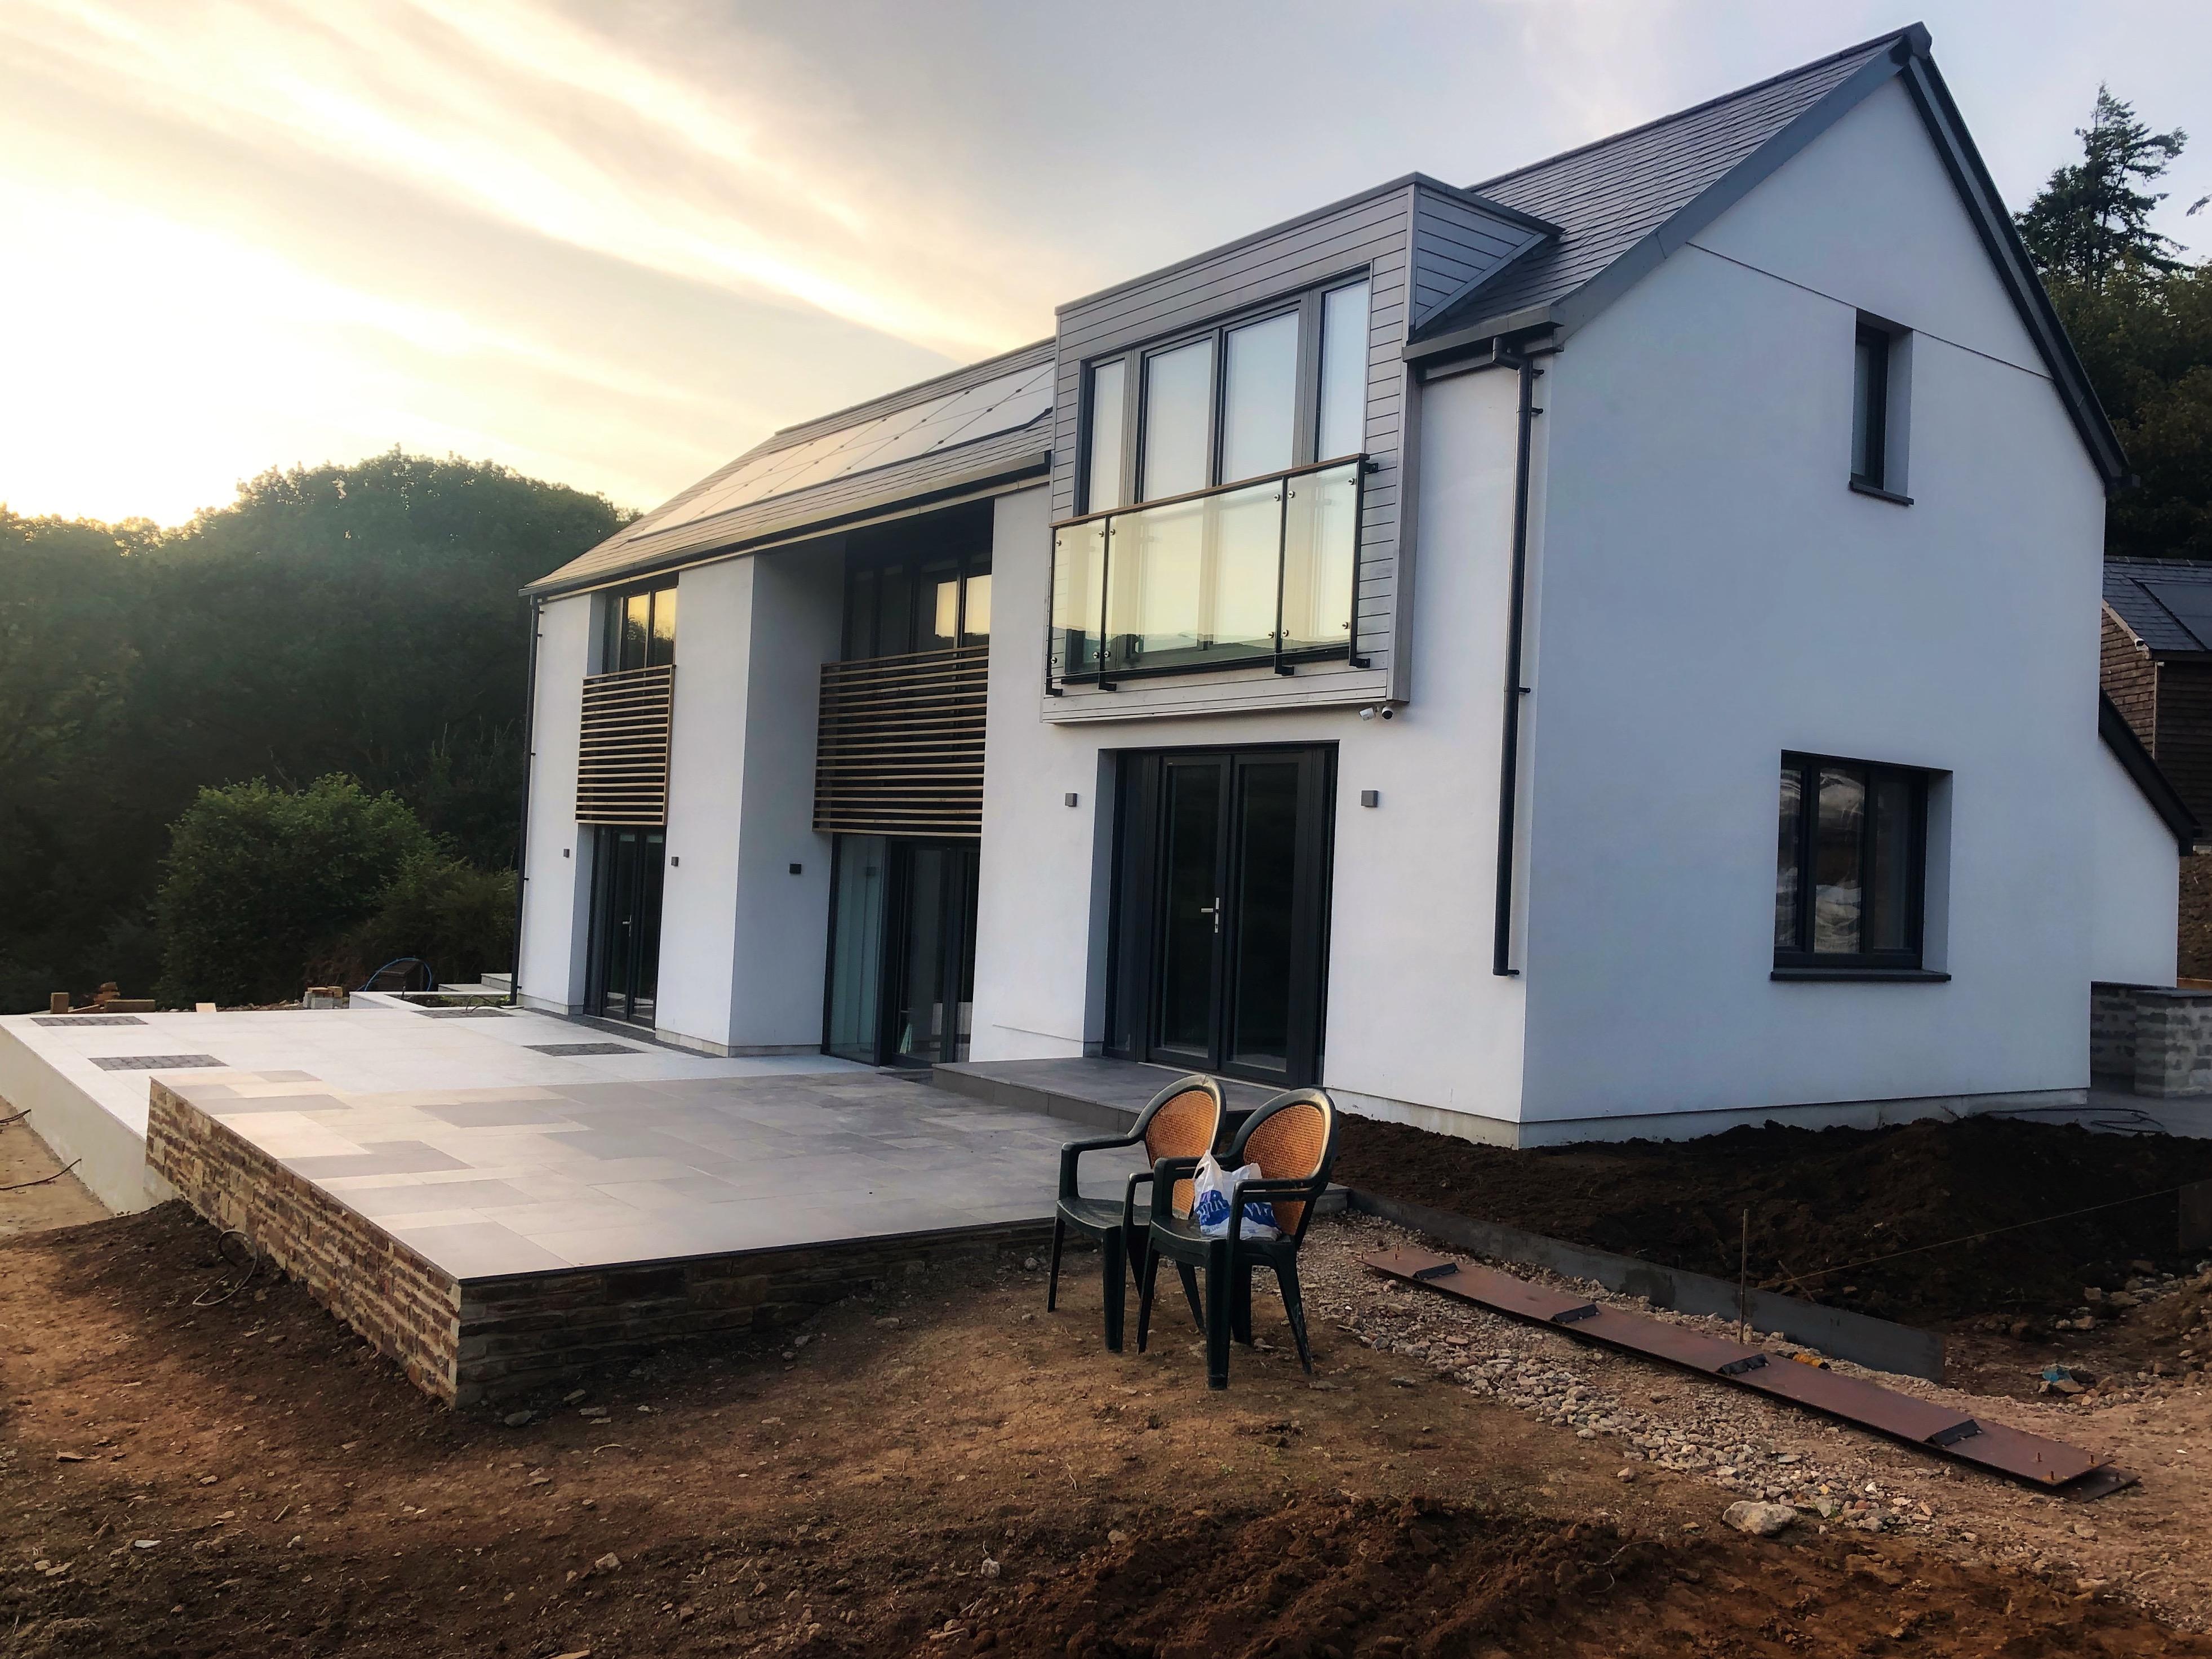


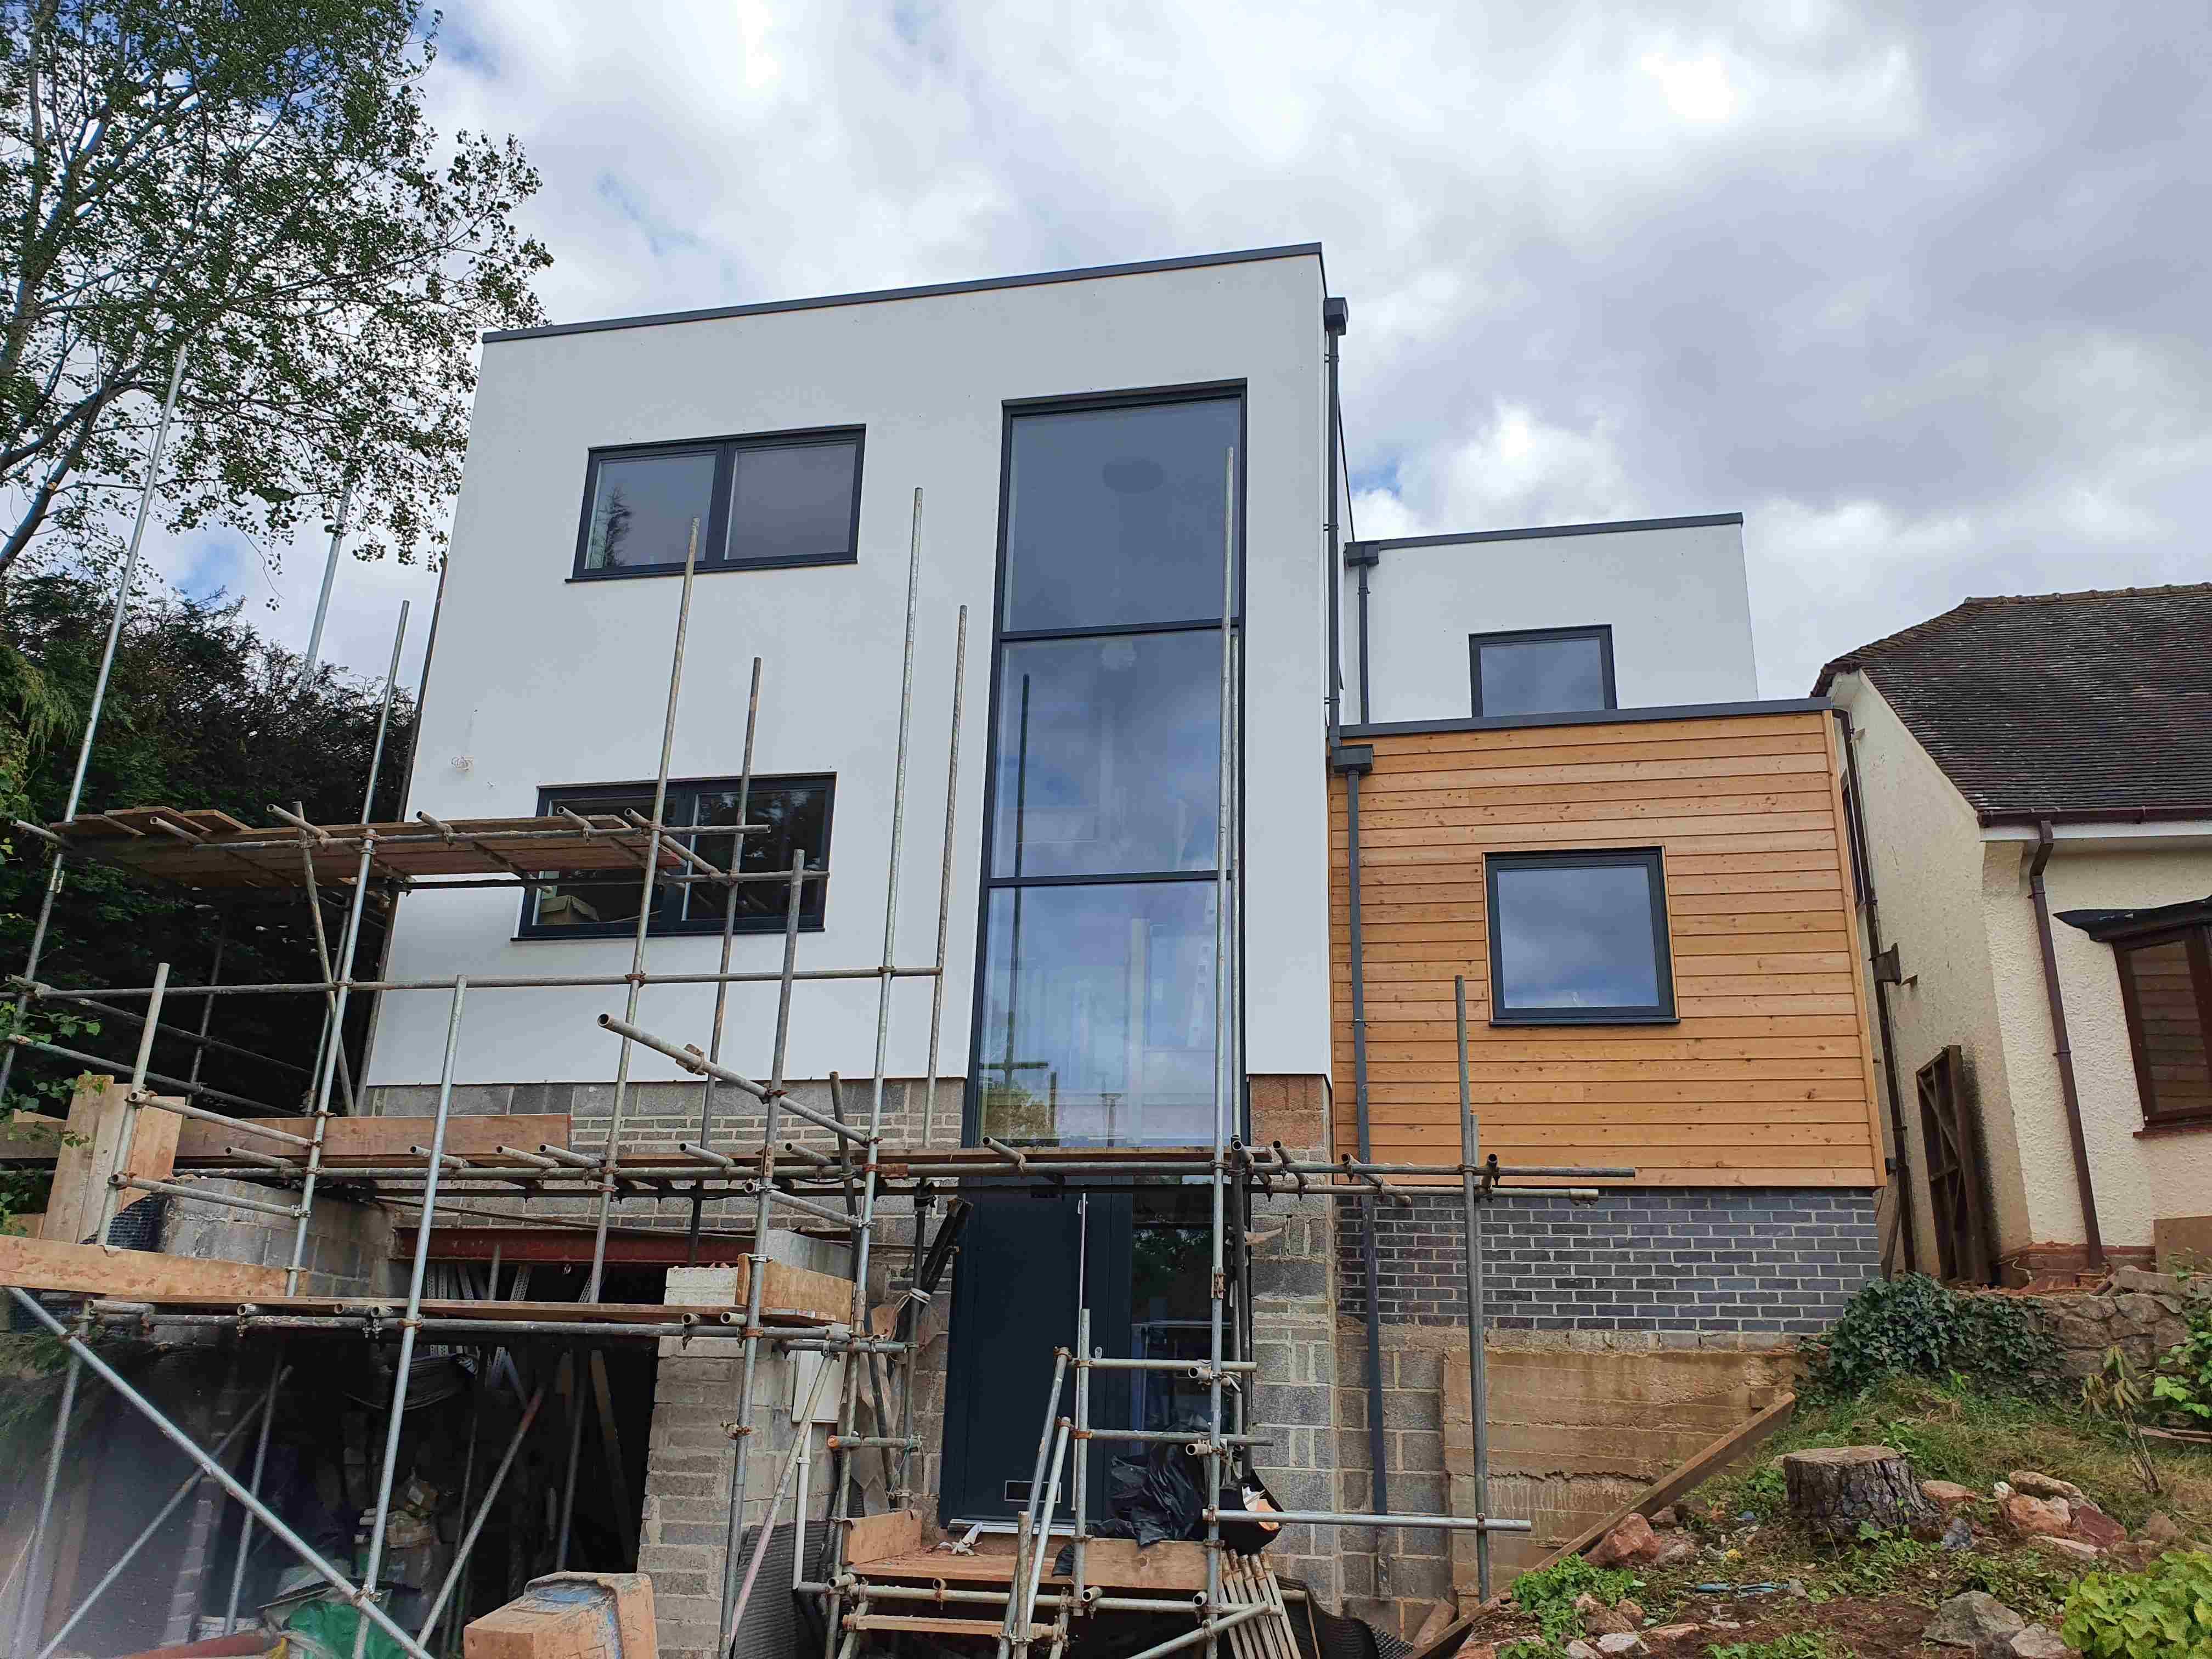


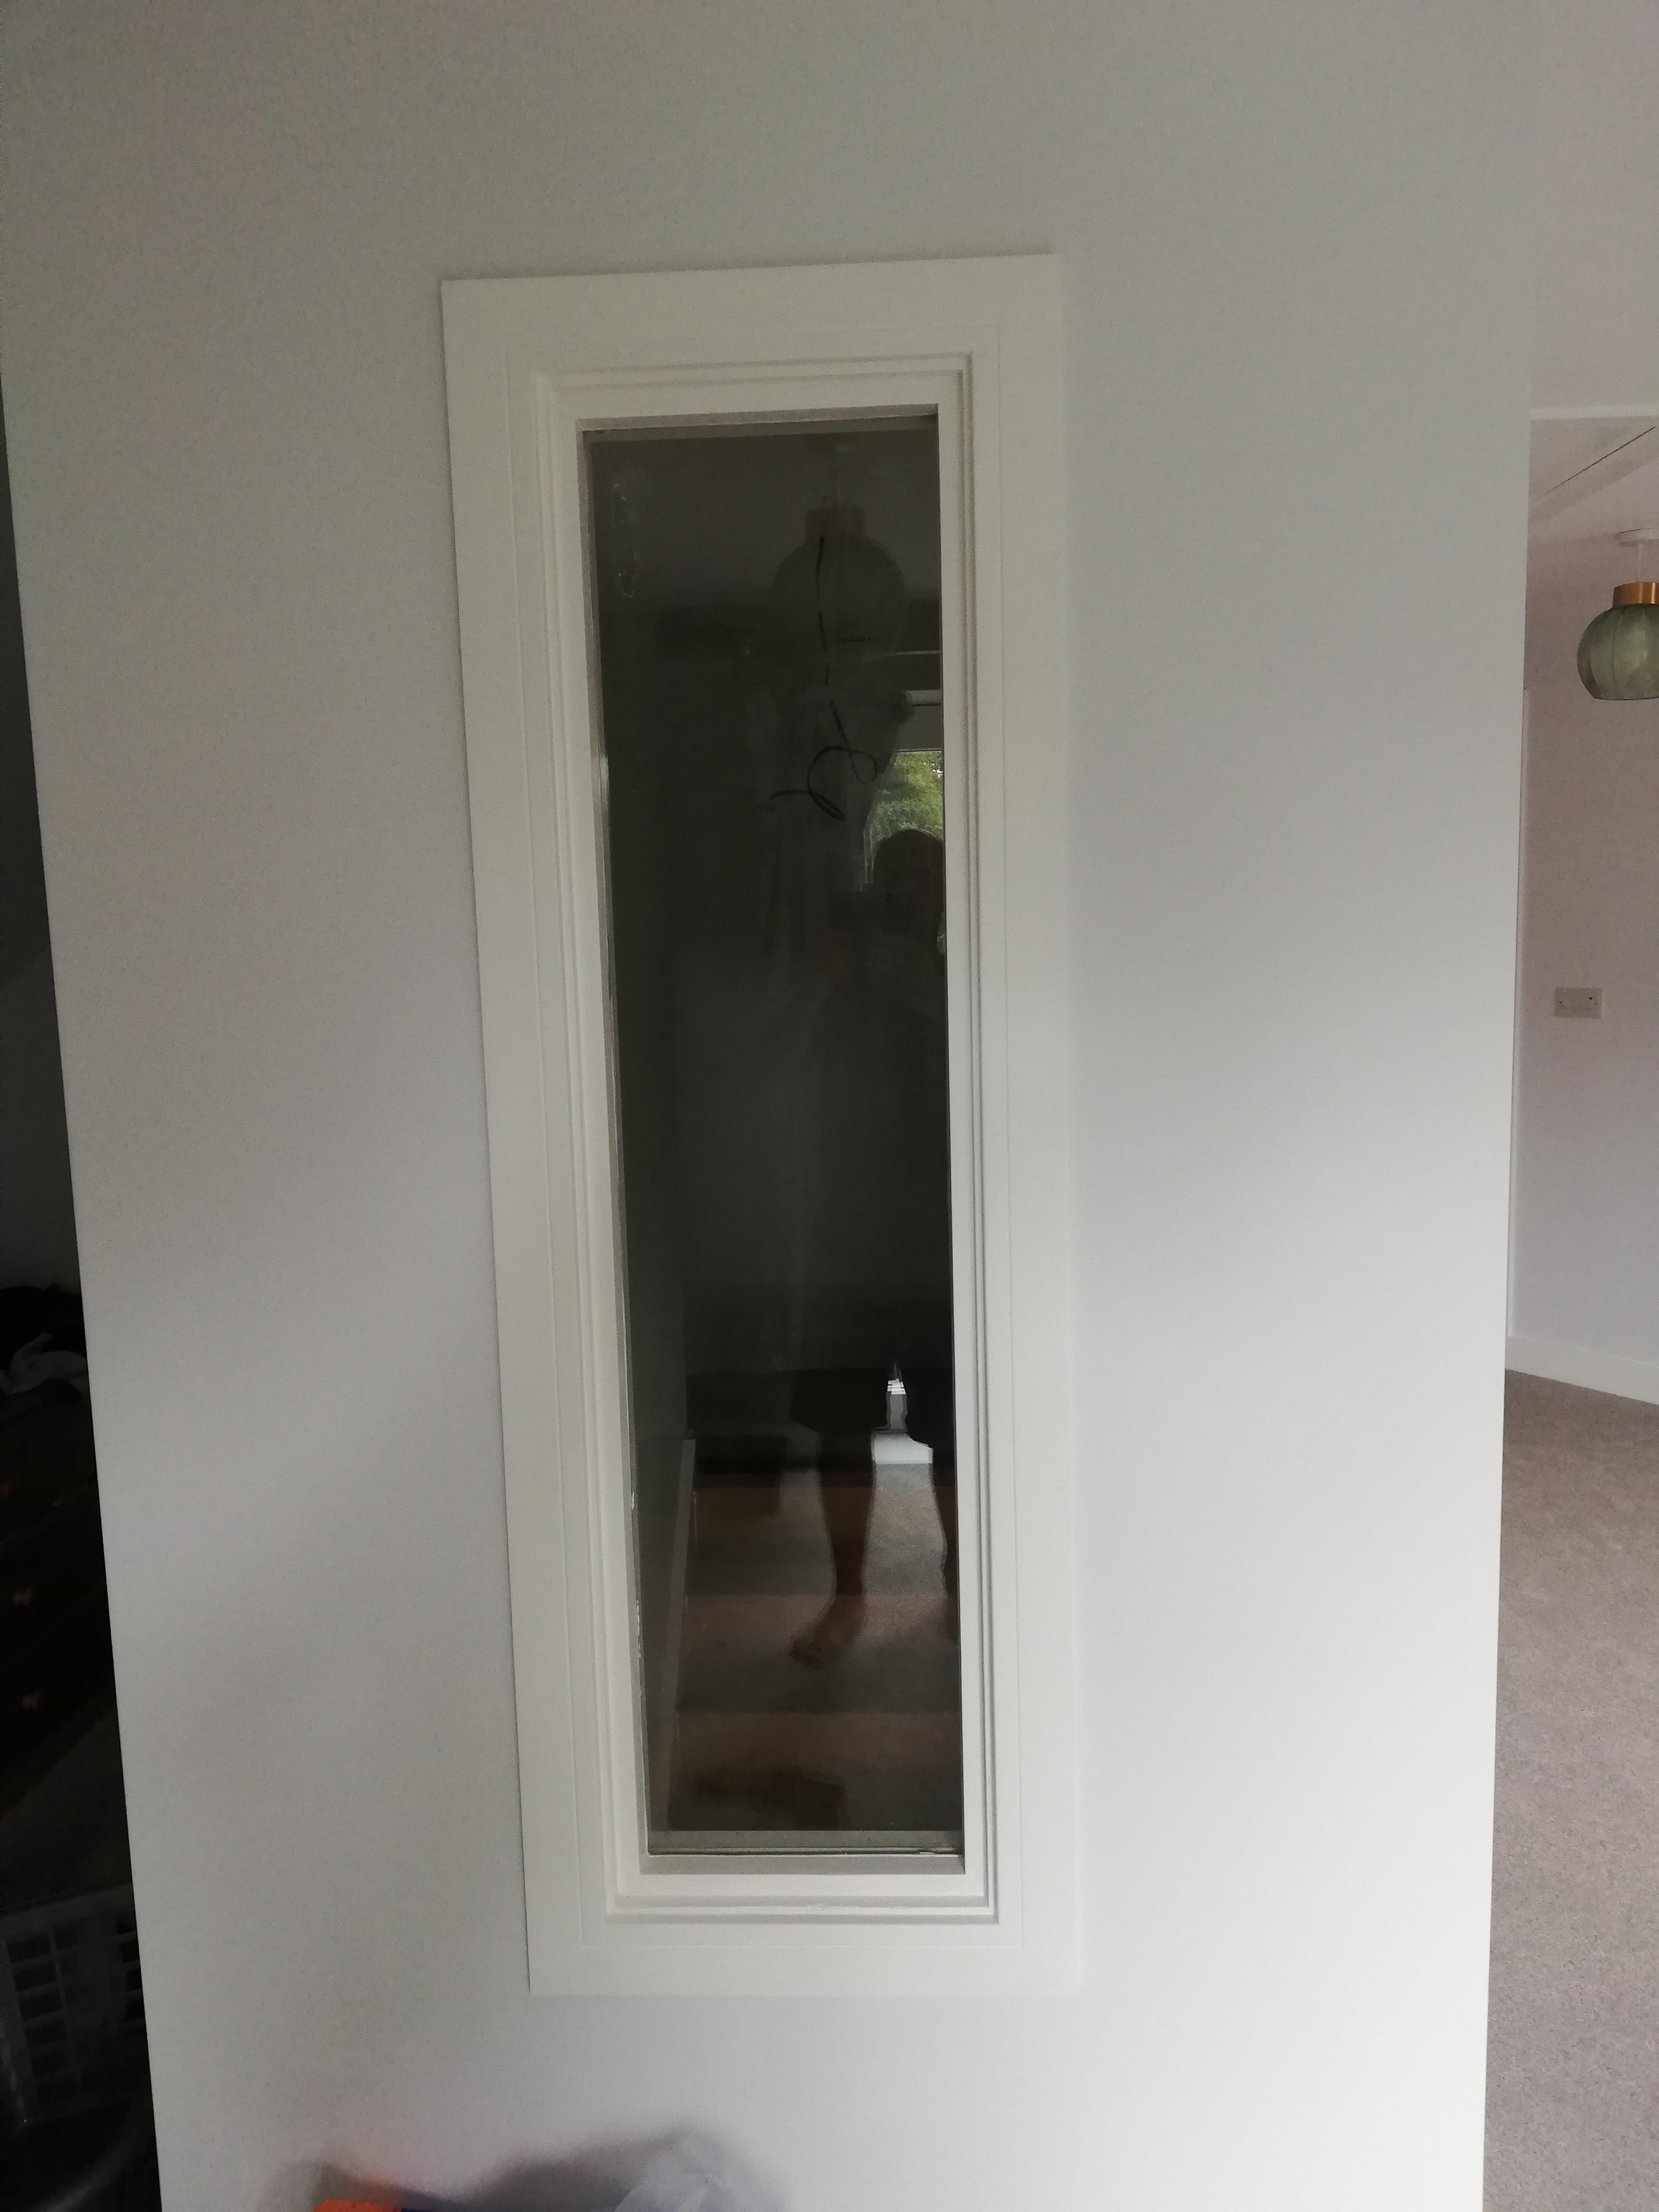
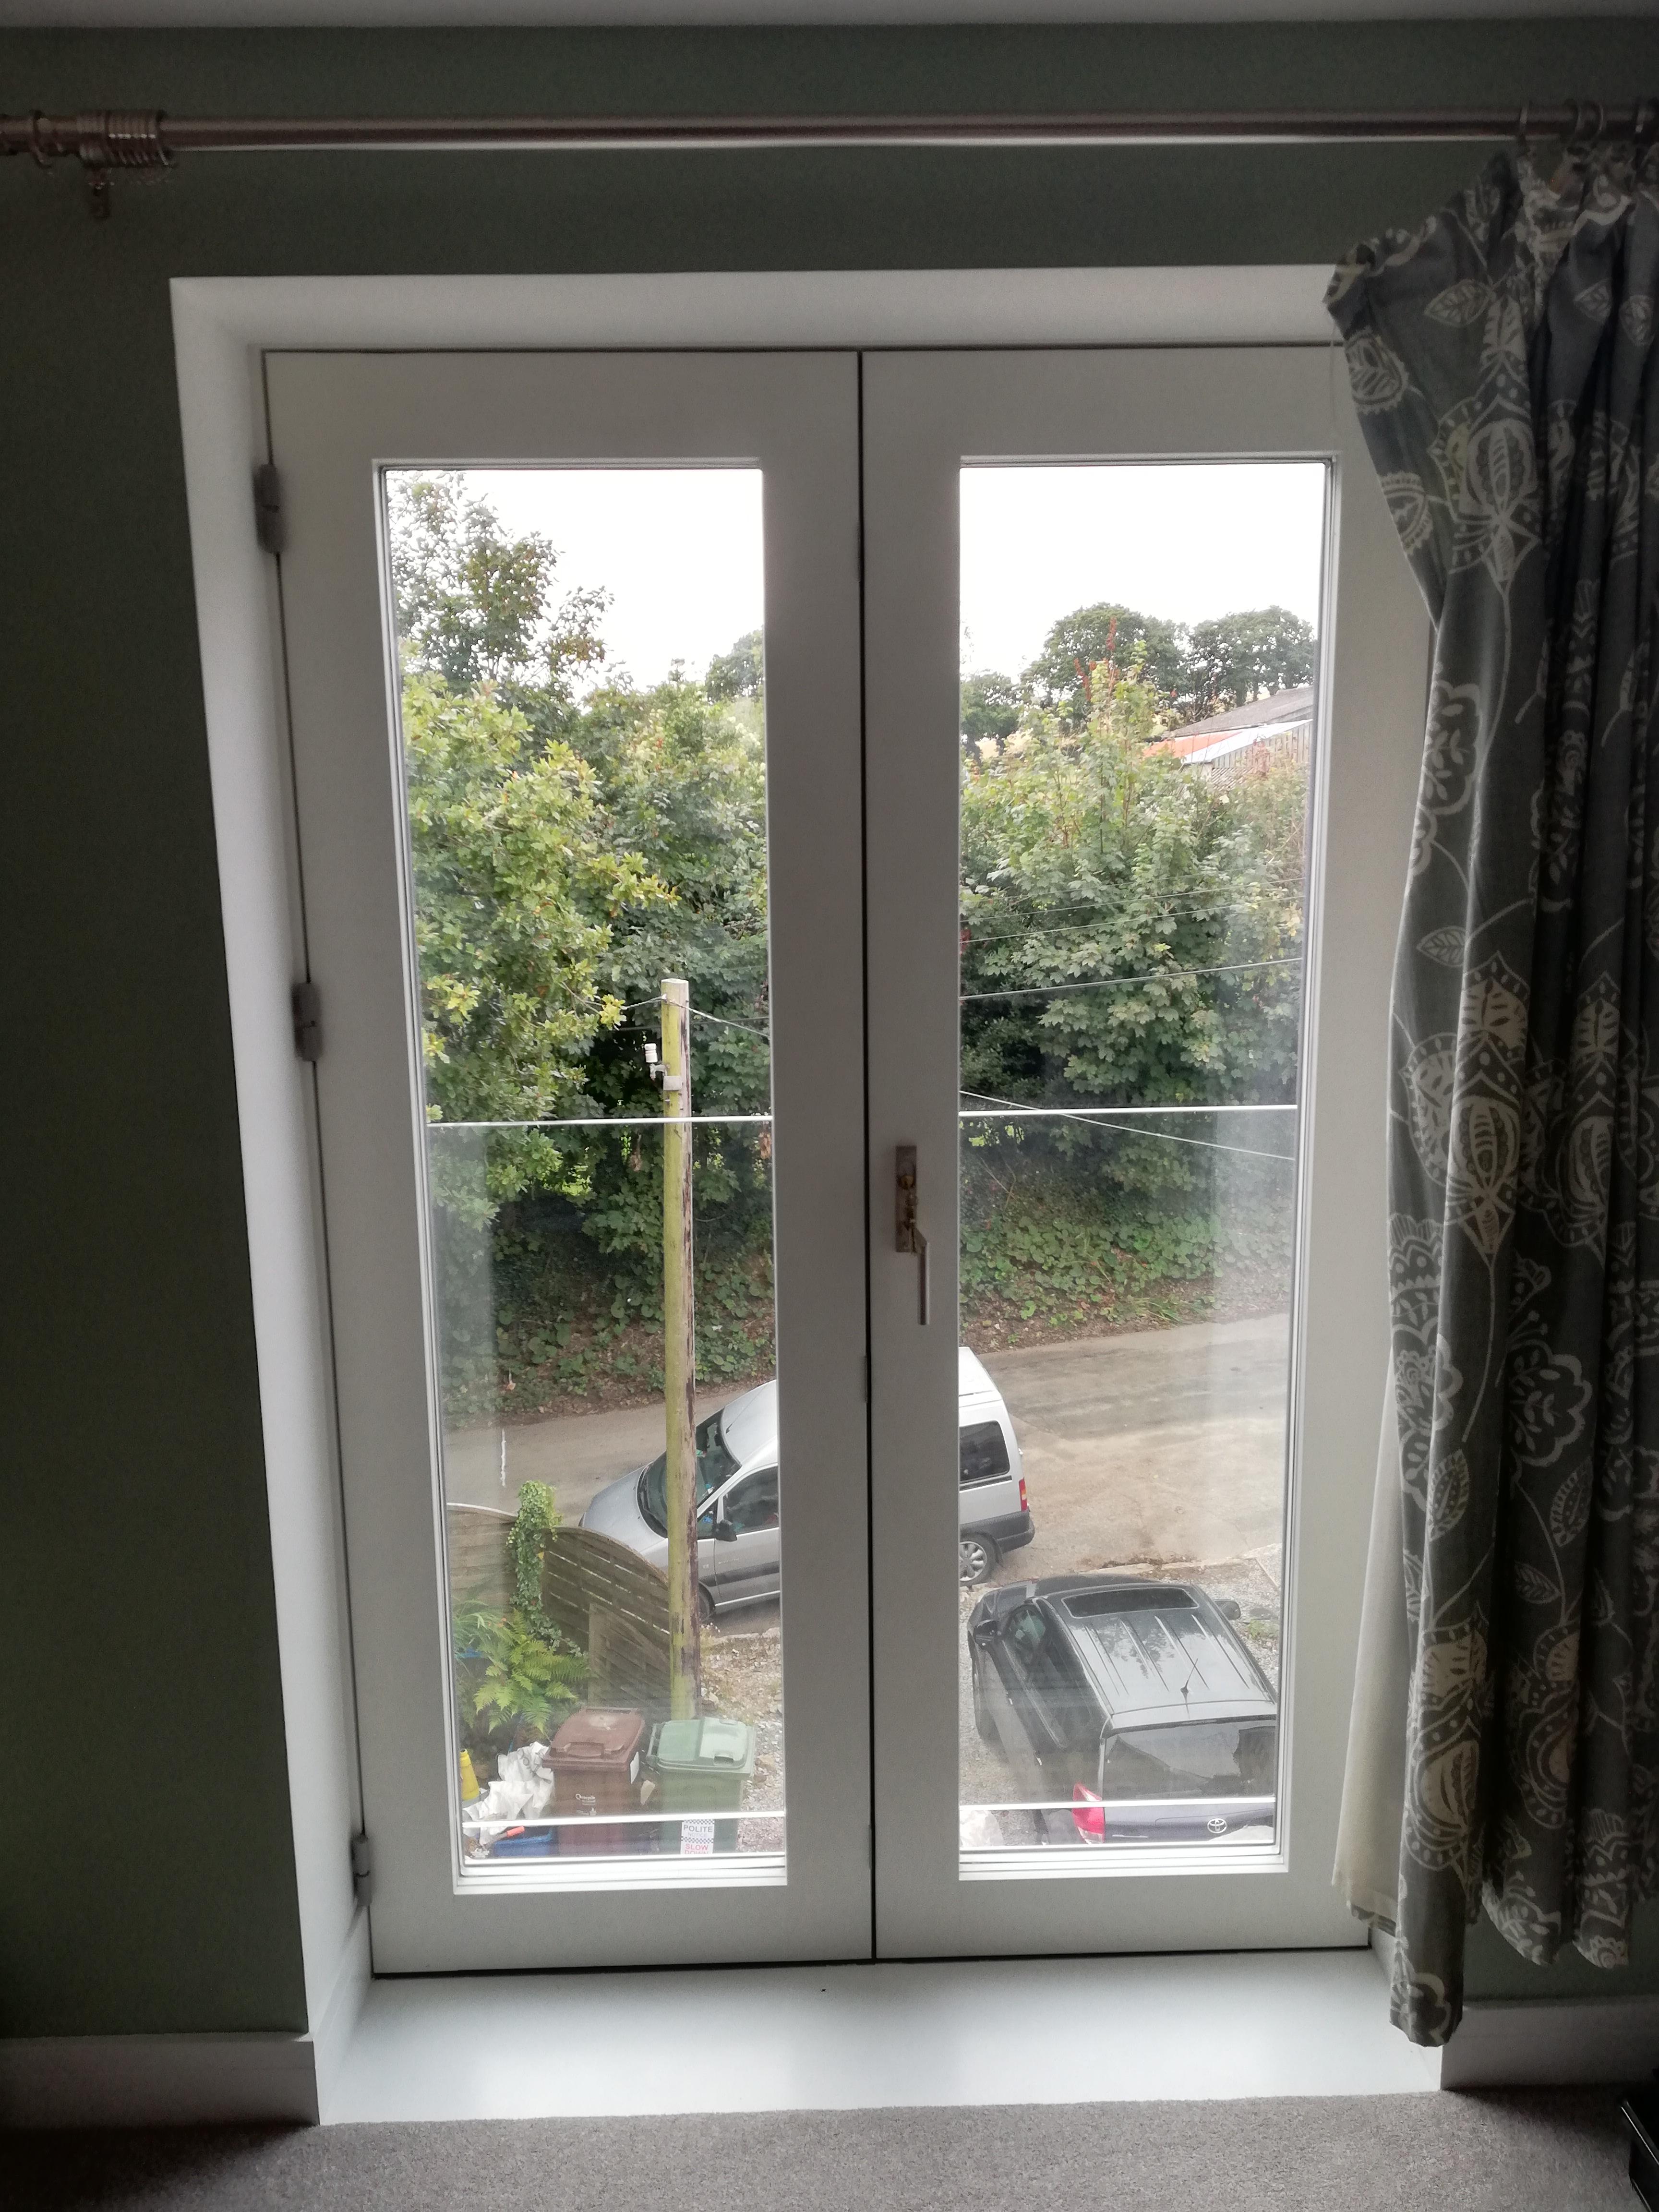
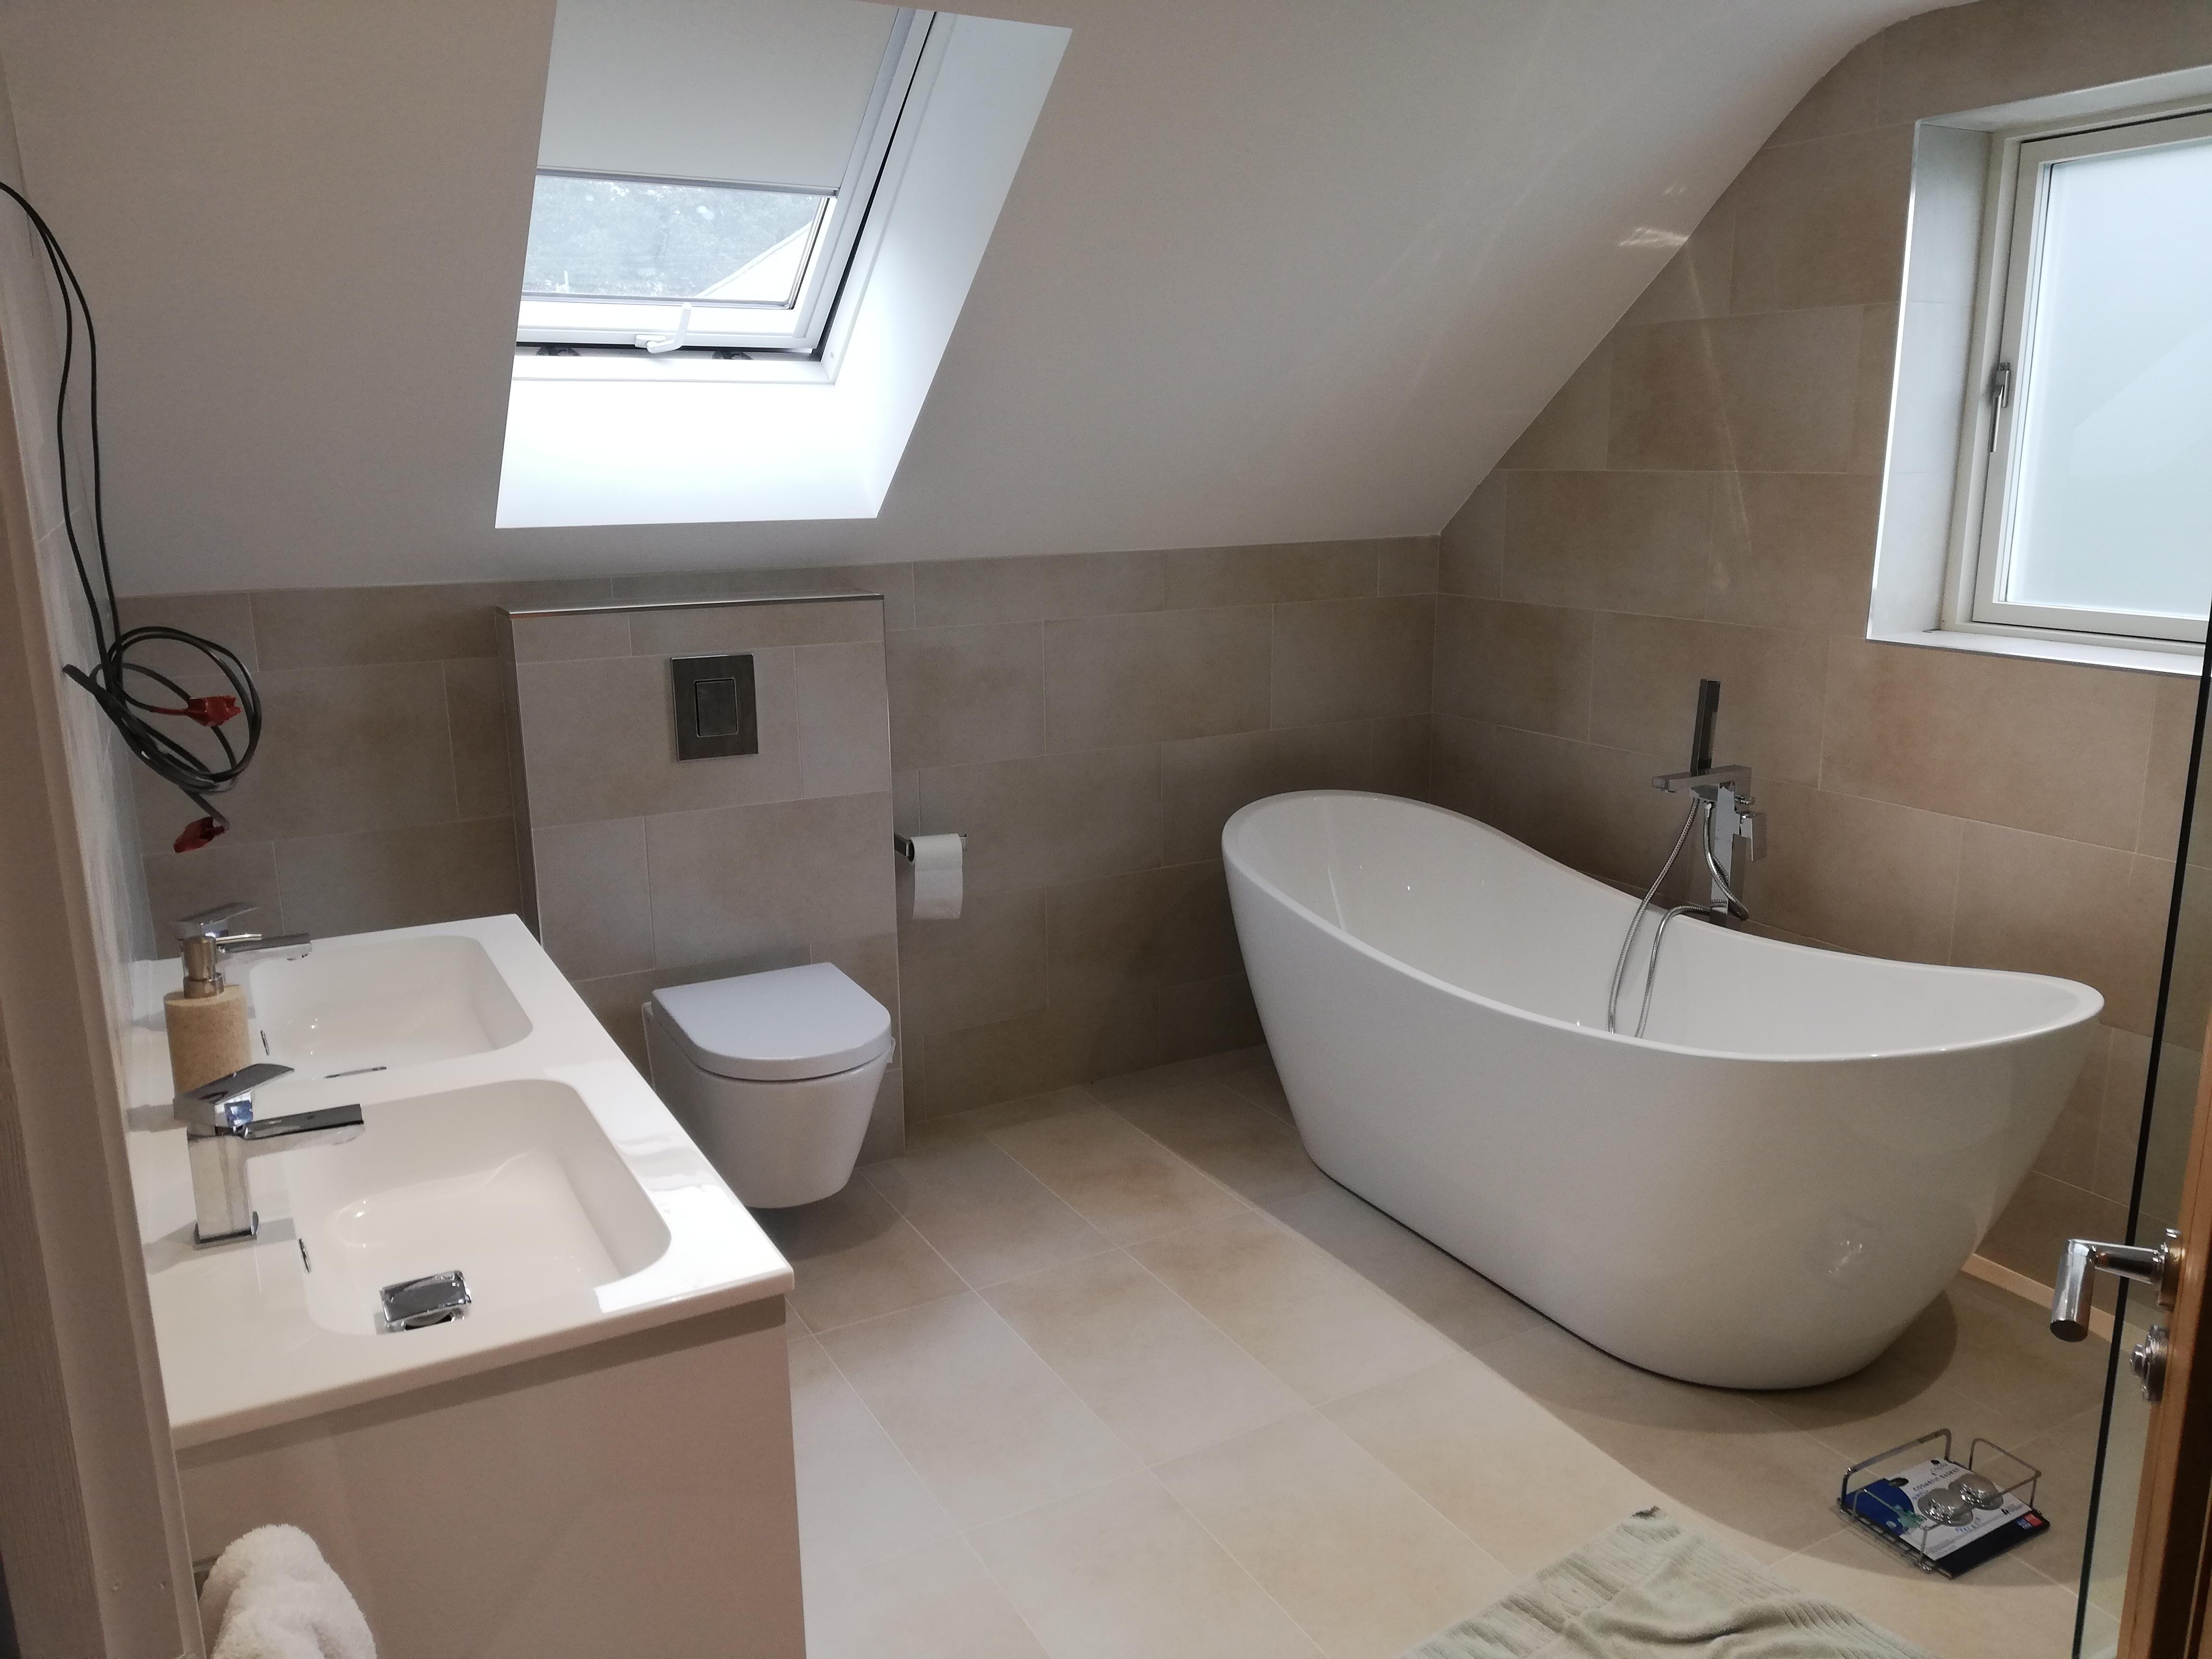

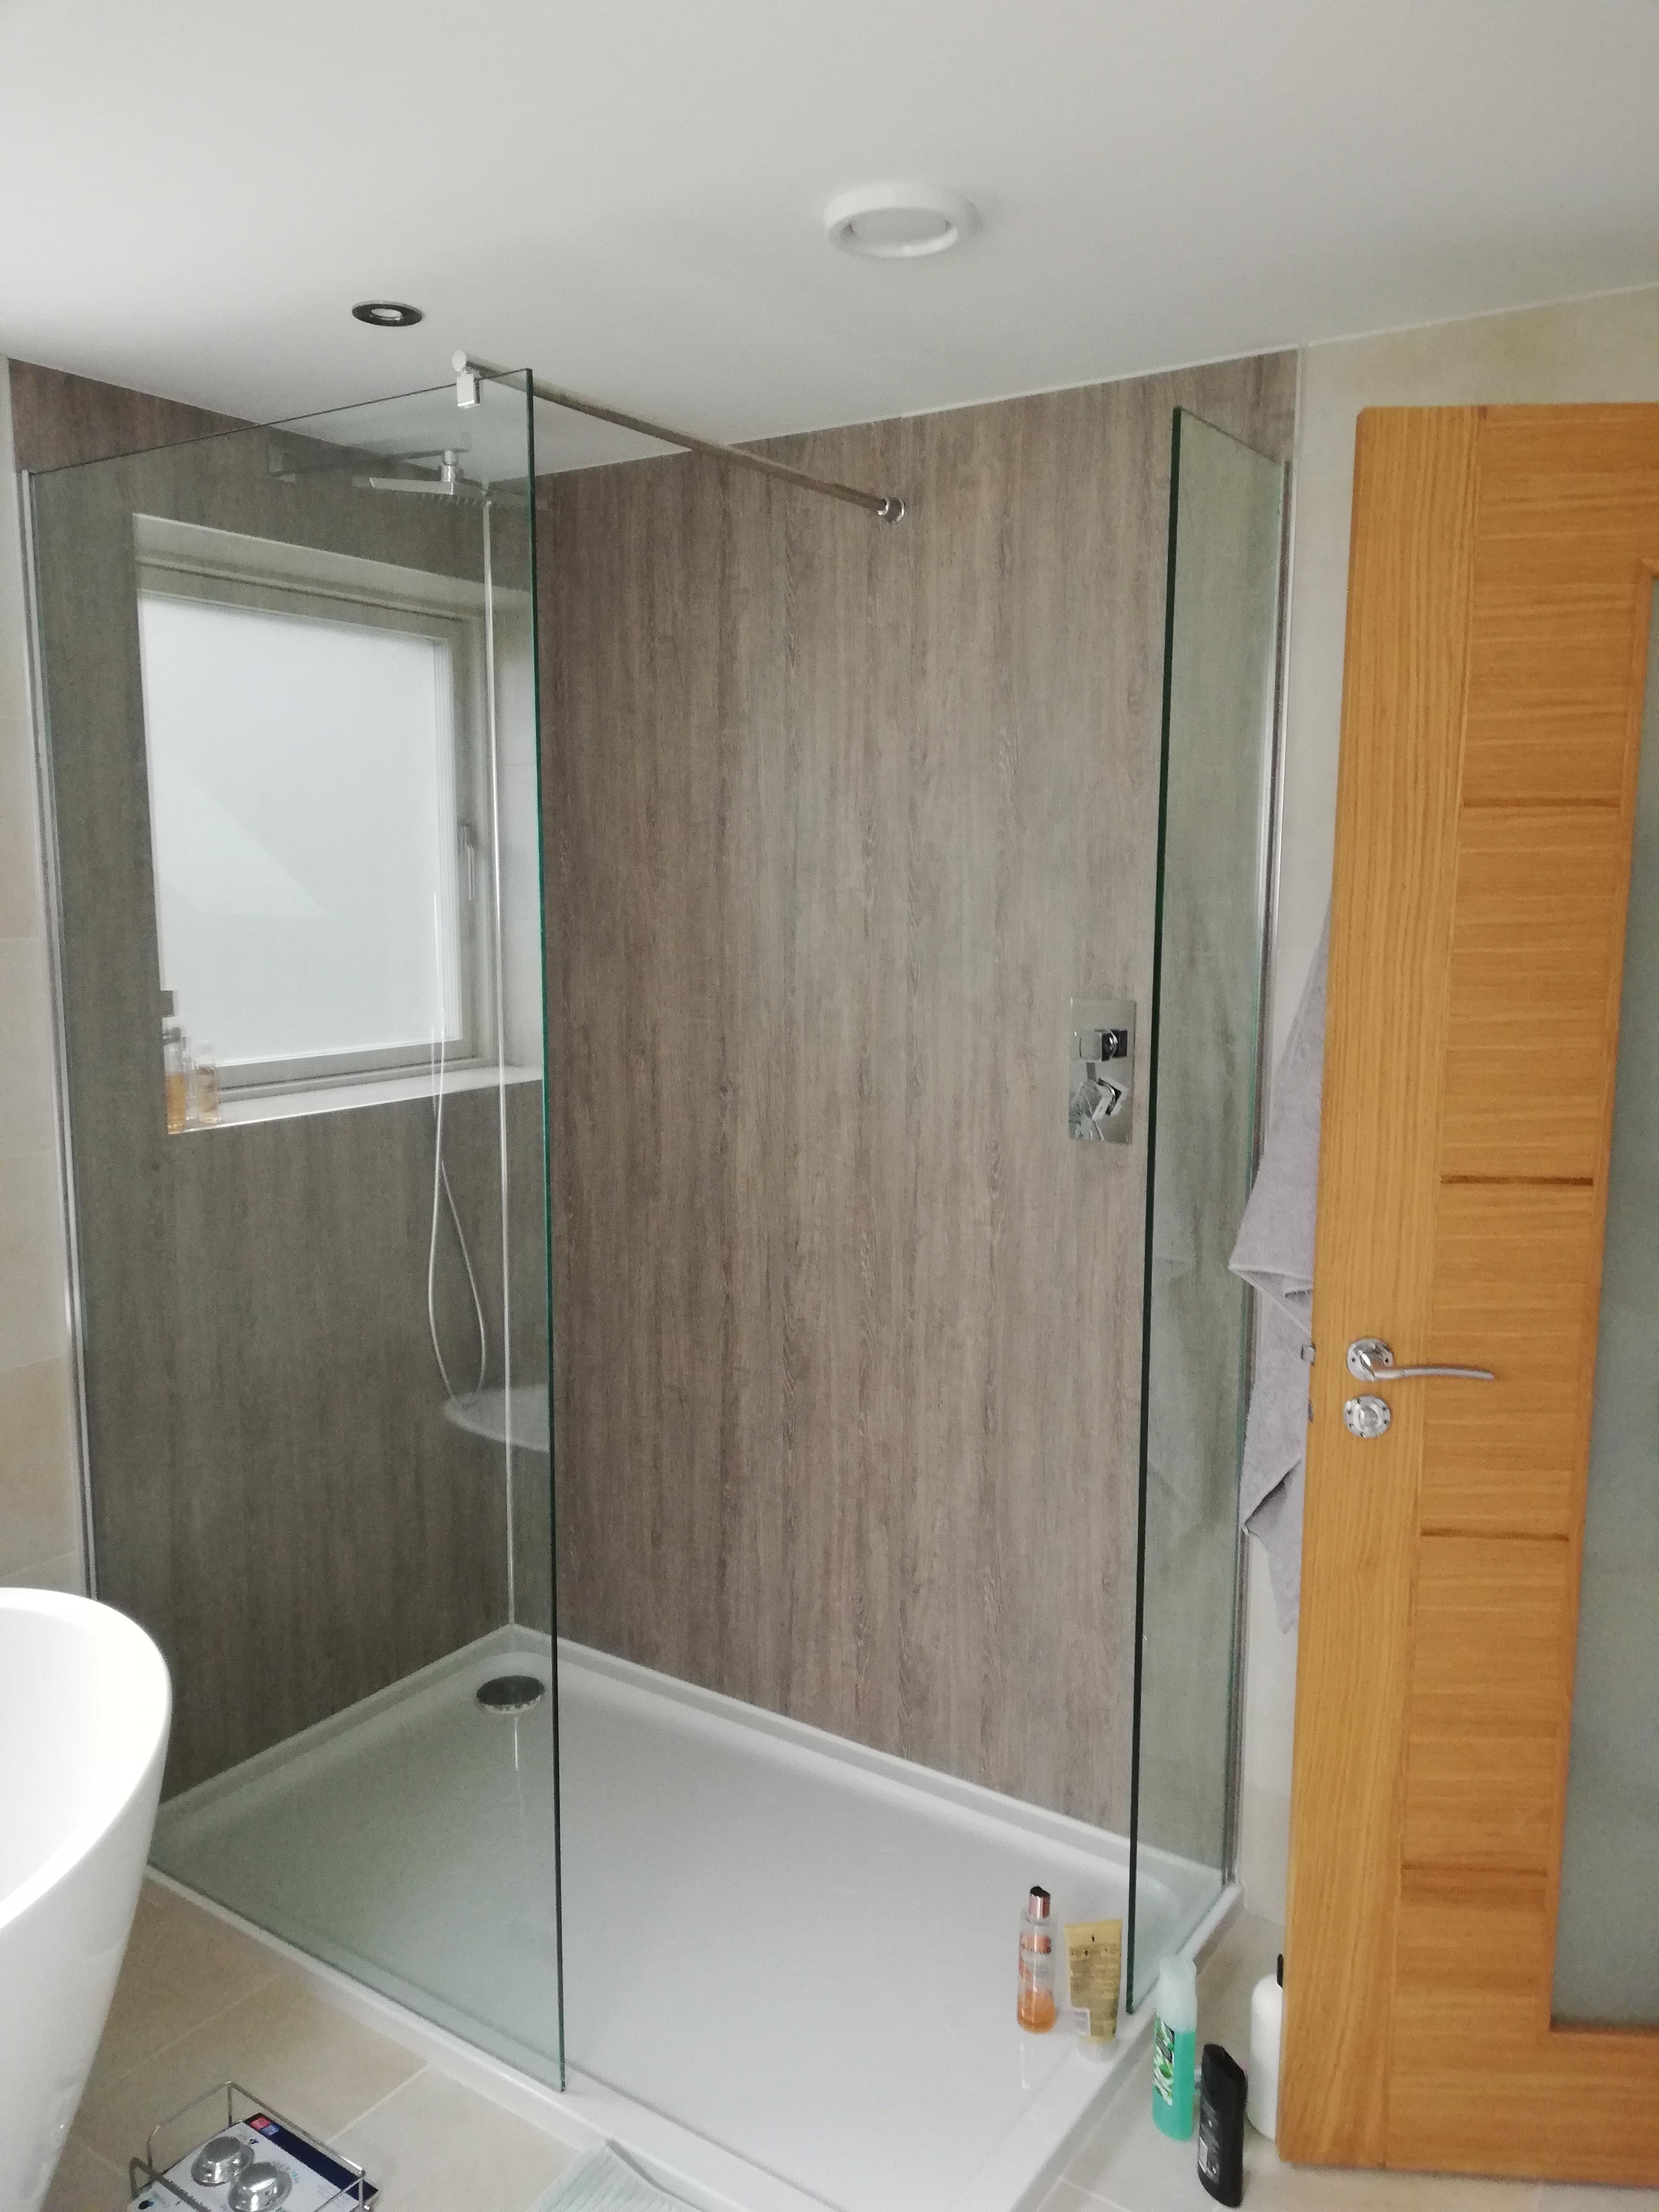

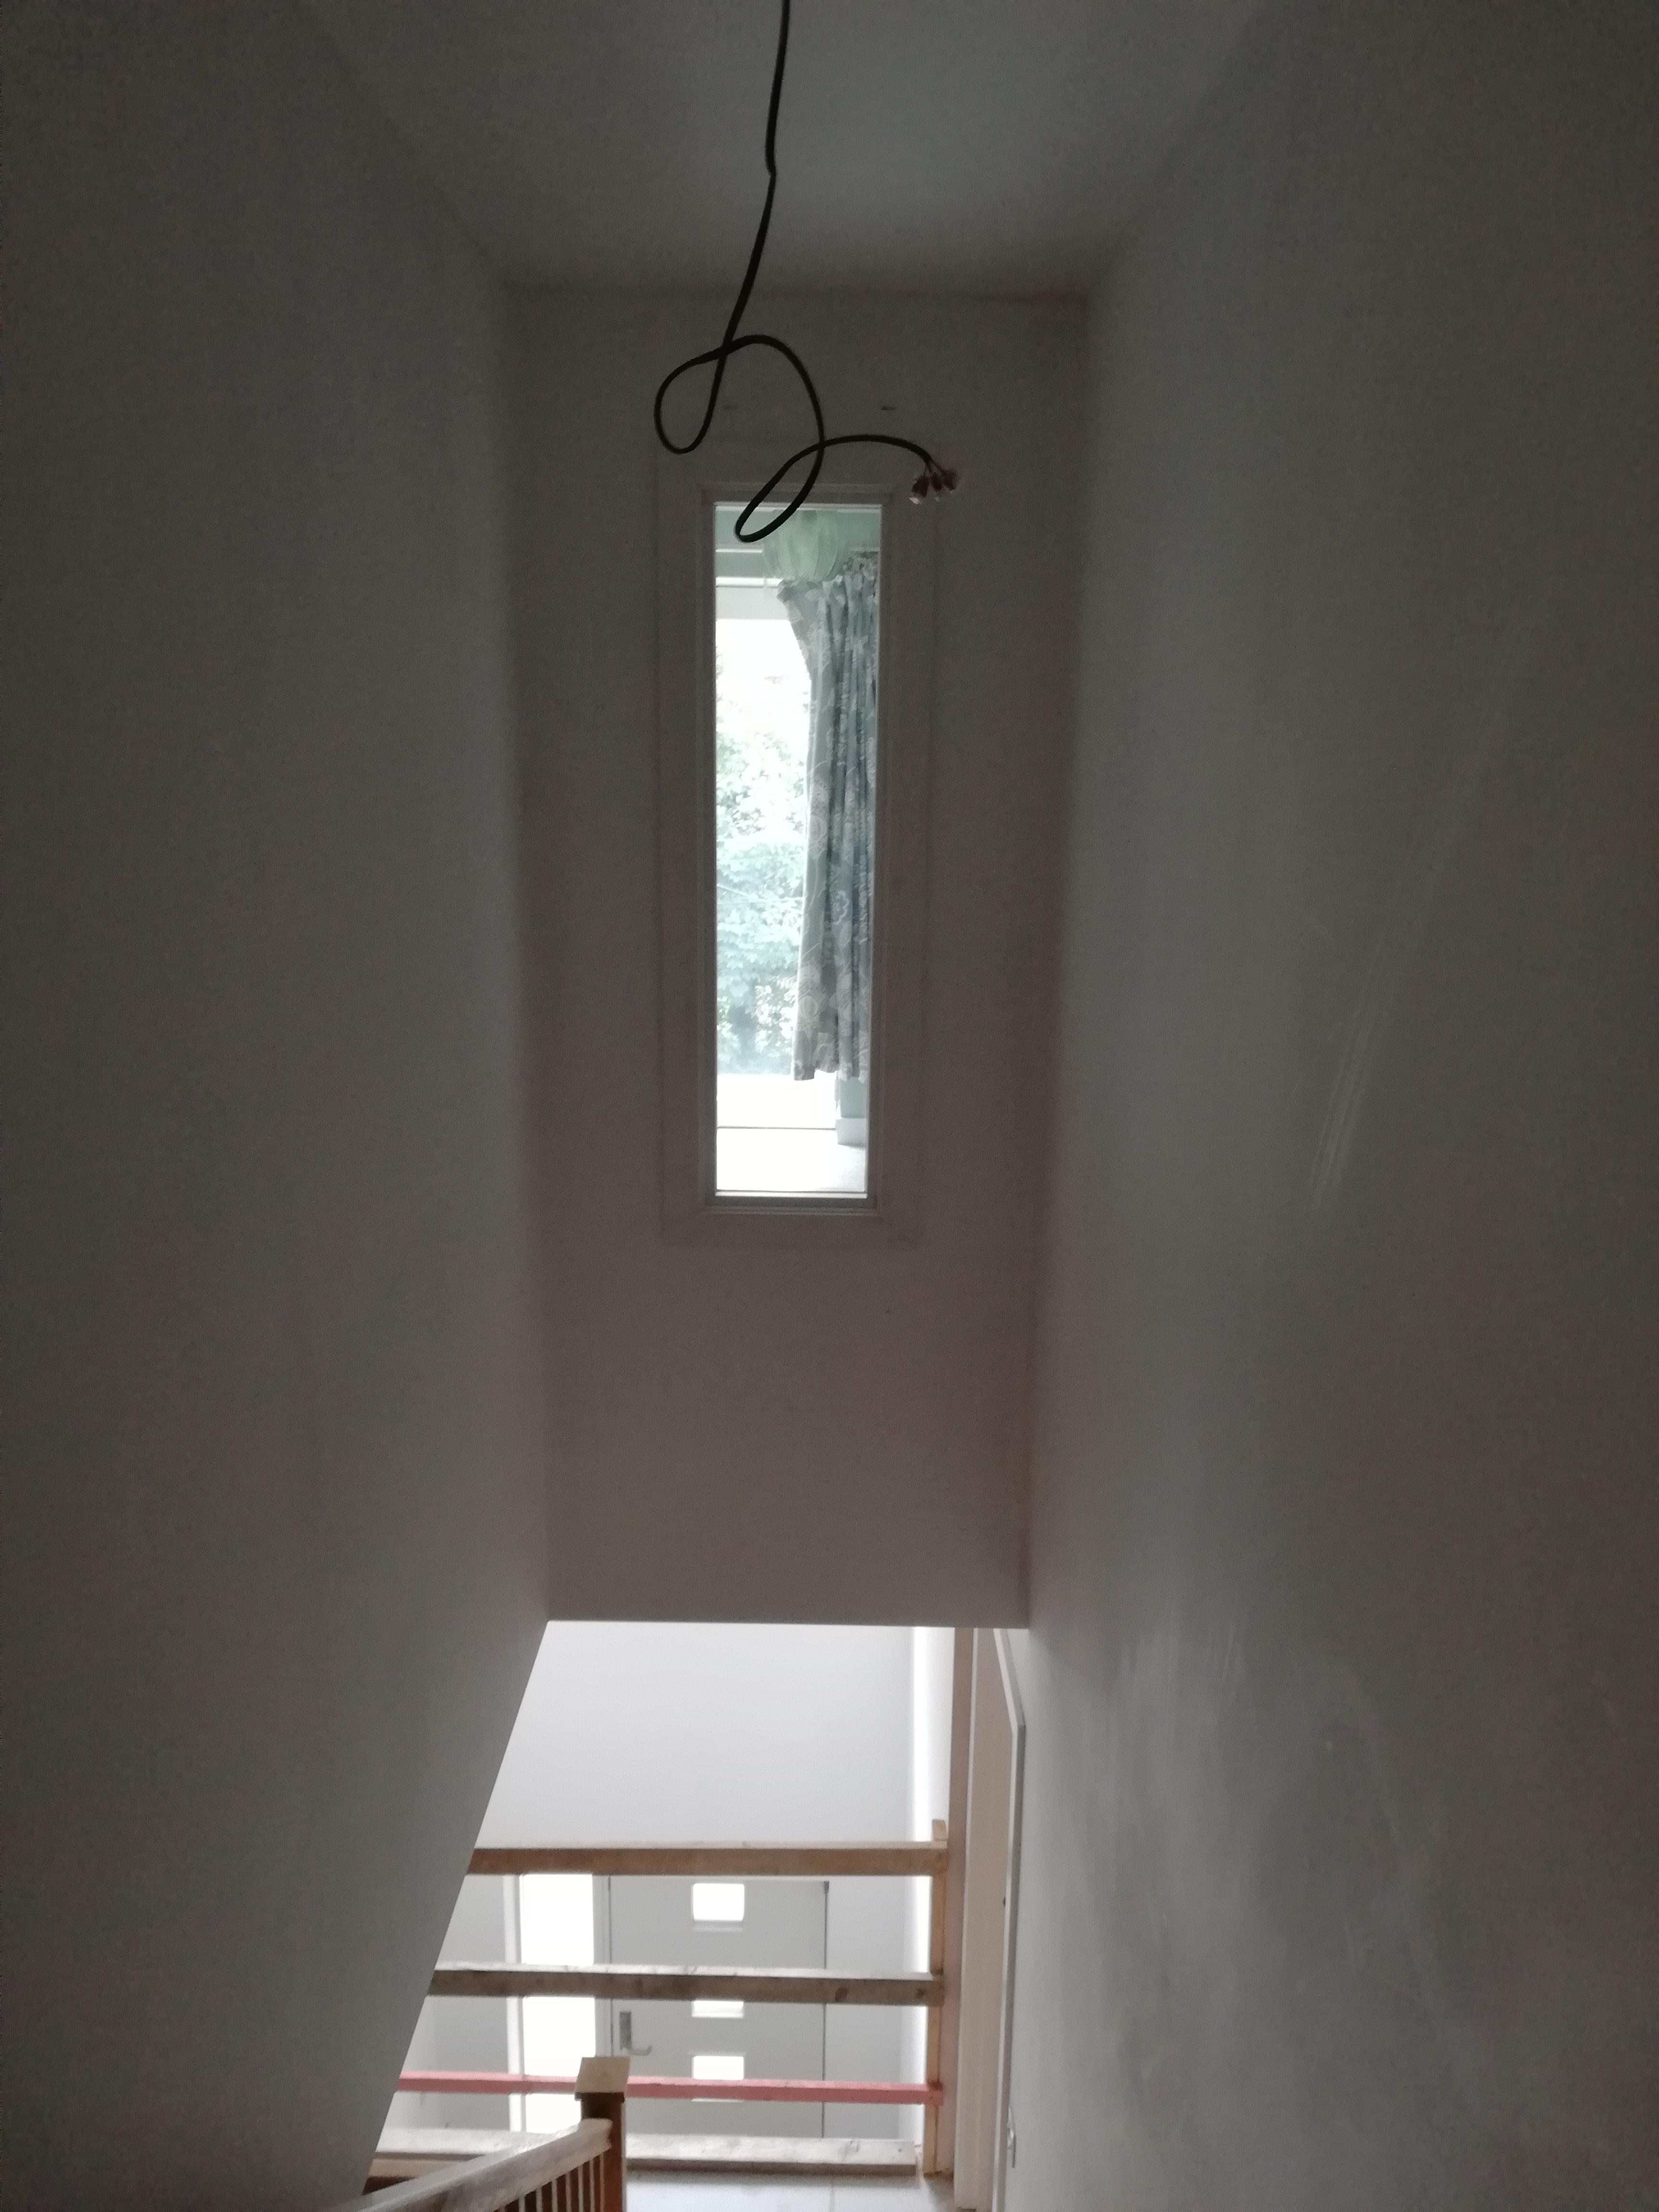


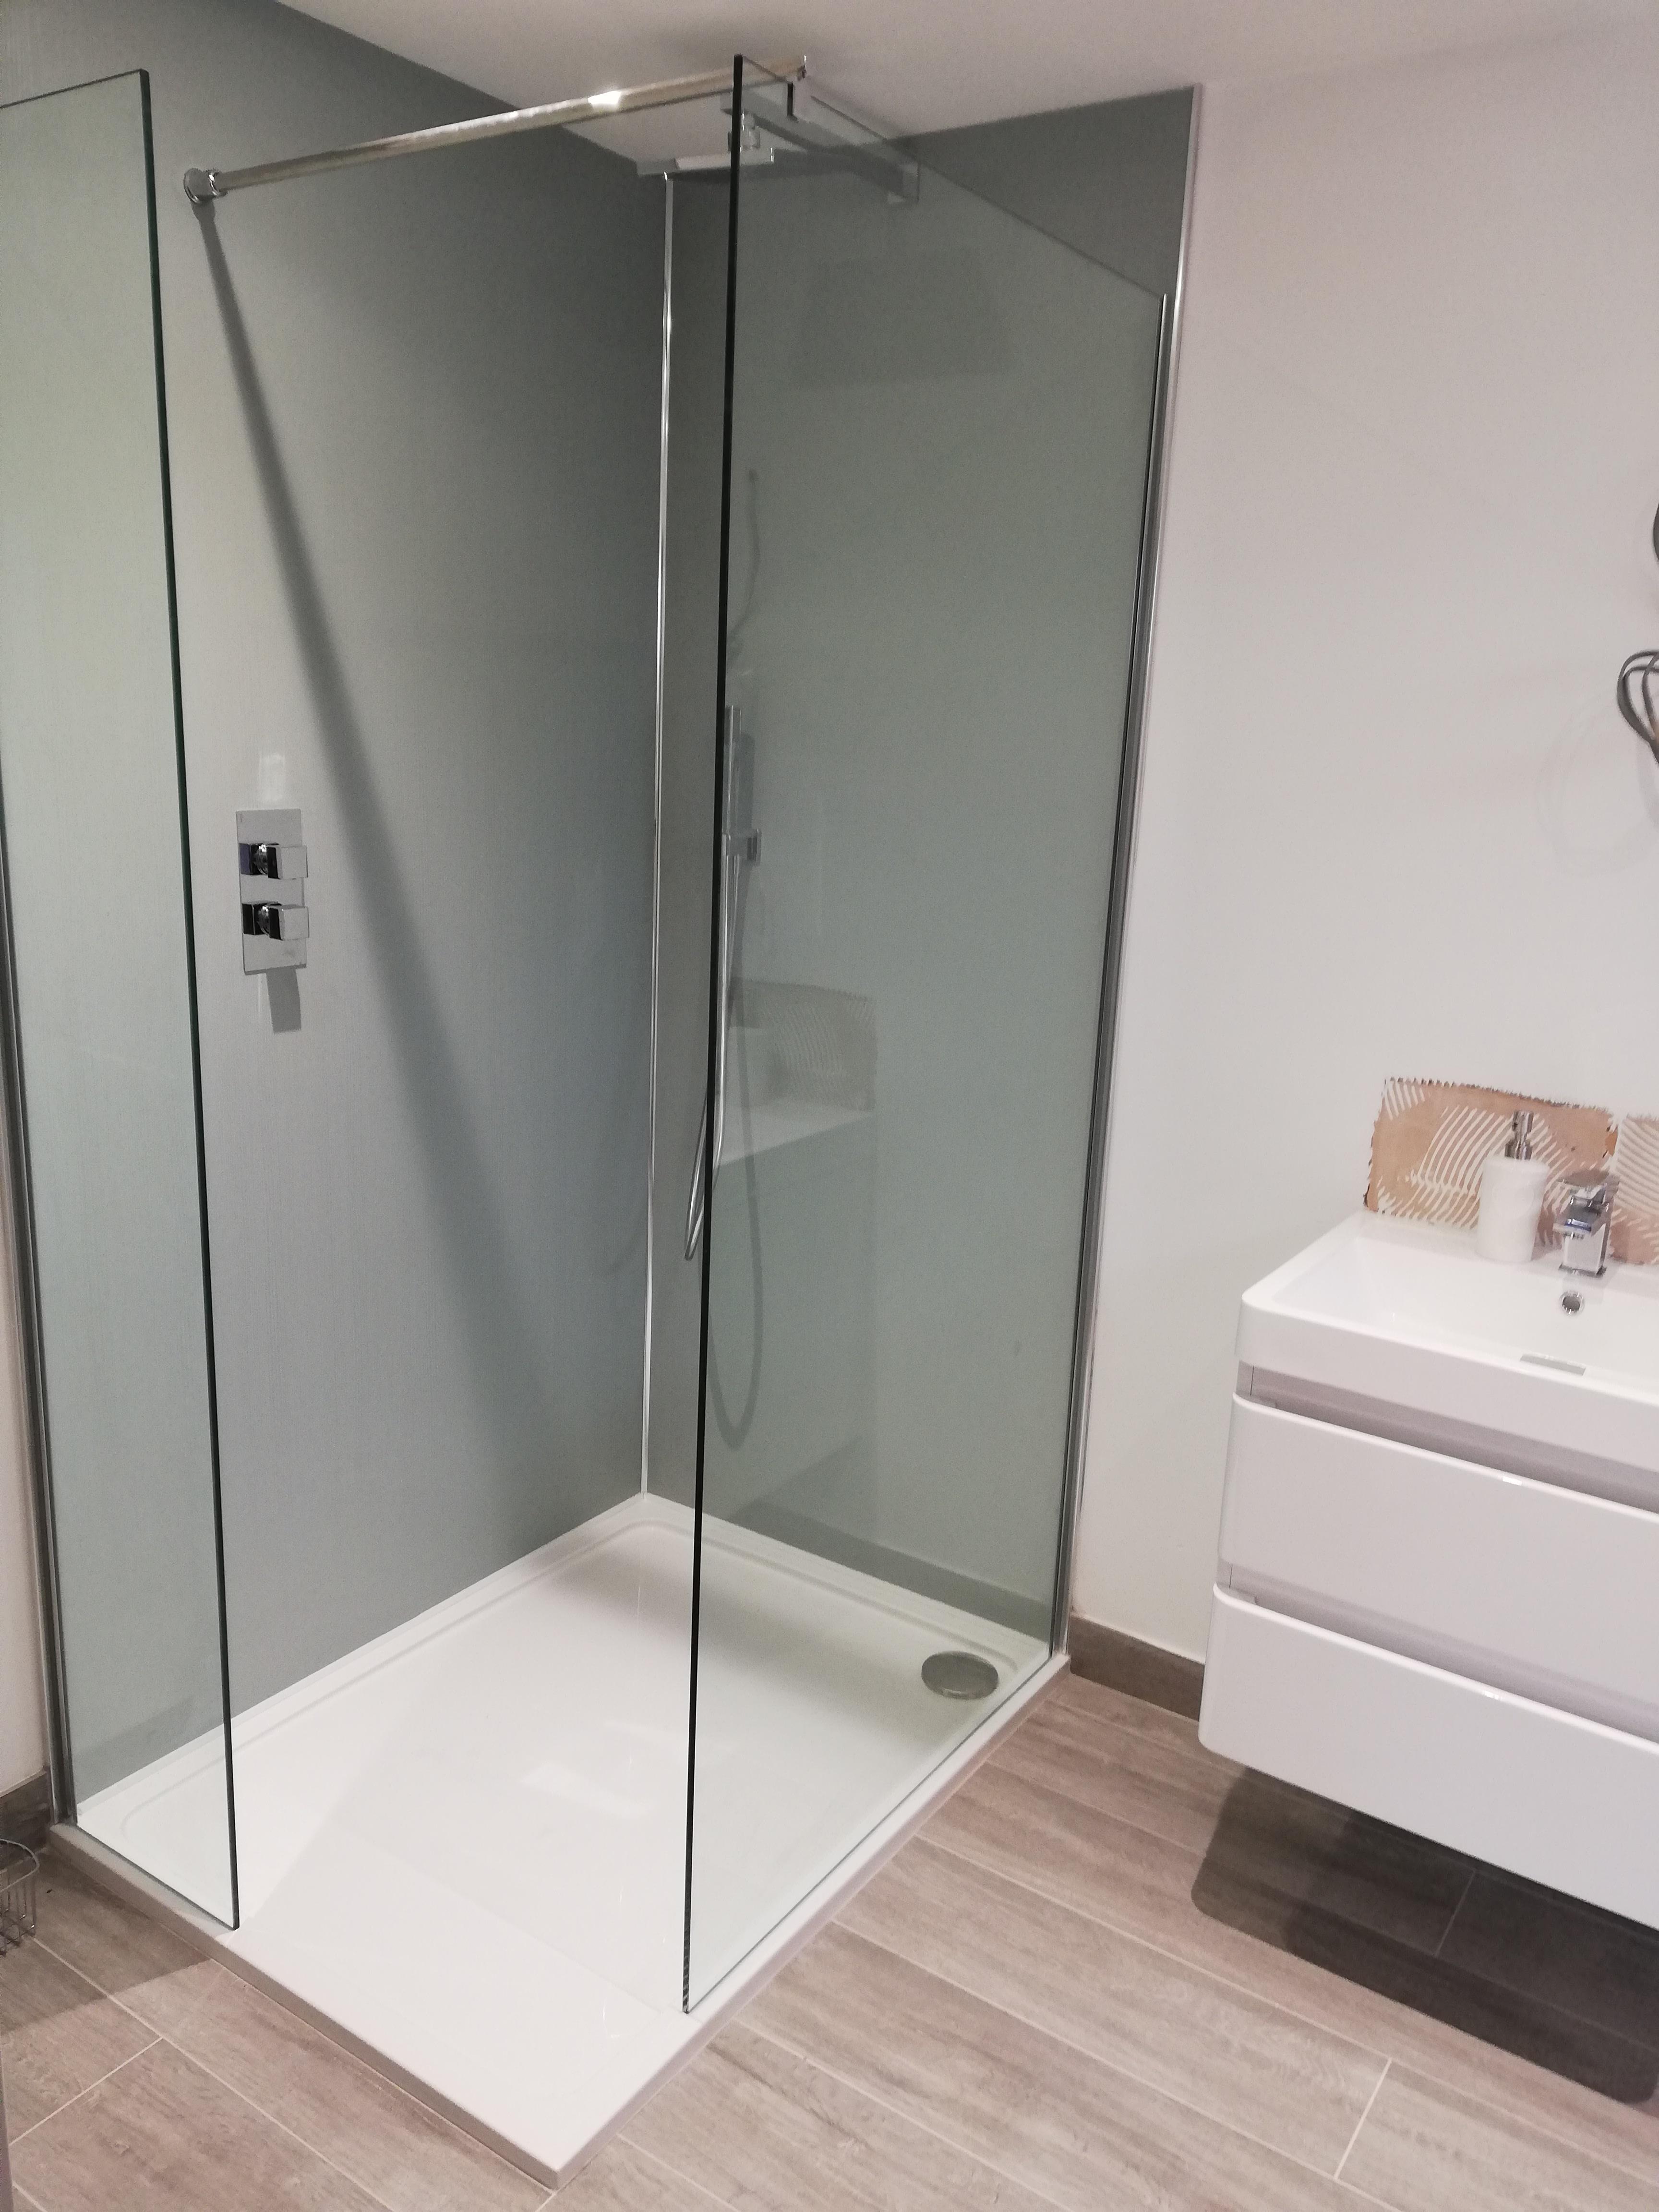


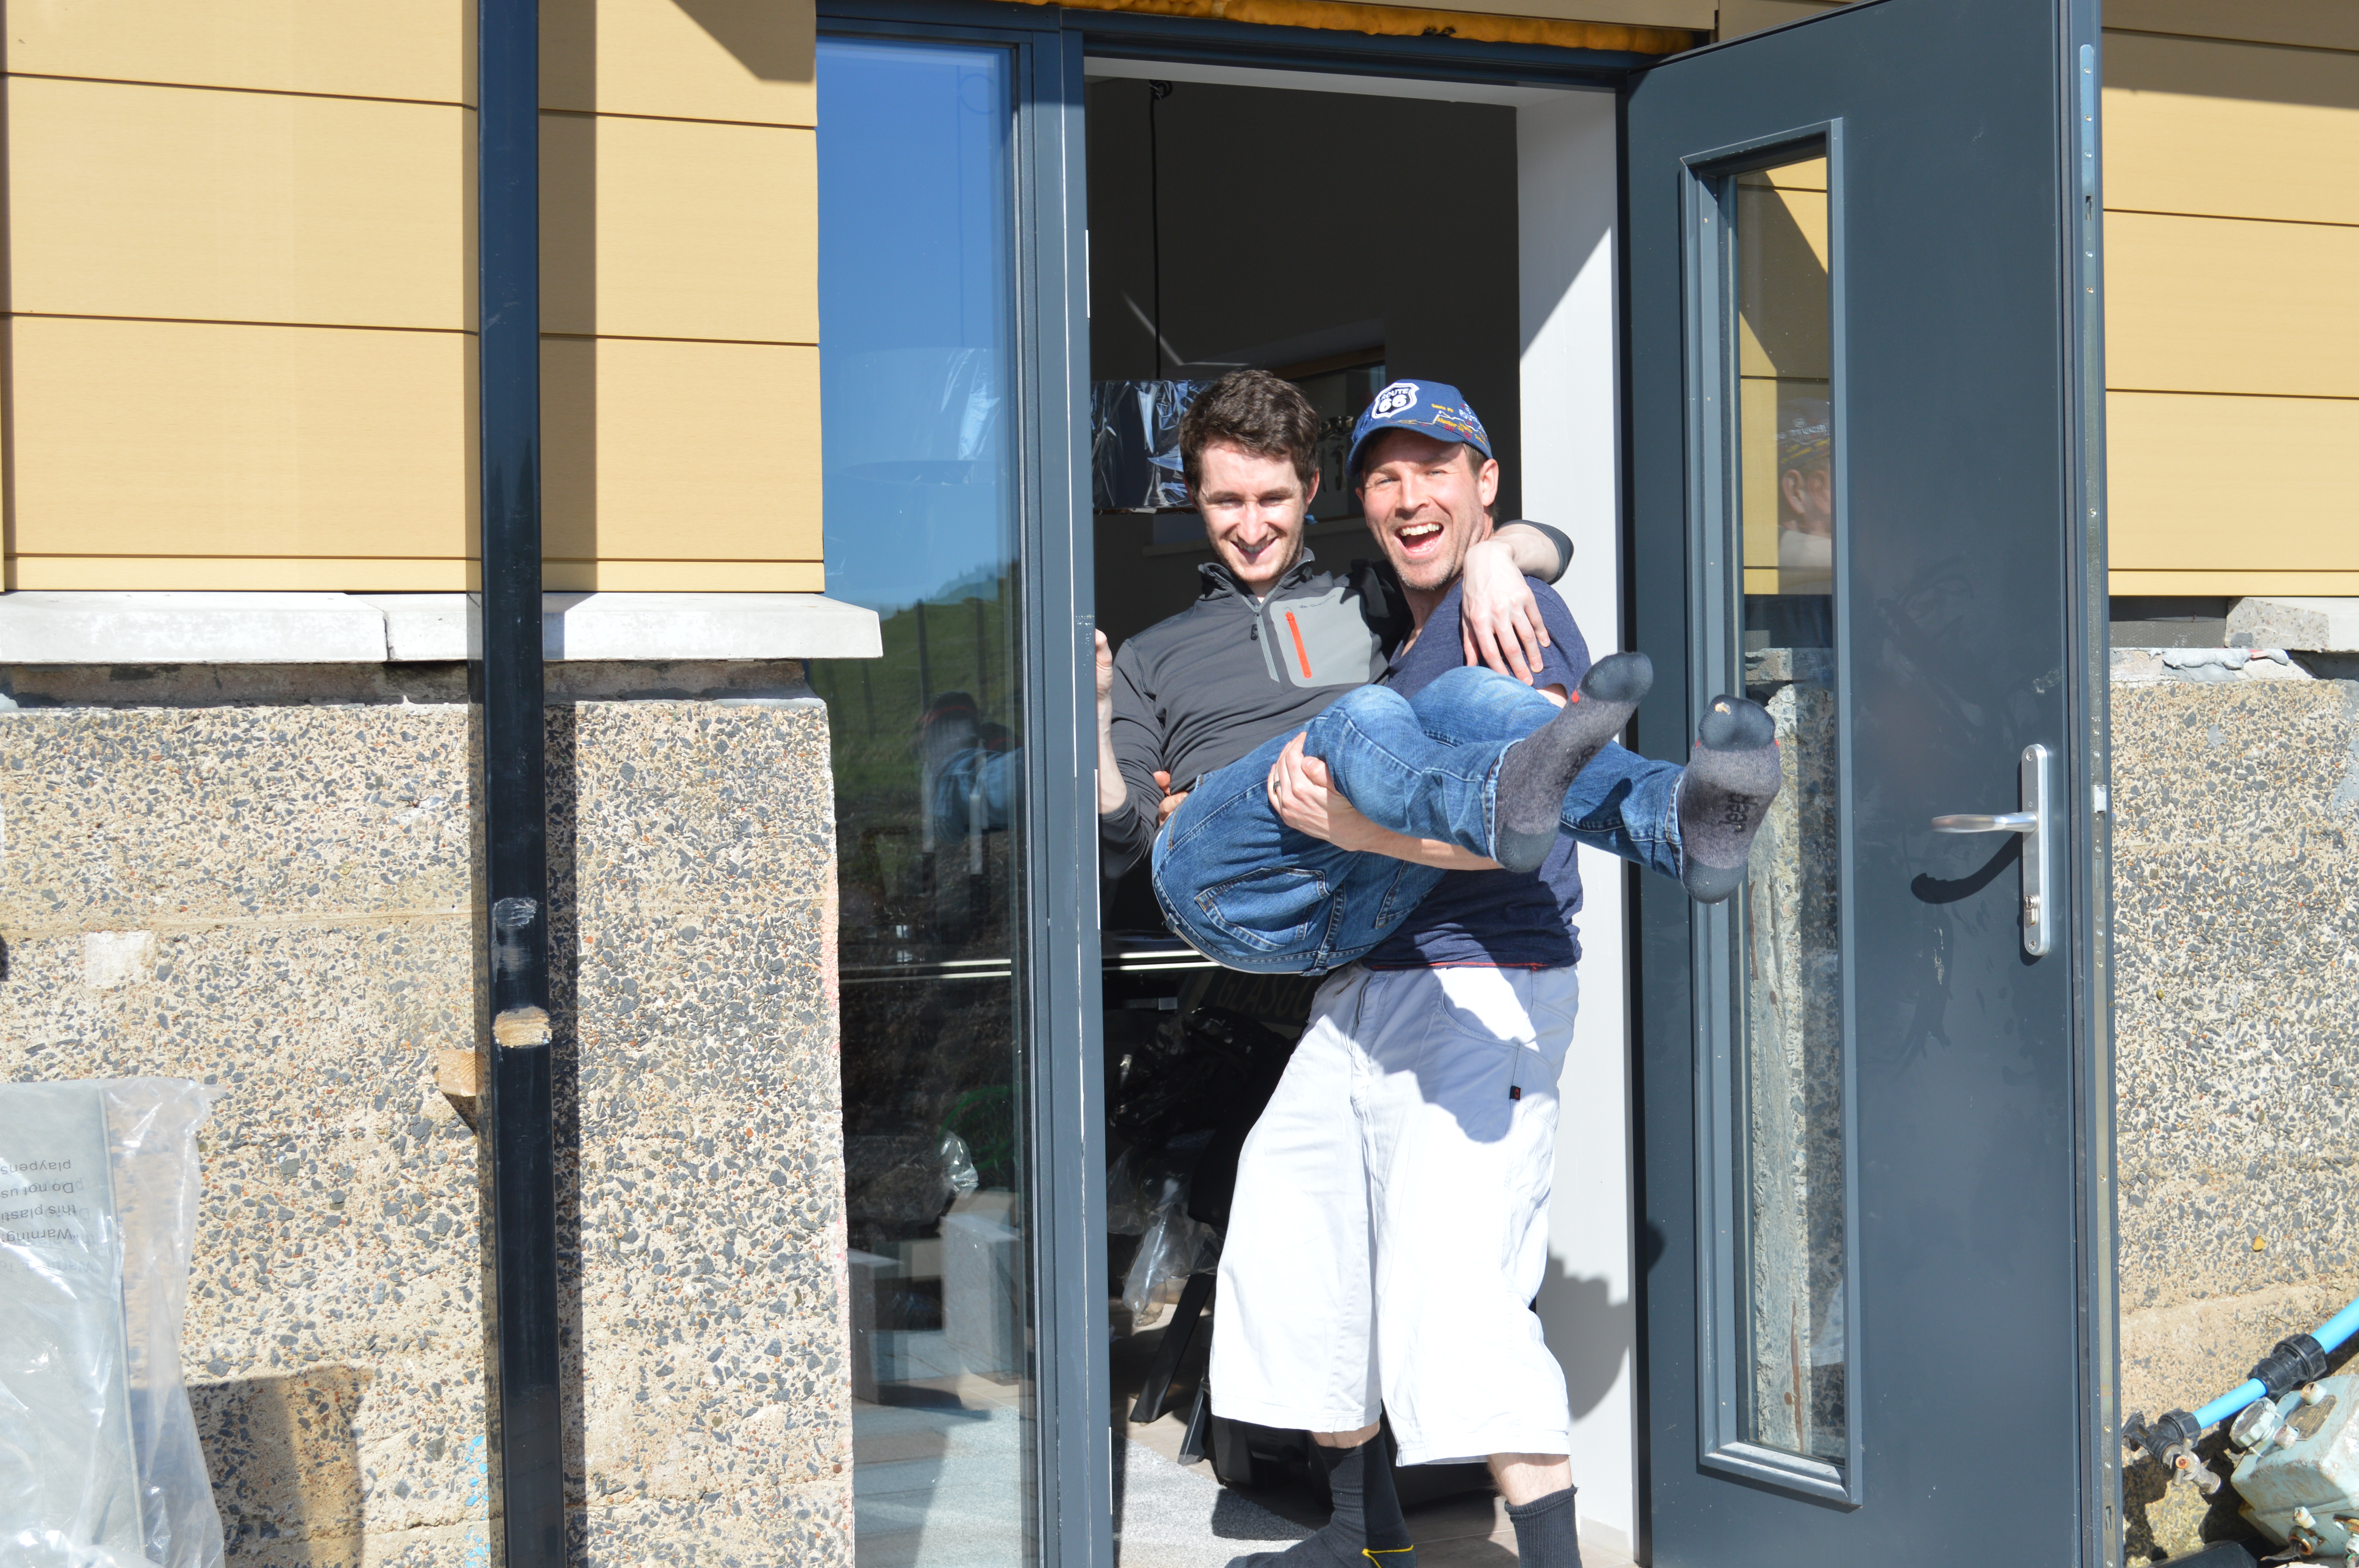
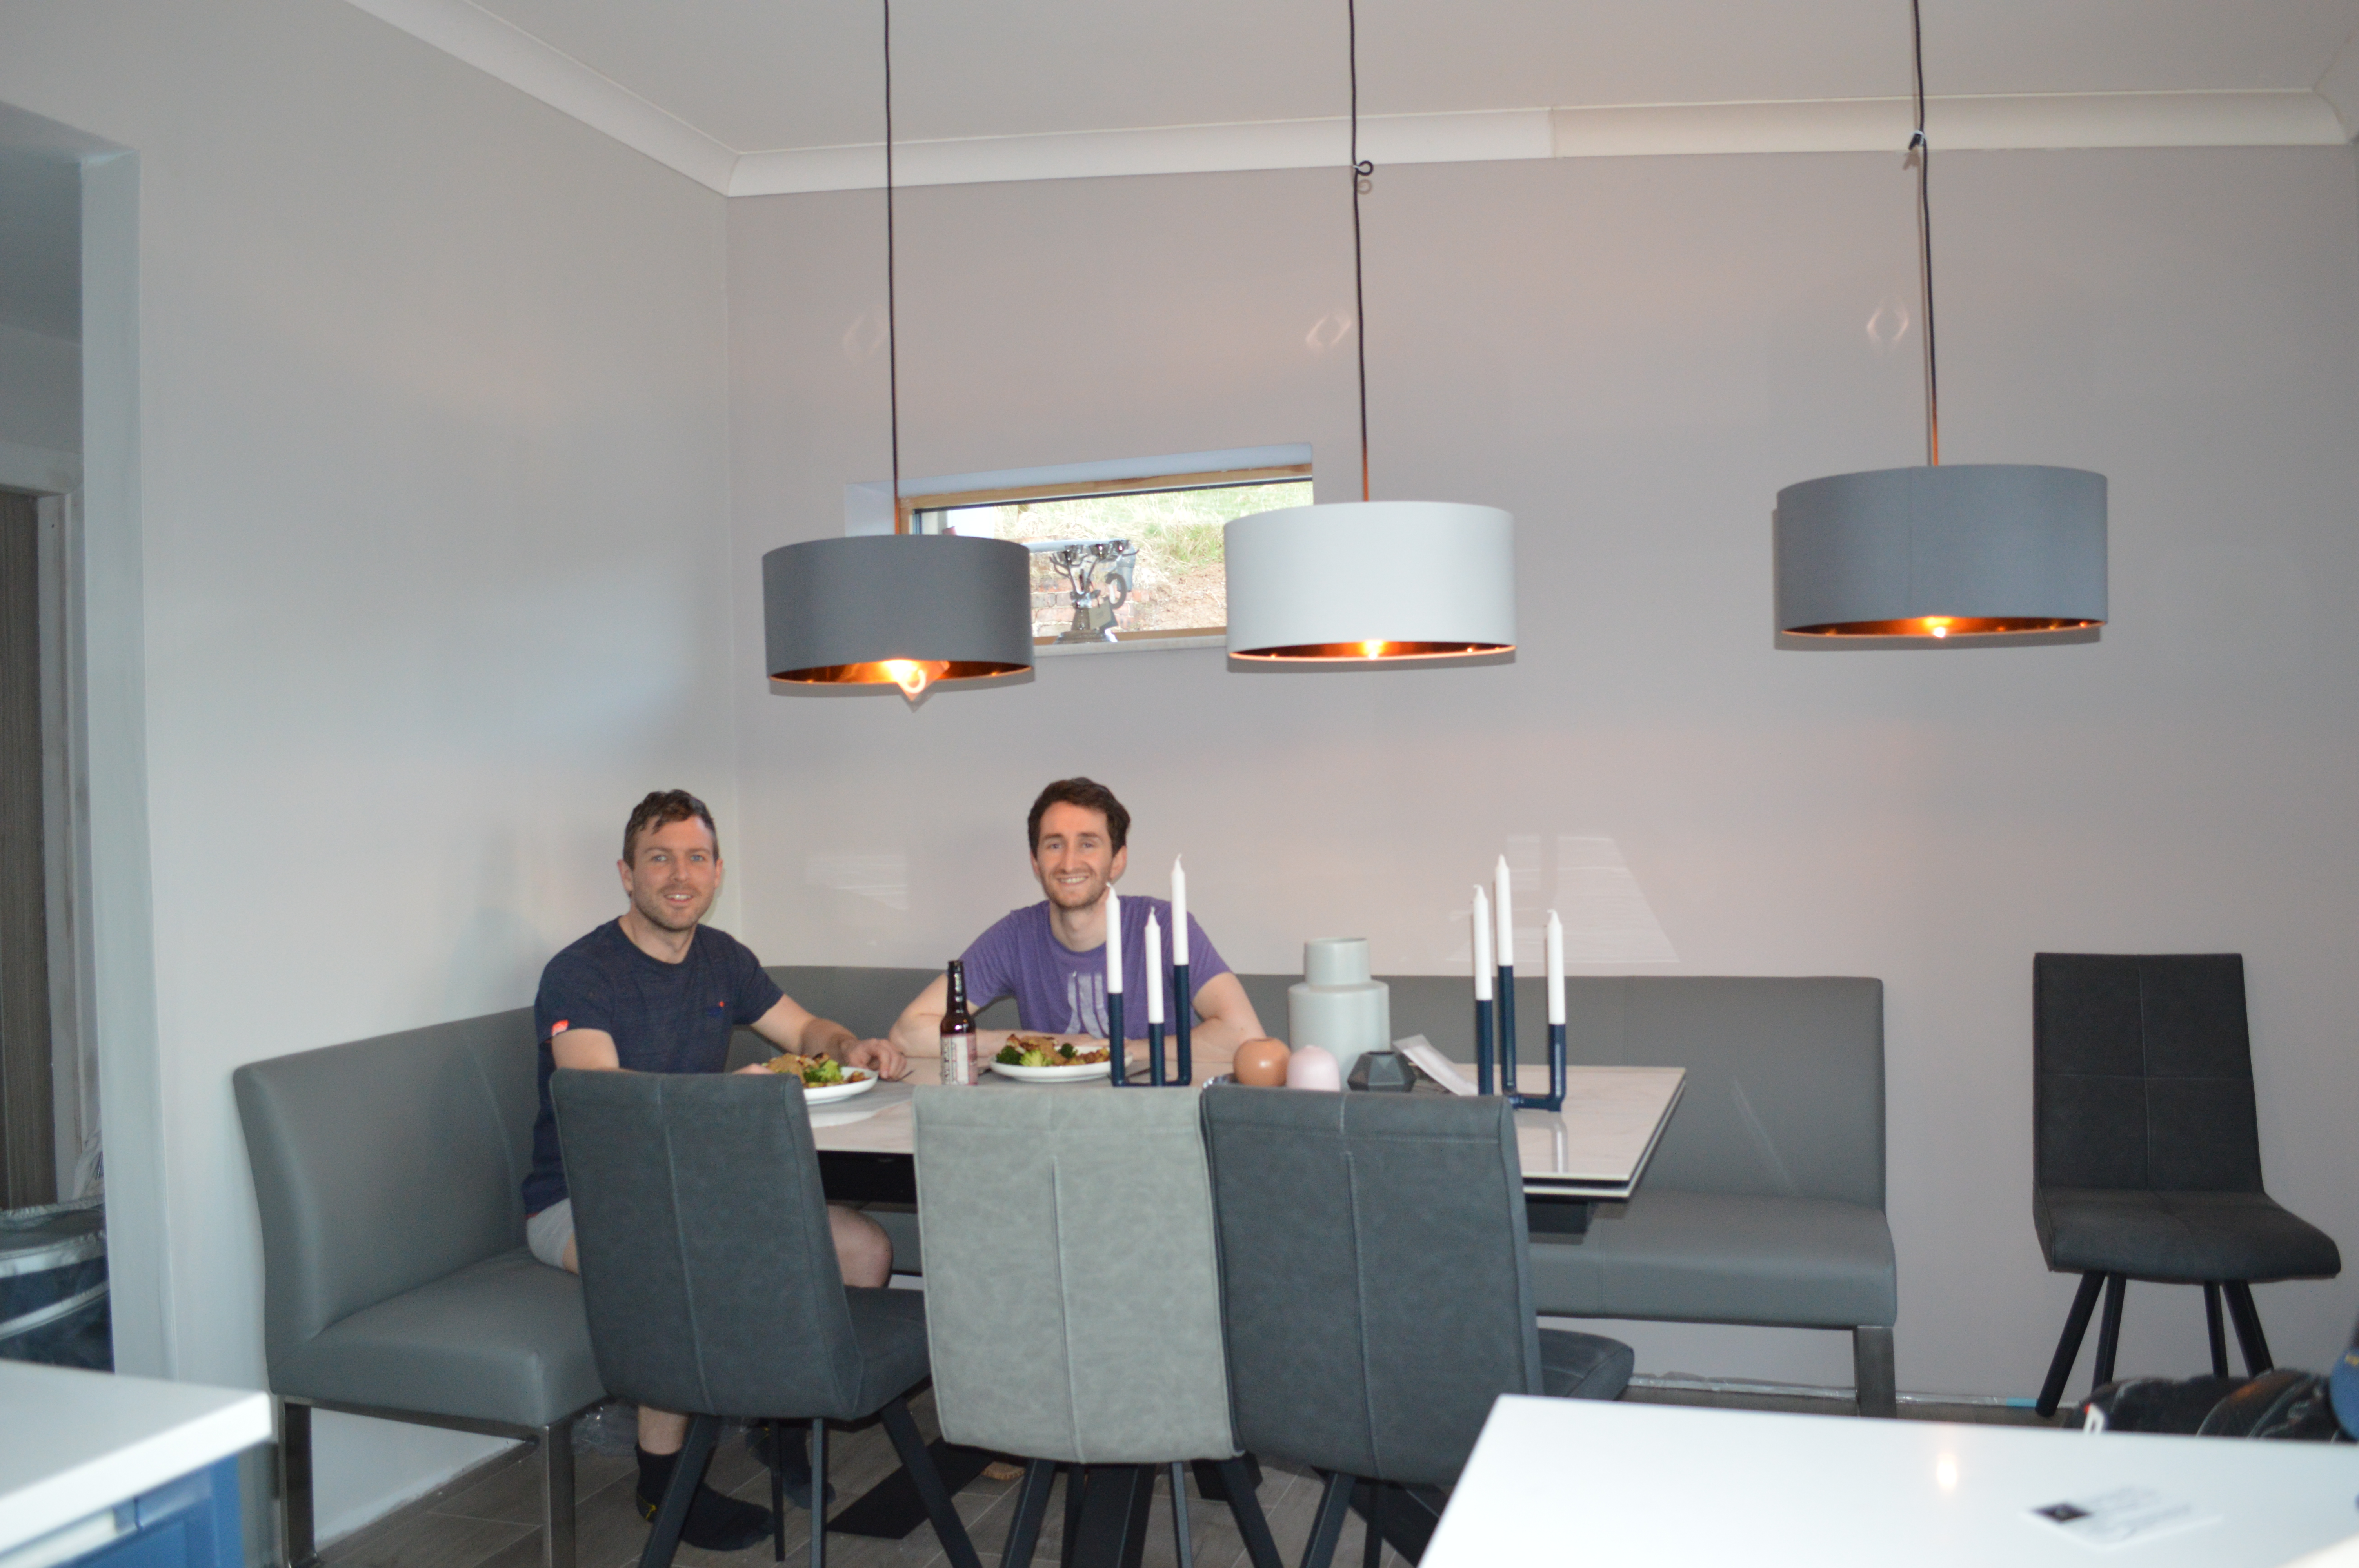
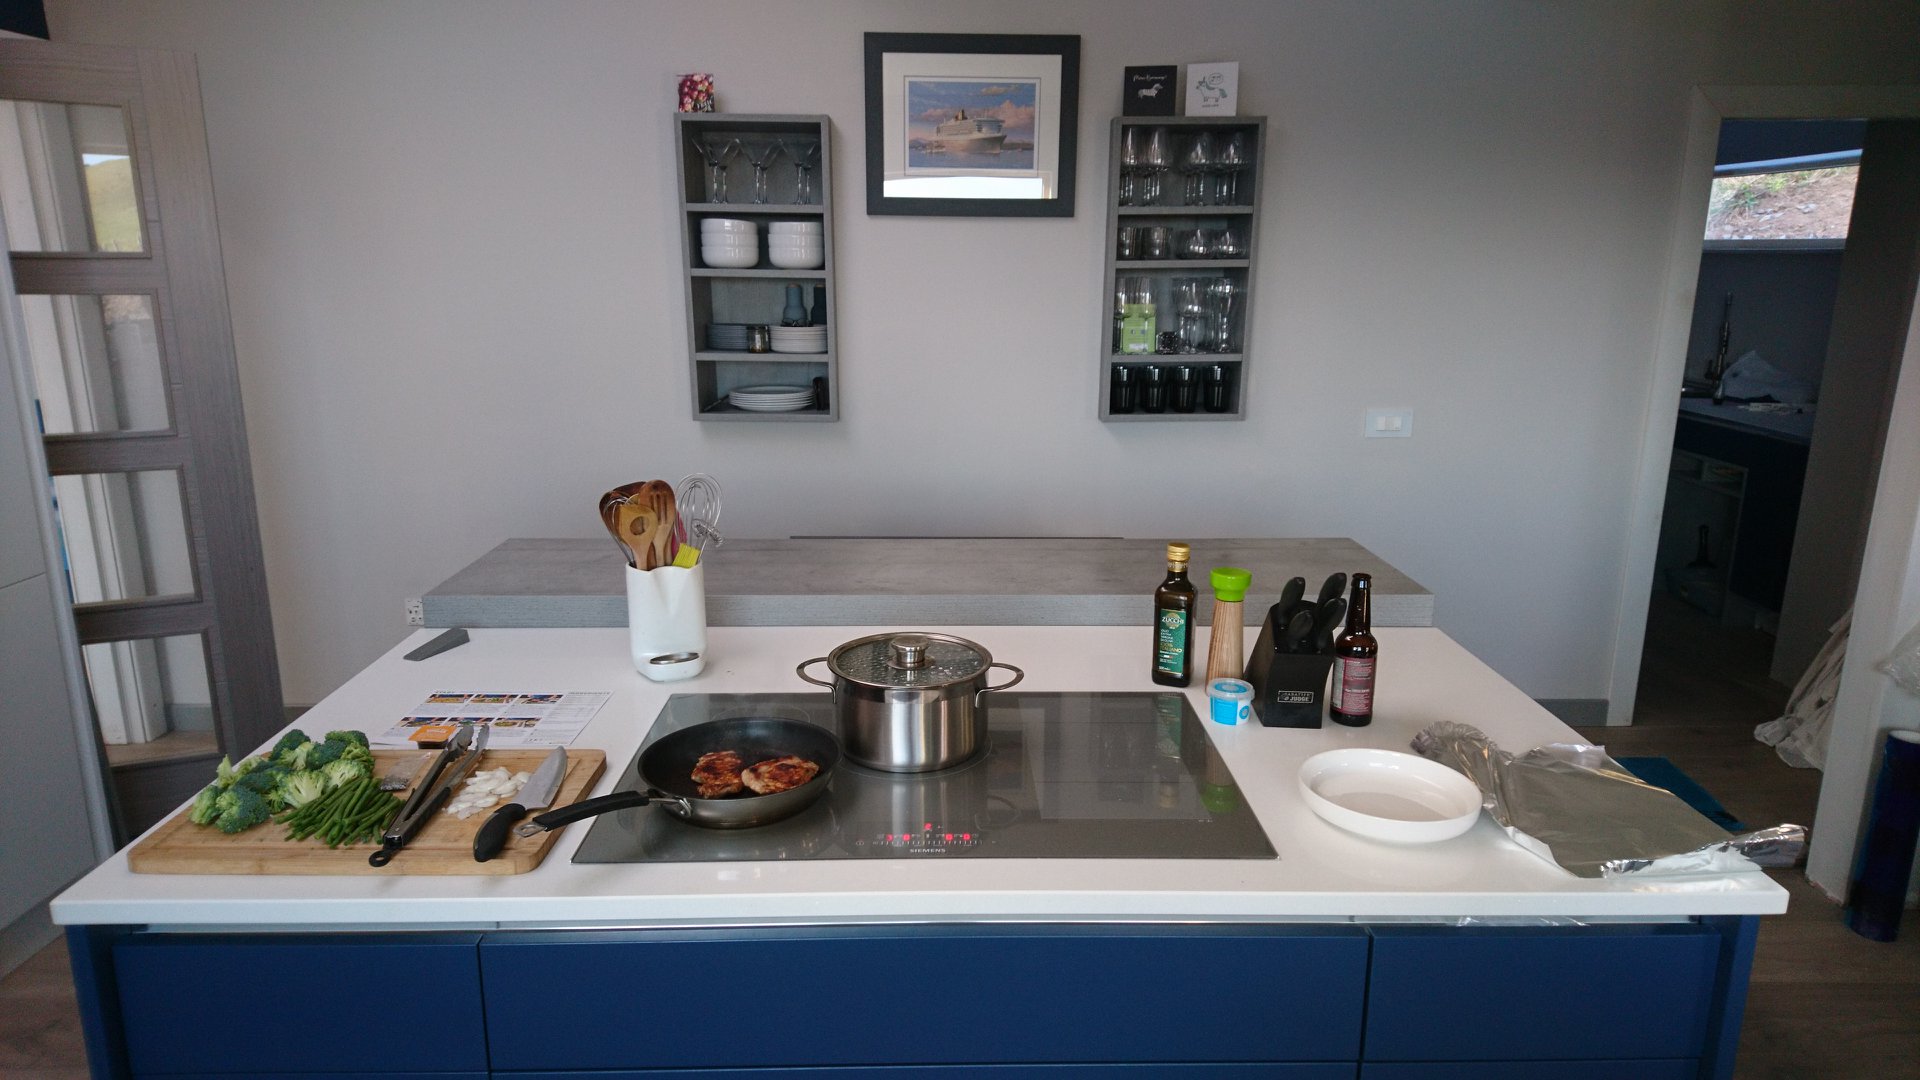


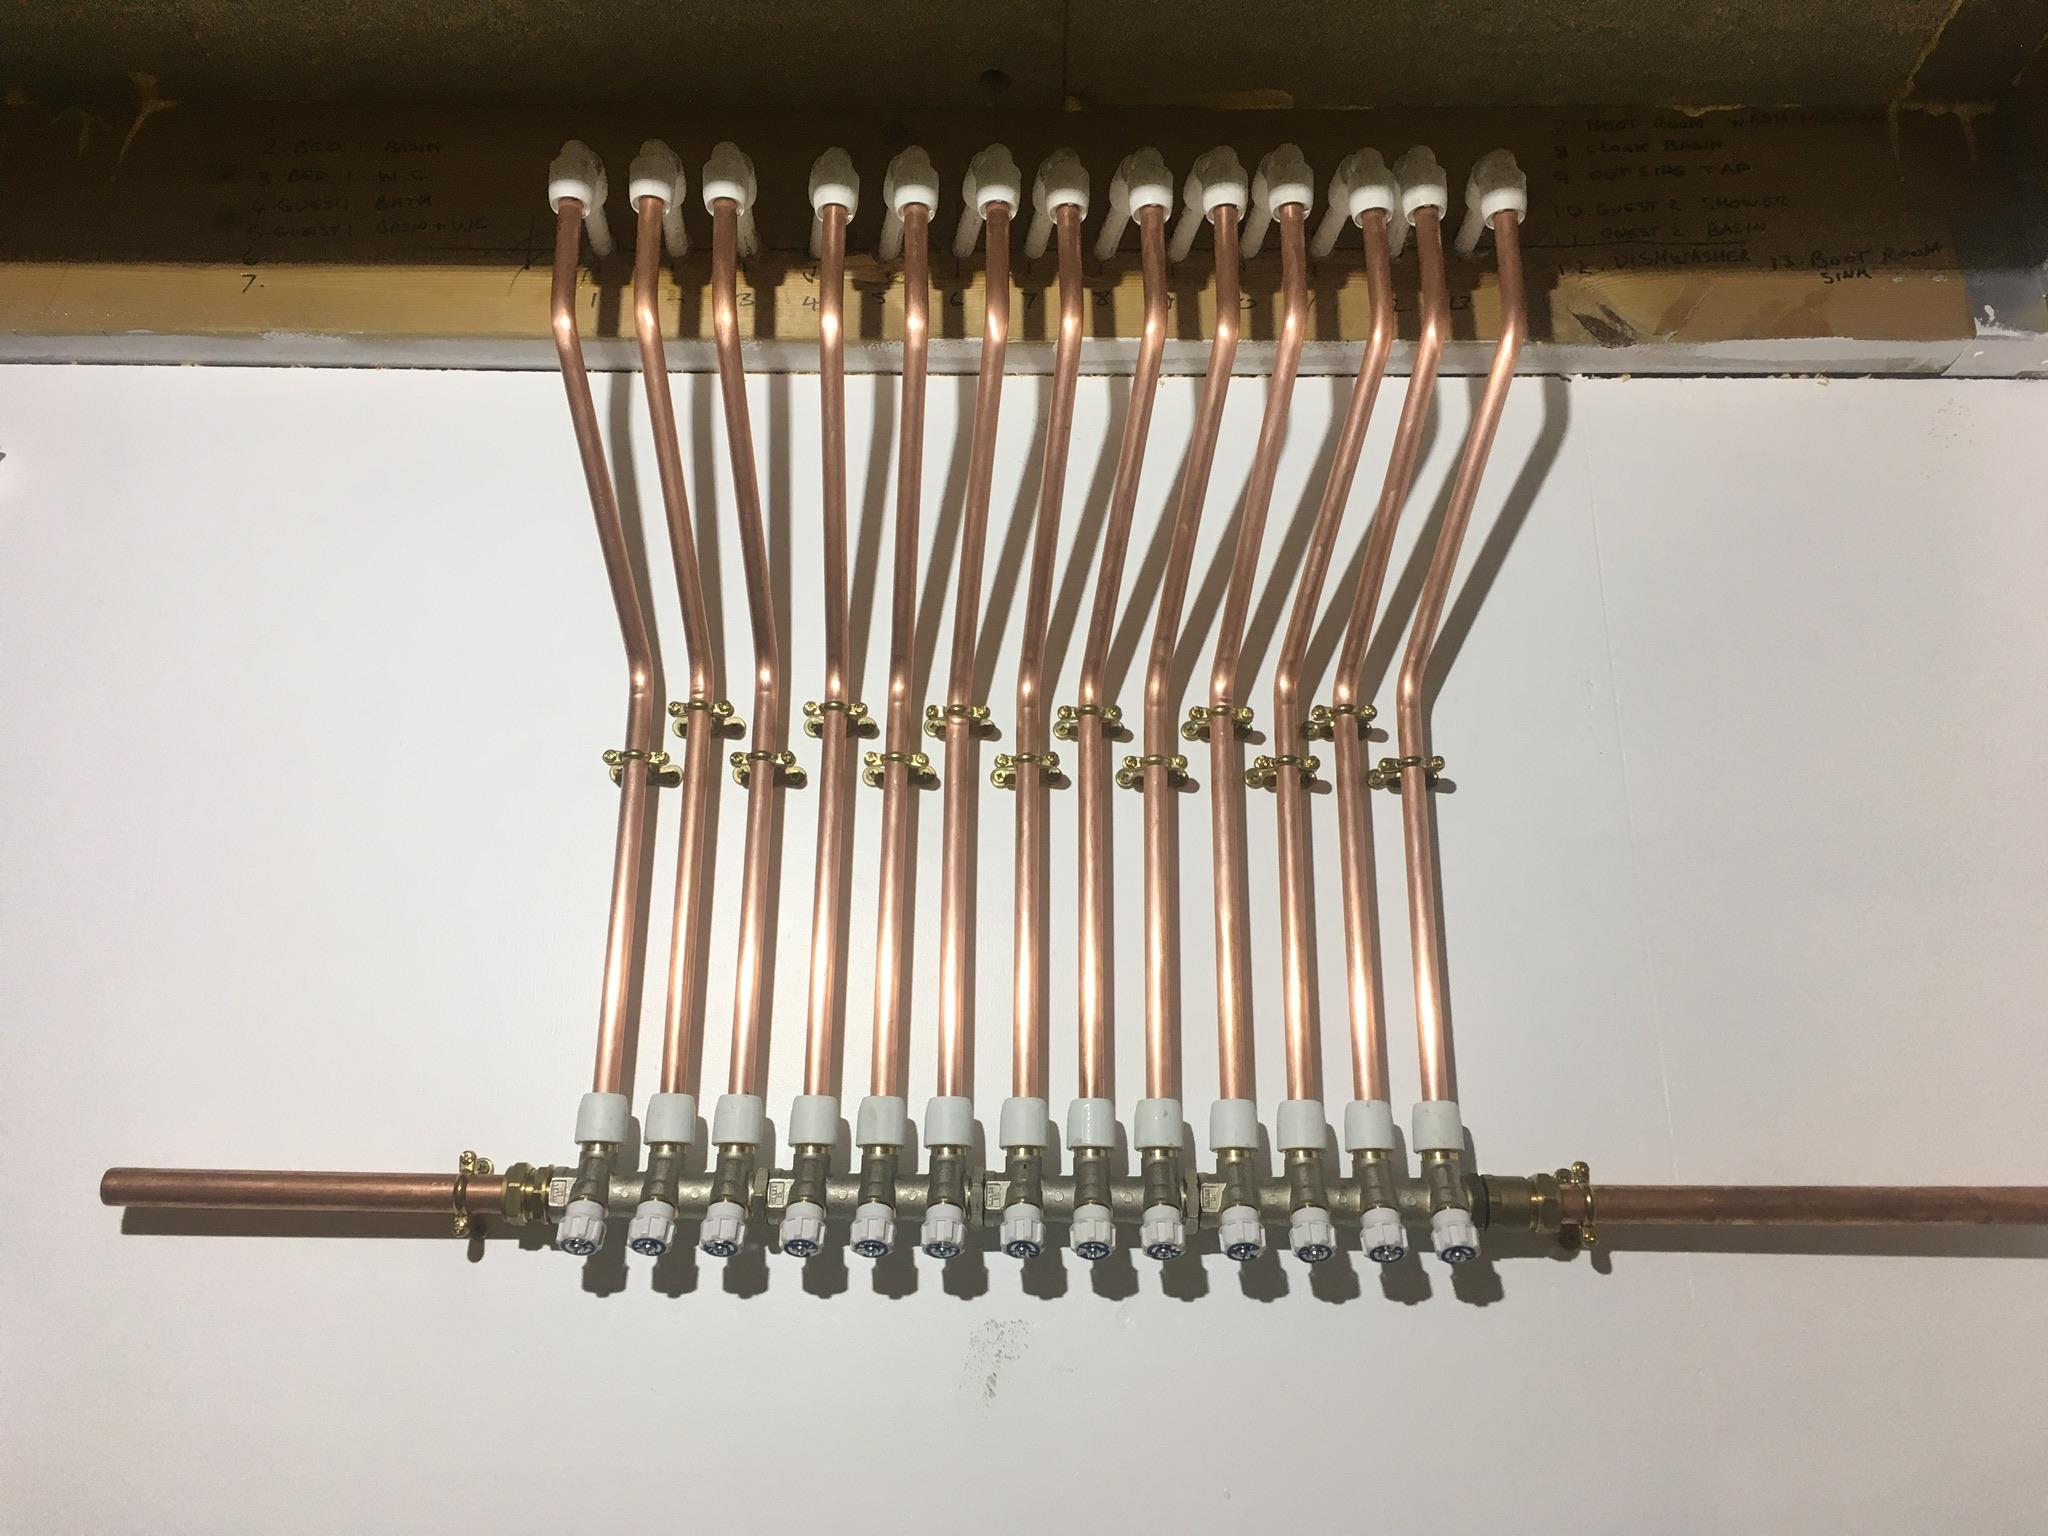

This leaderboard is set to London/GMT+01:00