
Leaderboard


Popular Content
Showing content with the highest reputation on 06/29/22 in all areas
-
Loads of speed, next to zero pressure whilst drilling, and a good diamond bit shouldn’t break out. If they’re very hard or very soft bricks you’ll need a tower scaff and do as per @joe90 did. Fail to prepare, prepare to fail. Simples.2 points
-
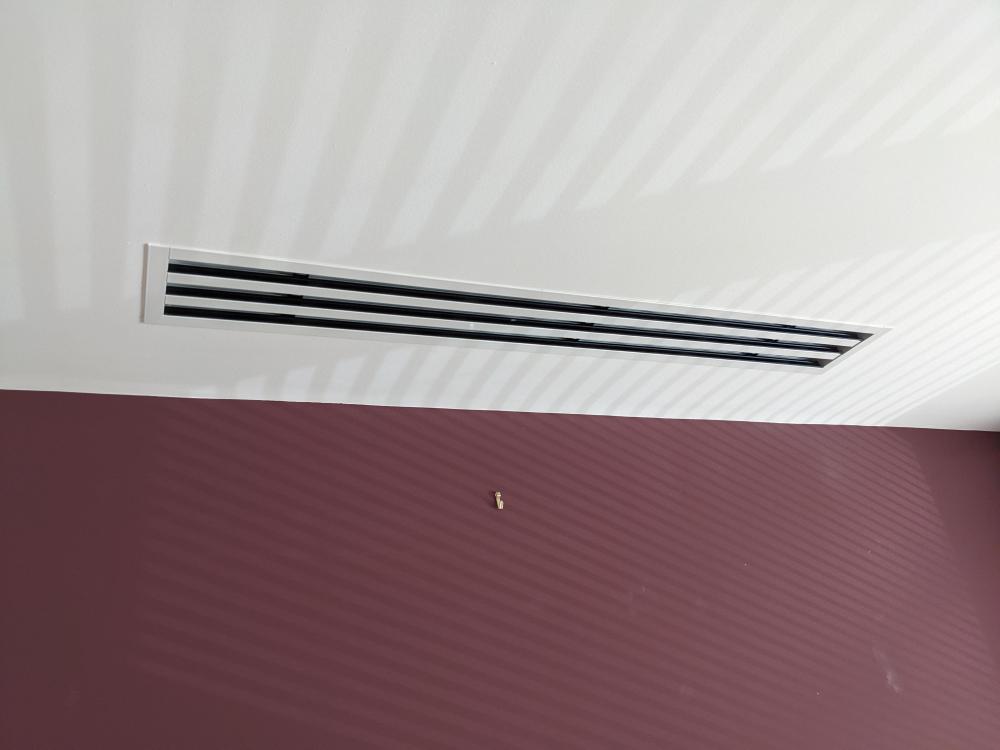
Small update on my FCU install: yesterday I finished installing one of the bedroom ducted plenums and grills. It was a pig of a job to do. Wish I'd done it during the build rather than thinking "oh that will be easy to retrofit". But I'm pleased with the result. Just 3 more to go!! This one: https://www.ventilationland.co.uk/product/35035/slot-diffuser-with-3-adjustable-slots-of-1000-mm.html - along with the plenum, costs more than the FCU 🙄
 1 point
 -
Probably best, saves us reading all the way back to the beginning - picking up all the details, filtering out the various side eddies (where eddy = onoff), endeavouring to work out what the question was and try to frame an answer while sustaining the will to live and giving a dam.1 point
-
Surely just using beading and packers in a frame, like any window? Or am I missing something?1 point
-
I core drilled mine from the inside till the pilot drill penetrated the outside, then using the pilot hole finished from the outside which stops brick bits flaking off. (We did still have scaff up tho). Just sealed inside where the airtightness barrier should be.1 point
-
Thank you, I am. 6 years at university studying it. It is worth getting, or making, an energy data logger, then analyse what is really happening. It can show you so much.1 point
-
welcome Zak. always nice to have another structural engineer on here to assist and share their knowledge and I'm sure there's someone on here that can assist with your query!1 point
-
I've got one for our island and also for my study desk. love tech too much to not too!1 point
-
CAT6 is not just for superfast internet. It's also a very useful medium for getting 8 cores of low voltage electrical signal to a location. For example, I've used it for motion sensors, light switches, temperature sensors, primary side of relays, low voltage power delivery, driving low wattage LED strips, charging my toothbrush, control of the "call for heat" dry contacts on the ASHP, 0-10V driver for the PV redirect SSR, powering the cat-flap, HD-BaseT for HDMI video distribution, and probably a bunch of other things that don't come immediately to mind. To the OP - I put 2x CAT6A to the kitchen island, but haven't used either so far 🙂 One possible idea was to install a Loxone Touch Surface into the worktop, but the boss wasn't having any of that. The other is controlling addressable LED strips around the plinth -- still waaay down the priority list!1 point
-
Many people where, my first house was similar. Why I like insulation, airtightness and a heating system.1 point
-
Let the stone supplier / fitter worry about this. They will template it first usually with plywood or something and will make the end panel match the wall.1 point
-
The issue with ventilation is, to get full output you need some airflow at the rear for cooling. GSE trays do include ventilation. Even without cooling it is at max output when you may loose a few percent in performance, so 20 or 30 days a year, for a couple of hours a day if facing south. Not something to worry about.1 point
-
Good point. Often if converting an attic you run into head room problems and you want to try an avoid having to strengthen / deepen rafters if you can. PV panels have become much lighter as time has passed. SE wise you check the roof for the following: 1/ The self weight of the tiles / rafters and so on plus an access load of about 60kg per square metre. 2/ If a low pitched roof.. access plus wind loading.. sometimes critical if a big flat roof 3/ Snow loading plus roof self weight. Now in many parts of the UK the snow loading is much smaller than the access load. And under normal conditions you would not expect folk to be standing/ placing scaffolding etc on your panels (this would be what we call an accidental loading case). Thus you can primarily design for the self weight of the roof plus the panel weight plus snow which could be less than self weight plus access and you may find that works to give you head room inside if you get stuck. You could go further and go for an in system (if you can detail the ventilation ok) where you just have lightweight trays. Load is reduced further (no tile weight etc) and you save a bit on the tiling which offsets the cost of the trays. The difference is small but if you are struggling for head room have a chat with your design team.1 point
-
All that solar stuff looks the mutts. However, those wall cappings.........😂 ......Only kidding buddy. Enjoy your beer. Those cappings are way better than your solvent pipe stickings..1 point
-
Without knowing what the electrician intended I think I would run the following (twin and earth)... One from PIR to the top of the wardrobe (where you planned to put the driver). One from wardrobe/driver to the lamp. One from PIR to a switch to control the PIR. In each case leave several feet of wire (2ft?) coming out of the wall. If the electrician thinks he can hide the transformer somewhere in the wall behind the wardrobe or in the ceiling let him do that. Normally you want transformers accessible. It's probably a regulation as well.1 point
-
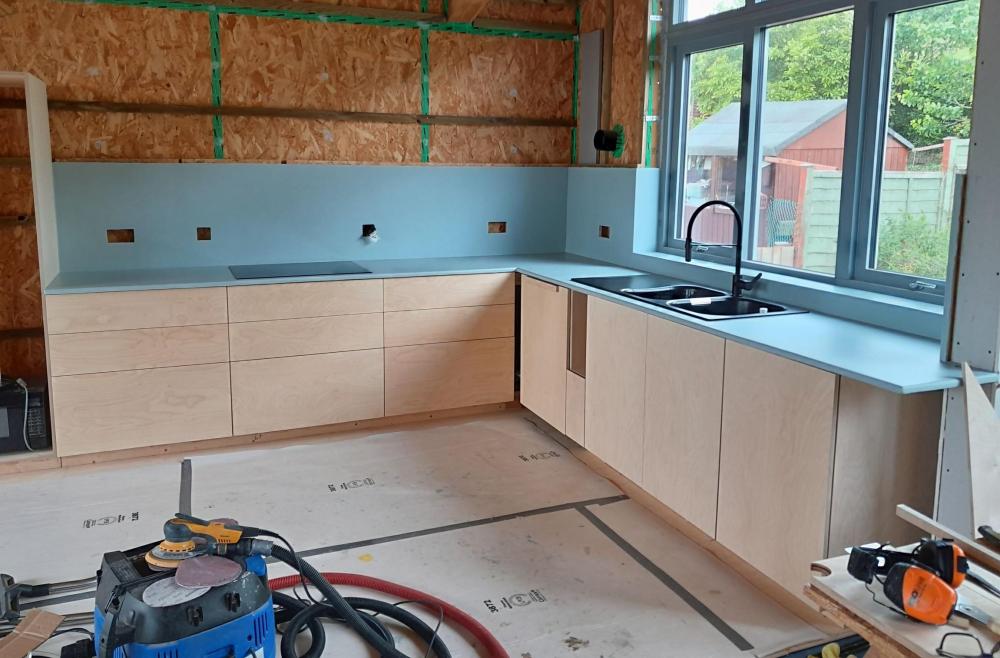
As you've already suggested, you've tanked the critical areas and you're installing the boards to go over the top edge of the shower tray and be sealed. If you're putting the sealant on, apply it to the top of the shower tray and then fix the boards on top of that so that the sealant is squidged between the board and tray and then clean it up nicely. I went extra by also having a final silicon bead at the bottom of the microcement/shower tray but is probably not necessary at all going by the installation guidelines. +1 to using the fine surface treatment to fill all the screw holes and joints before applying primer and mesh and do use scrim tape for the corners rather than the base layer mesh. I've just done this on my new kitchen worktop and it was so much easier. Are you doing it yourself? Microcement kitchen worktop although i decided on this occasion not to make the sink out of microcement too - just couldn't muster the energy for that much. (It looks more blue on the photo than it is, which is a 'silver' grey).
 1 point
 -
The next stage of the setup of the site took place over the last 3 weeks. with some good progress. The trip up North, 433mile from our current rental in the NW of England. I set off on Wednesday morning in the 7.5T truck, and the 2 dogs for company. I took some materials with me, and had a gut feeling I was overloaded. I had worked out the approx. weight of what I was taking, but was unsure of the TARE weight of the truck. so I didn't take all I was planning. Luckily the nice guys from VOSA, At Carlisle (Todhills check site), confirmed my suspicions when the invited me in for a check. I was over weight, but the truck and my paperwork were all in good order, and they give the truck a thorough looking at. The upshot of this was me renting another 7.5T truck for storage, offloading the excess weight, driving the remaining 333 miles, unloading, returning the next day with the empty truck, re loading and driving back to site. 1100 miles in 38 hours. not what was planned, but you live and learn.... I arrived back on site on early Friday morning, 02.30am. and slept in the cab of the truck, until I was woke up at 05.10, by the guy delivering the Static, he was at the end of the road... Here's a screen grab of our new home arriving to site, this was 05.25 am... I hired a contractor to carry out the highway works for the site entrance, basically as he had the correct insurance and RAMS it was easier to get this stage subbed out. The idea was he would open up the site, with a 5 T digger, start the initial road and stone this up with around 60T of type 1. I would then meet on site and hire his man for a few days to assist with the pecking of the treatment plant. This didn't go to plan, they had to use a 13T machine, as it was available, so when I eventually get to site on the Thursday, due to the size of machine, the operator has completed the initial works, then pulled out approx. 60M of the road, and pecked the treatment plant hole, and I got this for free... 😁 Having a 13t machine on site, with operator for the Friday, I needed to make the most of it, as I was only paying for the rental of a 5T machine. Mikey the operator, made short work of pulling out the remainder of the road up to the location of the house, in total this road is around 90M. Next I had him strip the area for the house. The house is around 13M x 7M, so I wanted to strip back a working area around the house, my thought was we would hit the bed rock so this was the plan, we marked out a 16M x 11M rectangle, and he set to it, it took him about 2 hours to strip the land and scrape it clean. The above is the bedrock where the house will be, and the road coming up the side of the house. (I used a geotextile as a separation layer for the road, although in sections the road is on bedrock anyway,) You can make out that there is a fall from the top left falling to bottom right, this will be made up with type 1 stone, raising SW corner of the house around 700mm, I will raise the road in this section and use some of the top soil to level this out a bit and soften the impact. The last Job for Mikey was to dig me the trench for the services, he dug a 600mm wide trench about 8M short of the Treatment plant (to allow me access to move the spoil, and a similar distance short at the other end for me to connect to the water. just shy of 60M. Friday was a busy day on 3 hrs sleep. The treatment plant also arrived as can be seen above, I went for a Tricel unit, this was based on cost, treatment, dimensions and availability. Last job for the day was to move the caravan, Mikey helped me with this and we stripped a bit more land and located here temporarily for the night North / South. Saturday I decided to get the water connected to the caravan, for this I needed to complete the trench from the standpipe to the large service trench. I never dug this on the first trip as I was concerned about the electrical supply to my neighbours property. Cables seemed to run across my field at around 300/ 400 mm depth. I used my contact at SSE and he arrange to get the cable moved / deepened. This was carried out a few weeks prior and we discussed the position of the new road, and he made a site visit and we talked about me extending the water pipe trench in both directions so that I could also lay a utilities duct to the road for broadband. So to say I was a bit surprised, and p***ed off when I cut through the neighbours supply cable. The cable was as I was worried about 400mm deep, and the marker tape was next to the cable.... How to upset your new neighbours by having their electricity supply stopped two times (1 for the initial connection, 1 for the remedial works), only for me to cut the cable for a third time.... At least they were very prompt, they arrived after about 40mins, and it took him around an hour to re-joint the cable. I then removed the water standpipe and ran my new water main up to the caravan. It will tee off for the pods at some point, and then continue up to the house. SO now I had running water in the van, and gas for the water heater and hob / oven. Sunday was glorious, so I caught up on my sleep, and had a restful day. Scottish Power were due to fit the meter on the Wednesday, so I needed to get my service cables from the meter box into the service trench and up to the caravan and to the pods. I dug a trench across the road and through to the service trench. I used a 125mm Duct, and inside here I ran some 6mm SWA to supply the pods and some 50mm Duct to run a service cable to the caravan and ultimately up to the house. I pulled the cables through, and I have put a caravan hook up point next to the static. Tuesday / Wednesday, I had 80T of Type 1 MOT delivered in stages, I spread this out using the Back hoe, and vibrating roller. so by the end of Wednesday I have the base in for the road. which will give me good access for deliveries. Scottish power were a no show..... Discussing the caravan with the neighbour they advised turning the caravan 90deg, so it was end on East / West as the stronger winter winds tend to blow from the West, and being side on would ultimately be unstable. I dug out another section of land next to the caravan with the idea of swinging the van around at weekend when Mandy Joined me for the last week. It took me and Mandy all Saturday to move the van, using the backhoe to pull it around. and most of Sunday to get it jacked up off the ground and levelled. We dug 4 pits later on in the week and concreted some anchors in to chain the van down. The van in position with Mandy getting the best job of the week to squeeze under the van and start to insulate the water pipes... Scottish Power let us down again with a missed appointment on the Tuesday with a promise of Friday.... They actually turned up late Thursday and fitted the meter, so we had power on the Thursday night. We spent a couple of days moving spoil around the site to create a mound of earth to shelter and soften the impact of the pods, this was also a planning requirement for the neighbours amenity. Still work in progress and there's 10's of tonnes more to move. Last job before packing up on the Friday was to level the base of the treatment tank pit. At this point we were still waiting for the building warrant. so couldn't actually install the plant. We end the week by getting the Building warrant approved, and the certificate for discharge for the treatment plant both on Friday. Thanks for reading..1 point
-
Brilliant thread tbh, I'm in awe. Wish I understood it but in awe.0 points
-
I had a customer phone me yesterday. "Can you come and look at my heating, it turns on and almost straight away the thermostat turns off"0 points
-
Thermals are the norm, fur coat is tricky. Tends to make me wheeze. My sister has my mother's old mink coat. If asked in the street, by a total stranger, if it is real, her reply is "yes, do you have a problem with that". Mt normal reply is "do you know how women get minx: the same way minx get minx" Usually defuses the situation.0 points
-
Give up the telly and drink tap water - 100% saving on those two - what's next. Turn off my pc and stop posting he..0 points
-
There’s a long story with those . Wrong sizes , months of delays … basically (expletive deleted) off 😁0 points


This leaderboard is set to London/GMT+01:00