
Leaderboard


Popular Content
Showing content with the highest reputation on 05/06/22 in Posts
-
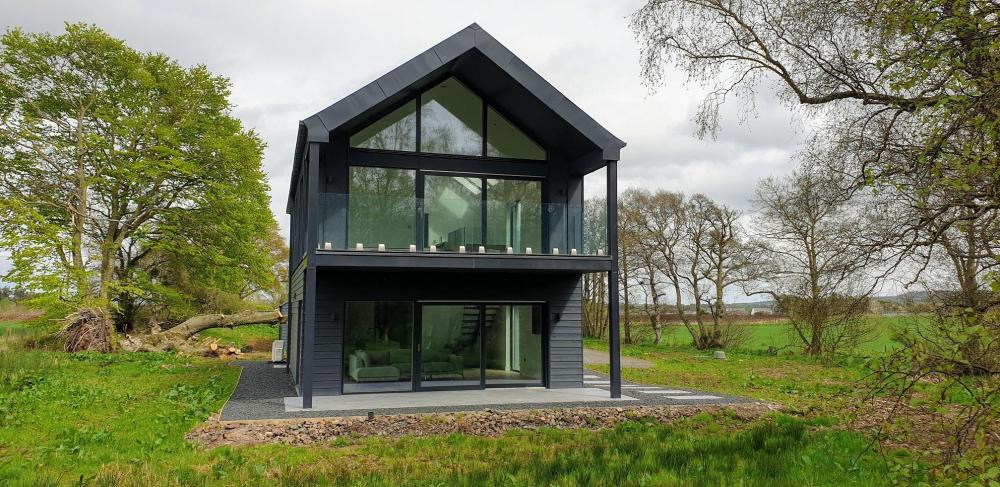
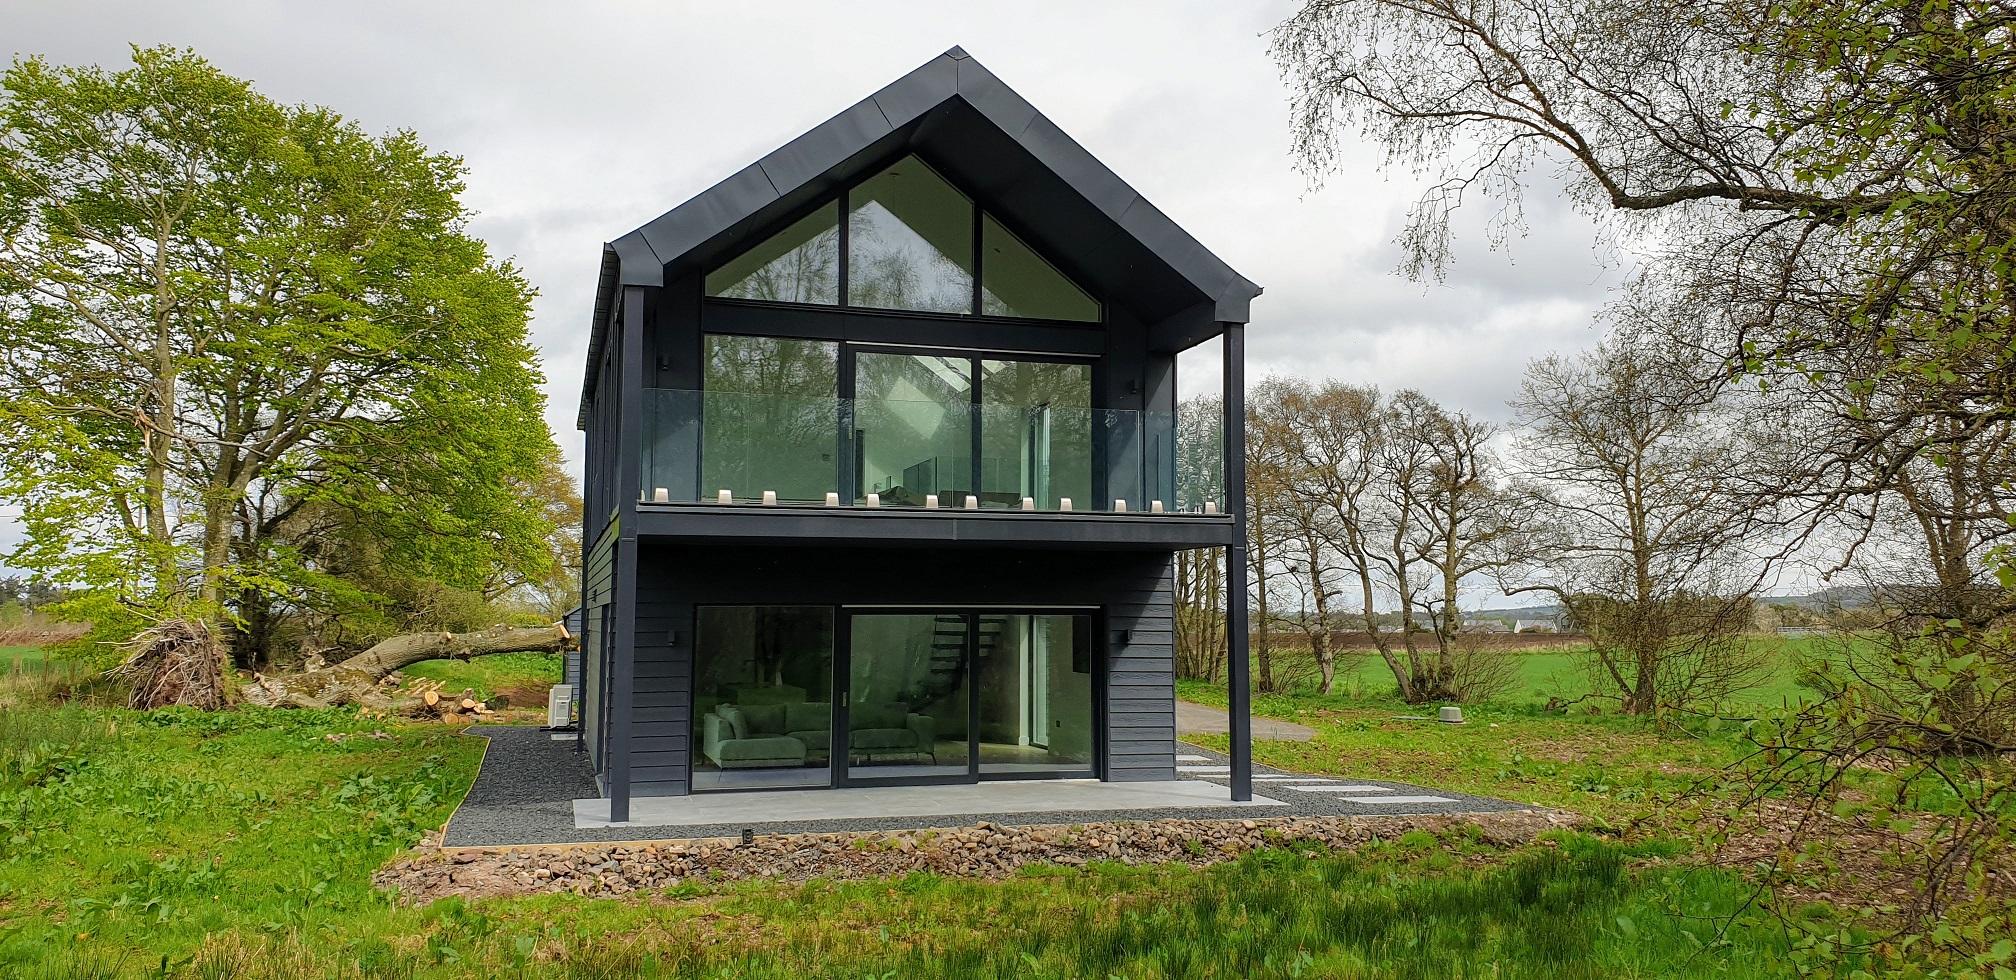
We bought our plot over 6 years ago and it took until just a few weeks before the first lockdown to actually break ground. It's been an absolute pig of a time but and we are finally in the house, albeit with still a fair bit to do. Thanks for all the help and advice, going right back to the previous incarnation of the forum. I'll no doubt need more in the coming months.
 10 points
 -
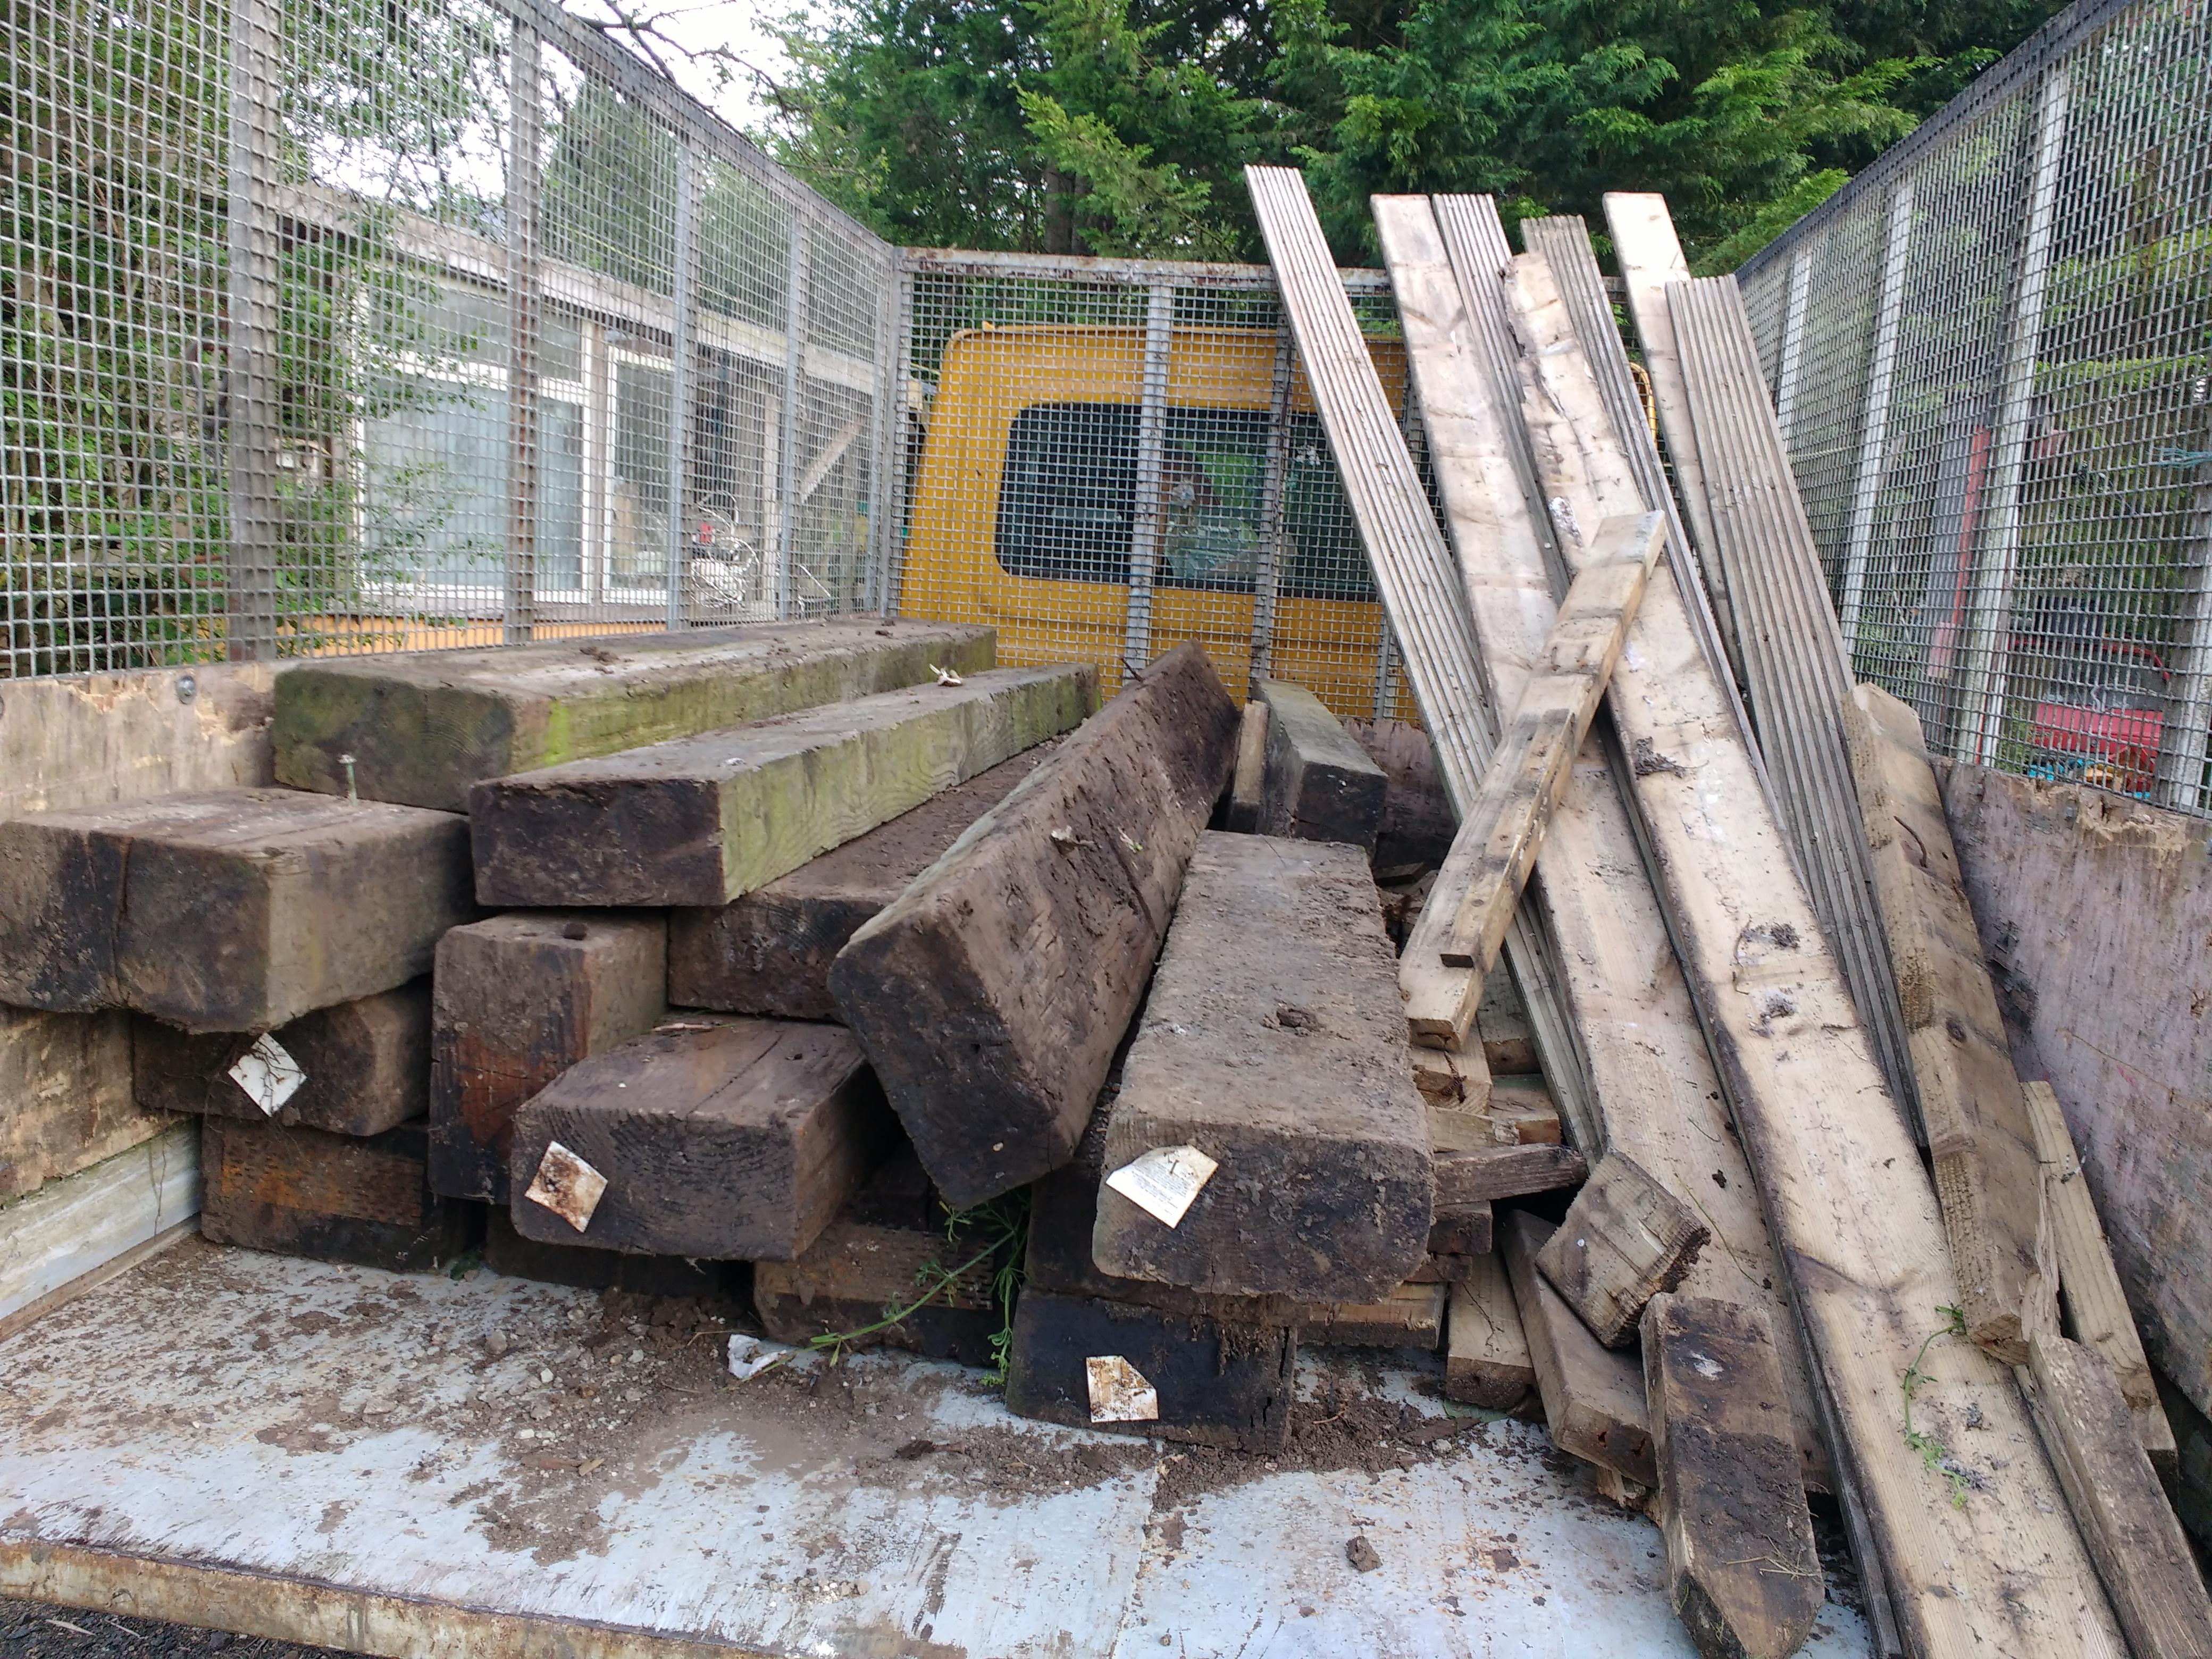
After missing out on some sleepers on Gumtree a little while ago, at what I thought was a steal, I figured it wasn't meant to be but reckoned something would turn up. My nephew suggested I look on FB which I don't frequent particularly. Had a quick look but nothing local and been busy since then so didn't really bother again. Then tonight my nephew rocks up and asks what I was doing tonight. He'd found this lot posted on FB an hour before, free! Off we went: A mix of proper sleepers and some modern pine ones I think judging by the varying weights.
 3 points
 -
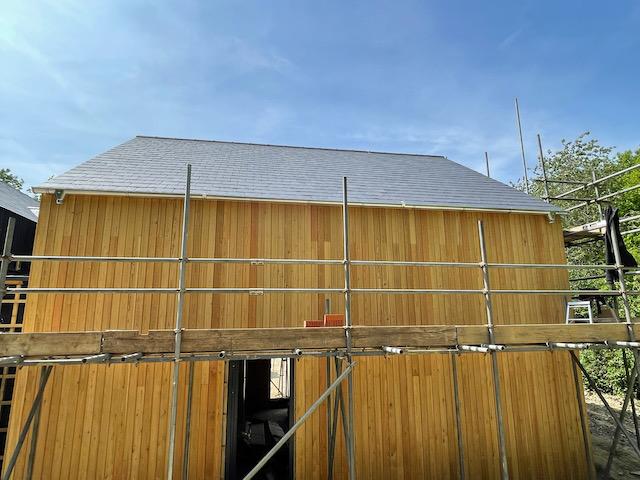
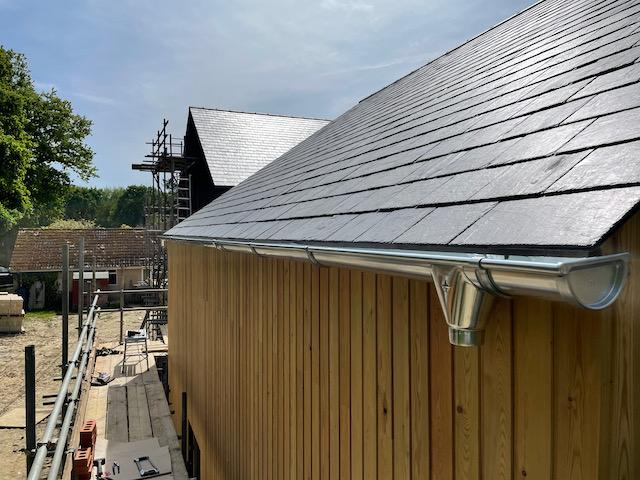
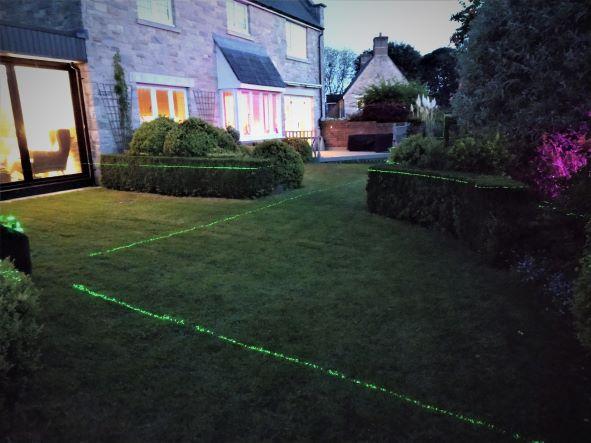
so we decided to go with Zinc guttering using a dry fix system (it's Zambelli) from Rainclear who did take-off for me and had a massive 30% off with next day delivery! couldn't be happier with them and their service. and I've done the first elevation. laid level without a fall as suggested by @Russell griffiths and confirmed by Rainclear due to the large and deep profile of the zinc guttering. And as @Roundtuit said, it is easy to fit and cut with a hacksaw and tin snips. even managed to fit our outlets without drama. all in all, it is easy and my worries were unfounded. and it looks fab! 🥰
 2 points
 -
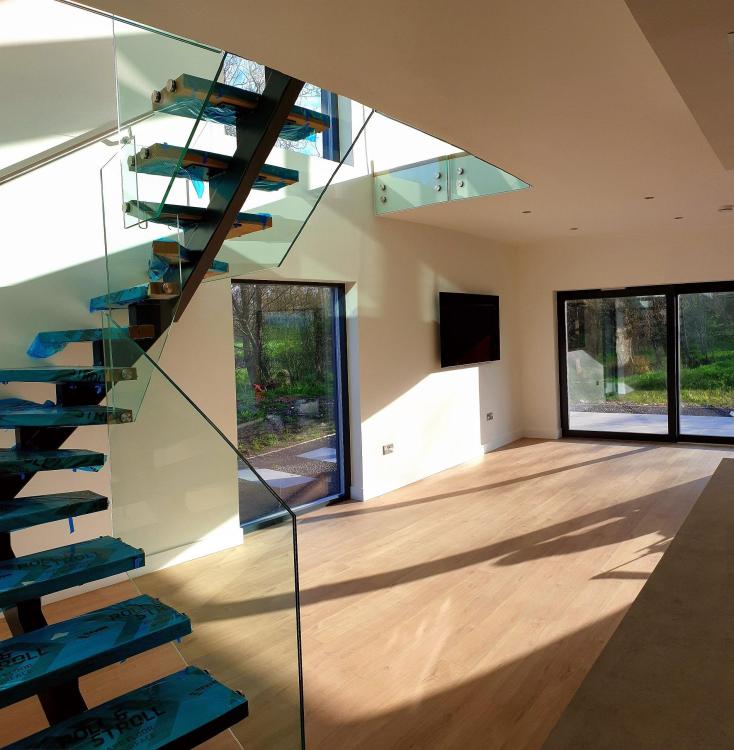
I love those stairs . Like a dragons spine with Daenerys Targaryen walking down them naked - oops sorry , one of my many fantasies…2 points
-
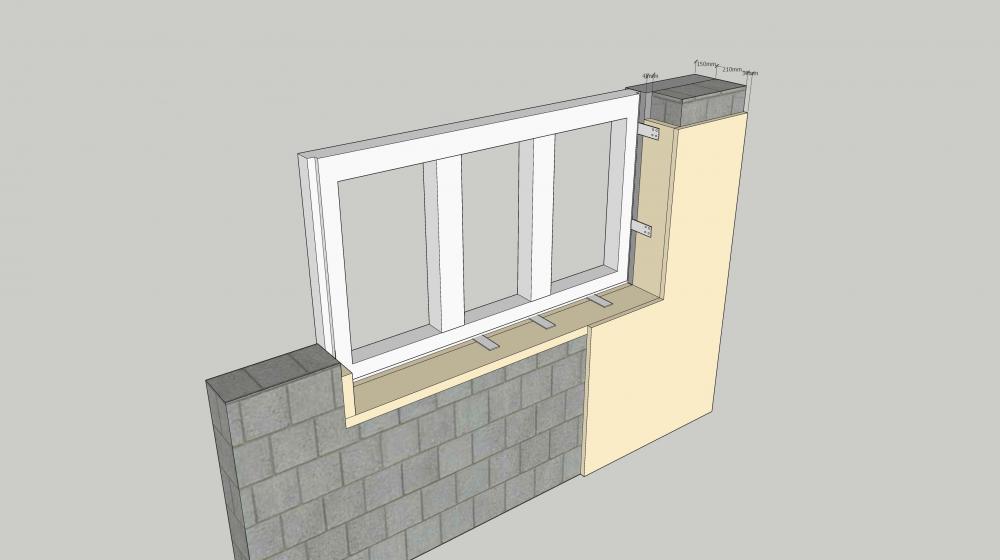
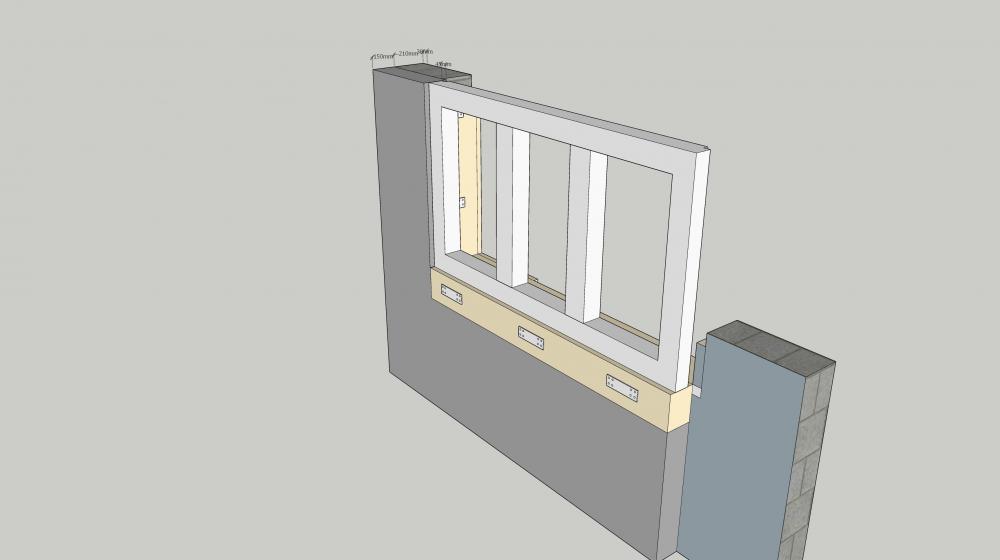
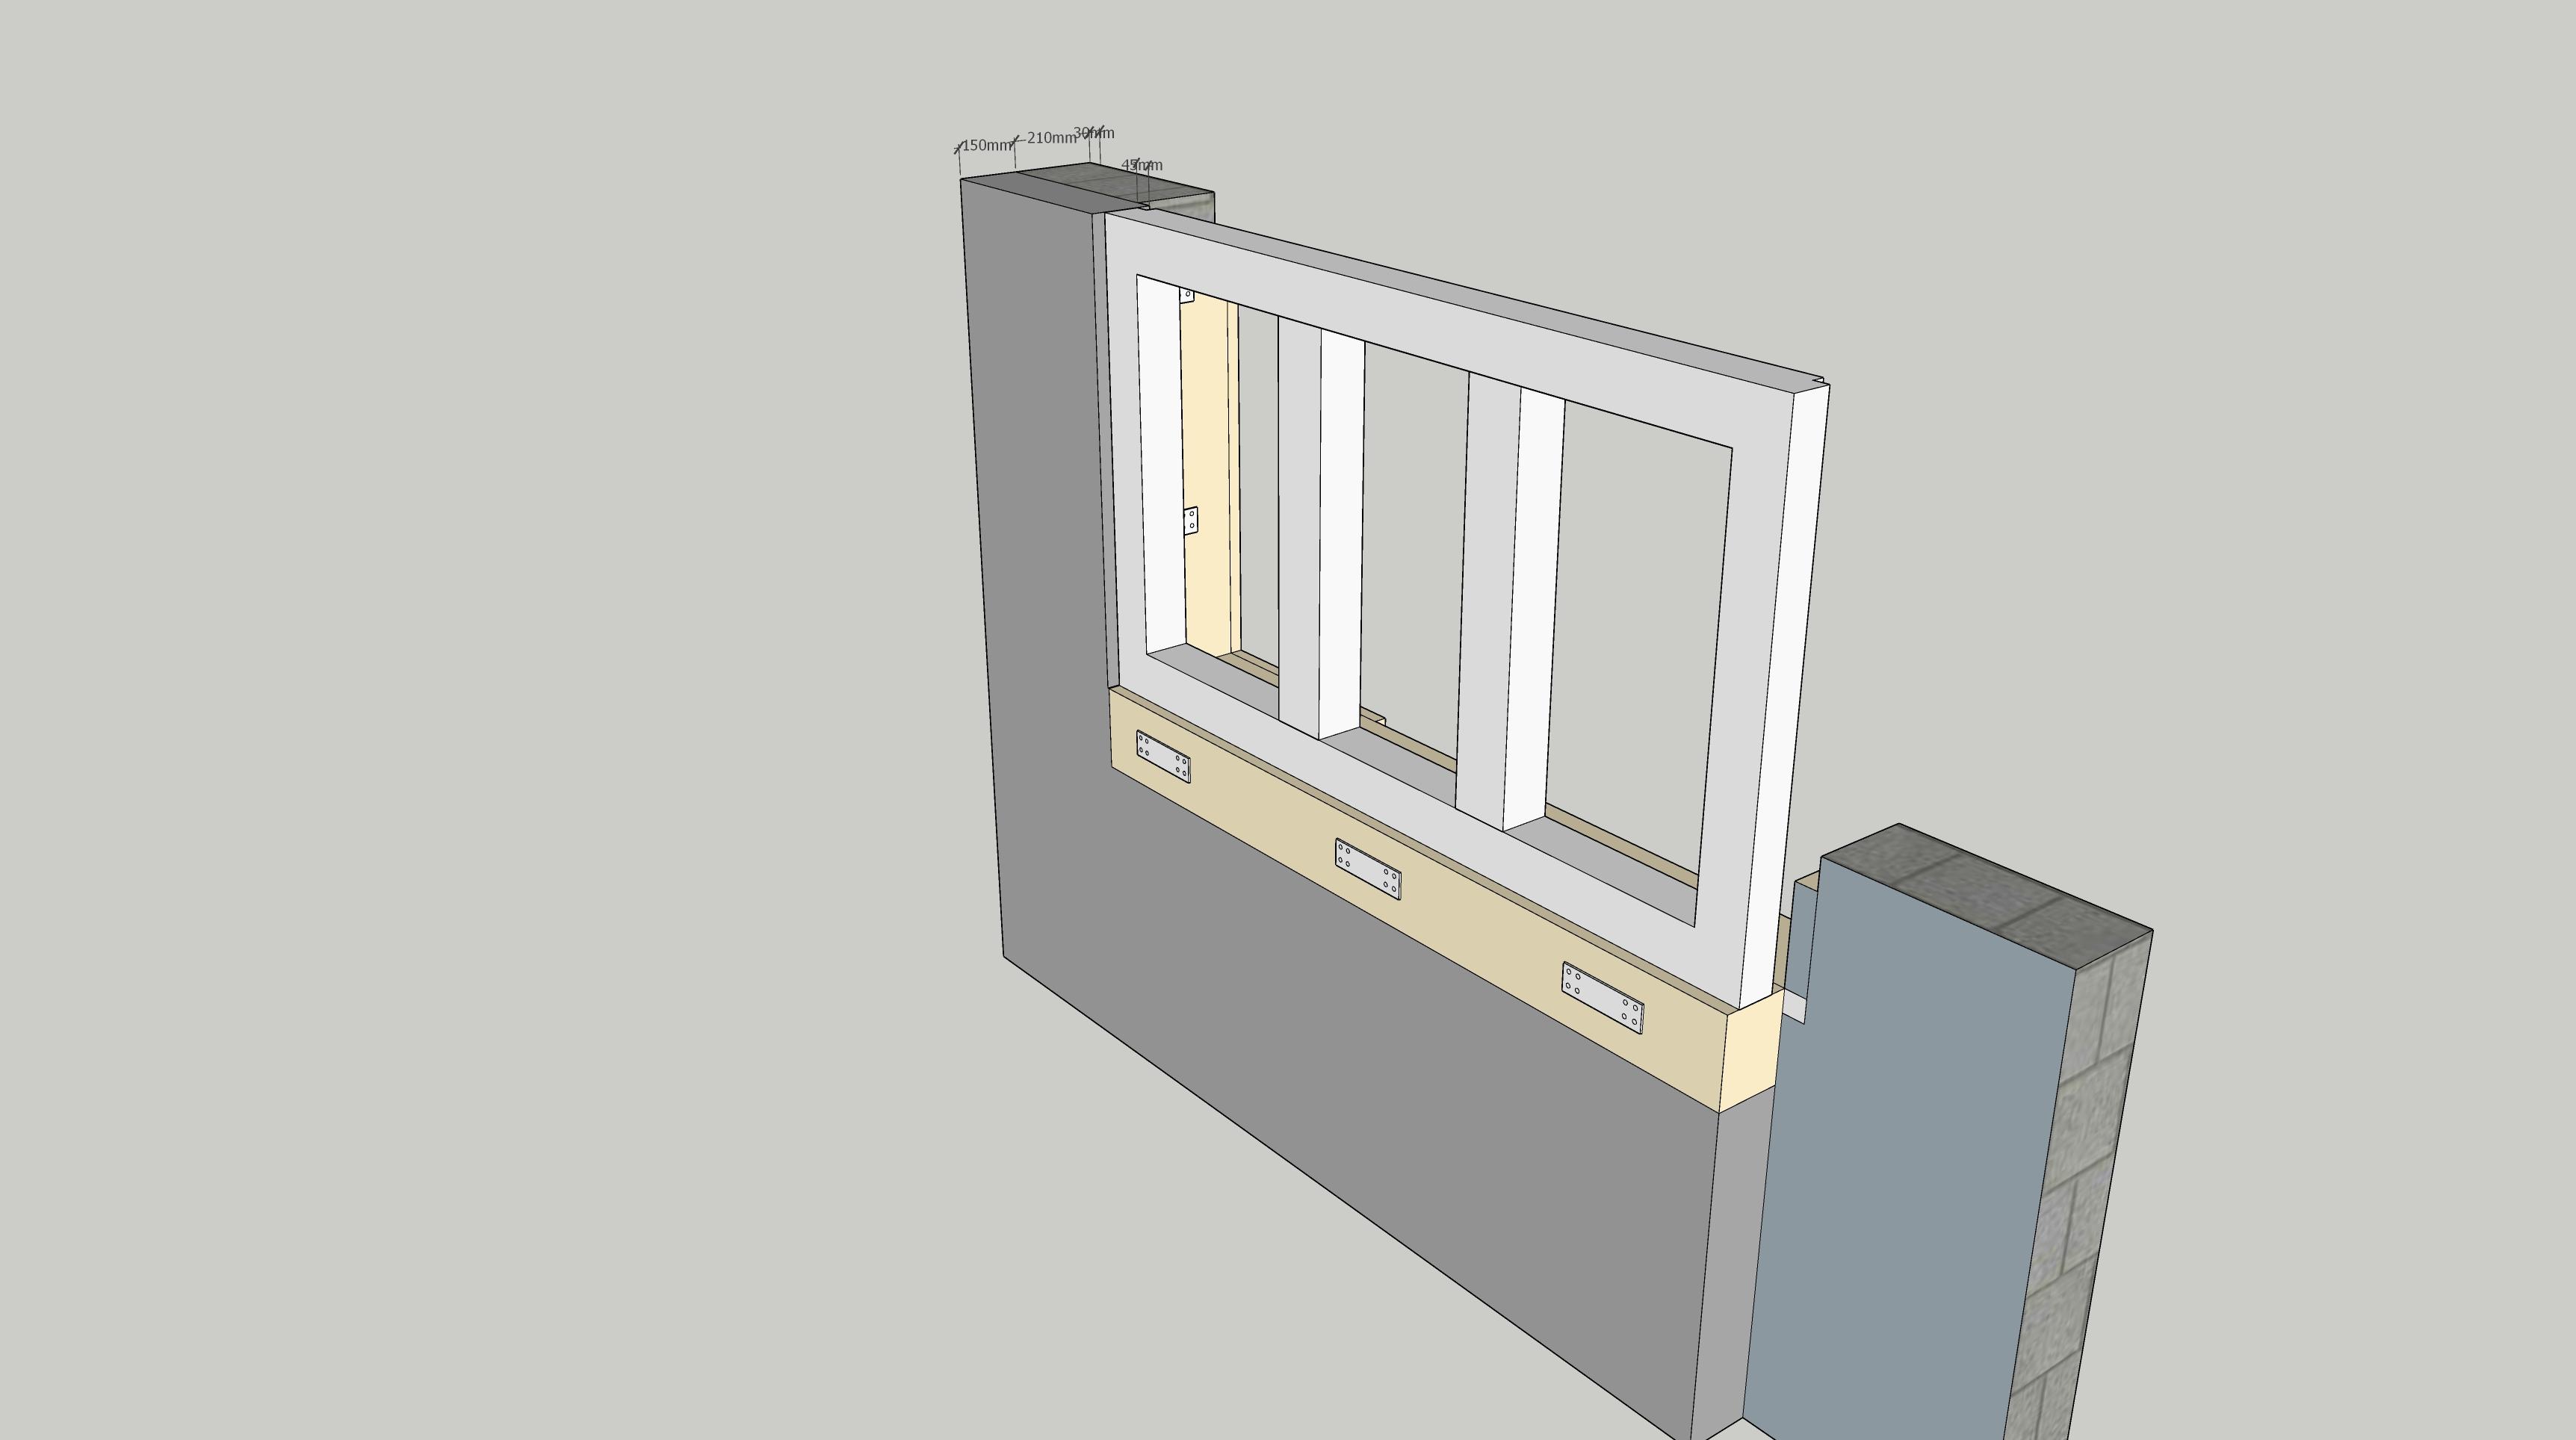
Hi, sorry to steam right in with a question, but tbh it's why I joined the forum to pick your collective brains! About 1/2 way through a deep refurb of a bungalow, all that was left was the walls and I wish I hadn't, but had had such a bellyful of planning in AONB and green belt that I couldnt face going back to argue for a complete rebuild application. The existing walls are atypical, 220mm thick, 85mm light block, 50mm empty unventilated cavity, 85mm light block. for simplicity I've treated this as a flat laid solid 215mm aircrete block. The wall build up from outside in will be silicone render, 150mm graphite EPS, 220mm existing wall, 0.5mm aluminium foil membrane (vapour barrier), 25mm PIR, 12.5mm plasterboard and 3mm skim. I'm planning on Internorm HF410 windows which have a potential U of 0.64 but I have to stick to 3 sashes in 1.8m windows so will be a bit worse worse than that with more frame/mullion and less glass. I've attached images of the proposed window mounting outrigged in the EPS. I had thought to line out the rough window opening with 50mm celotex or similar on all 4 sides of the rough opening and hang the window out in the external insulation EPS with brackets. I thought that if I ran a chunky sub sill of PIR/PUR under the window I could screw and plate that external to the wall to support the majority of the window weight. The bottom brackets could be L shaped and run down the inner wall face to resist any tendency to "turn out" the bottom course of block? Suggestions / critique gratefully received.
 1 point
 -
Dark room at night, with those strips installed in the ‘cornice / coving’ I made. IMG_2711.MP4 With added footage of where £2.5k went on a kick-ass gaming PC…….🙄😢1 point
-
It's the uniformity of brightness that is impacted by length. The reason being that the resistance of the copper tracks connecting the LEDs causes a volt-drop that increases along the length. This means the LED's furthest from the cable entry can be noticeably dimmer and show a slight colour temperature shift. 24V tape overcomes this in two ways: the current is halved, hence worst case volt-drop is halved for a given length of tape. Also, there are a few volts extra headroom for the current limiting resistors to operate within which makes their effect more linear. These effects can be mitigated in 12V tape through two mechanisms: the power can be fed in at both ends so causing the middle of the tape to experience the maximum volt-drop (which will be half as much as when fed from one end only) and 'professional' constant current tape which replaces 'dumb' resistors with transitor based current limiting. This dynamically compensates for varying volt-drops and produces uniform illumination. 5m really is pushing it for 12V tape. I have a 2m long tape that I can see is dimmer at the far end. You too are probably doomed (and anyone else reading this) now that I've mentioned it. 🤣1 point
-
So basically, based on the expected lifespan of the equipment, this is a goose which will continue to lay golden eggs for between 10 and 20 years. “Less typing, more fitting people!!!”1 point
-
Had a quick go but didn’t seem to like Smartphone input. 👍 Even so,still worthwhile as we’ll be in this house for many years. Washing machine currently does approx 10 loads per week (plus many 7-10 drying cycles),which can almost all be done to suit. HW via immersion,so potential there too. Thanks for the replies.1 point
-
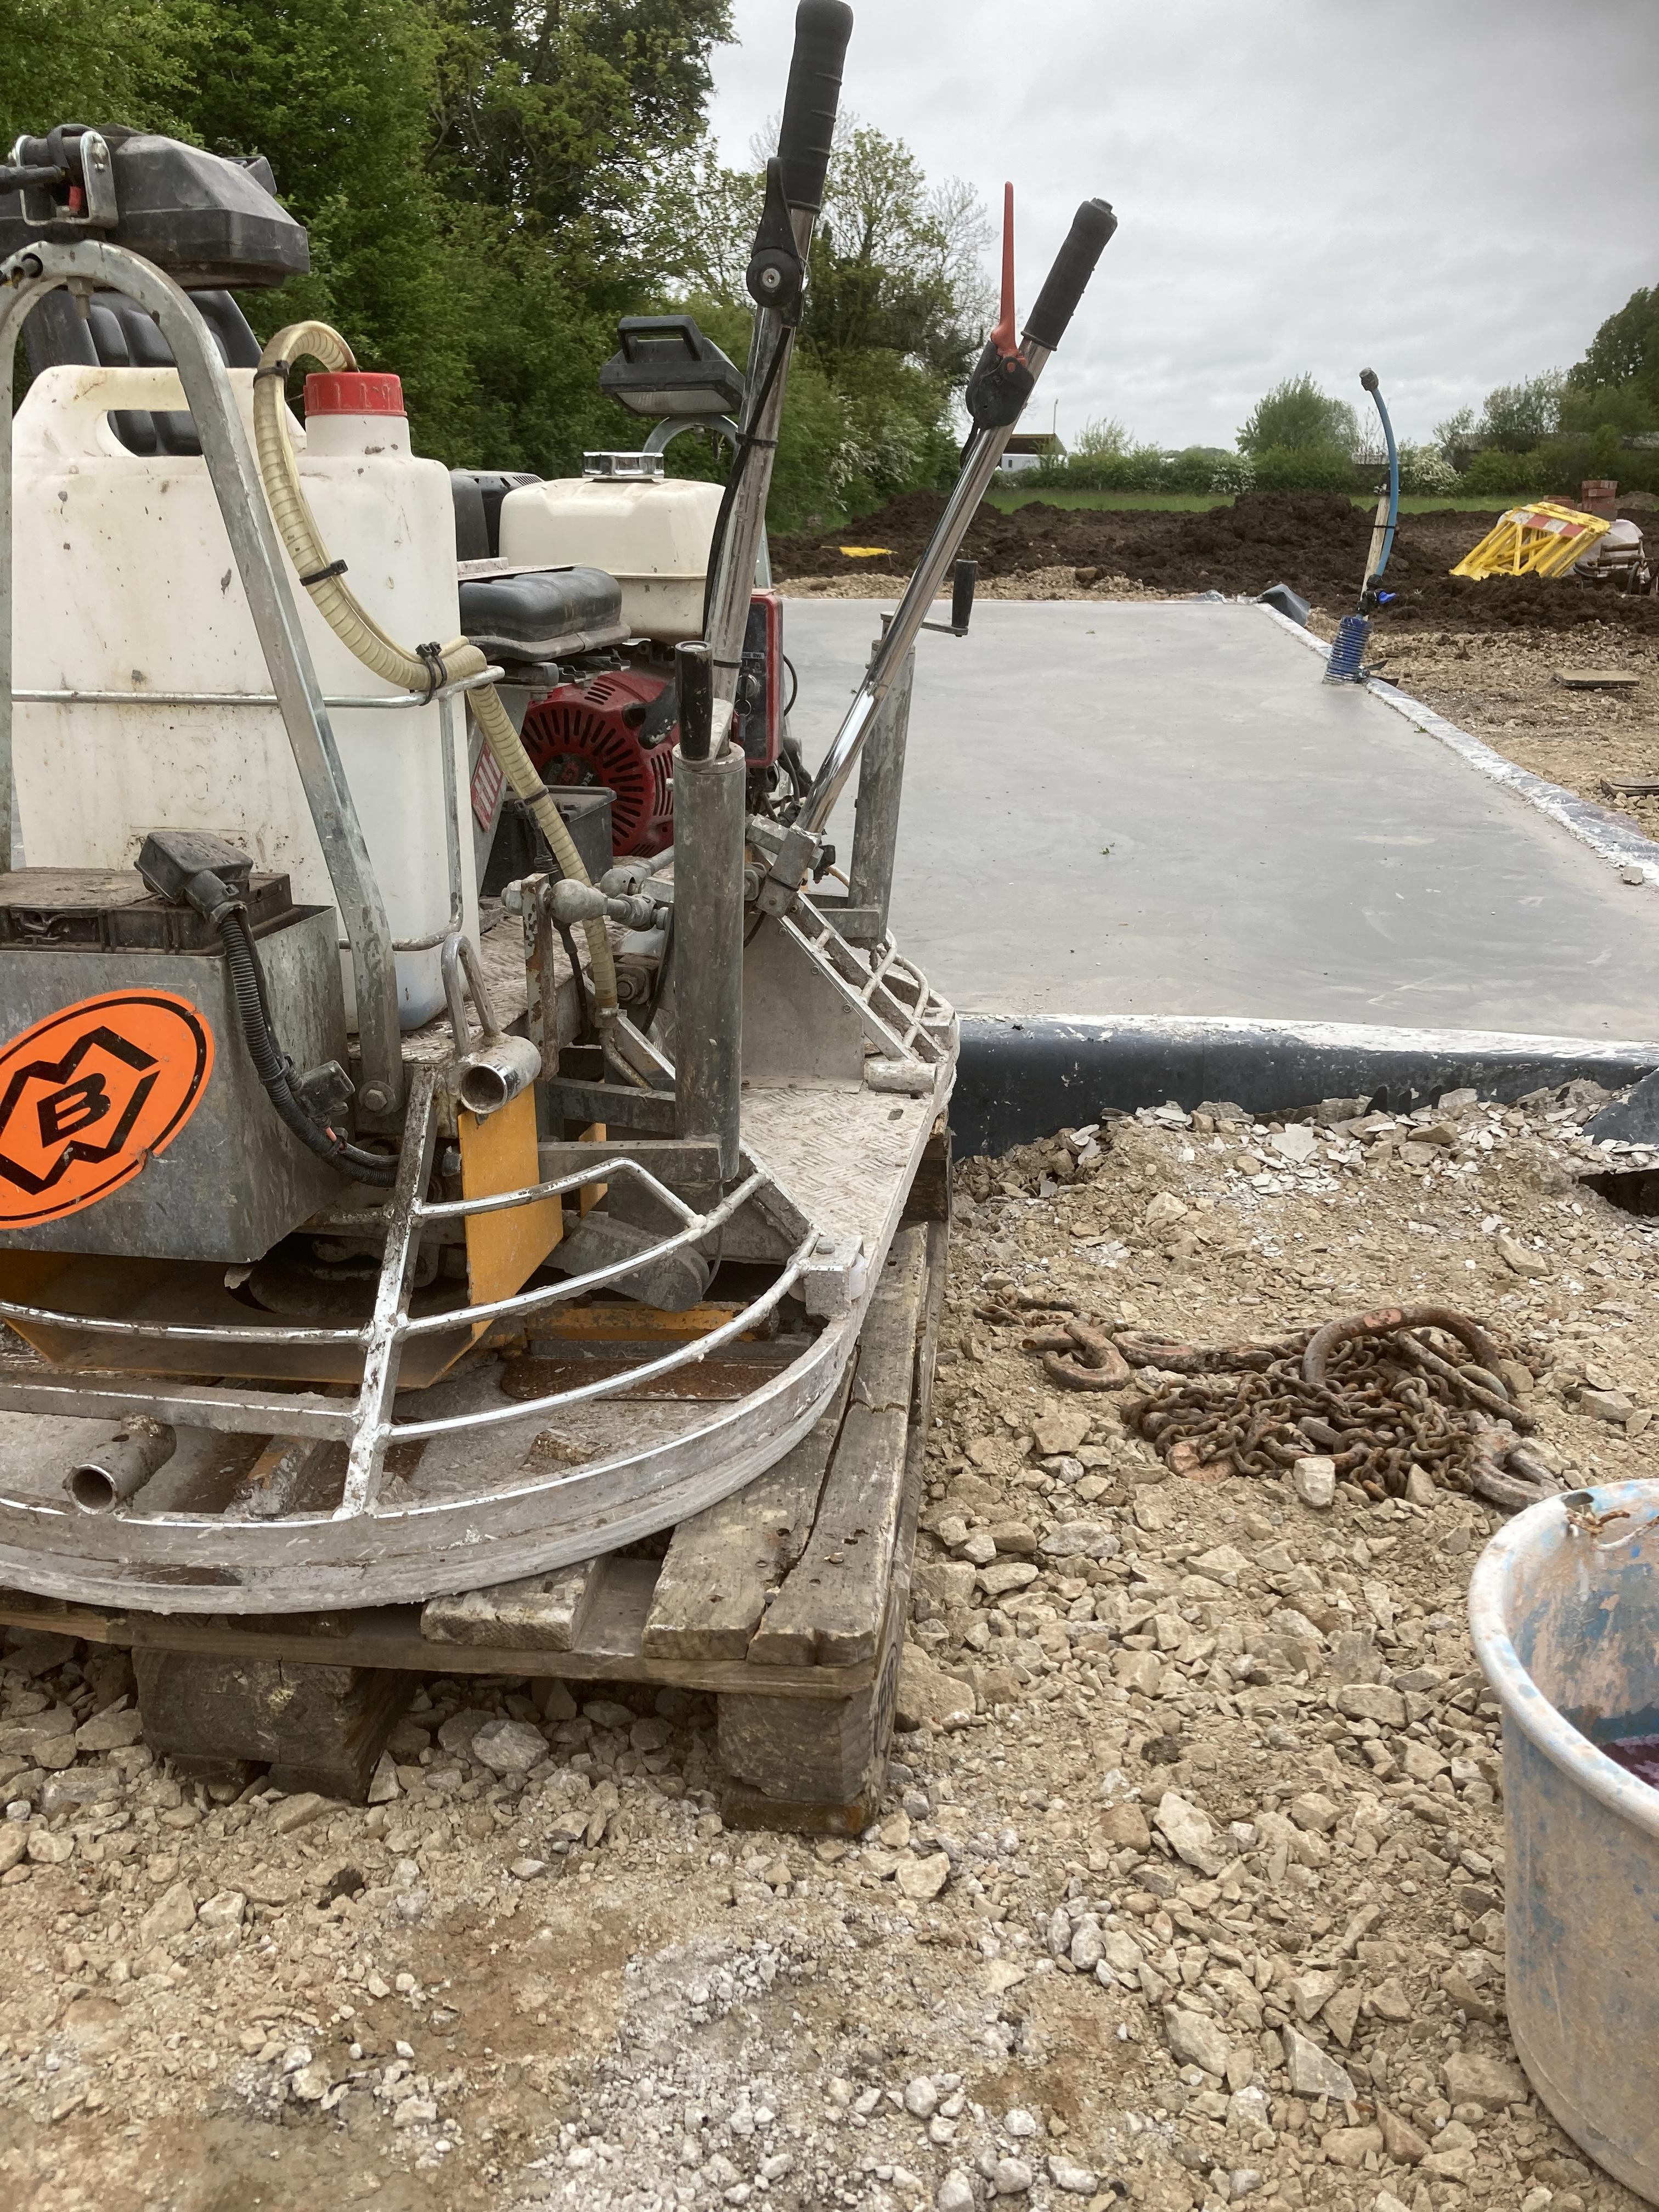
Bit of a cock up yesterday The 8 cube of concrete for the workshop floor on arrived at 4pm Whilst it flattened out nicely It was to late to get any kind of finish Just taken delivery of a ride on float Seems pretty hard I’ll put some pics up later of a beautiful flat floor Or a total mess that needs rr doing1 point
-
It does indeed! 👍1 point
-
A builder came and looked today and said don't bother, just simply lay the insulation down on top without any sanding, the screed will get rid of any imperfections anyway. Said to just use very good gaffer tape to seal the insulation tightly together.1 point
-
a few of us have gone down the route of blown cellulose, as it's blown under pressure it ends up quite a firm, semi dense insulation which won't sag, also no chemicals, well other than boron.1 point
-
we had electric and water come out at the same time and worked under the same road closure! it was a minor miracle and saved me thousands. some info in this blog post. but we're based in the South East. not sure if that makes a difference though.1 point
-
1 point
-
Passivhaus state not to start the MVHR until the house is fully sealed, due to dust getting in and you can't get it out afterwards.1 point
-
I doubled up on all the seals for my connections - gave me some reassurance and only cost a few quid.1 point
-
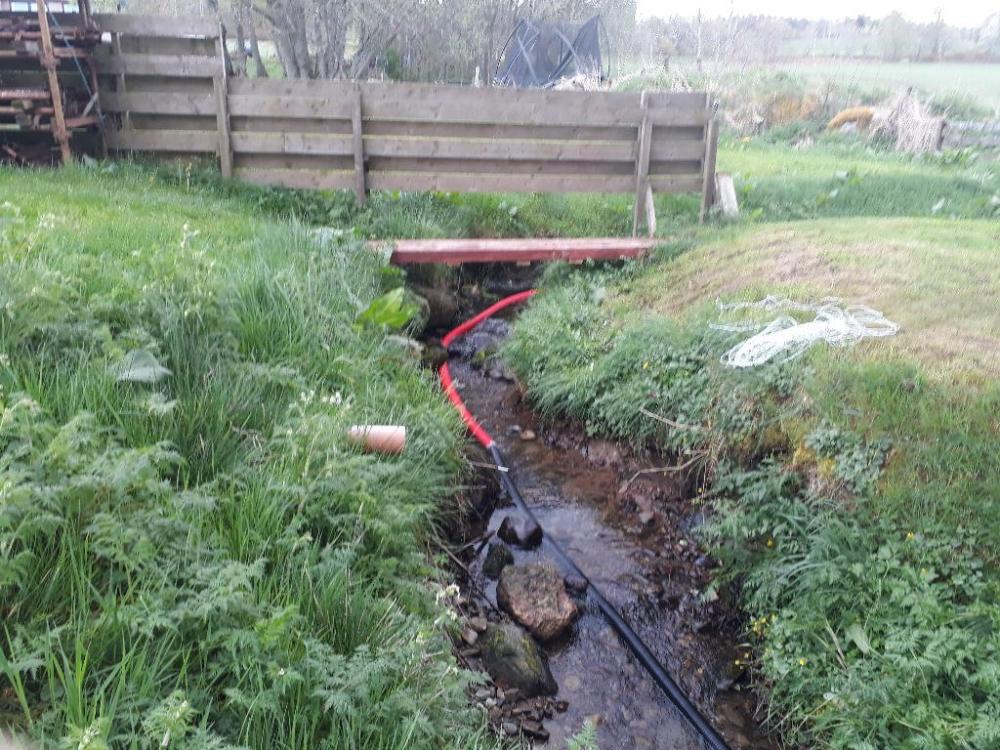
So I have done some more. I remembered where there was a spare coil of black electrical ducting, not ideal but good for my test work. So we have: Spare length of mvhr ducting collecting the water at a bit of a natural header pond right where the burn enters my land. that goes round the S bend in the burn. Where that runs out, it joins to the black electrical duct, a bit smaller and a tight fit inside the mvhr duct That black duct then runs as far as it reaches which is only a couple of metres short of where the burn departs our land At the end of that we still get most of the flow I had before, perhaps 6.5 seconds to fill the 12L bucket so say 1.8 litres per second. The head is now 1.4 metres So putting that into the page linked before gives a grand total of 24 watts I bet you would be lucky to actually get 15 watts of electricity from that. The only way to do this I think is is to treat is as a fun project and make a large water wheel for the water to run over as a garden feature and any power you get from it is purely a bonus. Or find a cheap / free very much larger length of pipe to increase the flow rate.

 1 point
 -
Yes. The lads that come out for one service couldn't give a stuff about any other services. Do as suggested above. It'll be reet lad , it be reet ... (as they say 'oop 'eer in't norf west)1 point
-
Not directly, but you won't get both utilities out together will you? (you would probably be a first if you do) So get water in first and back fill trench to depth for electricity and present that trench to them to install their cable. What I did with my shared 300mm wide trench was water in bottom along one side, partly back fill then duct for electricity the other side thus giving the 300mm horizontal separation.1 point
-
That @Ralph is self-build porn. MODS, please delete. I'm not showing this thread to Debbie. Not ever.1 point
-
Very nice! Great location and love the stairs1 point
-
Me too!1 point
-
Unless your house demands very rapid heat response because of high heat losses via poor insulation and airtightness I suspect the insulation won't achieve anything. For clarity we're talking about a floor above a heated room? If so just use the money and put more insulation elsewhere.1 point
-
Looks great. How long will the stair coverings stay on?!1 point
-
The problem with this is, you still need permission. It’s a G99 or G100 application minimum. As long as no one dobs you in, there’s potentially no harm done (if the install is up to scratch). But at that point, why not just apply for the G99 anyway? In the event of a fault or poor configuration, you ‘could’ end up exporting the full amount of your solar and batteries simultaneously. If like me you’re on a piddly little local T/X you could damage it and then be liable to your neighbours as well for the lack of power. The (particularly irritating) DNO rules are trying to prevent issues such as this. Don’t get me wrong, I think your approach is fine if it’s properly and safely configured and I’ll be following a similar approach if I can work out how to self-install more solar on my fairly steep roof!1 point
-
Yes A plastic stem with a 50 mil head 10 mil hole and a couple of taps with a hammer 2 minutes per sheet Readyfix sell them1 point
-
MBC seem to have figured that out. We were discussing how to do this as sealing around the joists is awkward. They tape it to the top of the wall plate then wrap it round the outside of the ring beam so the joists are air tight. But it has to be done whilst the walls are going up. Your solution of foaming PIR between the joists was my suggestion before we knew about this.1 point
-
Thanks everyone for the super-helpful advice. It gave me just what I needed to have a robust conversation with our architect who is now fully on board and making up for lost time rapidly! And the contractor has confirmed that they frequently build to these standards so has also given helpful input. Works due to start on 13 June - it is getting close and scary but exciting at the same time! I look forward to reporting our air pressure tests!1 point
-
Try to get your block n beam removed and do a slab. it’s one of the parts of my build I hate.1 point
-
If you're getting the MCS cert as a guarantee of installation value for money, quality of install not damaging property, amount of annual yield meeting what is promised, assurance to new purchaser of the house, it's obviously bit of a fraud. But if the only reason you're doing it is to appease your electrical supplier so they will pay for SEG export, it seems fair game to me. The installation needs to be safe to hook up to the CU and DNO, MCS cert or not, so requiring an MCS just to get payment is bureaucracy for the sake of it. Would be interested if you do go this way how you get on. Spring / right now (before summer!) is obv ideal time to install.1 point
-
No. PIR isn't a wise choice. If I was to do this I would put, from the top down. U value about 0.14 1.Standing seam metal roof. 2.Closely spaced battens 3.Counter batten on the rafters to give a total 50mm air gap. 4.Roofing membrane taped at all joints. 5.Timber joists full filled with Rockwool, mineral wool, or blown cellulose if you can find it. 6. Airtight membrane. 7. Battened 44mm service cavity with Rockwool. 8. Plasterboard For added noise protection put a layer of OSB above the joists SE may require it anyway, or use thicker plasterboard. If you need better insulation the cheapest way is bumping the service cavity up to 75 or 100mm. Or thicker joists or a layer of woodfiber sarking.1 point
-
There was a real boom in TF som 40 years ago But Barrets and Wimpy put pay to that for many years due to shocking management Now nearly all the Student accommodation I work on are TF and probably about about a third of houses are TF with two thirds solids Nearly all TF round here have a masonry outer skin1 point
-
That could by my new username right there...0 points
-
Very sustainable.0 points
-
Yes indeed. So WTF did I calculate in my previous our post... Oh, the same 8.6Watts divided by 1000 to make into kWh then times 24*365 to get 75kWh p.a. Should have multiplied that by 30p/unit and come up with the proper answer £22.50 p.a. I accidentallly skipped that bit 🙄 same for smart speakers - more like £8 p.a. to run.0 points
-
Lawn slopes away from the house by 1:30 on this side: Can never decide whether to cut the top of the hedge to follow the slope or remain level?
 0 points
 -
Just a case of changing mass to force. Then remembering that force at a distance is torque. And a moment is a place, not a spot in time. And materials fail differently. Holes can reduce forces. CT1 puts it all right.0 points


.thumb.jpg.bac90f3bbf6868cf2118d010d936c99d.jpg)


This leaderboard is set to London/GMT+01:00