
Leaderboard


Popular Content
Showing content with the highest reputation on 10/13/21 in all areas
-
Since the basement was finished at the end of June things seem to have been dragging on for ages but we are finally out of the ground and ready for the timber frame. It has taken 13 weeks and we had delays with materials that held things up but when I look back at the photos from the basement being finished to where we are now it is amazing how much has been done and we’re very excited about the timber frame going up next week. When the groundworkers came back post-basement they started by insulating the basement walls externally with 200mm of EPS 100 and then backfilling with clean crushed as per the structural engineers specifications. Then they started digging the foundations for the ‘arms’ of the building as I call them and you’ll see why from some later photos as the main building looks like the body with 2 x arms coming off it. These are a garden room (that links to the kitchen/diner) and the utility room and garage. These are designed as insulated slabs with 300mm EPS underneath which you can see in the photos. Here we see I had to put some Perinsul blocks in, thank you to @ToughButterCup for getting them to me. While that was happening the brickie was also on-site building the internal walls for the basement. We have a 3m ceiling height in the basement so we had to get scaffolding in to build them safely which was another expense I hadn’t planned for (beginners naivety) but something that had to be done. It was around this time that I purchased a DJI Mini-2 drone. It is brilliant and has given us a whole new perspective on the build. Here are a few videos from before the slab pours (please excuse the auto-added cheesy music that DJI added). And some photos of the slab pours. I also put in some VCL between the basement and ground floor as a Tony tray. Once the slabs were poured we move on to the block and beam flooring. This caused the biggest issue with getting materials as the company the groundworkers were using moved their lead times from 15 days to 6 - 8 weeks which would’ve put us stupidly behind schedule. So I sourced some beams from a local builders merchant and paid the beamers to cut them to size on site rather than waiting for the correct sizes to be fabricated and delivered. It was pretty stressful to say the least. But what made it worse is that I decided a while ago to move from precast hollow core slabs to block and beam but no one along the way told me that the beams couldn’t take the load of the walls above like the hollow core could and, by chance, during my conversations with the block and beam company designing it I found out that I had to put supporting steels on top of the basement walls to take those load bearing walls from above ground. Back to the structural engineer to get those designed and then fabricated and installed. And then the beamers tell us that they won’t do the work without a complete fall arrest system across the entire basement 600mm down from the top of the basement walls. Back to the scaffolders to come and put that up at yet another expense (although the safety of the contractors is important to us so I didn’t grumble too much!) and we were finally ready for the block and beam to be installed. So what turned out to be the decision to save a few £k by moving to block and beam has in the end cost me a lot more due to the extra work involved. Oh well, you live and you learn. Anyway, the day came for the beamers to install it and they were a smash and grab outfit but that is, apparently, what all block and beamers are like. They just turn up and smash it out and leave without any due care and attention. To say they were miffed that they couldn’t do that on our build due to the steels on the basement wall is an understatement and comments like ‘if I’d known there were steels I wouldn’t have taken the job’ and ‘I’m losing money of this job’ really filled me with confidence. And if I ever do this again I will probably do the block and beam myself as, although hard work, it’s not complicated and I would’ve done a much better job. Anyway, it was done and they left and we could get on with laying the coursing blocks for the sole plates to sit on. This is where I insisted on precision and I spent a lot of time out there with the brickie assisting with setting out to make sure everything was spot on for the sole plates and checking that the levels throughout were within 5mm - 10mm across the building. It was time consuming but I think the accuracy will pay off in the end. While that was happening and with the timber frame imminent the scaffolders came and put up the required 2 lifts around the entire building and by 5pm the Friday before the frame was due it was all finished and we were ready……or so we thought. The timber frame ended up being delayed by 4 days due to the chippies testing positive for Covid-19 (the first time we have been directly impacted (not including the material shortage etc) by Covid) and during that 4 day delay the contract manager attended site and noticed that the garage (which is 120mm below the main house) had it’s coursing blocks below the main house. After a quick email exchange it was pointed out to me that I’d misread the plans and that those blocks, and the sole plates, need to be at the same level throughout so I needed to raise the coursing blocks by 120mm in the garage by the end of the following day. The groundworkers have moved on and I couldn’t get anyone to do it so I knocked up some pug, borrowed a disc cutter, bought myself a trowel and got laying. I’ve never laid blocks before but I did spend a lot of time watching and helping the brickie so I had a good idea as to what to do. I started after work on Wednesday (sole plates due to be fitted Friday) and finished half of it well after dark and then got up early the next day to finish the rest off. And it worked! Level and straight (ish) and still standing the next day. Phew! And this is where we’re at right now. Timber frame ground floor wall panels are due next Tuesday so we should really start to see things happening rapidly now and within 4 weeks our superstructure will be up. But that will be the subject of my next blog. Here’s a time-lapse video of this part of the build. I had to speed up the footage x10 and each day is about 4s long so things happen at quite a speed but it’s amazing to look back and see what has been done these last 13 weeks. Thanks again for reading and I hope you’re enjoying this journey as much as we are. Until next time…3 points
-
If you install a plastic duct with a downward slope what are the odds of any water making its way to the inner leaf that a cavity tray would solve.2 points
-
Is it yourself or the bricklayers installing? That top sheet needs to come out,the snots cut off flush & cleared & then reinstalled tight. From here on,tell them you want the cavity side of the inner leaf pointed AND brushed off,as if it were face work. When they object,tell them you’ve no choice but to insist on it as,left to their own devices,they give you the work you’ve shown.2 points
-
Been there got the t-shirt. I did it the most awkward way possible. 215mm inner leaf 250mm cavity 100mm outer. Waited until the wall was insulated with beads. Drilled a center hole and then stitch drilled a 150mm hole. Chiseled out the concrete blocks . Watched a large bucketful of "bonded" EPS beads fall out on the floor. Used a water drum to float seperate them from the concrete and rigged a vacuum cleaner in reverse to inject them into the wall again. Slotted through my 150mm pvc duct. Used a long nozzle of low expansion foam to fill the rest of the gaps in the cavity. Sealed the hole with a sand cement mortar. Cut off the pipe flush outside. Painted the duct to the blockwork 2-3 times with airtight paint both inside and out. Installed a double door magnetic anti backdraft damper in line with the middle of the insulation. All I needed to do was install a good recirculation fan or get the bricky to build in the duct first time round. As for cavity trays made from dpc membrane. A personal hate of mine. If I had my way again I would use a 120deg pvc profile built into the outer leaf only over penetrations. If the water reaches the internal leaf you're goosed anyway.2 points
-
no problem. https://www.nhbc.co.uk/binaries/content/assets/nhbc/tech-zone/nhbc-standards/tech-guidance/6.1/ducts-flues-through-core-drilled-holes-.pdf2 points
-
Well, after my email to the EDF Managing Director yesterday and his note to the Director of Metering a cascade of shite has clearly rolled down throughout that entire organisation clearly landing on the head of whoever was causing me problems - install date improved from 19 November to Friday this week. Happy days.2 points
-
Total energy use was 45,296 and 33,805, CO2 was 9623 and 7141. We have inherited a gas fire which is never used. The calculator says that uses 8,600kWh/year while the main system uses only 33,000 kWh/year. Don't you love assumptions. Yes, it's a significant reduction in energy use but it doesn't move the EPC from a D into the proposed legal requirement of C, let alone a potential B Using an arbitrary letter from a flawed assessment system as a basis for legislation is madness.2 points
-
For anybody else searching ‘new meter’ or ‘meter supply’. British Gas. brilliant on the phone and coming same day.2 points
-
20% reduction due to difuse shading by a TV aerial wire...1 point
-
Nothing wrong with your proposal, a set of stairs does not add much load. Some local strengthening is likely but nothing complicated. Most of the work will be in cutting the hole and associated trimming etc.1 point
-
Vacuum kombi sucker on a crane or robot arm? @craig will be along shortly I'm sure.1 point
-
Sorry i missed your message, no meaningful water on the plot unfortunately, there is a dribble of a stream along the boundry but when i say dribble i mean dribble, barely enough water for the birds!1 point
-
When we needed to dig out for a new conc slab in our house, I ended up hiring a micro digger and tracked hi-tip dumper; https://www.fairfaxplanthire.co.uk/uploads/file/Kubota U10-3 ZTS Mini Excavator Specifications.pdf https://www.fairfaxplanthire.co.uk/uploads/file/tracked-dumpers/JCB/HTD-5/DUMT0650-JCB-Spec-Sheet.pdf Managed to shift about 30 ton in a couple of days (most of that time was spent getting the bloody dumper in and out of the house!)1 point
-
See this far too often with this type of product, only real solution is to rebuild. What manufacturer is it from? You could ask them for advice on install instructions along with BBA certificate - may give you leverage with contractor. Assume you currently have a U-value of 0.19/0.20 expect this to increase to 0.23/0.24 (the theoretical correction for bad install). SAP assessor will be able to run the numbers and see what insulated plasterboard would get you back to 0.20 or better.1 point
-
Having looked at the photographs it doesn’t look that bad. Have you tried pulling it in? Could you drill a few holes at say 1200mm horizontal and 900 mm vertical centres in the inner leaf from the ground floor up and pull the insulation towards the inner leaf and mechanically or glue fix to the inner leaf? Just a thought. what breed of insulation did you use?1 point
-
Just look at how many working age tossers are off in their lycra outfits blocking the roads at 10.30 in the morning. 'Working from home?' - yeah right.1 point
-
Remove as much of the cavity insulation as you can and pump the cavities. Or discount the insulation already installed, speak to your SAP assessor to run a new SAP with internal wall insulation. Guessing an insulated plasterboard thickness is a waste of time - the TER/DER needs to work with this new thermal element. As an aside I’d be a bit concerned if the boards were - at some time in the future - slip, touch the inside of the outer leaf and act as a bridge for moisture/water to pass across the cavity.1 point
-
It doesn't look too bad to me. No gaps between boards. I would be tempted to squirt in some low expansion foam or squash in some Rockwool to form a continuous barrier at this level and get them to fit the boards a bit snugger for the rest. Also, make sure that at the top the cavity is very well sealed.1 point
-
I never see them being built in as the build progresses and never see a tray put in above. The chances are the sparky or plumber will locate the duct or flue elsewhere in any case and they will not be dimensioned up on the construction elevation drawings, so no chance a tray will ever appear in the right place.1 point
-
If the insulation is contiguous, with no gaps between the boards, there should not be massive amounts of outside air circulating between the boards and the blockwork. For the rest of the wall, make sure the blockwork is built up with wall ties and retaining clips and mortar cleaned off as it progresses. I think that dry sand may cause issues should you need to drill through the wall in future. Also, if the gap is quite wide you would need lots.1 point
-
A long 102mm holesaw can be a useful investment. Or ask a fitter (eg gas or drainage) who has got one to drill your hole when he has half an hour at the end of the day.1 point
-
I can’t imagine the stress you’re under at the moment-can you post some pictures to see if there are any hacks we can suggest to achieve better performance from what’s already built?1 point
-
The point there was if you install the duct before the wall is complete it may gather mortar droppings. In reality the hole is drilled after and the link says is is not essential "Where a duct to an extract fan or boiler flue is installed through a core-drilled hole after completion of the wall it is not essential to provide a cavity tray although the provision of a tray during the construction of the wall is considered good practice."1 point
-
Chapter and verse would be good. (I note that the OP did not ask for a full comment - just how to do the penetration)1 point
-
NHBC regs? I thought building standards wrote the regs?1 point
-
it’s not good, working from home is ideal for some occupations- but definitely not en masse for others. Standards of service are through the floor.1 point
-
to meet current NHBC regs it needs a tray above it.1 point
-
Out of all your options it's the only one that I would choose. More expense for you though. Is it on every wall or just a few sections?? Shine a torch down the cavity and see how many boards kick out indicating they aren't flush with the wall. Have you said to the builder you ain't happy with this aspect???1 point
-
Just use insulated plasterboard on the inside is the easiest option. Not the cheapest but it is what it is. If you take it all down and do it again some boards will end up the same. It happens all the time, it really shouldn't but that's the joys of building.1 point
-
I’m confused-if you can pour sand down behind any given board can you not lever it back tight against the inner skin?1 point
-
Valinor, my walls are going up as we speak, I'm using full fill PIR insulation, cost me a fortune. The whole thing has been a complete and utter nightmare. My first self-build, 3 years in planning, bought into the science of everything, had multiple site meetings in the months running up to the build, had everything on site ready, colour coded notes for everyone. My architect said in 50 years he's not seen anyone better prepared. Totally pointless. It just doesn't work practically with the way the trades work, and they will not adapt to you. For example if brickies are on price work, all they want to do is lay brick, and QUICK. Air gaps, mess, thermal looping, you'll get the lot, even if you try to do the insulation yourself (I've been fitting my PIR myself around them since the first row). If you have the time, sell your PIR, at a loss if necessary. Get the brickies to concentrate on laying brick straight and accurate, lay the wall ties properly, wipe mortar away on all sides. Once they're off site, pour EPS beads in from the top ensuring all gaps are filled. I've debated and been advised by our knowledgeable friends on here to take mine down and start again. Not an option for me, so I've paid fortunes for full fill PIR, now I'm going to have to pay lots more and install insulated plasterboard on the inside to reduce the cold bridge effect, and lose internal space for the pleasure. EPS beads all the way.1 point
-
Seems like a lot of energy spent on this thread. Simple answer - remove the access to the roof! Why on earth would you you need access anyway? If you need to to maintain it (once a year) get a specialist cleaner in with a cherry picker.1 point
-
Spring loaded backdraft damper is one way. Or get a fan with a built-in backdraft shutter. There are plenty around. If you want something sexy looking there are the Airflow Icon range. Or better get a through the wall HR recovery fan. I have been using Lo Carbon Tempras from Vent-Axia for 7 or 8 years, as they have a trickle setting. I use them in conjunction with a PIV loft fan, which gives me a poor-man's MVHR to protect my houses from interior-wash-drying tenants. Not exactly sure how you would do this once the beads are installed, but see para below. Though I'd enjoy a video of all the beads from your entire house gradually filling your kitchen, if you can get one ?. My standard method of install is to insert a section of 102mm soil pipe in the wall using foam at a shallow angle down towards the exterior (for drainage of any moisture) sticking out a little on the outside to keep drips off the wall, and mount the fan in that - perhaps just tacked in with foam. That makes replacement easy and works well with a HR fan with the heat exchanger in the hole. I think the way to do after-beads would be to core drill through, then push it out from the other side with your piece of soil pipe. Ferdinand1 point
-
How do they use the front door when there's no garden gate?!1 point
-
Not really the way to look at it. The idea is that energy usage is reduced, preferably to a level where domestic PV, a long with HP technology can balance each other. It is not to do with the actual cost, complexity or return on the insulation required.1 point
-
So, feel free to yell at me to review a post I missed but... If this was incorrectly specified in the first place, why aren't the installers removing and replacing with a more appropriate solution under the MCS guarantees? I thought MCS would guarantee an accurate heat loss calculation and product choice, and cover the customer if these things weren't done correctly? I partly ask because I'm going down this road myself and I would like to be informed...1 point
-
8.1 kWp Nothing busy about this!
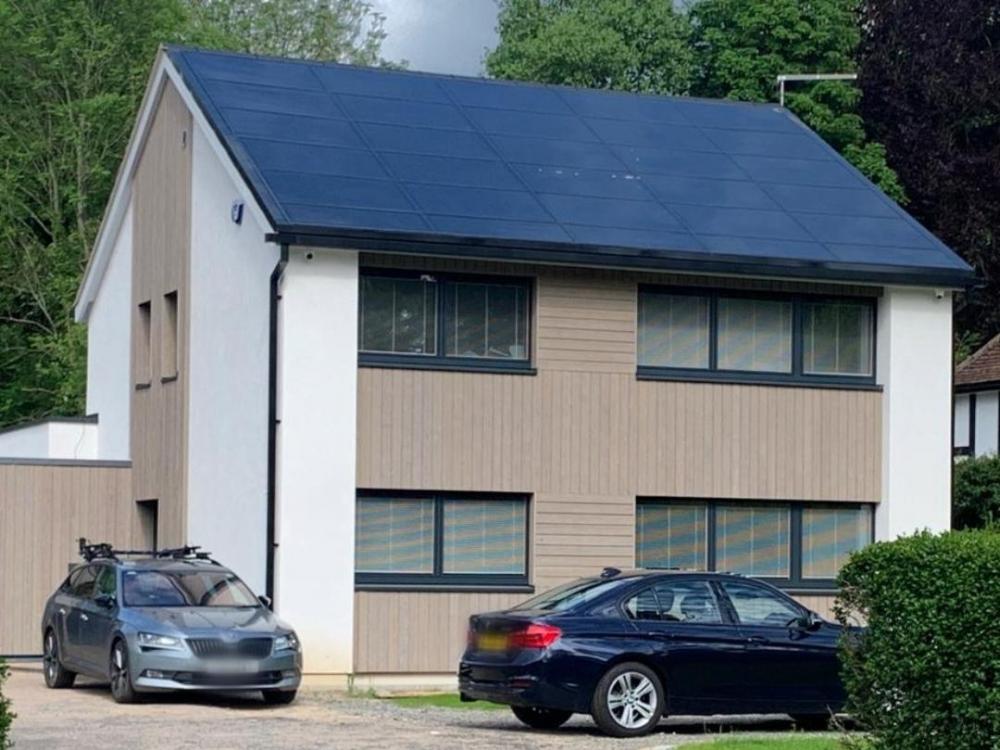 1 point
 -
You can always tell what is in a big businesses best interest, even if you can't see how... I am waiting for a simple yes or no to a simple answer and have been told it will take 3 months.1 point
-
All this meter fitting thing is weird. I'm being hounded all the time by SSE to have my existing meter changed to a SMART meter. Emails, phone calls telling me an engineer will be coming round on Monday unless I cancel it. So I cancel it online and then get asked when do I want it fitted. I told them that under no circumstances would I have my meter changed. Then it all starts again.1 point
-
When considering a planning application the planners are officially only allowed to consider "valid planning reasons" for refusal or rejection. This doesnt include things like the impact on the value of your house or loss of a view. It doesnt directly include an individuals need but may do so if they can show there is a lack of suitable housing in the area to meet their need - which is usually the case when someone is disabled or from certain other minority groups. Forget a solicitor as there is nothing they can really do. If you want to fight it i would spend money on a planning consultant. Remember you only have a limited time to object. Once approved there is really nothing you can do in practice. Unless they block your driveway they can park where they like. Consider making an application for a dropped kerb to widen your driveway?1 point
-
again it doesn't matter if they don't own it. Highways would need to allow them to use it (which they may if its a council house). Ask the planner when you have the conversation later.1 point
-
The architect 'should' know the law on this unless they are just taking your money! Find out who the planning officer is dealing with the application, send him the drawing and have a conversation. Don't mention any of the house value, don't like it, they don't need a bath etc as none of that matters. If you get the run around find your local councillor and have them do the chasing, they are quite good sometimes.1 point
-
ok, doesn't matter if they are disabled, have a bath on the plans or from mars. Planning laws are same. Ask the planning officer about the 45 degree rule, he will maybe ask the applicant to provide a drawing showing where it lies. If he doesn't use your local councillor. If they own the land in front of your house then it seems reasonable to use it as parking ? Don't object to 'makes my house worth less' it irrelevant and will be ignored by the planners. Your ability/disability is also irrelevant to planning.1 point
-
Good morning and welcome, do you have any drawings or sketches so we can see a bit clearer? a disability build can ease planning through but does not give someone a free pass.1 point
-
The energy market is very odd. It is often best just to choose a supplier who will get the meters in, then change later.1 point
-
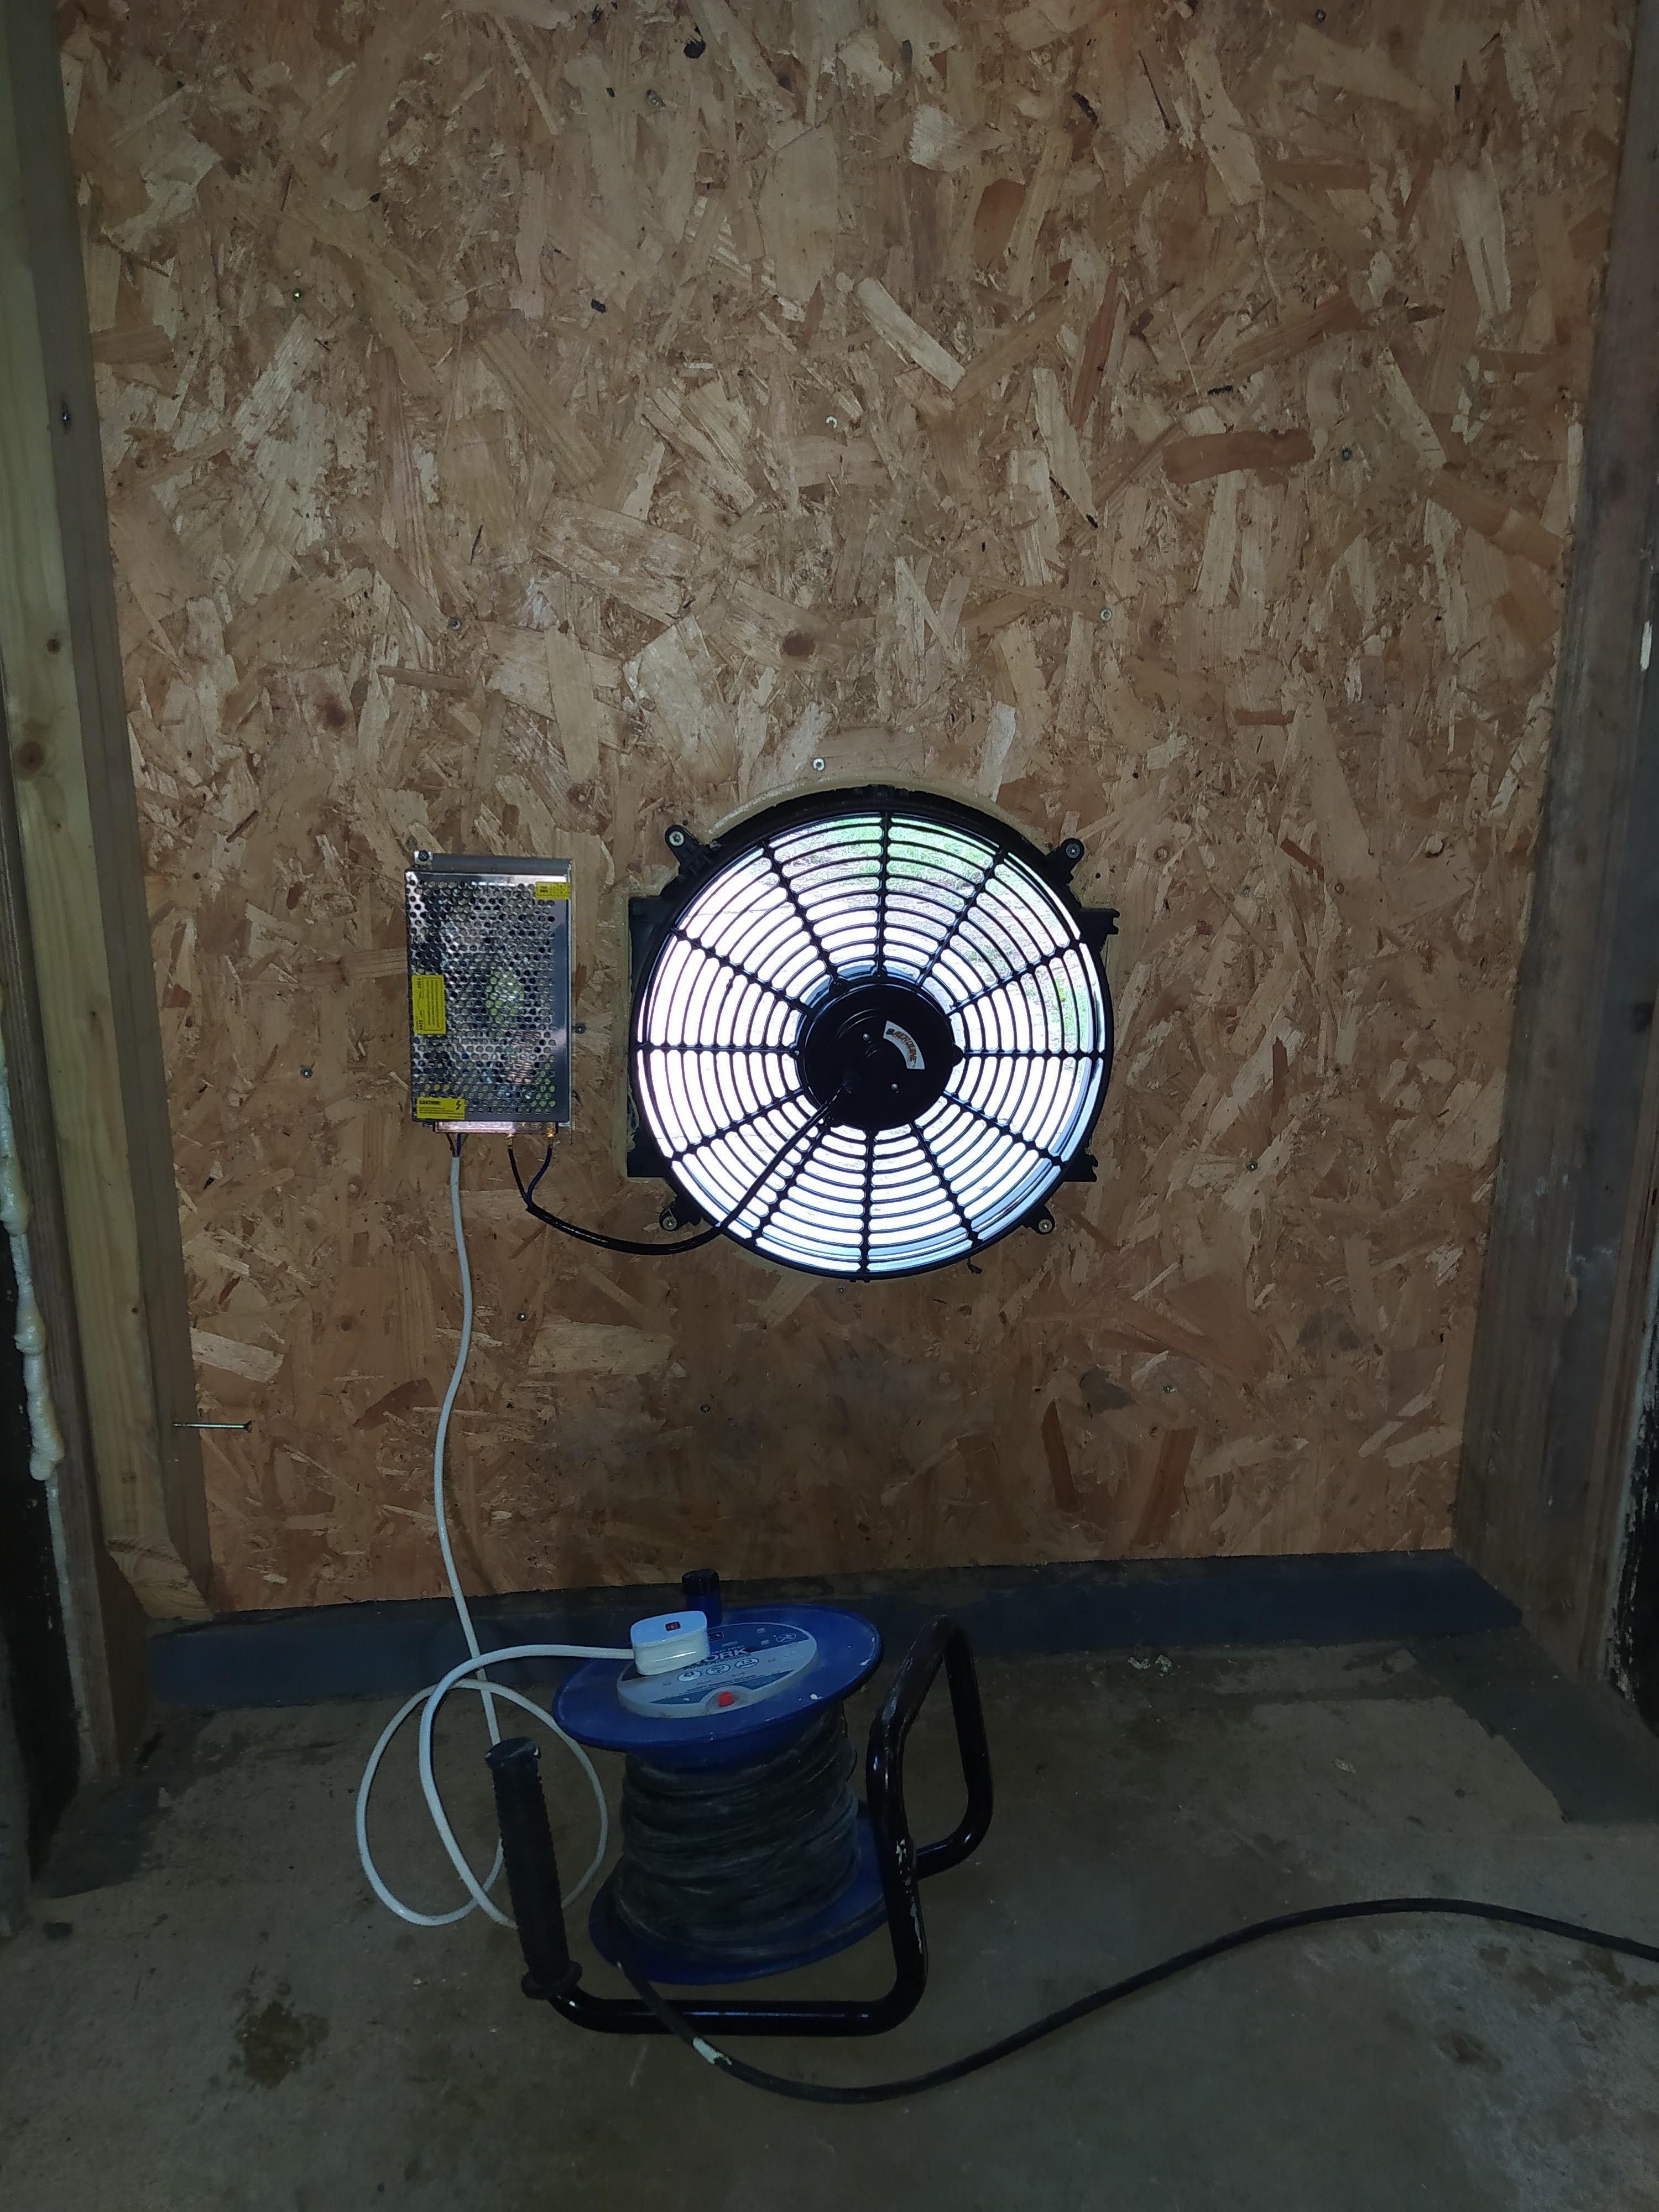
Thanks @IanR Yes. When I said no volume element I suppose I meant the volume of the house has no bearing on the m3/m2.h score. Preparations for the test are going well, Ive rigged up a 220W 14inch car radiator fan, no idea if this is powerful enough to simulate 50Pa. Found and treated quite a few minor leaks but no idea if Im likely to score 4ACH or 0.4ACH
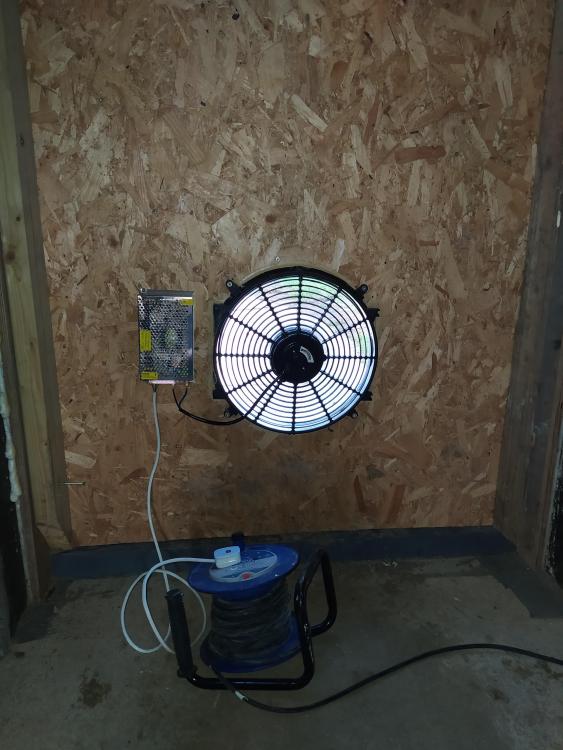
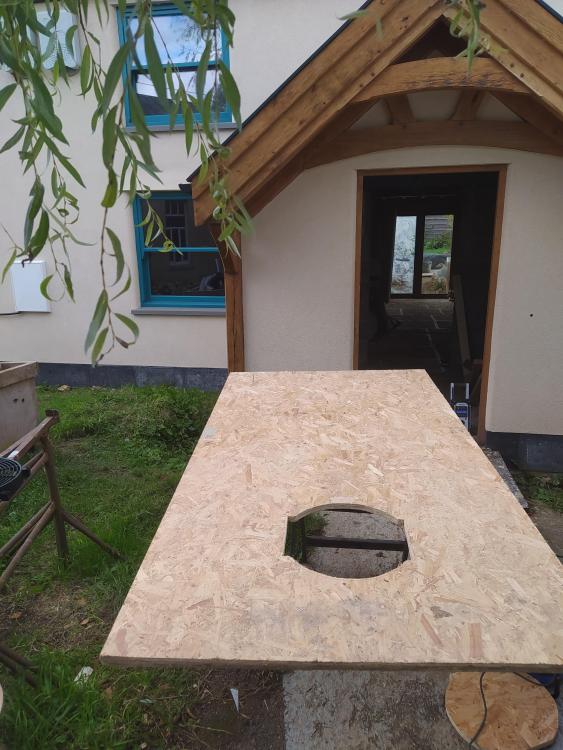
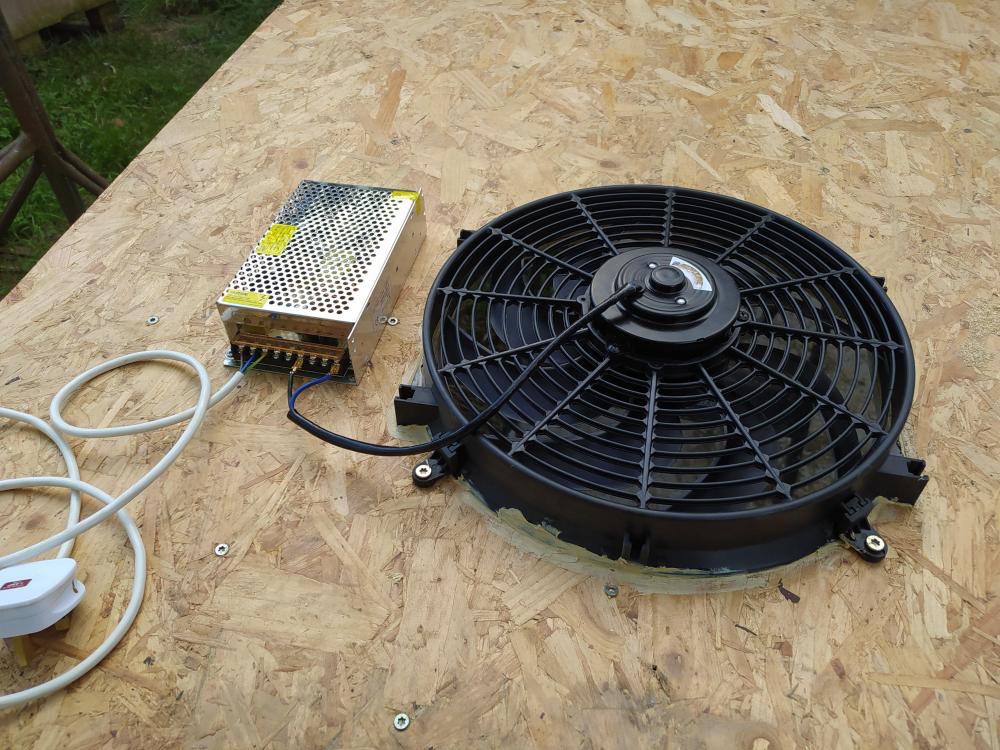 1 point
 -
Not when I did my machining, you ran the spindle the same way, just mechanically reversed the feed shaft. Agree on internal boring being a good idea to run the spindle backwards.1 point
-
The fireplace which is redundant really needs to be ventilated-a Louvre or air brick should be fitted. Is the height of the decking roughly the same as your internal floor height? If so,rain splash up will be affecting your walls above DPC.1 point
-
I’ve been put in this scenario myself-it’s an absolute #**#ache. As Declan said-blown in beads or full fill cavity batts are the practical solution. Otherwise,you’ll end up with an improperly inststalled,underperforming insulation system. If the PIR has gone up in price & is still packaged,would you not get the majority of your money back?1 point
-
Our Lough sand is too clean so it hasn't much larger particles in it so won't hold water. Apparently there is over a mile deep of sand in Lough Neagh, largest lake in the UK, so we will be using it for many many years to come. It's brilliant for concrete and for drainage on football pitches etc but just not great for mortar but it's very cheap so it's used a lot. I can get it a mile from my house at around £10 a tonne if I collect in a trailer and cheaper if I buy it in full lorry load. Also as the same company will do concrete you can make a good saving if you let them supply it as well. Pit sand will have dirt which helps keep it from going like fluff.1 point


This leaderboard is set to London/GMT+01:00