
Leaderboard


Popular Content
Showing content with the highest reputation on 05/05/21 in all areas
-
The BuildHub forum was founded by the Forum Foundation Group (FFG) in 2016, following the closure of a large UK-based self-build forum. The forum has continued to grow significantly and we currently have over 8000 registered users, and that number continues to rise daily. To date, BuildHub has been managed on a private and voluntary basis by a small group of members known as the Forum Management Group (FMG). The FMG looks after BuildHub's day-to-day running, including hosting and maintaining the forum software, moderating member posts, and managing membership applications. The FMG was originally constituted as a Members Association for the purpose of forum governance and ownership. While this was the quickest and easiest way to get the forum up and running, it has the disadvantage of not having an associated legal entity. The absence of a legal entity means that many suppliers will not contract directly with Buildhub. The result is that BuildHub contracts and assets such as forum software licences, server space, and URL ownership remain in the names of FMG members, which places a large legal burden on those members, and also involves risk to BuildHub. To address this ongoing issue, the FMG recently approved motions to: Form a Private Company Limited by Guarantee; and On an agreed date, dissolve the Members Association known as the Forum Management Group, and transfer its assets, including ownership of the forum, to the new company. To this end, Buildhub Forum Management Limited has been formed as a not-for-profit company, limited by guarantee. The company will operate the BuildHub forum website, provide a limited liability structure to own and operate the forum, and ensure that the forum software licences, server space and URL ownership are no longer subject to a single point of failure or irrecoverable circumstances. The company directors are not remunerated, and the costs for operating the forum and its support will be kept to those essential to run and operate the service. The date of handover was 30th April 2021, and this is the formal notification that it has been completed. BuildHub has always operated on a strictly non-commercial basis and will continue to do so. Advertising is not allowed and members may not offer services to other members via the public forum. This policy will remain under the new structure. Similarly, BuildHub intends to continue with its periodic donation funding model. Day-to-day operations will continue to be run by volunteers giving freely of their time and expertise in much the same way as it is now. This group will be known as the Operational Management Committee (OMC). Information about how you can get involved in the running of the forum will be posted shortly. In practice, your experience of using the BuildHub forum should be unchanged. As chair, and on behalf of the members of the now-dissolved Forum Management Group, I would like to express my thanks for your support of BuildHub since its creation. We look forward to the continued growth and improvement of BuildHub under this new and long-term sustainable structure.3 points
-
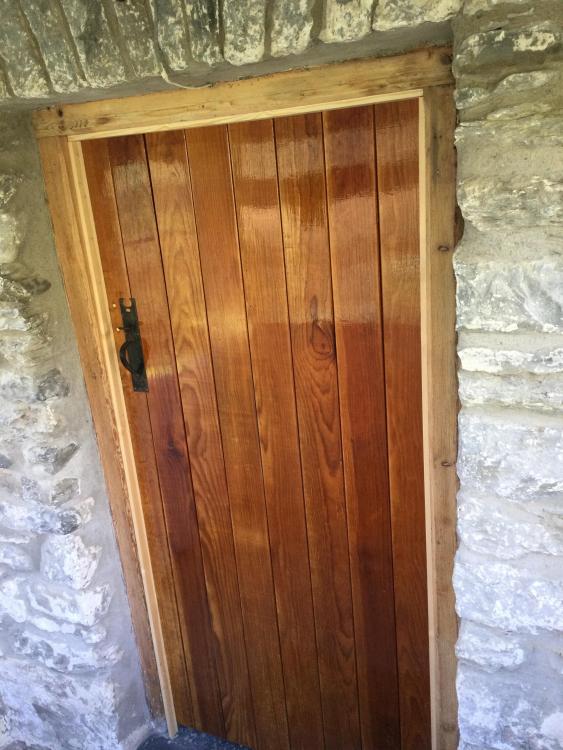
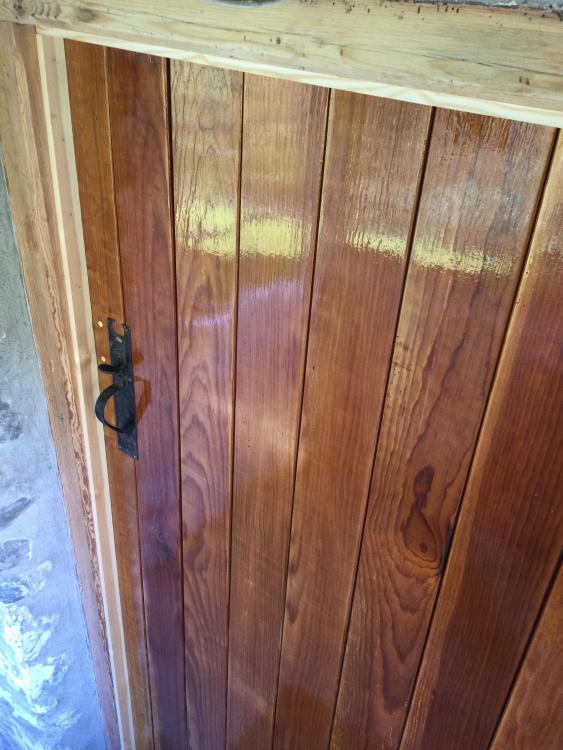
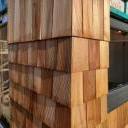
Nailed me plant ons on.. but loathed to glue them to the old frame. Couldn't source some nice oak trim.. so had to go with std bloomin stuff, lets the job down i must say/ real shame to hide the pitch pine frame with it. But hey it'll have to do. just varnish the trim to tone them down i think then calling the door done. One frame hole, a knot to find/ shape & fill it. Thanks.. zoot
 2 points
 -
If you feel at any point that the meeting is necessary, even if those two don't think it is, - insist on a meeting. Someone else's gut feel is not your gut feel. It is you who have to live with the end product.2 points
-
I made it clear that I was very upset about the mistake, without actually pointing the finger at him. Rather than point the finger and say "you're an idiot, you f***ed up", I tried a more diplomatic tack and said that I wanted to avoid any more mistakes and asked him to work more closely with my architect so that there are no further "miscommunications" and i emphasised that he shouldn't make any assumptions, that if he's in doubt he should call the architect direct and ask. I also showed the builder I was ready to compromise on certain things if he was too. I also insisted that my architect meet with me and the builder at least twice a week, unless both thought it really wasn't necessary. Most weeks we've done two meetings a week and it has helped create a better working relationship. There is still a hell of a lot to do, and the builder has fallen behind a bit, but hopefully things will start to pick up now that the structural works are almost finished. Touch wood!2 points
-
It's kind of taken me 4 moths to get here, we broke ground start of January took a while to get the road and the rest of the ground built up with the stone (700 Tonnes circa!). But we have finally done the UFH, tied the mesh and then poured the concrete. UFH: Fitting the UFH was pretty straightforward to be honest. I had 1.1km of pipe to lay, and just planned it out as per the Wunda drg, I adapted a little as I went along to avoid awkward bits but it went fine. The UFH stapler was a godsend, made it Uber easy and was just great putting it into the insulation. The decoiler also a godsend, god knows how you would do it without one of those. Both well worth the purchase. I laid pipes out in concentric layout, it gives the most even heat distribution as a return is next to a feed pipe. It was fine doing it, i started with outer at 400mm centres and then turned back to leave me with 200mm spacing. Once back at the UFH manifold point I cut the pipe to confirm it wasn't burst and got a big whoosh of air (Wunda pipes come pressurised). The only mistake i made (or remember making was the lengths. I thought i had 11 100m loops, but turns out I had 10 loops at less than 100m, then 1 loop at 101m - which they supplied a 120m length for. Of course didn't realise that till the end and it was the last pipe to be laid...purely coincidentally. I took a slightly shorter route, but either that pipe was longer than 100m (I had at least 10m spare) or the length they worked out was wrong (unlikely) fortunately it worked out fine! I also used the clip track to secure them, which works well and sticks good to the insulation, doesn't do well at loops close to it but staples there sort it. I never fitted the manifold, I just used a clip track mounted high on a wee frame I built where the manifold will go. I didn't pressure test either....or pressurise for the pour, I wasn't concerned about holes as I was the only one there and I put 1000+ castles down to support the mesh to the heavy ground workers wouldn't' squash it on top. My pipes were laid on the insulation at the bottom of the concrete well away from the mesh and any chance of people drilling through them. I'm confident not pressuring will be fine during the concrete pour - those pipes are very resilient. Mesh: By Jesus - straightforward again, but f$ck me....the bloody wire tying loops. My back was dead..and i don't have any back issues, I was like Quasimodo bent over for days tying mesh together. I had a single layer on the main slab, with two layers in ring beam and three at sliders. I used maybe 1000 ties. The mesh castles worked well to support it and the hystools too to give the spacing. I defo didn't think about heights where your lap the mesh sheets as you end up 20-40 mm higher due to where triple sheets lap each other. So I have lots of spare hystools at 100mm. I had approx. 360m2 of mesh to put in, cutting it was done with stihl saw (quik cut) - made life easy. I also purchased a dewalt cordless grinder originally to do this but you would go through wheels like a maniac. So that was used for small cuts and came in handy trimming bits. The stihl saw (which i own anyway) made it easy. I did buy a set of 36" bolt cutters as someone said to use that - shit idea, mega hard and I'd have been there all day using them. They done two cuts, went back in the box and were returned to Toolstation. Rebates: I planned two flush thresholds for my sliders - I shuttered these using the 50mm packing that came with the Insulated foundation, worked ok - But i had to weight them down during the pour. Also - I worked the concrete below the long one, but forgot the short one and it left a space which I will fix this week prior to kit going up. I also done a shuttered section at my downstairs bathroom so I can fit a floor mounted shower tray. That worked fine - just need to dig it out. Concrete: We had C25/C28 Specified but just put in C35 as it was what the guys normally use. We had a lovely day for it, 14 degrees and sunny, went pretty well. We had a bit of a delay with the last part load - which was at garage, but turned out fine. We also done the pads too and just overfilled them with extra that was left, my pad heights externally to the footprint are for posts to support my canopy and ended up different heights but I just gave the kit supplier all the heights and then are cutting to suit. They are all well below the ground anyway. I wanted to power float, but I didn't manage to get it arranged and my guys didn't seem keen. I was going to do it myself, but ran the risk of doing it for the first time on my own slab and didn't want to majorly mess up what they had done as it would have been in the evening by myself. 36cube in total went in. The only issue I was left with was that the boys forgot the poker. They did the vibro screed and all areas were filled, but missing the poker meant that we missed the concrete under a slider rebate. The long one (4.6m) was fine as it floated up a little so I hurriedly spent some time moving it up and down working the concrete below it, then I added stones on top to level it off. I shoudl have done this with the short (3m) one but didn't think as it didn't float up. It's no major drama, getting some concrete this week and will fill it. It'll be a cold joint but it's at a slider with no wall attached. I added ducts for the island below the mesh to we can get power there. The day after the pour I cut a control joint and then I tried to cover it with plastic (DPM actually) but I was ill prepared and didn't have enough, so just stuck with watering it with a hose each day when I could. I did get a couple of small shrinkage cracks in the main slab where it dried too quickly (they had appeared the next morning) due to it being so sunny the day of the pour. But they are small and nothing to worry about. all in all happy. There is lots of other stuff I'm sure I forget but it always seems to elude me when I write a blog post. I also find it hard to find the time writing them - but that's self building for you! Pictures tell better stories! Lots included. I'm learning to not sweat the wee details, it's ok if things go a little pear shaped. It'll work out in the end. For now Foundations are finished and it feels good to be done here, we will backfill later and finish drains but that's in a few months. I just have DPM to fold up and attach this weekend (How do you fold up internal corners?!) prior to kit being delivered and erection starting next week. I've had two weekends off since the pour and it has been weird not being there every night and weekend. Things I learned: 1) Check all pipes lengths and lay them out first of all! 2) Buy the stapler 3) Buy the decoiler 4) Plan all your cuts out for mesh 5) Don't bother with bolt cutters 20210421_093630.mp41 point
-
I have a quote for a 3000 litre rectangular tank that does not require concrete to position. We will be using it for washing cars, outside taps, toilets and washing machine in a 160 sq m house with mainly 2 people living in it. Location East Cheshire so NW England (just). Is a 3000 litre tank too excessive and could we get away with a smaller tank? Also any recommendations on suppliers - currently have a quote from Owls Hall.1 point
-
Wow, quite a big question! Congrats on getting planning through; that's a big hurdle sorted. I suspect your architects didn't want to change anything drastically to avoid a fresh planning application. Rather than look at individual materials, perhaps find some images of styles of house that appeal, and then consider how that would fit with your location?1 point
-
Have a look at these people based in Hucknall, although it is a total shot in the dark. https://www.midlandmetalwindows.co.uk/ @PeterW may know more about them. (My punt is nebulous not a recommendation, based on my architect dad mentioning a custom steel maker in that smallish local area ("Hucknall") quite a number of years ago - like 20+, when I was looking for a low-profile porch. Got a quote only.). F1 point
-
Yes, your original post didn't specify whether you were after sliders or regular french doors and I must have assumed the former when you meant the latter. Good luck with it. 2700mm high french door would look awesome in my opinion. You could also try MetTherm as they do a profile which although aluminium, is very thin, particular for internal doors which only need single glazing.1 point
-
I have been agonising over timber vs uPVC flush casement windows for a while now. Just took an advance delivery of one for my garage which I am building ahead of my house. It is a wood grain effect white window and I love it - can't tell the difference from a wooden window and 1/2 the price! I am not far from you in Farnham if you want to come and have a look! Sorry the photo is a bit distant
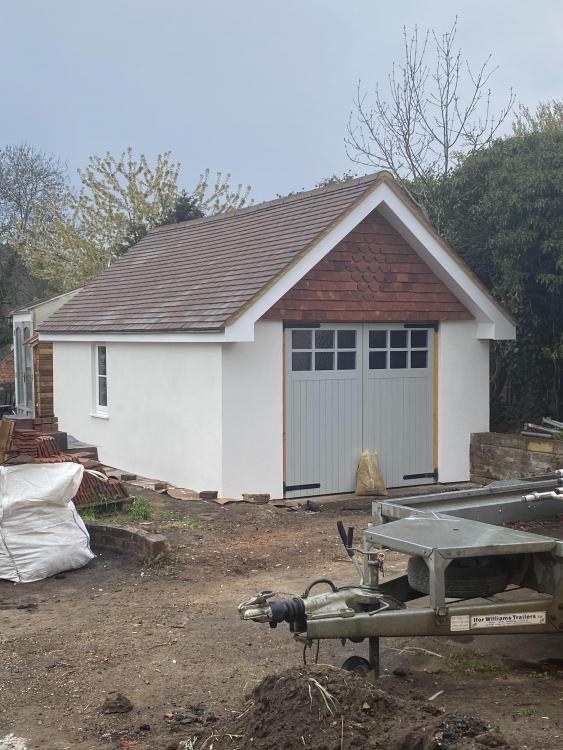 1 point
 -
That is nothing to be concerned about, the parapet and walls will prevent wind from drying the water. Only worry if it gets near the top of the flashing1 point
-
I would build a kiosk, meter box at one side just for the meter. At the side/above mount your CU and leave tails plenty long enough (meter installers love an easy install with nice long tails). Then you or your site guys can open the kiosk (this can have lockable door) and get to the supply without going into the meter enclosure1 point
-
I looked into RWH to feed internal systems and saw all of the cons raised above, you do need quite a bit of kit to meet WRAS requirements. There are some concerns over bacteria and virus from bird droppings being washed from roof into your system and not filtered out due to their microscopic size. RWH systems do not typically have UV treatment etc as the water is not intended to be potable. However flushing a toilet will generate an aerosolised spray which could introduce these into the air. We built a 4000 l tank using IBC in a covered location next to our basement and use it for garden watering only. Helped towards our water calculation signoff.1 point
-
One bedroom statics are very rare, +12" wide models are easier to find. At 13.5' x 38' mine weighs in at 8 tons. Are you confident about swinging such a weight from the public road onto your site? I cannot visualize your site but building something onsite might be your way forward. Checkout the following workshop build video series. He slots some insulated panels together around a wooden frame. p.s. a corrugated roof will require something to dampen the noise of heavy rainfall.1 point
-
The quote that I have includes the following: Leaf removal Particle removal A 3 stage filter including carbon filter This allows use for toilets1 point
-
Static caravans are flimsy structures so I would caution about moving walls or remodeling one. They are fitted out with space efficient modules particularly in the bathroom. Mine is an extra wide 13'6" model with a total floor space of around 460 sq ft. It is a rare 1 bedroom version and life has been more than tolerable for 2.5 years. By my calculations a mid size touring caravan is 100 to 130 sq ft. Even with a large static life became much better with an extra 8' x 4' garden shed to house the washing machine and tumbler. There are many solutions to the accommodation problem but a common theme is that people build extensions or add an awning to their initial accommodation unit. Do you have planning for a garage? p.s. I would want something larger than 4" x 4" posts to handle the occasional extreme winter gust striking the structure side on. Just a hunch...1 point
-
I don't think the planners can dispute the construction method used for temporary workers accommodation. It might be simpler for you and the planners if you obtained formal approval for temporary residential accommodation on site for the duration of the build. After reading this thread I would advise against the idea of living in a touring caravan for more than one summer. Have you thought about building the garage first? One solution I have seen is a touring caravan connected to one door of a double garage. The caravan was used for a bathroom, bedroom and late evening snug while the larger space of the garage hosted a kitchen and laundry. btw Touring caravans are expensive and buy you 25% of the square footage of a static at a similar stage of depreciation.1 point
-
clad each face with J-section UPVC fascia?1 point
-
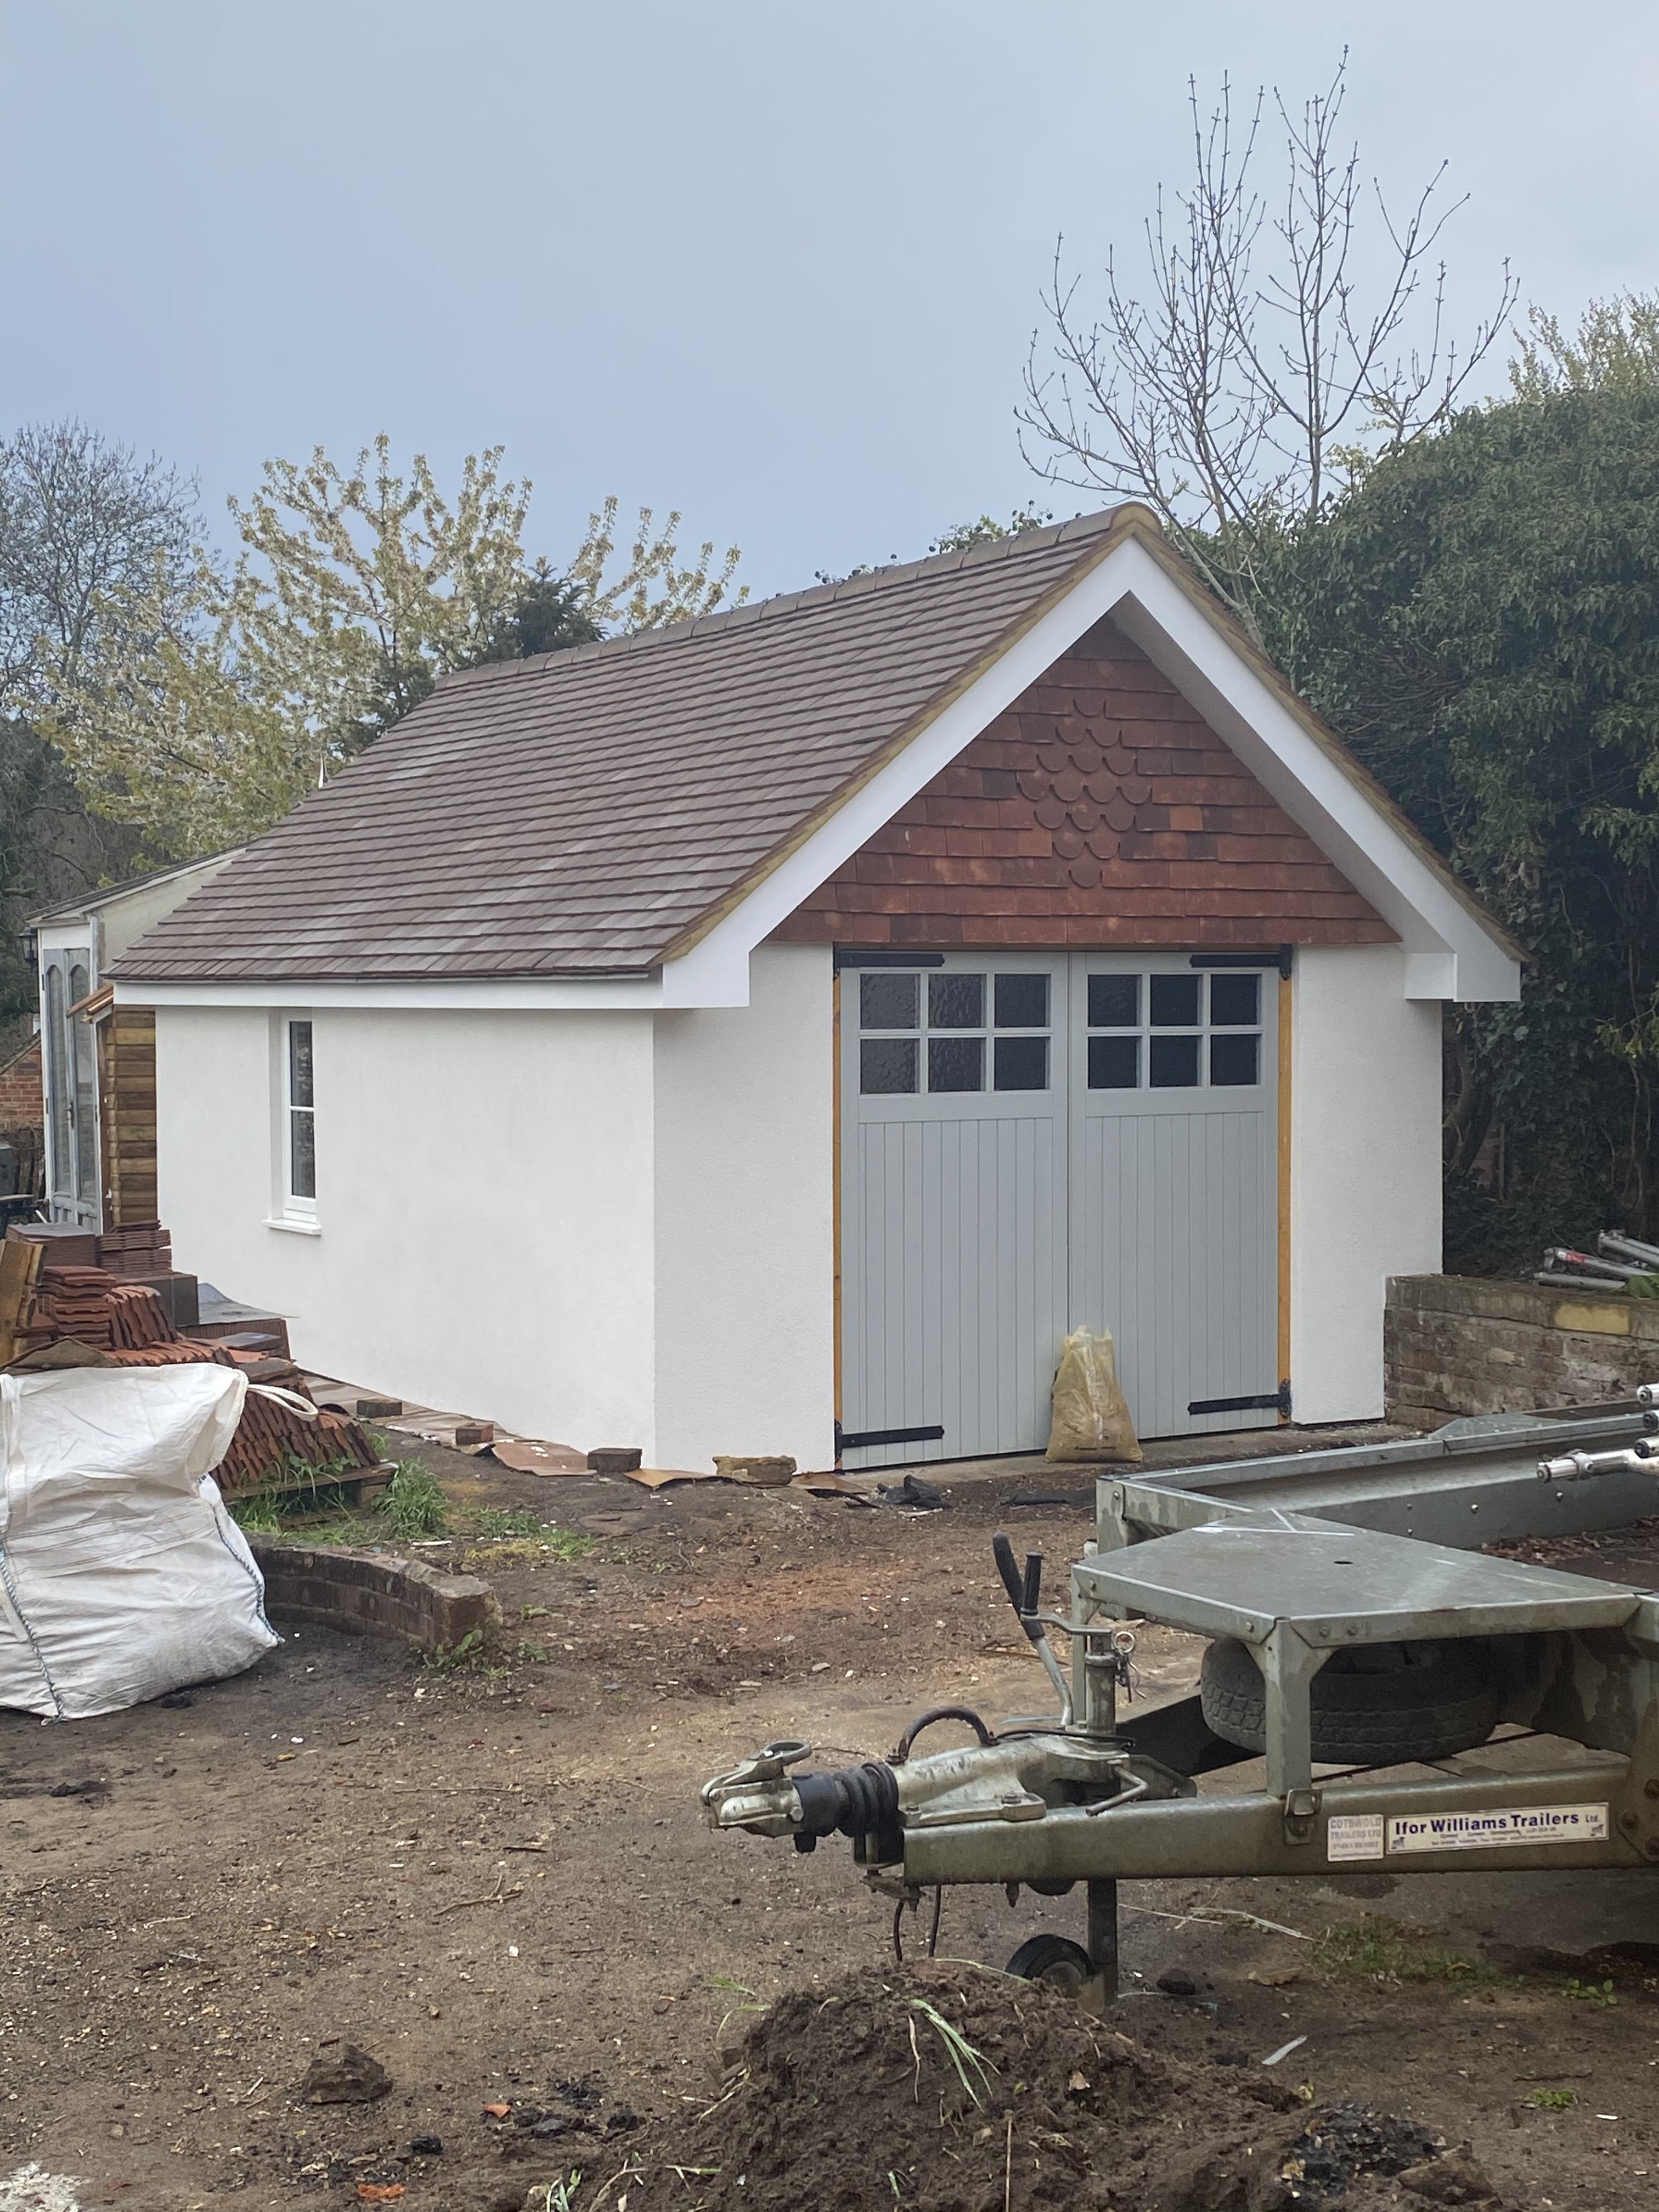
I would go with the @IanR suggestion. Your house is looking great!1 point
-
You could build the columns out with timber and clad them in the same horizontal stuff as the house, using the metal corner trims. I have done this on some details and with the trims it looks OK.
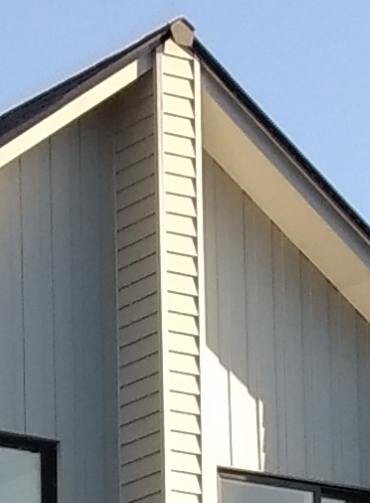 1 point
 -
Exactly what Toolstation did near every Screwfix near me lol No longer £10 for free delivery, they upped it to £251 point
-
I guess your roofers wouldn't have had the tools on site to fabricate the cladding for the columns from the wall cladding. It would also need some careful thought to avoid sharp edges that could cut hands. While the pre-made parts you link to are expensive, I would have thought fabricating bespoke cladding panels that neatly fit together, leave no sharp edges exposed and hide all fixings, would be even more expensive. That leaves you with a timber cladding, but for me that introduces another material and texture that doesn't relate to anything else on the facade. I'm back to painting what you have to match your windows, but introduce some detail at the top if you don't like the junction to the eaves. I don't personally feel they look too small in section, but do understand your concern. Perhaps with the balustrade attached they won't look so "out on their own".1 point
-
How about sand and fill (automotive body filler), and spray paint to match external window finish1 point
-
As @IanR says this is a common misunderstanding. You must be billed @ 5% for all eligible labour and supply and fit work, and your supply only materials will be billed to you with standard VAT. When you do your claim you can claim back the 5% billed for labour and supply & fit, and the full 20% paid on materials. Unlike new builds where labour and supply & fit are zero rated, all conversions and properties empty for 2 years are billed @ 5% VAT initially but you can still reclaim this as you are creating a new dwelling (subject to you meeting all of the scheme rules). Not all of the projects billed at 5% will be eligible for a full VAT reclaim and the rules are complex so if all are billed @ 5% it avoids trades having to determine whether to zero rate certain conversion works or not. Have a read of the claim form and notes. You will see that there is a separate section of the form for reclaiming the 5%. https://assets.publishing.service.gov.uk/government/uploads/system/uploads/attachment_data/file/828048/VAT431C_form_and_notes__1_.pdf1 point
-
Hi I'm currently a PM for a local community build where we are renovating an upstairs space to be used as a youth club1 point
-
If we’re talking ready mix stuff here (?) then ditch that tripe and get some powder adhesive and mix your own. I do like all the BS names given to the above-mentioned tile adhesive “power shower proof” and such other nonsense, but the facts are simple…….your tile adhesive isn’t ever supposed to see the shower water as the tiles / grout / sealants take on that responsibility!! Just get some Mapei / Bal / Ultra etc, 20kg bag for a couple of tenners, choose the slow setting versions ( commonly referred to as ‘standard’ or ‘extended’ set so you get an hour to play with it ), and that will serve you very well indeed. That will also be a cementitious adhesive which you can immerse in water with zero degradation. All of the DIY ready mixed stuff is garbage, and will reconstitute with any downstream exposure to moisture, so avoid that for any areas which are frequently / constantly exposed to splashing / running water.1 point
-
usually caused by exposure to frost / freezing.1 point
-
Hi Super JohnG. As the over hang is outside the thermal envelope, looking at the problem the only thing I can think of to do, if the fascia is too tall, is to cut part of sloping soffit side horizontal however I'm not sure this wouldn't cause you other problems. Hopefully someone comes up with a better answer. Good luck. M1 point
-
I believe this is a mix-up of the rules. Conversions are subject to a 5% VAT rate for supply and install, rather than the 0% of a New Build. However that 5%, + the full 20% of supplied goods can then be reclaimed at the end.1 point
-
My bet is they only looked at your application last week when they realised their decision deadline was approaching. They can now claim the deadline doesnt apply as your application was incomplete. Our planners also told us 24 hours before deadline that they wanted changes. This despite spending over a year at the preapplication advice stage. Fortunately they were trivial and my architect was able to get revised drawings to them same day. A few years later one of the planning officers made a comment that he thought the house looked nice and that his department had "done a good job". I had to bite my tongue. They have no shame.1 point
-
Or agree to what they want and take a more practical solution and quickly backfill ?1 point
-
If you have a big garden perhaps take advantage of the demand to use some of it as a swale / bog garden? The volume of that should count as buffer. If you have the bottom of an excavated pool as pond, then can you count the 2ft to the top as storage volume? Just musing.1 point
-
+1 - this will need a SUDS solution which will involve and unrealistic amount of soakaway crates. I am in the same position and, in my case, the whole this is completely unnecessary - the ground make up is 600mm peat over clay so the water goes straight through the peat and washes over the clay until it drains away. They are going to make me put rainwater storage in for a 1 in a 100 year event + 40% addition for 'climate change'. 40 sq. m of crates overall..... All to avoid a puddle in the garden once a century - which would never happen because of the peat! Madness.1 point
-
On clay soakaways may need to be very large or not work at all. Most water companies don't like you putting rainwater into the foul sewer and may or may not allow it. If they allow it its normally called a combined system.Some allow existing properties to continue with a combined system but dont allow but not new ones to do so. Some options.. You could dig deeper and see if a deeper soakaway works better. You could try applying for planning permission on the basis that a combined system is proposed. The water co will be consulted and may or may not allow it. You could propose storm water attenuation system with outflow to the foul sewer. The water co will be consulted and may or may not allow it. You could propose a rainwater recycling tank with overflow to the foul sewer. The water co will be consulted and may or may not allow it. You could approach the land owner of the ditch for permission to use that. They may allow it but may also want a significant payment if you have no other options so careful what you say when you approach them. If your land has riparian rights you might have a right to use the ditch. I suggest you need to look at the costs of different options. We opted to propose a rainwater recycling tank with overflow to a roadside ditch. It was allowed. Your mileage my vary.1 point
-
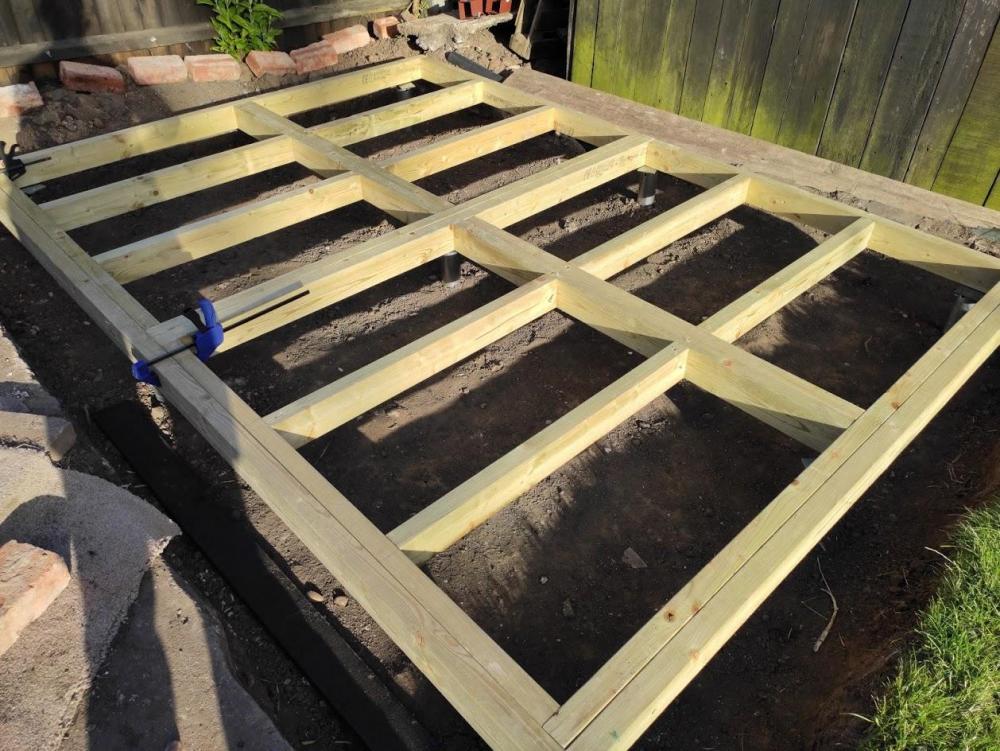
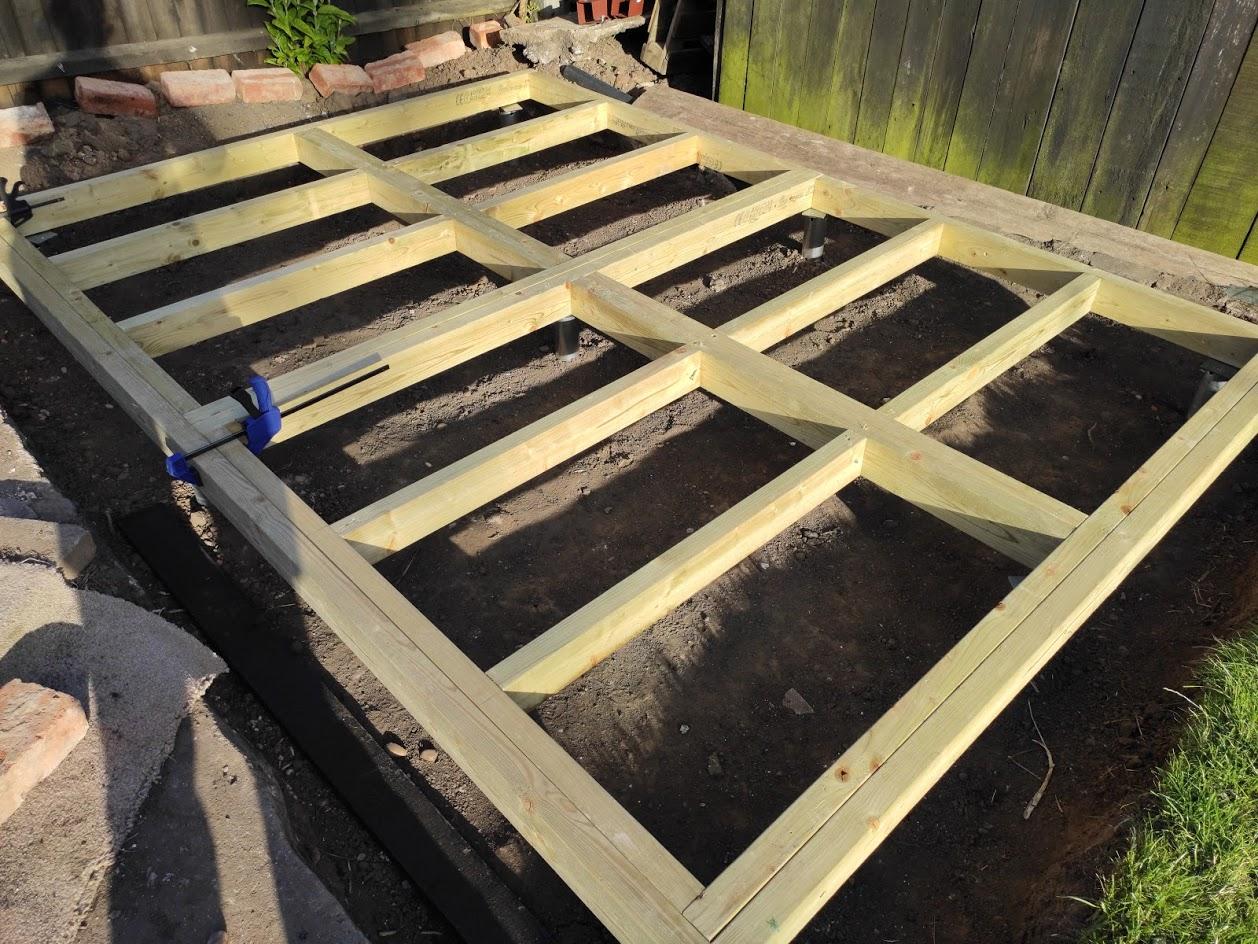
I try to avoid concrete where I can. This was totally dry and totally DIY - after getting advice for the right screws that would support the weight of this building. I did have to scan the ground first though - I was petrified about screwing into a pipe or cable so wanted to make 100% sure. Here's a sneak peak of the floor before the insulation went in. You can see the ground screws underneath.
 1 point
 -
The usual presumption for rainwater would be a Sustainable Drainage System these days, I think.1 point
-
So the presumption should be that you connect your wastewater from the new builds to the sewer. Unless there are insurmountable obstacles, you're not looking at an off-mains wastewater treatment plant and drainage field. Percolation tests in accordance with BS6297 are required for the design of a drainage field. How is the rainwater from the main house dealt with? If it is to soakaway then that suggests this option could work for the new builds too. Infiltration rate tests in accordance with BRE 365 are used for soakaway design. If these are what you had carried out and gave bad results then I'd be looking at further tests to assess the variability of the soils across the site and with depth before ruling out this option. Alternatively, interception of the rainwater and attenuation before discharge to the ditch could be a reasonable solution. Discharge of combined wastewater and rainwater to a sewer is normally not allowed. I'd have expected your engineers to have put all this in a Foul & Surface Drainage Strategy Report.1 point
-
what is the sewage from the main house? does it connect to a combined sewer? Our ground conditions don't allow for a soakaway, and luckily there is a combined sewer in the road in front of our house. We wrote to the local water authority who granted us to discharge surface water to the combined sewer.1 point
-
Depends if there is layered clay. How deep did they dig?. I went down for my soakaway and at the bottom broke through to a sandy stony layer and the water just disappears! Pity I didn't find this before the rest was dug out!1 point
-
You need to be care here, the 'high temperature' may come at the expense of efficiency, the CoP, or because it uses a normal resistance element to boost temperature. First thing to do is a decent heat load analysis, then you can start to look at the cost of fitting a system. It is a bit like buying a suitcase, small ones tend to cost less, but if they are not large enough for the job, they are useless.1 point
-
Building controls have issued our “Completion Notice” a big milestone for any self build and definitely called for a celebration. A big sigh of relief from both our councils building control and us.? Our many thanks to all the contributors at BuildHub, we certainly could not have done it without the support of the forum members. Particularly Jeremy Harris @Jeremy Harriswho’s broad knowledge and good advice...goodness knows where he’s disappeared to but the forum is a poorer place without his input. It’s been a while since we first broke ground in January 2019 and it certainly has had it’s moments and a good few sleepless nights. There is no doubt in our minds when doing a self build that you have to be doing it for yourselves. We’ve ended up with a house that we could not have gone out and purchased and learned a whole lot on the way. Our initial vision was something small, manageable and future proofed. Hopefully we have achieved this and have added a decent quality house to the housing stock. When we started we visited the building research establishment (BRE) and looked at the Zed Factory house that was there. We decided to take a look at that route. ZED provided either a shell or turnkey solutions, both of which were within our budget. The cost per square metre in the ZED literature at BRE indicated a very competitive turnkey price in the region of £1,350 a square meter. As with all things the low price came with compromises as it was a “cookie cutter” solution and the finish was not all that we would have liked. What we have ended up with is our own vision at a comparable cost of around £1,400 a square metre built to our specification. Sounds like a great result, that is until you factor in the fact that we did the majority of the labour. It’s easy to see why the prices from ZED increased to more like £1,600 a square meter when we asked them to quote. From a design point we still need to live a full year in the house to know if we got our energy sums correct. Early indications are that we should need very minimal input in winter but may have too much solar gain in spring. Our east facing windows are great for the clear winter morning but a little too warm for April sun. In the big scheme of things it should be easily fixed by adding blinds. Our EPC rating came out as a “B” marked down from a due to our use of gas for heating and water, a bit daft given it’s the lowest CO2 emissions at 0.184kg per kwh compared to electricity which is in the 0.233kg region. It would be simpler and better just to do EPC on a kwh per square meter basis, putting the emphasis on input reduction. The MVHR is certainly helping, here's a screen shot from the duct temperatures on a frosty morning. We’ll draw our blog to a close at this point, just got to dust off our resumes and add house building to the skill set ?.1 point
-
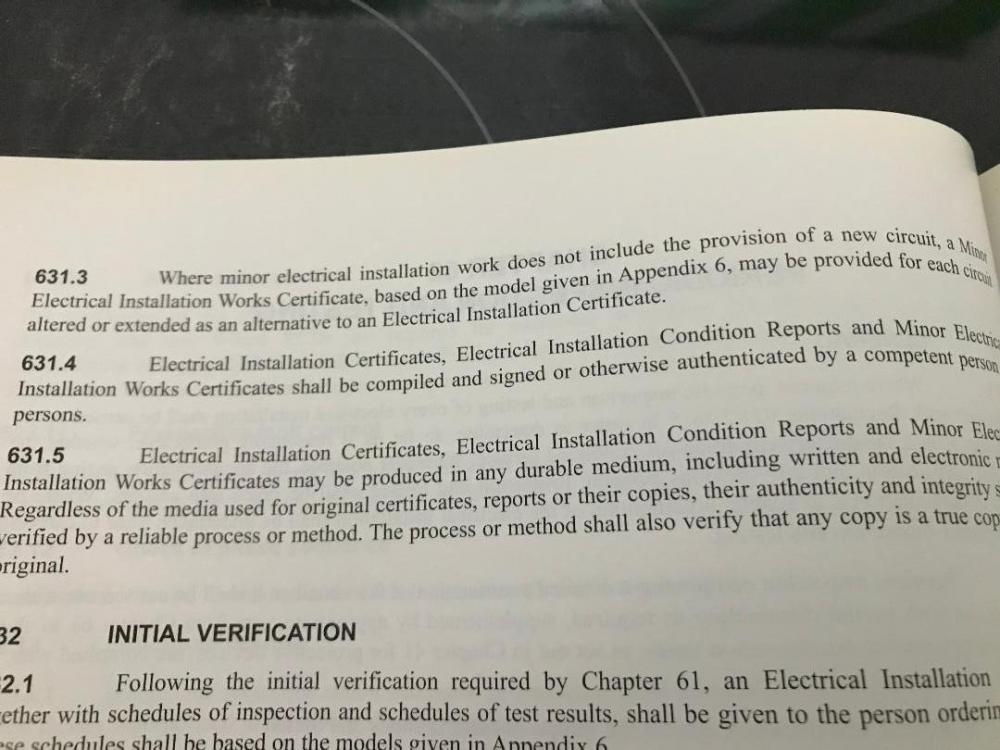
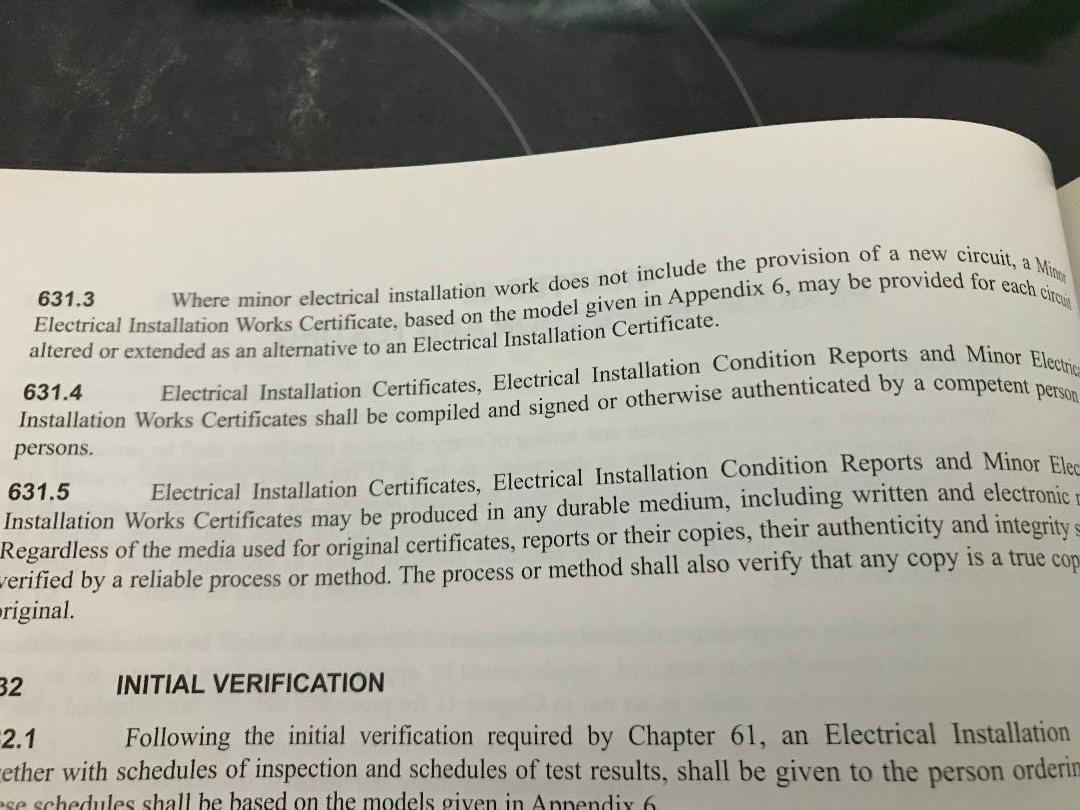
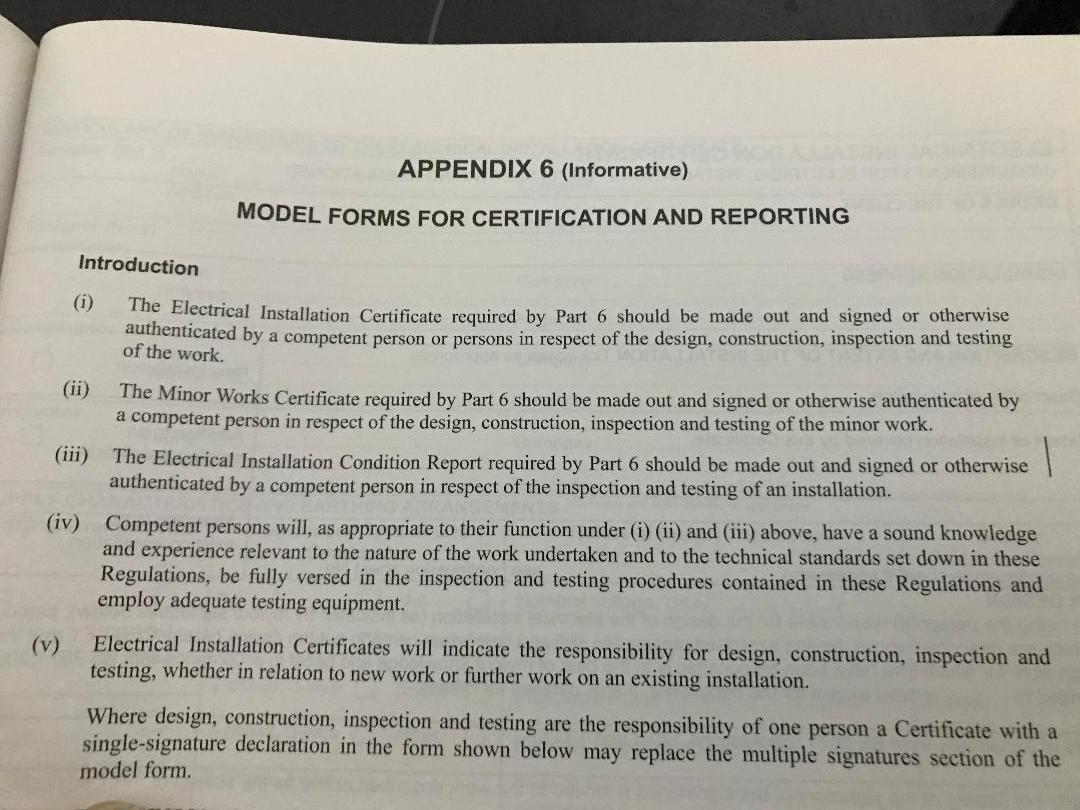
sorry I'm a new member to this forum and only just seen this. I qualified under BS 7671 17th edition and the reg then was 631.3 and App 6 as in the graphic. I believe under the 18th it's 644.4.201.
 1 point
 -
Crittall may be having all the money...0 points
-
Well I’m having crittall style sliders, but there you go. Is a bit like American style cheese, is usually not American at all!0 points
-
Now you're talking. Why has it taken you so long to contribute? I do sometimes wonder whether you're actually serious about wanting to sell the walk-on glazing.0 points
-
Apologies. They both boast the same ‘qualities’ but both are acrylic, so both will reconstitute with the presence of water / moisture / extreme humidity etc. Neither better than the other afaic but I wouldn’t use these in any areas other than ‘dry’ sections of wall. I’ve been tiling for over 25 years btw, and only ever had one job go tits up, and that was customer supplied ready made ( acrylic ) adhesive which went into the skip ,via the 3rd floor window.0 points
-
I can definitely associate with that!0 points
-
As above: 'No Mow May' will be shortly followed by 'My Lawn Looks $h!t June'. I'm all for creating wildlife habitat and I'm trying to do my bit, but it isn't going to be the lawn I'm afraid.0 points


.jpg.c21f3ac78c9b7efd90cbdcb312744dc5.thumb.jpg.7adcad4c0e384f5ecd7d56b0618df6e5.jpg)
This leaderboard is set to London/GMT+01:00