
Leaderboard


Popular Content
Showing content with the highest reputation on 08/02/20 in all areas
-
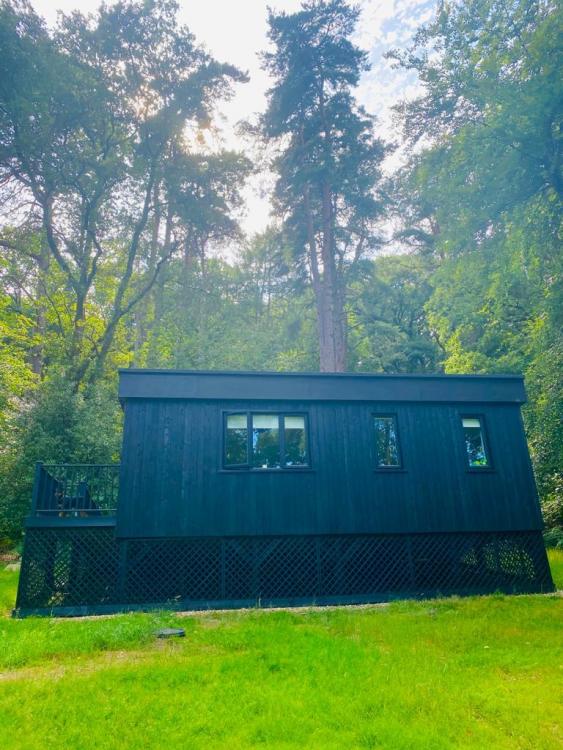
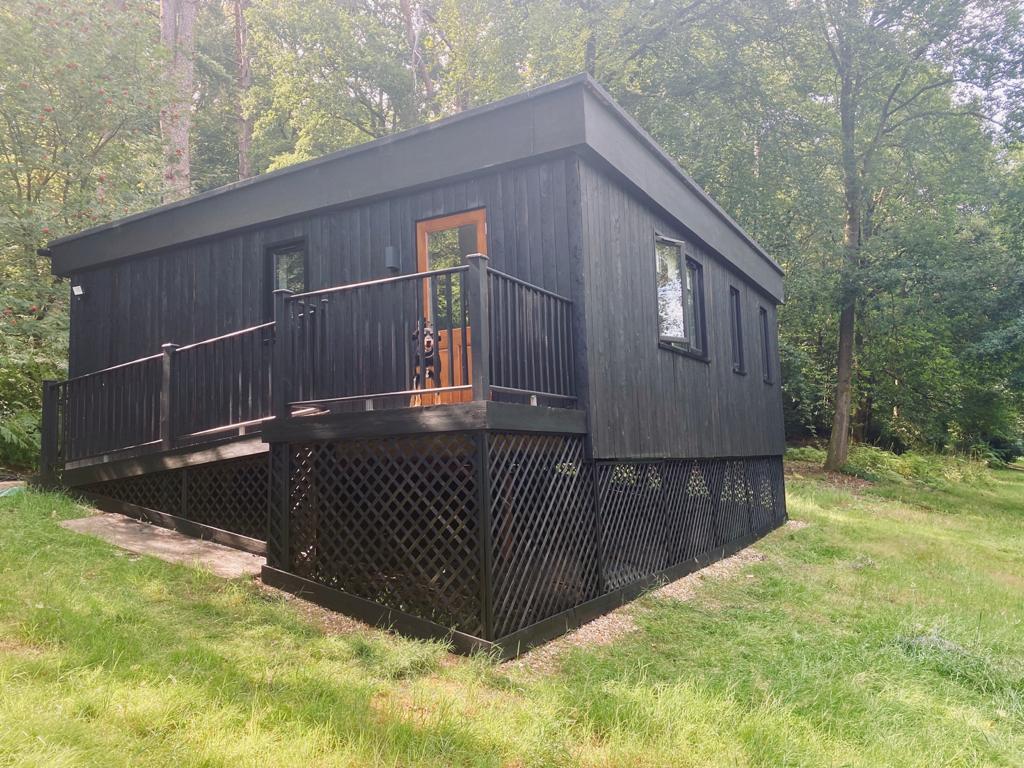
First all my apologies as this blog entry is about about a year late given that we moved in August 2019, but better late than never as they say ! Moving on from finishing the shell, we moved onto completing the inside. We knew from previous experience this would be the most intensive part of the build and had tried to make as many decisions up front as we could regarding bathrooms, kitchens and flooring, nevertheless there were still a lot of decisions to make. Everything went broadly to plan with the electricians, plumber, carpenters and decorator all working well round each other and coordinated by the builder who had put up the shell. There was an awful lot of work ordering everything and making sure that material was on-site at the right time. There was the occasionally thing that didn't go to plan, most notably the kitchen where i had the bad luck to have my kitchen delivered with many missing and damaged components and a supplier who took 8 weeks to sort everything out. The trades were proactive and happy to suggest how we might achieve what we were looking for which was a great help, but by the end of the project we were both fit to drop. Self build is a very rewarding but exhausting business. Here are some pictures of the finished house. There is still a little bit of landscaping work, the fencing and some furniture to sort out and I guess at some stage we will sort out some blinds to replace the high-tech cardboard that is doing the job at the moment. Following the build, we sorted out the VAT refund - 500+ invoices and a £32,000 refund for VAT. I ordered just about everything and given the number of invoices I got someone to prepare the submission to HMRC this for me which was money well spent. The electrical certificate, certificate for the unvented cylinder, building certificate and warranty were sorted out and finally the last submission for the CIL exception was made. The Dog seems to like her new home ! Still a bit of work to do in the garden View from the study window3 points
-
We originally tried to go down something like this route (currently a bungalow, wanted to put a new floor on top of part of the house and insulate properly), and eventually abandoned it purely for cost reasons: Downstairs is already in need of major refurbishment, so we would essentially be keeping the existing walls and foundations. Unfortunately the cost of EWI to a good standard is not far off that of building new walls from scratch, and to sort the layout we even had to get rid of most of the internal walls. Keeping anything above the foundations means that the whole build attracts VAT at 20%. For us this would have been significantly more than the value of what we could have kept. Very few of the package companies would quote because of the risk to them that the walls would be slightly mismatched to the plans when we got the roof off. The only one that would quote still said it would be cheaper to knock down. If we wanted to go for EnerPHit we would need to dig out the slabbed parts of the ground floor by hand, and possibly dig out under the suspended floor area too before insulating and re-laying. We would also have been left with a very annoying step (the existing rear extension was built on top of the earth excavated from the original foundations, as far as we can work out), and around half of the losses would have been through the floor. Existing layout isn't great, and we'd be locking that in. In particular, to leave by car we have to reverse out into a fairly busy road, albeit one with a 30mph limit. I've since found out that one thing I knew was a bit of a risk hit some people over the road very badly - they were planning to do much the same as us, albeit probably to a slightly lower insulation standard. However, when they got the floorboards up to start work they found the place had essentially no foundations and it got condemned as unsafe so they were forced to demolish and rebuild after already starting work on refurbishing. Our house is from the same era and on the same ground (gault clay) so we would have been at severe risk of the same thing happening. Looking at what you're thinking of, it looks a lot like our initial thinking - "we need to fix items X, Y, Z, that's it, it'll be much cheaper than knocking down and starting again". The problem is that those items didn't form a clearly defined section of the existing structure, they were scattered all over the place. That then had knock-on consequences, which snowballed. Essentially if you can get what you want with extending the existing loft conversion (e.g. hip to gable conversion for another room) then it's likely to be viable. If not you're probably worse off than knocking down and starting again.2 points
-
30 years ago I had the gonads, I just didn't have the money. The trick is acquiring sufficient funds before you reach an age when you lack the energy or become so risk averse that yours gonads have gone into hiding. Do it before it's too late, and good luck!2 points
-
Hello all, Please excuse me for the newbie question. We are looking to purchase a large plot with planning permission for a four bed property & outbuilding. Once planning has been approved, how difficult is it to make amendments to the planning with reference to the external structure / look of the property? We love the situation and land that comes with the property, but the actual designs aren't necessarily what we would wish to build. Thank you1 point
-
If you thought about this for 5 minutes with a coffee you would get it - it is an experiment we all did at school: Find the volume of an irregular solid by seeing how much it raises the level in a container of water. In this case we only need an answer to about +/- quite a lot, so personally I would guestimate a third for any reasonably sized sort of gravel, but obvs it takes up more of the volume if it smaller. But the tolerance means we don't need a big sample. If i really wanted to know I'd do it a la probable Jeremy: 1 - Get a big measuring cylinder or a bucket or anything of which you know the volume. Find out where say the 5l line is (put in 5l of water and make a mark or measure the depth). 2 - Empty water and fill up to your mark or depth with gravel. Do the hokey-cokey and shake it all about to max the amount of gravel. 3 - Refill with water and see how much it takes to the same line. Steal a measuring jug from the boss. 4 - The difference as a fraction or % allows you to calculate the allowance you need to make. This method even allows for any voids inside your pieces of gravel. Personally I would add 25% to the whole thing afterwards just to allow for uneven rain to give me a buffer. Ferdinand1 point
-
Are you sure you will have 20mm of render, I was under the impression that the render used on eps was just a thin coat with mesh imbedded, probably ending at about 7-8mm.1 point
-
In practice a lot of people with MVHR find that their washing dries so well inside that washing lines outside are redundant. Control condensation *THAT* well for many.1 point
-
I did not explain myself properly, yes I have double extract from bathrooms. I have mainly double supply ducts and double extract which was different from what @Bitpipewas saying he had done1 point
-
If you are well ventilated that should help control your risk of condensation, which is water vapour condensing from a wet atmosphere on a cold surface.1 point
-
I thought about flashband but that's my last resort if I cannot get anyone to do it before winter or the silicone doesn't work. As always if in doubt just dump loads of sealant onto it ?1 point
-
All it might have needed was the tongue on the left hand side of the new tile grinded down 20mm+ to allow it to slide under the old tile. Then start at the join and work to the right. Either they come up or your going to end up with something like a 300mm wide strip of lead down the roof in lengths to suit 3/4 tiles with enough tucked under the top tile each time to hold it in place. Will not be the nicest looking but will keep the rain out. What you have now won't keep anything out.1 point
-
@Nickfromwales Thanks for the kind words. The brief I gave to the architect was quite concise and is contained in the thread above. We looked at putting a study downstairs but that would have made the utility quite pokey so then took a look at the landing. Most of the good ideas were the architects interpretation of my brief and he came up with some ideas I would never have thought of. The study window is raised up from the desk for example so I can see out of the window but no-one can see me working at the desk. I am working from home full time at the moment and the space is working really well for me.1 point
-
They panel areas at my work like this and it looks quite good for the amount of effort involved, just keep your fixings away from the edge so you can fill and paint without loosing the edge detail1 point
-
Plus one with Rus You can’t fill and joint onto timber You could tape and joint Abito PB Just as solid as MDF You can fix directly to it like timber and a bit cheaper than MDF Or you could router a chamfer on the MDF edges to give you a nicer looking finish It all depends on what you are trying to achieve not using PB1 point
-
You mean around the perimeter? I did a quick analysis of the thermal resistances in the Beamshield Plus system and it is the insulation under the beams that does most of the work - hence you essentially have "warm beams".1 point
-
Snap again - we are four years in, since planning permission granted 3 years of building, and just getting the roof rafters in which is a great feeling. I am not quite knackered but feeling the pressure now to crack so so having wished you all the best that is what I intend to do. Good luck - maybe I will have a coffee first - no just get back out there sharpie..1 point
-
I had the same problem in my draft design, and hence am looking at the Springvale Beamshield system which puts the insulation between and underneath the beams rather than on top. Not quite sorted yet (should get final pricing next week), but promises a U value of 0.12 with a P/A of 0.551 point
-
You cannot tape them and fill it will stand out proud and look dog rough, can you just use a cover strip over the joins, nicely rounded edges so it looks like panels. Why not do a panel configuration, so flat boards but with a raised trim at floor and ceiling and at every 1200 around the walls. You can get a plastic T shape to go in the join so it shows a 15mm wide plastic trim at each joint. Have you thought about fermacel instead of mdf.1 point
-
Snap. 5 years on we are between second and third fix .... and boy am I knackered: I mean walking dead knackered. Today's the first day off in the last 30 or so. Almost giddy with relief. Go for it. Good luck.1 point
-
Is the question : does passivhaus design and build cost more than more traditional design and build? If so, yes, it does. Much difference? Depends on too many factors to give sensible advice at this level. From your post, I think you might be interested in this document about the Enerphit Standard: in essence, a passivhaus retrofit standard. Here's a list of other resources you might like to read1 point
-
Even the "wrecks" here, really only suitable for knock down & rebuild start at around £500,000.00. I imagine anyone buying this place would view it as such. Imo you should get concessions (grants? ? ) for wanting to improve the housing stock, not keep having to pay more and more to do so.1 point
-
totally agree and you all decided i,m totally nuts doing what I, m doing --but hey just go for it - and plan for worst scenario which in my case is put it all up for sale .If the plot is good you will always be able to move it on if age gets the better of you they not making any more land1 point
-
Basements are real fun . Cost more , more work and leaks ( in my case ) - but so worth the extra space .1 point
-
I,ve been looking at this over the years for the house I am in and on my new project every time every builder say -start from scratch , and you can see why they can quantify every part of it much easier --no bobby traps so yes it doe not surprise me that flatten and rebuild will work out cheaper and better solution in the end pre- planning advice is the way to go in my view Its what I am attempting to do with my ruin- so I can then make proper decisions on what they will allow and then cost it before starting to spend money on lots of plans they won,t like my solution wass to lift the roof build up the walls another 8ft and extend other side of house you can,t see by 3 m then refit modifed roof ,the way house is built I loose 0ver 1m upstairs on each side foot print now of main house not including extension is 11mX6m also considered making it 2 storey over the kitchen /garage -by the time we worked all that out and scafolding tent etc,-it was cheaper just to flatten in next couple of years the pylon you can see is going --new major line is being constructed around the town and this one is being removed now If i get lucky for a change this should work in well when new house is built and lift the value of this one


 1 point
 -
Love it! ? (Always annoying when someone's garage is built better and is warmer the my entire house! ? )1 point
-
Tell them you'll pay when you're happy and not a second before.1 point
-
Struggling to find anything to dislike there, and I looked twice Really nice touch with the RAL heads and cills in the outside window & door reveals, have noted ( stolen ) that for future brownie points. Really liking the study / office at the back of the landing space. Architect input or your own ideas mostly?1 point
-
In that case, lol; And welcome!1 point
-
Now this is not the end. It is not even the beginning of the end. but it is, perhaps, the end of the beginning. Coming up on 2 years since we first instructed our architect and over 8 months from submitting our planning application, we have finally been granted permission. It's been a tale of missed bat season, incompetent planning officer, excruciatingly slow conservation officer, numerous complaints and all capped off with some pretty ridiculous pre-construction conditions. But we're there! In the time it's taken us, I've done back to brick renovations on 5 projects plus a couple of loft and rear extensions plus we've had a child and a global pandemic (which I blame on our resident brown long-eared bats) Oh and we've also completed our permitted development outbuilding/yoga studio/stealth shed All I'm hoping for now is to get the foundations in before winter.

 1 point
 -
Sure that’s what I suggested. ? c,mon keep up.0 points
-
Seeing what people have done here the only way I would want to go is a floating slab on 300mm of EPS. One thing I've forgotten is money. I haven't got any! ?0 points
-
The truth hurts!0 points
-
And they have finished bathrooms too ....0 points


This leaderboard is set to London/GMT+01:00