
Leaderboard


Popular Content
Showing content with the highest reputation on 07/29/20 in all areas
-
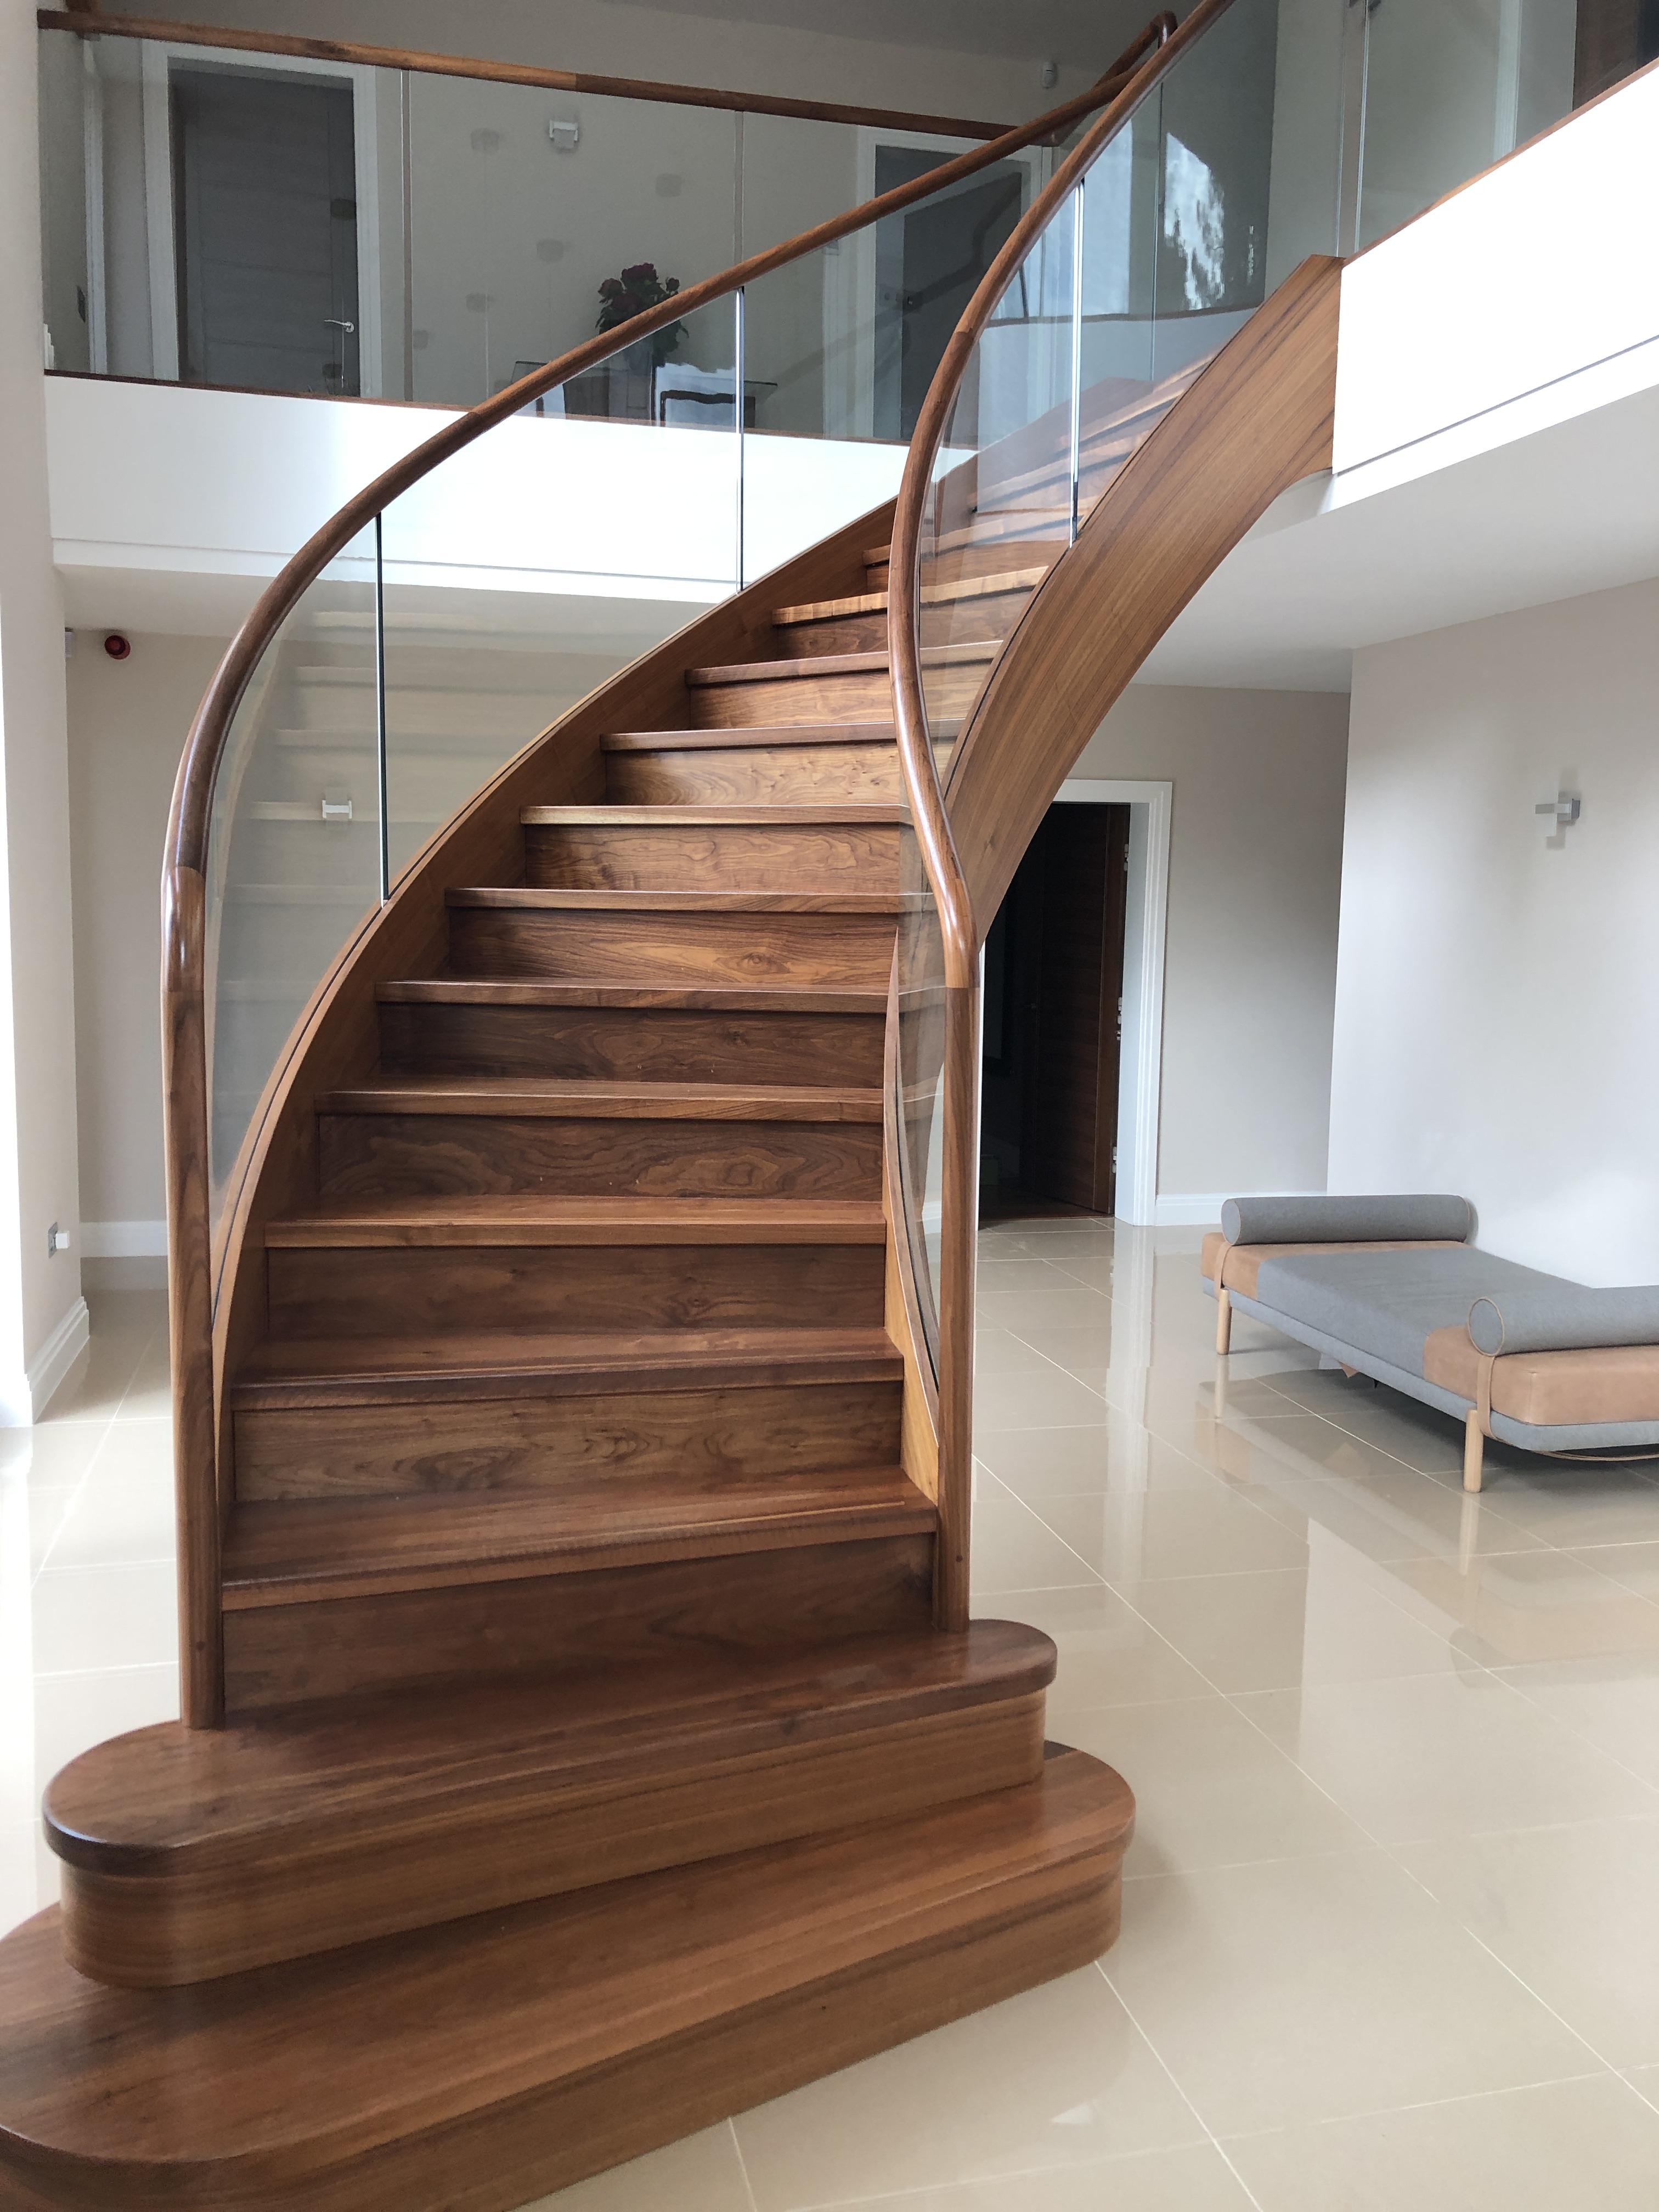
Stair porn at it's finest. We all salute you sir.3 points
-
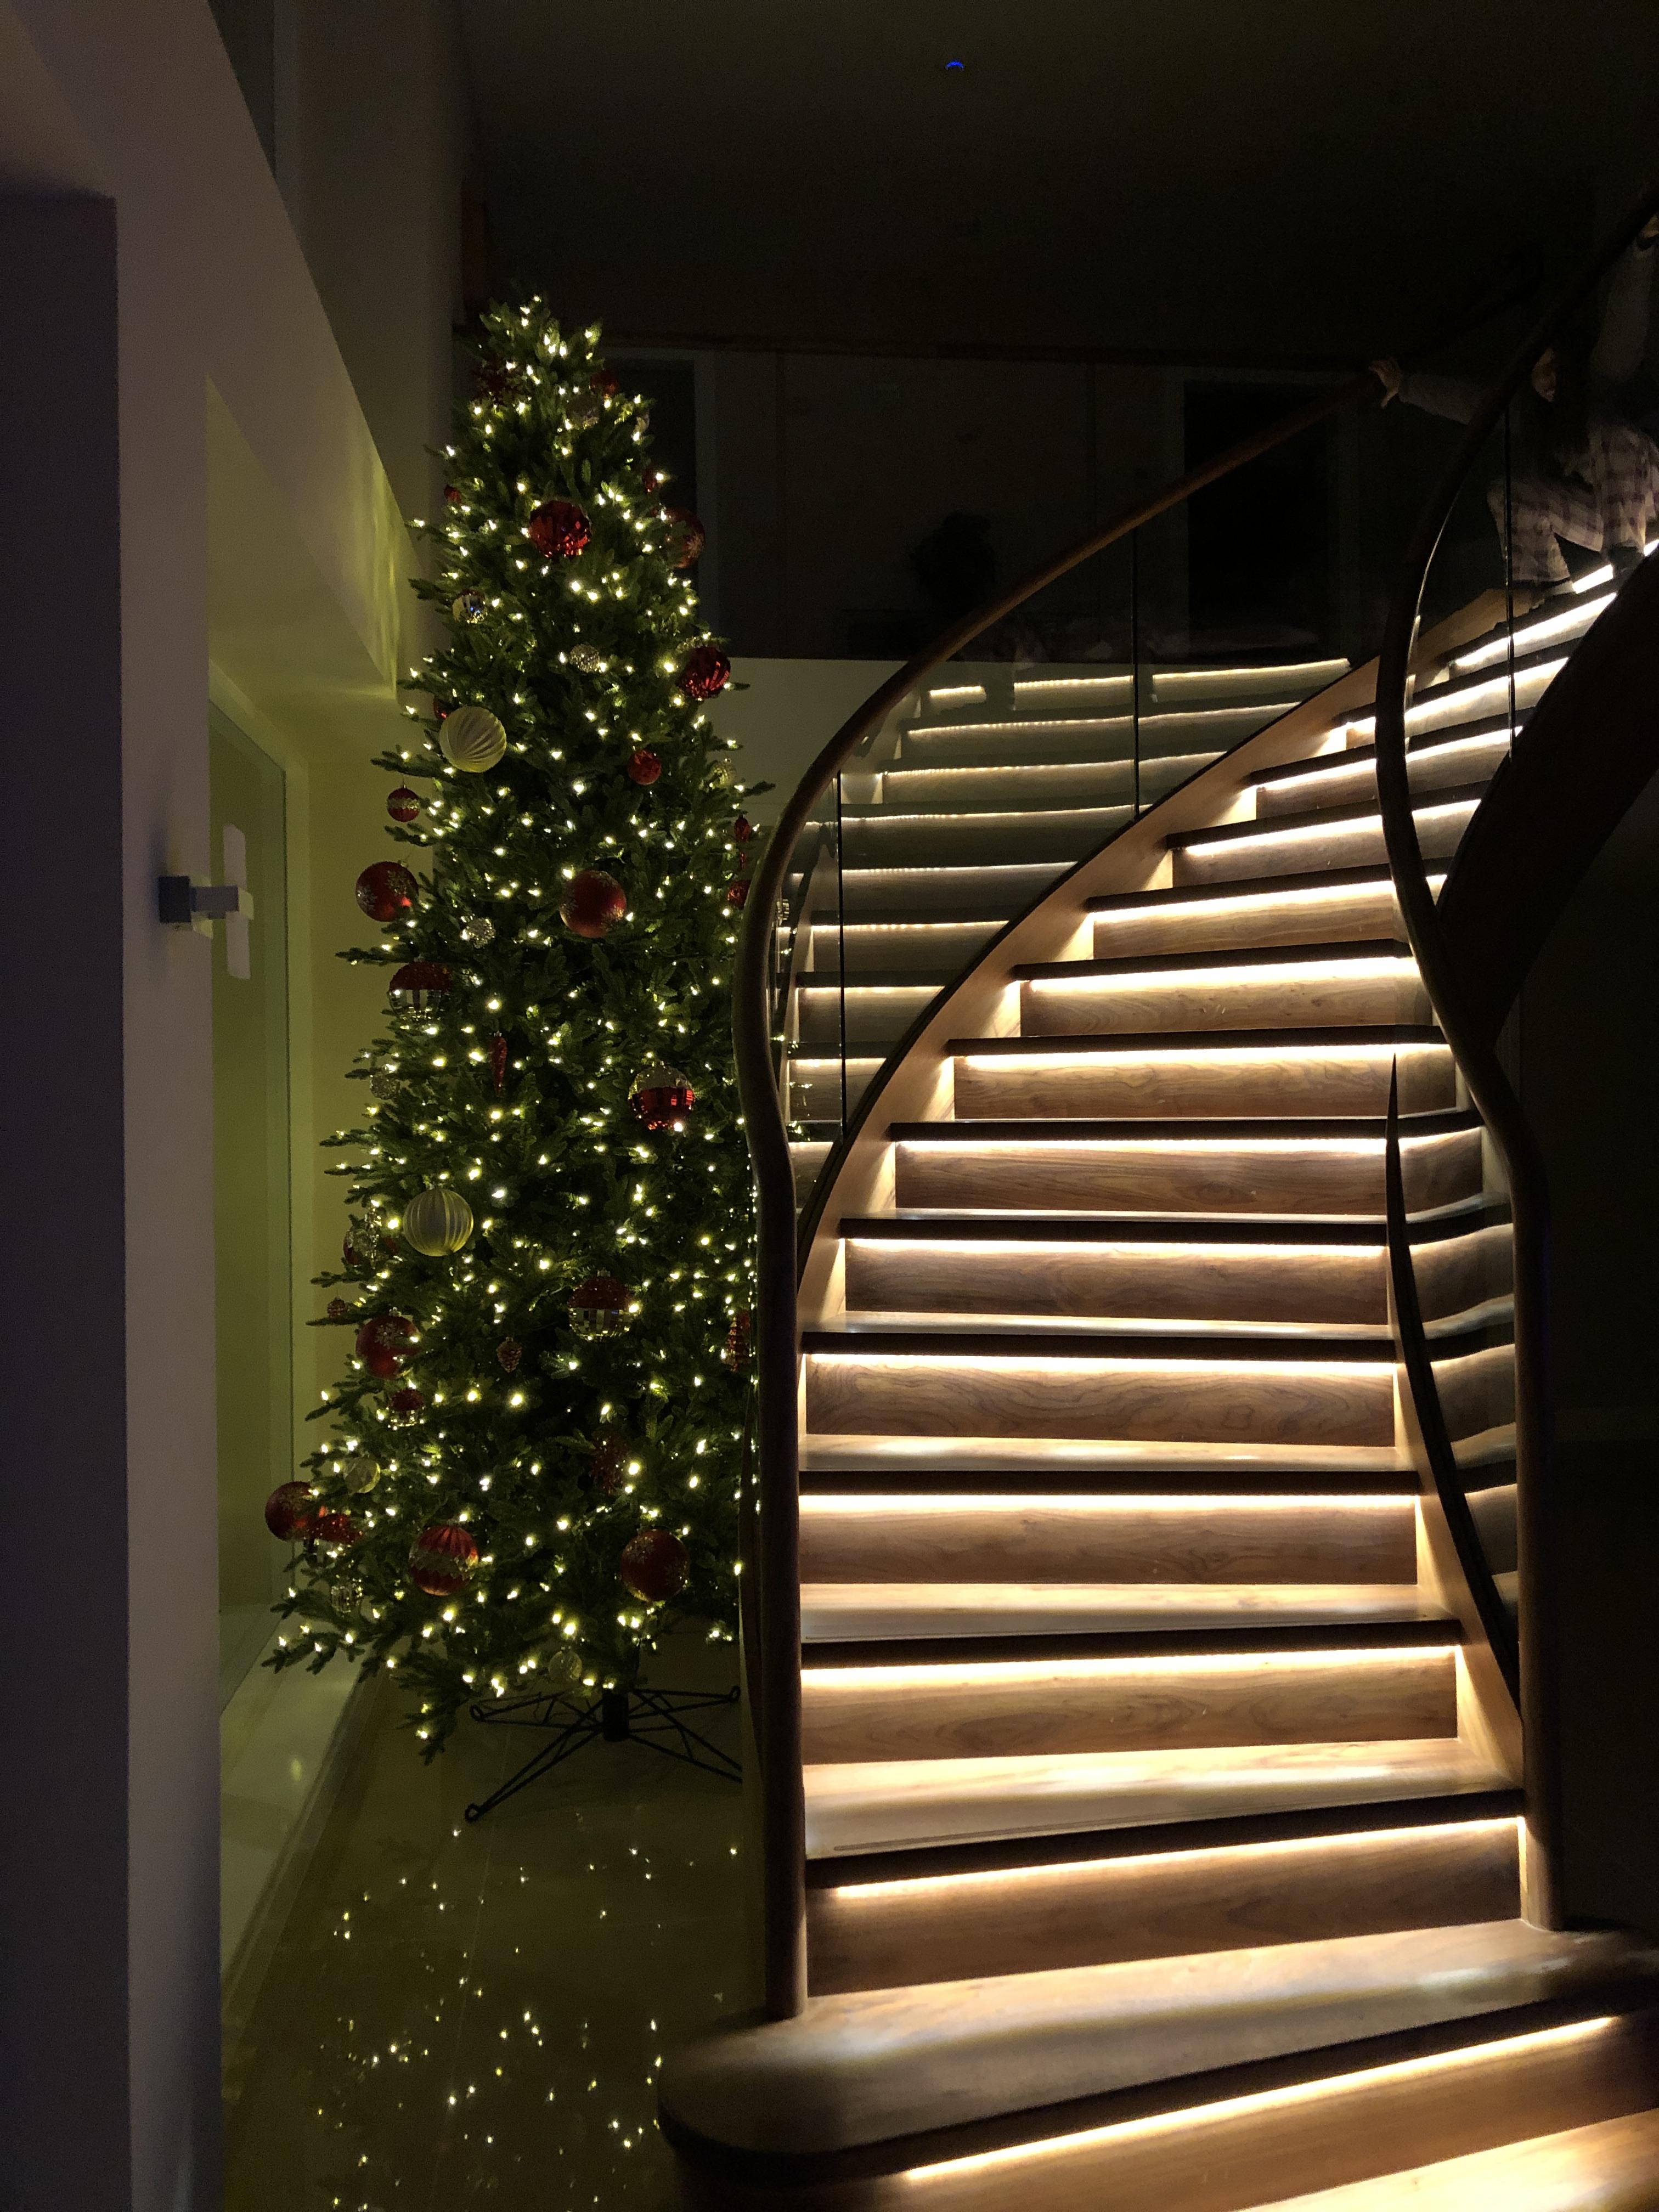
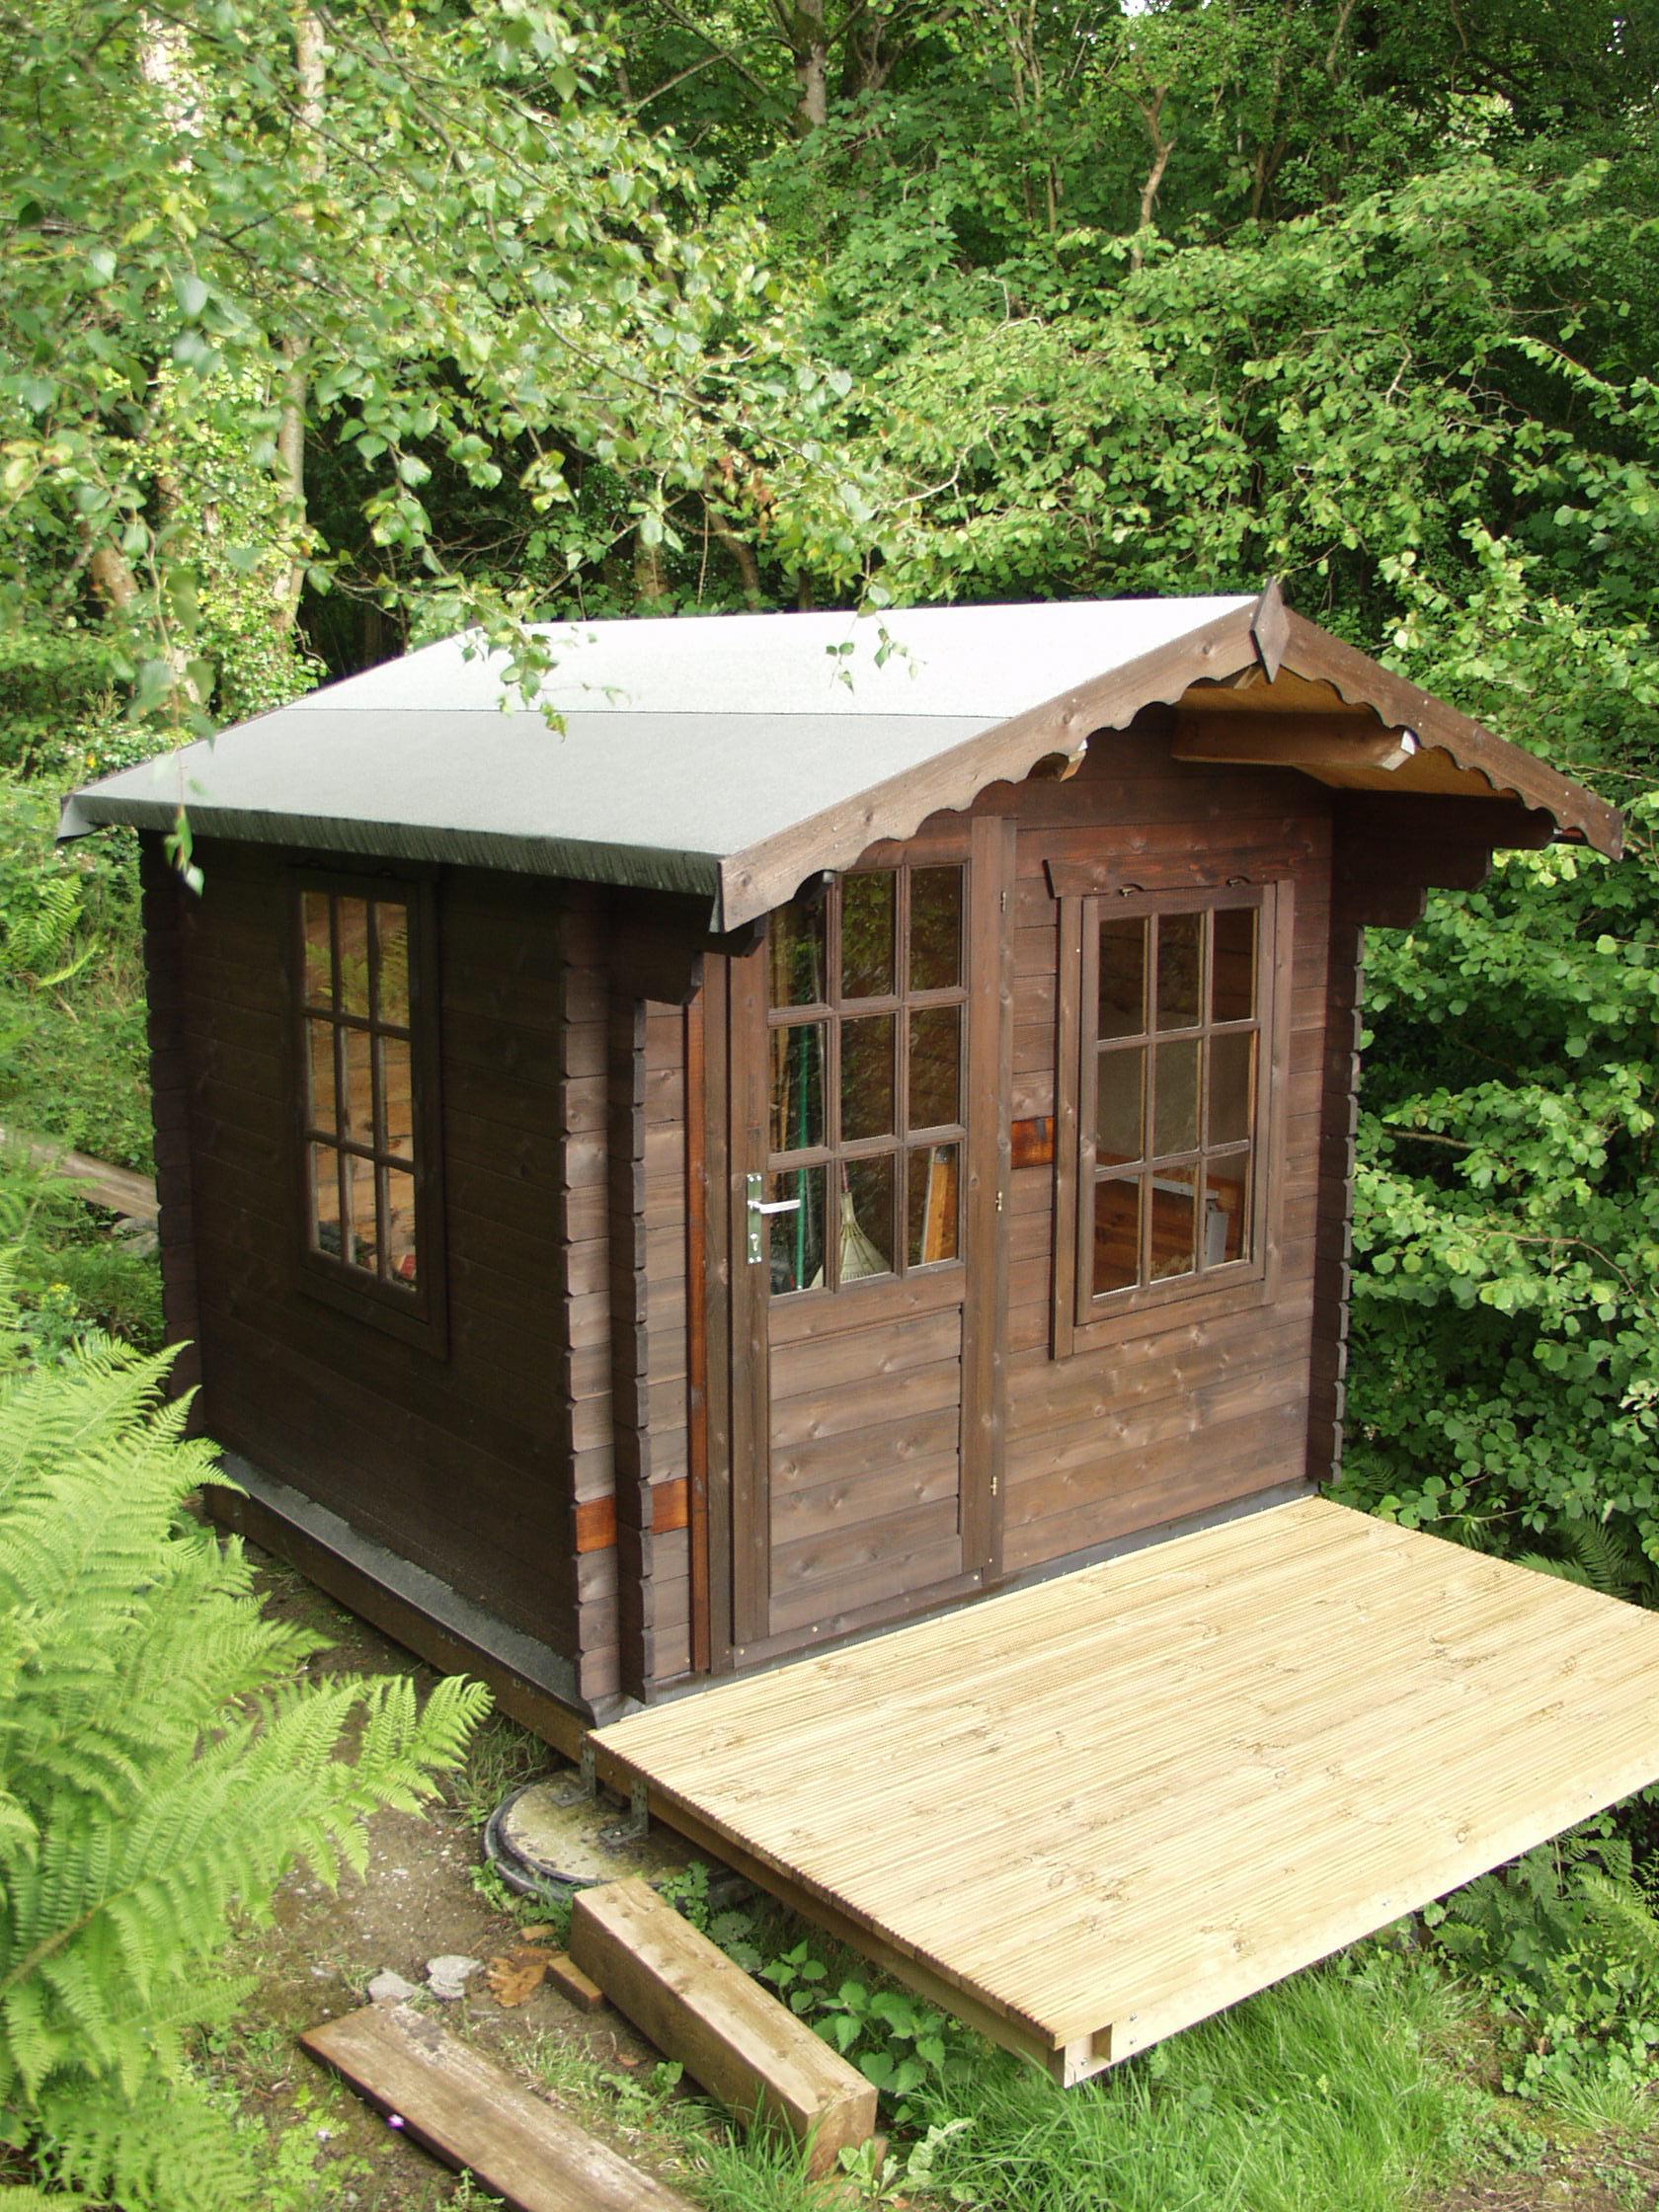
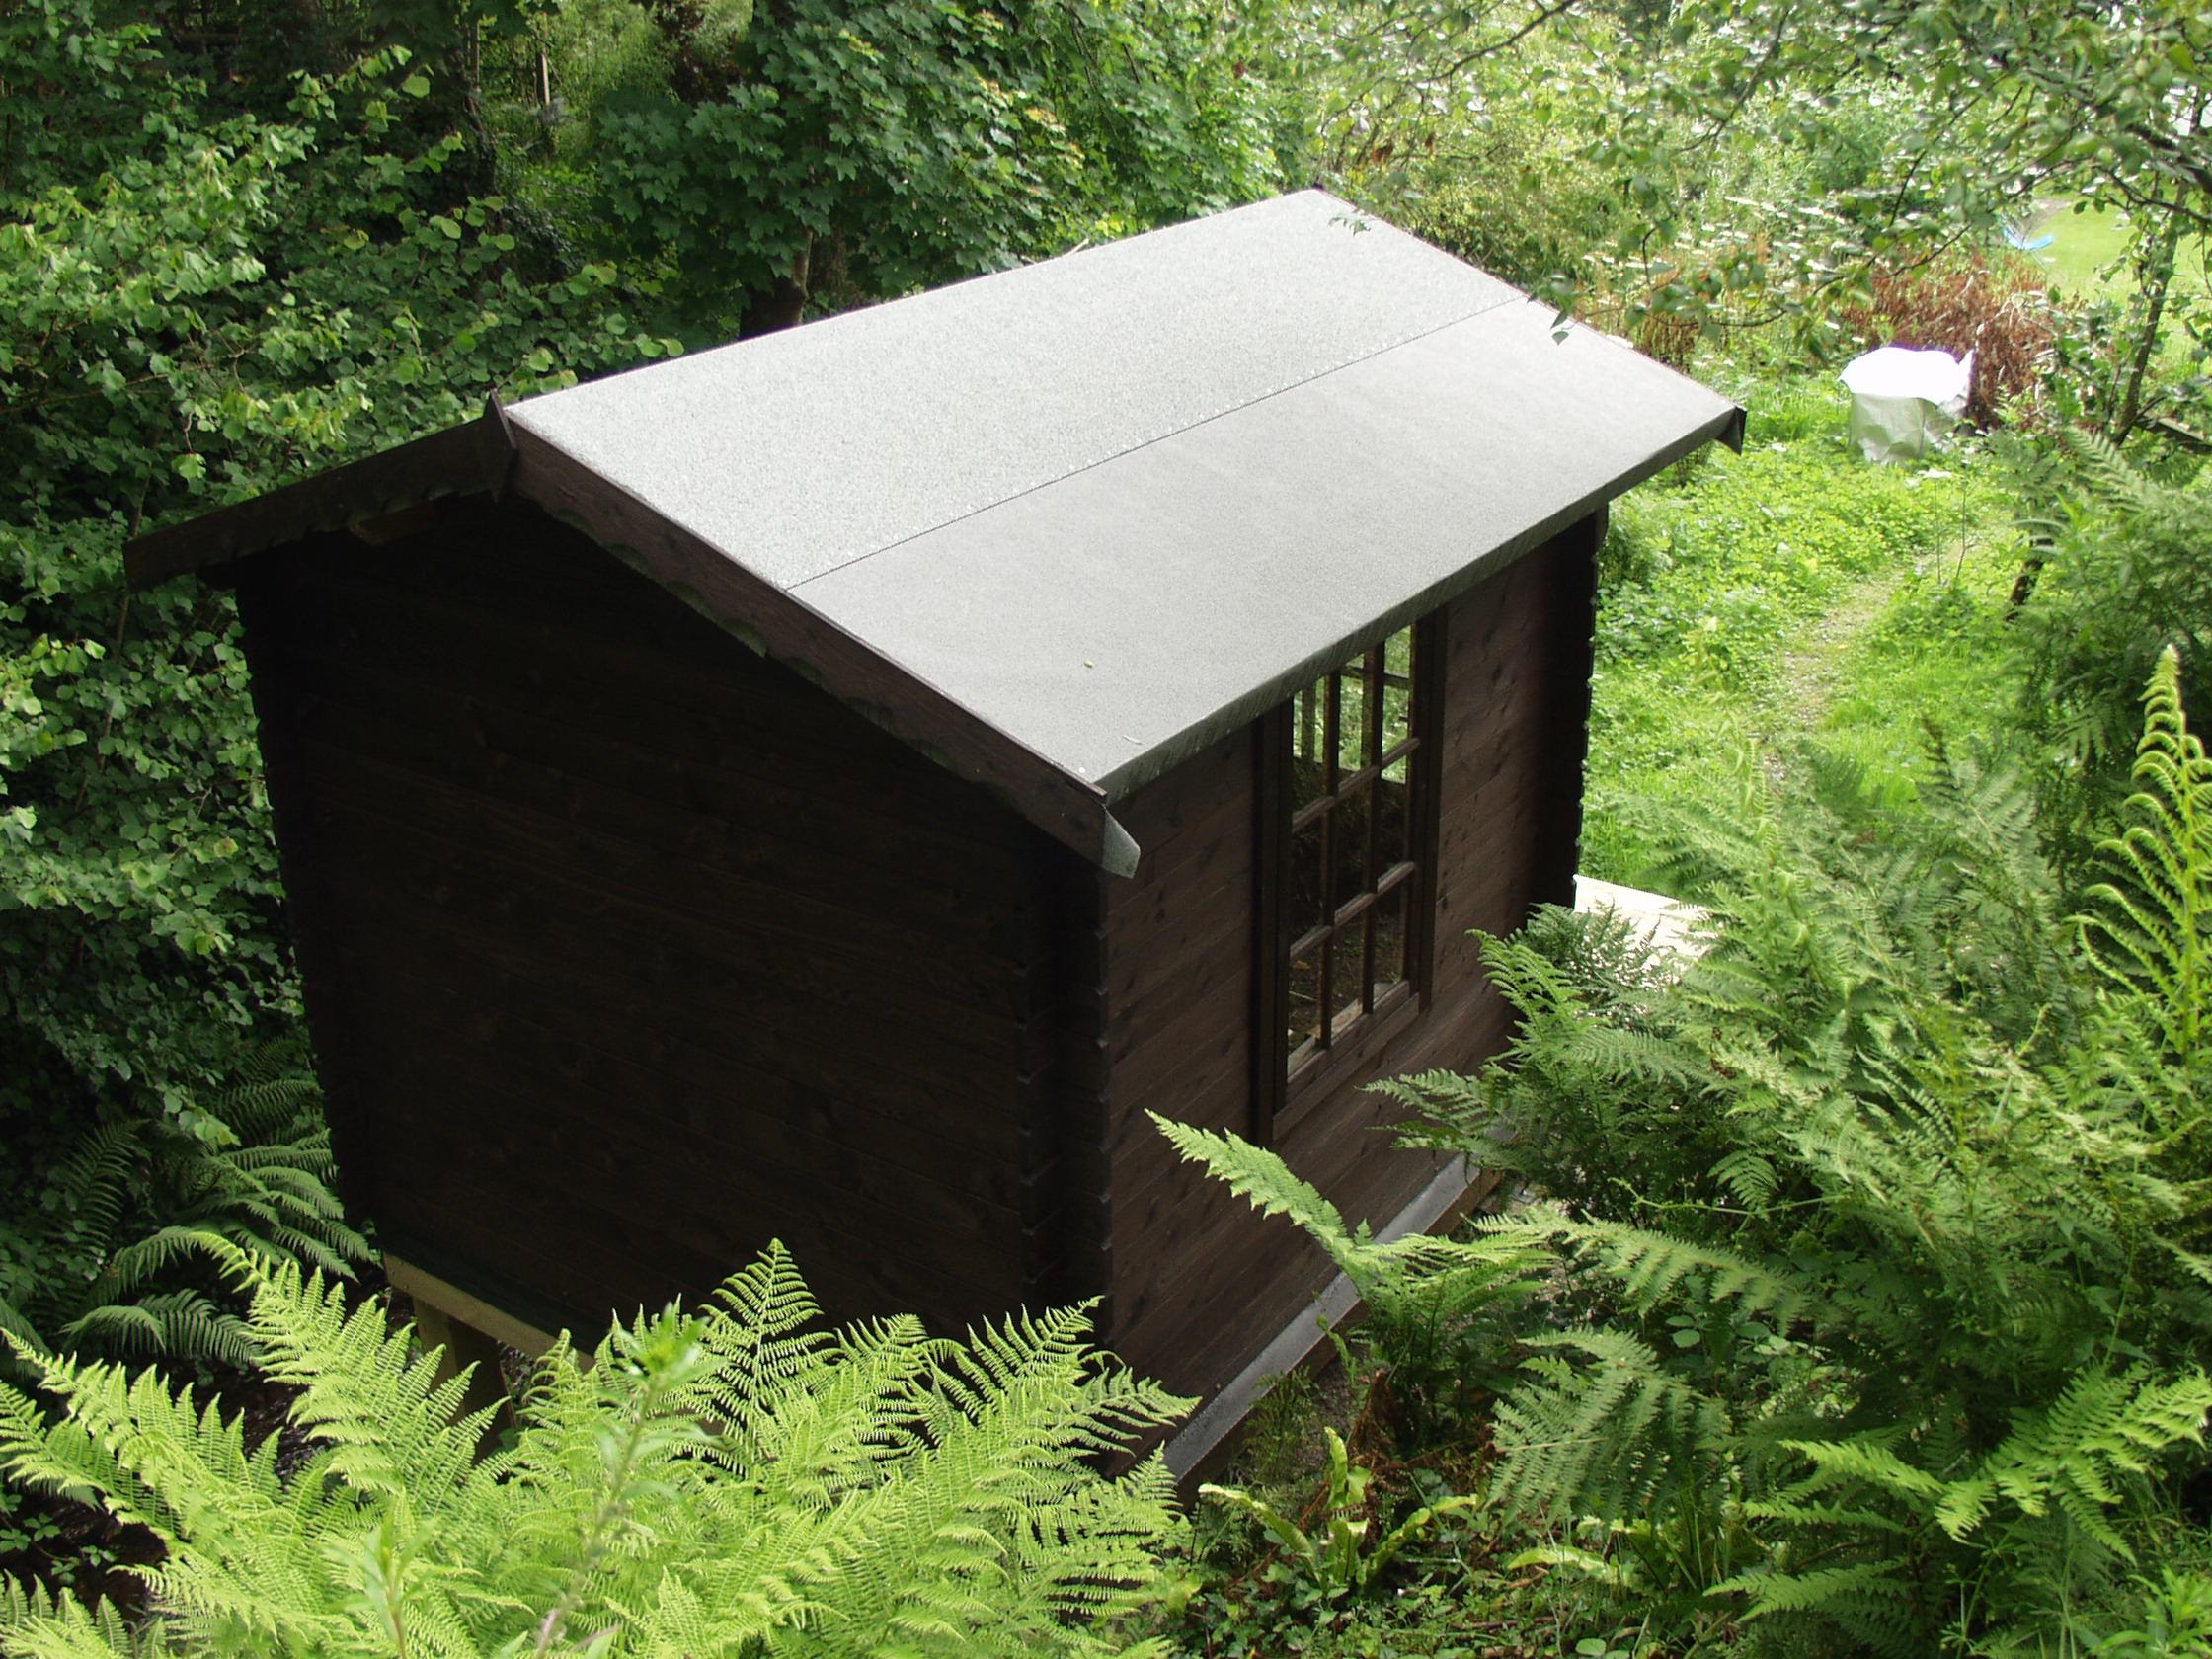
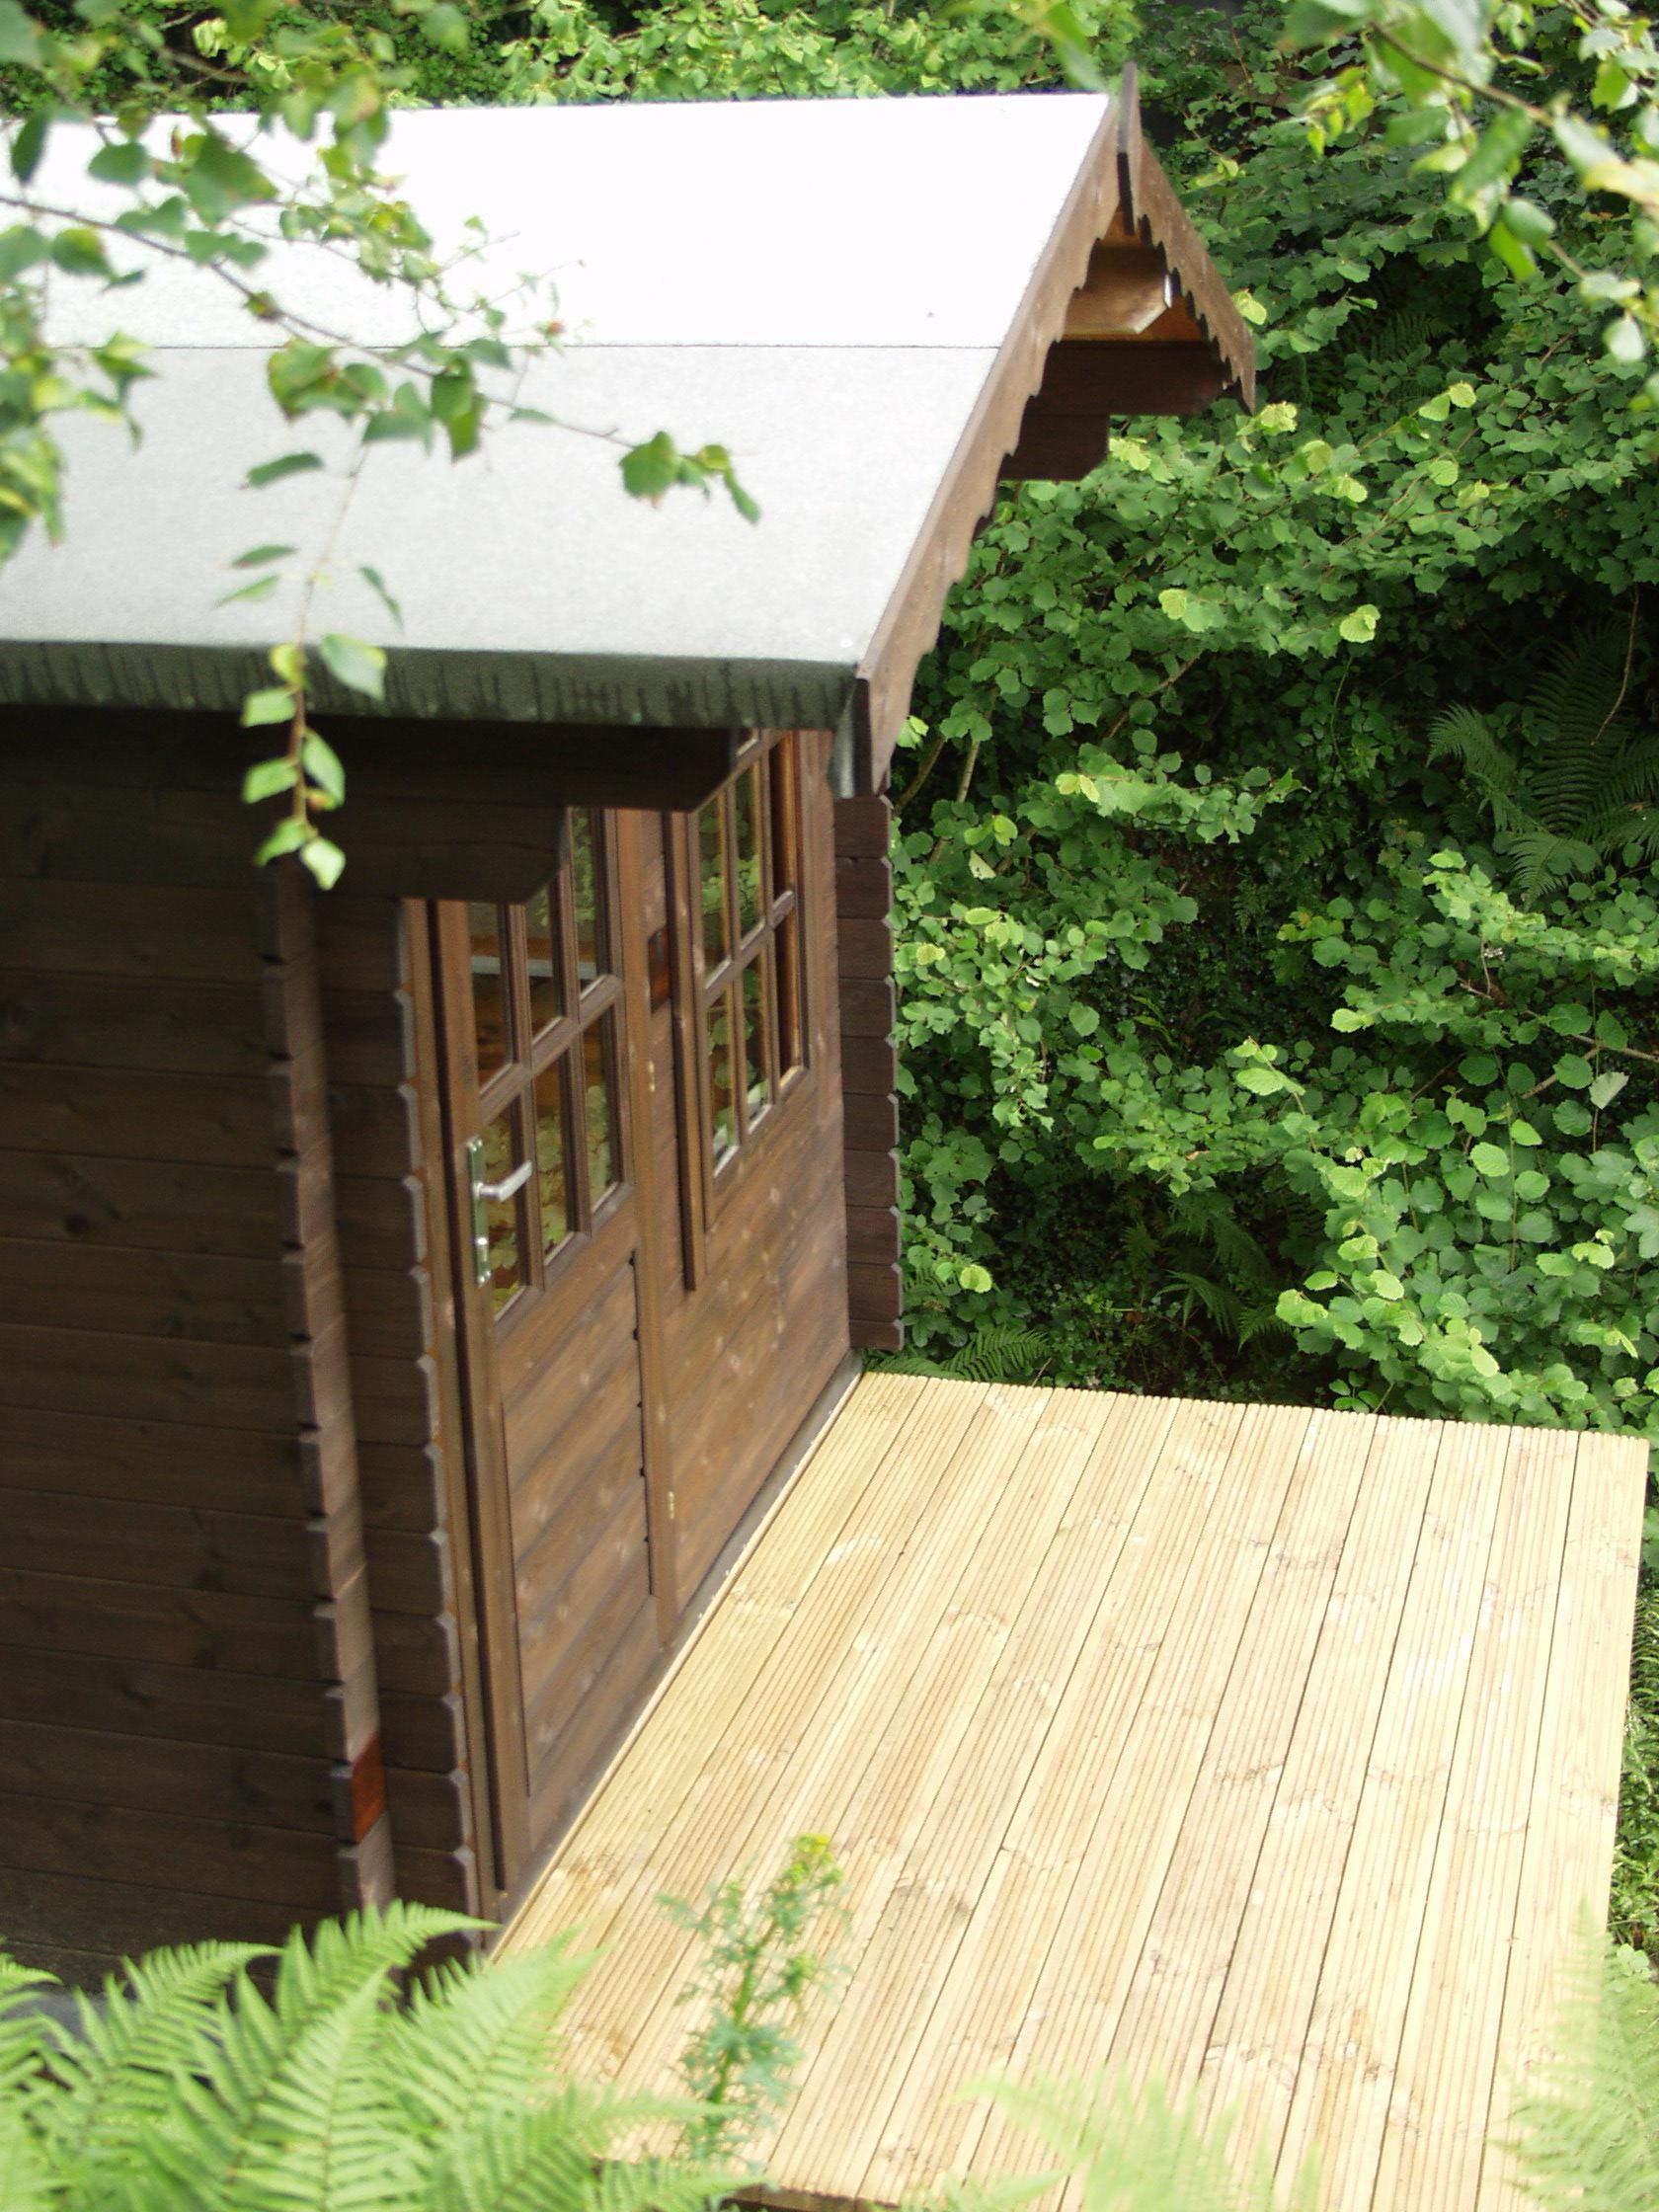
Thanks, I was prepared for it to be over £30k having looked at prices. I got 10% off for buying 2 stairs and a bookcase. With the 10% off it was 29K including 14m of balustrade on the upper hall. So the stair itself would've been somewhat cheaper. However, we have a matching walnut and glass stair up to the second floor that isn't curved and it was less than half the price, showing the premium for curves. As the first thing you see when you come into the house, we wanted something special. I remember an episode of Grand Designs where someone put in a curved stair that I don't think was a nice and I think they said it cost £35k. Picture from today and from Christmas.

 3 points
 -
I have seen pics and it looks more like £50k3 points
-
I hope its okay to make couple of comments on this thread without it being seen as commercial. @readiescards I am sorry you and your tenants had a frustrating experience with hot water failure. You were a week out of warranty on the controller which could have been doubly infuriating. So when you spoke with Neale from our team, he sensibly offered you a free replacement relay as a goodwill gesture. You specifically requested the ‘most up to date’ relay - so we sent the spade-terminal relay as this is the one used in the current B100 controller. I appreciate this differed from the one in your box which fits on a DIN rail. (Note: There has never been a safety-related recall campaign - we did upgrade to make the product somewhat quieter in operation.) Feel free to contact us directly and we will swap it for a DIN-rail part. From Sunamp’s CTO, Sandy Gataora (with my emphasis added in italics) on Solid state relays (SSR): For these reasons we do not use SSR. It is nothing to do with cost and everything to do with safety. (Do note that if we had a penny-pinching approach I would never have specified Vacuum Insulation Panel to get an A+ low heat loss ... I would have just used PUR and got a B, C or D like a hot water cylinder. I wanted Sunamp to do better.) On ‘arcing’ this is completely normal for relays or contactors of any kind. On all the other safety related notes in this thread we use the same safety-first design philosophy. Hence relays not SSR; hence overheat stat as a last line of defence if relays or controllers fail in an ON state. Finally we have independent test lab validation of the safety choices we have made. @readiescards do feel free to contact us directly if you have any residual concerns.3 points
-
You're a guy who likes a challenge, yes? Sorry if I am repeating stuff you have covered. I think we would need to know more about where you are with planning for detailed comment, as there seems to be no-PP post-2015, which means that if that is so you need to repeat the whole thing, including the Bat and Tree reports, and possibly the Archaeology one, too. Guestimating, that would be up to 5-10k for the Planning App if it all has to be redone. It would be useful to know how big the floor area is. As a Grade 2* listed church, it is one of the top 6% of listed buildings, and one of the more (ie in the middle between most and least ? ) important church buildings. There's a lot of detailed stuff mentioned in the listing (below), with a lot of bits going back to Medieval (you won't be able to lay a finger on any of that). You will have close supervision by conservation officers, as well as Bat Men, Tree Officers and Archie the Ologist. I think for work on the most important building in the village, in the High Street where everyone can see it, with a diverted public footpath round the edge of your site, you will be doing it by the book - though you can probably create a less expensive version of the book than otherwise by adjusting the scope of your work. I think the Heritage Report which is part of the Design and Access from 2015 is important. I think you have some tension between the statement therein not to divide up the interior vs your proposal for a mezzanine (are you even allowed to bolt it to a Grade 2* listed wall - I have no idea?). Also if I am correct it says that the roof needs work, but also gives hope that you can change some of the 19C and early 20C accretions. It says that the building was unsafe and in need of urgent repair - that counter to your suggestion that the roof is usable, and the 2015 scheme involves raising the roof. One problem is that if any one of these type of issues explodes in your face, it can be a 50k hole in your budget overnight (KEY ISSUE - Risk Assessment up front). Little villages routinely raise 6 figures for repairing the structural elements of church buildings eg roof or chancel or porch. You need to have confidence that the once-a-century need will not land on your watch. Was this building ever on the Buildings at Risk register? An FOI to English Heritage for all their information may be very fruitful. Is there any risk of disturbing skeletons and bodies? That could be painful, though the churchyard being closed since 1900 may help. One technique I have seen used is to fill in discovered voids with sand rather than doing archaeology. So what to do? Suggestions All those drains through the churchyard and the French Drain look bloody expensive for archaeology. The quotes may sound expensive; unfortunately it is. It will have to be done if the ground is disturbed, so scope out the need if you can. Need to focus on minimising archaeology. if the interior floor was disturbed by Victorians or 20C people, then I would consider running drains and pipes etc under the floor or a raised floor rather than digging up a medieval churchyard - unless you can show it is previously disturbed. There may be a lot of value for you in running things under the path. Or perhaps there is a plague pit and voids underneath? We found one in a church in Nottingham where I was once on the Church Council while reordering - would have required us to find somewhere for an extra 4 months for a congregation of 500, so we filled it with sand and put the new floor in with cantilevers, rather than let Archie back. Do you have good advisers to argue your side? Thinking of eg the architect who used to do Quinquiennial Inspections when it was a church, or the one who worked on the 2015 application. This is important, and needs to consider your proposals - are you allowed, for example, to stick insulation between the beams of an ancient roof? Are you familiar with how church buildings work - consider taking up churchcrawling, perhaps especially the Churches Conservation Trust buildings. I think you need to consider yourself in attitude the custodian - almost long-term janitor - of the building, and make everything reversible if you can. Doing nothing where it is not necessary is an important technique, and beware of ologists and officers who want to spend your money on their enthusiasms. You should be able to find a lot of info about the interior and the fabric, perhaps from the Ecclesiological Society or former church warden etc, or perhaps the "Church Recorders" from the Arts Society have done this one at some point since 1971. If all else fails Cameron Newham has had a 20 year project to record photographic surveys of every building mentioned in Pevsner, and especially rural churches, and has now done about 70-80% or rural parish churches and his photo archive is getting on for a million - he will talk to you but will probably want money if you want photos. I think he did Bedfordshire quite early, so you may be lucky. Or find someone who crawled it whilst it was still a church; just find a group and ask the question or email bedfordshireparishchurches.co.uk . I very much like the suggestion in the heritage statement about re-rendering the walls that were stripped back to stone due to former fashion, though some "freeze it in aspic when it was listed" people may have a blue fit (probably a good thing for their mental attitude). I am not at all sure that UFH will work in this sort of space. Take great care with ducting fat and stuff out of your kitchen. Much potential to damage the old fabric. I think the key is exploring the cost and risk of each element before you do anything substantial. I can't overstate that. (Update: should have mentioned that some parts of the listing will be out of date by now, but I think eg the bellframe and bell are stil there - or were in 2015.) Really, really wishing you all the best. Ferdinand -------------------------------------------- TL 13NW GRAVENHURST HIGH STREET 4/65 Upper Gravenhurst 23.1.61 Parish Church of Saint Giles GV II* Parish church, originally a chantry chapel. C12, C15 and c.l900, the latter work by Sir Arthur Blomfield (Beds. Times and Independant, 14th March l902). Coursed ironstone rubble witn ashlar dressings. Chancel, N vestry/organ chamber, nave, S porch, W tower. Chancel: c.1900, replacing a brick structure. 3-light E window, 3-light and 2-light S windows in C15 style. Embattled parapet. C12 round-headed chancel arch with zigzag carving to W side, the paired columns and scalloped capitals being c.l900 replacements for Jacobean wood columns. Flanking round arches also c.1900. N vestry/organ chamber: c.1900. 3-light and single-light windows to N in C15 style. Plain parapet. Nave: C12, with some C15 reworking. C15 2-light windows to E bay of N and S elevations. Blocked round-headed doorway to N. C15 S doorway with 4- centred head. Embattled parapet, patched with red brick to N elevation. S porch: c.1900 replacing a brick structure. Pointed arched doorway, single lights to sides, plain parapet. W tower: late C15. 3 stages. Diagonal buttresses to NW and SW angles. Semi-octagonal stair turret projects from lower stages of S elevation. W elevation has 4-centred 3-light window to lower stage. Bell stage has 2-light pointed arched window to each side. Embattled parapet. Pointed tower arch. Interior: Plain 12-sided font, Cl5, reworked C19. C15 nave roof has moulded beams and braces, carved bosses, and angels holding shields and musical instruments, some parts of roof retaining traces of painted decoration. Other fittings C19. Listing NGR: TL11305359872 points
-
You are correct Temp - they are helping me out. Ok I now understand. This is the extract from the regs - Inner rooms 3.7 An inner room is permitted when it is one of the following. a. A kitchen. b. A laundry or utility room. c. A dressing room. d. A bathroom, WC or shower room. e. Any room on a storey that is a maximum of 4.5m above ground level which is provided with an emergency escape window as described in paragraph 3.6. f. A gallery that complies with paragraph 3.13. 3.8 A room accessed only via an inner room (an inner inner room) is acceptable when all of the following apply. a. It complies with paragraph 3.7. b. The access rooms each have a smoke alarm (see Section 1). c. None of the access rooms is a kitchen. Our kitchen is an access room (it is open to the front door and open to the staircase) and you go though it to escape from any bedrooms or reception rooms. All our bedrooms are inner rooms (they open to the kitchen access area) and permitted due to 3.7e (provided with an emergency escape window) The ensuite is an inner inner room and fails to be legal because of 3.8c (our kitchen is an access room) So we either add the bedroom fire door and bedroom alarm as explained by building control, or put up a door / partition so the kitchen is no longer an access room.1 point
-
That’s not entirely accurate - whilst it is normal for that to occur due to the current present, it is best practice design when switching loads to fit snubber or arc suppression circuits. On (a) MTBF and the erosion of the terminals due to sparks would indicate that a EMR (relay) has a much shorter life and therefore failure due to mechanical issues is more likely than SSR failure, notwithstanding the propensity for a closed fail On (b) suggest he speaks to the vast number of electric boiler manufacturers who use SSRs to drive their heating products. The relay or SSR should never be part of the safety circuit - that is why you have failsafe devices such as overheat thermostats. On (c) a zero crossing SSR produces no more EMF than a relay - in fact it’s probably less as there is no induction coil to generate a magnetic field and EMF. Given the way an SSR can be used to drive proportional heat cycles, it seems a logical step for Sunamp to use them - even if it is in series with a power isolator relay - as the benefits of being able to ramp up and down the heat load by driving a semiconductor would mean that the raw binary on/off for initial heat loads could be much better controlled.1 point
-
Can you post the floor plans of your house?1 point
-
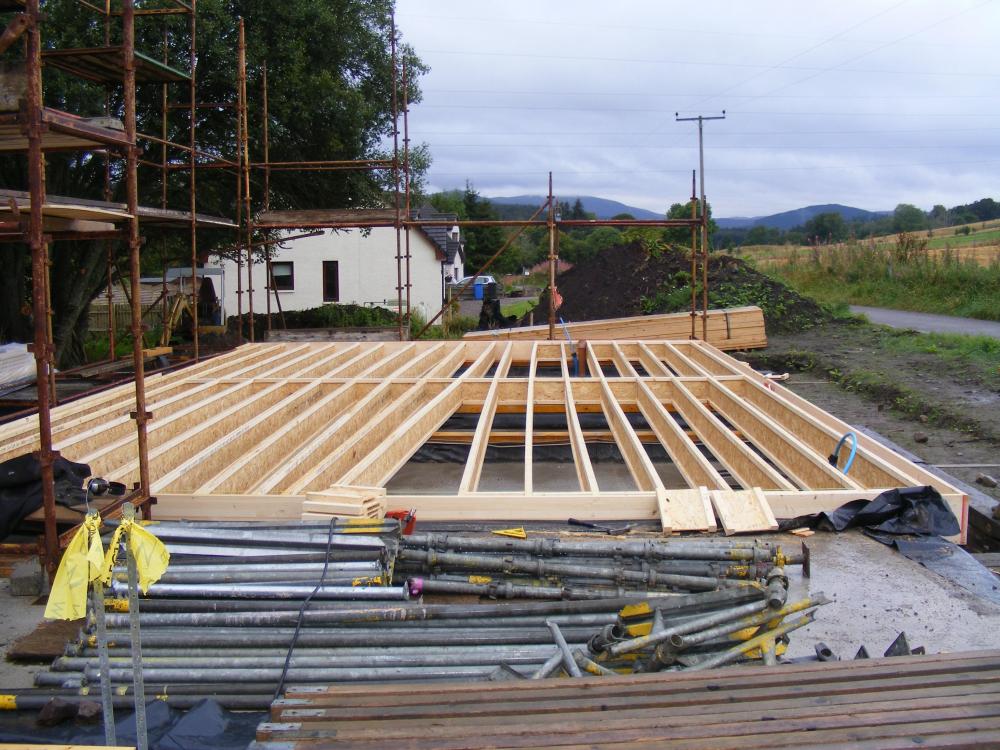
Mine had them. The "noggins" were just short bits of the same I beam construction. Here's the ground floor being assembled with some in place already.
 1 point
 -
"Dead man walking" ?1 point
-
Think they're having your pants down.? Wickes are best for cement round here, £4.20 a bag all in, don't forget you can get a trade card for 10% off. And £60 Inc VAT for a bulk bag of sand from Travis Perkins delivered Or £42 at wickes even with the £30 delivery fee on top makes.me think they've not given you anything like a decent price.1 point
-
Really, I’ve just had a few bags of cement at £4.25 a bag plus vat.1 point
-
I just watched the Youtube. I would be worried if my house had that much combustible material inside it. We have sprinklers in the second floor and the sprinkler guy was here today. He said he would have put them all through the house. I said that I tend not to worry about it as there is hardly anything combustible in the house. The most combustible part is the roof with wooden rafters and PIR insulation. I think the regs are quite general and don't take different construction methods into account very well. Putting polyurethane inside all the interior walls of a building would mean that if a fire took hold the whole place was very likely to go. It is a very strange thing to do.1 point
-
I used garage floor paint. Hard wearing and just nice to look at ( grey not terracotta )and cheap as chips. Also, it should act like a bit of a vapour barrier too. Moot most likely, but made sense to me and my small grey nodule. Takes a LONG time to dry so put on in lots of thin layers.1 point
-
1 point
-
I have a service lift, as the kitchen is on the 3rd floor. I use it for food and bins. If you have a passenger lift you need to be tied into a maintenance contract and there are lots of regs that apply. The service lifts are fairly simple. Good for 50kg and cost £8,000.1 point
-
One of the things that puts me off is that I think a small residential lift could look quite naff as it would probably be made down to a price. I suspect a nice one is £40k. I would assume that a lift needs yearly servicing and unlike a block of flats where it is split between many people you could easily be £1000 a year for maintenance/insurance. My nice curved glass staircase was high 20s and the only maintenance is dusting and occasional oil.1 point
-
I'm not 100% convinced. But if it's cheaper than a staircase why not?. Also it will look cool - I mean a nice lift - upmarket. Just a thought at this stage...... What are the regs?. if I have a lift I assume I must have a staircase somewhere in the event of lift failure or fire. I plan to have a staircase also but it would be external. Wonder if @Onoff wants to build me one once he's finished his bathroom of course!1 point
-
I think @Russdl was planning one, or at least the provision for one.1 point
-
A little bit has gone on most things I’d check her prices Shes about double what the diy stores are charging1 point
-
I considered it and we have a space where we could probably put one. As we don't need one at the moment I decided it wasn't worth the hassle in term of maintenance and so on. My feeling is that barring any unfortunate accidents, if I get to the point the I need a lift to get upstairs then I will have other things to worry about.1 point
-
My further comments. 1 - When you EWI you seal your 2G in, so you need to do that first or make provision for upgrading from the inside later. 2 - It is all about detail, and sweating it. Work your quoters hard with your questions. If one of your suppliers is noticeably more knowledgeable, then it is probably worth paying some extra - I would pay 10-20% extra for a reliable and durable local supplier in whom I had more confidence. 3 - You can save a certain amount by removing some of your fittings yourself that need to go back on top of the EWI. Also consider allocating spots where you are going to put things later (eg external lights) and making sure that the mounting points are sound. 4 - Personally I would put a priority on going for 100mm or 125mm as the extra cost will be relatively small. I would then consider champfering the window reveals as that makes it less 'blocky'. 5 - If you are going for RHI on your heating, do your initial EPC before anything else. Here's why - because it is done on the difference, so if you improve then baseline, you get less. This was a couple of years ago, but I think it still applies - check. Ferdinand1 point
-
A few further comments in random order. I am assuming that your engagement with this building is long term - either decades or 'will only leave in your coffin' (my dad's statement about his small manor house they renovated and lived in from 197x to 2009). 1. Aha. So your architect management was inspired by Sir Henry Wootton on Ambassadors ? "Legatus est vir bonus peregre missus ad mentiendum rei publicæ causâ." 2. I think you need to think about which layers do not contain likely archaeology, which probably means bones or former graves/architecture. My surmise is that you should be safe with accretion since the graveyard closed in 1900, since by definition no one has been buried since then - assuming Bedfordshire has had no reversed version of Burke and Hare inserting bodies in churchyards in the dead of night. I would say that that means you should be safe to dig perhaps 12-18" down around the walls for 12-24" out. Your call if you feel a need to talk to someone first. You may find that that alone will dry your walls over a couple of years. It might be tempting to go for a paved path at the new level so you can just sweep it. It could be a good idea to see if you can get a local Archaeology Department to use your ground for letting their students practise with Ground Penetrating Radar in exchange for cups of tea and a copy of the result, or an email / short report / memo report (they also need to practice writing erports...). It may be that they will be able to discern disturbed layers / areas, which would help you tell where it is safe to dig, and that such an opinion would get it past the Conservation Officer without a full pro report if you need to show them. Get the relationship right and maintained, and you may be able to get informal opinions on the phone or two para emails for free forever just because someone is interested. You would benefit from 20 such relationships - pros who become friends; you need to find ones who are as eccentric as you are. 3. I think your garage also needs to be secure storage and a workshop, with or without the car in there. Think carefully. One thing you are relatively short of is outbuildings. This is important. 4 - To keep costs down you need to decide which serious bits of kit you buy rather than hire. I would suggest a scaffold tower high enough to do the entire inside safely, perhaps scaffolding, and some tools. 5 - I would also think about transporting things. My technique is to have a car that can tow 2 tons, and a trailer that is the maximum length allowed into the local tip without a householder being charged. 6 - It might also be worth developing one or two specialist skills to conservation quality yourself - work out an interest, and which one will be most use. Lime pointing and repairing your leaded glazing, perhaps? Try more than a couple and you may not get the depth of skill necessary. 7. Medieval and later stone churches are really forgiving if you work with the building, and you can spend years and years needing to do nothing if they are basically sound. Then every so often a gargoyle winks and something needs 25k or 50k spending on it in the next 5-10 years. There is a lot to learn from the way the CofE manages its buildings - they have a proper professional inspection every 5 years which generates a list of works, which allows planning usually via a dedicated fund in the accounts and sometimes appeals etc. Most have very long term relationships with architects. You could find out more about that by chatting to a local churchwarden or 2 (not usually the Vicar), or reading up on their resource books. The buildings panjandrum in the Diocese is the Archdeacon (known as the Archdemon to their friends), not the Bishop or Chancellor. There is also a huge range of resources on the ChurchCare website, especially the advice and guidance sheets. https://www.churchofengland.org/more/church-resources/churchcare 8. Glad to see that you are taking a thoughtful approach to adding bits to the building. Excellent. 9. Gutters - do you actually need gutters? If gargoyles and waterspouts were good enough for 400 years, what has changed? 10. A lot of churches put their secondary glazing outside, as it is aimed at protecting stained glass windows. I agree you are probably better inside - though perhaps a heat model would be a good idea to understand it well. One of members developed a good one here: 11. I think one big expense I see appearing at some point will be repairs to those weathering window frames. 12. Have you considered how you will manage casual visitors? eg couples married there 40 years ago wanting a photo in the porch? In such a prominent position you *will* get them. What about having a small display board by the gate making it clear that it is now a private house, but sharing a bit of historical detail? Then maybe a display in what will be your porch with any artefacts you have found, and a bit more info - so if you ever decide to do eg Church Open Day or the National Garden Scheme you can satisfy the interest whilst keeping your private space private. My preference is to manage visitors gently rather than totally exclude, as it can be very enriching. At our house we had all sorts of people who had lived there, or knew people, or doing family research at the rate of a couple a year. 13. Similarly for the garden - needs some thought for what you will do to keep your eg private sunbathing or child playing space. One useful possibility could be a hedge (hedges not regulated - fences are) round inside the wall. A hornbeam, yew or beech hedge would work wonders for private space. 14. Does it need to make money? Depending on what you do, you could use the garden + porch as a location for local wedding photogs. Relatively unintrusive and could bring in say £100-200 a number of times a year to pay for projects. 15. If you want historical information, parish registers and things are normally in the public domain somewhere. Perhaps County Archives or scanned by the Mormon Church. 16. If you do put wool insulation in, ask about what happens if it gets an infestation. 17. Are you in a position - not having started - to get indemnity policies now? eg insure against dry rot. Once you know what is there you can't insure against it. Could be good value. 18. I slightly think you are doing your budget process backwards. You've already committed, and what you gotta do, you gotta do. What you can control is more about when you do it, which bits you can delay or avoid doing, and cost control of that. I would suggest thinking about the selection of bits of project you need in order to be able to get in, focus on cost-efficiency on appropriate quality work and accept that the rest will happen in due course. 19. I think the mains not a composting loo is probably the way to go. 20. I would suggest a habit of being nosey about converted churches, where you can learn a huge amount by just knocking on doors when you drive past it. Perhaps have some photos of yours on your iPad, but people love talking about them. Or visit ones for sale. Also develop an eye for detail of alterations to older churches - huge numbers had loos and kitchens added very well for the millenium, and I find them the most interesting category of listed buildings as the only ones that have been allowed to continue evolving since 1950. 21. You may never have to pay in full for a holiday again. You'll be able to do exchanges for Gin Palaces in Florida and Villas in Venice. The Yanks for one would love it. 22. Grants. Grade 2* may mean that you have more prospect than others - eg for conservation on your medieval chancel arch etc. You will not likely get things to make your life better - though perhaps there may be stuff under the latest govt eco scheme etc or RHI. Enjoy. Ferdinand1 point
-
building control should be flexible here, there is scope for them to compromise on insulation upgrades where there are significant limitations that might limit scope to achieve regs. And even 25mm EPS would be a huge improvement over nothing at al so I would be surprised if they wouldnt accomodate less if it was necessary. I cant recall whether with graphite EPS you need 100mm or 90mm, had a feeling it was the latter but maybe the regs have changed since I last looked. Your installer should give you a u-value calc for BC. maybe you already have a BC on the job, a chat would give you an idea. Mine was fascinated by EWI and hadnt seen it before, he took loads of pictures and several of his colleagues came for a look. one other neat feature to consider is using frameseal beads (pic below). These provide a gasket seal to the face of the frame and a mesh carrier for the render, they provide a nice detail for the renderer to work to and a neat finish along with a long term weather and wind seal to the frame, otherwise you'll be looking at rendering up the frame (can be scruffy) and a silicone joint which will fail over time. my renderer hadnt used them before but was converted and now uses them on all thin coat rendering jobs, EWI or not. They arent very expensive and take minutes to fit (self adhesive backing to hold to the frame until render is applied) if using a specialist contractor ask for some detail on the method and the products they are using, there's a lot of detail here and the stuff I mentioned above wasnt done by any of the installers who quoted me so I did it myself using a renderer on a labour basis with me fitting and detailing all the boards and sourcing the best product I could find myself if the soffit is going to be out during the installation, take the EWI up between the rafters and then foam in. You can then run loft insulation up the top of the EWI in the loft eaves
 1 point
 -
Can't recommend it as I am yet to use it, but I am planning on using EuroBrick's P-Clad system for my timber-frame building, which will be going up soon. I also considered Wetherby Systems solution, with @PeterStarck used. And I considered Corium by Taylor Maxwell, which has metal rails, but that was more expensive. All of the suppliers were helpful when I contacted them. Eurobrick offer training (I intend to DIY the cladding) and an estimation service from plans before ordering.1 point
-
Thanks for your responses. To recap then: A) Focus on draught proofing. B) Use fan heater (s) for background heat whilst under the car. C) Install an IR heater above the workbench. After that I may reuse some of the double glazed units from the house, which are being replaced, since presumably the window glass is the least thermally efficient material in the structure.1 point
-
Yes mate, my render is all done now. Total cost worked out at £50/m2. I paid for the materials direct and deducted that from the renderers bill so I can VAT back - so if take VAT out it is around £47/m2. There were some sections originally to be clad in render board etc. Renderer said he works his price on £50/m2 - the sections of render carrier made no difference. Where abouts are you?1 point
-
I'd get as much topsoil over the gravel as you can to avoid summer drying out as punter says. I wouldn't use a membrane in clay soil - the membrane itself can clog up over time. Not sure if I'd want to start putting clay back into the trench unless you have a year or two to wait for it to sink back down to its final level.1 point
-
First thing i will say is i have never seen timbers stacked vertically like that to make up the top plate detail on a timber frame, also the "roof truss" sppears to be missing a considerable amount of structure, and appear to be drawn as if they are going to be cut on site and overlapped at the eves and the drawing doesnt show a ridge board, the first drawing indicates it is section "B1" however on the plan drawing i dont see the corresponding line to show where "B1" is showing the section of. i am struggling how you will connect the tripple top plate to the studs, also 400 centres seems excessive as there isnt exactly a massive amount of load on the roof to hold up, in my opinion it has been drawn by someone with little timber frame experience1 point
-
I used http://www.spiderelectrical.co.uk/ who are localish and has also provided several useful pointers and tips, and has an hourly rate for consulting remotely or onsite to unblock me if I hit snags, which is perfect arrangement for me knowing I have that backup if I need it. In particular, he's very familiar with the graded alarm integration. @Rob99 can also resell the parts, so I'd likely otherwise have gone with him (indeed I contacted him first but unfortunately missed his reply due to an zealous spam filter. Sorry again about that Rob!) Thanks ?1 point
-
Hello Glen. Hope this helps. Coming off the main house you have a gabled portion (call this gable 1) then you have another bit on the end of gable 1.. call that gable 2. When you are forming timber lintels in a TF kit you can generally nail them together. Common spec would be " nail timbers together with pairs of nails at max 250mm horizontal centres, for deeper lintels you use three nails vertically. You need to keep an edge distance between the nail and the edge/ end of the timbers. In other words you if put the nails too close to the edge / end of the timber it is no good. Also, if you put the nails too close together this is less helpful as you start to encourage the timber to split and so on. To support the ends of the lintels you commonly use what is called a cripple stud arrangement. The window you have on gable 2 looks fairly wide so you may have two shorter timbers under the lintel to hold it up, these are the cripple studs. Smaller openings tend to have just one cripple stud each end of the lintel.. the reasons for this are a bit lengthy to go into detail here. Then you have another stud which is the same height as all the other studs and this is nailed to the cripple studs. You nail through this full height stud into the ends of the lintel. Over the top of the whole thing (unless you are tight for height) goes what is called your top rail and on top of this you have a head binder.. this is the bit of timber that ties all the panels together. Once you nail all this up the lintel is held in place. If you search internet for timber frame cripple studs you''ll see drawings and so on as to how this all fits together. Some of points I make above are conservative in nature, you can fine tune stuff later. Turning to the tying. It's good to get this out the way early on as it's just as important to stop things moving sideways as it is to stop things falling down vertically. Well done picking up on this commonly missed feature. As a further word of encouragement! There are a few ways you can approach tying gable 2 into gable 1 and gable 1 into the main house. The starting point is to determine the ceiling height.. are the ceilings flat or is there some vaulting going on? There are trusses called raised tie trusses - see internet. Here you would line through the ceilings and tie them all together at this level with wind bracing, usually 100 x 22 timbers. Lastly I see the are some UB's (universal steel I shaped beams) on your drawing. It could well be that unless you have a very big main house roof that you can swap these out for timber beams, solid timber or laminated type. I'm a big fan of trying to mimimise the trades, simplify the material procurement process and so on. Here, if you can use timber instead of steel then it's easier for the joiner. You need them for the kit anyway. It's often a lot easier to connect old/ new timber to other timber than connect it to steel. Also, if you get / measure the steel wrong it's often harder to fix. If you cut a bit of wood wrongly.. nip to the mechants, buy another bit and try again. You can use the " reclaimed" timber on the wood stove if you are lucky enough to have one..or cut it into dwangs (Scotland) noggings (England and mostly else where?) That's what I do "occasionally"1 point
-
And just about to get ours into place and install! I'll be reaching out to then to see if we can address the issue during installation.1 point
-
If you have clay to loose (I just paid a fortune to have mine taken away) then use it, if not “A” is my bet (but will cost more in stone). Around here (heavy yellow clay) they don’t recommend using Drainage pipe as it can block, they recommend stone only. I have several French drains around my build (stone only) and they work well.1 point
-
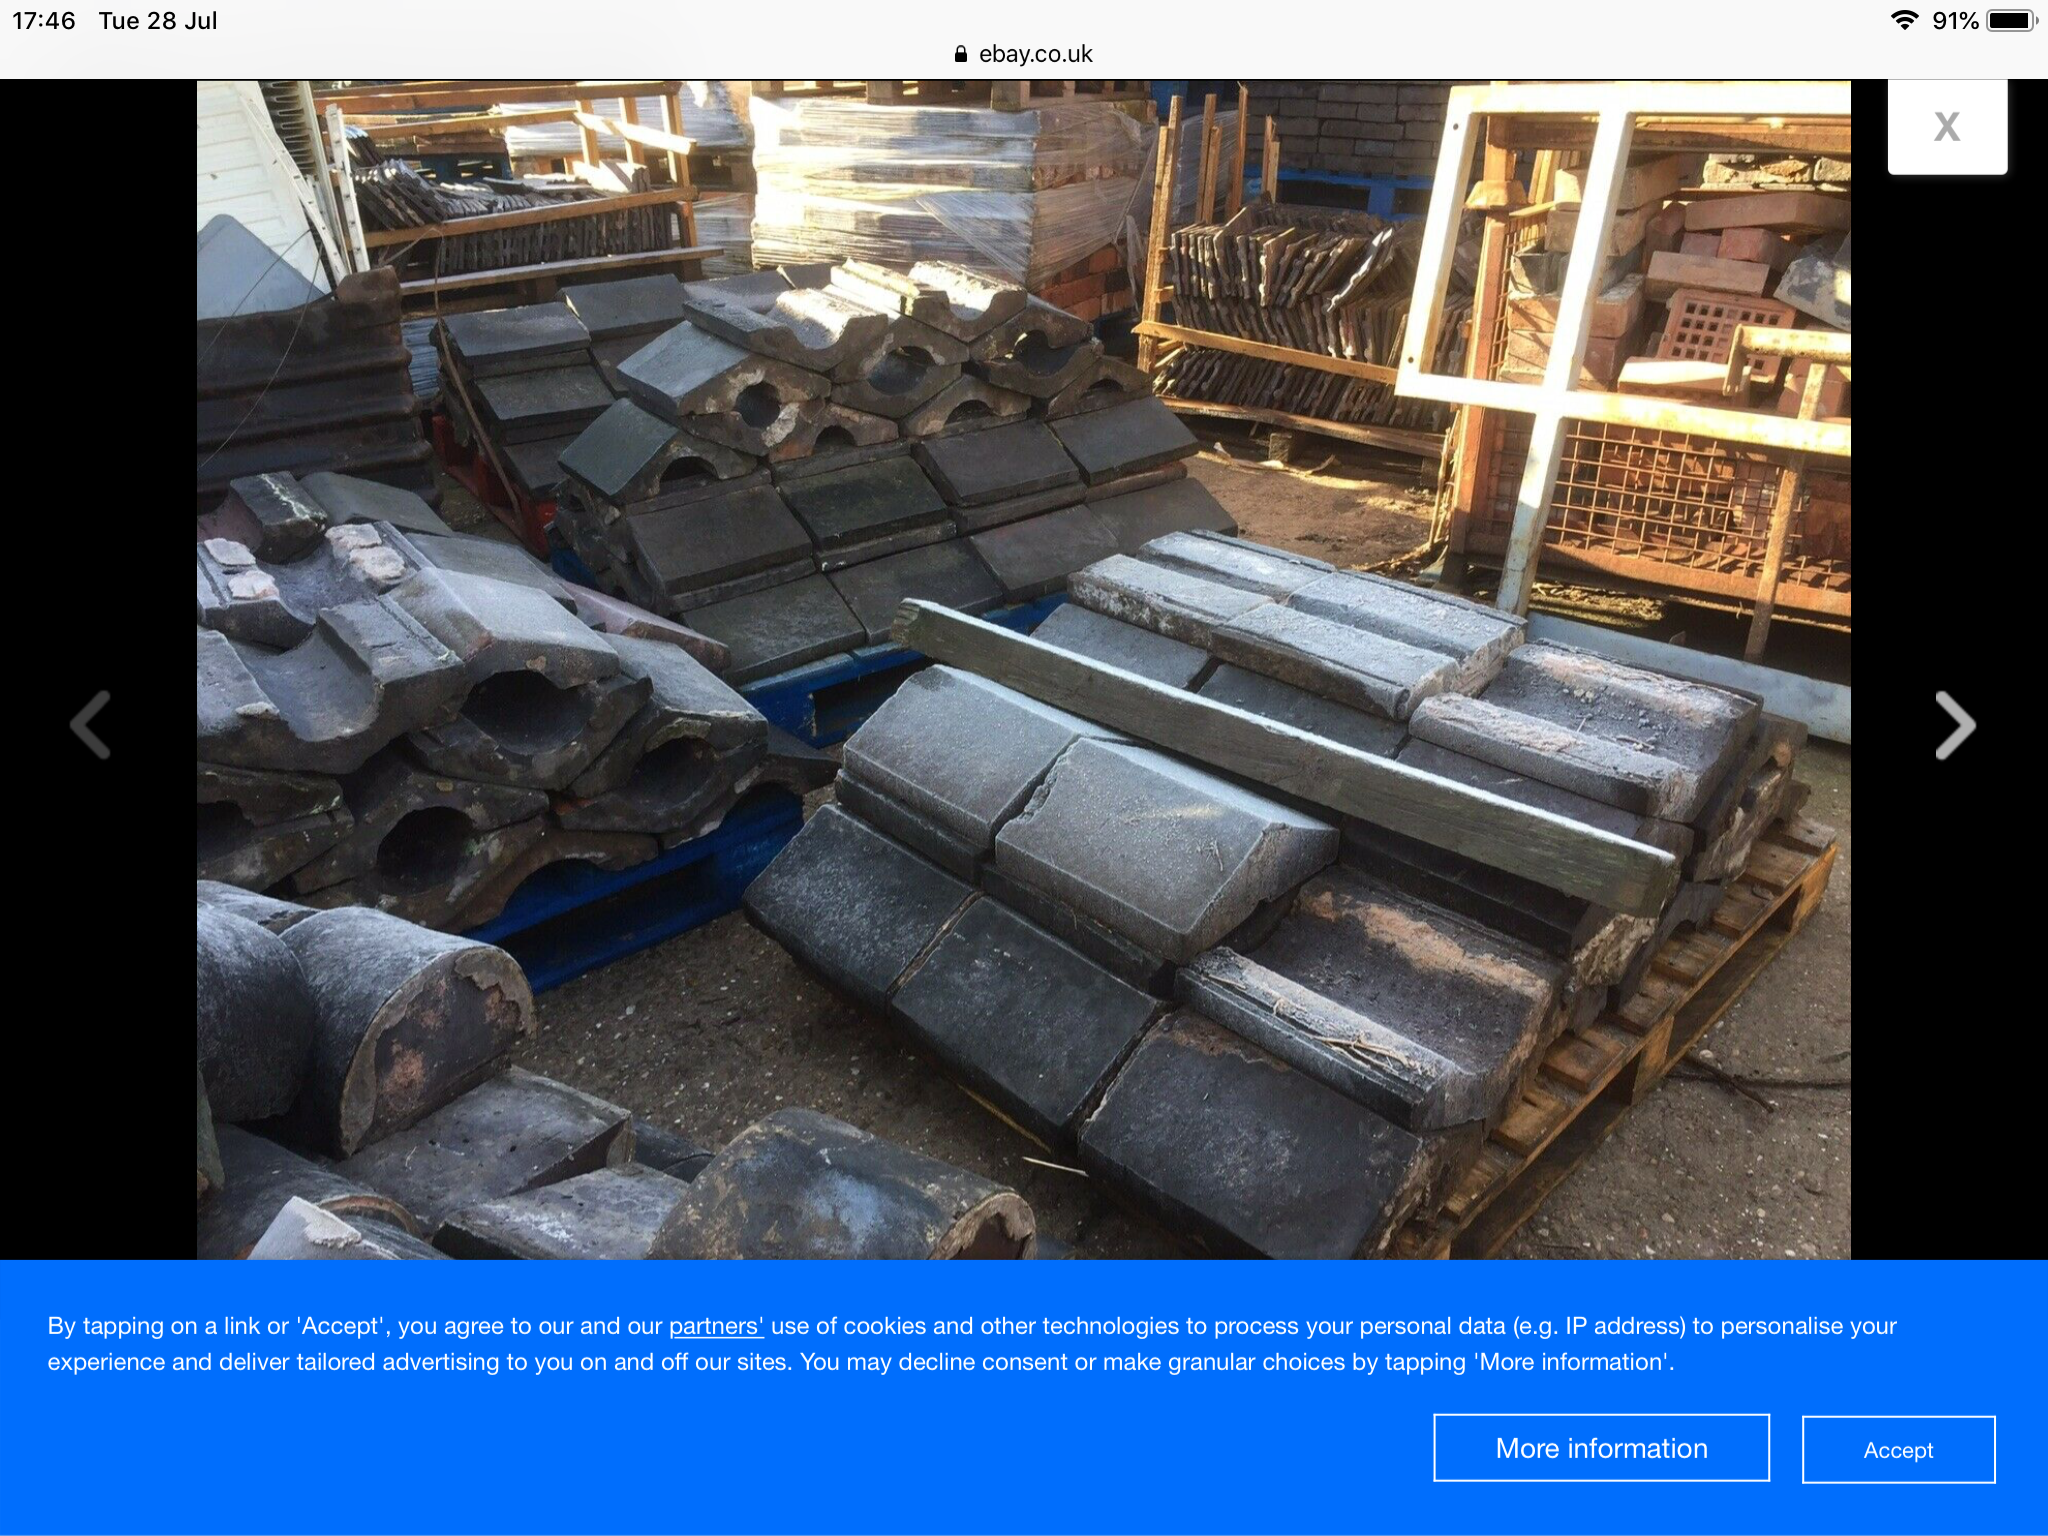
here you go. E bay.
 1 point
 -
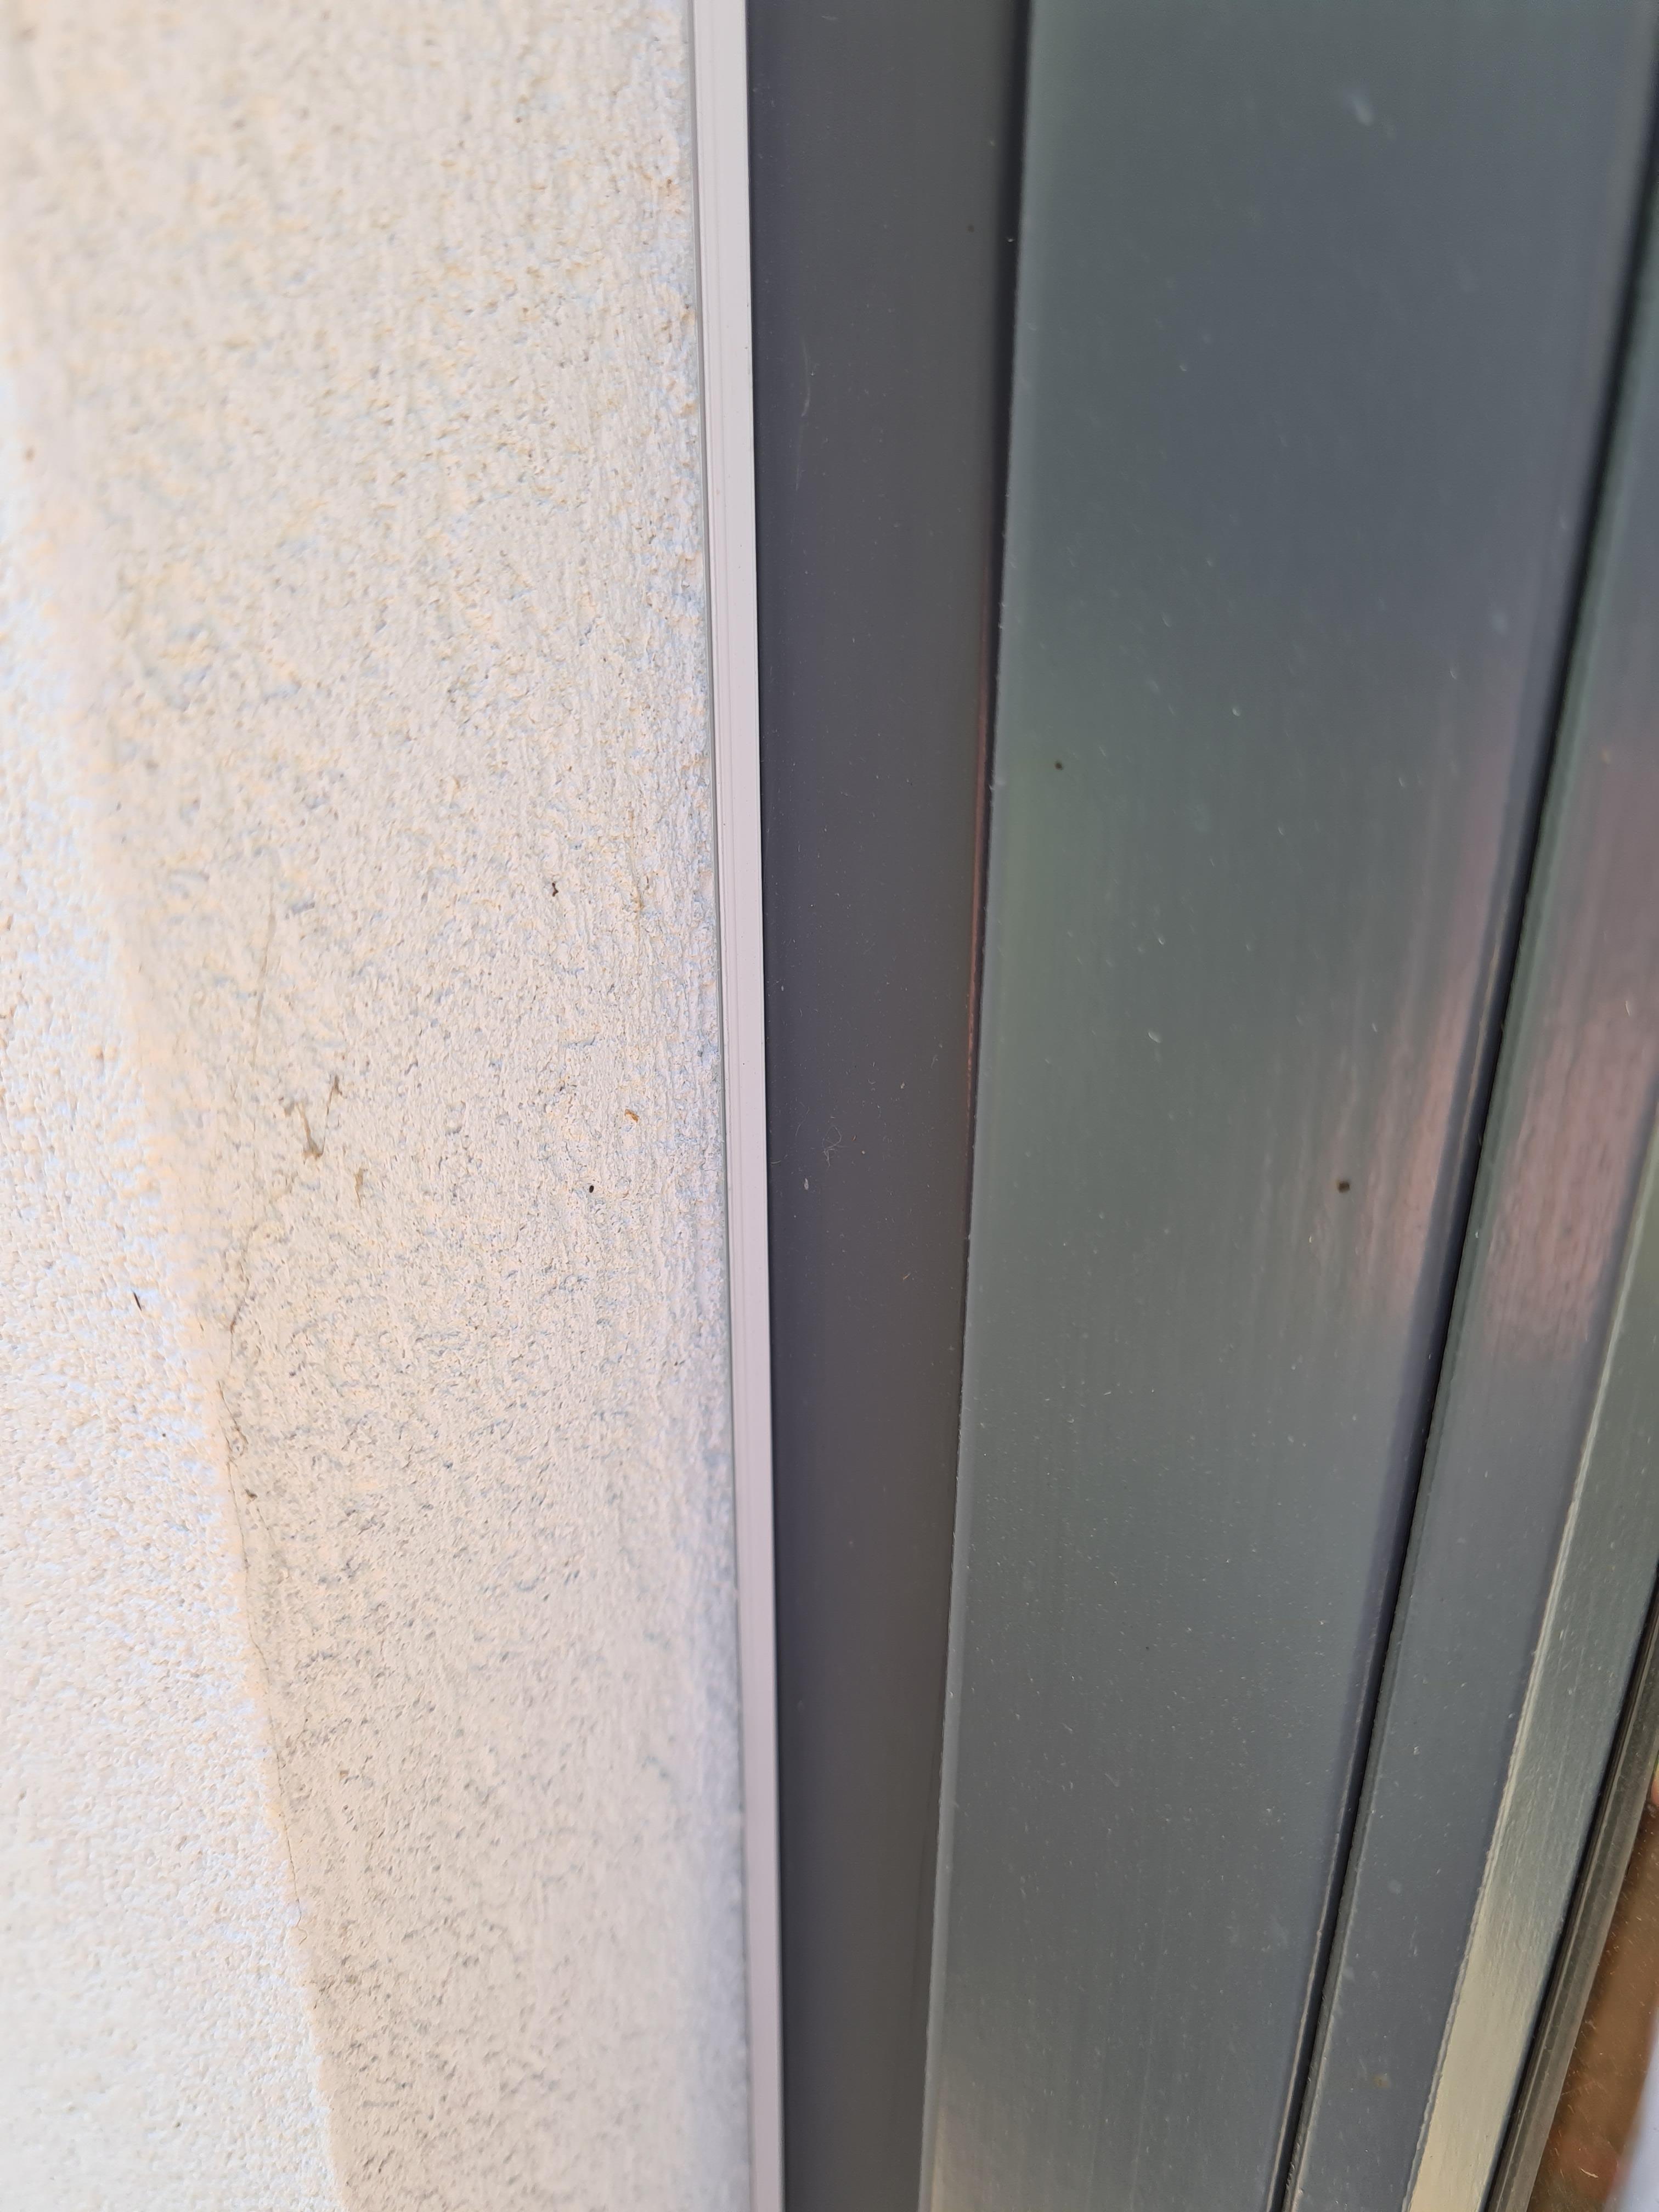
I think I it’s too solid for a ridge tile, I believe it’s a saddle wall coping stone. Perhaps the most common, saddle - or twice-weathered - wall coping stones are shaped in a similar way to a hip roof, with the same end goal of maximising water runoff. These wall copings are designed to direct water to either side as they are angled on both sides with a ridge running down the centre. Usually, these are found on garden walls and balustrading, where it doesn’t matter which direction the runoff goes. They may also have ‘drip grooves’ on the underside of the overhanging section of the coping, which prevent water from dripping onto the wall itself and causing damage. Saddle wall coping stones can come with a pointed ridge or can be rounded at the top. Either serve the same purpose, so it’s usually an aesthetic decision to opt for one over the other.
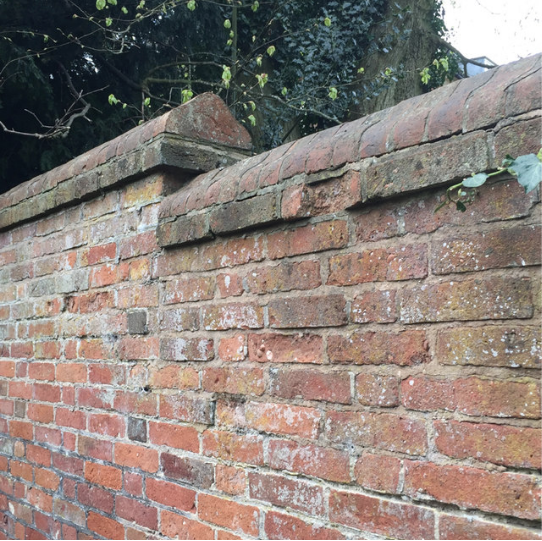 1 point
 -
Looks like a ridge tile?1 point
-
seems sunamp are still using "tombstone technology " like aero industry did at start of jet era ---when enough wings fall off -time to upgrade them not doing themselves any favours long term for sales especially when cost of these peripherals is so little in overall cost of the system1 point
-
@readiescards I would be looking at a permanent upgrade to a din rail SSR and get rid of the relay - cost would be £30 tops and makes it safe and also silent.1 point
-
That is now the OEM solution for any SA unit sent out in the last x number of months. They could just fit a bloody SSR and all this goes away in a 'flash'....... Yup, give or take. Seeing 15a is a worry, as it'll do the job but is still very close to the known duty. I know there's not massive shunt resistance with an immersion, but it should still have a lot more headroom IMO, even if just to promote longevity!1 point
-
What you have is a screw terminal DIN rail relay. Why have the sent you a spade terminal screw mount relay as a replacement when they say the Finder one is "okay"? I would personally replace with another DIN rail mount of another better make and higher current rating but then you have the thorny issue of warranty even though you would have fitted a better part. I used to build industrial machinery and we quickly found Finder were not the best. Of course you can fit the one they have sent just by crimping spade connectors onto the wires you have. then you have got to mount it somewhere.1 point
-
This is such a common issue on all sorts of equipment and seems to significantly reduce relay life. All for want of adding one or two supressors across the terminals to stop the sparking/arcing.1 point
-
Starting with U=2.2, going down to U=0.38 saves about 45kWh/yr per m2 and going down to U=0.2 saves about 50kWh/yr per m2 in central England. (Full SAP model)1 point
-
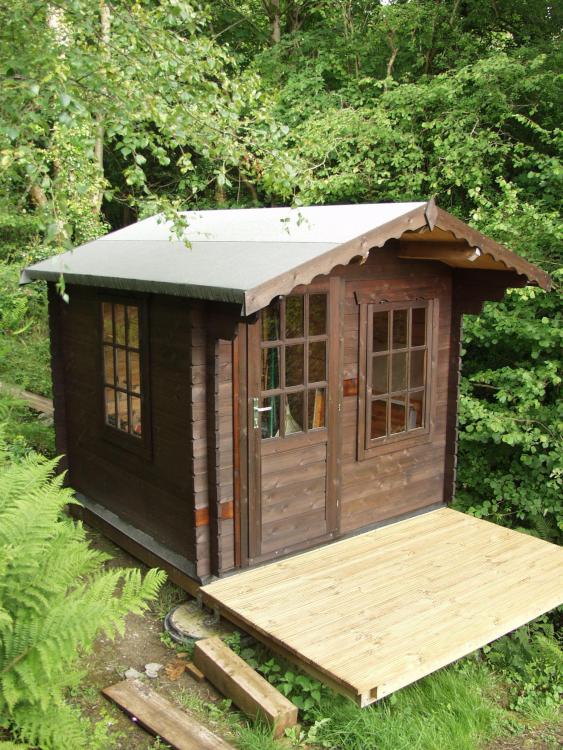
@PeterW & @Onoff Pretty much finished.. just got to renew two diddy windows, colour darker than usual due to existing surface of logs.. but seems to have turned out fine, a sort of antiquey look maybe. Hugely appreciate the help from all on this project- couldn't have worked out better. zoot.

 1 point
 -
Sorry for the delay since the last blog. Things have been very hectic keeping a track of everything that is going on with the build and holding a job down ! As we approach end of January and move into February there are lots of things going on simultaneously on site including battening the roof in preparation for the roofers, finishing of fitting the smartply in preparation for blowing in the insulation and fitting the windows and doors. The first window goes in on 30th January. Many of the side reveals to the windows have splays to help spread the light from the window. We are using Green Building Store Progressions windows and Green Building Store Ultra doors. The Progression windows are expensive, but the narrow sight-lines give a lovely contemporary look and very little of the frame is visible outside, so it should be as maintenance free as you can get and seems like a good investment. The Ultra doors look very similar to the Progression doors and are of a similar thermal performance but are more cost effective to purchase. From the 12th - 15th February, the Warmcell insulation is blown into the frame. I hadn't realised, but you can do this before all of the windows are fitted, as long as the boarding out is completed inside and out. By 21st February all windows and doors are fitted. A lot of time has gone into ensuring the windows are fitted properly and are as airtight as possible. In parallel, the brick plinth is built. Whilst you won't see all of this once the ground levels are built up, I am really pleased with the quality of the job. Next job is and fitting the Aquapanel in preparation for the rendering. The roofer we had lined up pulled out at the last minute, but we are able to get a local firm with a good reputation to take their place at short notice. We took a lot of trouble selecting the roof tiles and we are particularly looking forward to seeing the tiles laid. The roofers are on site beginning of March after a small delay due to rain to do the counter-battening and lay the tiles. The roof is a pretty simple shape so the roofers make quick progress. We are using plain clay smooth machine-made tiles made by Dreadnought tiles and supplied by Ashbrook Roofing. We found out about them at a self build show we attended and have had great support from both Dreadnought and Ashbrook. We are using two colours - 70% staffordshire blue and 30% blue brindle mixed randomly. Before you know it, the roof is in place. Big Day on 8th March as it is our first Air Test. We'd put 0.3 air changes per hour (ach) @ 50pa into phpp so we were hoping for something similar or better. Results were: 0.08 ach @ 50 pa 0.11 m3/hr/m2 @50 pa Absolutely delighted with the results. Given building regs are 10 m3/hr/m2 @50 pa and Passivhaus standard is 0.6 ach @ 50 pa, this is over 90 times better than building regs and over 7 times better than Passivhaus standards and a great testament to the attention to detail shown by the build team. Flashings between the wood cladding and the render are fitted. These were made by a Herefordshire based fabricator. Work continues fitting the cladding. We are using Douglas Fir, supplied by Ransford which is literally 5 minutes down the road. Once the roof has been laid and the weather allows, the rendering starts. We are using the Weber system, with a base coat applied first followed by a thin silicon based top coat which will be sprayed on. The roof and detailing around the dormer window are completed Once the cladding is complete and before the scaffolding comes down, we need to treat the cladding. The gable ends need a fireproof coating due the proximity of other houses, so it's one coat of primer, two of Envirograf and two of Osmo. The front and back of the house get one coat primer and two of Osmo. It's one of those jobs that costs more and takes longer than expected. We hadn't planned on having to to apply so many coats of product and in my naiveity I thought it would be a layer or two of fireproof coating on each gable. The wood looks a little orange at the moment but that is typical when new and it does weather down nicely which is what I plan to allow the wood to do. Hopefully to osmo will help even out the weathering but I have no plans to keep on applying it. The guttering is attached whilst the scaffolding is still up (Lindab galvanised) The scaffolding on the house comes down and goes up on the garage to allow the roof to be completed on the garage. The second coat of render is sprayed on and the shell of the house is now complete.1 point
-
This is an interesting one going on at the bottom of our road. They had a delivery of heating oil. Unfortunately instead of filling the new oil tank as instructed they filled the old, now disused tank. Even more unfortunately that must still have been connected somewhere with the result 400 litres of heating oil leaked into the floor void under the suspended timber floor. The owners have moved out into a caravan. I have just spoken to the contractors starting the remedial work. The plan is to dig down and underpin the foundations, to then enable them to dig under the house and remove the contaminated soil. At least a months work they estimate. Being paid for i understand by the delivery companies insurance. It will be interesting to see how this works out.0 points
-
The treads are actually wood-effect walk on glazing.....who'd have thought !!!!0 points
-
Just copy the one your making for outside ???????0 points
-
You can take the girl out of Kent etc.0 points
-
Is that a selfie (runs away to hide...................)0 points
-
Many years ago the water treatment guy's manager on a near finished site I was on asked about welfare facilities. The site manager said he'd make the gents on floors 15 and 5 available as long as the water treatment company cleaned them at the end of the job. Not wanting to clean two lots the water guy's manager said just to leave the gents on 15 open. Off handedly he told his guy's there were loos on site. Somehow he told them the loos were open on 15 AND 5. We all used to indulge in the pub culture a bit hard. Coming down from the roof one day after a serious pi** up one lad from NZ REALLY needed to go. He stopped on 5 and ran to the loo... LOCKED. He then then ran frantically round a pristine empty floor trying all the WCs which of course were locked. Now in blind panic he chanced upon an open riser cupboard. In he ran into the dark riser, dropped his strides and let rip. As his eyes adjusted he realised he was actually squatting on an open grill floor and had explosively just shat down 5 plus floors. It gets better... Just at that moment the building manager arrived on the floor with some prospective tenants. Keen to see not just the office space but the M&E risers too they began their tour. By sheer luck the lad in the riser had rung his mates having used his shorts (he'd gone commando that day) to "clean himself up" with instruction for them to go to M&S and get him some new shorts. A couple of them arrived on the floor to find the tour in full swing. Trying to keep a straight face they signed to the building manager's PA and whispered what had happened. In shock she was desperately trying to get the manager's attention, mid him espousing the virtues of the building. It went on the lines of: "Not now Debbie!" "But it's REALLY important!" Taking him to one side she muttered what had happened and that it might not be a good idea to show them the risers. "I suggest we break for lunch!" said the building manager. Alan from Wanaka you're a legend mate!0 points


This leaderboard is set to London/GMT+01:00