
Leaderboard


Popular Content
Showing content with the highest reputation on 06/06/20 in all areas
-
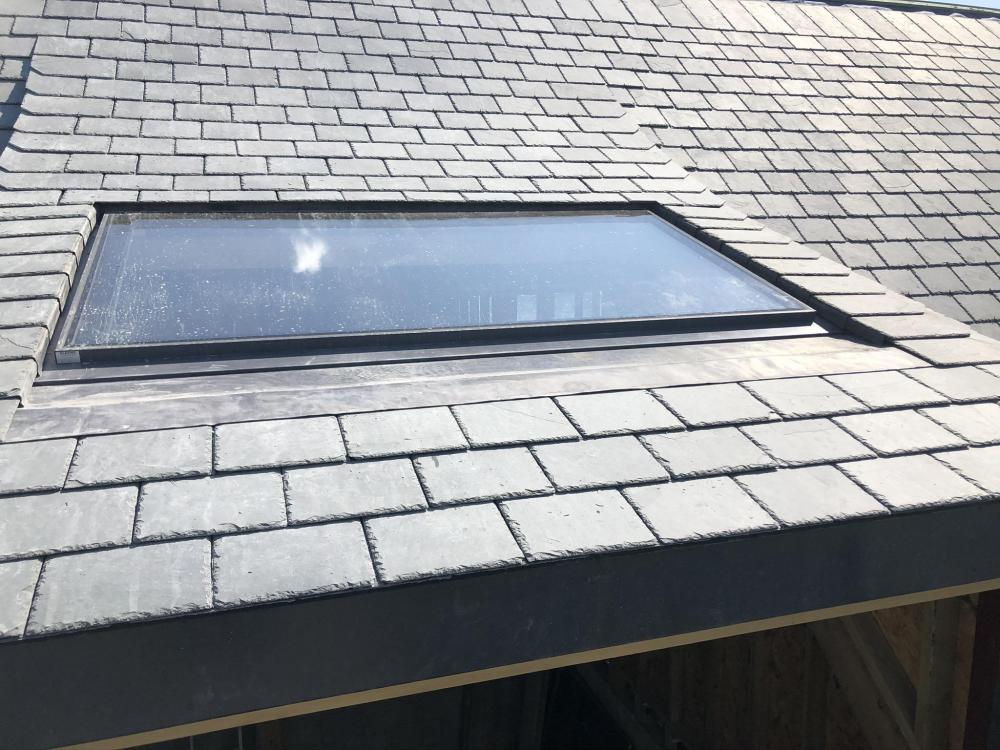
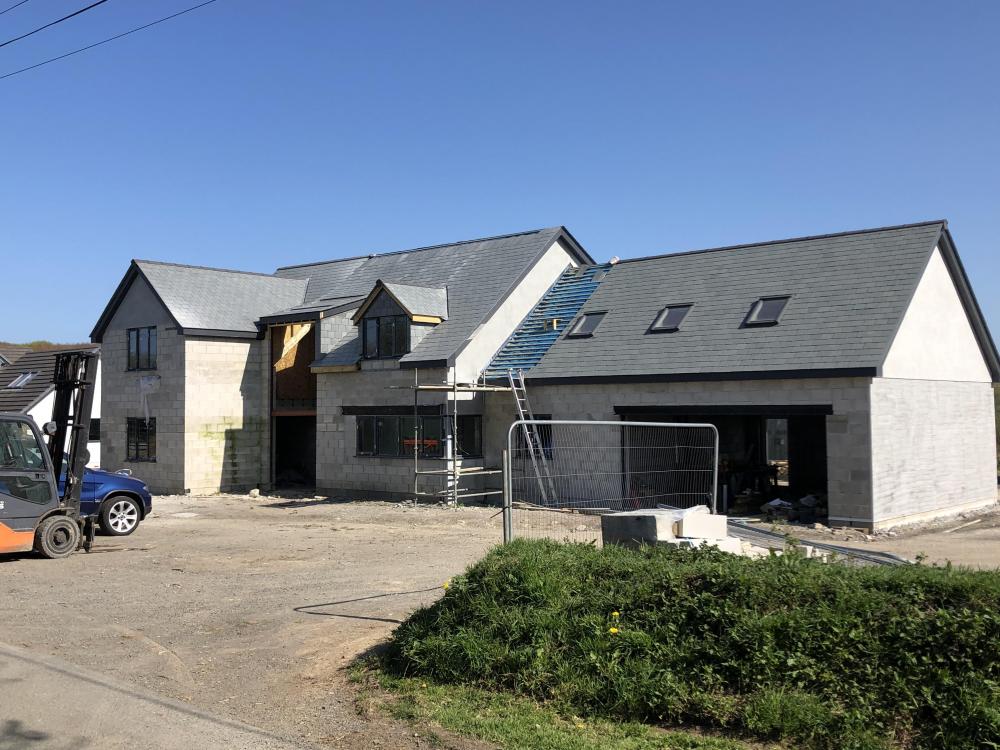
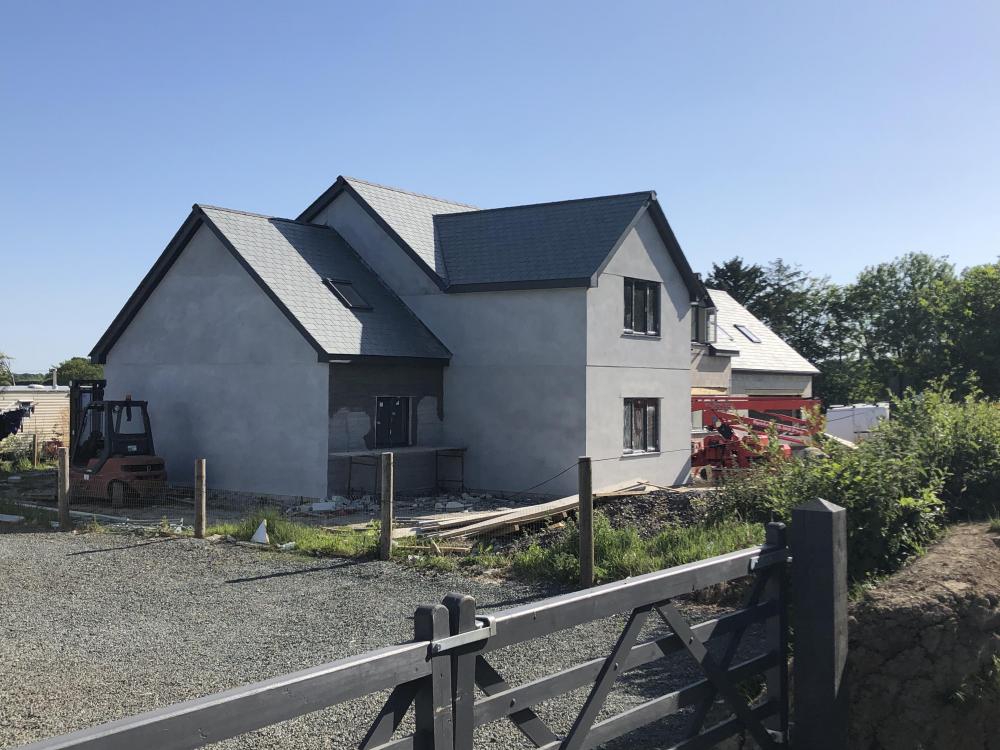
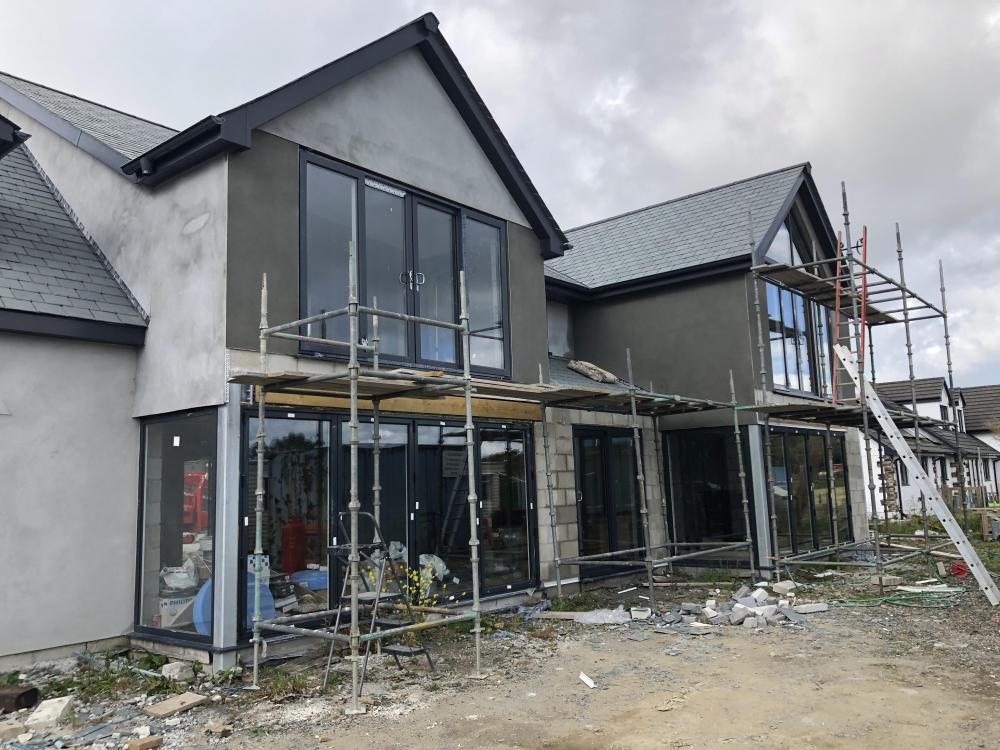
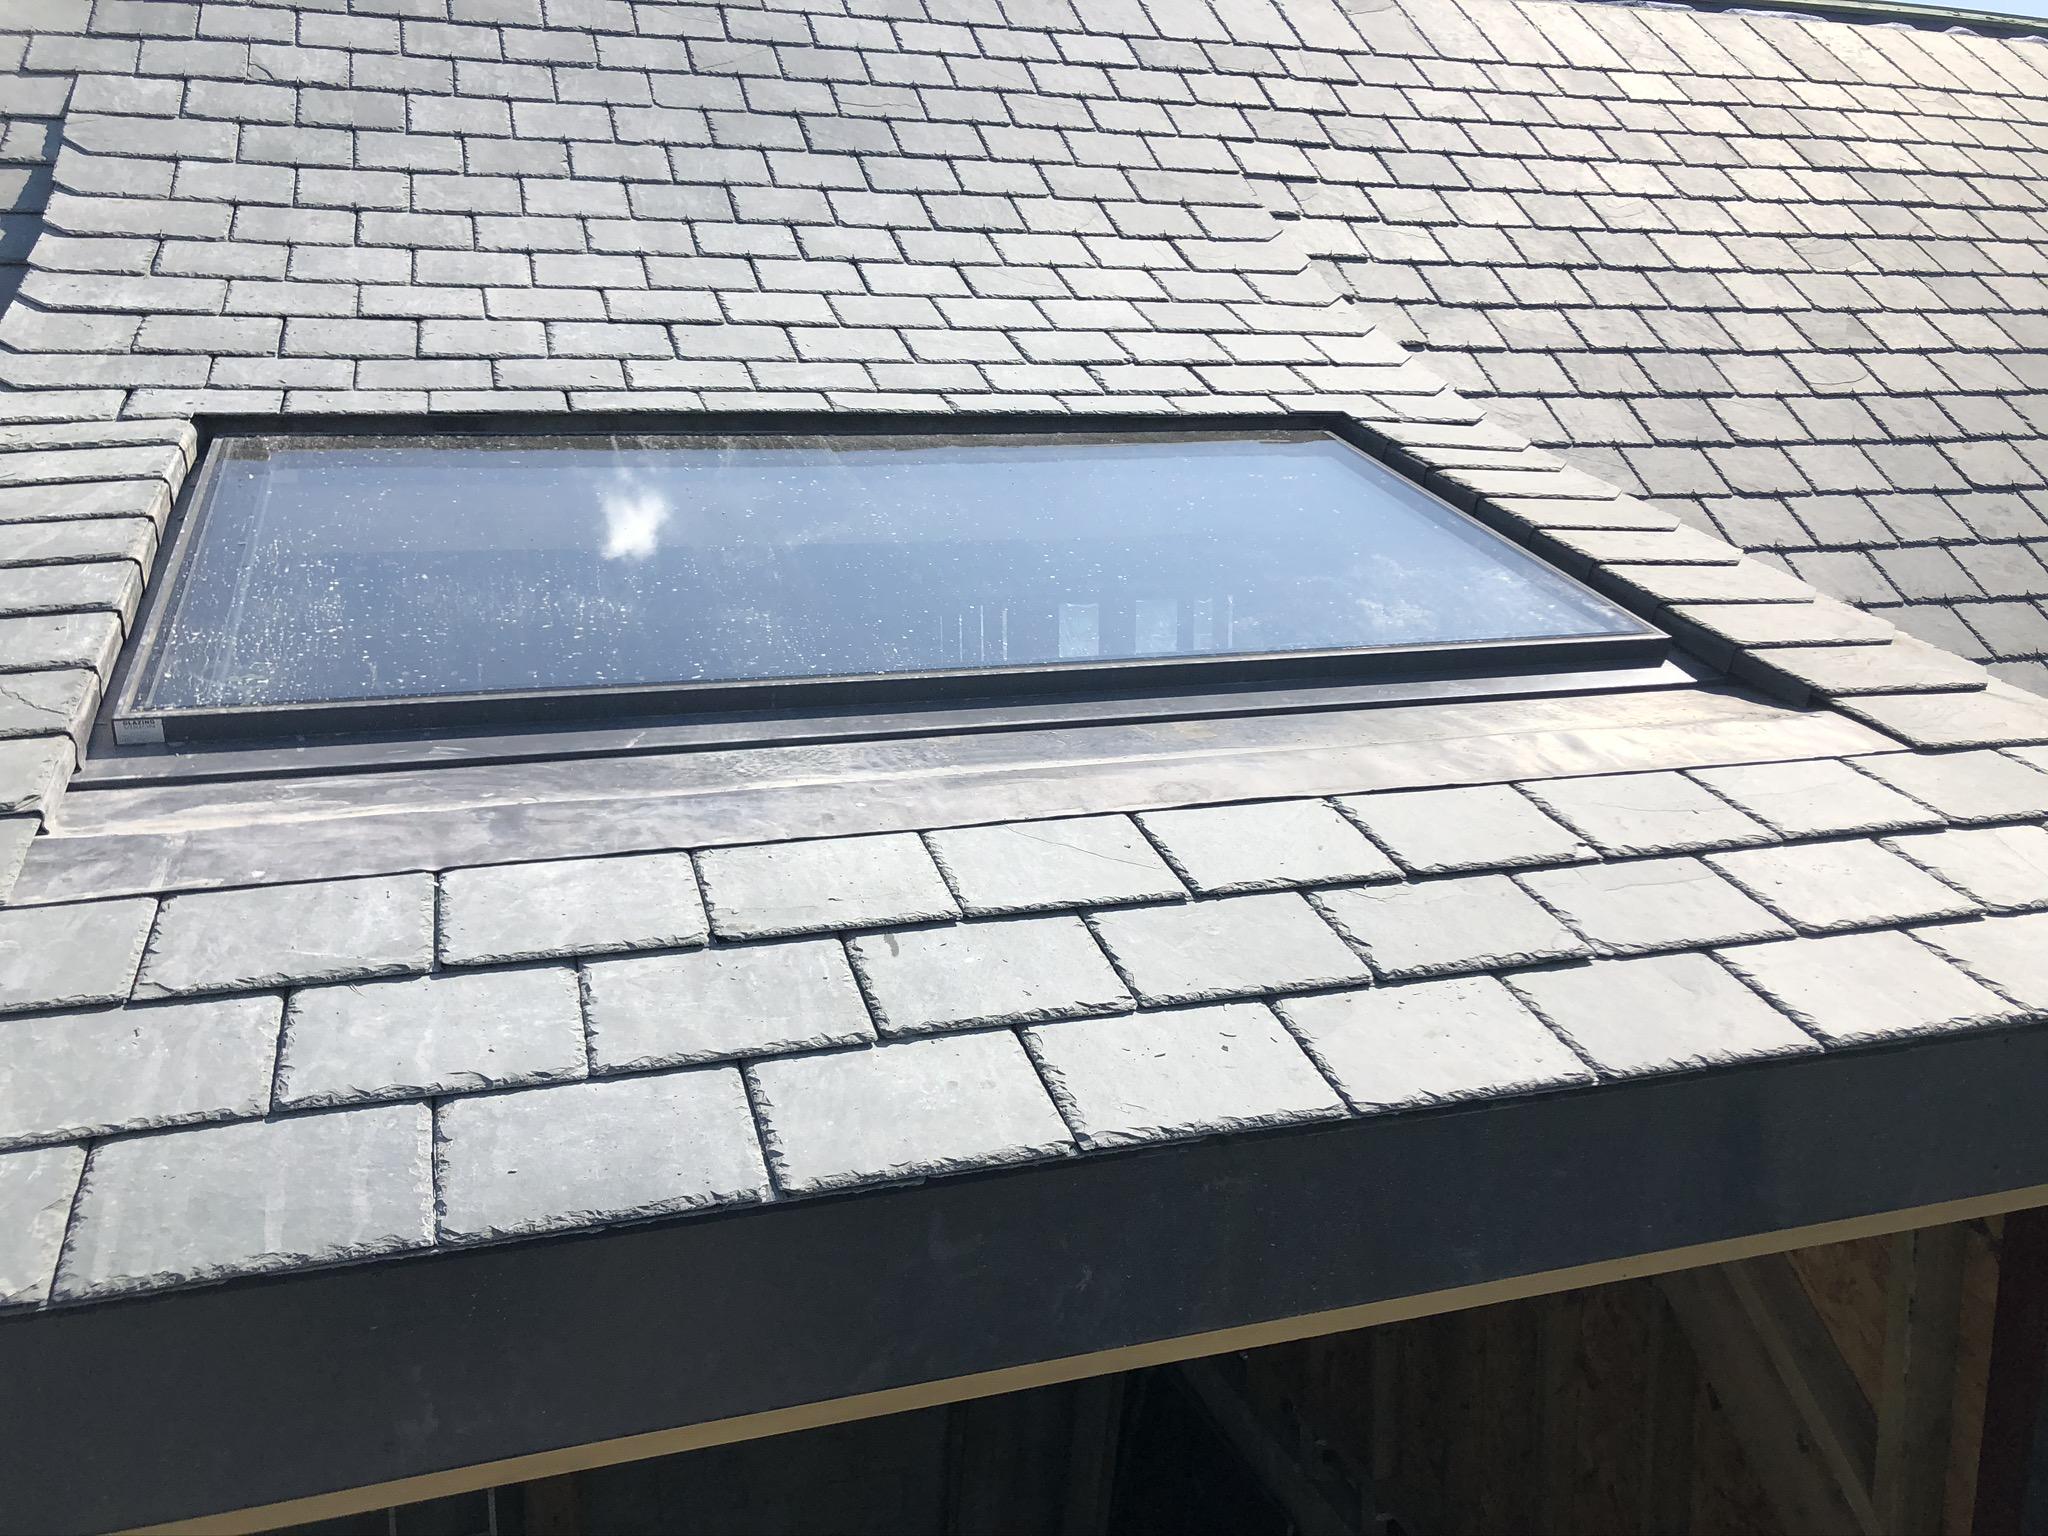
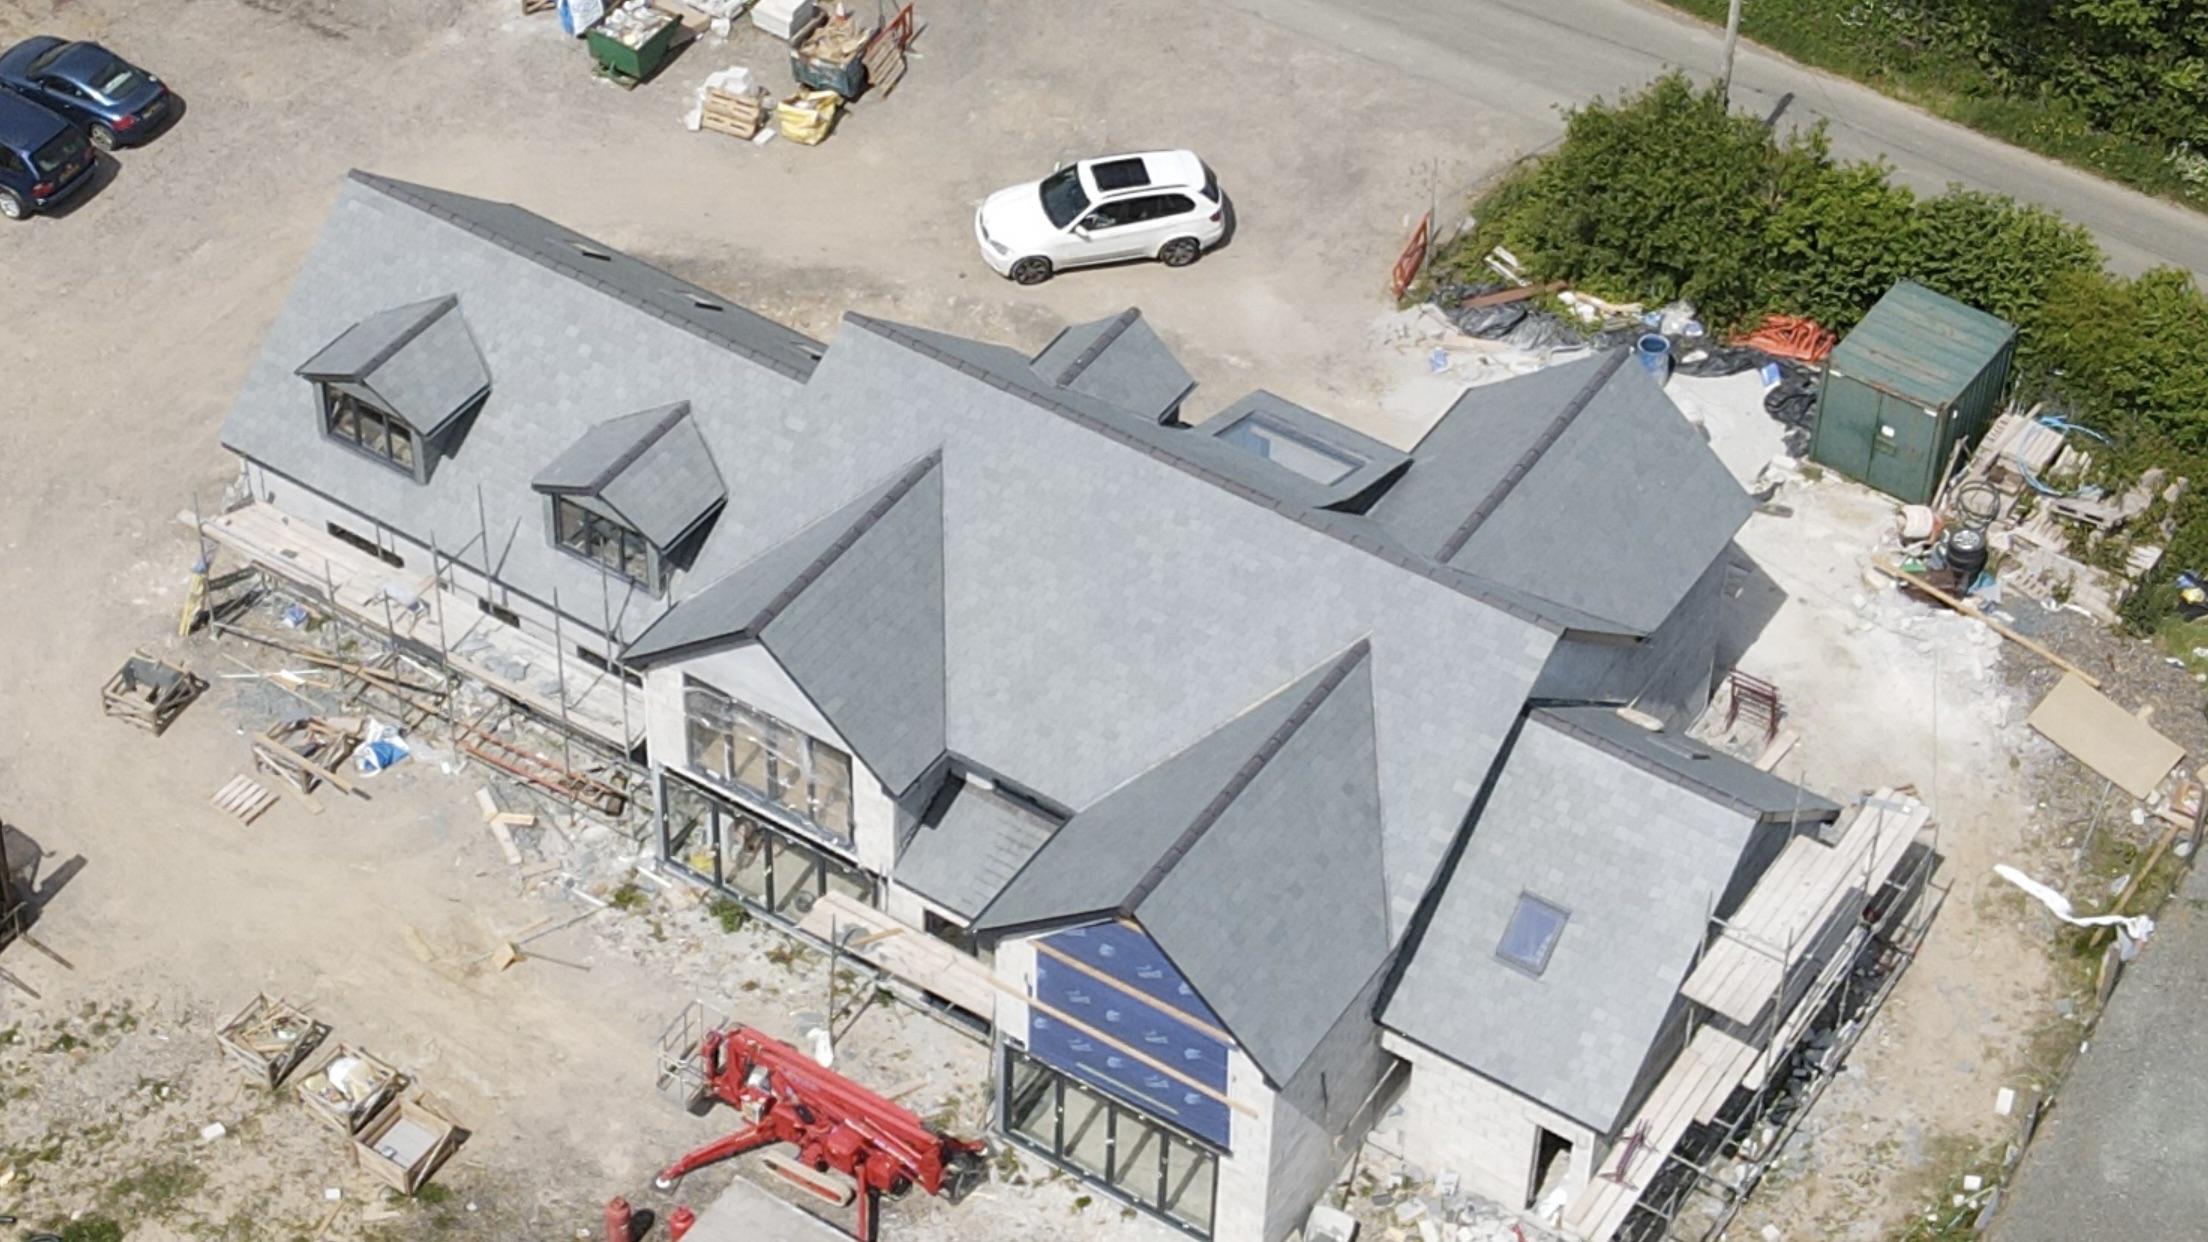
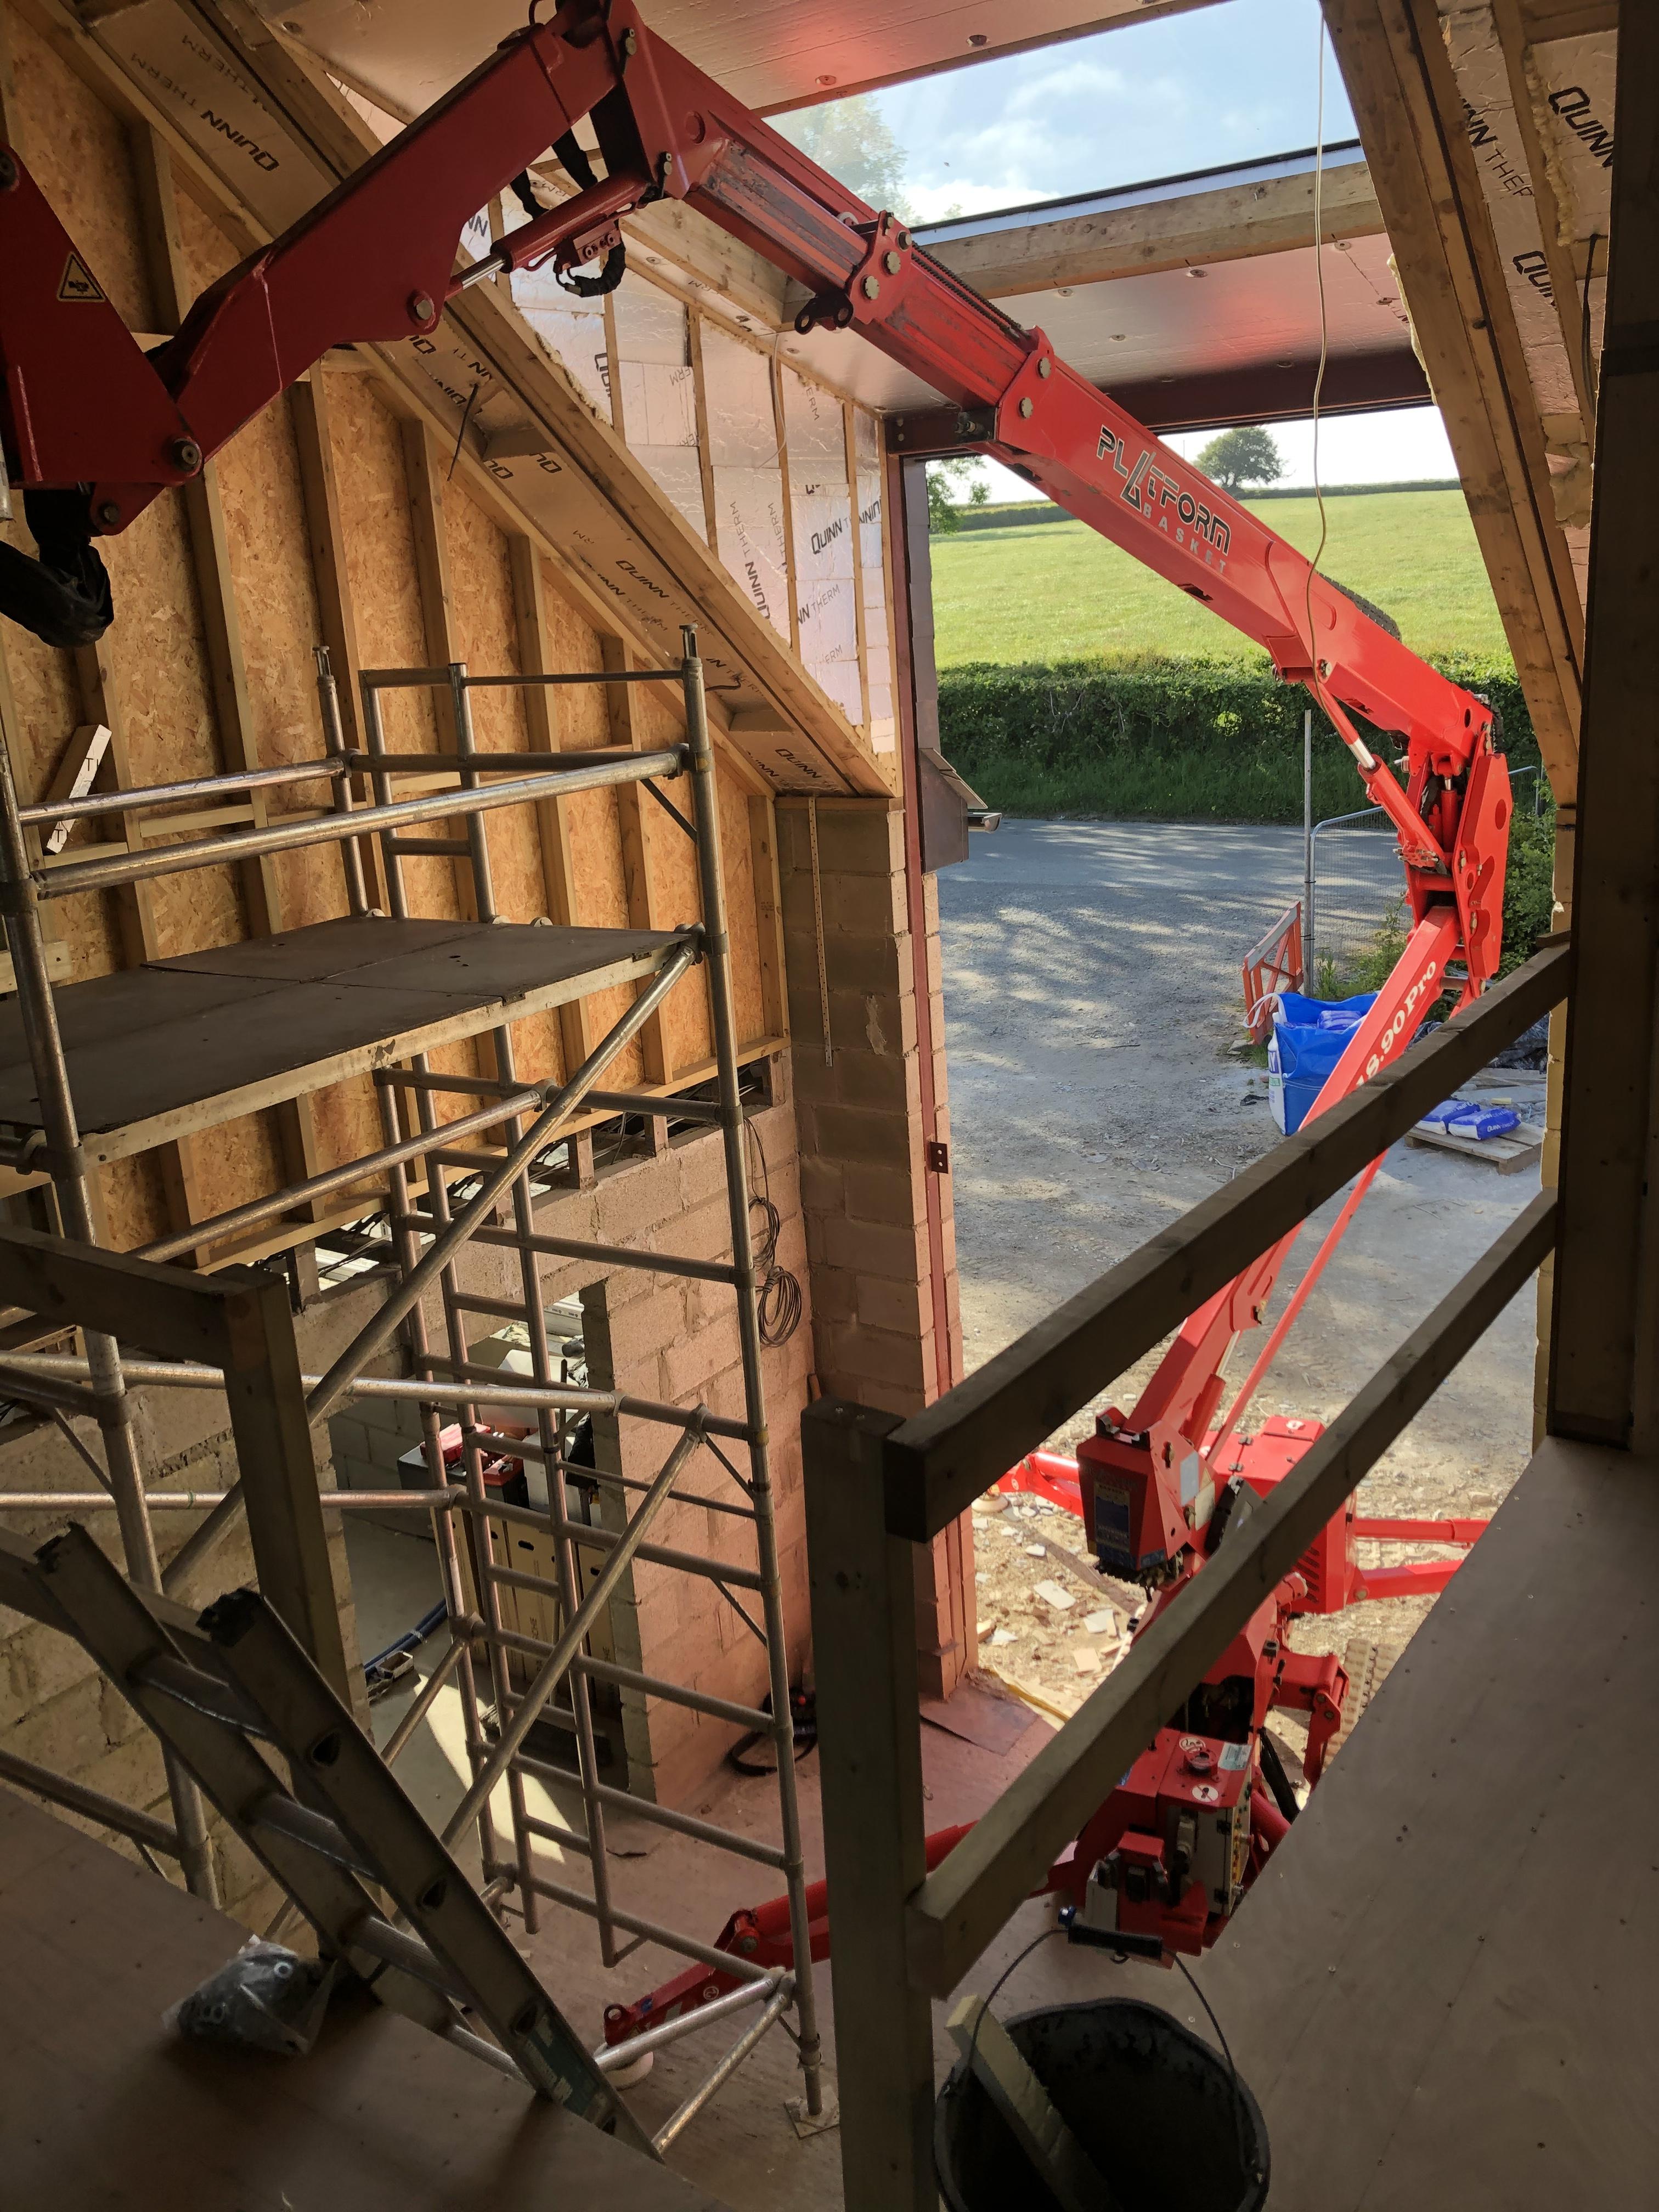
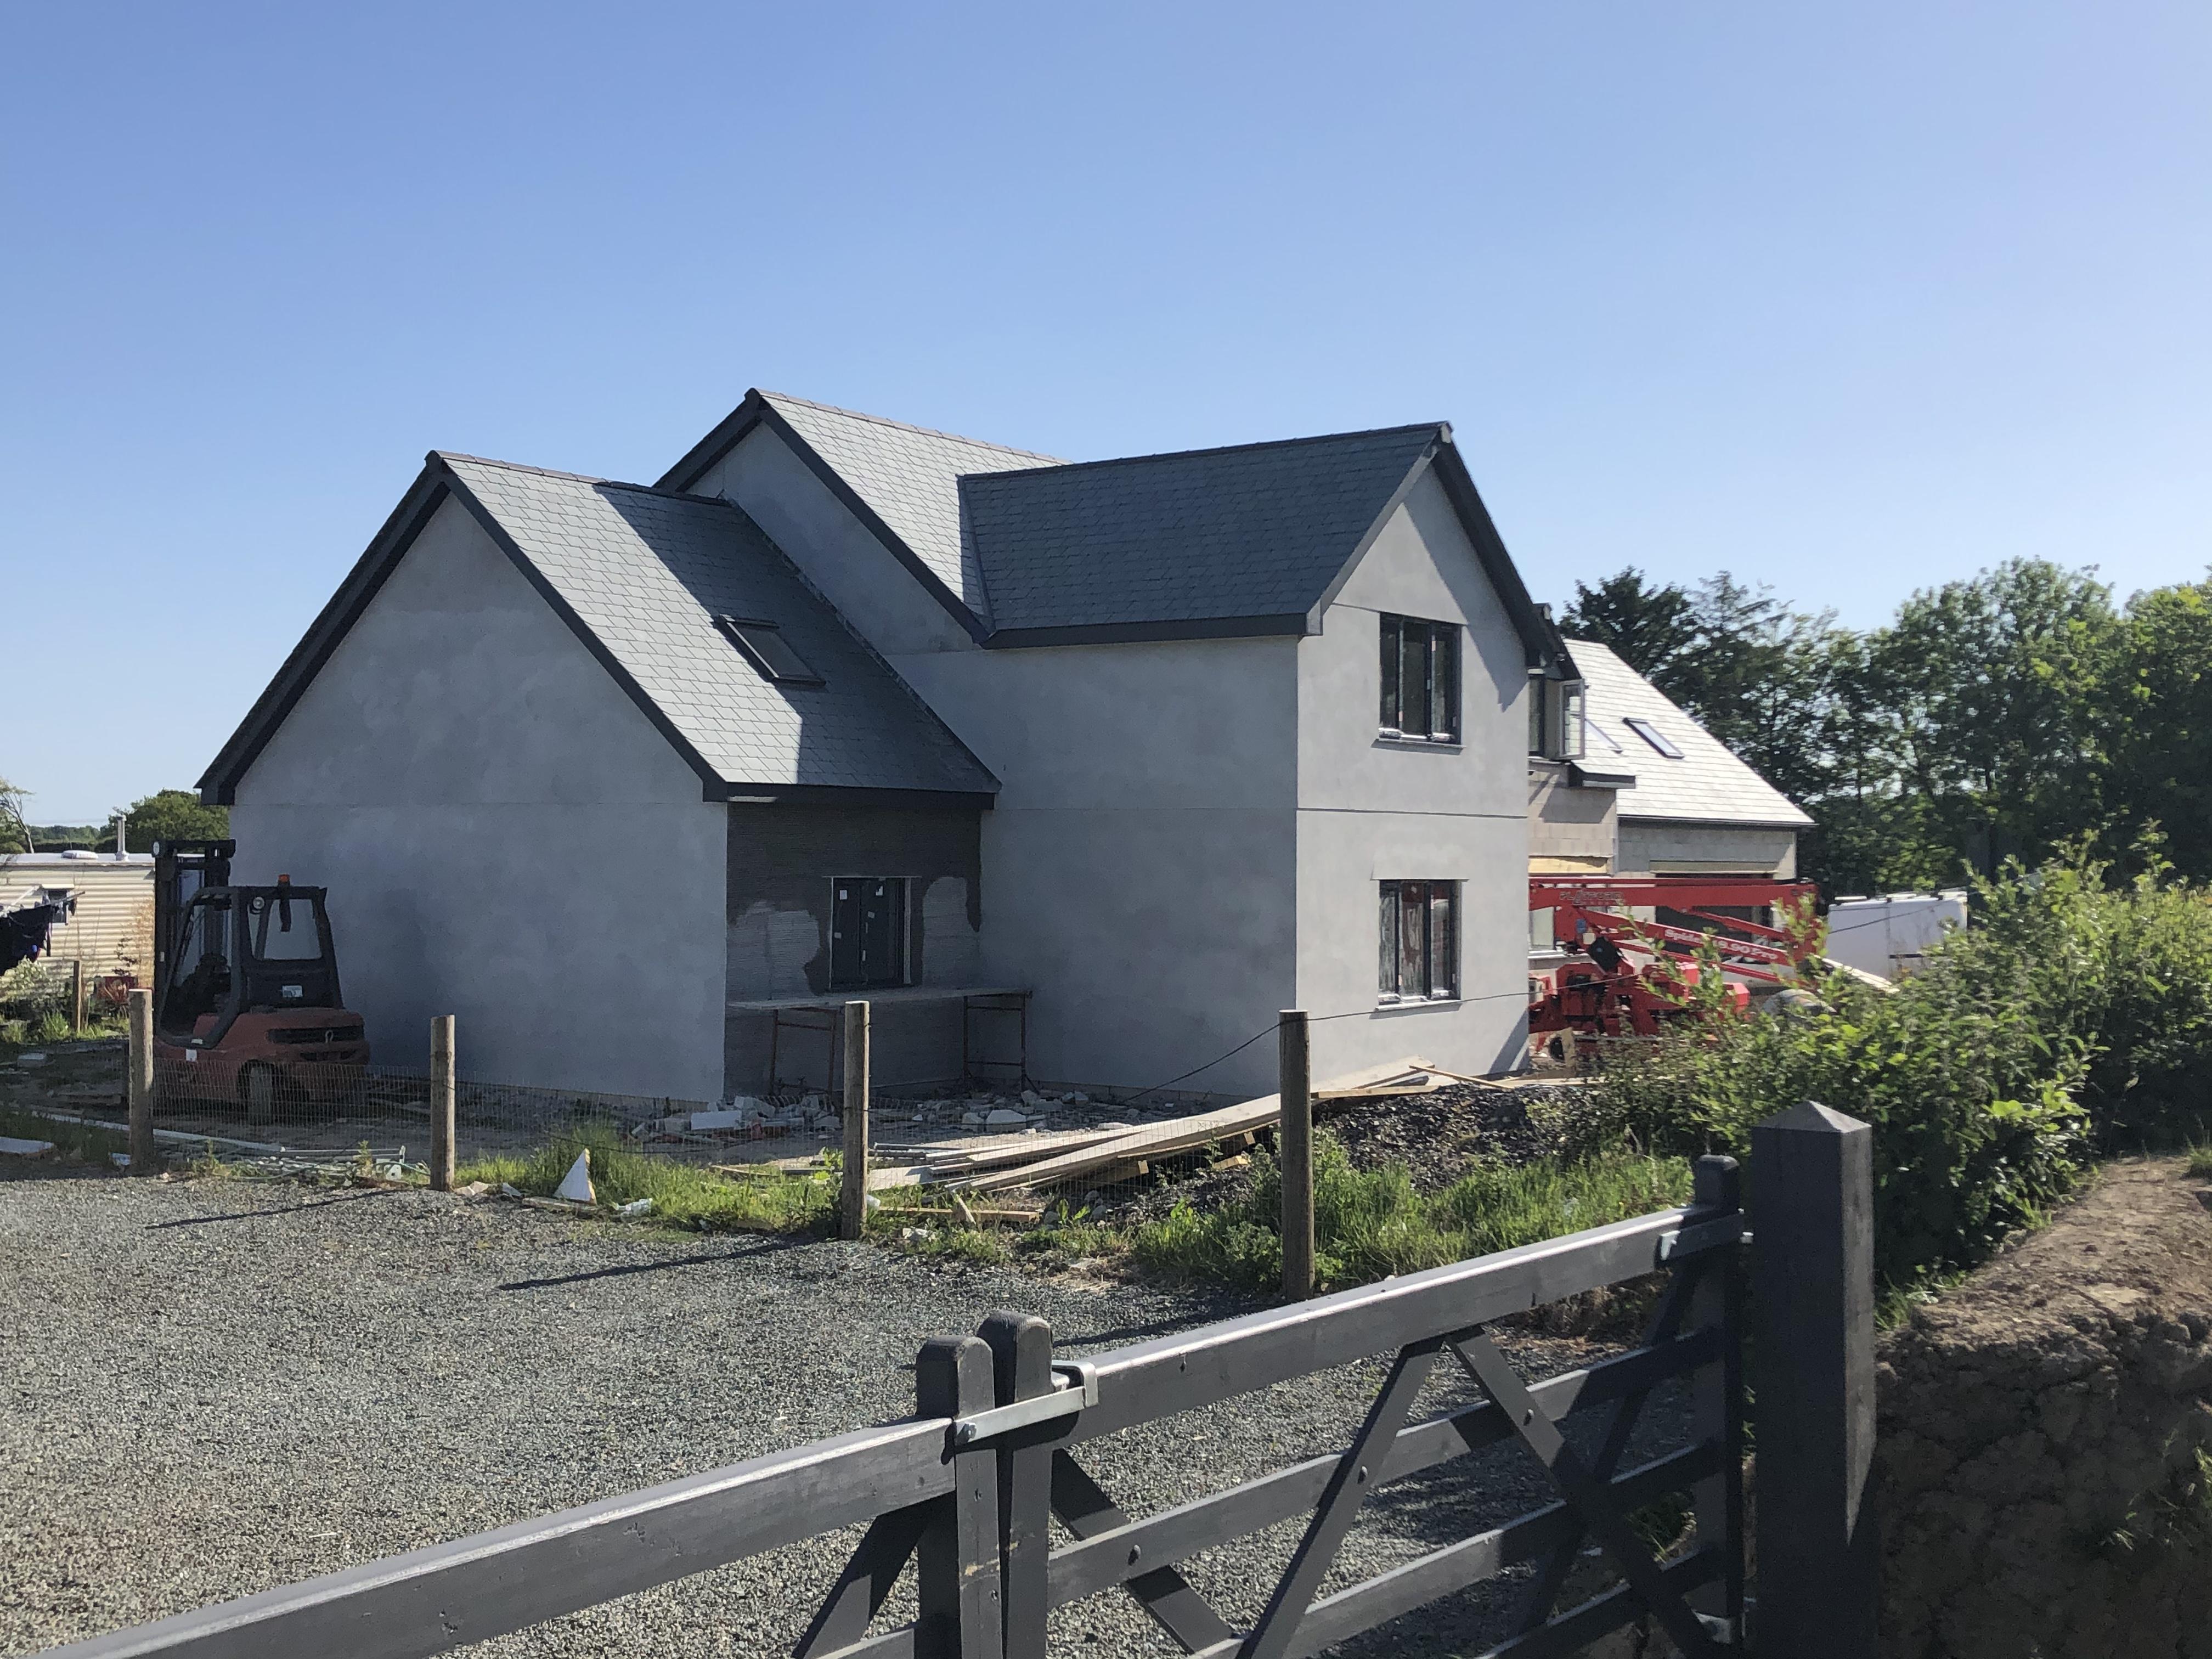
Afternoon everyone! Originally thought I’d keep up the updates etc on here but as you can see, completely forgot! Progress has been made since my last post and hopefully, won’t be mush longer before we are able to start thinking about moving in. The caravan in wearing a little thin now, especially with a 3rd little‘un due next month. Its gone relatively smoothly so far, roof is now finished, all windows are in just waiting for our front door and glass panels above the door to arrive. rendering is nearly complete, electrical and plumbing first fixed, upstairs ceilings and wall are boarded, main bathroom being fitted on the 29th, and the staircase will start to be made next week hopefully. A few alteration have been made from the original plans as I never liked the flat roof on the cinema and above the front door so we added a dressing room and ensuite above the cinema and sloped the roof above the front door with the roofers bending/curving the skates back up the roof and adding a 2mx1m skylight. Will try my best to update more regularly over the next few months. PS - the front door being delayed actually made it a lot easier to insulate the ceiling etc with the spider lift fitting through the gap! Hopefully I haven’t bored you all to much ?


 4 points
 -
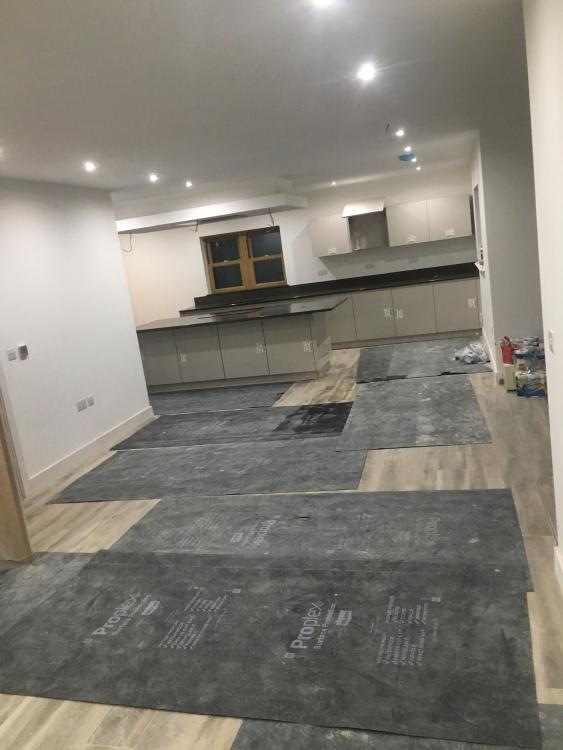
In the last few months work on the house was on hold because of the COVID 19 pandemic. With the rules starting to be relaxed we have now been able to make some progress. A few months ago I posted on BH about being a bit concerned about the bath being a tight fit as it’s 1800mm and the distance between the wall was 1802mm. Not sure how the plumber got it in but happy that it fills the space. The bath is made from Carronite so it should feel more rigid when showering. Our joiner fitted the hydro lock panels and the plumber came back to fit the shower fittings. The Joule Aero tank has now been connected up. The tank holds 260 litres and utilises a heat pump which draws air from the bathroom, utility and ensuite. We visited a couple of properties that utilised this set-up and although they were happy with the efficiency of the system the feedback we got was to consider potential vibration noise from the tank. We took some steps to do this, firstly sitting the tank in a cupboard in the utility room, using a thick anti vibration mat with 22mm plywood on top. The ducting throughout the house is metal but we switched to flexible ducting for the last bit to ensure any vibration would not travel through the ducting. We also fitted a silencer to reduce the noise travelling through the ducts particularly to the ensuite. These steps have had the desired effect. Because we have yet to move in, I was able to monitor the electricity consumption of the tank when it heated the first 260 litres. To get the water to 50 degrees it used 4 units of electricity which would be about 50p. The tank also has a dual immersion which could be used to heat the tank more quickly if desired. After the air has gone through the system it passes through an external vent through the utility wall. In the last entry I mentioned that we wanting to prepare the ground for grass seed. The first job was removing a lot of stones. I’ll probably use the smaller stones to extend the parking area slightly and it would be good to use the larger ones for a small wall or some other feature in the garden. After the stones were removed, we raked the ground and then sowed the seed. The grass is starting to come through which is promising but we will need to fill in any patchy gaps. I can see why people go for the more expensive option of turfing but a big bag of seed is very cheap and although it takes some time and effort it’s satisfying to see the grass come through. I guess this is a good analogy for our self build! We had a sunny weather spell which allowed me to finished off some painting and my wife put some oil on the cladding. This had been previously left to weather but as this is on the southern elevation this could now do with some oil. We chose one which had a slight pigmentation and after applying the finished result was that it looked very similar to the pre oiled look but helped to even out the upper areas that had yet to sliver as they are shaded by the soffit. We plan to work our way around the house with the oil. We have used various tins of Osmo throughout the house and although it is quite pricey it does the job well. This is the tin what we used on the cladding. What is next? We had hoped that we could order some furniture from Ikea to furnish the downstairs but I think the pandemic is affecting stock issues and delivery. We now need to decide whether we want to move with limited furniture or wait a few more weeks. The next jobs: - a little bit of electrical work, lighting fittings, connecting up cooker, towel rails etc - BT due to connect us up on Tuesday - need to get some tiling work done for splashbacks - order some chips to spread around the site. - need to decide what to put as a finishing layer on the access road. - need to order materials for ramp, decking and downpipes for guttering. I hope everyone is keeping well and thanks for reading.3 points
-
I have been saying it for 40 years, 35 with posts mostly on GBF as a builder I stopped using aircrete widening the cavity instead in the 80’s, medium density blocks, no cracks or call backs better quality, only ones who moaned were the brickies2 points
-
Google found this YouTube video for a simple project with visual display. Uses a library called TkInter.1 point
-
We've now been shortlisted for the RIBA regional awards - so awaiting the jury visit "some time"!1 point
-
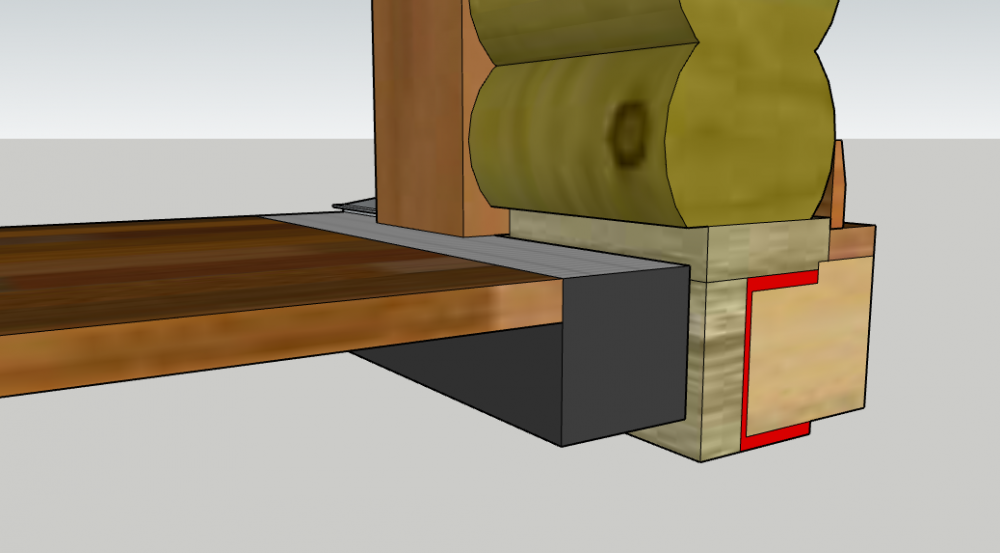
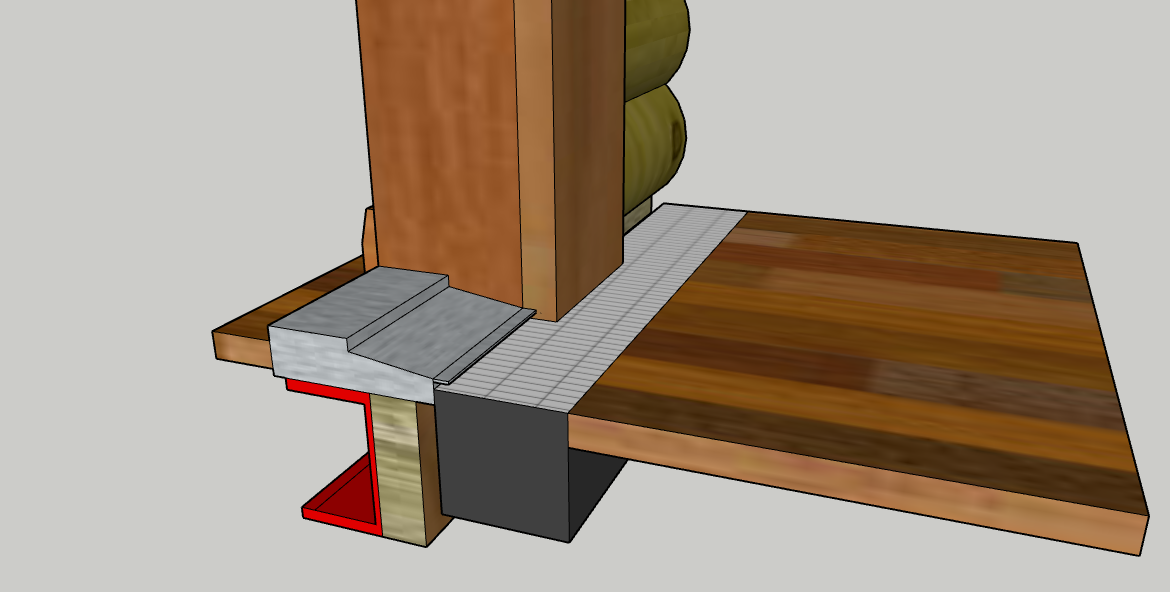
I feel more comfortable visualising this now. There is a 30mm drop from the log underside to the channel drain. There is a 15mm step up onto the threshold from inside floor level then a 10mm step down onto the channel drain off the threshold. I'm pretty sure this meets the regulations. I was looking at some other speciality disabled accommodation and they really have gone the full hog with grab handles all over, wet rooms etc, hoists into beds etc. Basically fully fitted out which is very impressive and commendable. It was never my intention to go to this level of 'disabled friendliness' and I don't want to for this dwelling for various reasons, I'm going to speak to the listing company I intend to use and see what they actually require. The tick box is 'wheelchair access' - https://www.cottages.com/scotland/dumfries-and-galloway?fshow=1&features=6734 Looking at the competition I think they are just making sure the entrance door is level and that's about it.
 1 point
 -
Hi Andy, yes I resorted to cutting RHS of board down (I've only -ever- found it difficult to conceive trying to do the wiggle L whilst still keeping the taper @ R: the wrong assumption was I couldn't understand how to do the L edge!). Its not a great join.. but will have to do. The wiggle L went fine/ jigsawed, but the R edge was always the problem to get dead-on (especially having only 15mm of stud to hit: THIS is where I was stuck on!!).. & I couldn't in fact: its a bit of a mess here so will need attn later. Thanks for help anyway chaps. zoot
 1 point
 -
Ivy wood is very soft, so loppers or a decent pruning saw can achieve a lot.1 point
-
Re harnesses. A fall arrest is probably overkill and in any event they need "space" to activate so are really meant for seriously high stuff. I just have a harness , a few climbers slings and caribinas and clip myself on to anything secure that might be the tree or might be the ladder.1 point
-
Thanks for the video @scottishjohn - very informative and I love the almost complete absence of PPE ?1 point
-
Stick to one manifold. As long as the runs are 100m or less you’ll be perfectly ok. As peter says, ask Wunda for the auto balancing actuators and you don’t need to do any commissioning whatsoever. Just plug and play, and go to the pub. Where the pipes are congested, just insulate the flows and leave the returns bare. If you’re on an ASHP then stick to 150mm centres to keep the water volume high.1 point
-
What’s the Delta- T and output temperature they have designed it to ..?? Screed depth and material..?? 150mm is quite tight for some of those loops - I would look at 200mm centres and run it lower temperature for longer. Like others - need it in the En-suites and a lot to be gained from using the individual flow and return pipes in hallways etc. Loop lengths are irrelevant, they should be roughly equal where heating the same room, but use the auto balancing actuators and 99% of the problems go away.1 point
-
I think most common reason aircrete cracks is too strong compo. Think you're talking like 6:1 for aircrete1 point
-
Nolte1 point
-
Try and do a bit of research regarding the different type of blocks. Aerated or aircrete, or thermalites. Are proper rubbish and I wouldn’t use them if they where free. Lightweight aggregate blocks are fine. Dont be confused with the load rating, even some of the shite aerated stuff can have a 7kn rating.1 point
-
I've not heard of any minimum time between pours. Considering how long it takes to strip all the bracing and supports (1 day at least), then build the next story (perhaps a week), finally adding bracing & supports (another day or a so), then confirming pump availability and concrete. I think there is no chance you could be pouring onto concrete that isn't cured even if you've got a large team of builders.1 point
-
have you looked https://www.usedkitchenexchange.co.uk/product-category/handleless-kitchens/ here?1 point
-
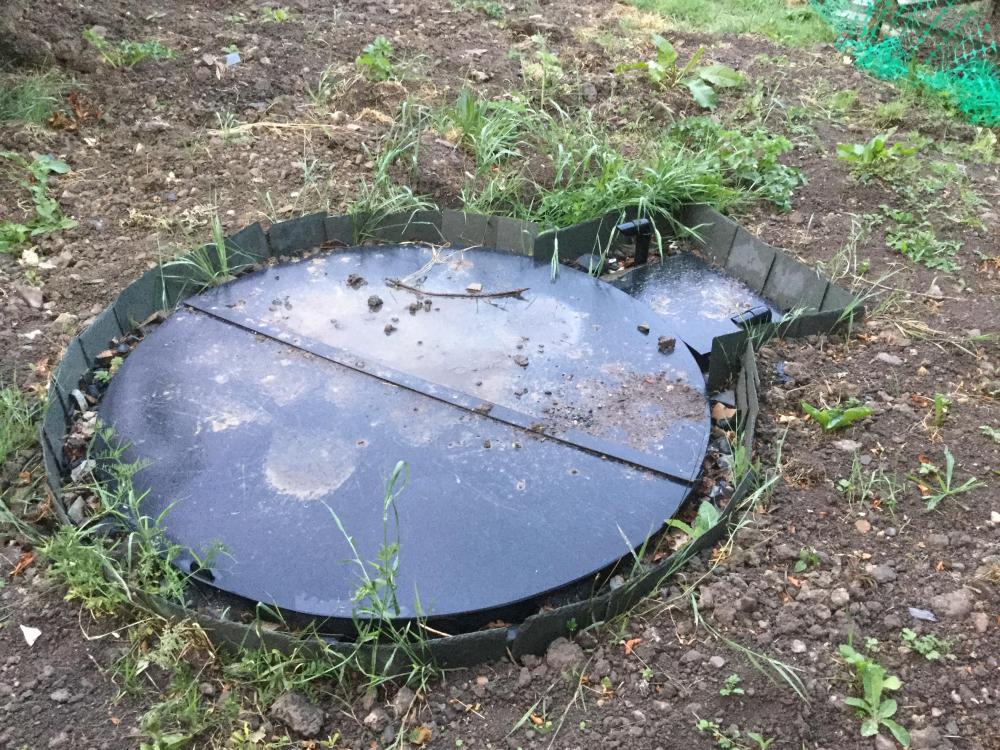
Hi @Miek here is a pic of mine, excuse the weeds, yet to do the landscaping. I dug a hole which is directly over the rumble drain and lowered the pump box onto and surrounded by 50mm drainage stone, any water that gets near it drains away through the rumble drain to a ditch. You can see two black 40mm pipes sticking up, these allow fresh air to keep the pump cool as it needs ventilation. Any questions please ask ?P.S. the existing air pipes were long enough to be re routed through new holes in the side of the tank.
 1 point
 -
I would say you need somebody to do some calculations on this for a couple of reasons 1. If you under specified your steel your roof will sag and stop your doors working. 2. If you over specified your steel it could cost you a chunk of cash you could spend else where. Calculations should be done for a couple of hundred or just go and get a dirty big steel from the scrap yard and a steel corner post, for probably less than the calculations. Depends on your risk level. He who dares rodney. A rough sketch and theres probably a few blokes on here who could run the calcs for you.1 point
-
This video in link below may help you. I bought my 'Folding Sliding Doors' from here and installed them myself as shown in their video. Detailed instructions can be downloaded here:- https://www.foldingslidingdoors.com/info/advice-centre/installation-instructions What is the best bi-fold operating system1 point
-
You would normally have a steel beam above the bifolds that will support any brickwork or roof or floor above the bifolds The bifolds will be delivered without the glass fitted and the doors will be set within a frame Once glazed all the weight will be on the bottom of the frame which sits on brickwork Hope this helps1 point
-
I'm planning on getting an ikea kitchen (fitted on in our last house, very happy) and making my own ply doors etc (simple enough with a good table saw setup) and then getting them painted. It won't work out any cheaper than IKEA fronts, but we get the exact colour we want.1 point
-
It’s a matter of taste I fitted this one with handleless I was quite pleased with it My wife hates it
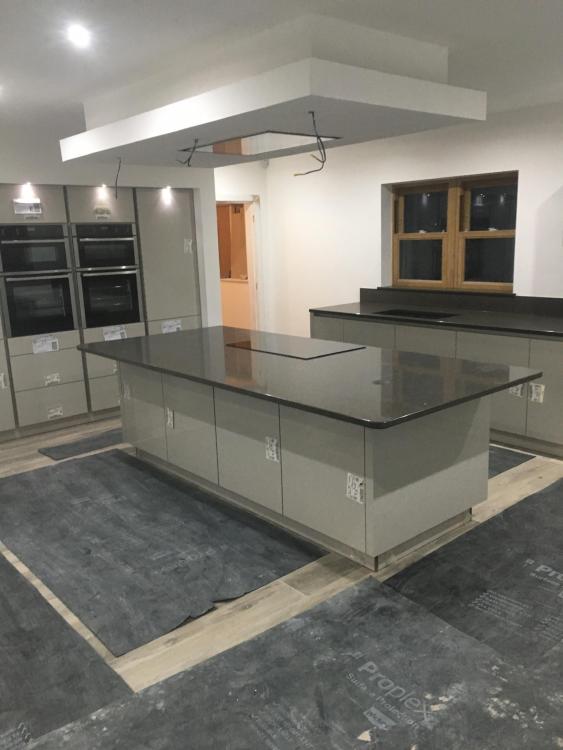
 1 point
 -
They both use a scratch coat for the base. Cost wise their wouldn't really be much difference. If you want it white or a different colour than cement grey then it will cost more to wet dash. If you want a nicer looking stone then it will cost more.1 point
-
Get a dog. Cats will move quicker and not burn their feet.1 point
-
Have you considered a harness and a safety strop so you can tie yourself on so you have both hands free.1 point
-
I think you are ok because of the way "height" is defined on sloping ground. This will be familiar to people building extensions or outbuildings on sloping ground as it also applies to the way the eaves and ridge height are defined.. http://www.legislation.gov.uk/uksi/2015/596/pdfs/uksi_20150596_en.pdf See also.. https://www.gov.uk/government/publications/permitted-development-rights-for-householders-technical-guidance Page 6 See also someone complaining about similar decking on sloping ground.. https://www.gardenlaw.co.uk/phpBB2/viewtopic.php?t=20009#p188412 You should probably check with the planners just in case I'm looking at out of date regs but I reckon its fine at least as far as planning regs go. Neighbourly relations are another matter. There is one important point. If you were to build the deck and then later extend it, the new part would be treated as a separate development. It's height would be measured from the highest ground adjacent to it, not the highest point adjacent to the original deck. So build it all in one go.1 point
-
You could have the decking stepped so none is more than 300mm above tge existing soil level, or dig down on on side, by say 700mm and then have a level decking all the way across1 point
-
i have misleading info in my post above - I couldn't find the actual data when I respond and made a guess without checking ( we only had a paper copy of the original quote and I couldn't find it before I posted - apologies. So in the interests of providing good data, SWMBO has has now located the paper copy and the actual facts are: 1) Landscape Designers would seem to work like architects and their normal basis of fees is based on % of final landscape cost. I attach a redacted copy of Appointment for Landscape Design Agreement, which sets out the expected % Fees, Their % fees vary from 17.5% to 10%, depending on the total costs off the work value. 2) We only used their service for stages A and B but on a hourly rate basis, as we had no intention of using their services for Detailed Design and other subsequent stages. Our cost was £3500 (including VAT). SWMBO still insists that this was money very well spent! 3) Landscape Designers do not undertake actual construction services but would offer project management and contract services to supervise/manage the actual works. ( analogous to architects mode of engagement). 4) For completeness, I summarise the actual landscaping costs ( 2015/2016) , including ground clearance, regrading, retaining walls (both concrete block and wood sleepers), all foundations ( including garden shed, paths, terracing and drive), supply and lay terracing (210 m2), supply and lay SUDS drive (Marshall stone 110 m2) topsoil for planters, copings for walls, all service ducting for cables and water to various points in garden, ACO drains in terrace etc . Rear and side garden and terraces/paths/retaining walls - £45,311(% VAT rated) Drive - £16,450 (% VAT rated) 5) On this basis of these construction cost, the Landscape Fees would have been £4737 +VAT (as a minimum) though I suspect they would not have carried it out a efficiently as my contractor, as we utilised all the heavy machinery already mobilised to site for the main ground works and foundation preparation. So, I have probably been unduly critical of landscape designer fees...... 6) SWMBO did all the planting design and planting, providing many of the plants from cuttings taken from this garden before ground clearance and previous garden. Much of this was completed before the house was completed, as the retaining walls provided a garden separated from construction traffic and builders damage. Of course, we also retained and protected all of the mature hedges, trees and plants during the ground clearance, which provided a great basis for the landscape design/plan. _Appointment for Garden Landscape Design Agreement_a.pdf1 point
-
Local college that does horticulture. Students always need projects to do.1 point
-
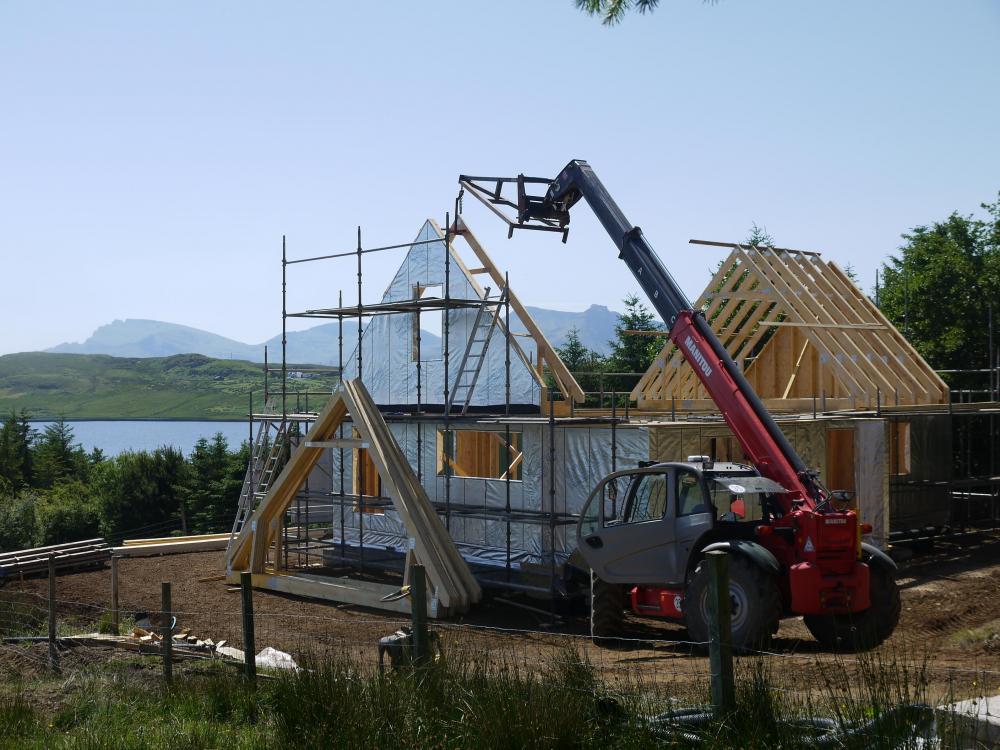
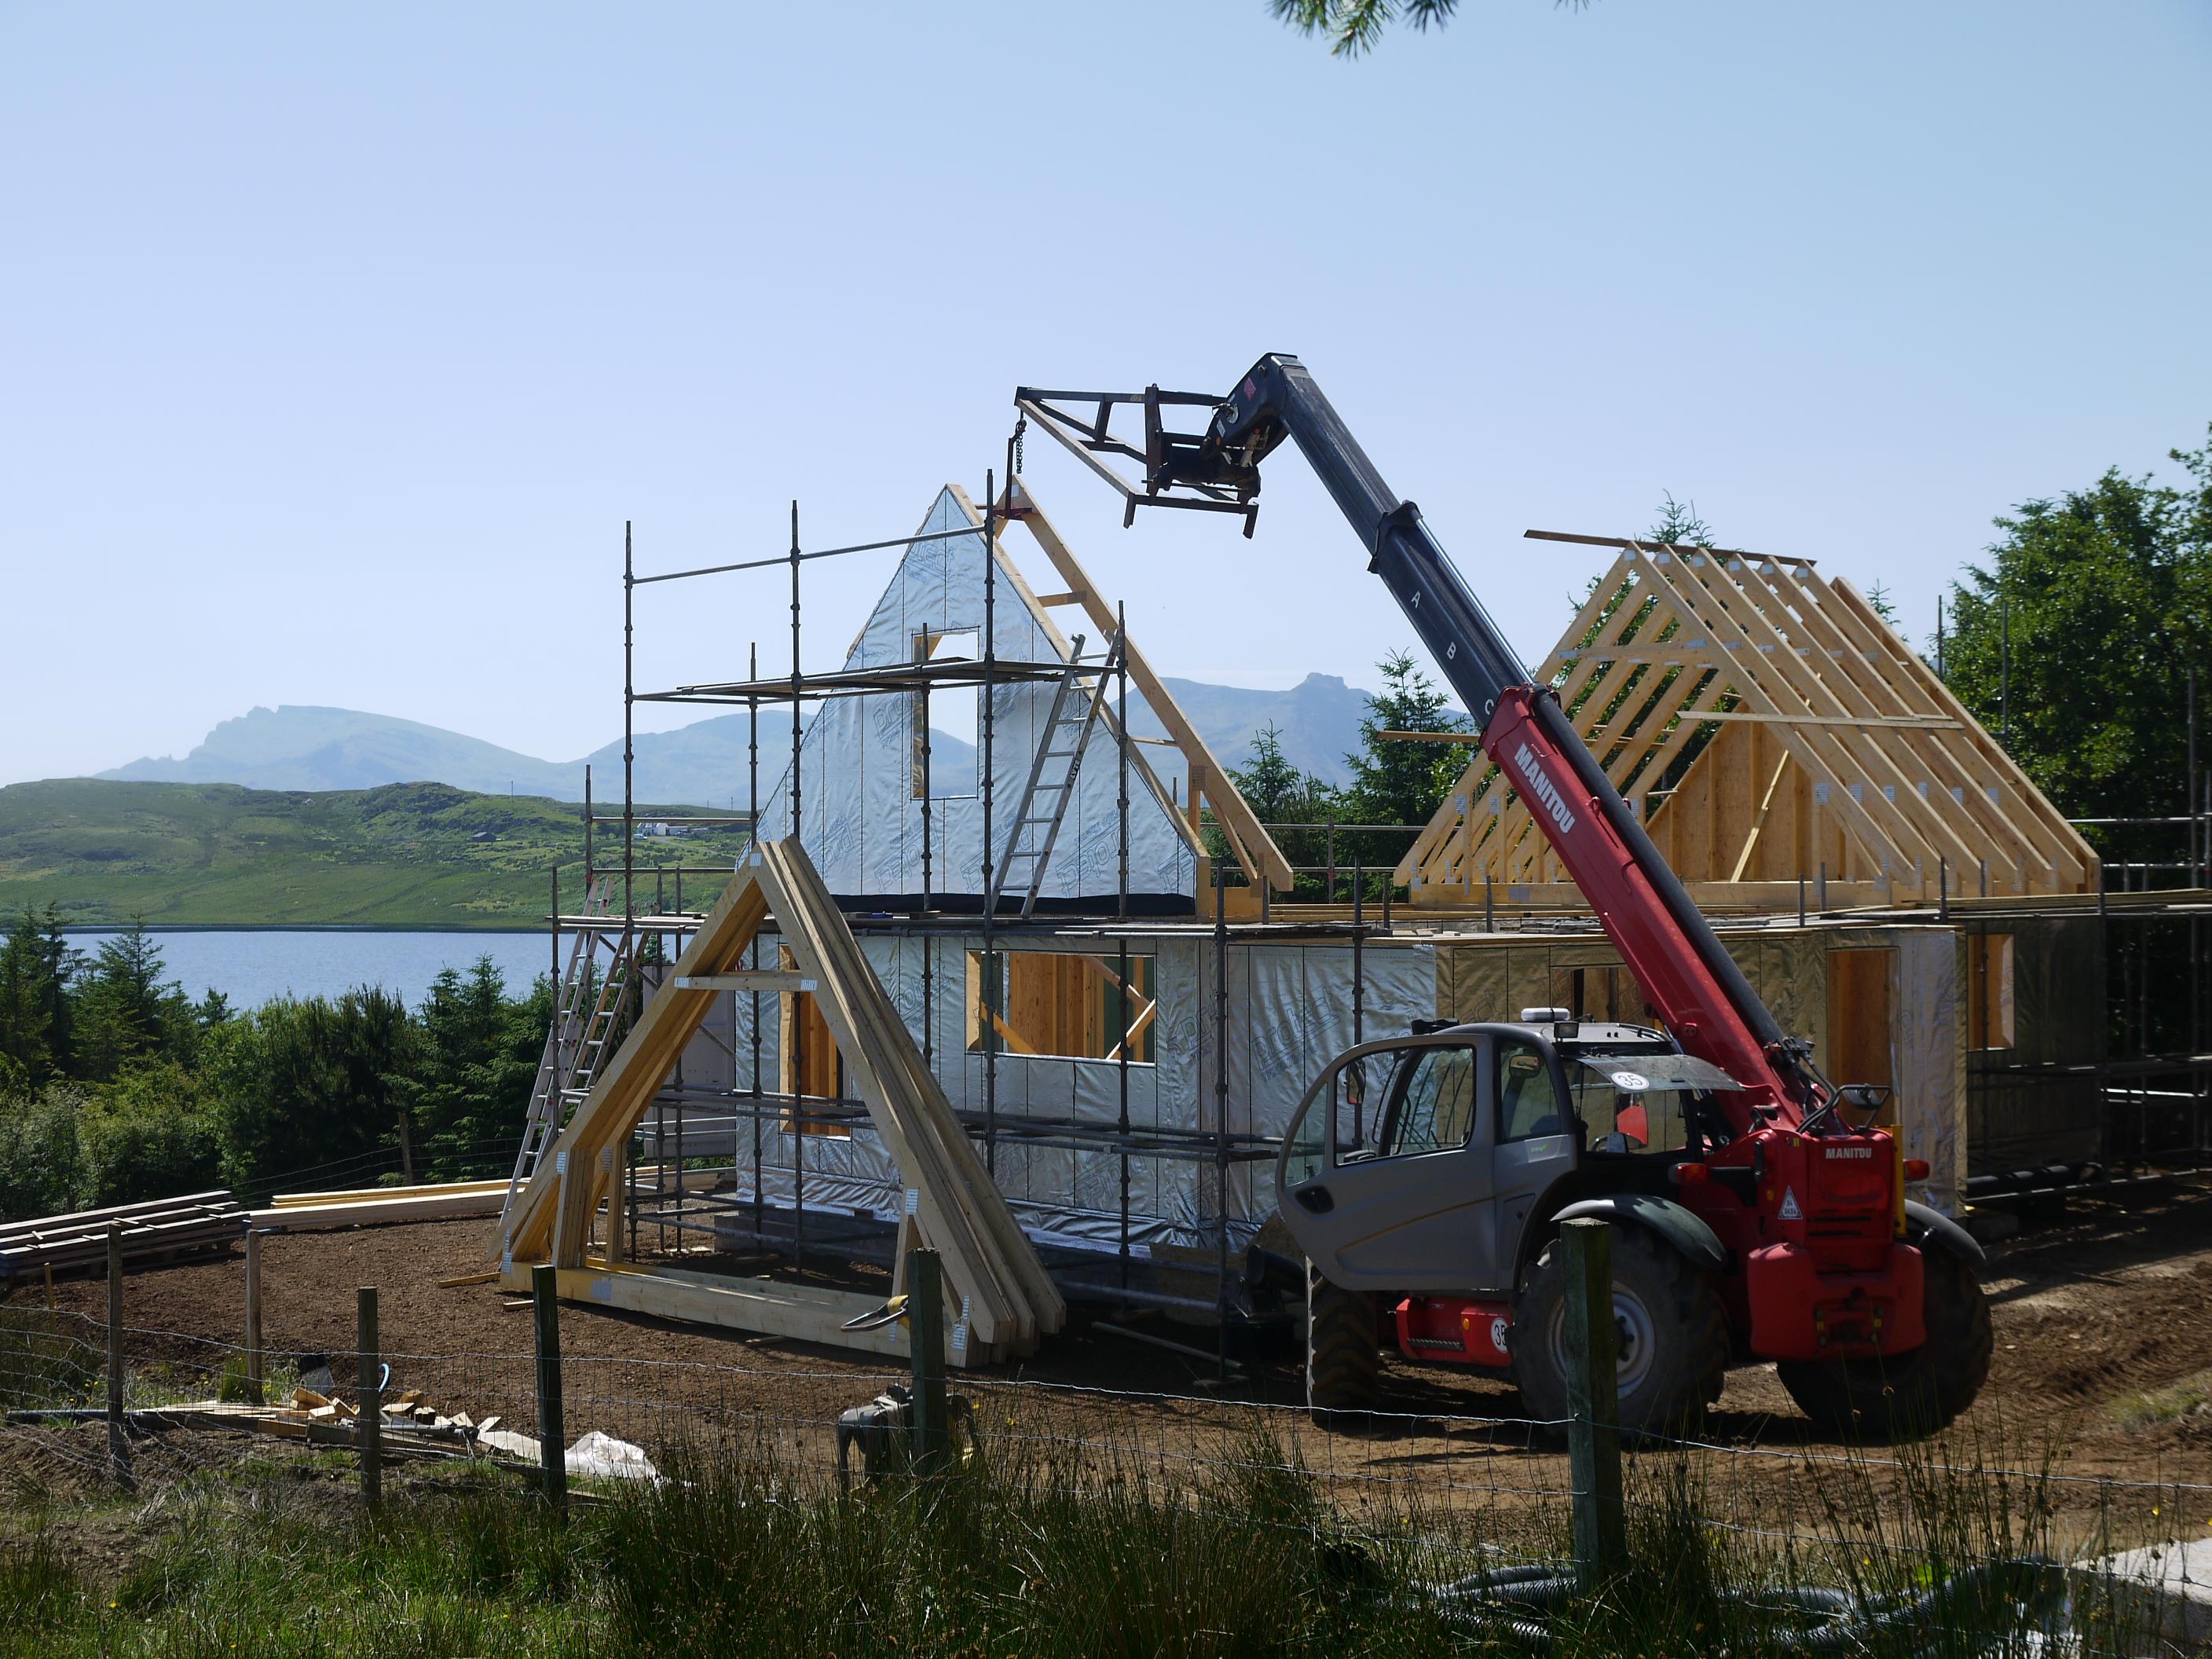
We hired a telehandler with truss jib as a crane would be expensive. Managed to get this one for a couple of weeks to do the heavy lifting for loads of jobs. It was around £500 for two weeks. I think the cost of a crane hire for single day could be that.
 1 point
 -
It's nothing to do with being in the ground, it's to do with the base of the timber being kept cool, because of the thermal bridge to the ground that the concrete pad would provide. The effect of this for an indoor structure would be to create a condensation locus at the base of the timber. Our insulated slab has a load of point loads from the whole mass of the house into timbers with a 89mm x 38mm section applied to a timber sole plate that works just like a padstone. Structurally all that is required is to reduce the point bearing stress to a value that is well within the allowable bearing stress for that area of the slab. This is dead easy, and doesn't take much at all. For example, let's assume that the slab is the same as ours (which it is, it looks near-identical AFAICS). Say the outer reinforced concrete ring beam has a max allowable bearing stress of 5 N/mm² (that's a very conservative figure, as after 30 days cure plain RC35 concrete should be able to take at least 10N/mm², without allowing for all the steel reinforcement). For a post bearing area of 150mm x 150mm (22,500mm²) the max allowable load is about 112.5 kN, or around 11.5 tonnes. Just adding a modest padstone would increase that in direct proportion to the ratio of bearing areas, assuming sufficient thickness to allow for the lower edge perimeter to remain with the 45° line.1 point
-
I'd actively encourage everyone to do the design SAP themselves, if they can. The main reason is that spending a bit of time learning how SAP works gives you a bit better understanding of the things that impact the EPC. The EPC score is far from being the Holy Grail, though, as you can have an appallingly energy inefficient house with an apparently very good EPC score. SAP is really optimised for conventional new build houses that "just" meet building regs and that don't have a lot of renewable energy generation. The latter is a significant flaw, as any house that has been trimmed back, in terms of overall energy efficiency, can be made to meet the building regs requirement by just sticking a few solar panels on the roof - not exactly what was intended when the legislation was framed, the idea was to encourage builders to build more energy efficient homes. Finally, I would take any heating requirement figure that you get from SAP with a pinch of salt, if you're building to significantly better than building regs standard. Our as-built SAP worksheet shows a heating requirement that is just over double our actual heating requirement, for example. If I'd been daft enough to use the SAP heating requirement to size our heating system it would have more than double the capacity, and would consequently have cost a fair bit more.1 point
-
Is he asking if the EPS insulation has BBA type approval, or the foundation system? Kore have their EPS 80 and EPS 150 products approved by the NSAI for use in ground and under a floor slab, as per the quoted document, but for the foundation system there is no such approval, the buck stops with the Structural Engineer that specified it.1 point
-
welcome to the madhouse, in three years you'll have caught up with @joe900 points
-
Can I ask what his missus looks like?0 points


.thumb.jpg.bac90f3bbf6868cf2118d010d936c99d.jpg)


This leaderboard is set to London/GMT+01:00