
Leaderboard


Popular Content
Showing content with the highest reputation on 06/02/20 in all areas
-
2 points
-
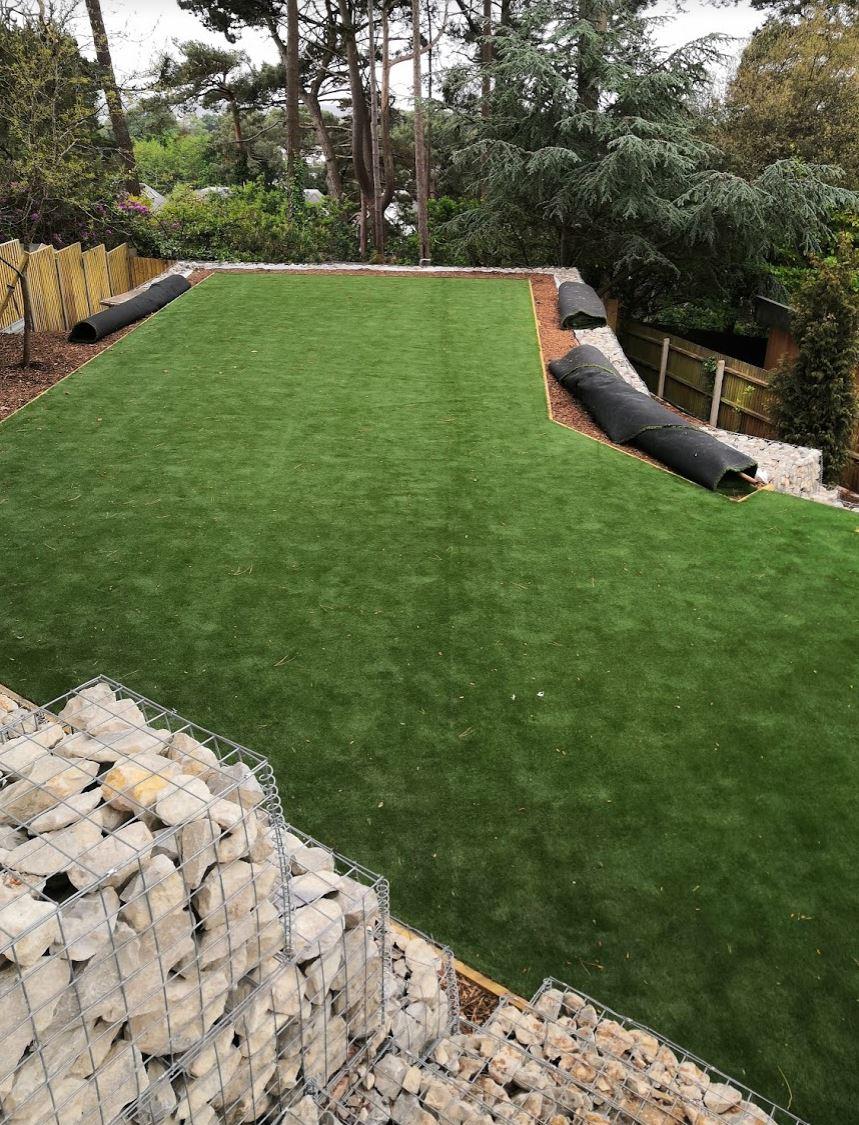
So we've got our grass down - pic below just after laying so not finally fixed hence small wrinkles etc but really happy with that! [... polite advertising removed ... ] My question for those of you experienced with this stuff is what is the best way to remove leaves/pine needles/pine cones etc that will be collecting on it? A blower, a sucker, some form of power broom???
 1 point
 -
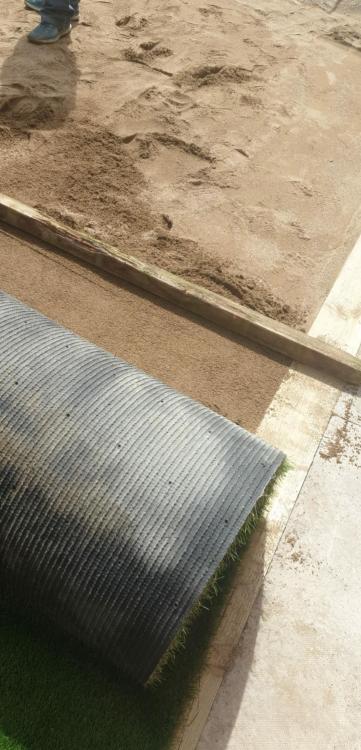
I installed my own. It's basically a really heavy carpet. The important work is the base. Mine had 200mm of well compacted hardcore and then a level screed of sharp sand as the top. I used treated fence rail as the edging which meant I could screw it down to hold it in place. The edging also acts as your screed rails. Depending on how wide your area is you could need more rails to get it perfectly flat. It's not the easiest thing to join together. You have to cut in-between the stitching on both sides and then when you pull them together they both fit without any difference in the grass. It is very hard on Stanley knife blades for the cutting. They go blunt after a few metres of a cut.

 1 point
 -
you could indeed. I imagine he would be very busy but on the off chance he fancies working solo with social distancing being observed I'd appreciate you giving him a shout1 point
-
I posted a couple of weeks ago John remarked that the repair was quite noticeable The homeowner has sent me a photo today While you can still faintly see the repair I don’t think you would notice if you didn’t know it was there Especially once we have had a bit of rain
 1 point
 -
I'd say that will be a helluva problem. Personally: don't without a test. I would spray the first coats then roller, unless you are in boy with toy mode. Read the megathread though. The paints I have sprayed OK: Leyland Trade, Armstead (sp?), Valspar. Who's the ugly chap in the photo?1 point
-
Best using a Henley per tail so one live and one neutral as the stacked ones are crap and if they break then the bus bars become a very big welder... Think you will also have to earth your SWA but one of the sparks will be along shortly...1 point
-
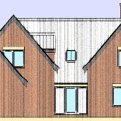
No, the ground and first floor plans are meant to be the same size - a simple box-shaped house with a two-way pitched roof (east/west). The porch would be on the south side of the house. If there's a discrepancy it's down to my poor drawing!1 point
-
Of course I’ve seen it ! Use to work in the games industry. Know some people who have dev units .... Stunning number crunching going on1 point
-
I cannot see a problem in using real stone at any thickness if you build it up and totally fill with mortar to the ICF. don,t see any need for cavity providing you don,t leave holes in it for water to gather in-then freeze and expand . just thick brick slips if you like I am seriously considering cropping my lovely grey creetown granite into 100mm thick bits(approx 300mm to start with) and doing just that so it looks like it is made rom granite If it will crop thinner .all the better I would have been tempted to use the thick bits as they are --but i couldn,t work with them at that weight1 point
-
How it should be!1 point
-
I was told it will be flush fronted.
 1 point
 -
it does look good! did you see that video showing off the new unreal engine on PS5? hang on....I'll dig it out.... watch in on Chrome in 4k (Safari only offers 1080p max). truly stunning! I skipped the PS4 as I preferred the Xbox One X but I think a PS5 might be on my list to Santa this year.1 point
-
Not the whole house but I’m having a stone front elevation. My choice at the moment is being led by material availability. I live in an area with loads of local quarries so ideally I would use a local stone. However I don’t like the look of it and it looks to old lady cottage, when we are looking for sharp new world. So I think I’m going slips, even though it is not the logical answer, so I think your choice is down to what the finished product needs to look like.1 point
-
I have invoice software that only runs on windows. that and makeMKV is what I use it for. hence just having a VM I can spin up when required. otherwise we're an Apple household with a few Google devices thrown in for fun.1 point
-
1 point
-
Nerve touched! ?1 point
-
Nah, Only need the VM when I need to use crappy windows software for editing.1 point
-
Think only one way to find out.1 point
-
Google found a video of someone spraying Zinsser 123 on railings but only limited info in the description, none in the video. Elsewhere they say clean the sprayer with meths but some reports say it's difficult to clean up?1 point
-
thanks, as I said having fitted a few kitchens you get to know what looks good. guilty as charged ? that’s why “planning, planning, planning” pays off.1 point
-
Zinsser 123 Primer Sealer then Zinsser Perma-White Interior Mould Resistant Paint. No idea if you can spray it. If not use it anyway on a roller. We had bunch of issues with other paint on the ceiling above our shower. Then someone here recommend Zinsser and it's been fine since. The ceiling actually drips with water sometimes.1 point
-
Hi @joe90 - the boss has said that this is what she wants. I will order another side panel and replace the existing one, better than looking at it and thinking what if.... Thanks to all of you for your suggestions.1 point
-
ha, you’re just like me, my motto is “why buy it if you can make it “ !!!!. During my build I have had to learn life is not long enough to do everything. On my build I have done what I am good at / enjoy and contract out what I am not so good at / don’t enjoy.1 point
-
Our lawn structure was compacted type 1, weed membrane, 40mm compacted granite dust, grass. The weeds still grow though, most likely self-seeded above the membrane. I got loads of samples and it was clear you got what you paid for. We ended up using Easigrass - I think it was their Chelsea or Mayfair range. A good product but I couldn't recommend the installers (Easigrass use a network of franchised local fitters). They fitted it well enough but there was one section where the 'pile' of the grass was longer. It appeared as a 40mm wide bump running the width of the grass. Despite repeated requests, they failed to remedy it (at one point saying they would have to go out and buy some new scissors!), so I did it myself. Looks fine now. Overall it was very expensive at about £24/sqm + fitting. What you can see cost us £8k, but we had a lot of offcuts. Sufficient to do our daughter's small lawn!1 point
-
IMG_5973.MOV1 point
-
+1. It is what I do and it looks really smart and looks right!1 point
-
If you want a sensible basement quote, talk to local (ish) groundworkers who build underground structures all day long. Not much difference in an underground carpark and a basement other than the finish. They will manage heavy plant, excavation, muck away and reinstatement - likely they will sub out the concrete works and build whatever spec your SE has designed. They will also do all your services work, laying fouls, rainwater, fresh water, ducting for power and plant, site access, etc. A general builder will likely not have underground experience beyond standard foundations, which they may well still sub out to a groundworker. A basement company will certainly inflate the price, most of these firms specialise in basements under existing dwellings which is a different thing altogether. If you have a clear site with decent access, a sound understanding of the underlying ground conditions and a sensible design from a SE then you should be able to approach most GWs for a quote. Make sure BC are happy with design inc. access and emergency exit / fire protection. If you don't have a separate exit from the internal stairs then you will need fire suppression such as sprinklers. Expect prices to increase /sqm if the basement is small, access is difficult, neighbouring properties are close and you have challenging ground conditions such as weak ground, high water table or radon gas etc. When you have the finished basement shell with house on top, you fit it out with the rest of the house. I found very little of the 'domestic' building services (builders, architects etc) confident to deal with basements. However once I tapped into local GWs then I had lots of options. Tip - if there are any large public works going on near you, see who the GW contractor is. But before you do ANYTHING - get a decent ground survey designed by a SE as that will drive all costs as you move forward. Maybe you spend the money and decide you can't afford to proceed but that's better than starting the job and finding nasty surprises that mean you can't afford to finish it.1 point
-
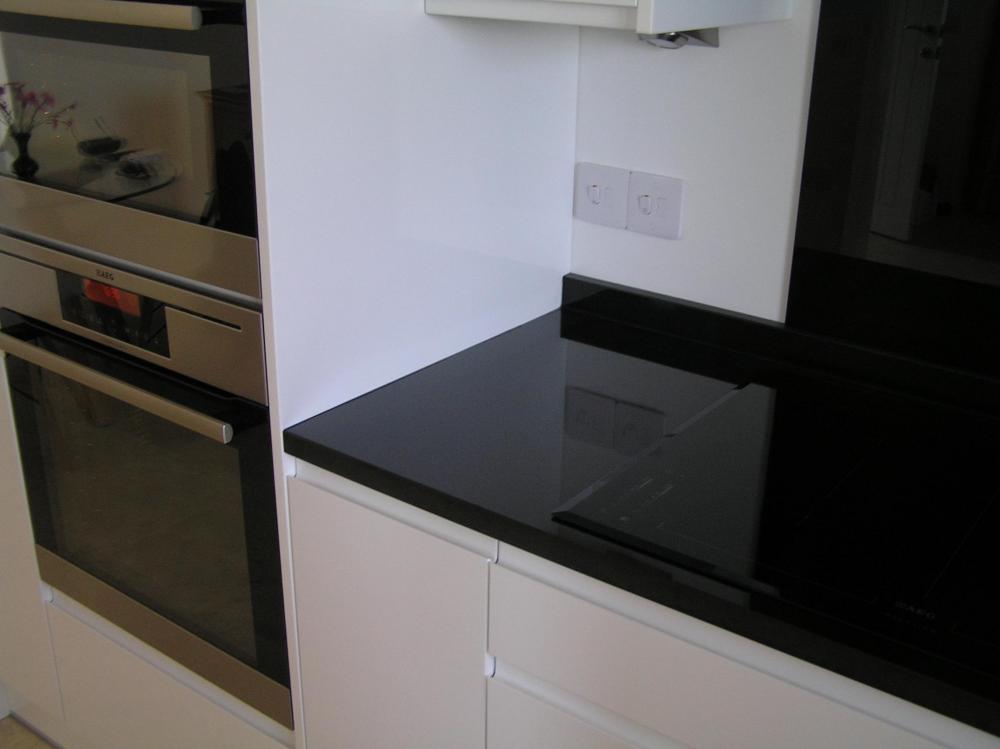
I've not had much success with edging tape. For ease, I think I'd get a length of aluminium end cap, cut to suit and glue and/or screw fix it on. You'll be binning most of the end cap, but it will protect the edge and take a bit of wear and tear. It is the utility room ?1 point
-
@Nick1c interesting, thanks. How much more do I have to learn before this project is complete? Sadly I’m a bit like Homer Simpson, every time I learn something new my brain has to dump something to make room for it.1 point
-
PS Those steps in B-B and C-C are to stop water being blown in. PPS If you arrange for the top of the slab to be 100mm above ground level you may need small ramp at main entrance.1 point
-
I’d cut a small chamfer on it to 30 degrees so it’s not as sharp, get some dark wood laminate filler and butter the edges to fill the gaps in the chipboard and then epoxy on a piece of trim edge and let it go off. Then trim with a very sharp Stanley blade. The filler behind it hides the light colour of the chipboard and you won’t notice it.1 point
-
Could you stick on a bit of stainless steel? Maybe fill sand and paint the end?1 point
-
The key thing with ground like that is get the foundations in now, while the ground is dry. If the water table then comes up in winter it won't matter. This garage foundations is basic stuff for a builder. Perhaps mention when talking to contractors about the garage that you will be building the cabin and eventually a house so you hope to find a reliable builder that you can work with and they might be more willing to be agreeable. Post any quotes you get here before you accept them.1 point
-
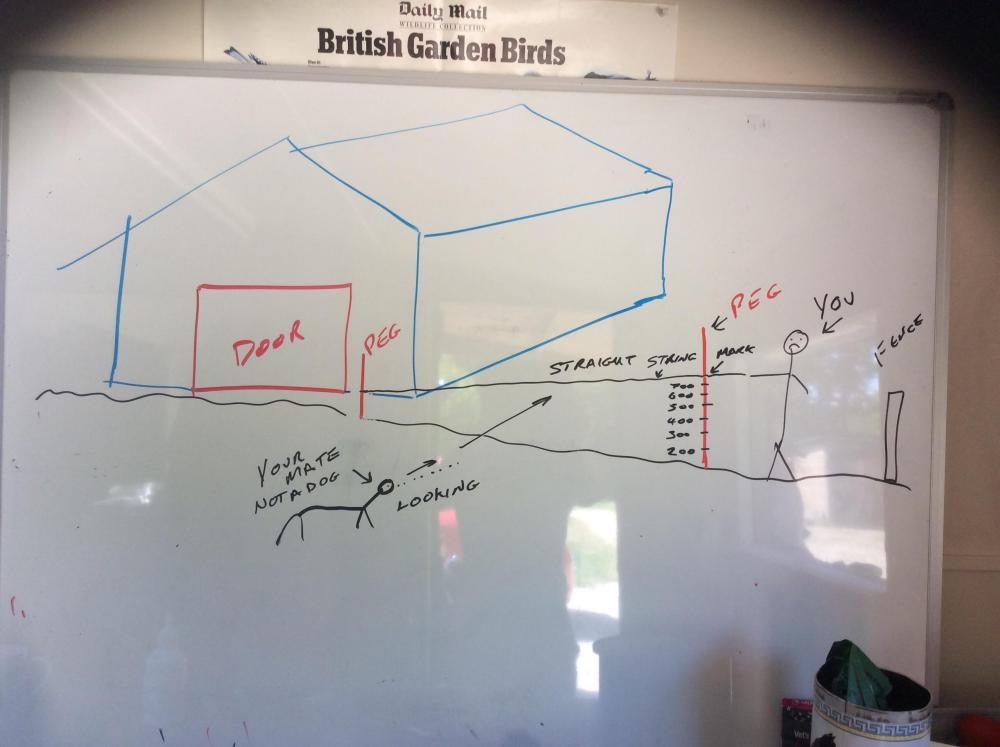
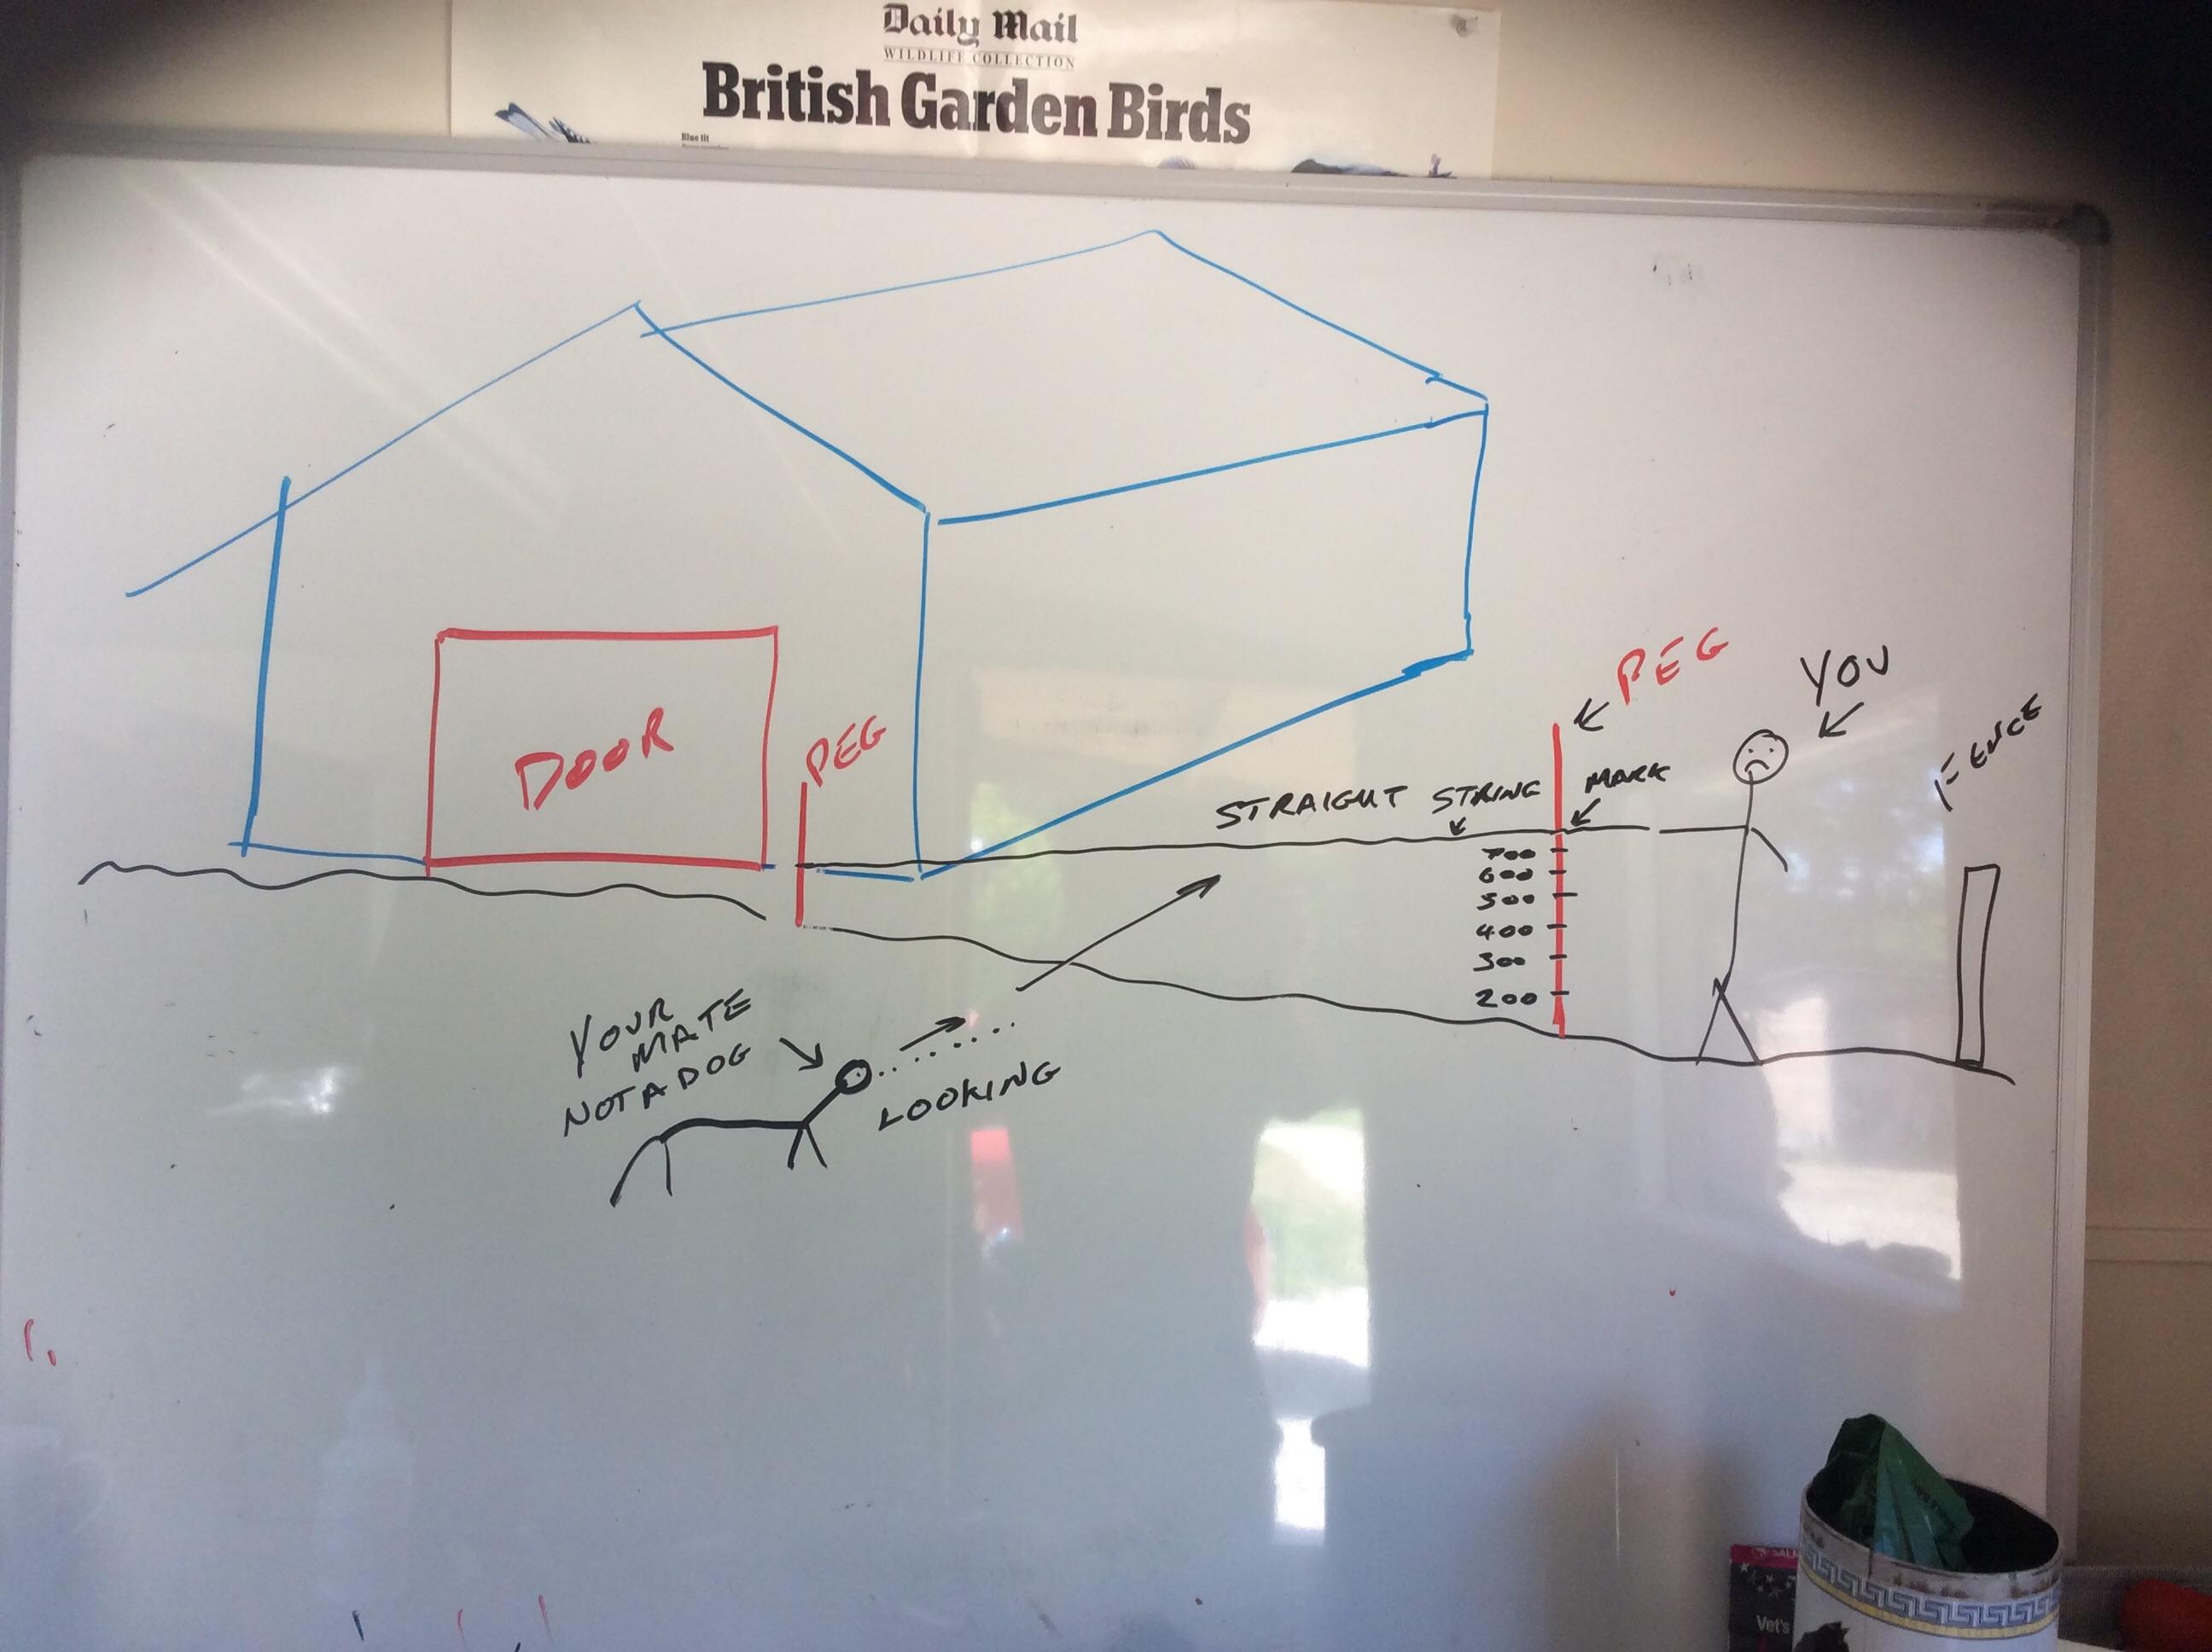
Ok, you need to do some homework the reason is you need to sound like you know what your talking about, otherwise you will come across as a numpty and somebody will take you to the cleaners. Do this. Work out which way around you want the building look at the large door location and work out roughly where this will sit on the site bang 2 pegs in the ground to mark door bang 4 other pegs in the ground to mark 4 corners of building. Rough not accurate look at the height of the pegs at the door, draw a line on these at your ideal finished floor height. FFH. Tigh a bit of string to these pegs on the mark and walk to the lowest corner, lift string until it looks level ish, get somebody to look at string while you hold it up. Ok now you will have an idea how much fall you have from ffl at the door to the lowest bit, measure this and do a sketch, look at mine and fill in the blanks. Come back on here and tell us then we can come up with a cunning plan.
 1 point
 -
I fitted Airflow Icon fans with delayed start timers, so they do not come on if you only have the light on for a short visit. They do a mixed flow one which will easily cope with a long duct run. You can duct through the ceiling or surface and box in if the joists run the wrong way.1 point
-
Exactly what I did, but IIRC the inline fan I fitted had the timer option1 point
-
connected with a timer to light switch so it runs even after you have vacated -proper toilet exact fans have them built in, so you just hook up to light switch1 point
-
You can get inline fans, then duct under the floor to an an external wall (if you have floor boards). So the extraction vent is low in the toilet and would go out to an air brick.1 point
-
Saw this on FB and thought of you @Ferdinand
 1 point
 -
I really like these - could soon diy one with some 50mm pipe https://www.supragarden.com1 point
-
Don’t forget if you’re having a row of boxes, or boxes above and below each other then you need a decent spacing. 35mm is good - happens to be the depth of a back box too so spacing is simple ... Just make sure the noggins and socket locations have enough space for them1 point
-
Just a note, my plasterer wanted the front edge of the metal back box nearly level with the finished plaster otherwise he said the plaster could crack around the hole when fixing the front plate.1 point
-
height between 450mm above floor to the bottom of the box & 1200mm to the top of the upper box. I don't put them any closer than 150mm from corners. Decent size noggins so you have some wiggle room; screw inplace. 47mm back boxes - easy wiring guaranteed. Leave the box out slightly from the timber frame etc so when boarded it sits back slightly from the boards. They take some time to do for a whole house......1 point
-
"Crossovers" should be done in the ample joust space and then the services dropped in order so they don't have to cross again . Not so important with cables but deffo with pipes. You shoukdbt actually have that many pipes in the same single service void so a bit of planning goes a long way ?1 point
-
There'll be a little test button on the RCD that'll say "Test Monthly" etc. You press it and it should trip every circuit upstream of the RCD. Just because it trips by pressing the button doesn't mean it's safe but it's a reasonable indicator. As the trip is an electro mechanical assembly (coil imbalance picked up by a search coil triggers a solenoid type deal) pressing the button ensures the mechanism is less likely to gum up over time from being static. Of course you will have to go round resetting all your clocks etc! Different from an RCD tester which is a special bit of kit that basically tests how fast the RCD works. Nice explanation and little diagram picked at random: https://www.electricalengineeringtoolbox.com/2016/01/how-residual-current-device-rcd-works.html?m=11 point
-
F me . I’m sick of those spinny dots just a moment a bit longer hang on just a moment ffs “Hello I’m Cortana “ You can guess my response ! I only gave it 1 ‘cpu’ might be the issue Jesus Cortana- first thing I’m going to do is turn you off ! Oh hang on “ just a moment “ Give me my Mac back !0 points
-
I went to the factory to see ours being made. Talking to the lads, the key thing they pointed to was the quality of the timber : before use, they dropped each piece into a former - a sort of guage - and if it didn't fit, then it was rejected. Without the jig for both the timber and the assembly, I would hesitate even if I were as Just-Bloody-Do-It as you are John.0 points
-
V nice @RandAbuild interesting also as I'm Adam and my wife is Rhiannon so could also use that id ? To help stop weeds we did a layer of membrane below sand and a layer above so hope may stop at least a few of them, apparently this also prevents sand migrating through the grass drainage holes. Leaning towards the widest brush thing with a collection bucket at the moment, especially if battery or petrol powered.0 points
-
We used to have a peacock. We lived in the old manor house, and someone turned up with one and said "we found this in our back garden - is it yours?". Dad (fool) said "yes" and spent the next years bringing it back when it kept flying away.0 points


This leaderboard is set to London/GMT+01:00