
Leaderboard


Popular Content
Showing content with the highest reputation on 05/14/20 in all areas
-
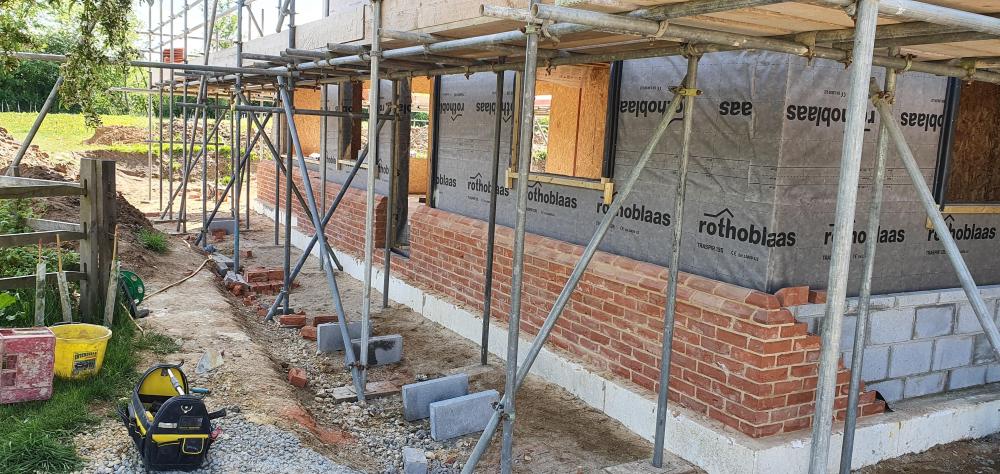
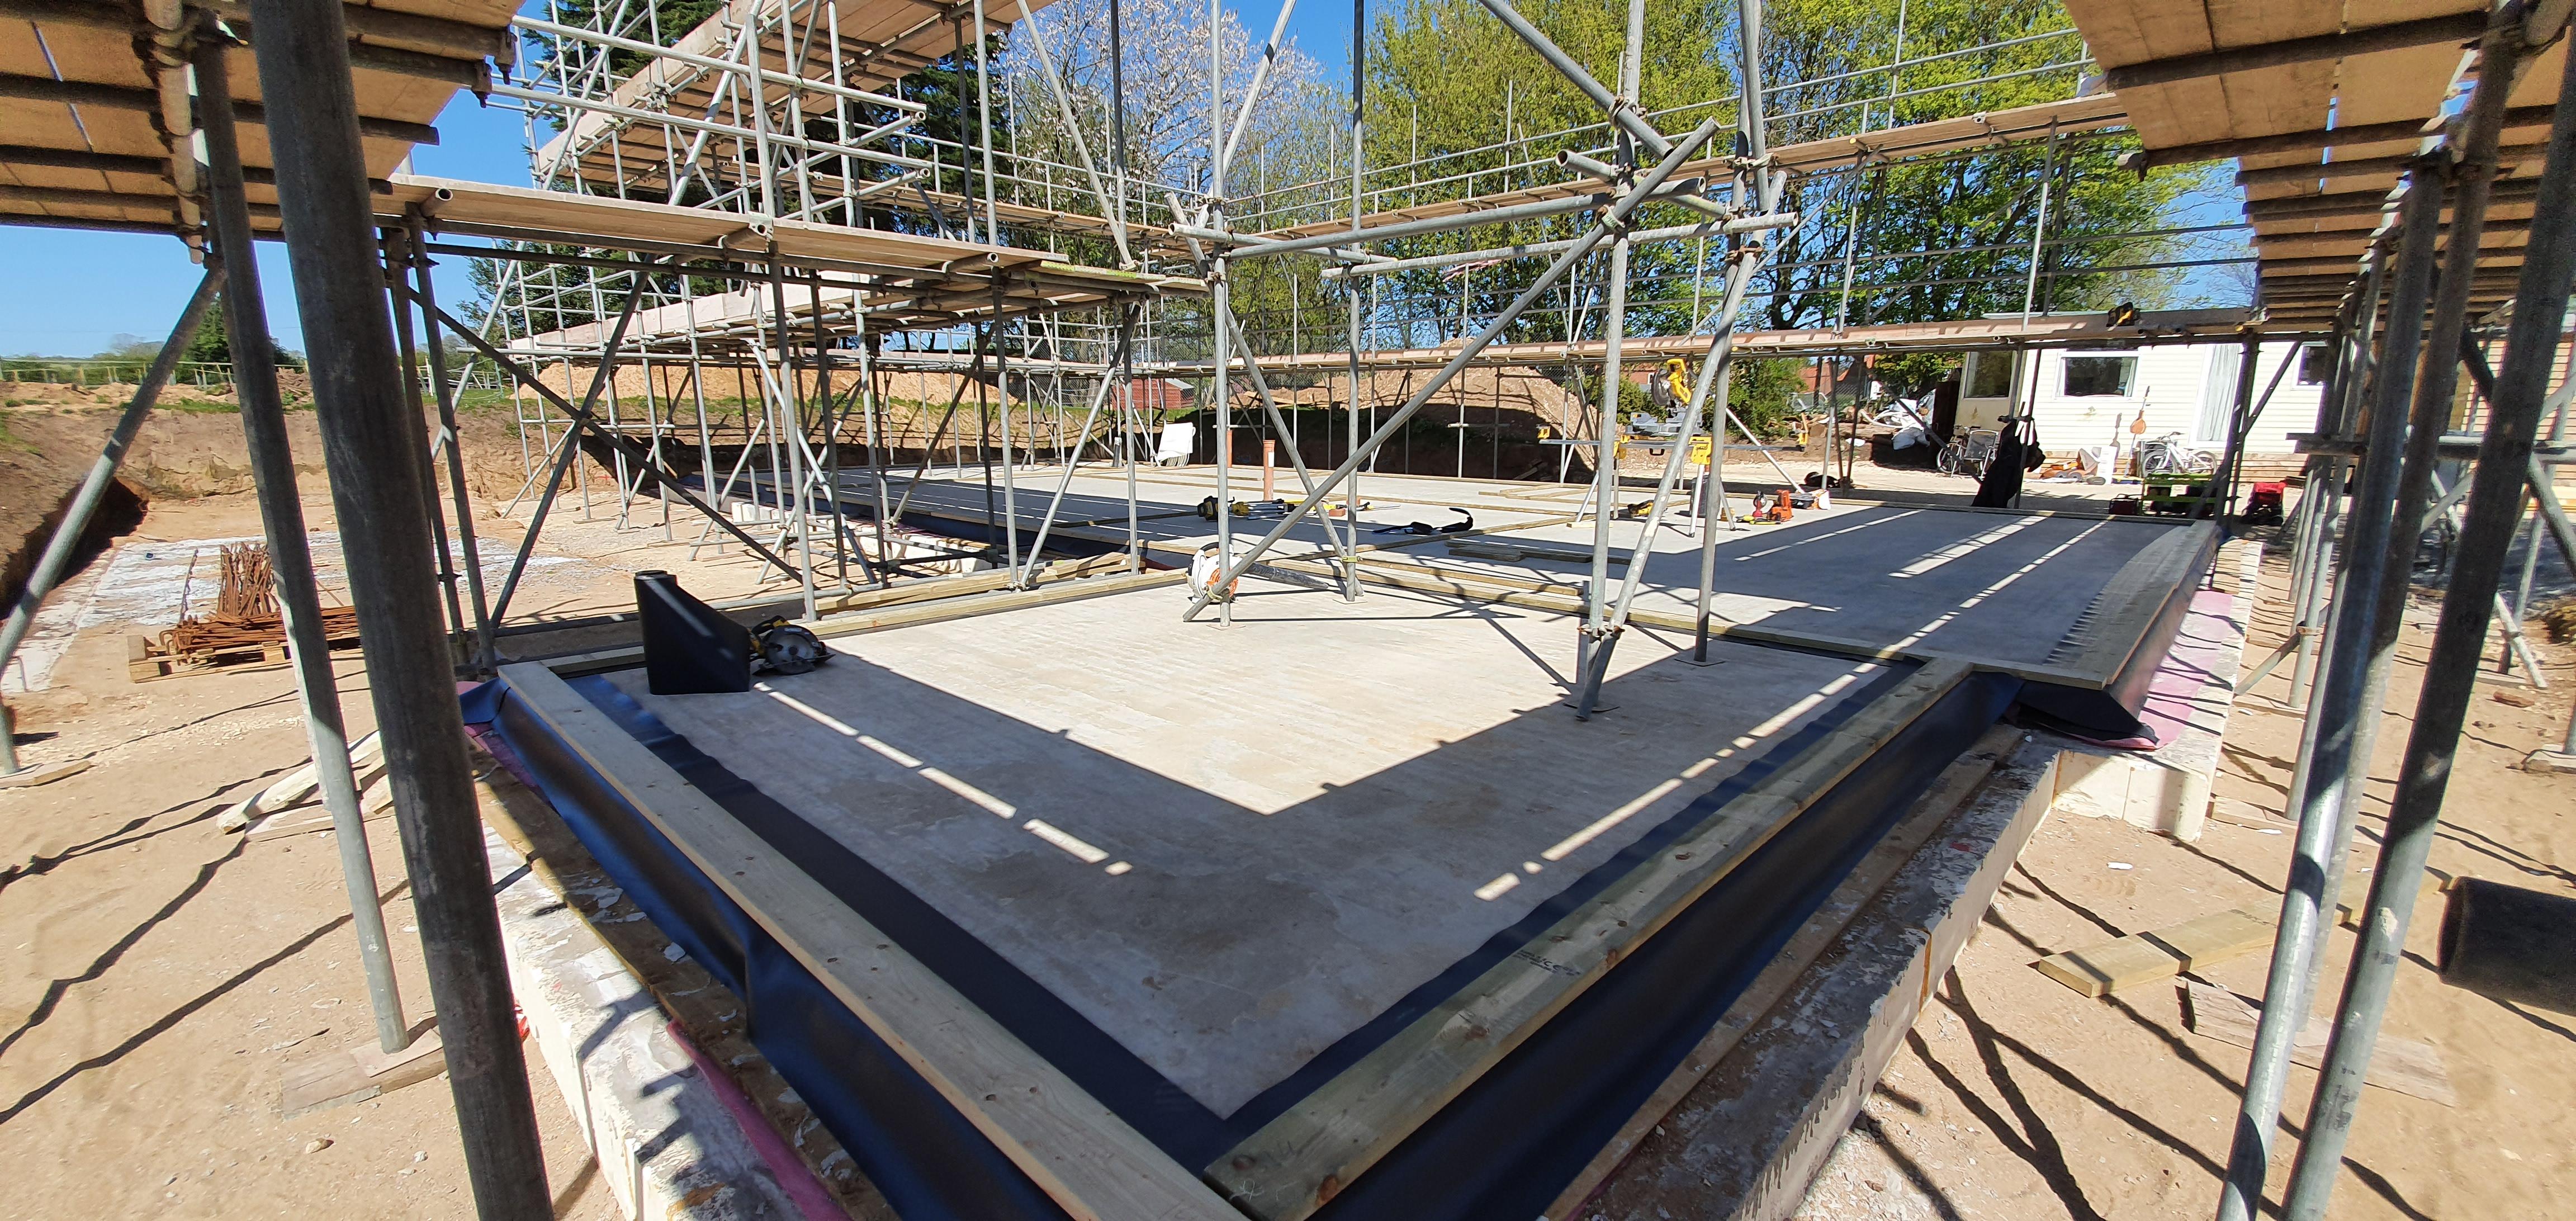
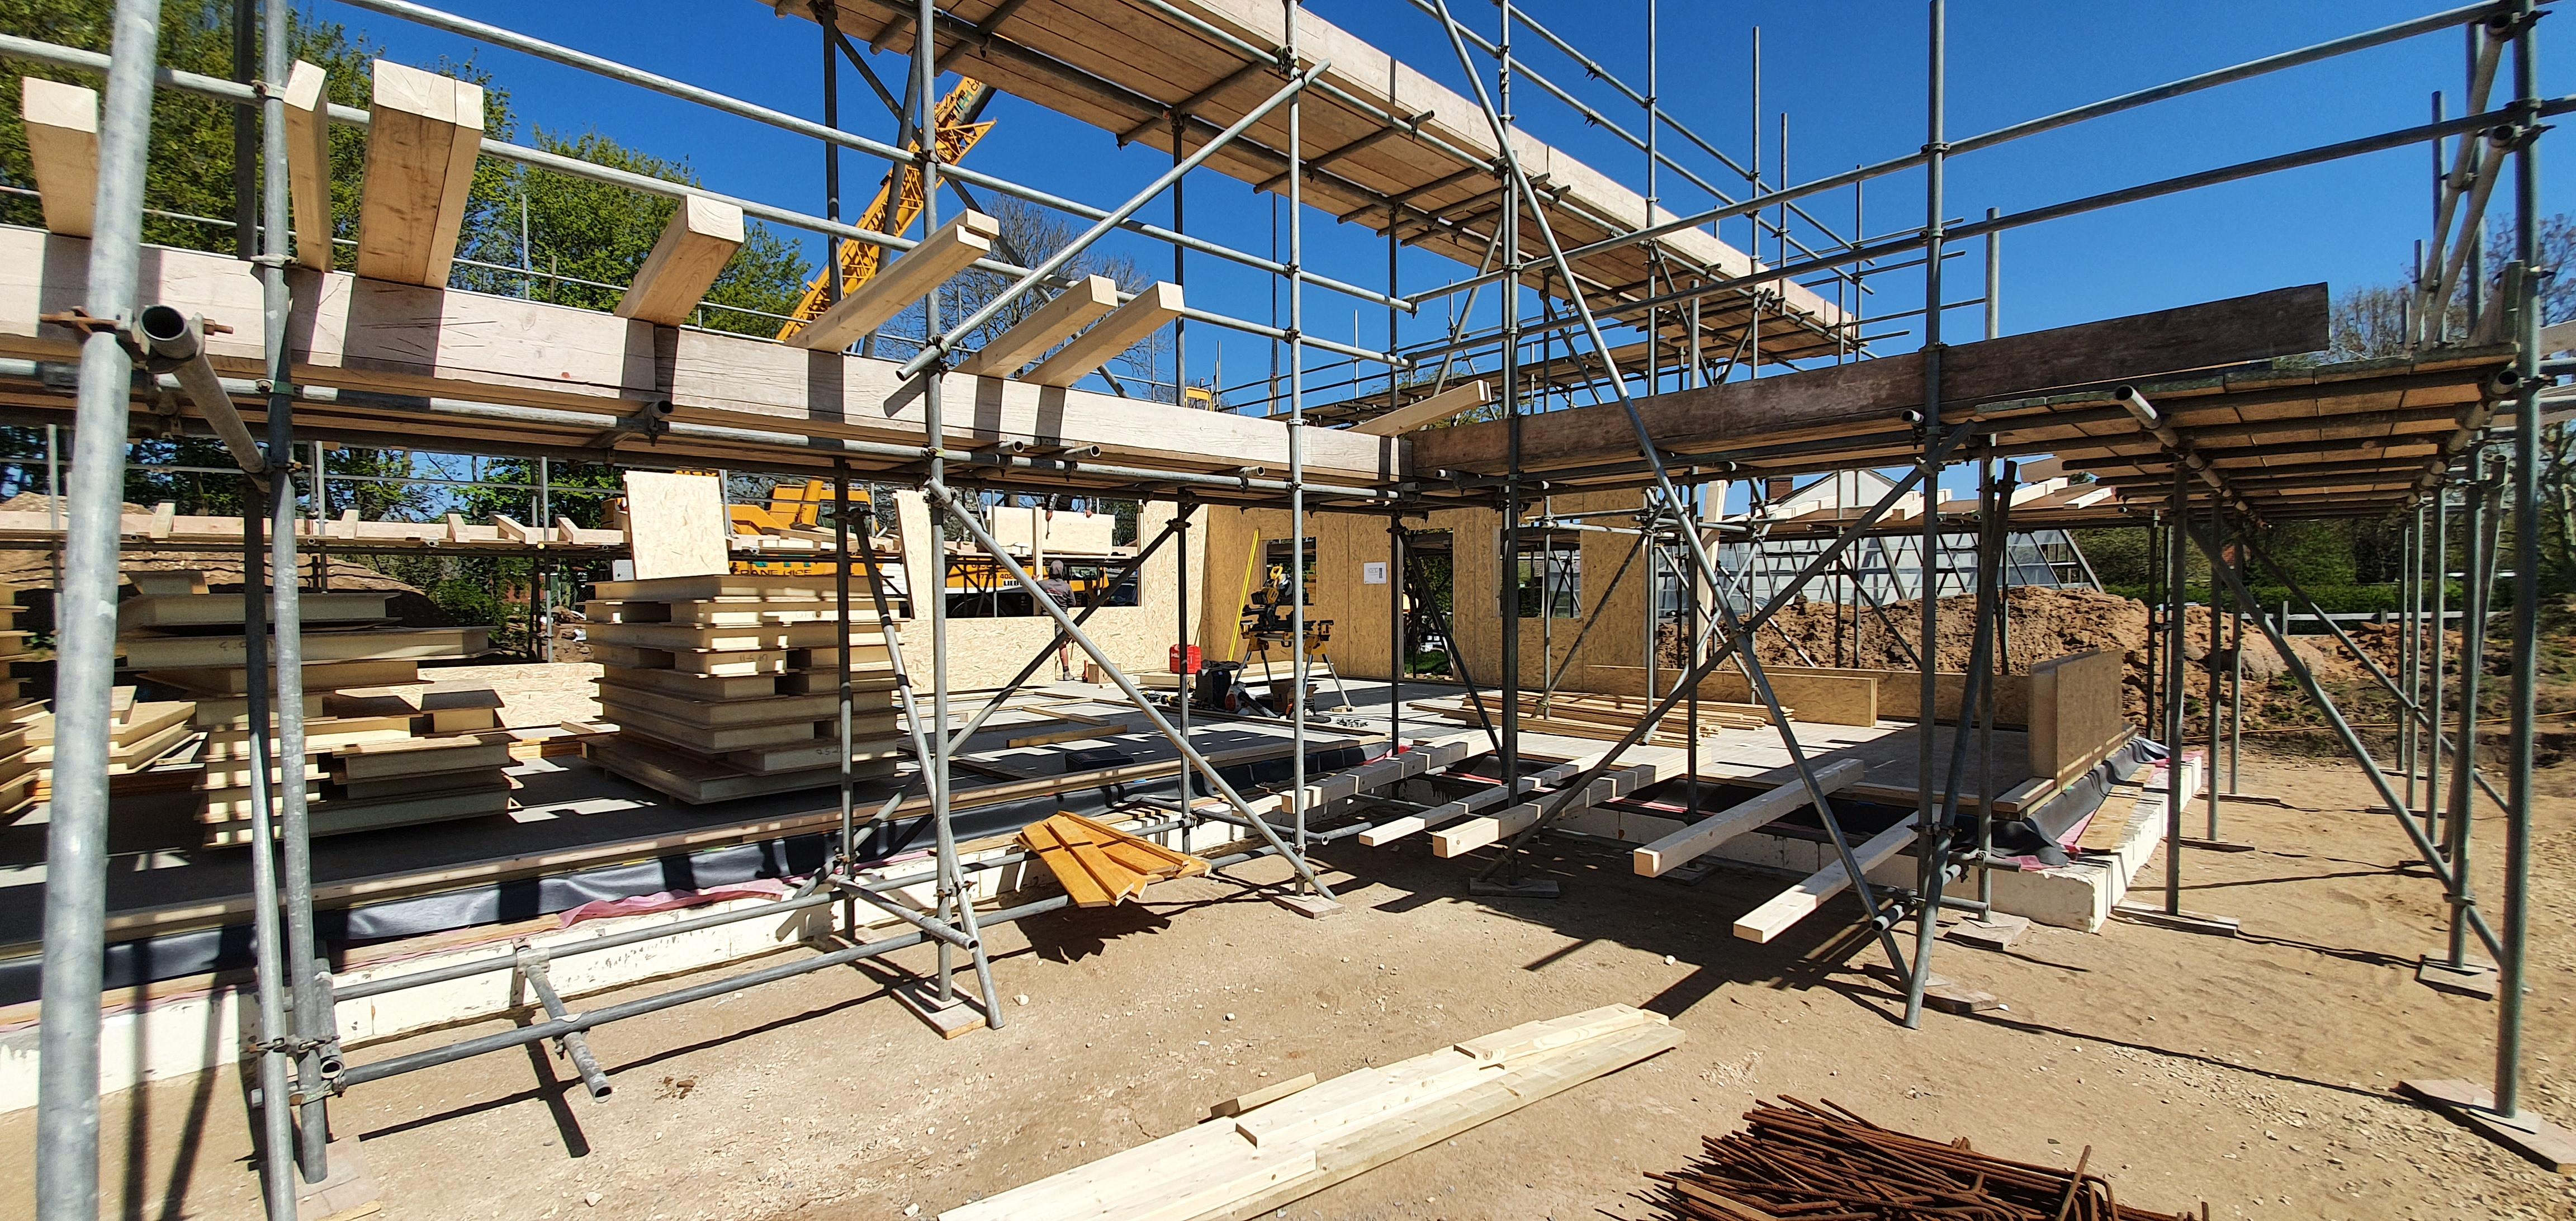
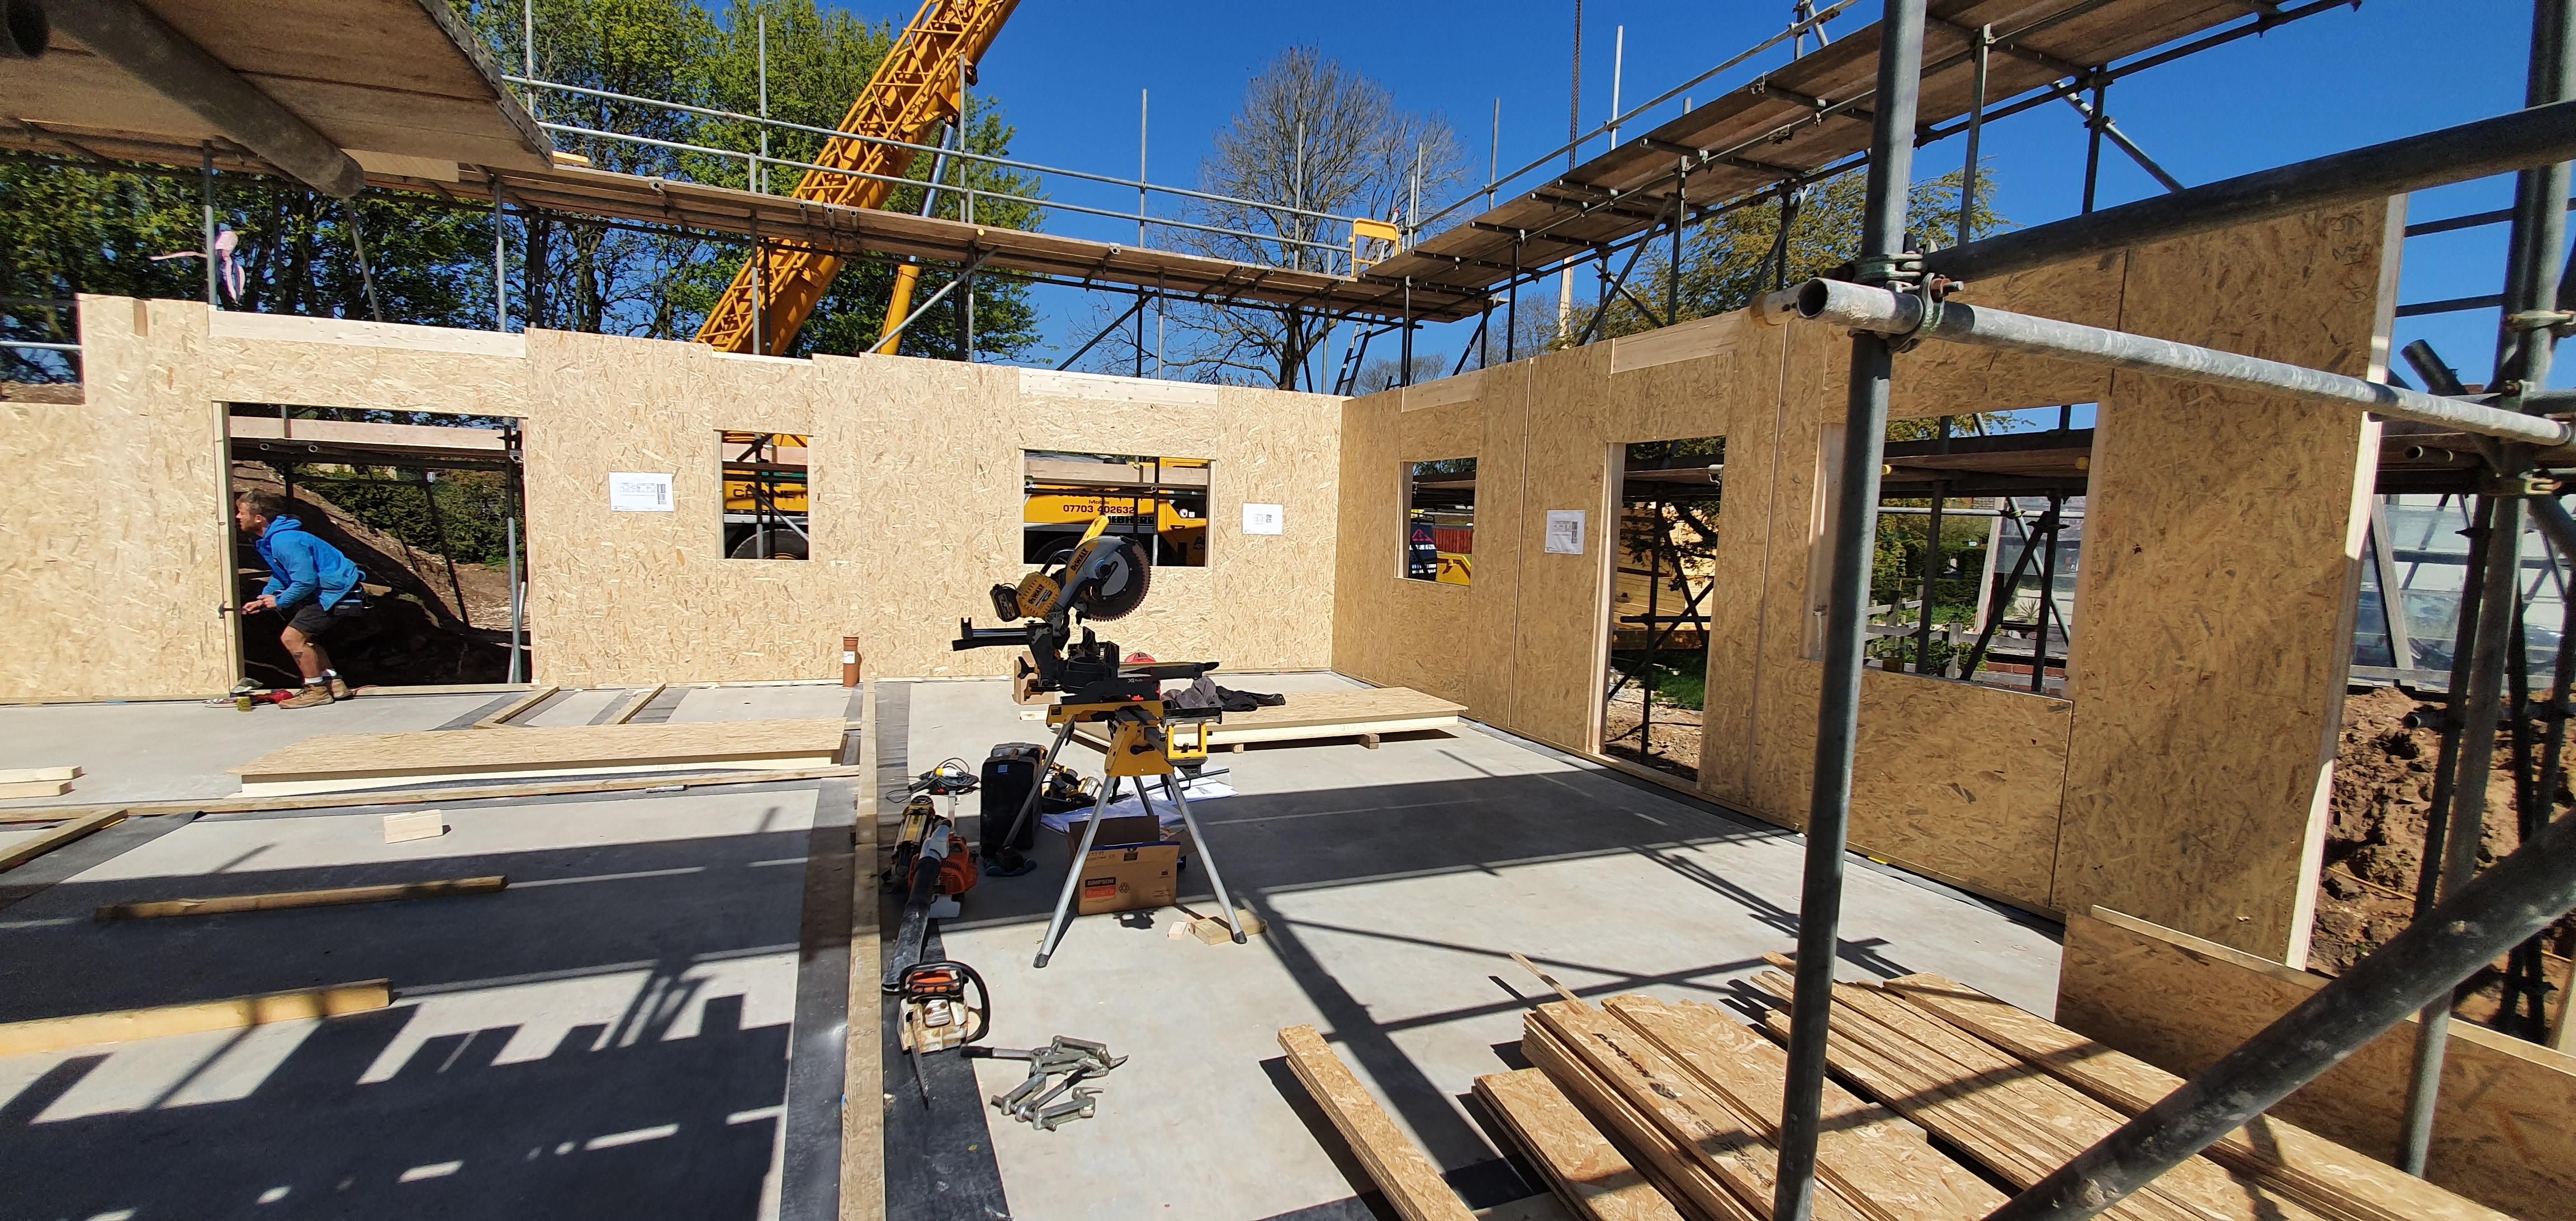
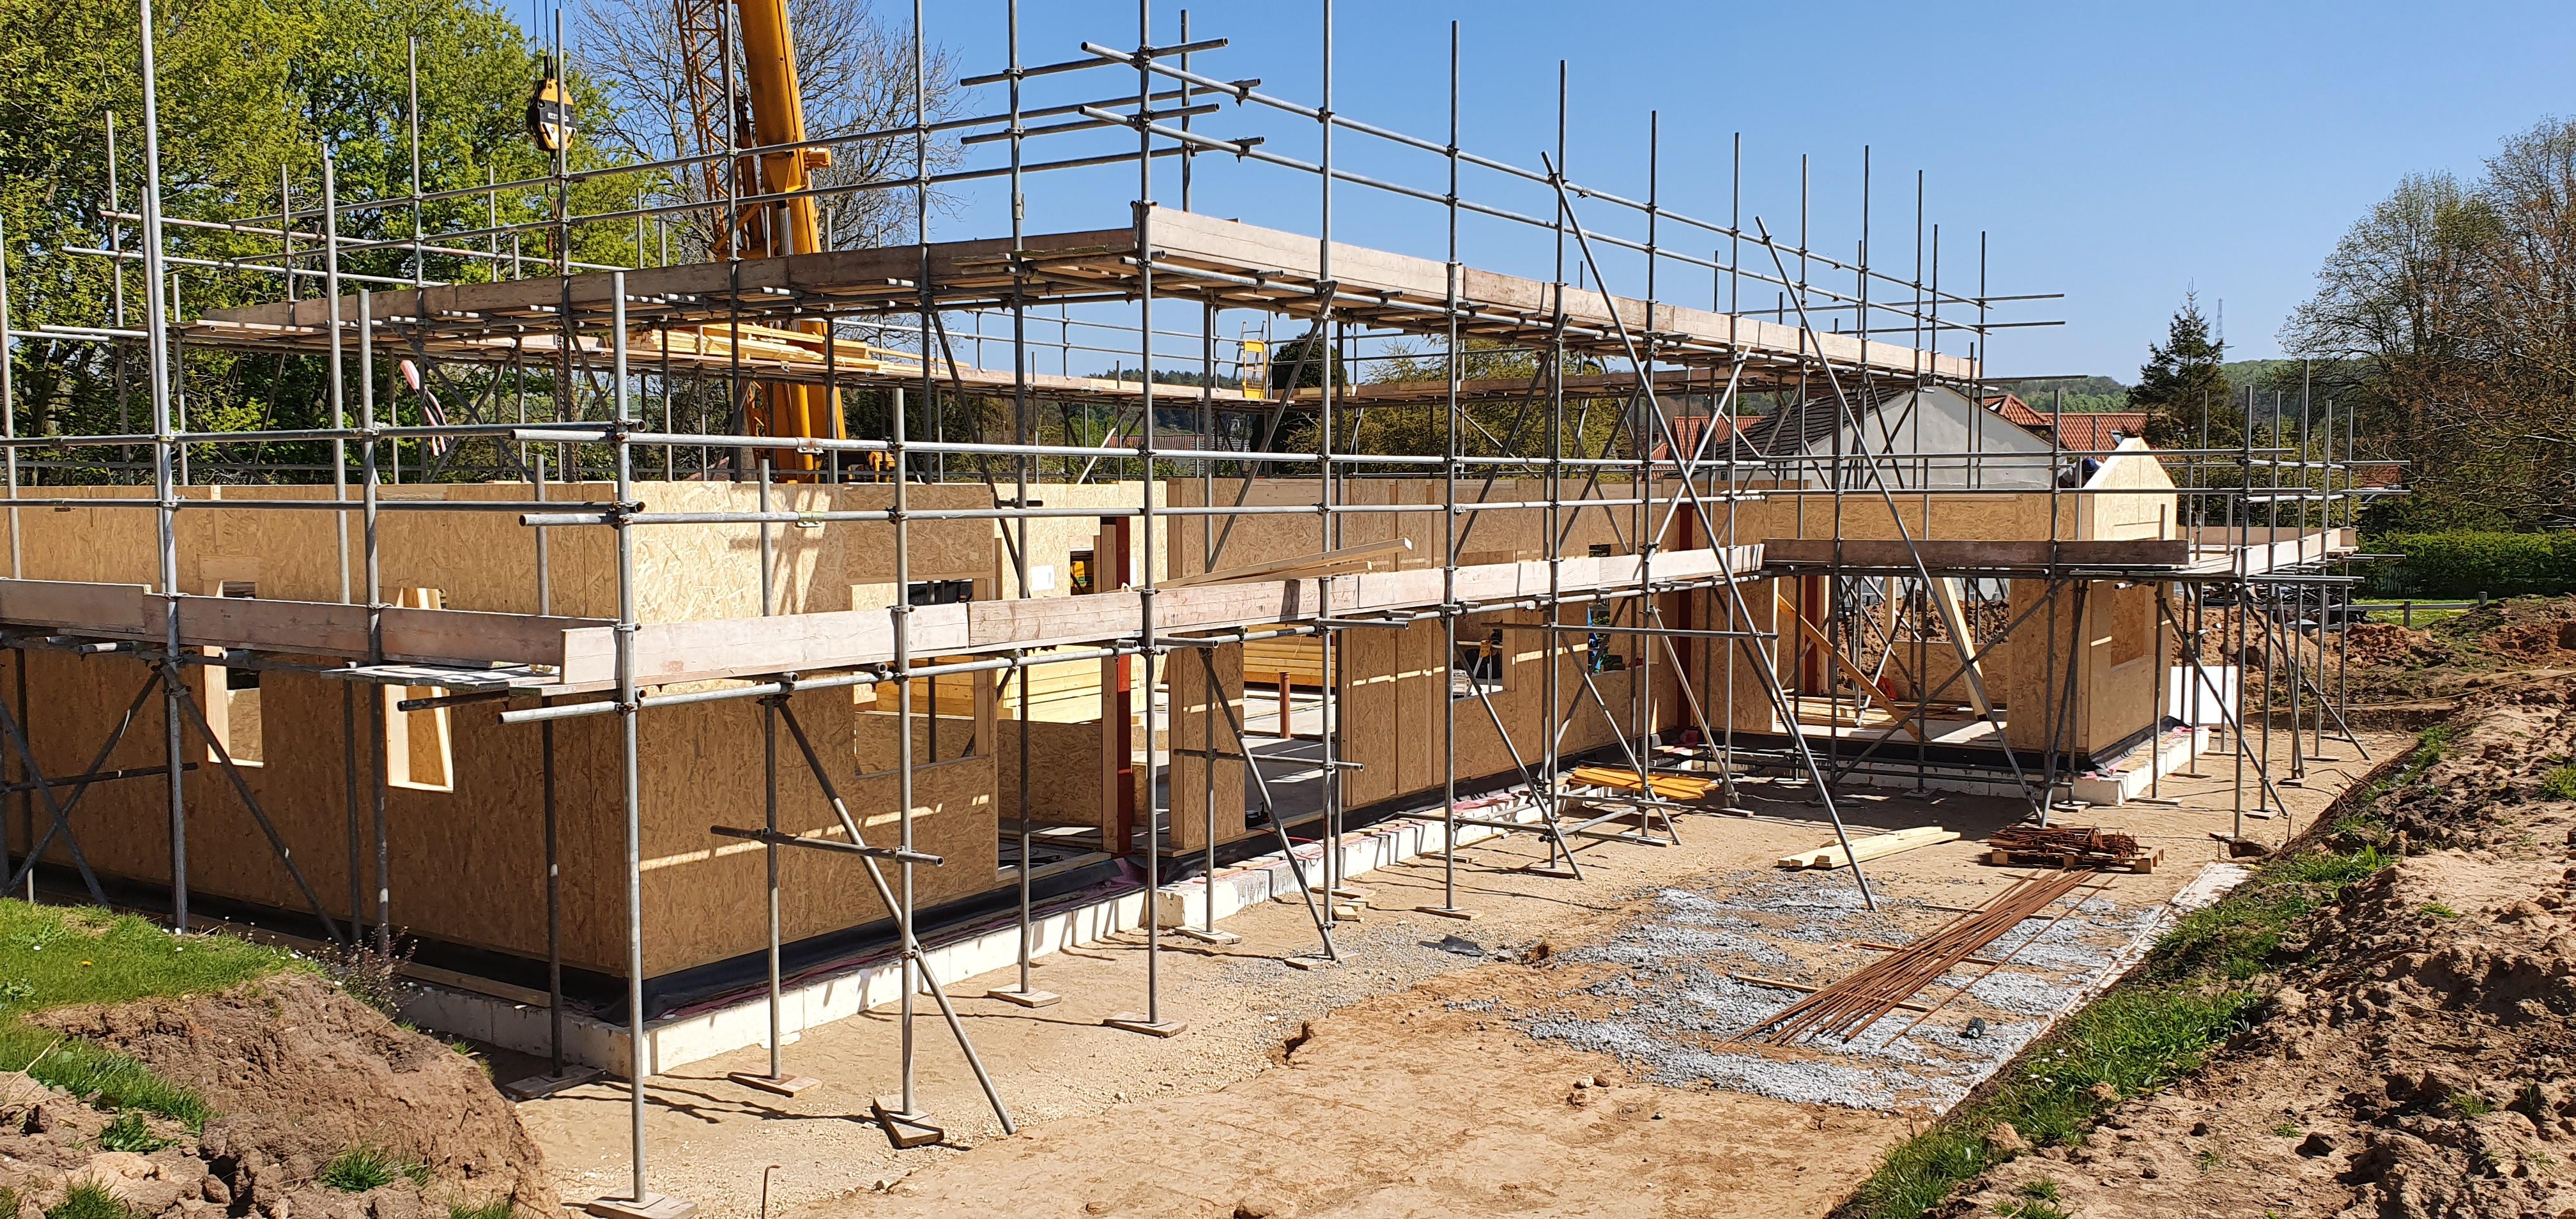
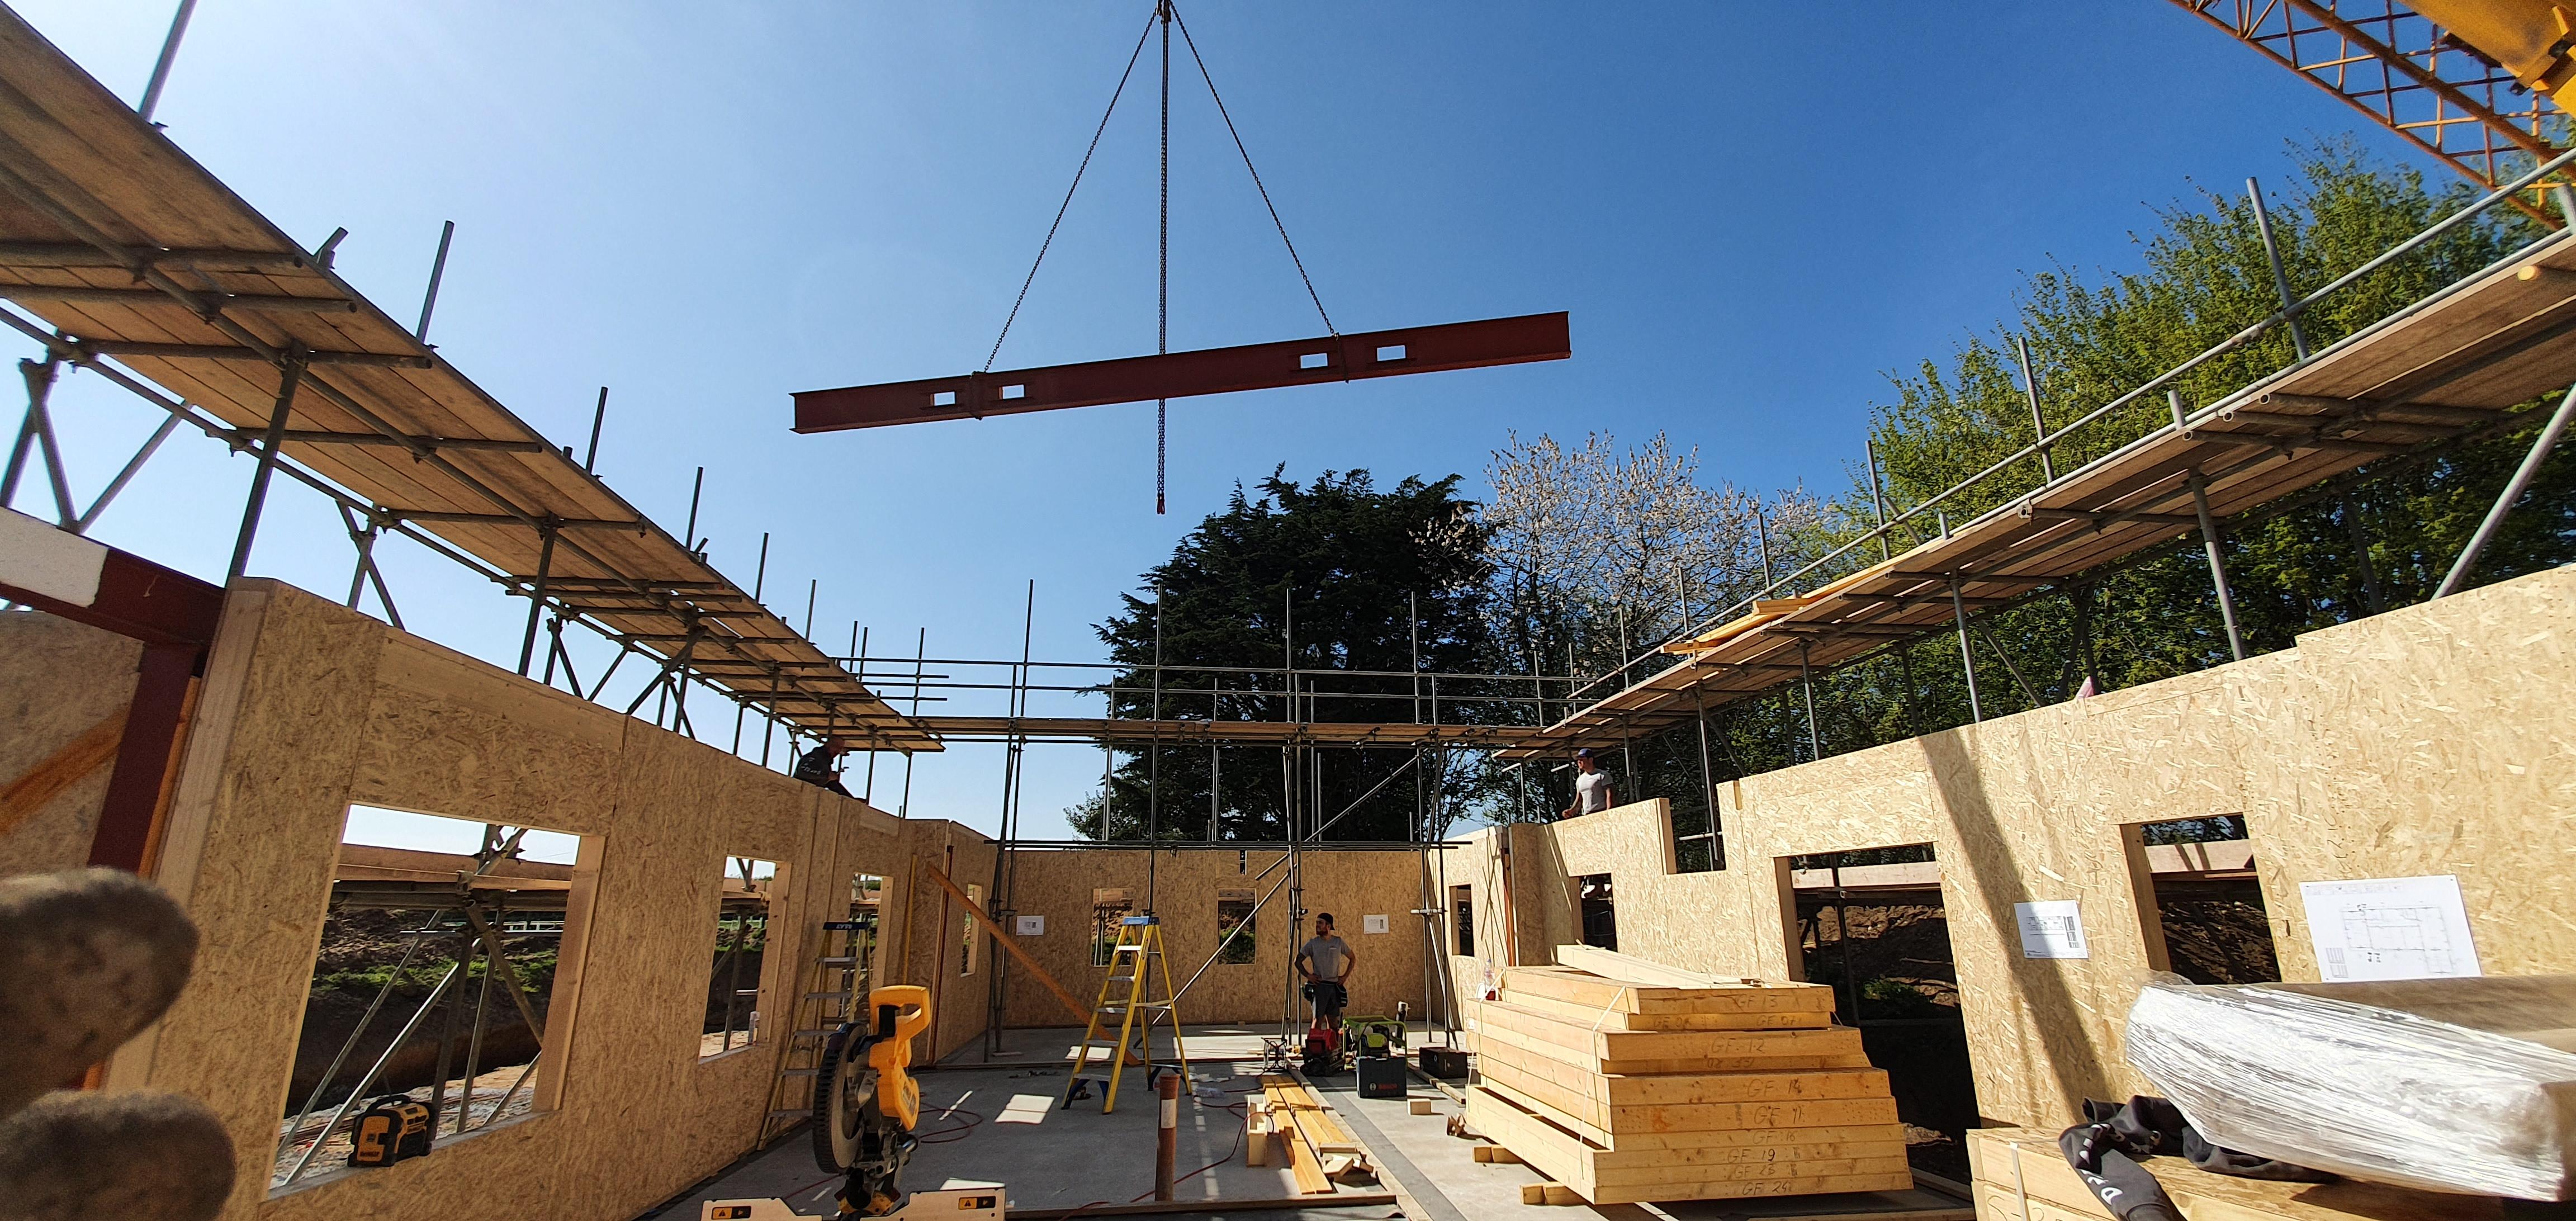
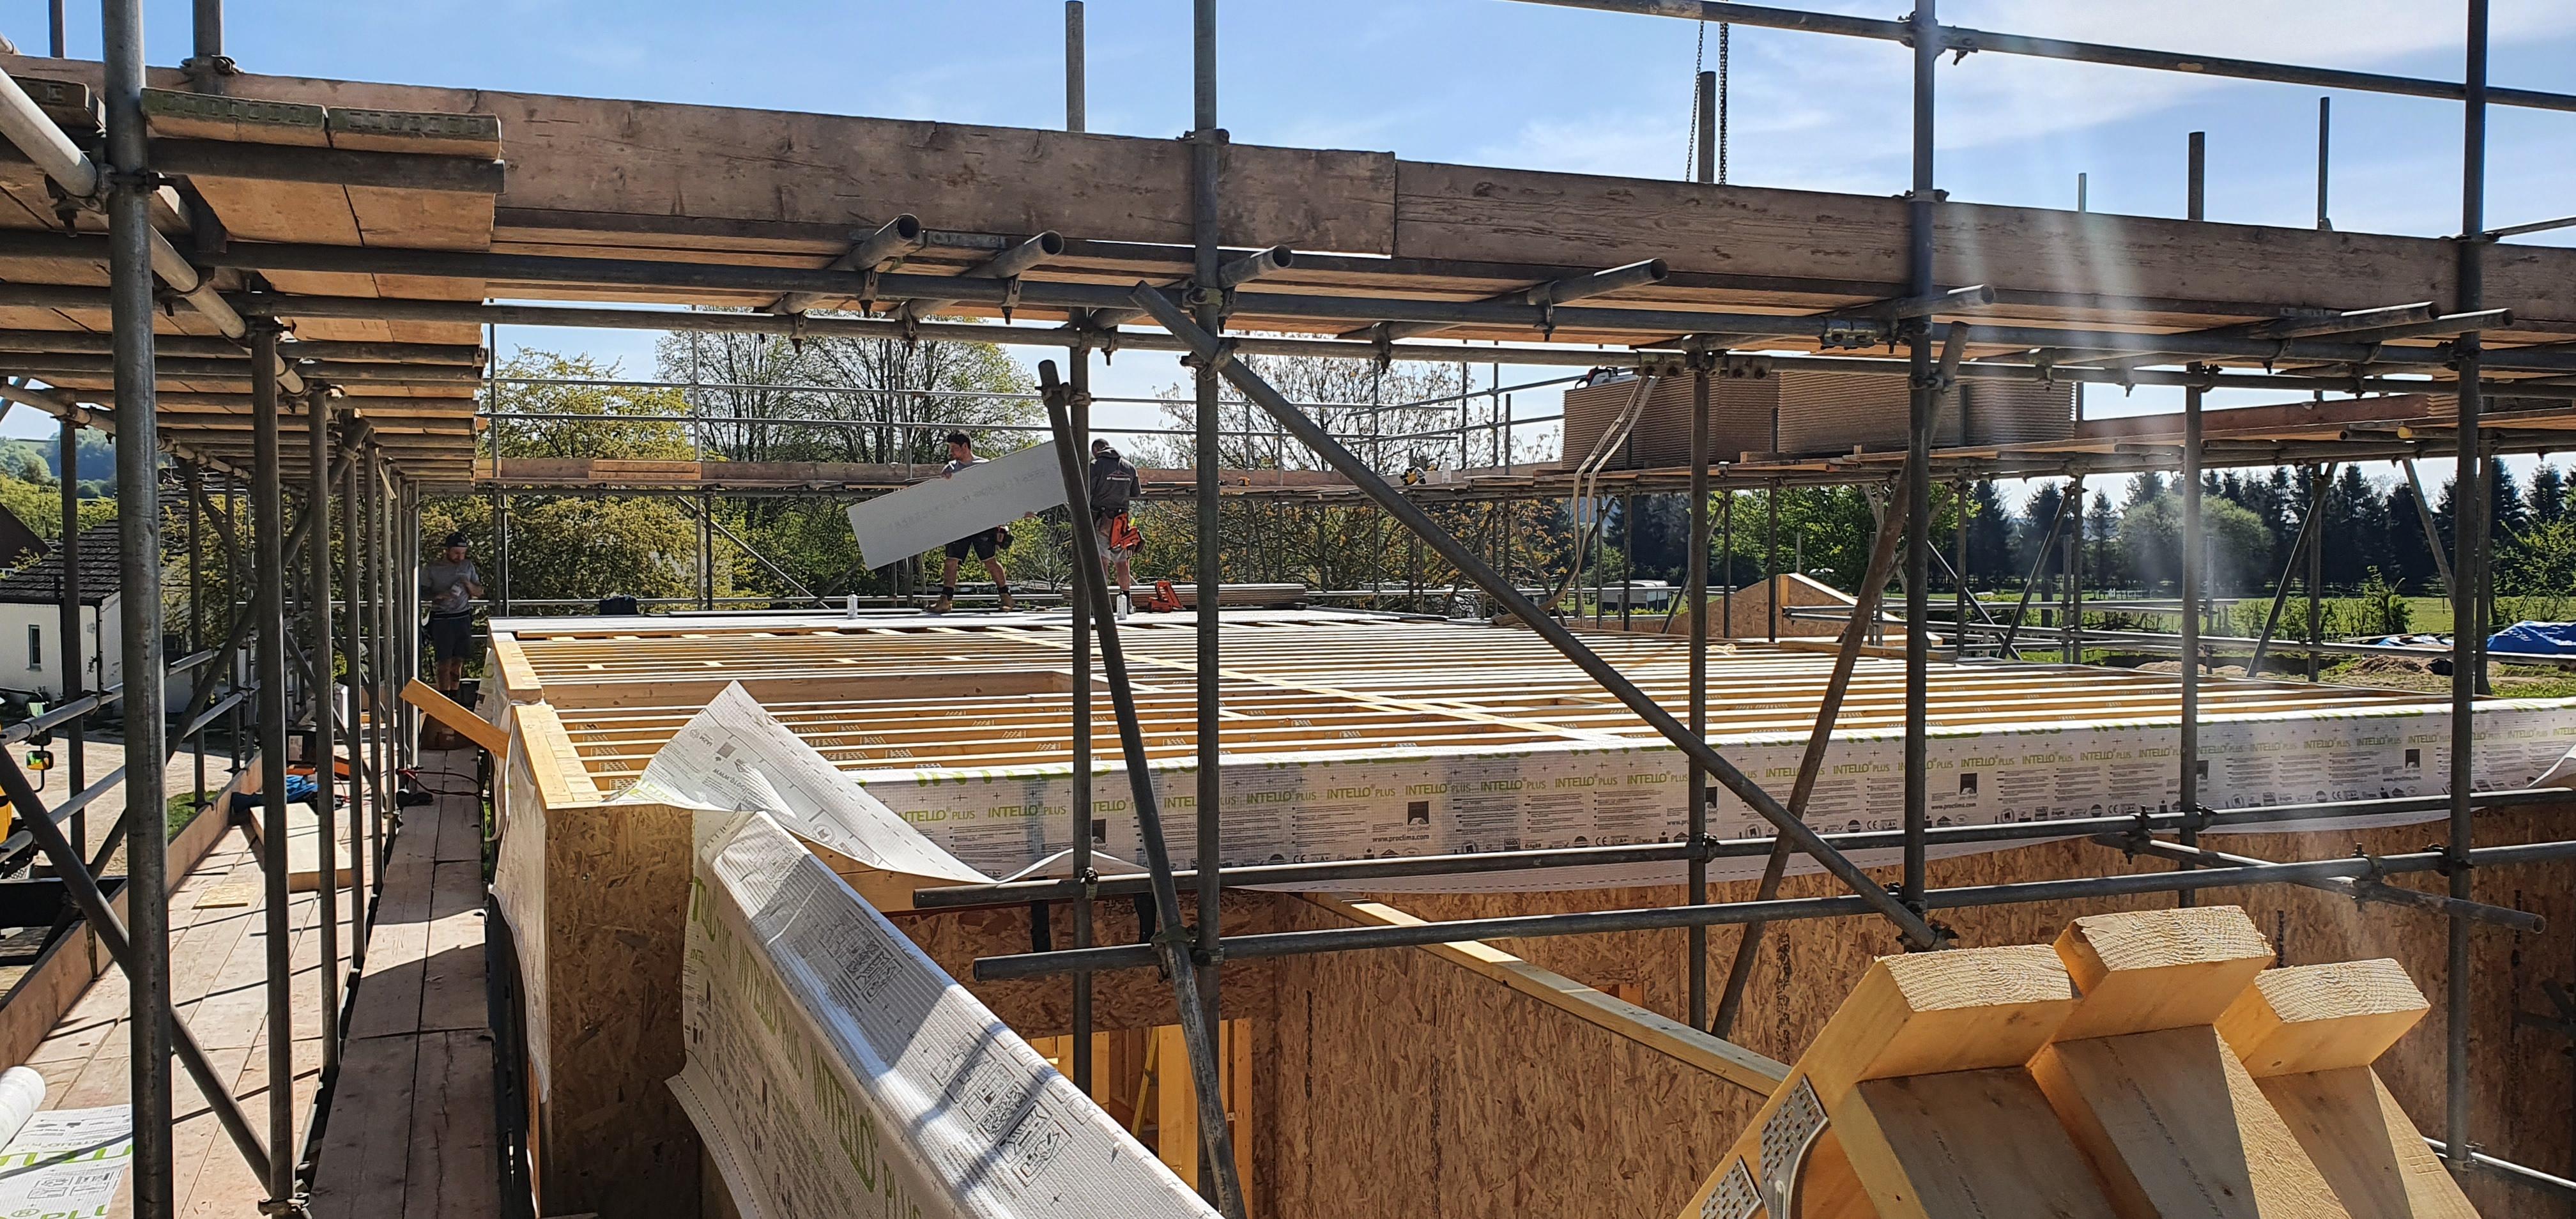
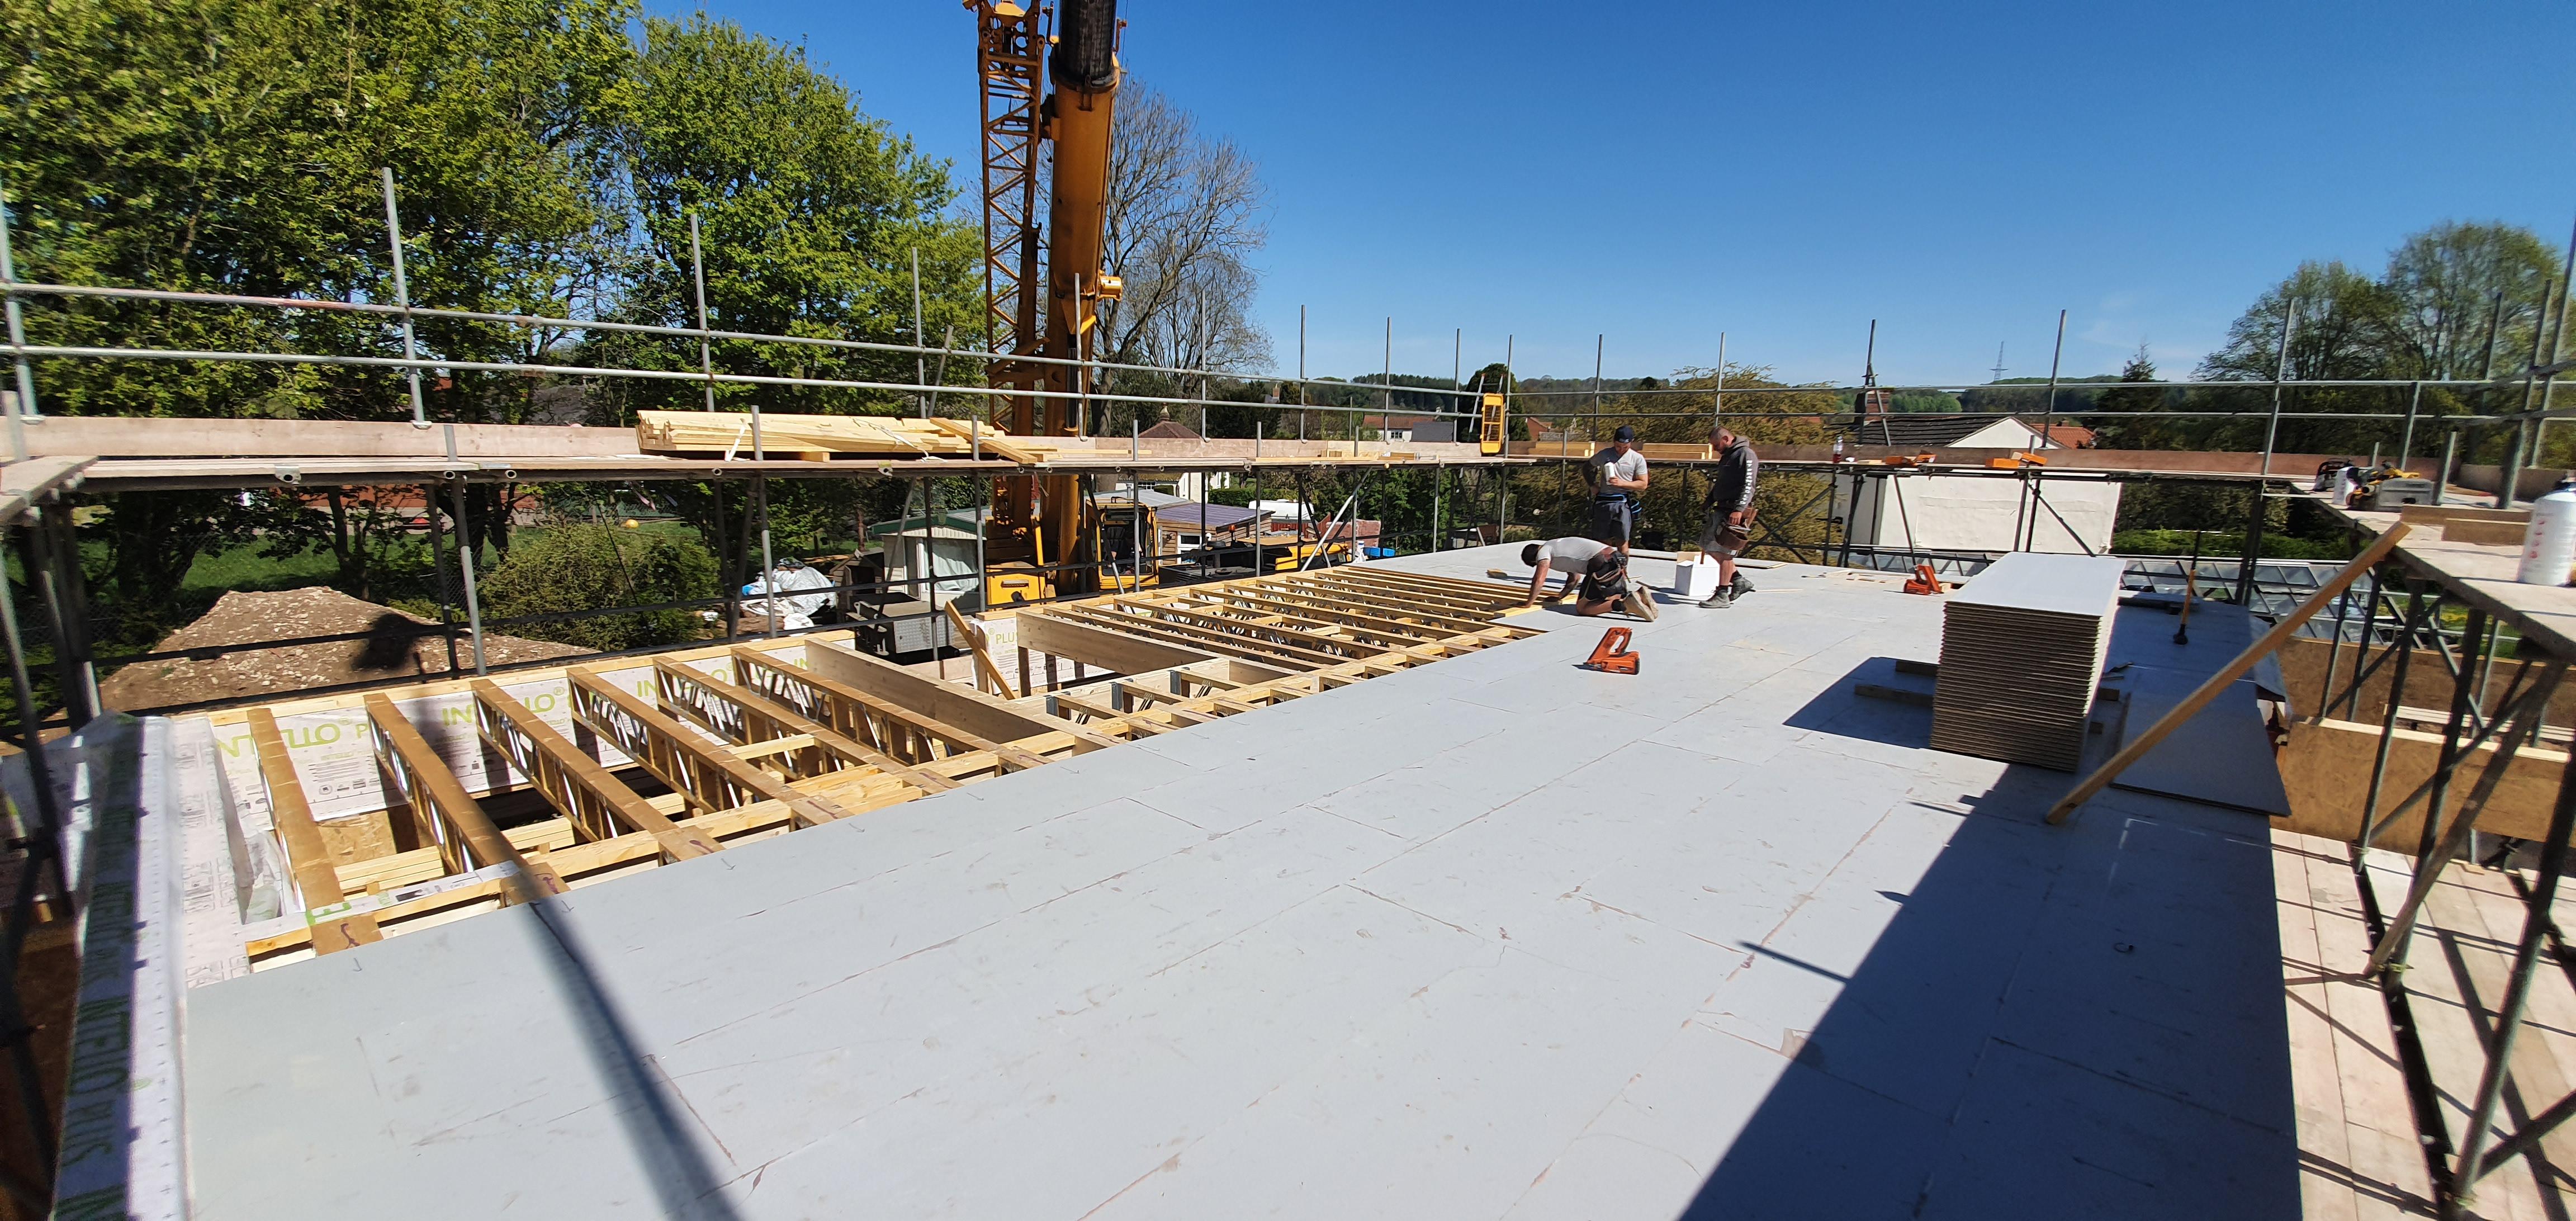
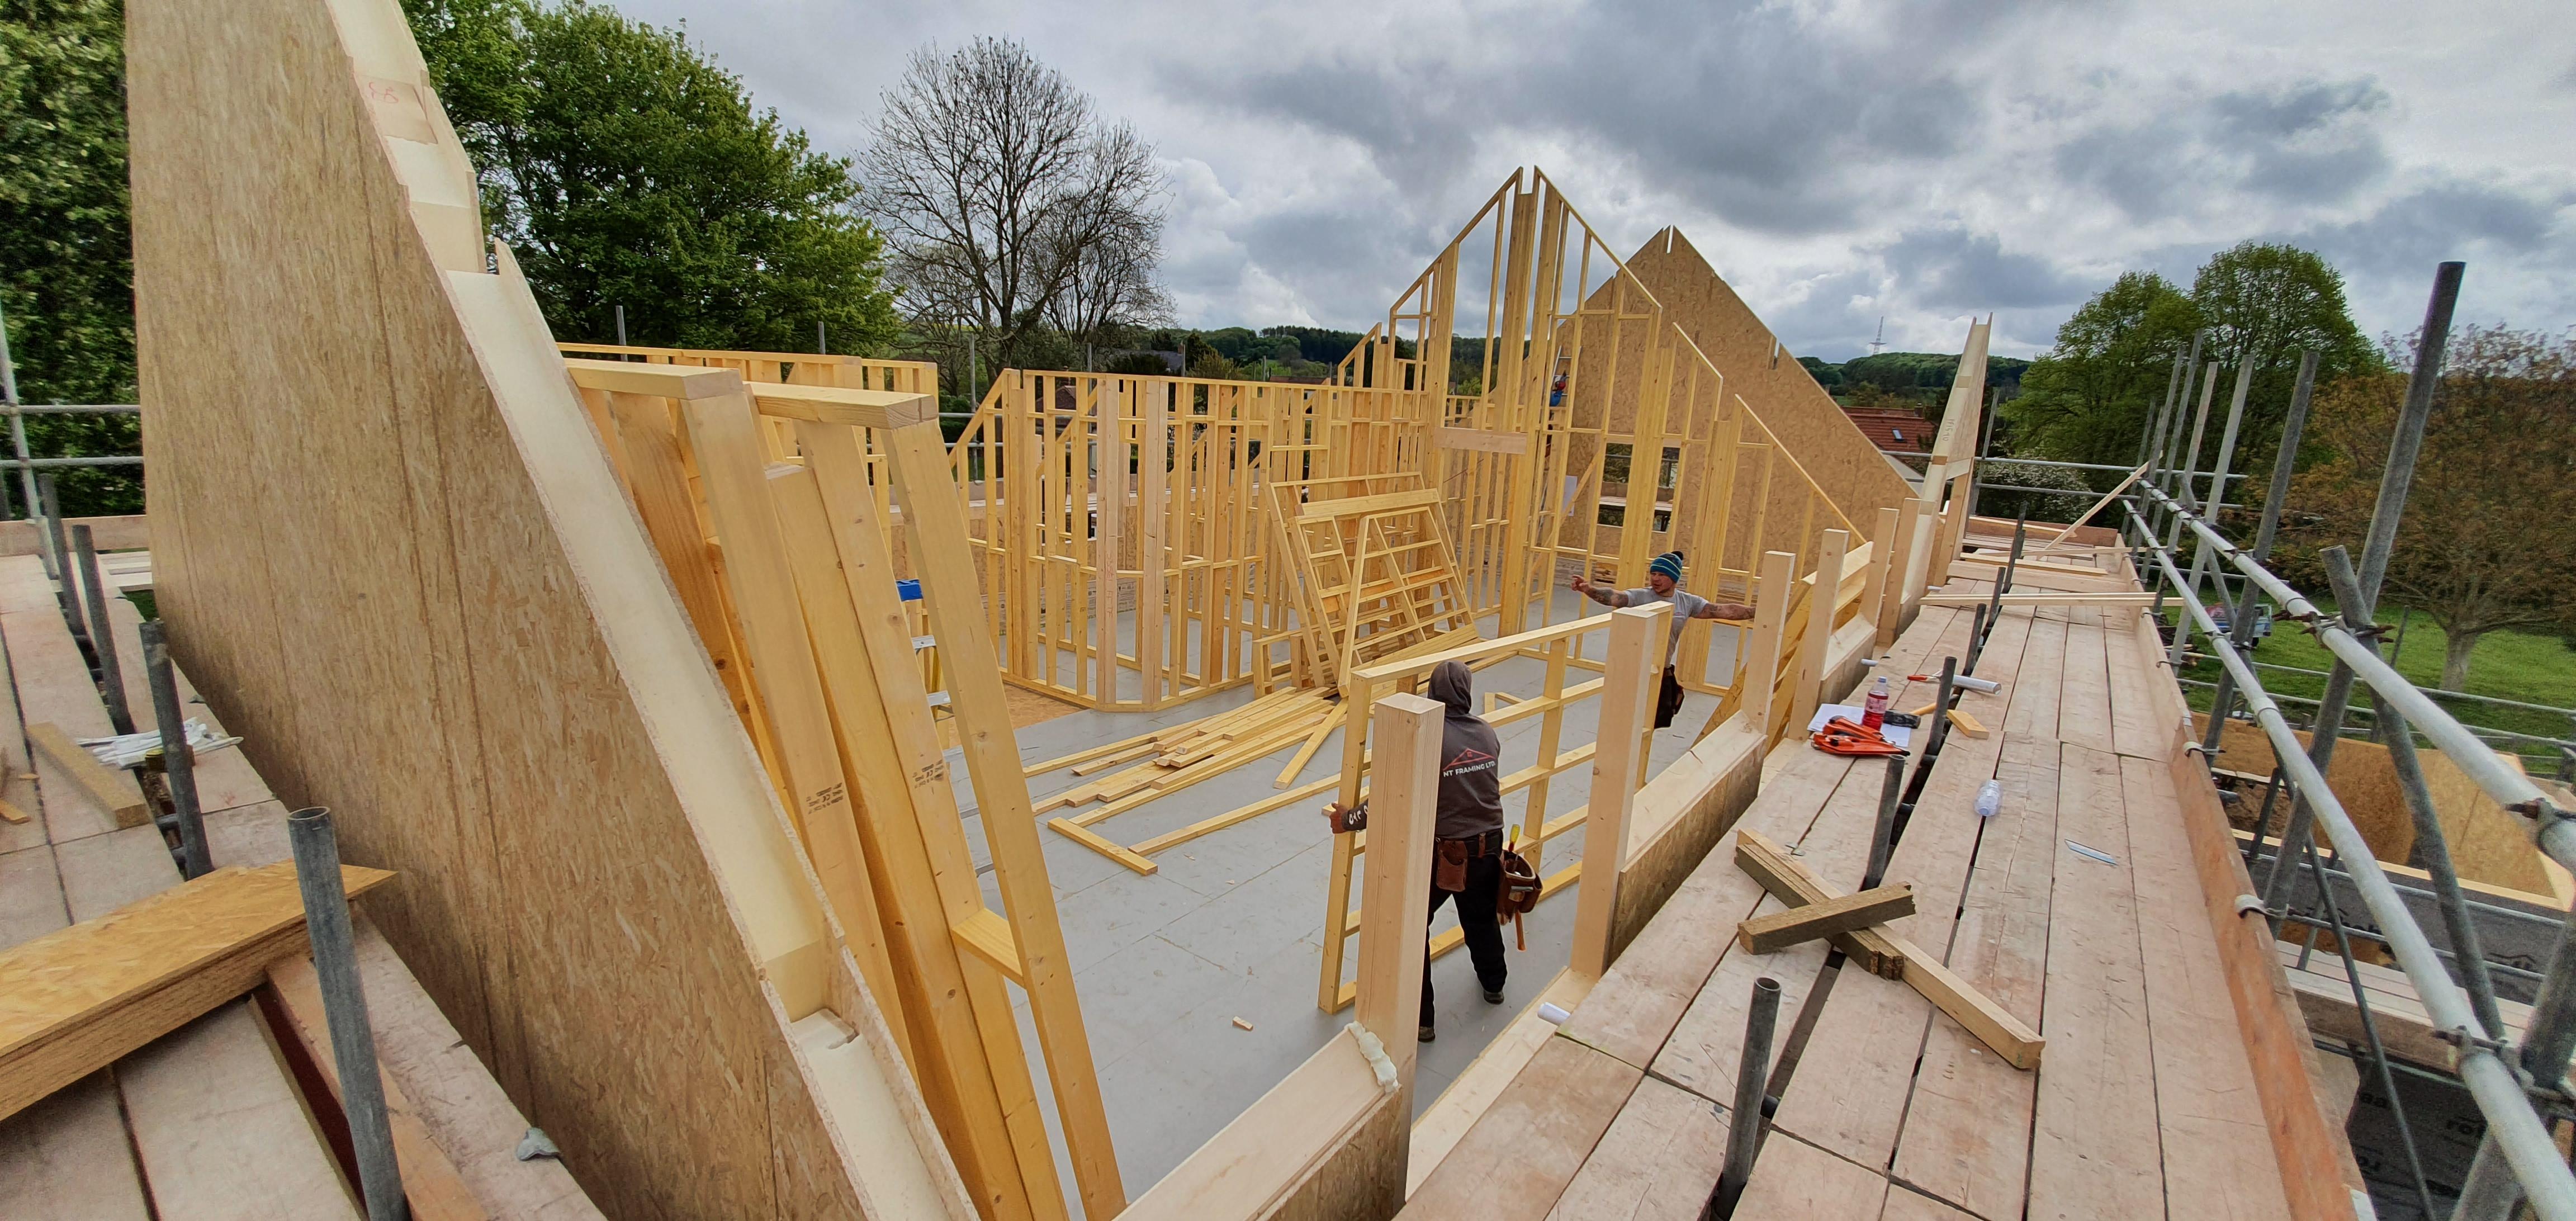
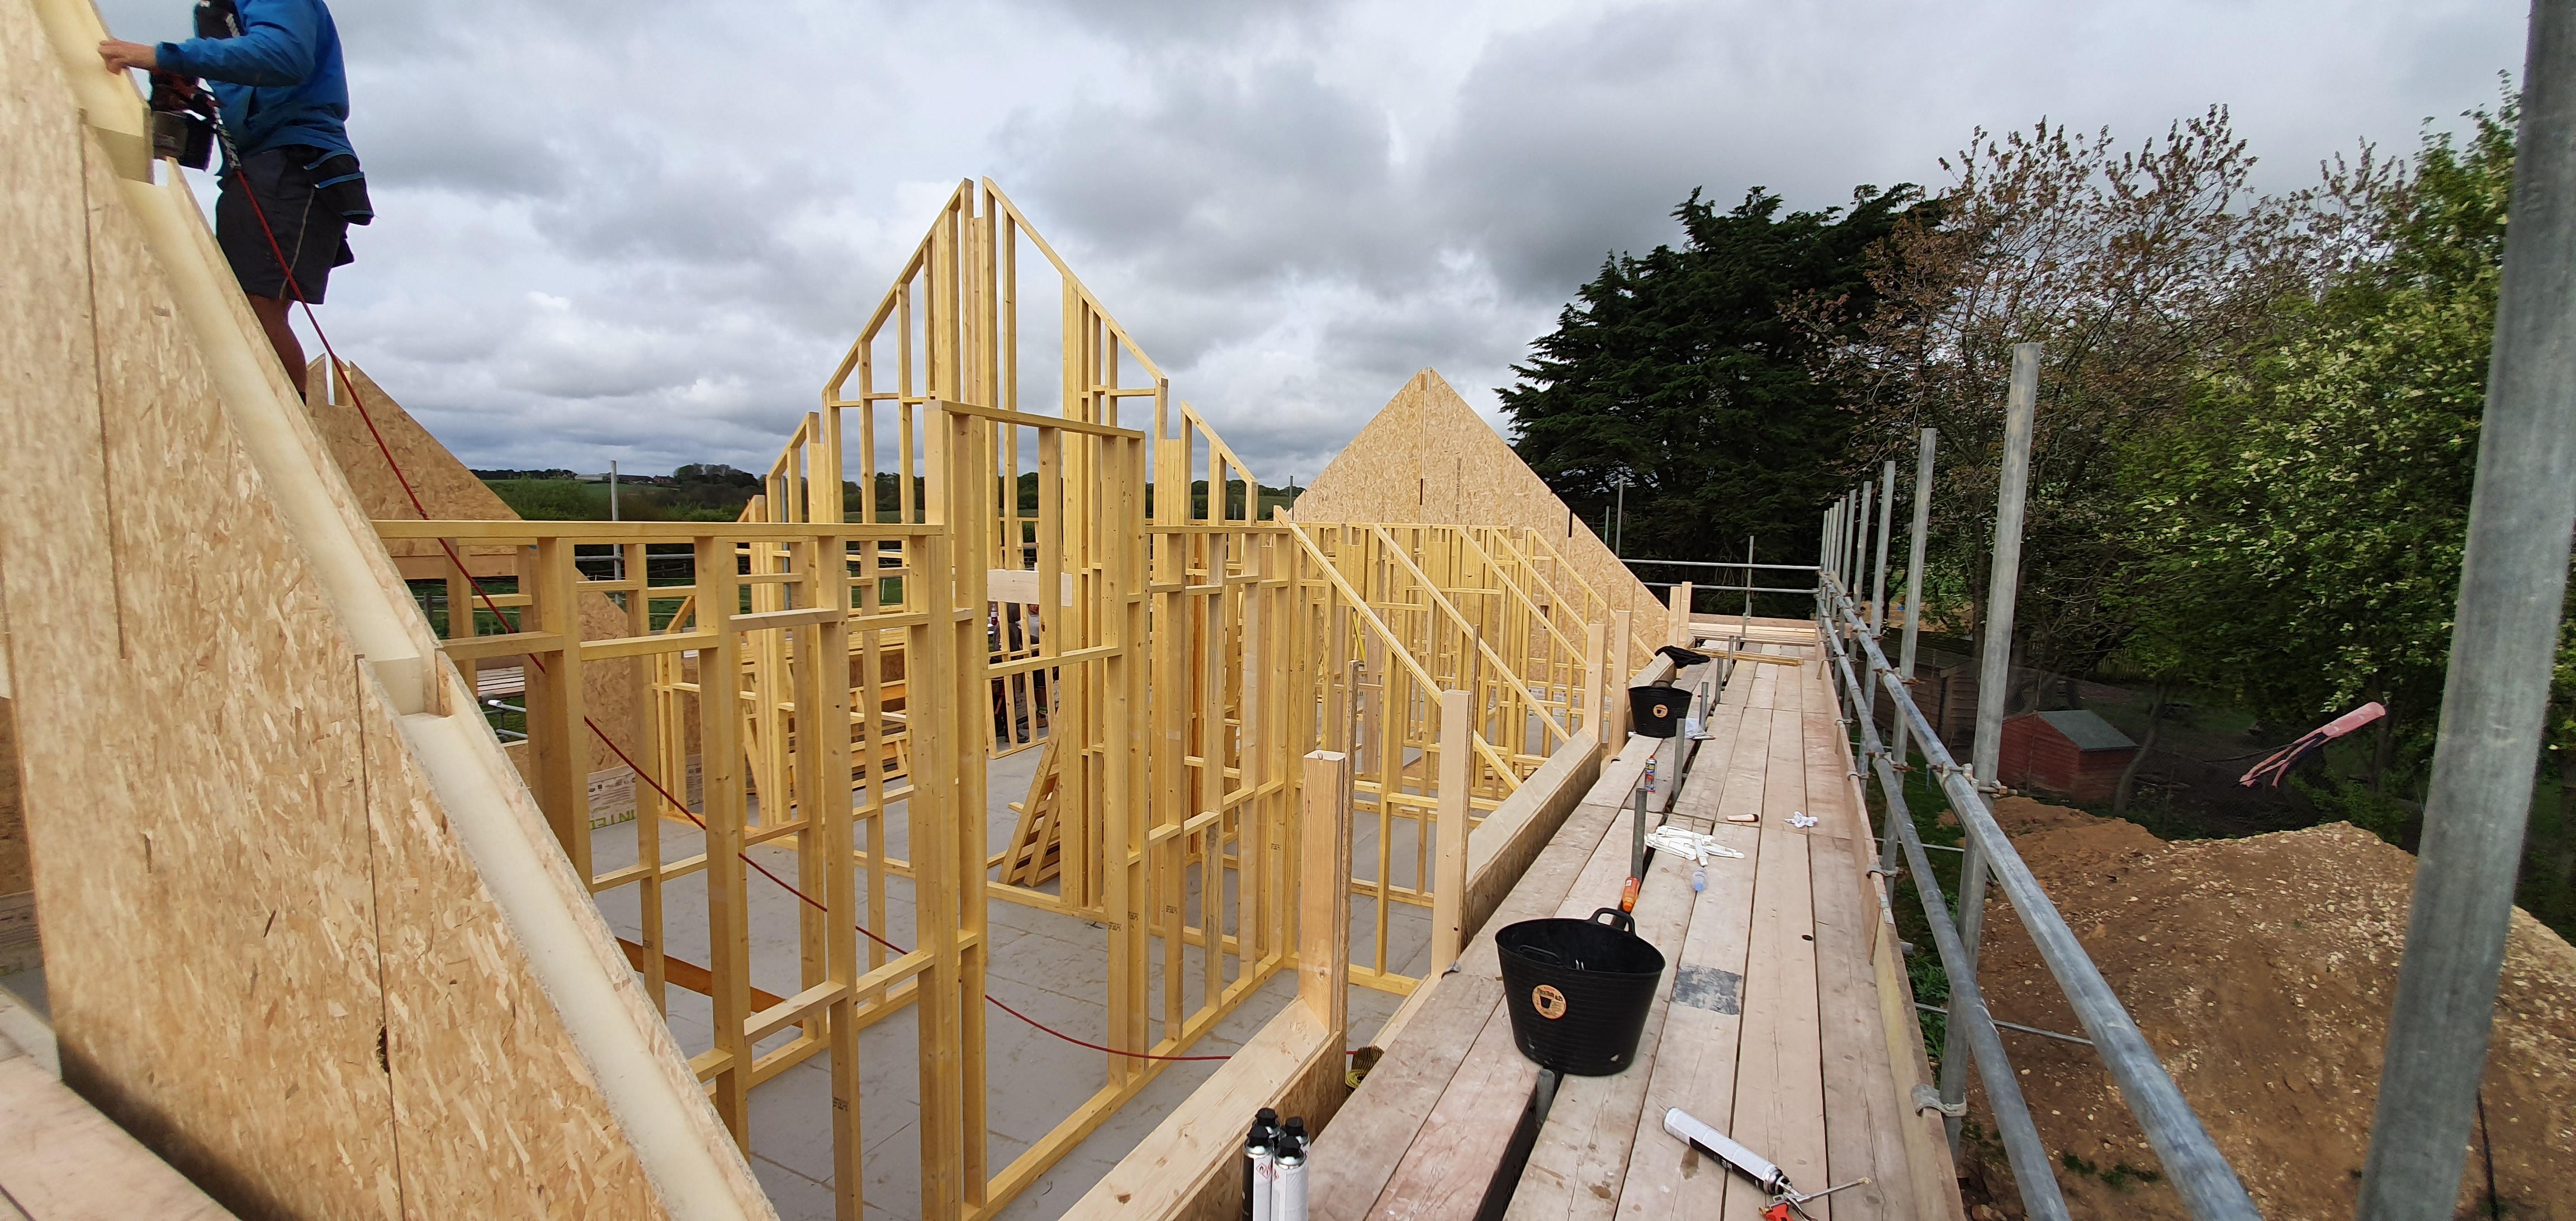
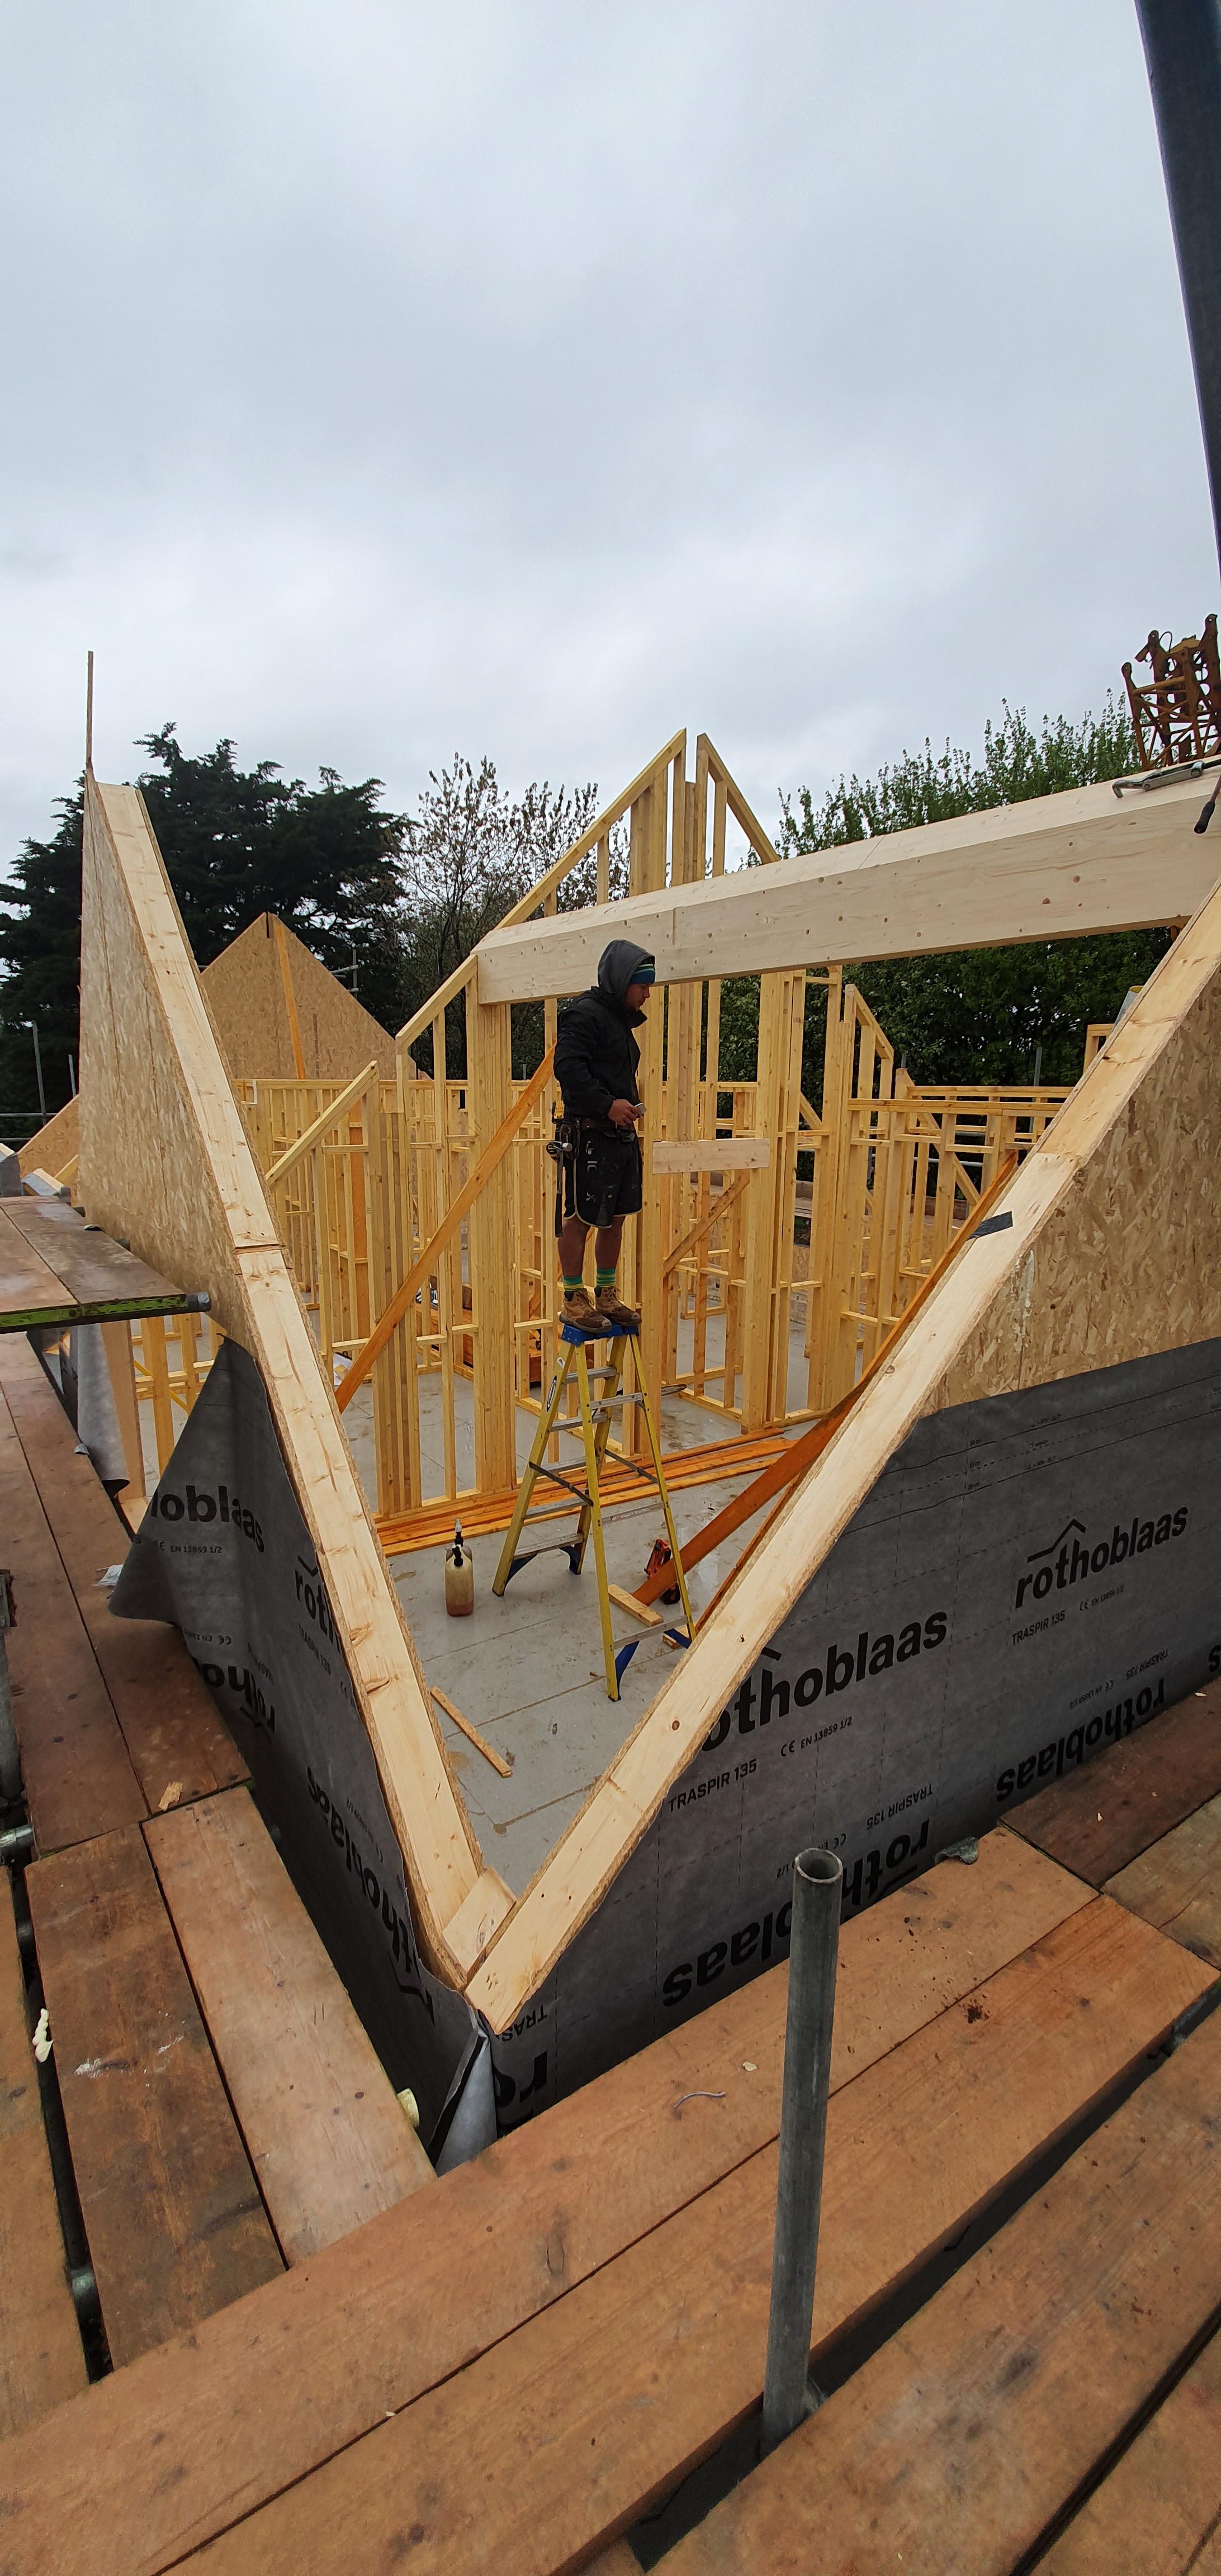
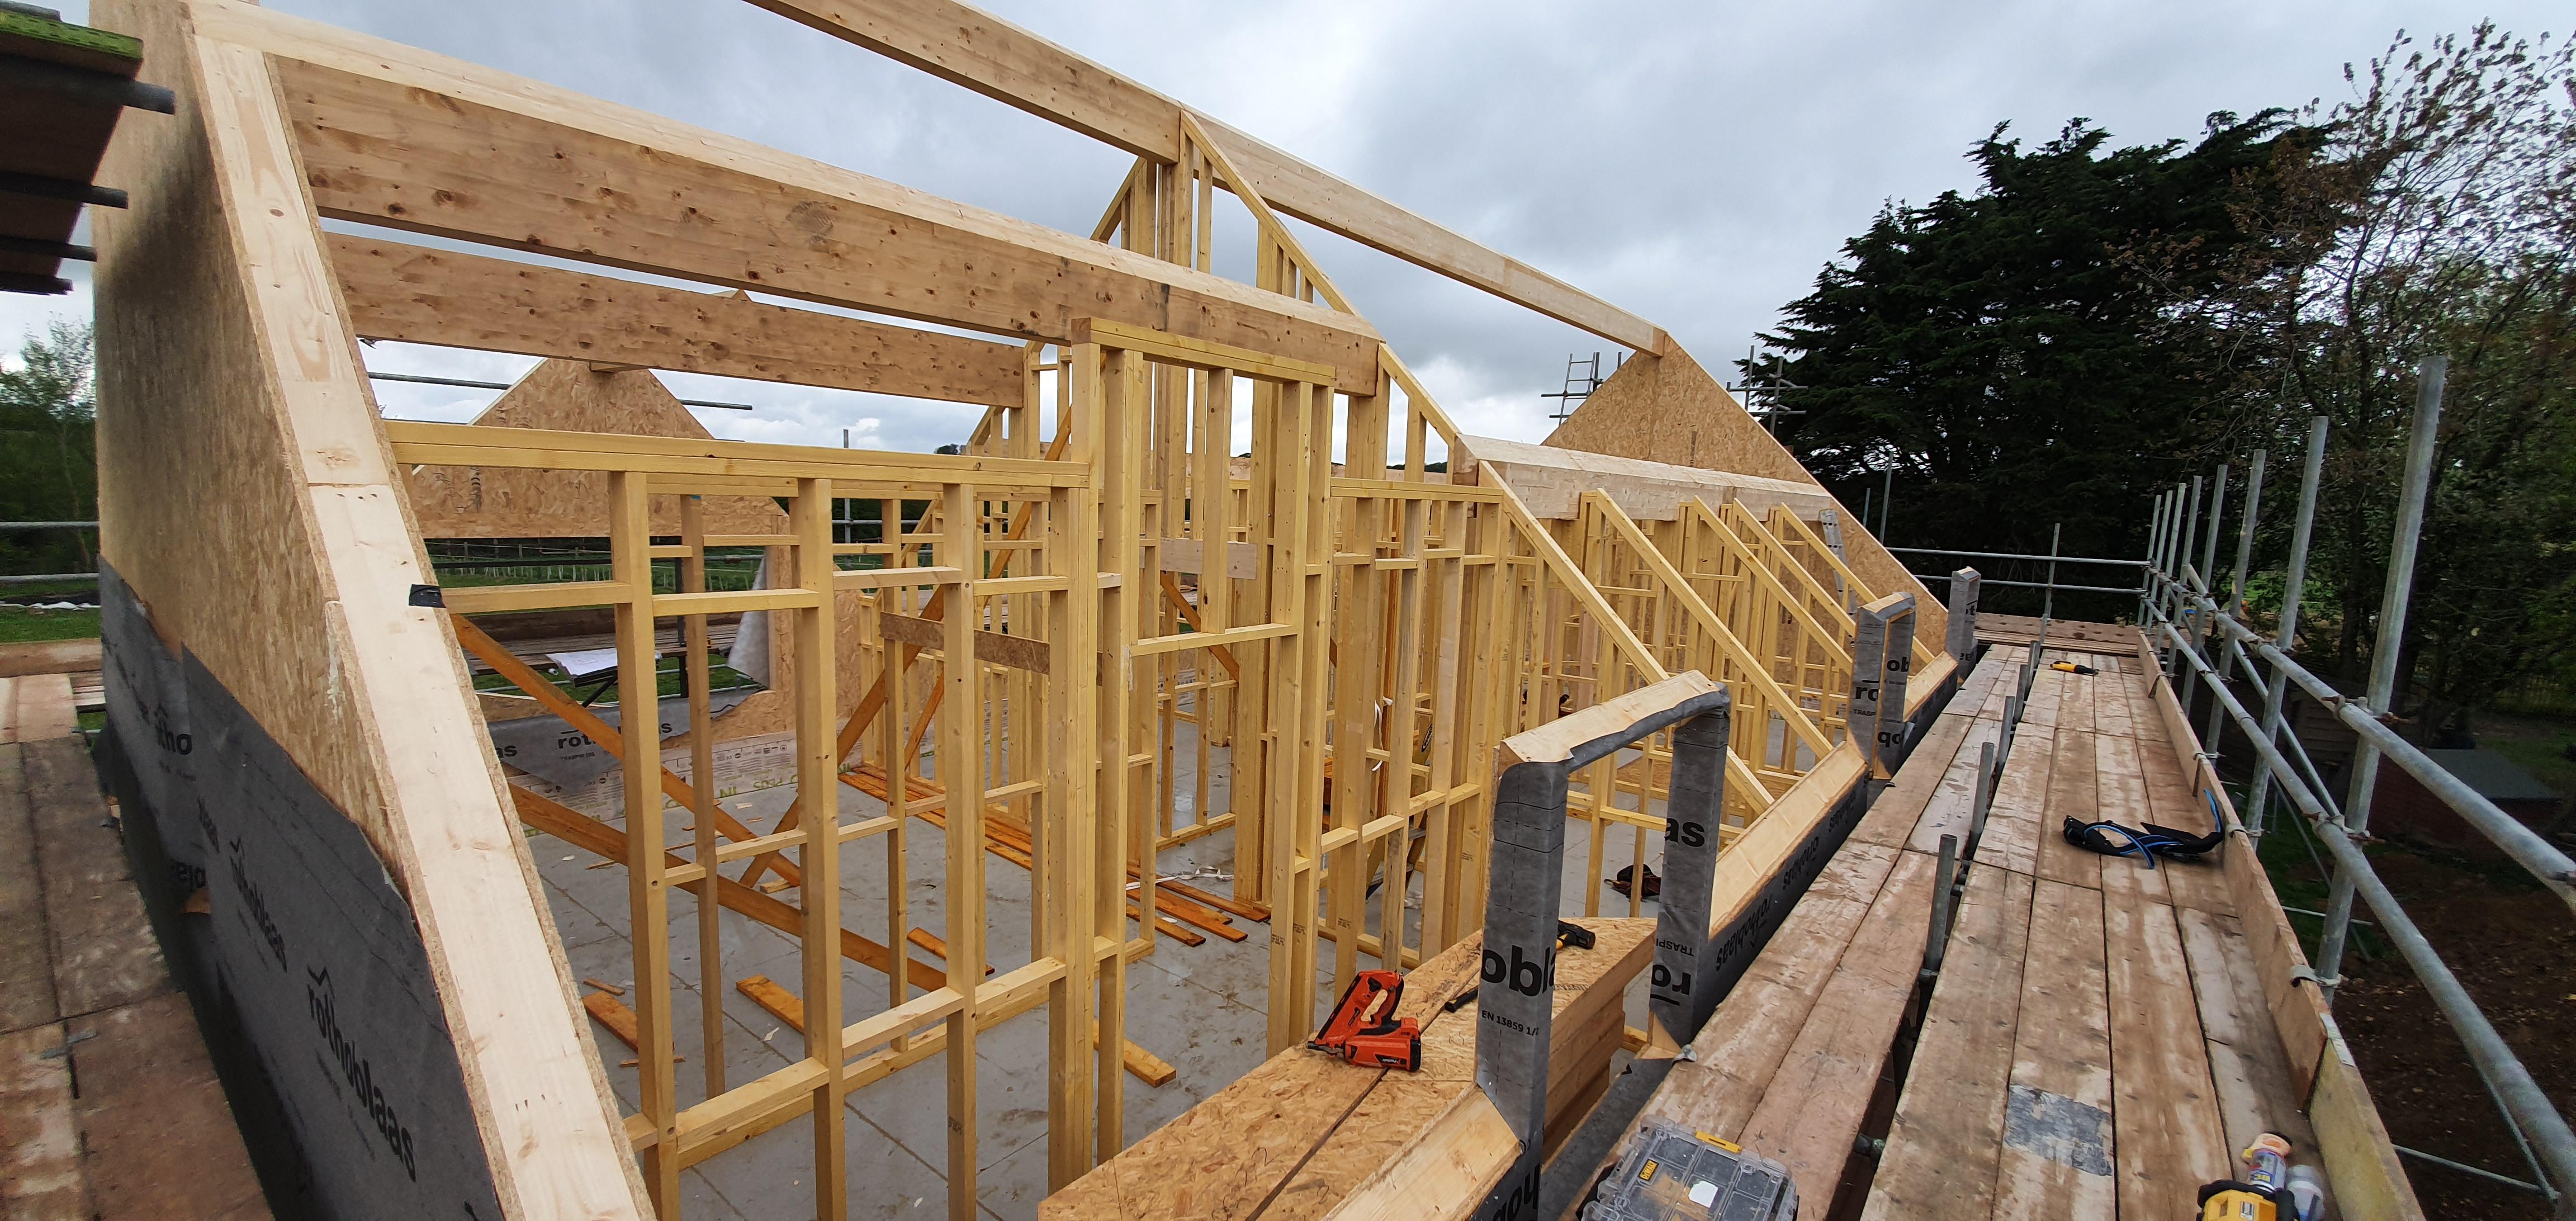
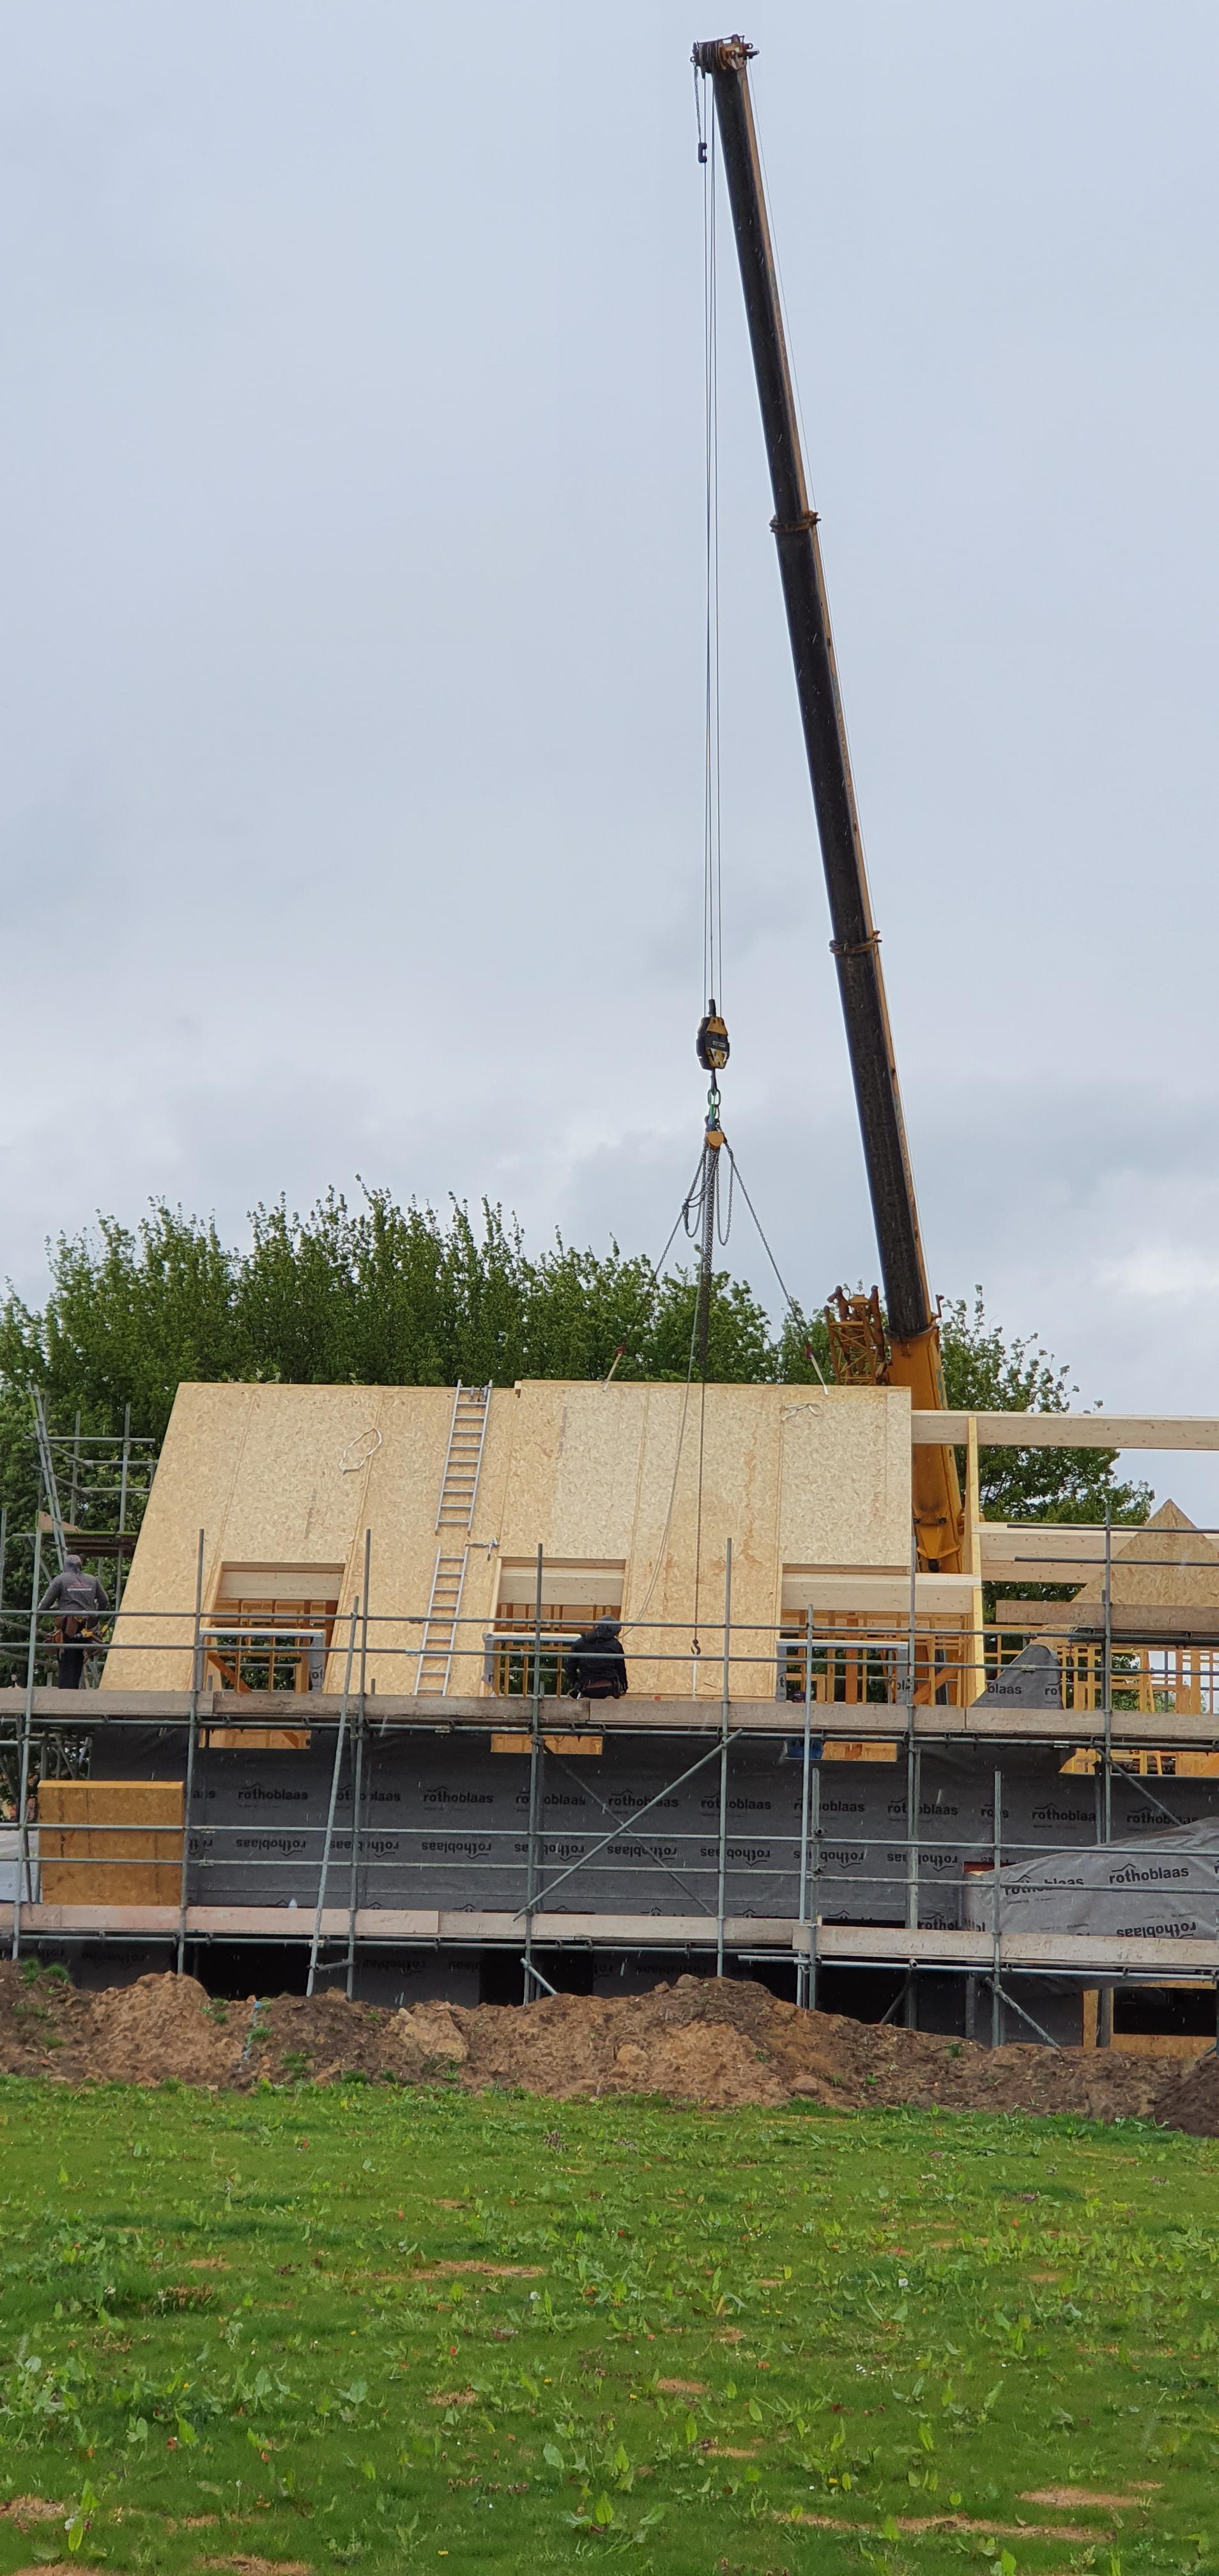
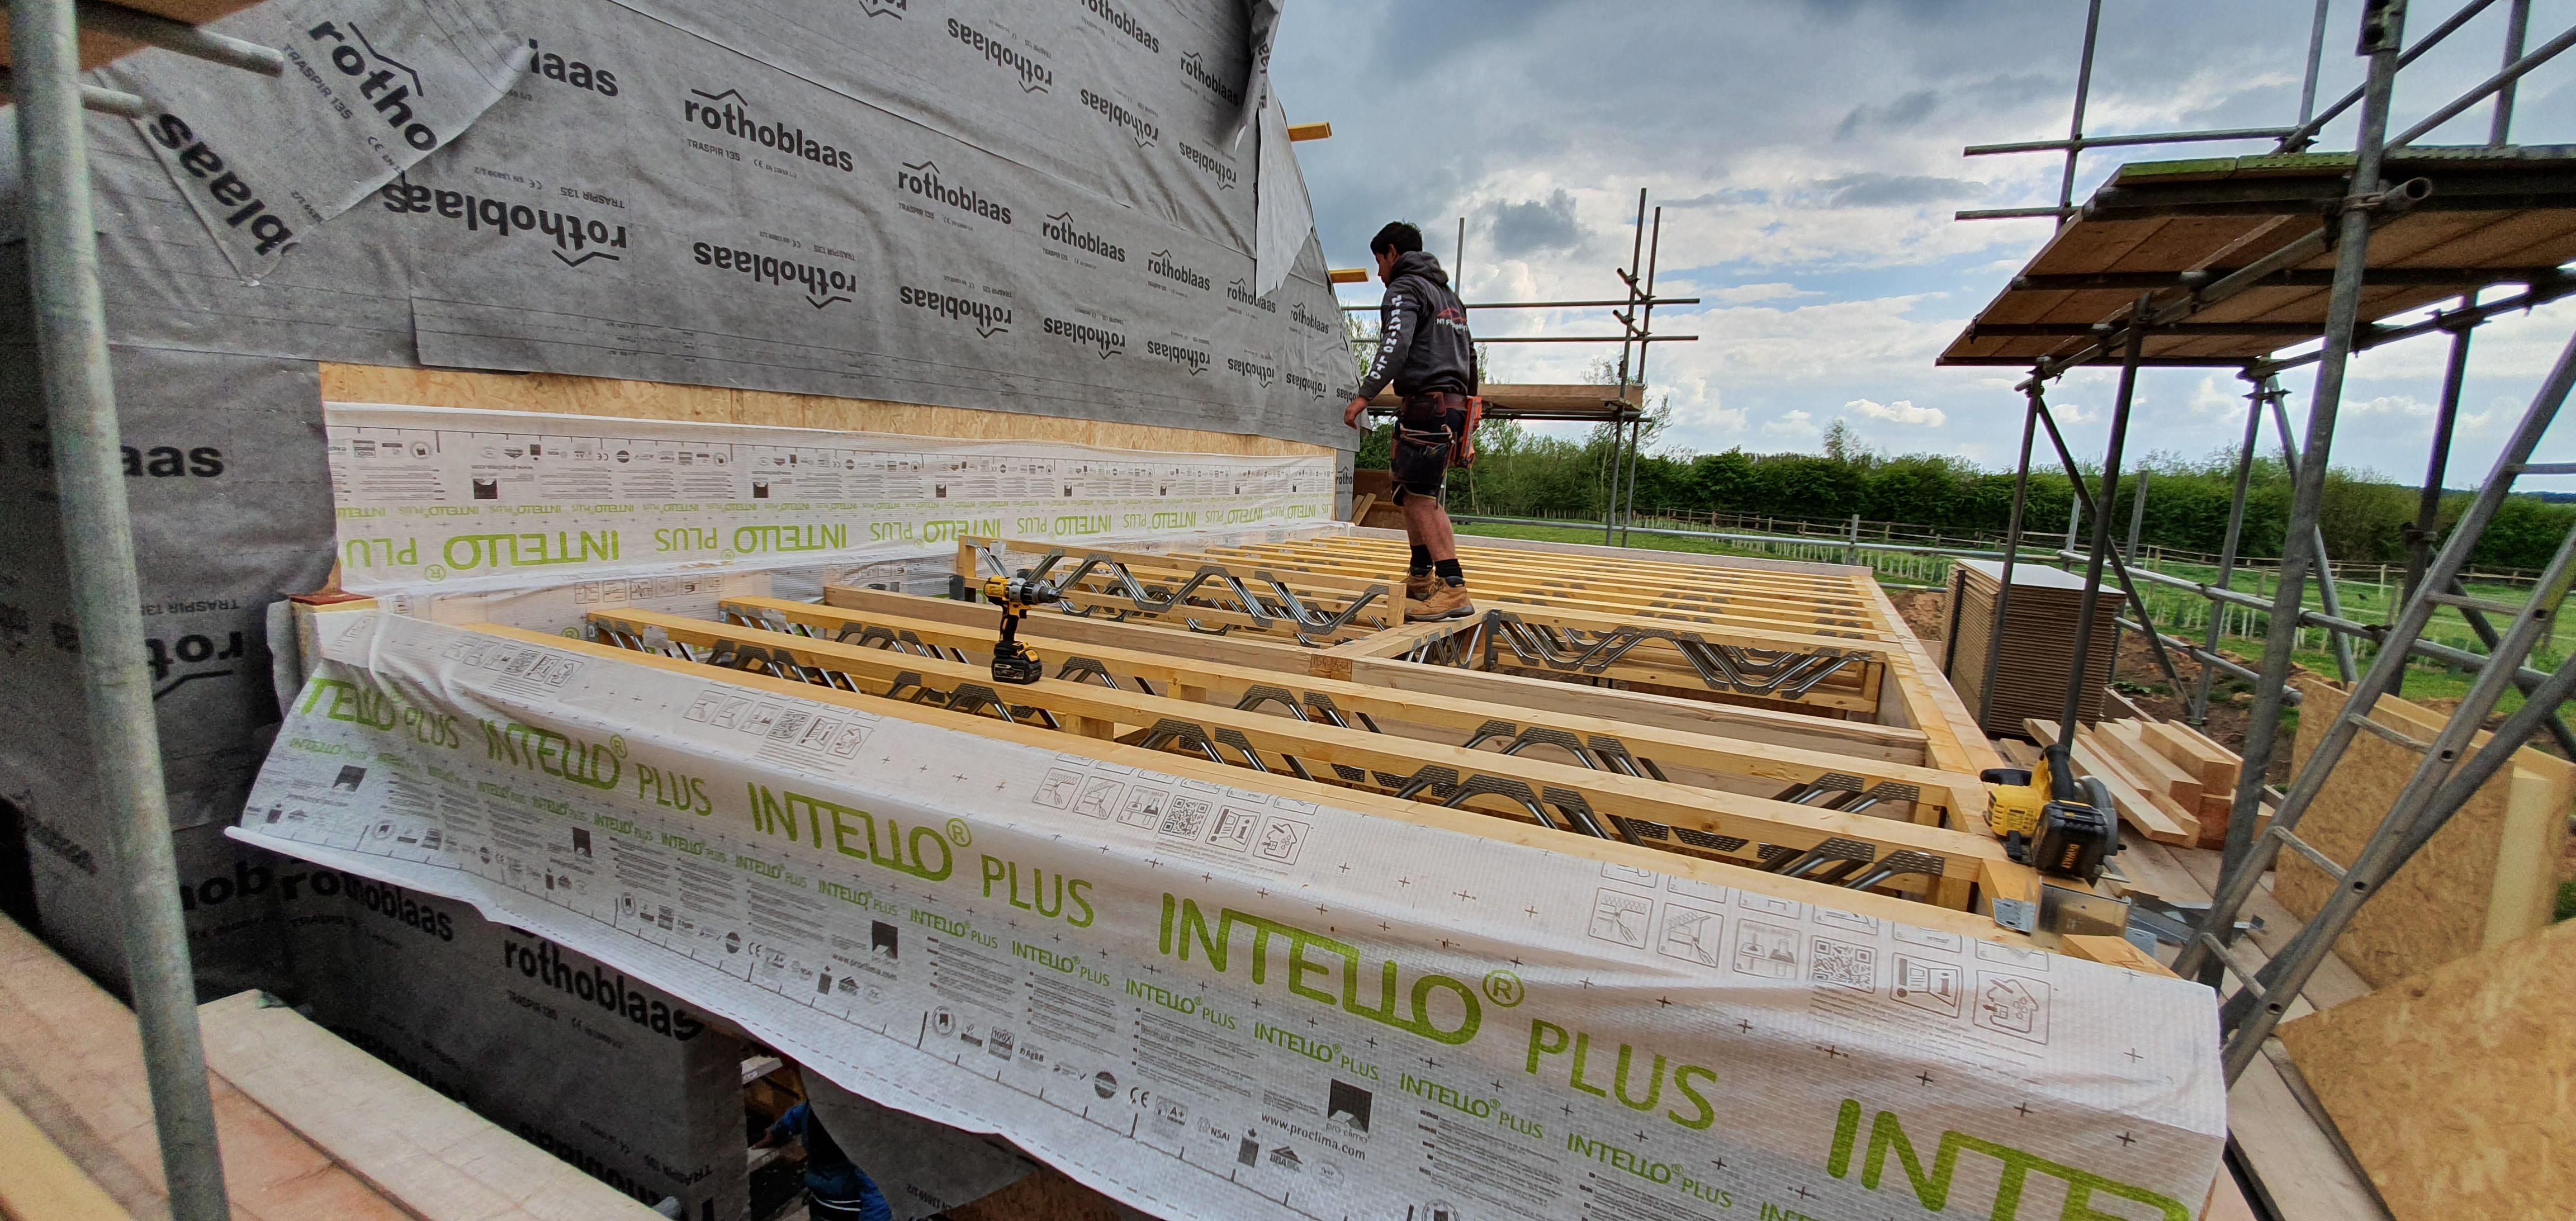
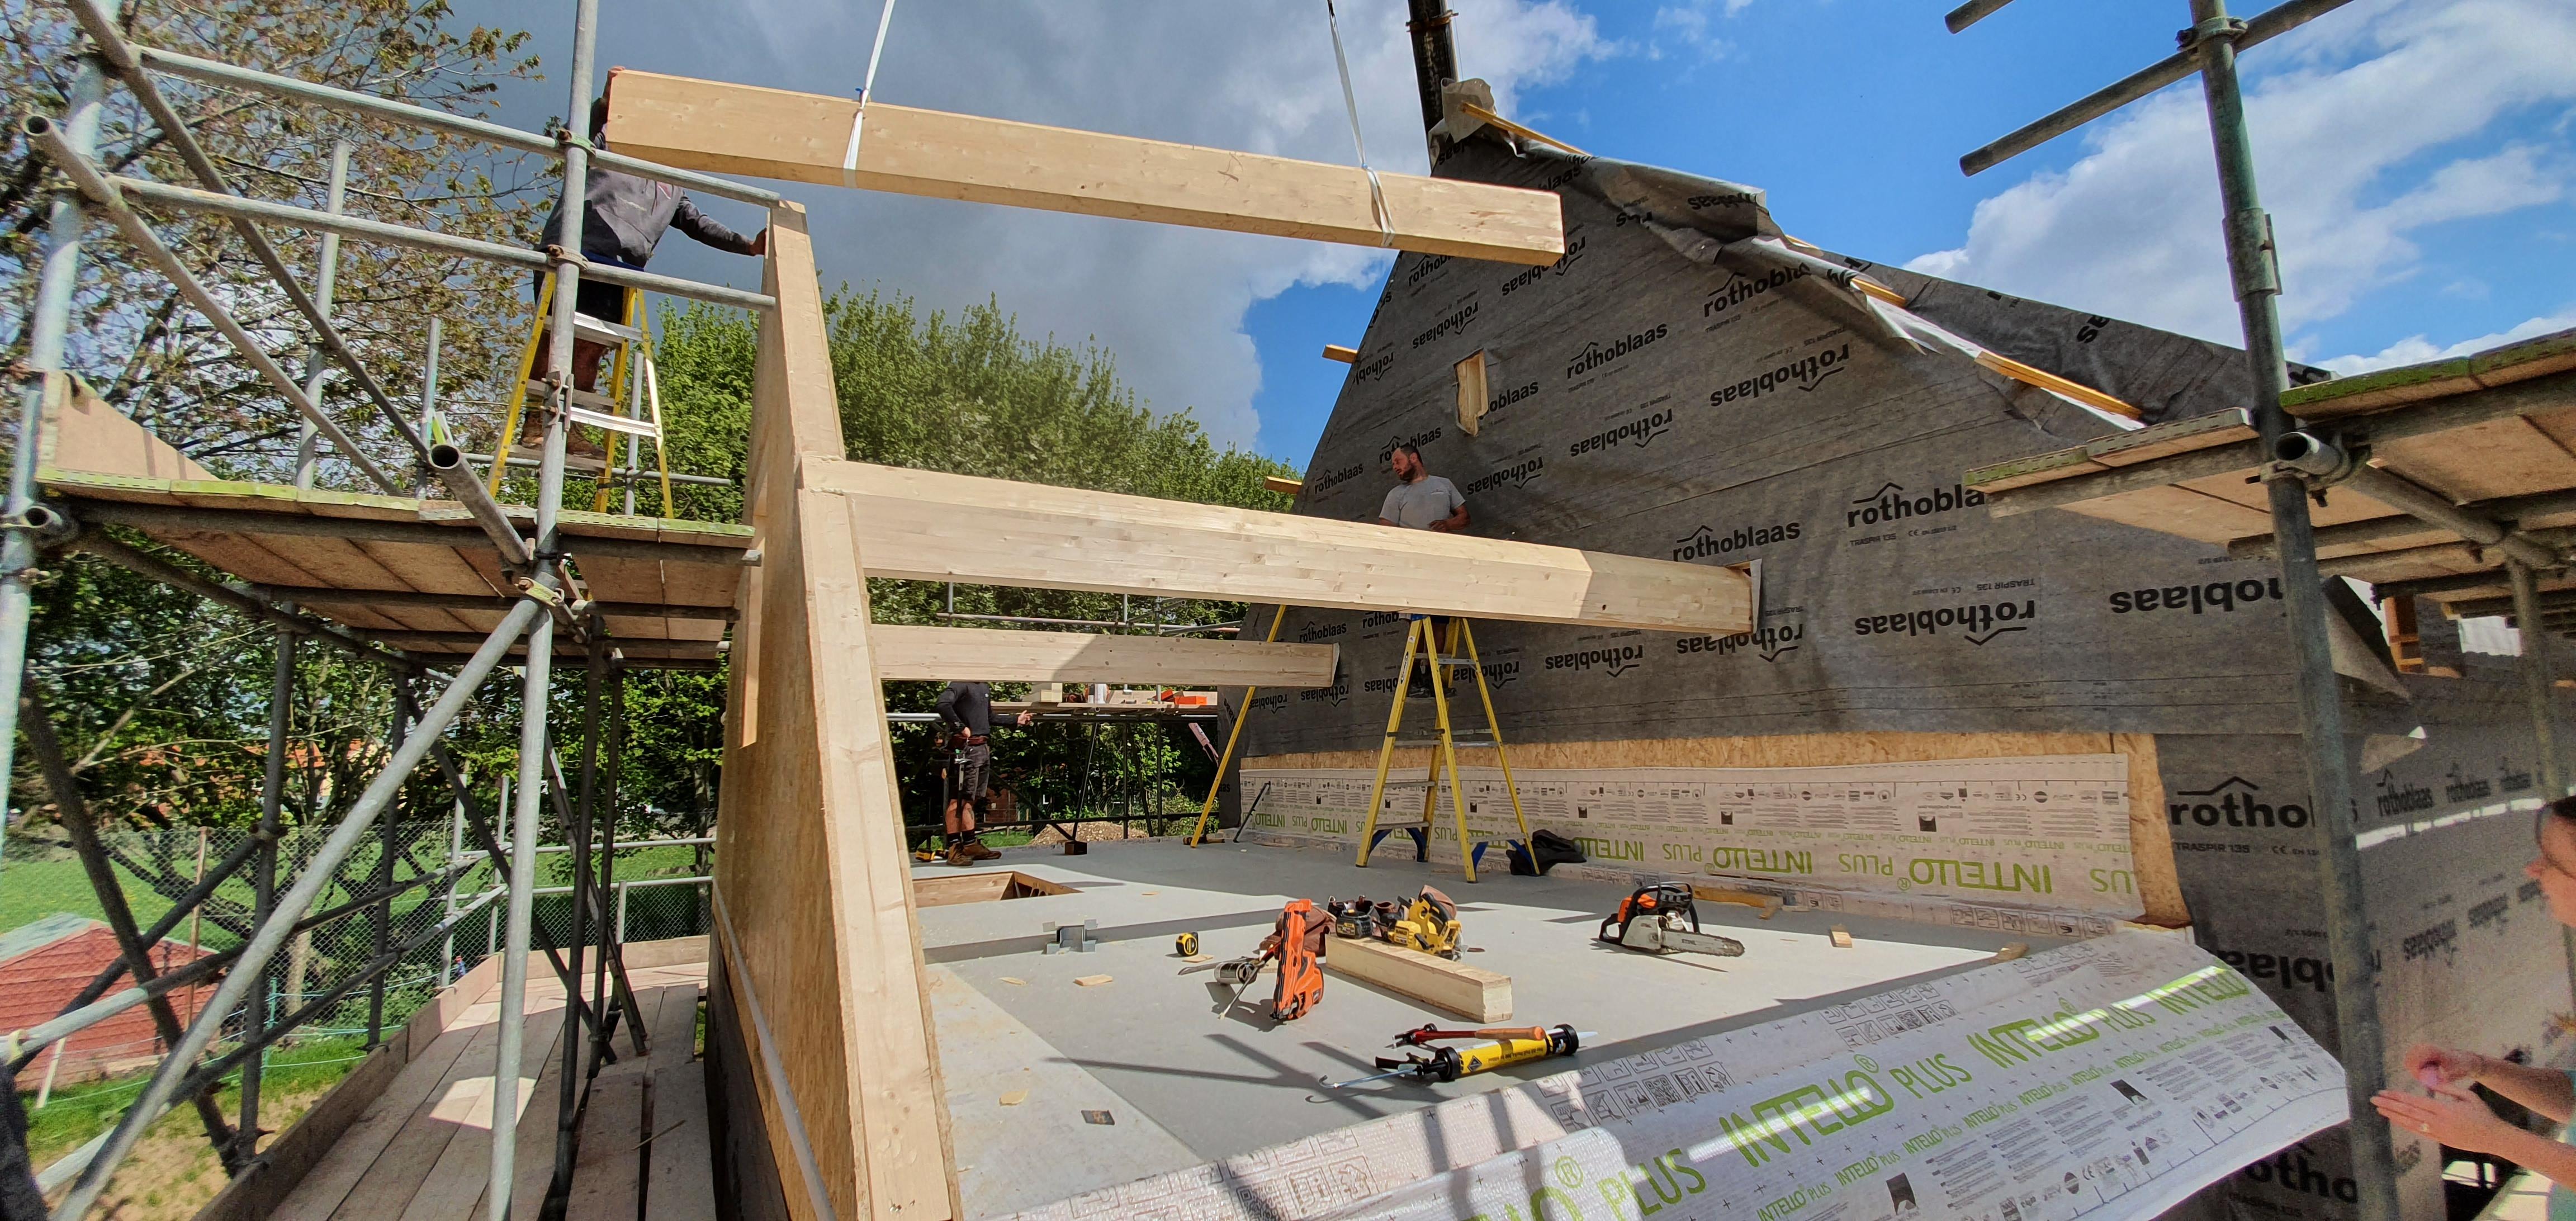
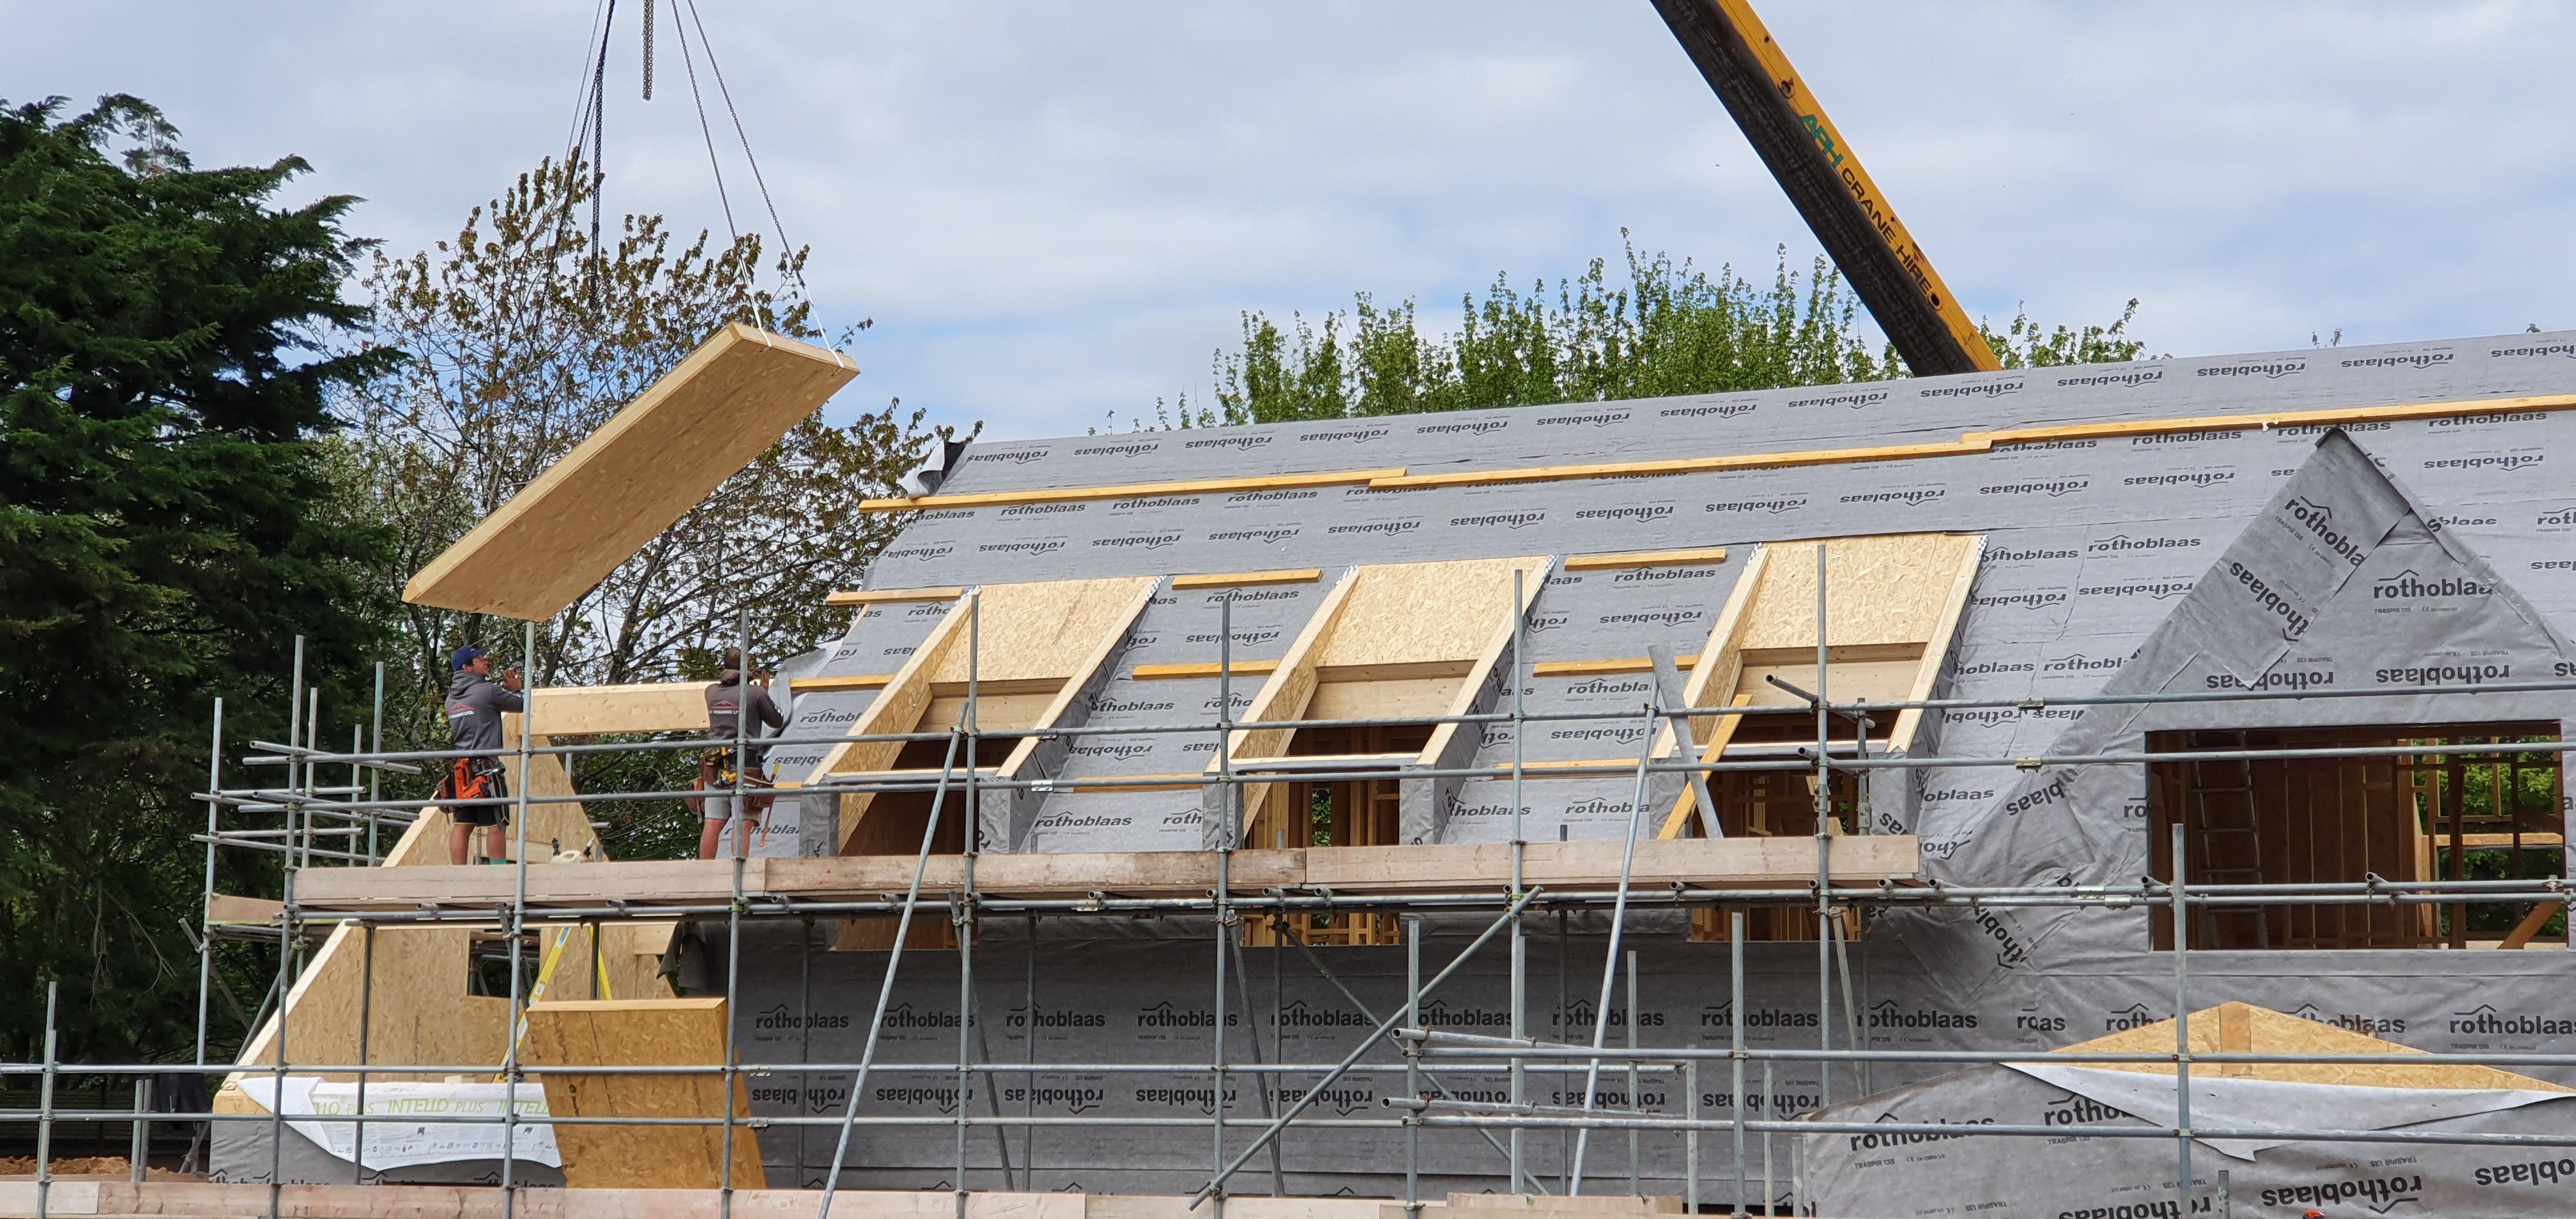
As requested @SuperJohnG, 1 x SIP build photos:
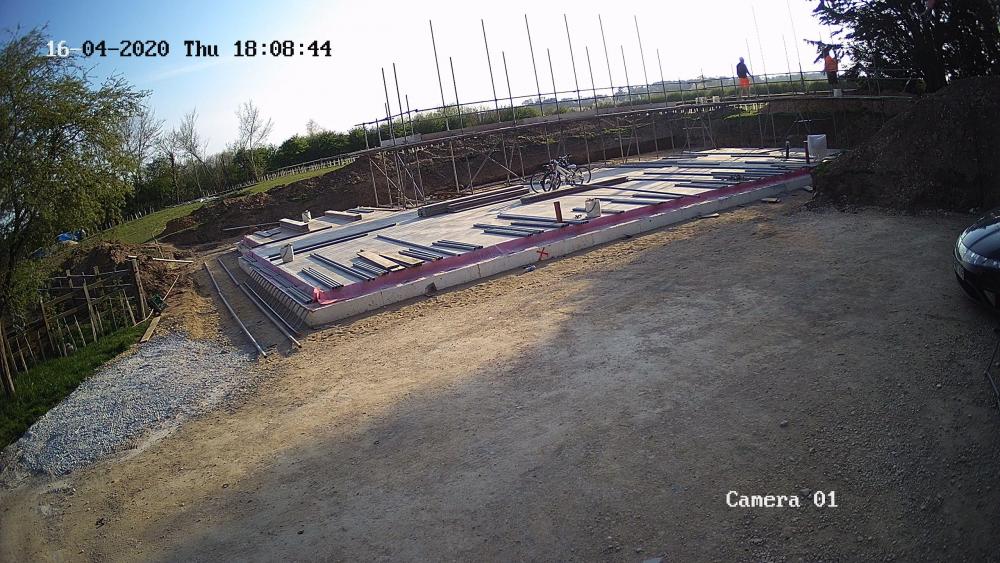
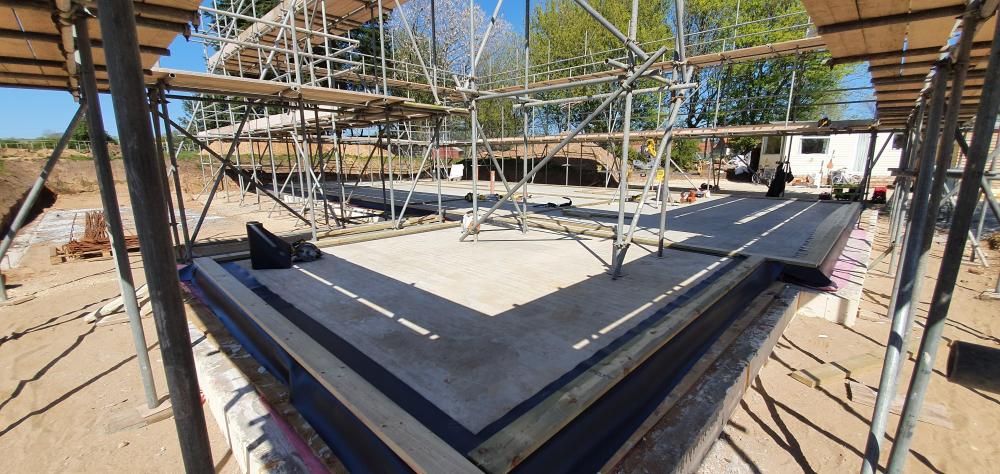
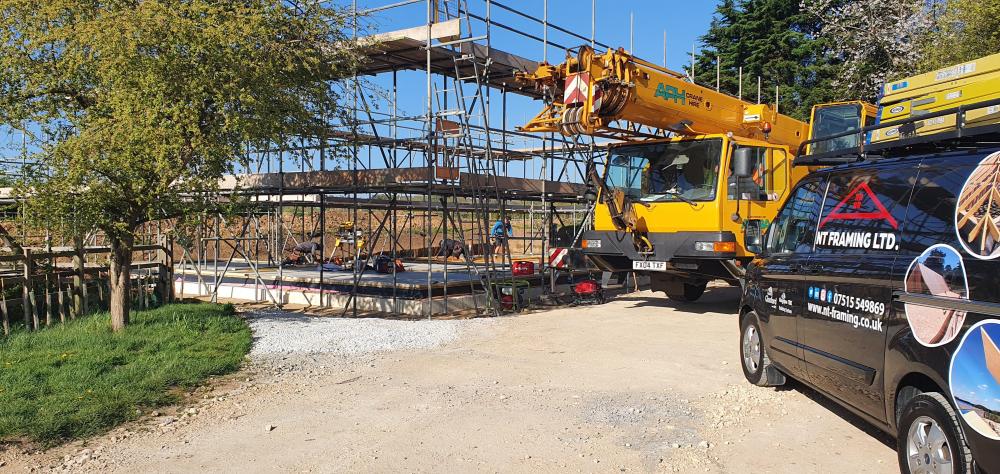
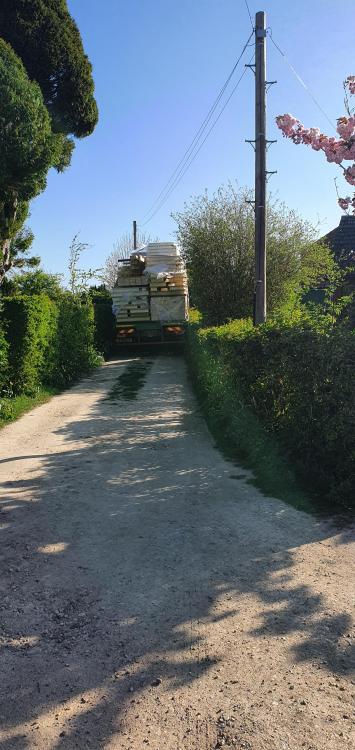

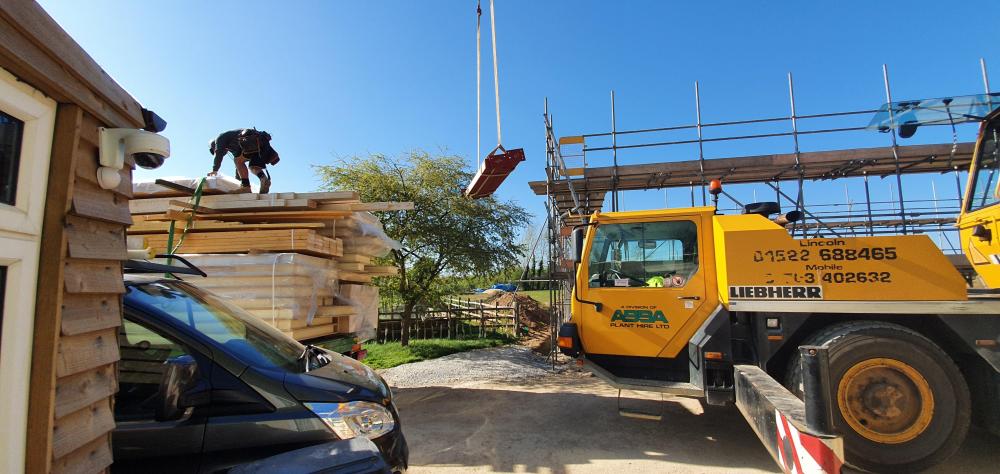
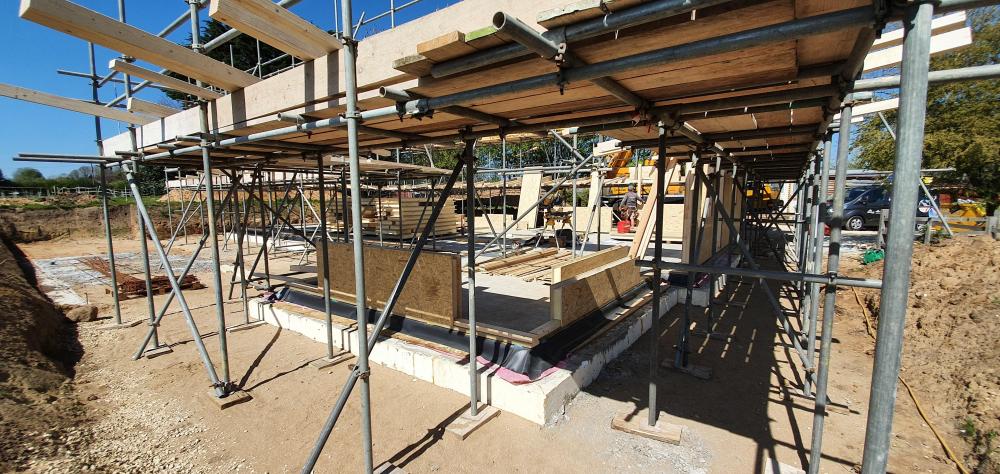
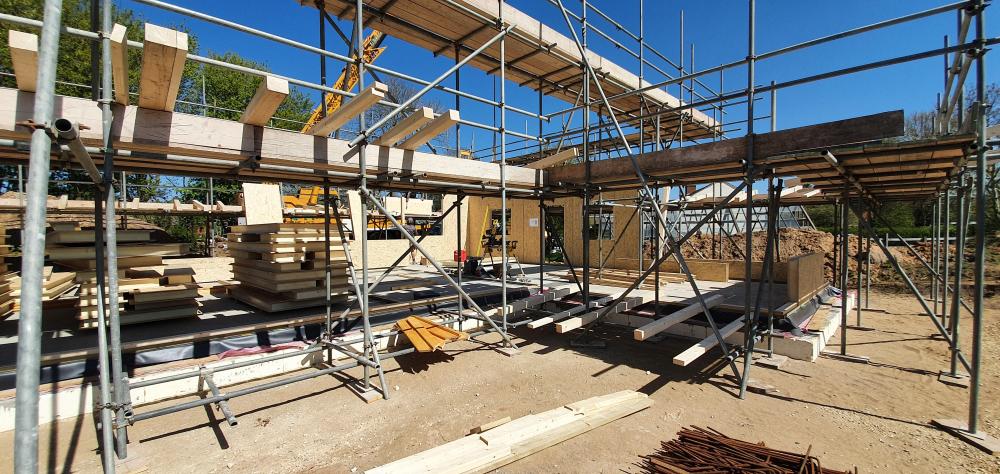


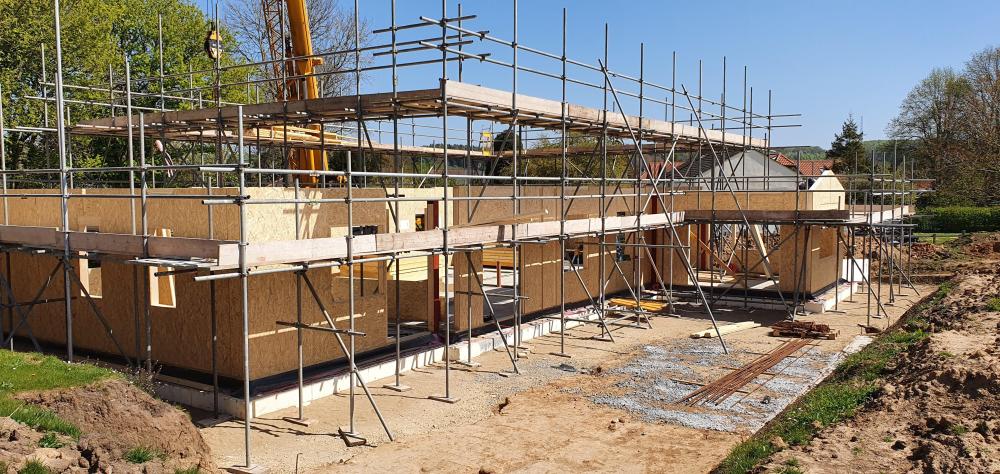

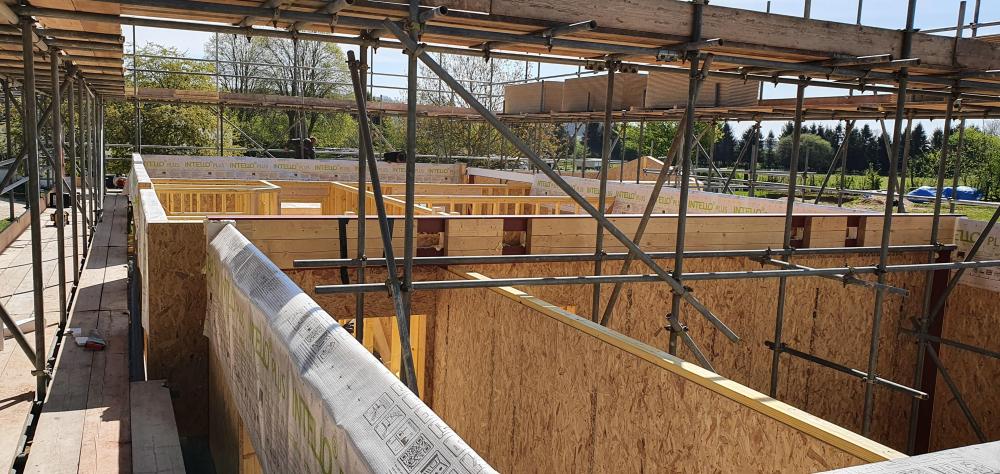


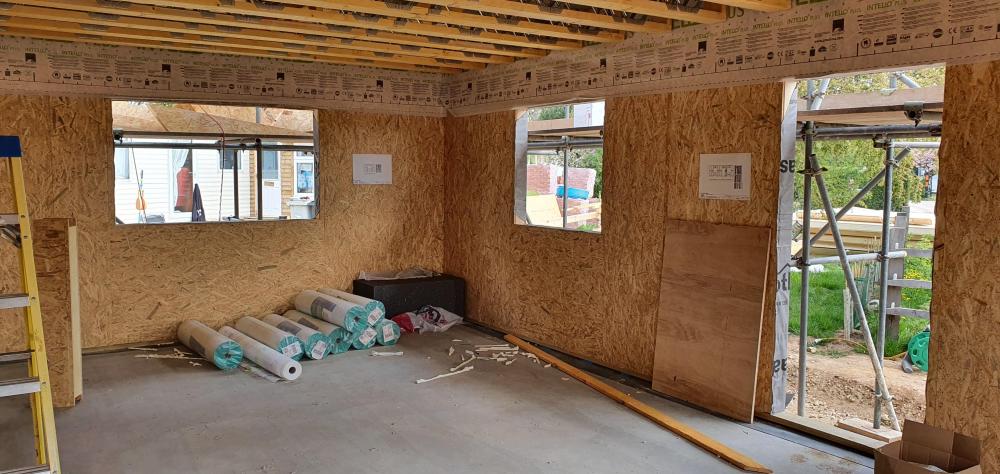
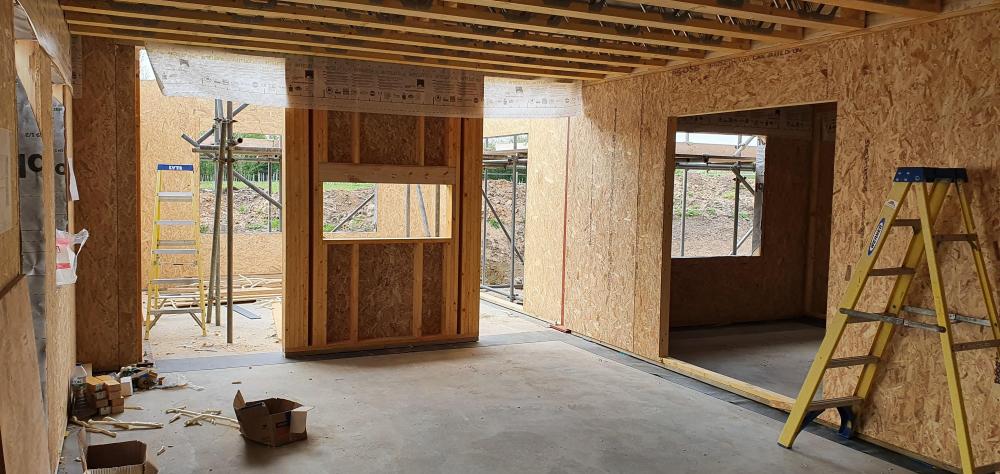
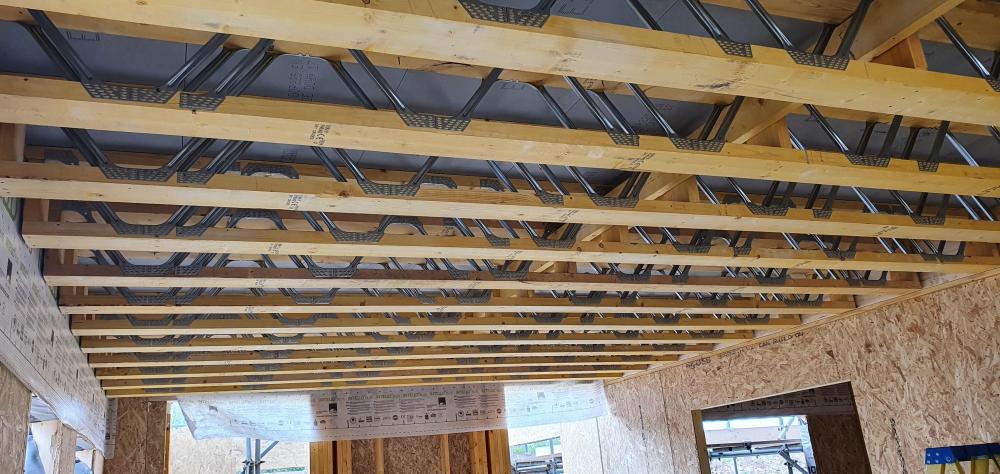
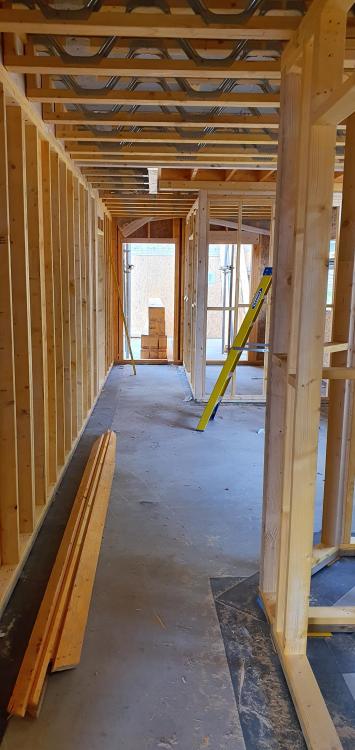

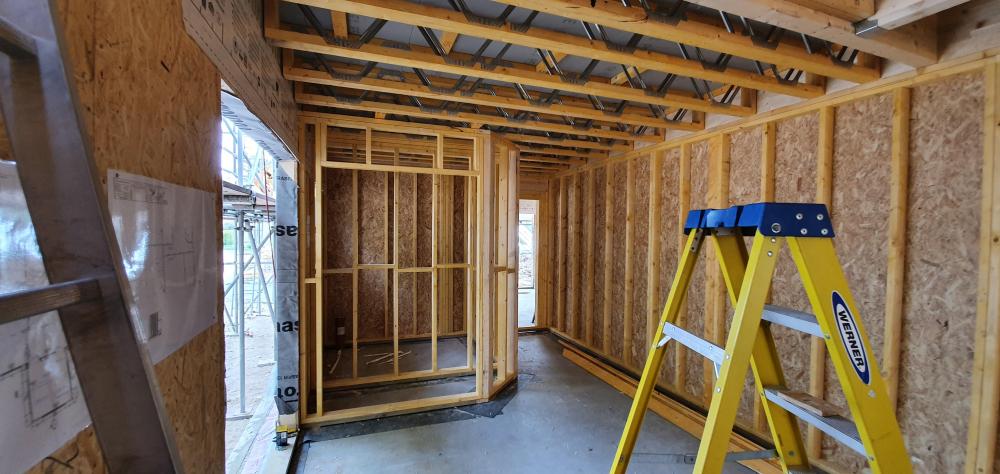
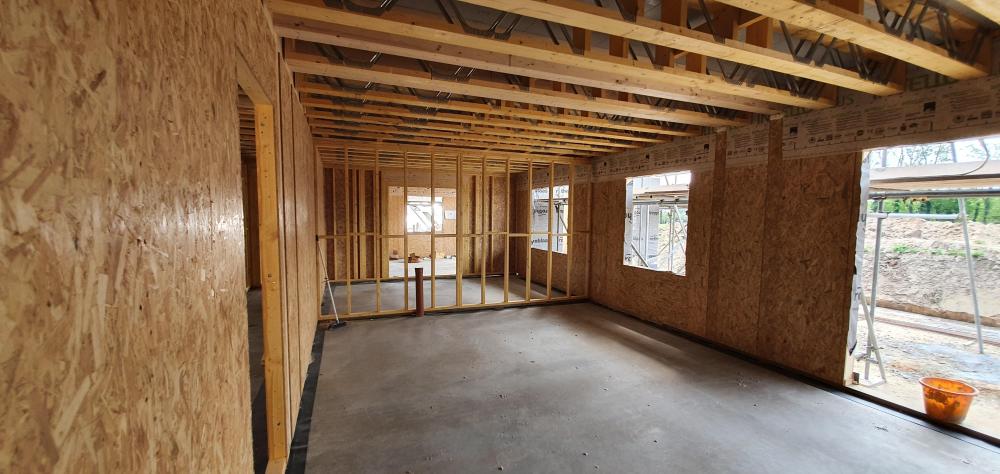
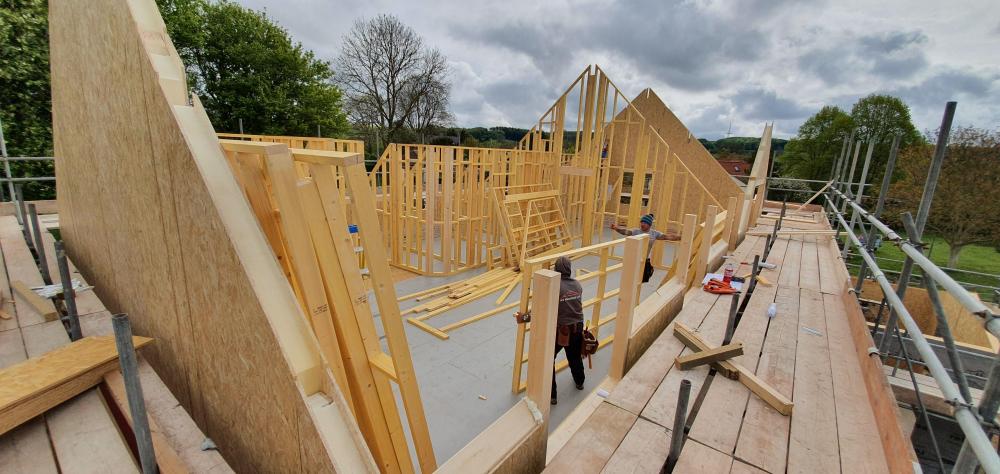


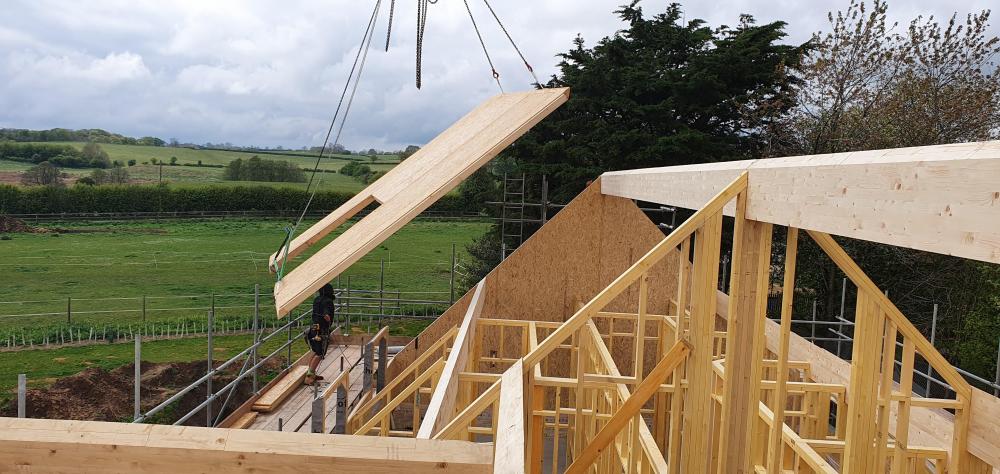


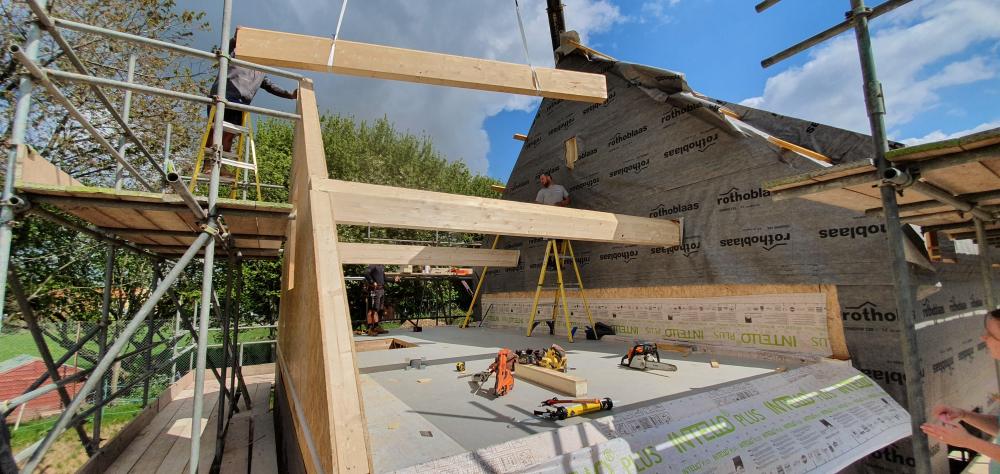
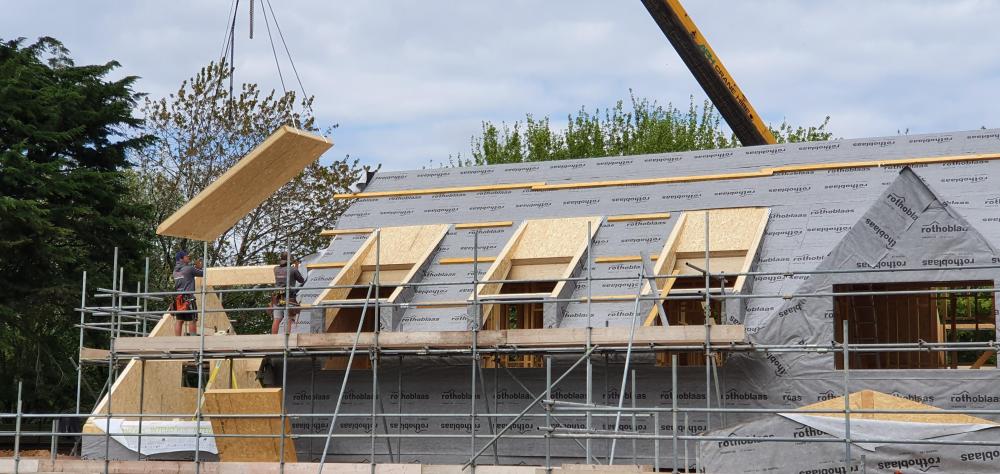 7 points
 -
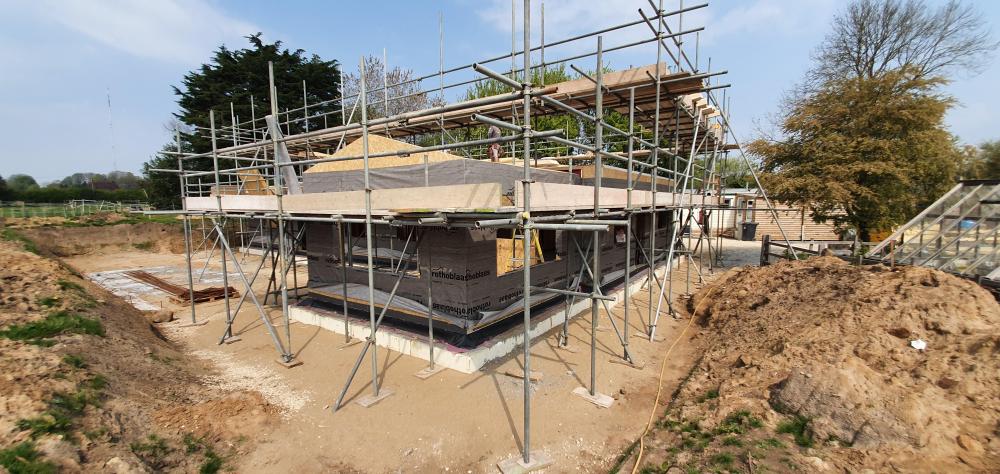
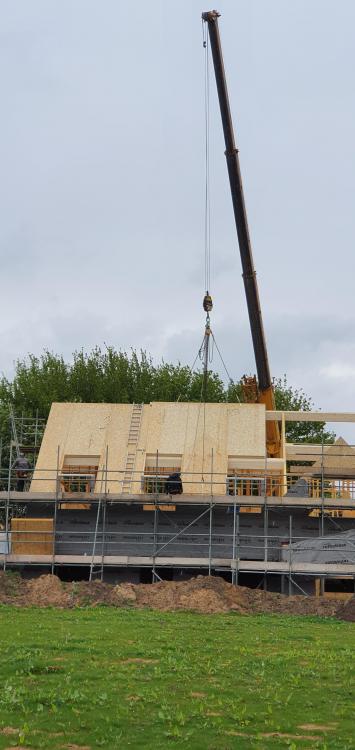
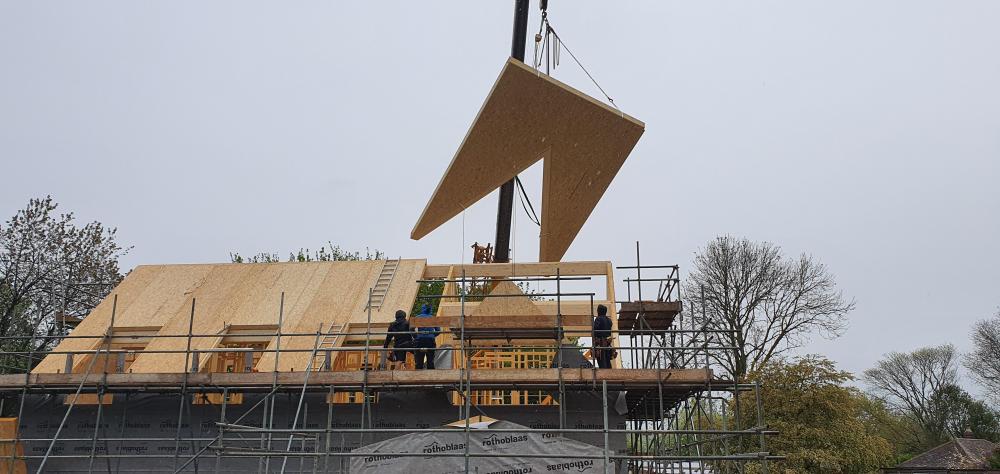
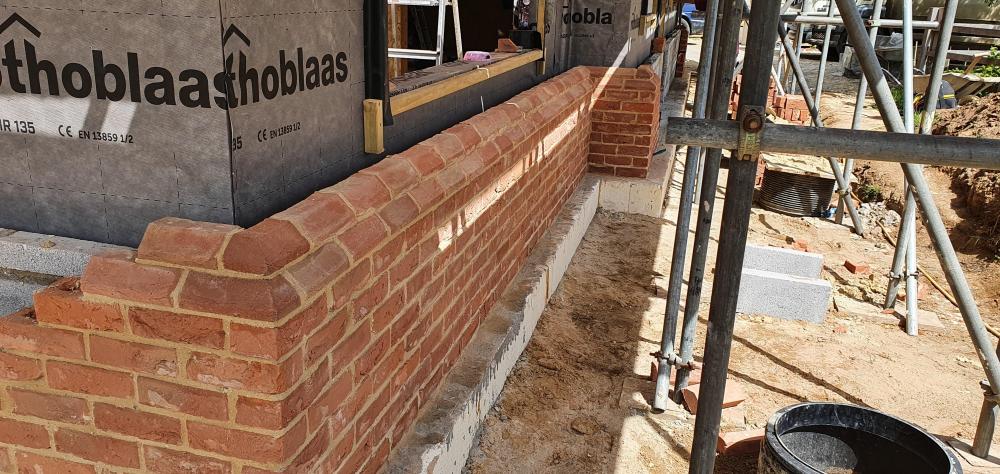
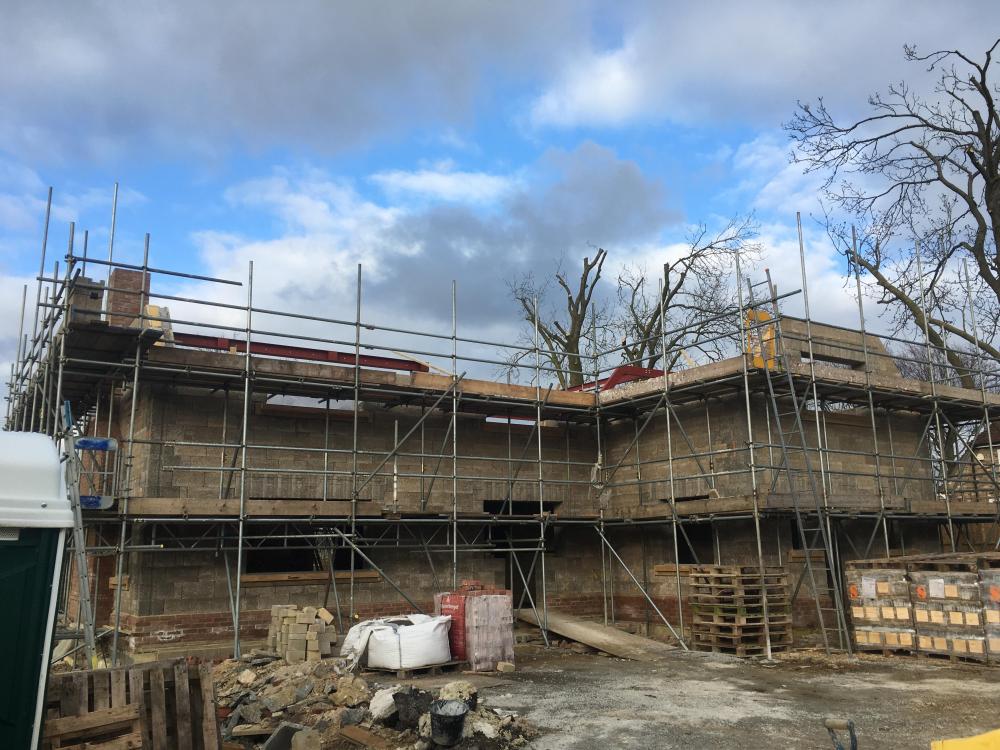
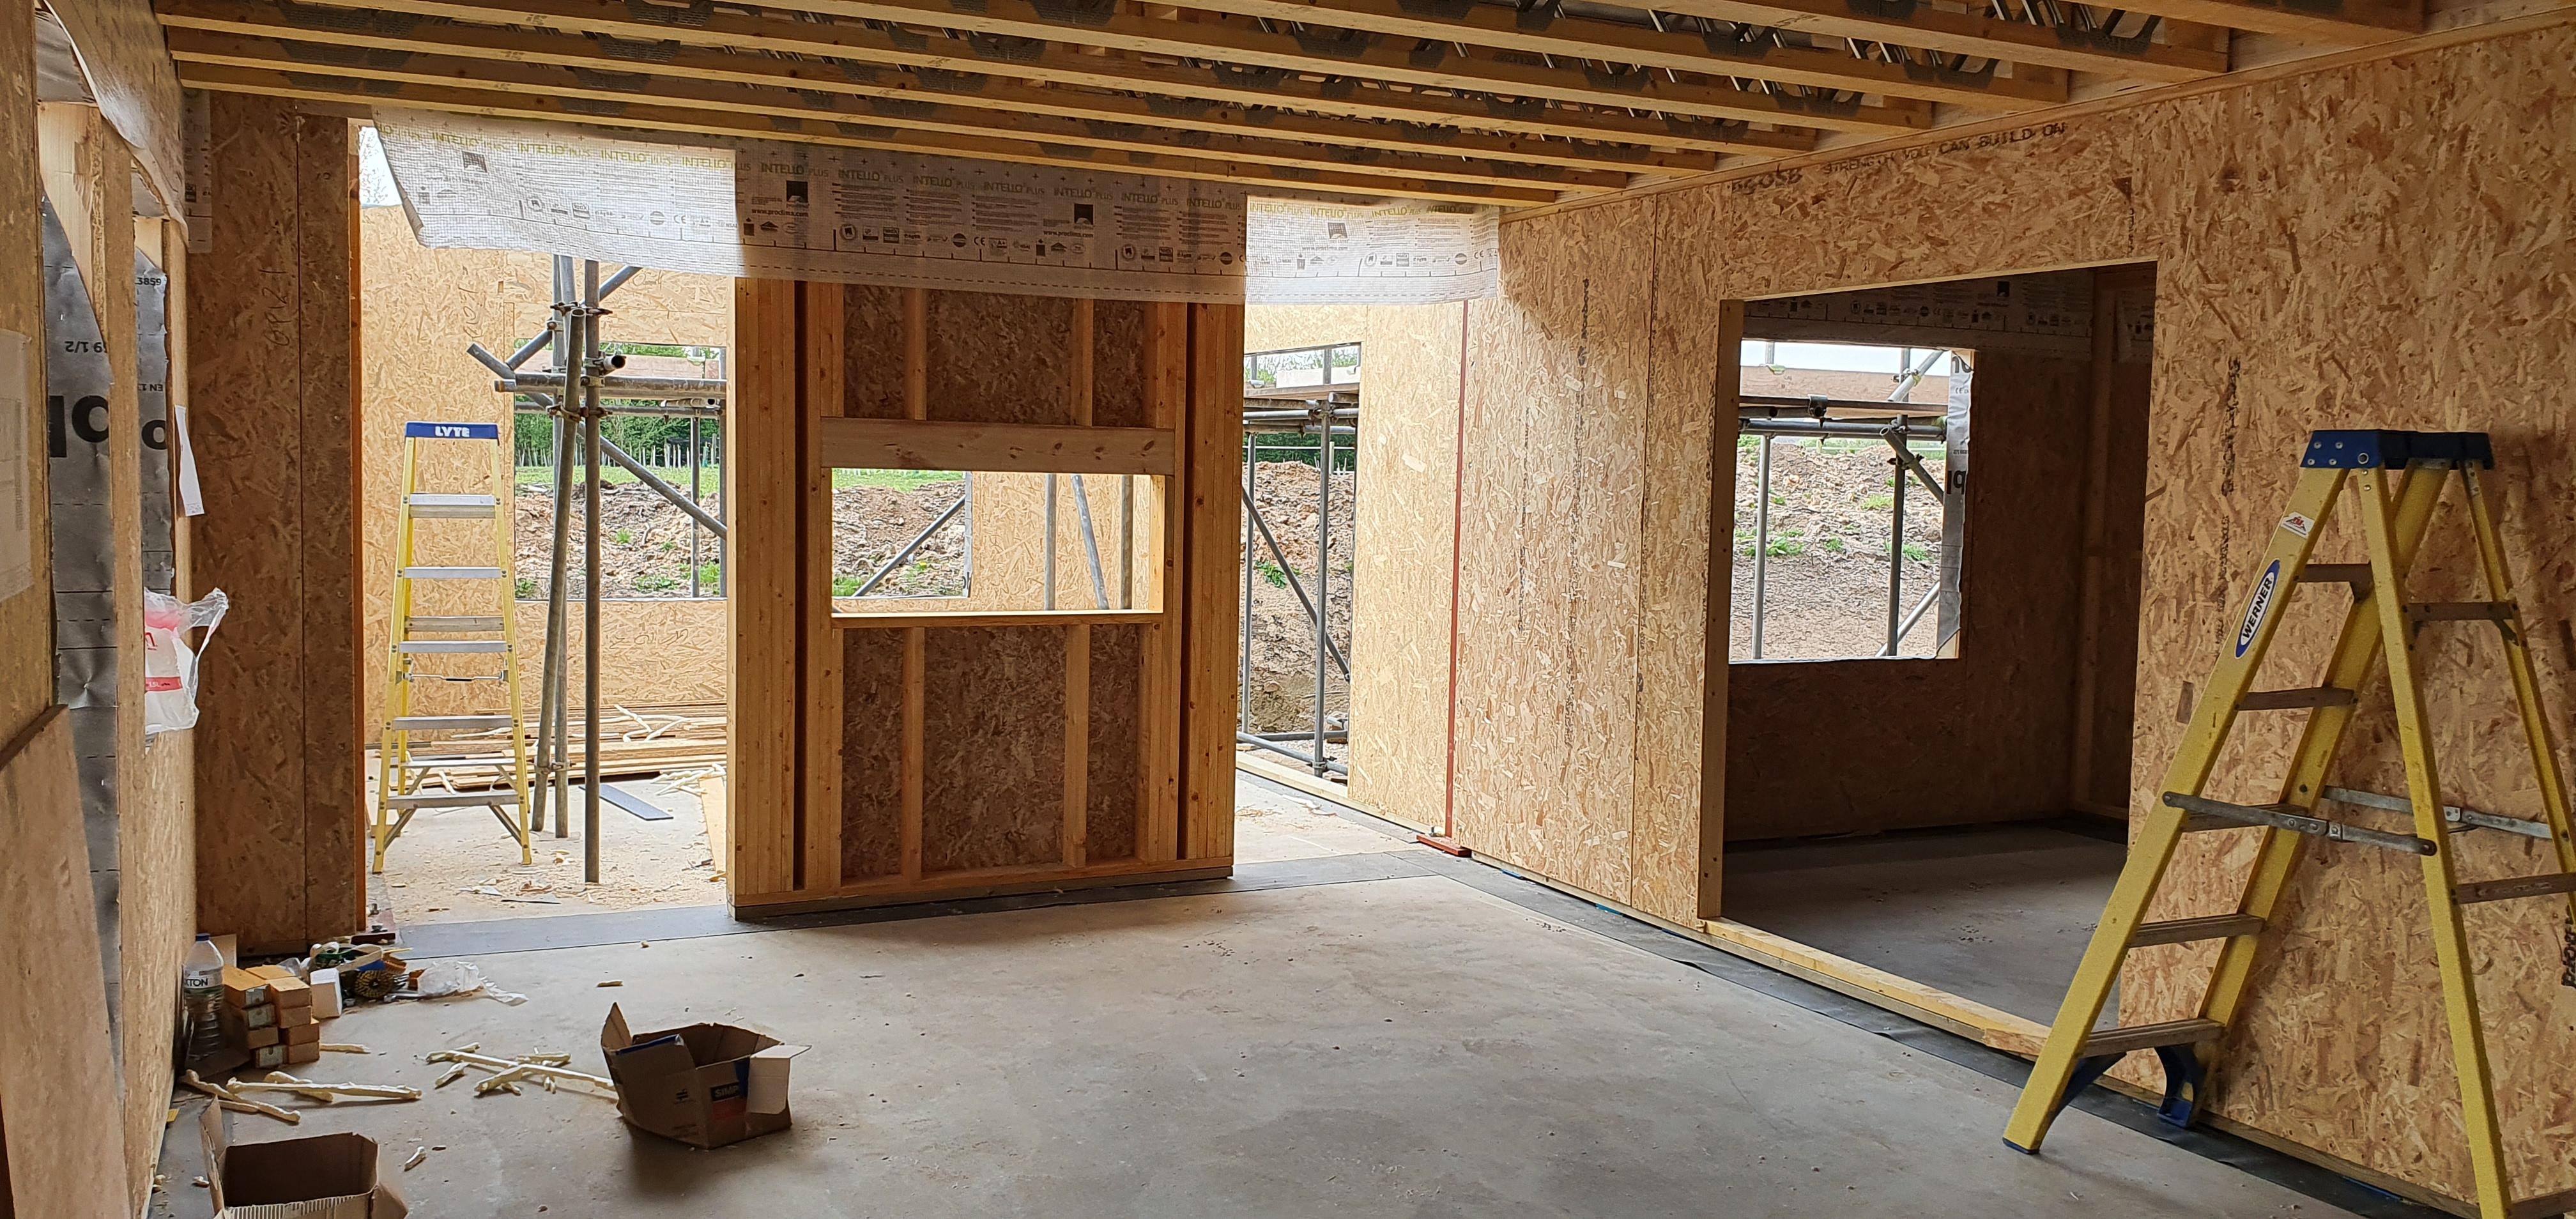
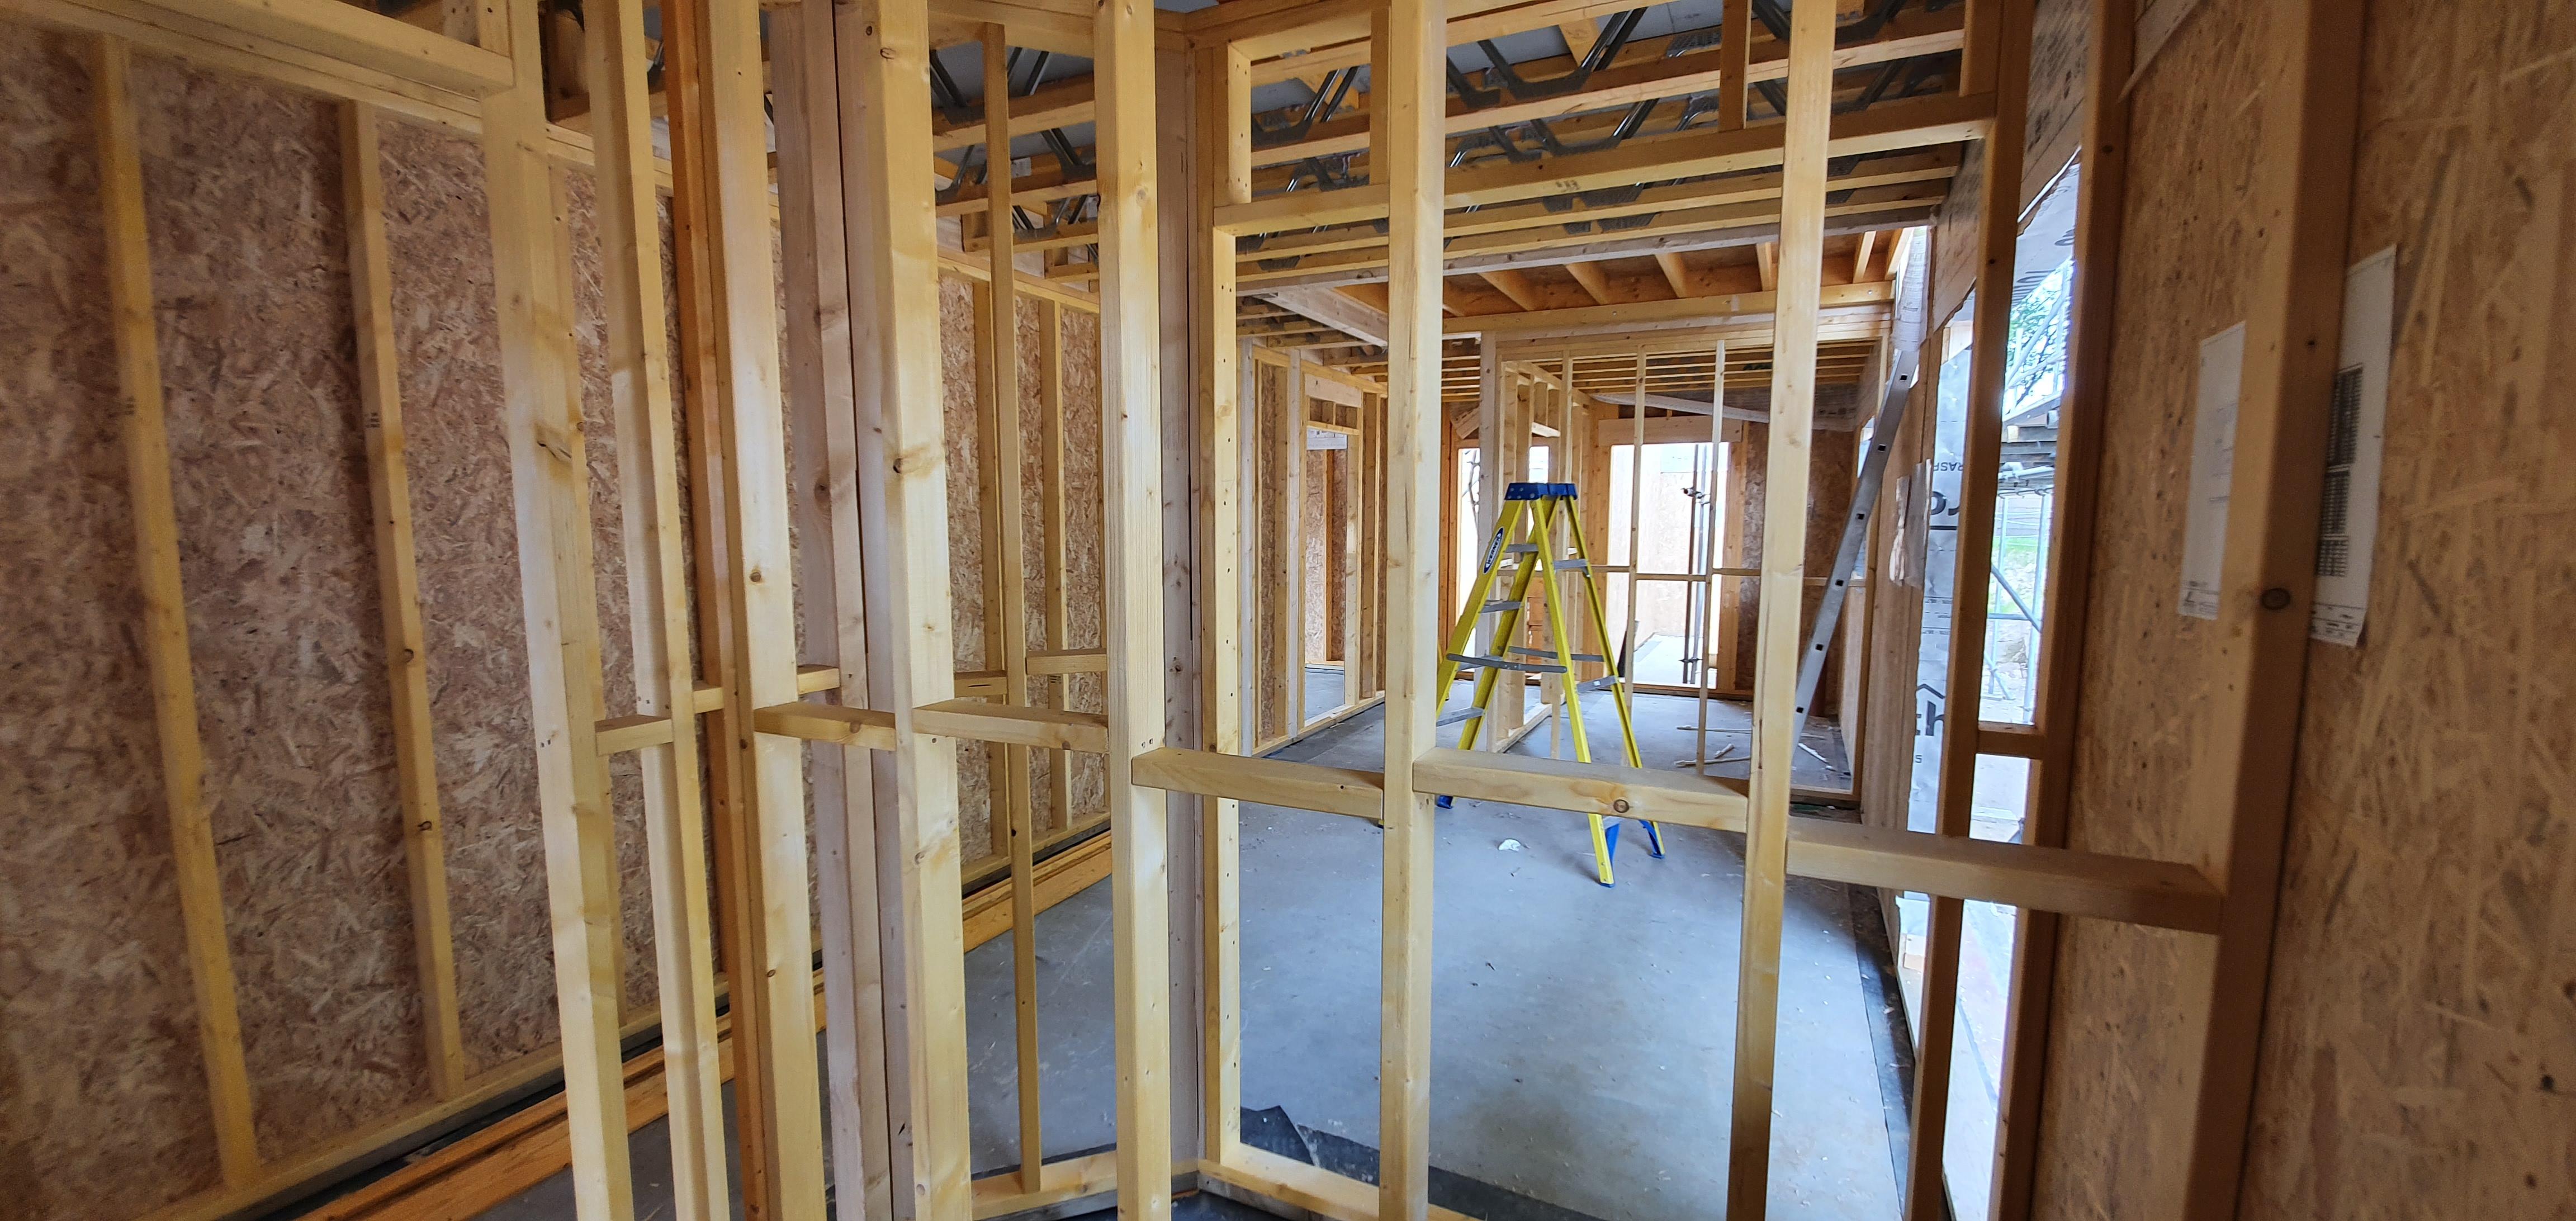
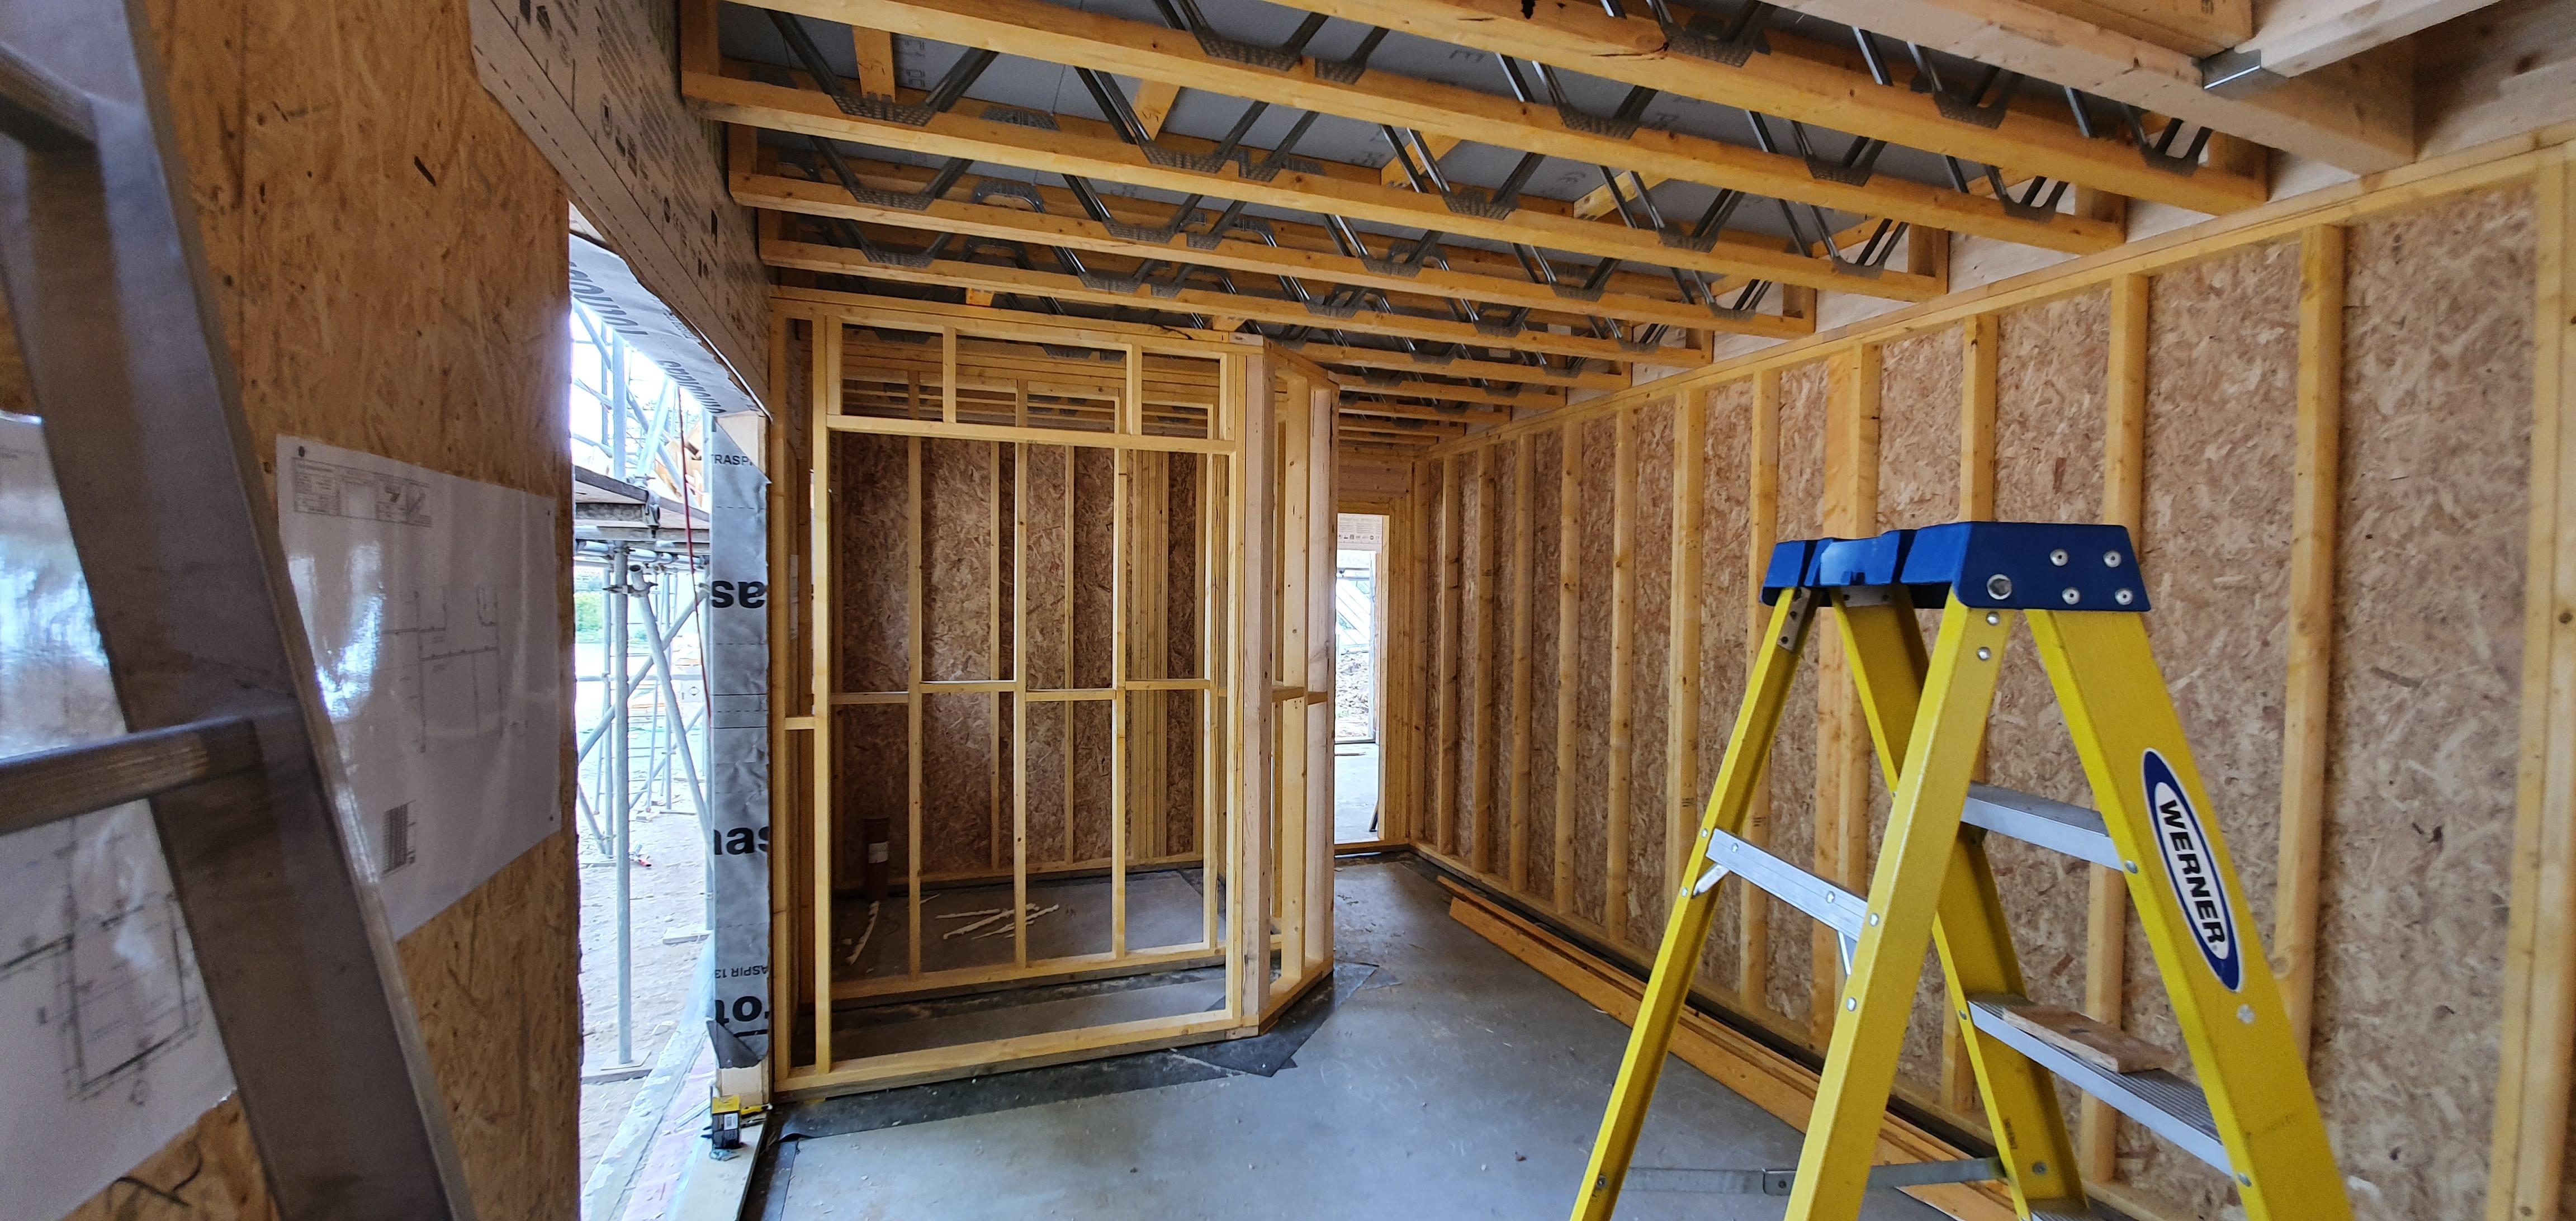
Finished shell:
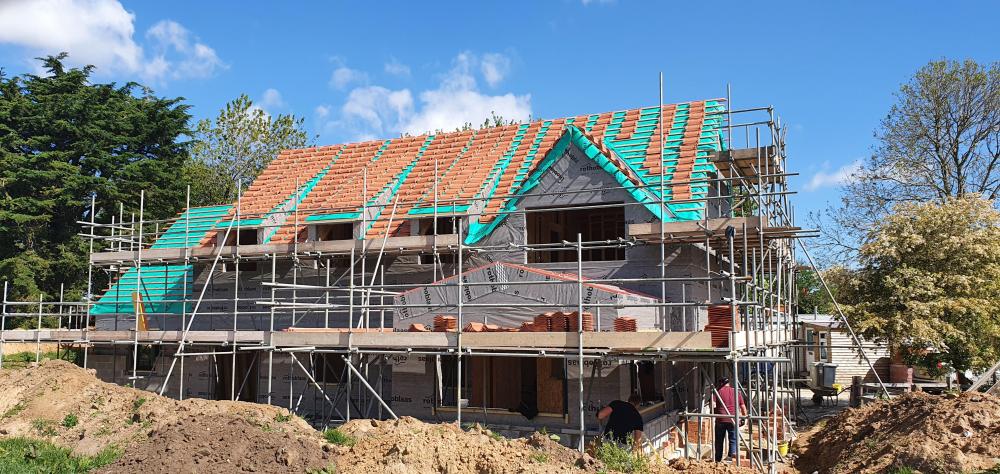
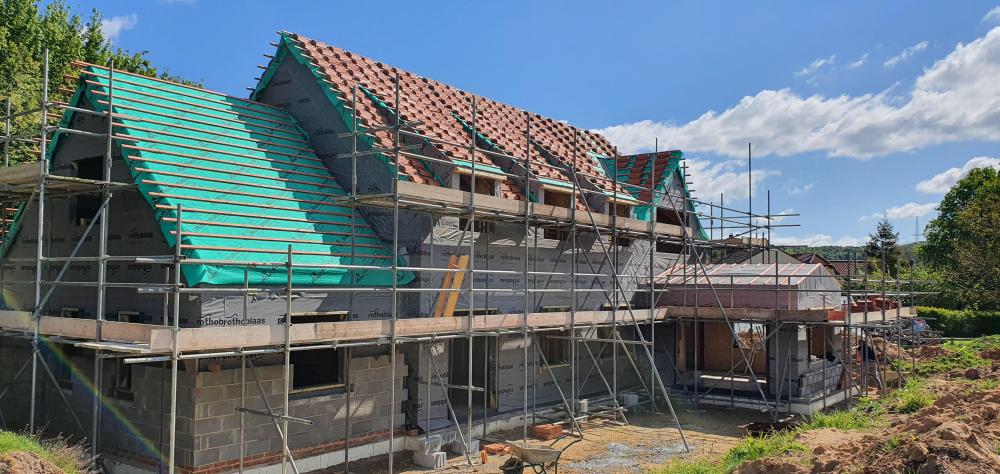
 3 points
 -
Ah. Let's call it a Party wall then! In that case, I think all you can do is politely insist that it's all done properly (planning app, party wall surveyor etc) and hope the cost puts him off!3 points
-
ME. Every time. Never had a problem or complaint. Nobody questions cutting in light or socket holes before plastering, why not cut light holes?2 points
-
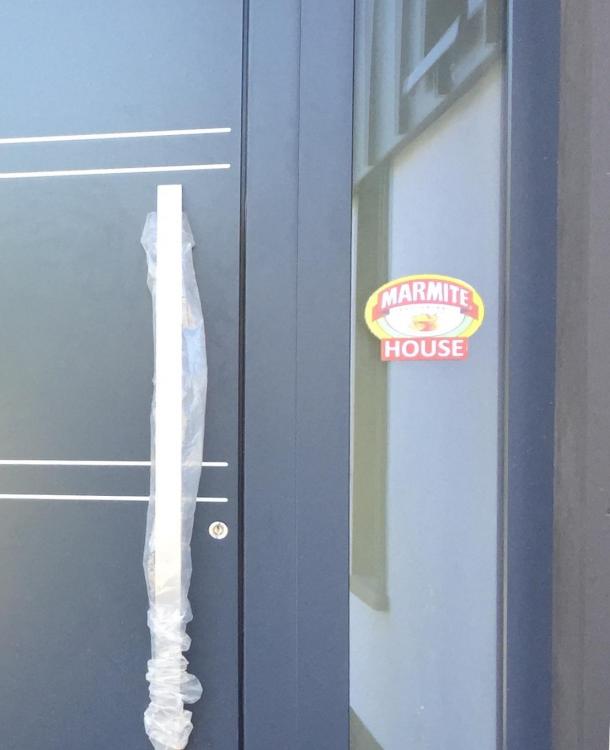
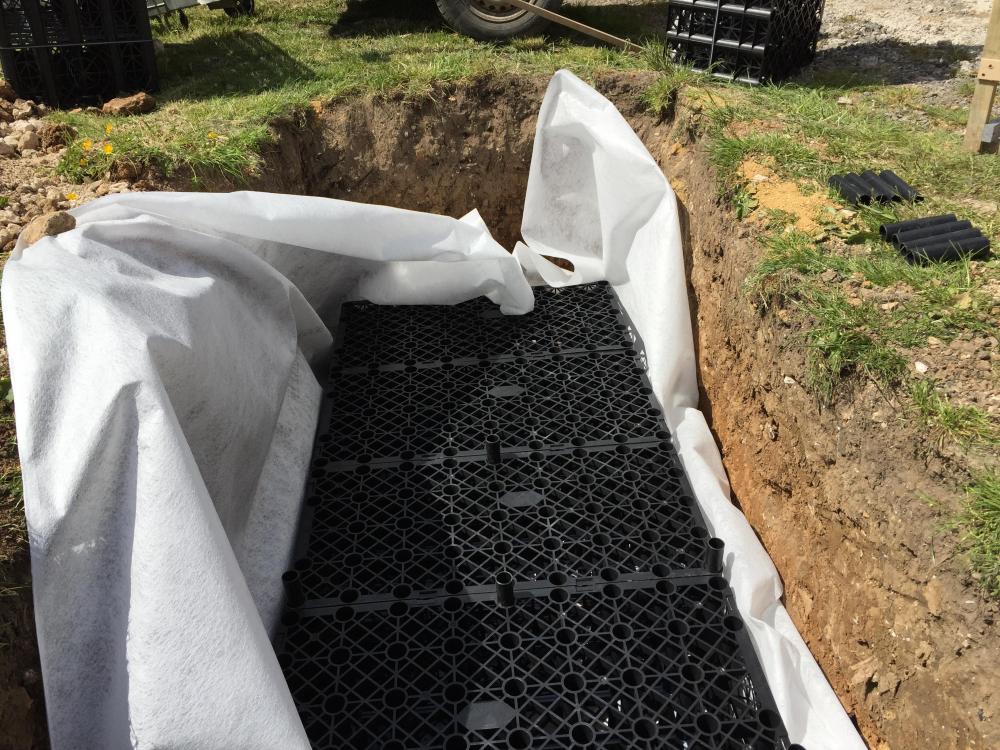
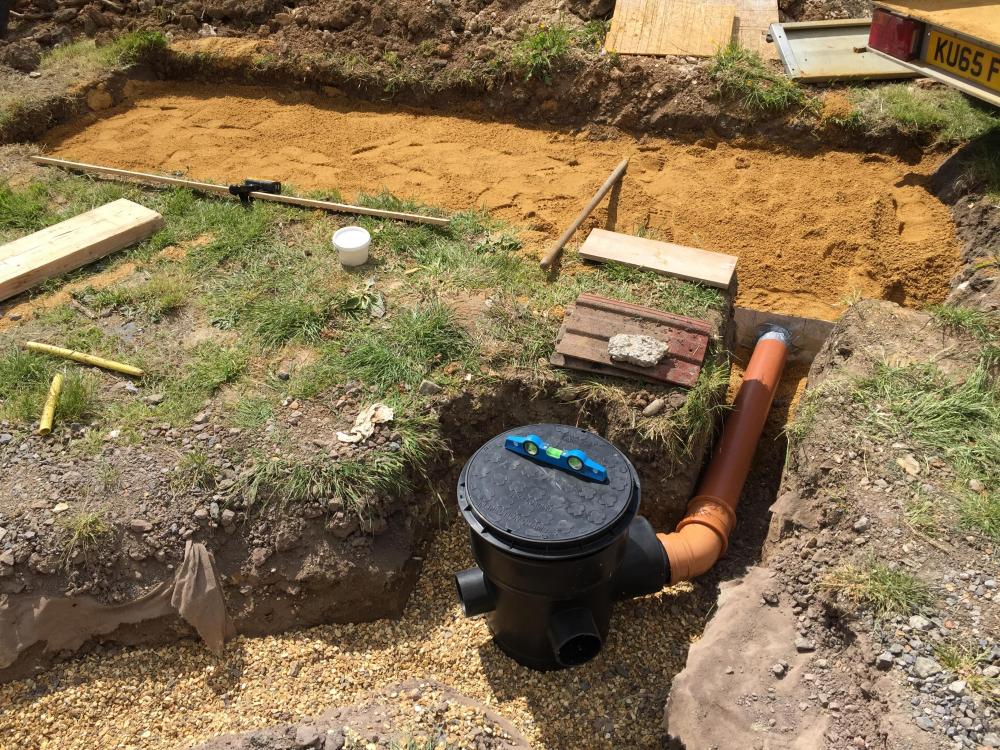
So I dug a big hole (well, my grave digger mate did) and dropped in 14 crates which equated to 2.8m3. The invert level into these crates is about 150mm below the top of the crates, maybe a bit more, so that removes .5 - .75m3 of storage so I've effectively got around 2.2m3 of soakaway. The BCO just wanted to see photos but at the last minute changed his mind and wanted to see the crates in situ. I was mildly concerned that he was going to change his mind and say it needed to be bigger so awaited his visit with a bit of apprehension. He turned up yesterday. He liked the cladding on our house and took some photos. He liked the (maybe) temporary name I'd given to our slightly contentious house and took a photo. He had quick look in the hole, took a photo of the membrane wrapped soakaway crates and drove off. Perfect.

 2 points
 -
Do you ever think you must have been a really horrible bloke in a former life. I seem to have had about 3 months of everything I own either not starting, leaking or generally just falling to pieces some days I just want to smash it all up and buy a little flat in Spain and sit in a bar waiting to die. Sorry cannot help with pump, but I feel your pain.2 points
-
Hi, taking the opportunity of the enforced slow down to catch up on paperwork and research. We are building a 5 bed house near Cambridge with Durisol. Will try to add updates as we progress further. Edward Fletcher MCIOB
 1 point
 -
So finally managed to update the blog. Seems like nothing happened , but a bit of progress still. Now just have to get this monstrosity past Building Control . Challenging task but I will manage. As always. I can tell I will not become a Groundworker in this life . Or the next. http://tintabernacle.blogspot.com/2020/05/rc-beam-or-ringbeam-preparation.html Here are some entertaining pics from this : Above ground shuttering takes a bit of timber Give over - it s gonna be inside a pile of concrete anyways ? Let s just assume this will hold.1 point
-
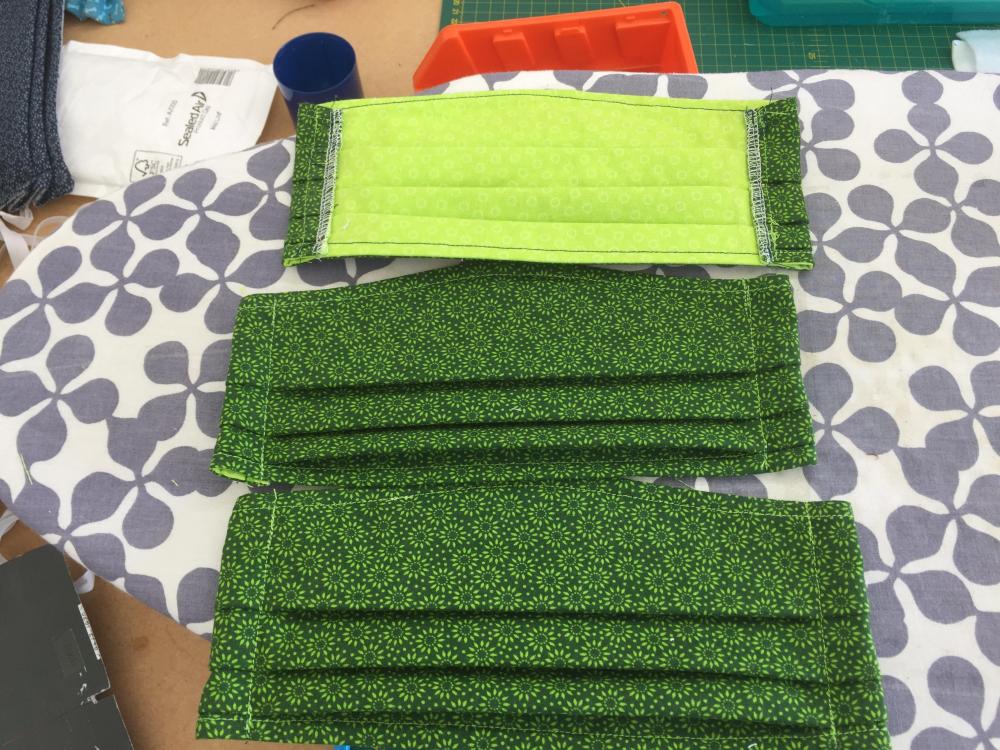
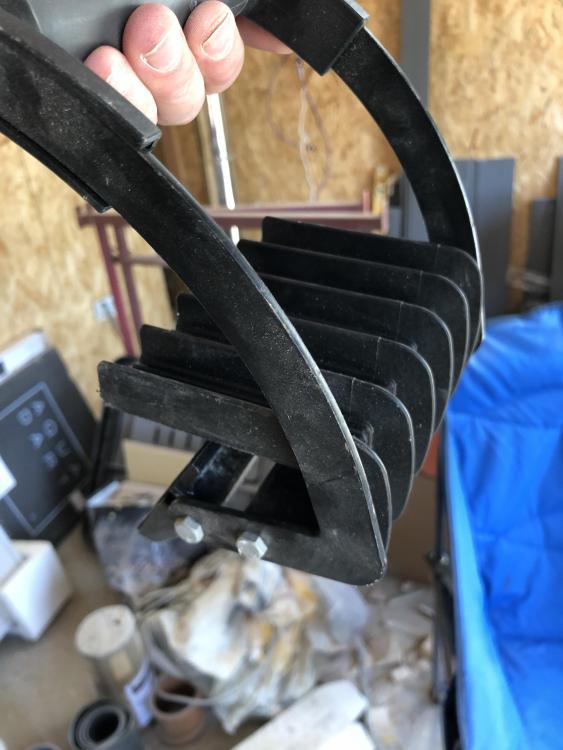
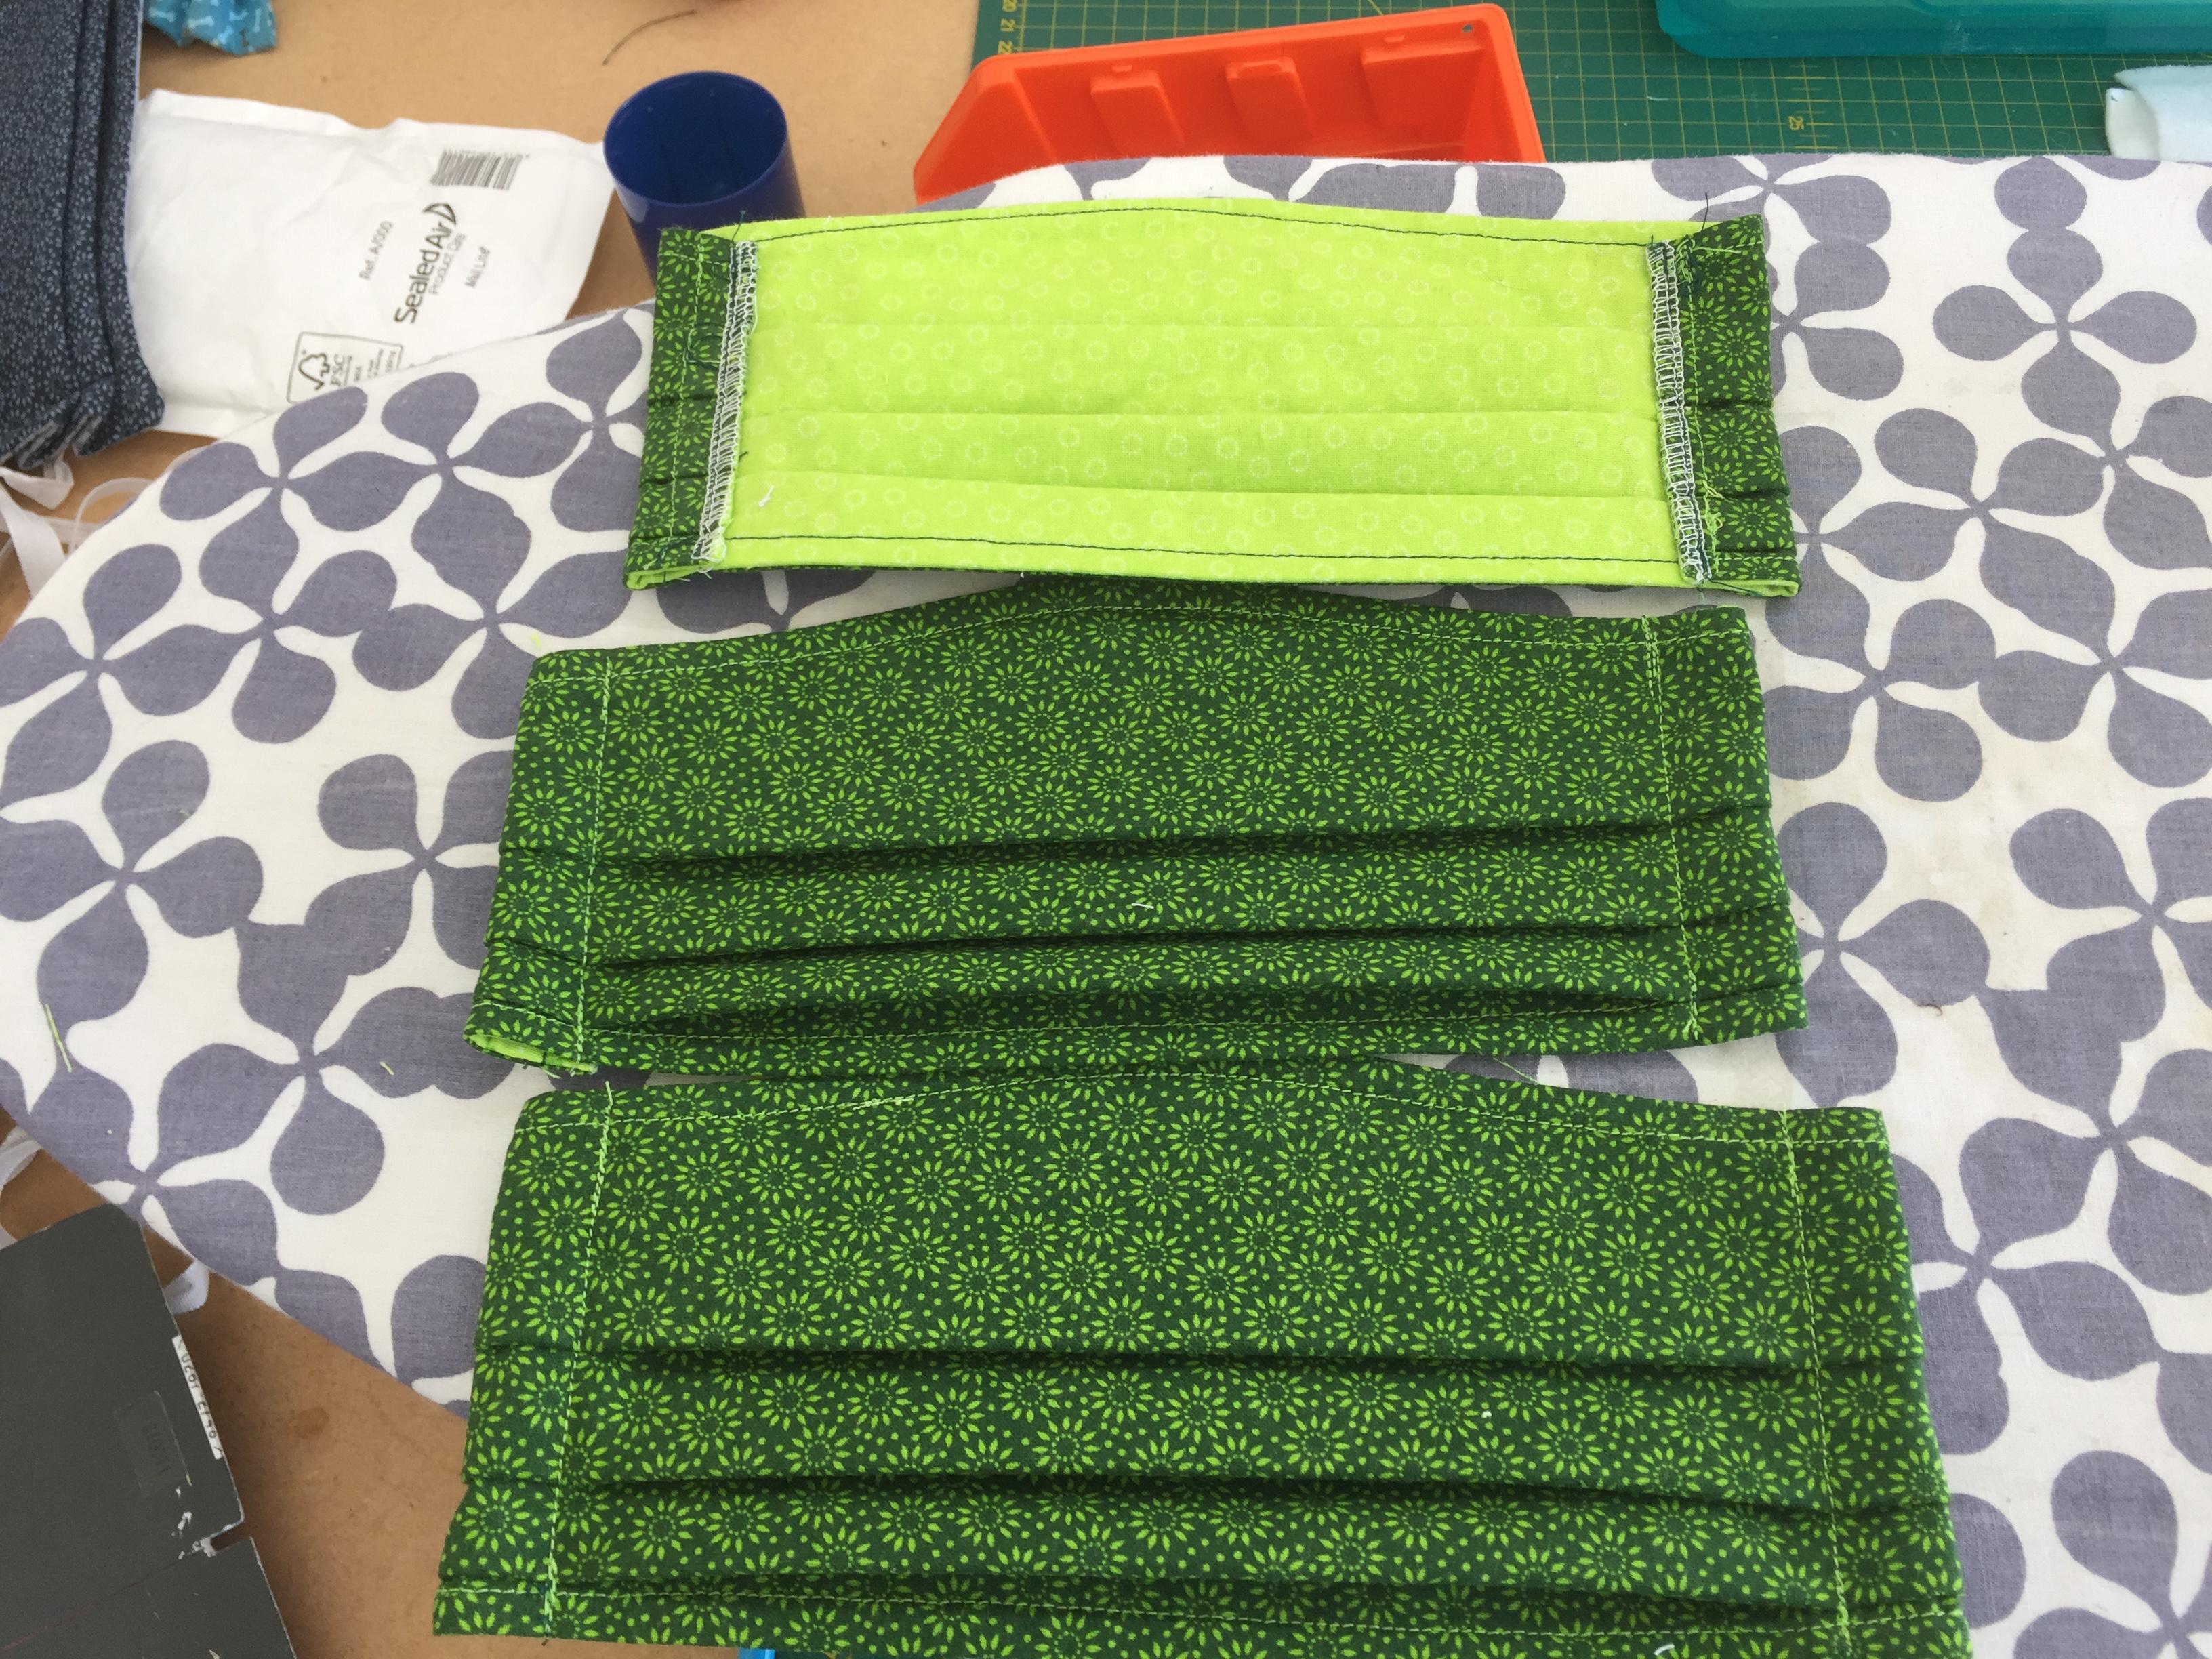
I have friends who have requested that I make some for them. That is what I am doing tomorrow. I made these three this afternoon as a test run. Nose wire in place (you need that if you wear glasses or you will steam up within seconds). A filter pocket, three layers of cotton and removable elastic. I figure we will have to wear these things for many months so a lasting version that can survive many washes is better (hence the ability to replace the elastic).
 1 point
 -
Yes it’s a bit of a sham really No certificate needed or inspection I didn’t use the company that did the original I used an online company I could have told them anything Asked the make and type of boiler U values for windows and doors I simply sent them the original quote showing each window u value I fitted all windows and doors myself I could have sent in any quote The water usage was done by them all the final Sap £105 24 hours after sending in the forms While I was truthful and scored 89 High B Without MVRH Solar panels where a planning condition We decided payback wasn’t worth it so didn’t bother If I had told them we had installed PV It would have put me in lower A1 point
-
Some git will always point them out! On a serious note we cut all the ceiling holes first and managed OK as first time plasterers.1 point
-
Relative to 70°C outputs at 30°C/13.5%, 40°C/32.1%, 50°C/53.0%, 60°C/75.8% for rooms at 20°C and 'ordinary' radiators1 point
-
"Not us, Guv - see BCO"1 point
-
I used one fir the first time a few months ago to double board a fairly high ceiling and it was great, I wish I had bought one years ago, no point In struggling, I sold it fir what I paid fir it as well.1 point
-
I also have an intrest in this question, I have a room that is just under 2.4m wide so if I put the boards with the joist, is there any point in staggering the boards as it would create unsupported joints. Also if you board the ceiling first, then the walls, do you need perimeter noggins as the ceiling boards will rest on the wall boards?1 point
-
I used Sennocke Insurance and got an unoccupied buildings policy.1 point
-
I'm sure that we can help with that, if you share details of your neighbour's proposal & the structure of the wall. BTW, if it's a new extension, I presume that it's the original house that's moving, not your extension?1 point
-
I’ve a couple Collecting dust They do work But can tip Im not sure if HSE would allow them on site1 point
-
Ps ceilings also1 point
-
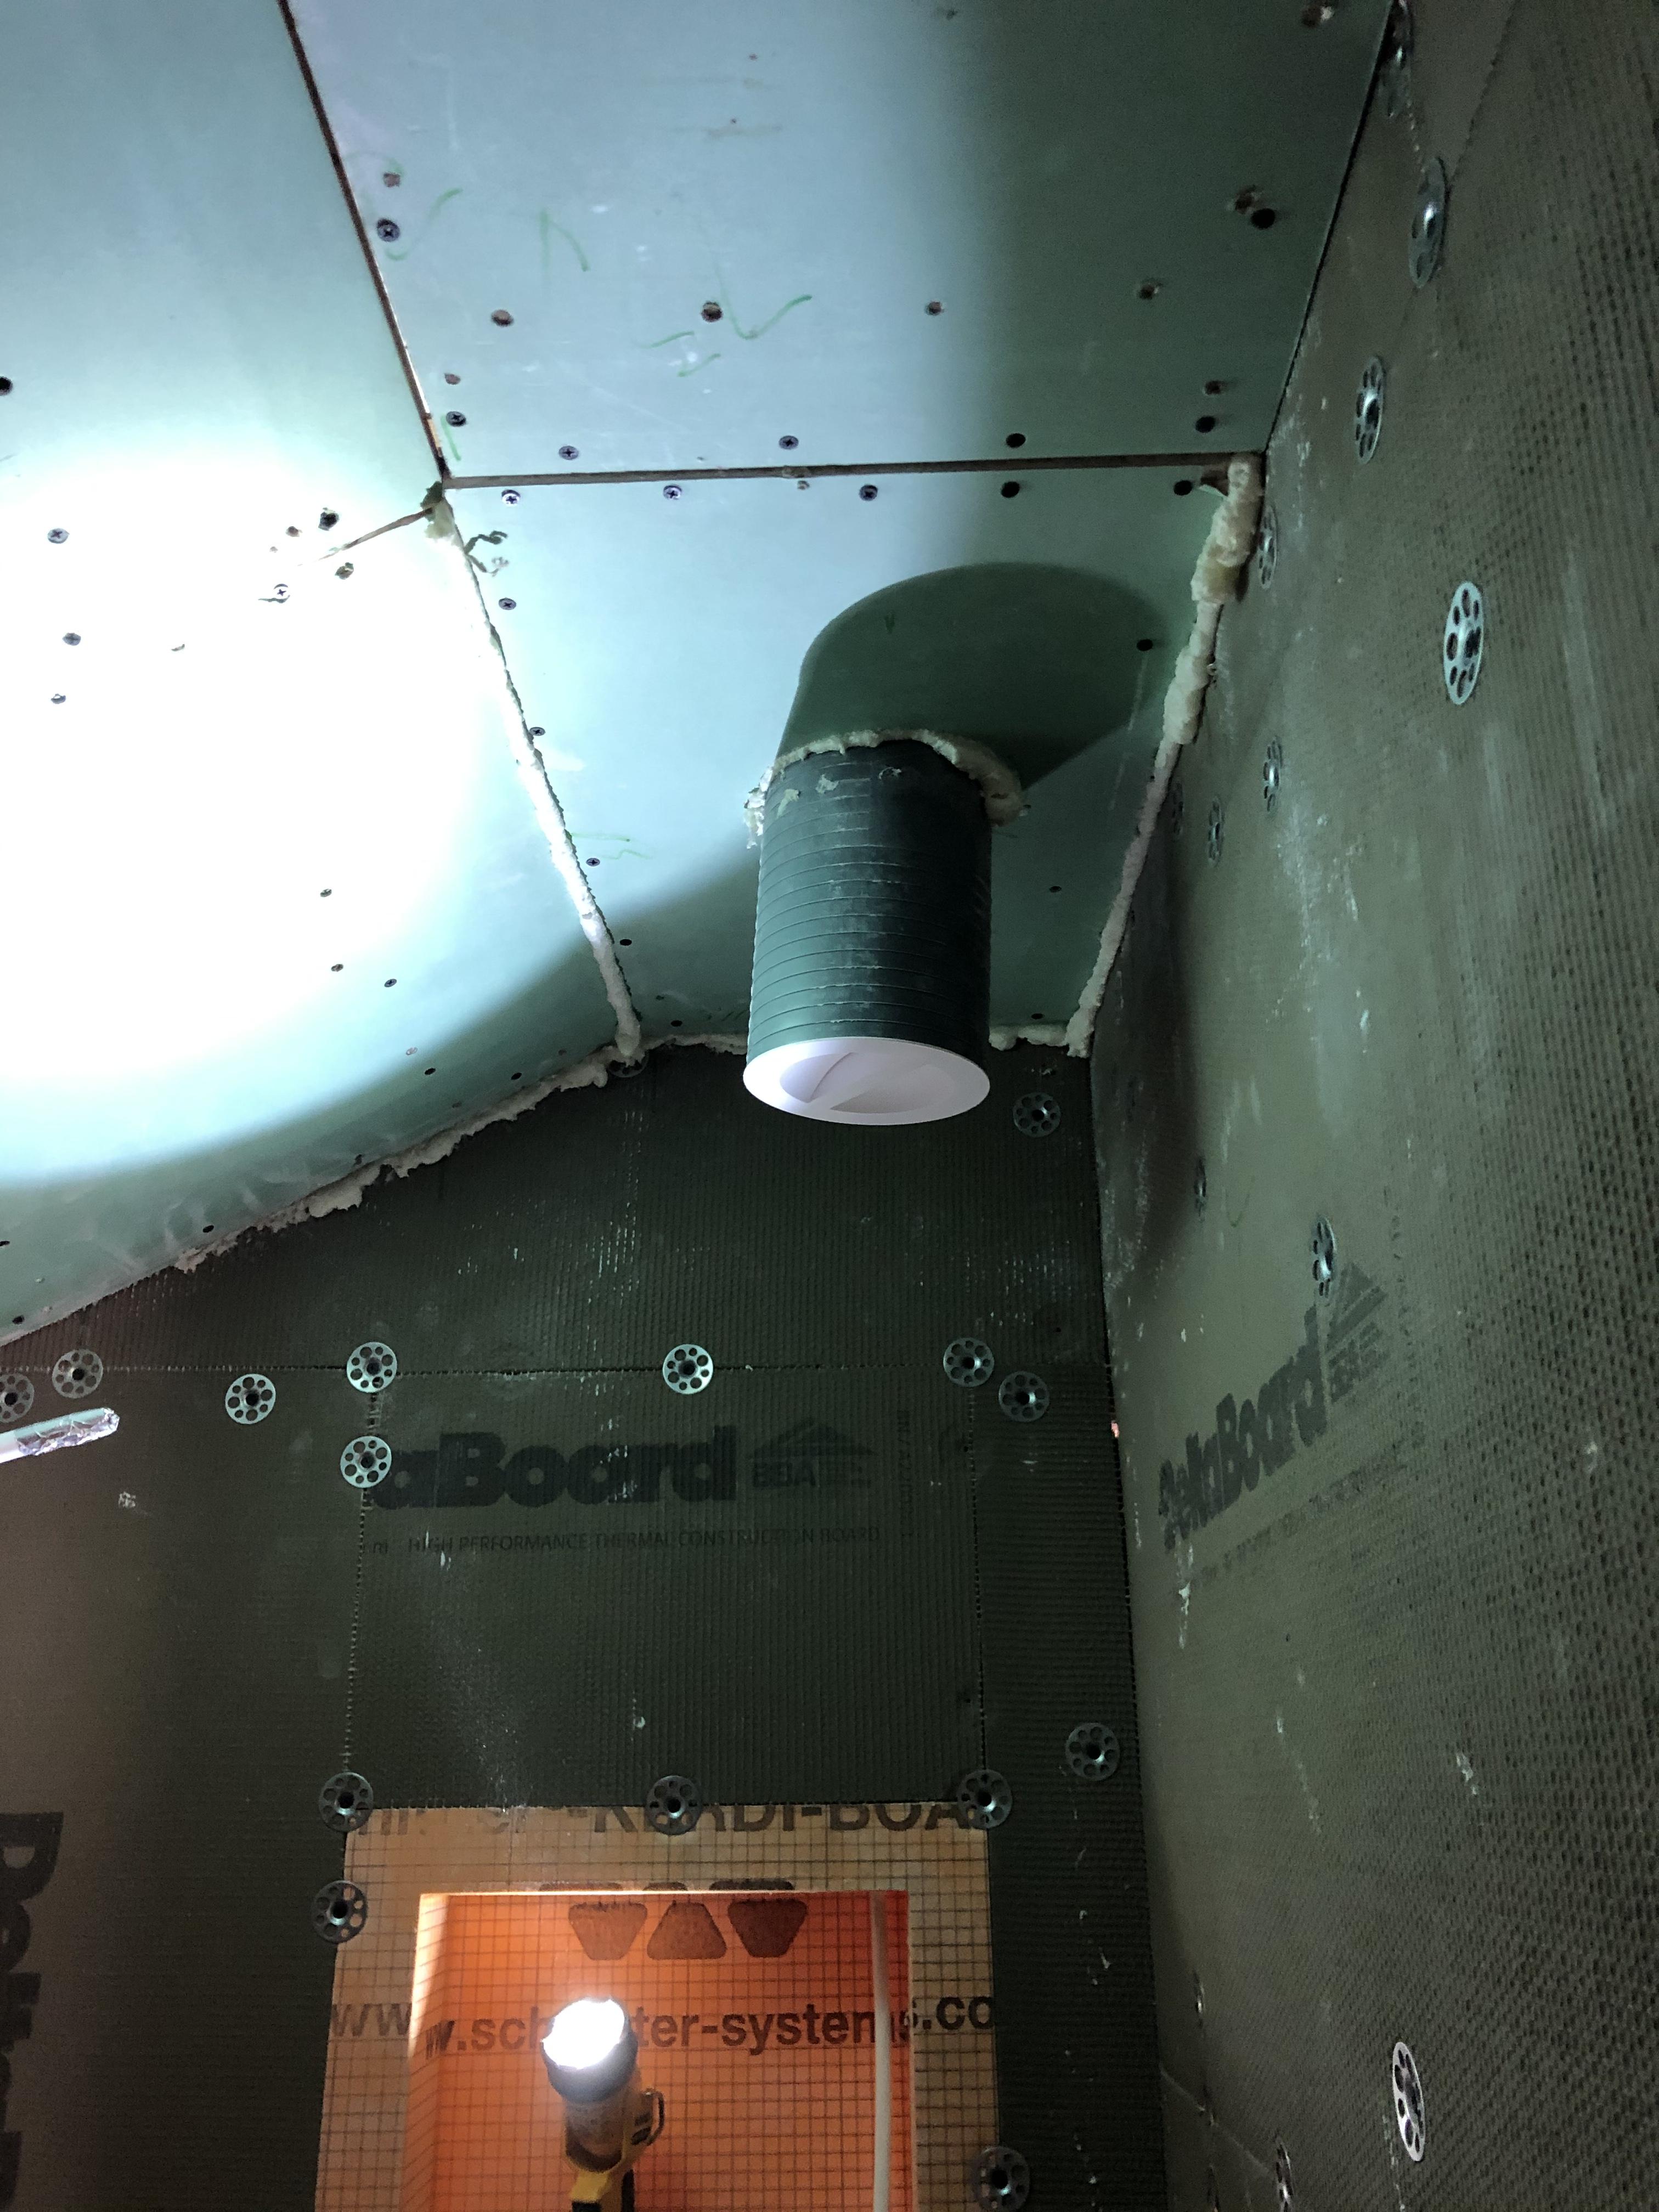
Yes you should use moister resistant boards in all bathrooms regardless of weather they are being tiled or painted1 point
-
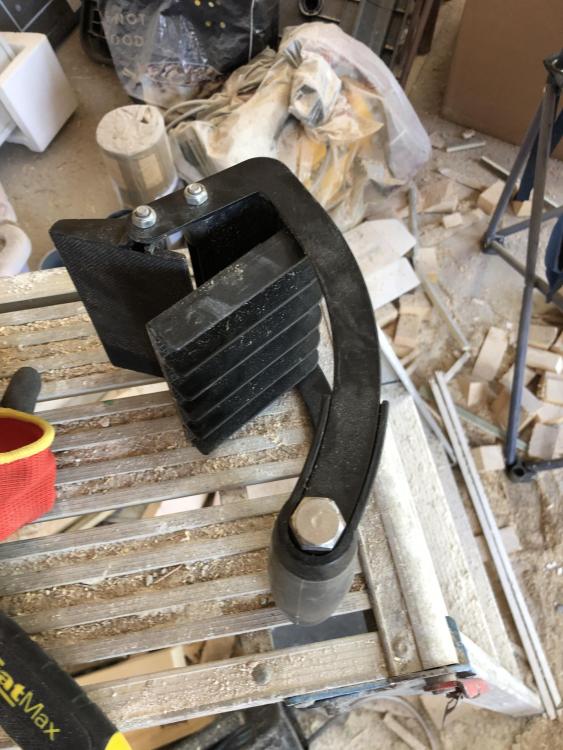
Not needed this until now . 10 sheets of moisture resistant arrived today . The driver had to hold the van door open so I could unload ( lazy git ) Anyway , they are pretty heavy and I now have to carry them in . Remembered a random eBay purchase of a carry handle for this type of thing . Works really well ! Recommended !!
 1 point
 -
One more bad work from you and I will send round some highly trained cats to crap in your garden.1 point
-
Welcome. Suggest you start with a couple of blogs. Try this one, which came in well and relatively cheaply (for a self-build - 200k buidl cost I think). Though think @simplepimple just just done a build that is both smaller and less costly.1 point
-
I have scaled from the picture and it is now very slightly too far to the right. P.S. I see you have foamed the joints. My plasterer told me off for filling the joints, he said leave them and he will fill them with plaster while setting out.1 point
-
My annual Protek insurance is not much more than your 3 month extension and I have previously noted their 12 month policy rate is better value per month. Are there any optional extras you can remove from the cover like hire plant, legal cover and personal tools? I recall a previous thread on this subject where someone said they managed to get conventional householder cover pre completion, this was through a specialist insurance broker.1 point
-
A few weeks back I tried to move onto normal insurance. it took over a week of questions back and forth to the broker about what work was still to be done on the house, and when the quote came in, it was £100 more than renewing the self build insurance. I have concluded I am not going to get a sensible normal insurance quote until I have a completion certificate. All that needs doing to mine is the sun room needs finishing (does not even have windows yet) and some internal joinery. There is no heavy machinery work needed, but that did not stop the insurers being ultra cautious. and your self build insurance will have employers liability insurance for trades you employ.1 point
-
? When all's said and done you know it's all in jest and happily take it on the chin.1 point
-
I once put grey aluminium half round on a development. It ended up looking similar to plastic but was 10 times the price.
 1 point
 -
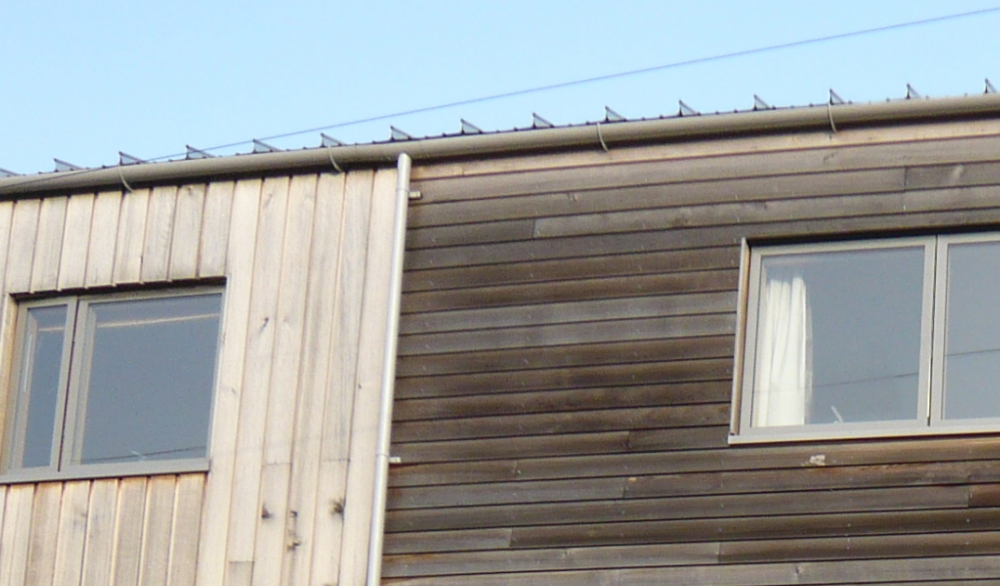
I installed plastic (fake cast iron) and it looks great, plastic is only noisy/creaky if Installed as supplied! It only creaks if the guttering is tight in the brackets, heats up in sunshine and scrapes through the brackets. Using a sharp knife or spoke shave take a little off the guttering where it fits in the brackets so it slides without jarring and it will be perfectly silent, I know, mine is. People have commented that “your cast iron guttering must have been expensive “ ? https://www.fasciaexpert.co.uk/gutters-and-downpipes/cast-iron-gutters-and-downpipes?gclid=Cj0KCQjw2PP1BRCiARIsAEqv-pSUTE7P__bYtmp6uEtUJSmPVDKzvmMLHTFjmwkCMKWkZUsEh_RROxQaAvdLEALw_wcB1 point
-
A 15mm (ish) plastic pipe for the wire, filled post hoc with airtightness foam. (Daughter works for Open Reach)1 point
-
Let's hope this company might be able to help And as far as @Russell griffiths is concerned, he already is a horrible bloke but his teeth haven't fallen out yet. Mine have. That's at least two BH members who feel your pain. I'm going to start a Self Build Samaritans group. Who wants to join?1 point
-
These guys are very good IMO https://miniexcavatorcentre.com/1 point
-
As an interim measure you could try that "old banger of a car" trick of running with the radiator cap loose so it does not pressurise. At least it would slow the rate of coolant loss for now.1 point
-
Just realised I have no pictures of the finished frame so I will take some tomorrow. The roof has now been felt/latted and loaded out. The brickwork is well on it's way too.1 point
-
if you have a high water table then water will be seeping in and running down to the sewer continually.1 point
-
Yup, beginning the day on site it always a challenge. Then I get angry, start fixing something and am on a roll of just fixing more stuff until the day is over. @Mr Punter Yup, you can see in the top of the 2nd last picture how it was drilled into the studwork and 18mm ply on both sides. Skirting was going to be plain white MDF glued on, but we've been so impressed by these guys that we've asked them to quote for doing all of it in the same wood. Unconventional, but I am finally having fun playing around with the finishes! @wozza I should have said it'll be a clear varnish. Final image shows the result vs the others that haven't got it on yet.1 point
-
Protek asked for the specification of the piles and a schedule of piling. I supplied the piling plan which showed the number and location of the piles and ground beam along with the details of the piles we used (150mm tubular steel driven to set for 150kN). They also asked for details of any party wall agreements required which didn't apply in our case. Once the piling was complete they wanted to see the piling log. Just to clarify my comments above, we did have a soil investigation carried out which involved 4 trial pits down to about 2.5m. I am assuming this is what you've already had done for the soil analysis. In our case it was very clear from these that piling would be necessary. If we were borderline and a further investigation could possibly remove the need for piling I would have carried it out. Moreover if the SE or piling company would have said further investigation were necessary I would have had it done. I think it's also worth mentioning that we had a selection of piling quotes, all of which quoted a price to a certain depth and then an additional cost per meter per pile thereafter. All of them made it clear there was no discount if the piles didn't go as deep as their initial depth. With the quotes we gathered the one who quoted the smallest initial depth was also best value at deeper depths but I imagine there may be situations where one company is cheaper at shallower depths and another cheaper at deeper depths and in this case it may be worth having more investigation up front to determine which route would be best value. Finally there's no guarantee that the piles will go to the same depth across the whole site and there can be large variations. I'm not sure how may boreholes a typically geotechnical survey carries out but even with this data there's still a chance the actual piles will need to go deeper (or less deep) in parts of the site as the conditions vary.1 point
-
@Adrian Walker No, Not Screwpiles. Im not a millionaire. Cheap standard driven piles aka ram a piece of metal tube into the floor with a giant overpriced hammer. ?1 point
-
I did look into hiring the piling rig and doing my own piles, but thought this was one step too far even for me who does absolutely everything myself. After now having had it done if my budget was very tight I would consider doing it my self. However you need to consider the cock up factor, you will need the rig for longer than the piling team as it will take you a while to get up to speed, on my job the rig broke a cable and had to have a new one re threaded on. Down time of half a day. My piling came in at £10500 including the design of the piles, the design of the ringbeam, and the bar schedule. If you have to have a separate engineer this could be a few quid, then you hire the rig, then you have the steel tubes, then you need to take two weeks of you time into consideration. Are you having a building warrent. Having spoken ken about your site, why do you need piles what about an insulated slab.1 point
-
Terry is my booking agent, gets a 10% fee Happy to help - I posted a lot on ebuild on our basement and I think some of the content made it over here. We also started down the Glatthar path and while they are a fine company with a high quality product (friends have used them), they are pricey. Here's our story: 1) we got a SE to design the basement - design was simple, an open box that followed the upper wall footprint with some lateral steels to support a suspended floor and point loads. We already had the MBC frame design in hand at this point so that was their point of reference. After construction, we framed out the interior in timber to give us some future flexibility in layout. 2) SE needed a ground investigation report and drew up the spec for that, we both shopped around for a few quotes before choosing a reputable firm. Unfortunately they had poor supervision on site and the subsequent report was a bit of a mess, needed to be re-done to collect more data (which I had to pay for, albeit at a discounted rate). But we finally got what we needed and the engineer did the necessary calcs and drawings which I took to building control and shopped round local groundworks contractors - NOT basement specialists. EPS under the slab is chosen based on the loading per m2 in N - EPS 200 grade met our requirements. The side insulation does not have any vertical load on it so we used EPS 70. Thickness is up to you, makes no structural difference purely thermal. We chose 300mm for the slab and 200mm for the walls. 3) waterproofing strategy depends on the conditions. We did not hit water until 4m so well below the slab. Our ground is clay, gravel and chalk so free draining under the basement. Engineer specced a land drain around the slab to soakaway and 1m of stone backfill. We were happy to just use warrantied waterproof concrete (Sika) - the internal membranes are expensive, especially when pumps etc are required and I was wary of the external membranes (how do you every prove they are the cause of a leak?). 4) Engineer was very conservative on the size of the excavation required but we spoke to a few ground workers and they said that 1m working room with a small 45degree batter at the top was standard - this is important as party wall law for basement is concerned with where the excavation starts not where the wall starts. Was pretty easy to conclude that we would be ok based on the 45 degree rule so I took it no further and the neighbours never raised it. Up to this point, it's hard to be definite on costs as you may have some scary ground conditions that need piling or other specialist work - so you take the risk that you may get this far and need to walk away if you can't afford the cost. 5) we shortlisted two contractors, both are essentially muck movers and sub to specialist concrete teams. Neither had a clue on the EPS but were happy to prep and let me lay it or do it themselves at a day rate. Excavation and muck away was about 1/3 of cost - if you can loose spoil on site then you'll make a big saving. Concrete prices were broadly similar, complex structures will cost more as there is a lot of skilled joinery in making the formwork. We bought GRP lightwells from MEA in Germany - effectively the contractor leaves a window hole in the wall and the light well is fixed during back fill. Window goes in later with rest of building. Would have been quite expensive to get concrete lightwells cast in-situ. 6) We picked a contractor and got to work. I purchased the EPS via a buyer who got me the best deal, but you can get prices from SIG and other places. Laying it was not complicated - ground worker compacted 150mm of type 1 and then laid 50mm sand, blocks were just laid on top, allowing for 200mm min extra all round. We didn't need to cut blocks at this stage. EPS was covered with a membrane, tucked down and taped and the gaps between the EPS and excavation were filled with type 1 to give the concrete team a level working space. 7) Slab was laid out in steel and poured and then the walls were cast. Regular inspections from Sika and a final sign off at the end. You need to give some thought on service penetrations for fouls and water, electricity etc - normally an oversized duct is cast in place and the eventual service will run inside with the gap sealed up. 8) I then applied the EPS 70 to the sides using LE foam to adhere and fill gaps. This was clad in corex to minimise damage during backfill. Used a small chainsaw to cut it - messy but quick. Land drain installed and then backfilled with stone as per spec. Half way through this I put the light wells on. Top was 200mm graded flat with muck ready for the scaffolders and frame erection. Was probably one of the most straight forward parts of the build, once all the SE work and GI frustration was resolved. Needless to say, we love our basement, great decision that gives us 50% extra floor space for about £1000/m2.1 point
-
I'm using half an old bra. Or a whole one doubled up. You may mock..... you wait, it'll be all the rage soon.⚕️0 points
-
I'd be using one, or paying someone. Don't sit on it and swivel, even if so advised ... you would be stuffed, or even stiffed.0 points
-
You’d be better off manning up a bit, if you really struggle I will get zoothorn to help you. ??0 points
-
I deserve a thanks off you for pointing it out before you had it skimmed...0 points
-
I considered getting one, but instead went with two deamen, a pair of gloves (size small) and a tenacious other half.0 points
-
Wish there was a ‘bastard’ emoji0 points
-
Sir Whingealot! Everybody else's fault but yours. Next you need to blame your builder/ neighbour / neighbour's cat and how everyone's ganging up on you. Edit: Sorry, thought the OP was a different person. Is it me or is that vent slightly off centre? (Grabs coat and runs).0 points
-
What !!! I was here at 8:30 ! Took 2 hours a right pain . Access was the issue ( the timber work bodge above it is rather Frankenstein’s monster ) Anyway you are not allowed to reply as your response wasn’t constructive. Do you get pleasure in your criticism? Why weren’t you more helpful and come round and do it for me ? Why do you pick on me and mention my ‘fuss’ ? . Why belittle me and not offer help ? Do you think you look big and clever now ? I only ask for help yet you mock me and make me change it . ???????????????0 points
-
Right ! I’m going to take a ‘z’ attitude ? Don’t bother replying unless you have something constructive to say or come round and actually do it for me . Don’t comment because you want a like or a thanks . Admins job is to know everything and give 100% accurate advice for free . ??????
 0 points
 -
No problems. What size, 3XL & ruined? http://dildo-generator.com/0 points


.thumb.jpg.bac90f3bbf6868cf2118d010d936c99d.jpg)


This leaderboard is set to London/GMT+01:00