
Leaderboard


Popular Content
Showing content with the highest reputation on 10/19/19 in all areas
-
Digging is progressing well despite the rain - they had to pump out a bit as we had that swimming pool we wanted! They had no muck away on Monday so only 4 days and the bulk of the big dig is complete and you can start to see the scale of the project. They have done the rough dig and are now levelling out the bottom and starting to place a layer of stone that will then be concreted over to form the slab. The hole is actually bigger than the basement by about 1m all round so they have room to work so it will get smaller! You can see that they are laying a gravel filled French drain all round the back to collect the water that runs out of the clay in the thin layers of sand, but given the rain we have had the water is not at all bad. We have to say the contractors are absolutely brilliant - very pleased so far, but for them this is a relatively small hole - hate to think what a big one looks like! Now the big dig is done we can heave a sigh of relief because there were no 'nasties' underground to cause us unforeseen problems - one of the advantages of such a huge excavation - so we are technically 'out of the ground' (it might not look like that though) and past that big landmark moment. Its taken a lot to get to this point - its really good to know we are moving forward and been a long uphill struggle to this point - now we should coast downhill all the way!!! The Building Control Officer came out this week and brought a couple of his graduates (who like the BC Officer really loved the project which is really encouraging) as they dont get to see this kind of construction often (or ever before if I understood right!), probably because not many people are as insane as we are! He was really happy with the soil conditions and the works so we can proceed with the slab and he will be back when the steel is in and we are ready for the first pour. He is really helpful and supportive and a complete contrast to Planning (the less said here the better), we get the feeling his goal is the same as ours - a really great building. We had some discussion about a window from the garage/ workshop into the pool room - it needs to be fireproof as its between a garage and habitable space, and its also through the thermal envelope so it needs to be thermally efficient. Now these two requirements (FR 60 and PH) clash and we have struggled to find anything that does both (at any price). We batted about some options and he made some good suggestions to mitigate the problem. But in fact I think we will follow the Architect who said - its only a workshop and you can buy an awful lot of lights for the cost of a very special window! So artificial light in the workshop will be fine. We have also finalised the windows because a 12 week leadtime means they need to be in production in time for the TF. After much research / quotes and head scratching we selected Internorm for two main reasons - firstly they do a really neat integrated Juliet balcony that was proving very tricky for the SE and Architect and was going to be really expensive to do any other way (though the Internorm solution is expensive its really simple). Also we were going for wood/aluminium on both houses, but they do a PVC/aluminium range that is 15-20% cheaper, has the same external appearance and performance and looks really pretty neat on the inside in dark grey (not at all like your typical uPVC windows). So Plot 1 will go that way and this brings the cost down. The only concern is the quality of the fitting (we are assured that they now have this under control) - the quality of the windows is amazing. We just need to bottom out on front doors - any suggestions as the Internorm option was pricey. Also signed Nick (from Wales) up for M&E - looking forward to that and he does seem to be one of the few people who knows exactly how to integrate all the bits and pieces that come with PH levels of design. So that's it for another exciting week - hope you liked the videos atmospheric look as the digger appears out of the mist/rain at the beginning of the day - we worked so hard to achieve that effect. Seriously does anyone have any suggestions on how to solve the problem of overnight condensation on the camera? See https://www.dropbox.com/sh/th9f6e3cel5dm1q/AAAfsWdAH184J75bCNUUtzVra?dl=0 for the week by week video diary P.S. seem to have solved the battery problem for the TL camera by using Energiser Ultimate Lithium AA's - at least they do more than Duracell - appreciate the suggestion on external battery pack and will go for that if the Energisers dont prove to last long enough.2 points
-
Time for another update. Most of our work this month has been focused upon finalising the kitchen design, stair, stove etc. Tangible work on the house has consisted of the taping and filling and fitting the last bit of ducting. Not terribly exciting, but it's all progress. Here are some photos. Next up I need to resolve an ongoing treatment tank problem which will be covered in a separate entry. We hope to start internal paint work in the next few week pr so.1 point
-
Much has been written about the cost per m2 mans folk massaging figures We where due to take delivery today of the last of the landscaping materials Last big spend Which prompted my wife to go through the spread sheets and also with our vat claim being paid last Monday Get a final total of our spend While Ive kept track I have always said about roughly Hope to Well everything has been accounted for All fees and right down to tubes of silicone The only thing admitted was the purchase of the plot She has even included the materials I haven’t yet used on the quite expensive drive £14000 The grand total comes out at 812 per m2 If we had paid 10k for a kitchen instead of nearly double We would have dropped under the 800 Labour has been the key to keeping the costs down Or lack of it1 point
-
Some Aluminium U channel bolted to the wall to hold the insulation on that side, and then threaded bar coming down from the Concrete to hold the perimeter area, yeah, that might do the trick! Thanks Lads1 point
-
For fixings, just use threaded rod from screwfix cut to size (you can get them in 1m lengths) . Resin bond it in to the concrete (pretty straight forward) and use decent washers /flat plate to ensure the load is spread. Counter sink the areas as Russell said.1 point
-
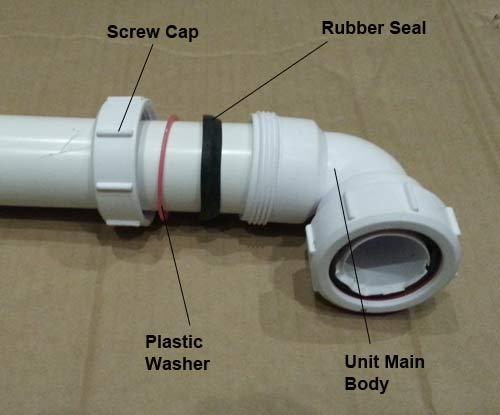
Random pic off the web. Note how the black, tapered washer fits. The red fibre washer compresses the black one without turning it. Hand tight only as above:
 1 point
 -
Yep, and another is that in general the rooms are simply bigger and quite often smaller houses have a similar number of rooms but you are only buying 1 kitchen, 1 heating system, 1 MVHR unit, 1 front door etc. Yes those things can be a bit larger in a larger house but they don't generally cost twice as much when comparing (for example) a 180 m2 house to a 360 m2 house.1 point
-
After getting some good advise on the forum (DON T DO IT!!! LEAVE IT TO THE PROS!!!) I decide to ignore that and buy some 2nd hand equipment on ebay. How hard can it be http://tintabernacle.blogspot.com/2019/10/setting-out.html?m=1 It wasn't. Just time consuming. At the end it always is a question of wether it is cheaper doing it yourself or if it actually would have saved £££ getting a pro in. My case for doing it myself (as much as possible) is the massive knowledge gain. Even if it turns out to be the same price than having someone doing it for you (which most of the time isn't the case), I wouldn't want to miss what I learned so far.1 point
-
Ah, thanks chaps. OH has managed to get it undone and there is no washer. Looks like a trip to Screwfix.1 point
-
On some of these there is only a clear tapered seal at that joint and no red washer, rather flimsy and easy to get wrong (ask me how I know?).if it’s that tight someone has used a wrench to try to stop the leak.1 point
-
I hope not cos my project will be even bigger .Lol## but think you maybe a bit optimistic1 point
-
That should be a compression joint with a (usually tapered) rubber sealing ring, and it should only be hand tight. The fact you can't undo it, suggests the proper sealing ring is missing or damaged and it has been bodged. A replacement is not expensive https://www.ebay.co.uk/itm/WASHING-MACHINE-DISHWASHER-STAND-PIPE-TRAP-40mm-WITH-CLIPS-brand-new/273825602547?hash=item3fc1471bf3:g:RQcAAOSwKOZb-xGu1 point
-
@Russell griffiths thanks, it's just for show, if I didn't make this overhand 300mm lower, the window on the right at the top, would have a skinny looking render area under it that wouldnt be in proportion @jamiehamy thanks very much for your suggestion ? I'll make up a frame like you suggested, I'd nearly prefer a metal frame in case the box ever sprung a leak, also one lad told me to have the same material under the thin coat render, as two different materials could cause cracks, expanding and contracting at different rates, I might try boxing out that frame with insulation.. To have the exterior rendered surface all the same.. Thanks for your suggestion1 point
-
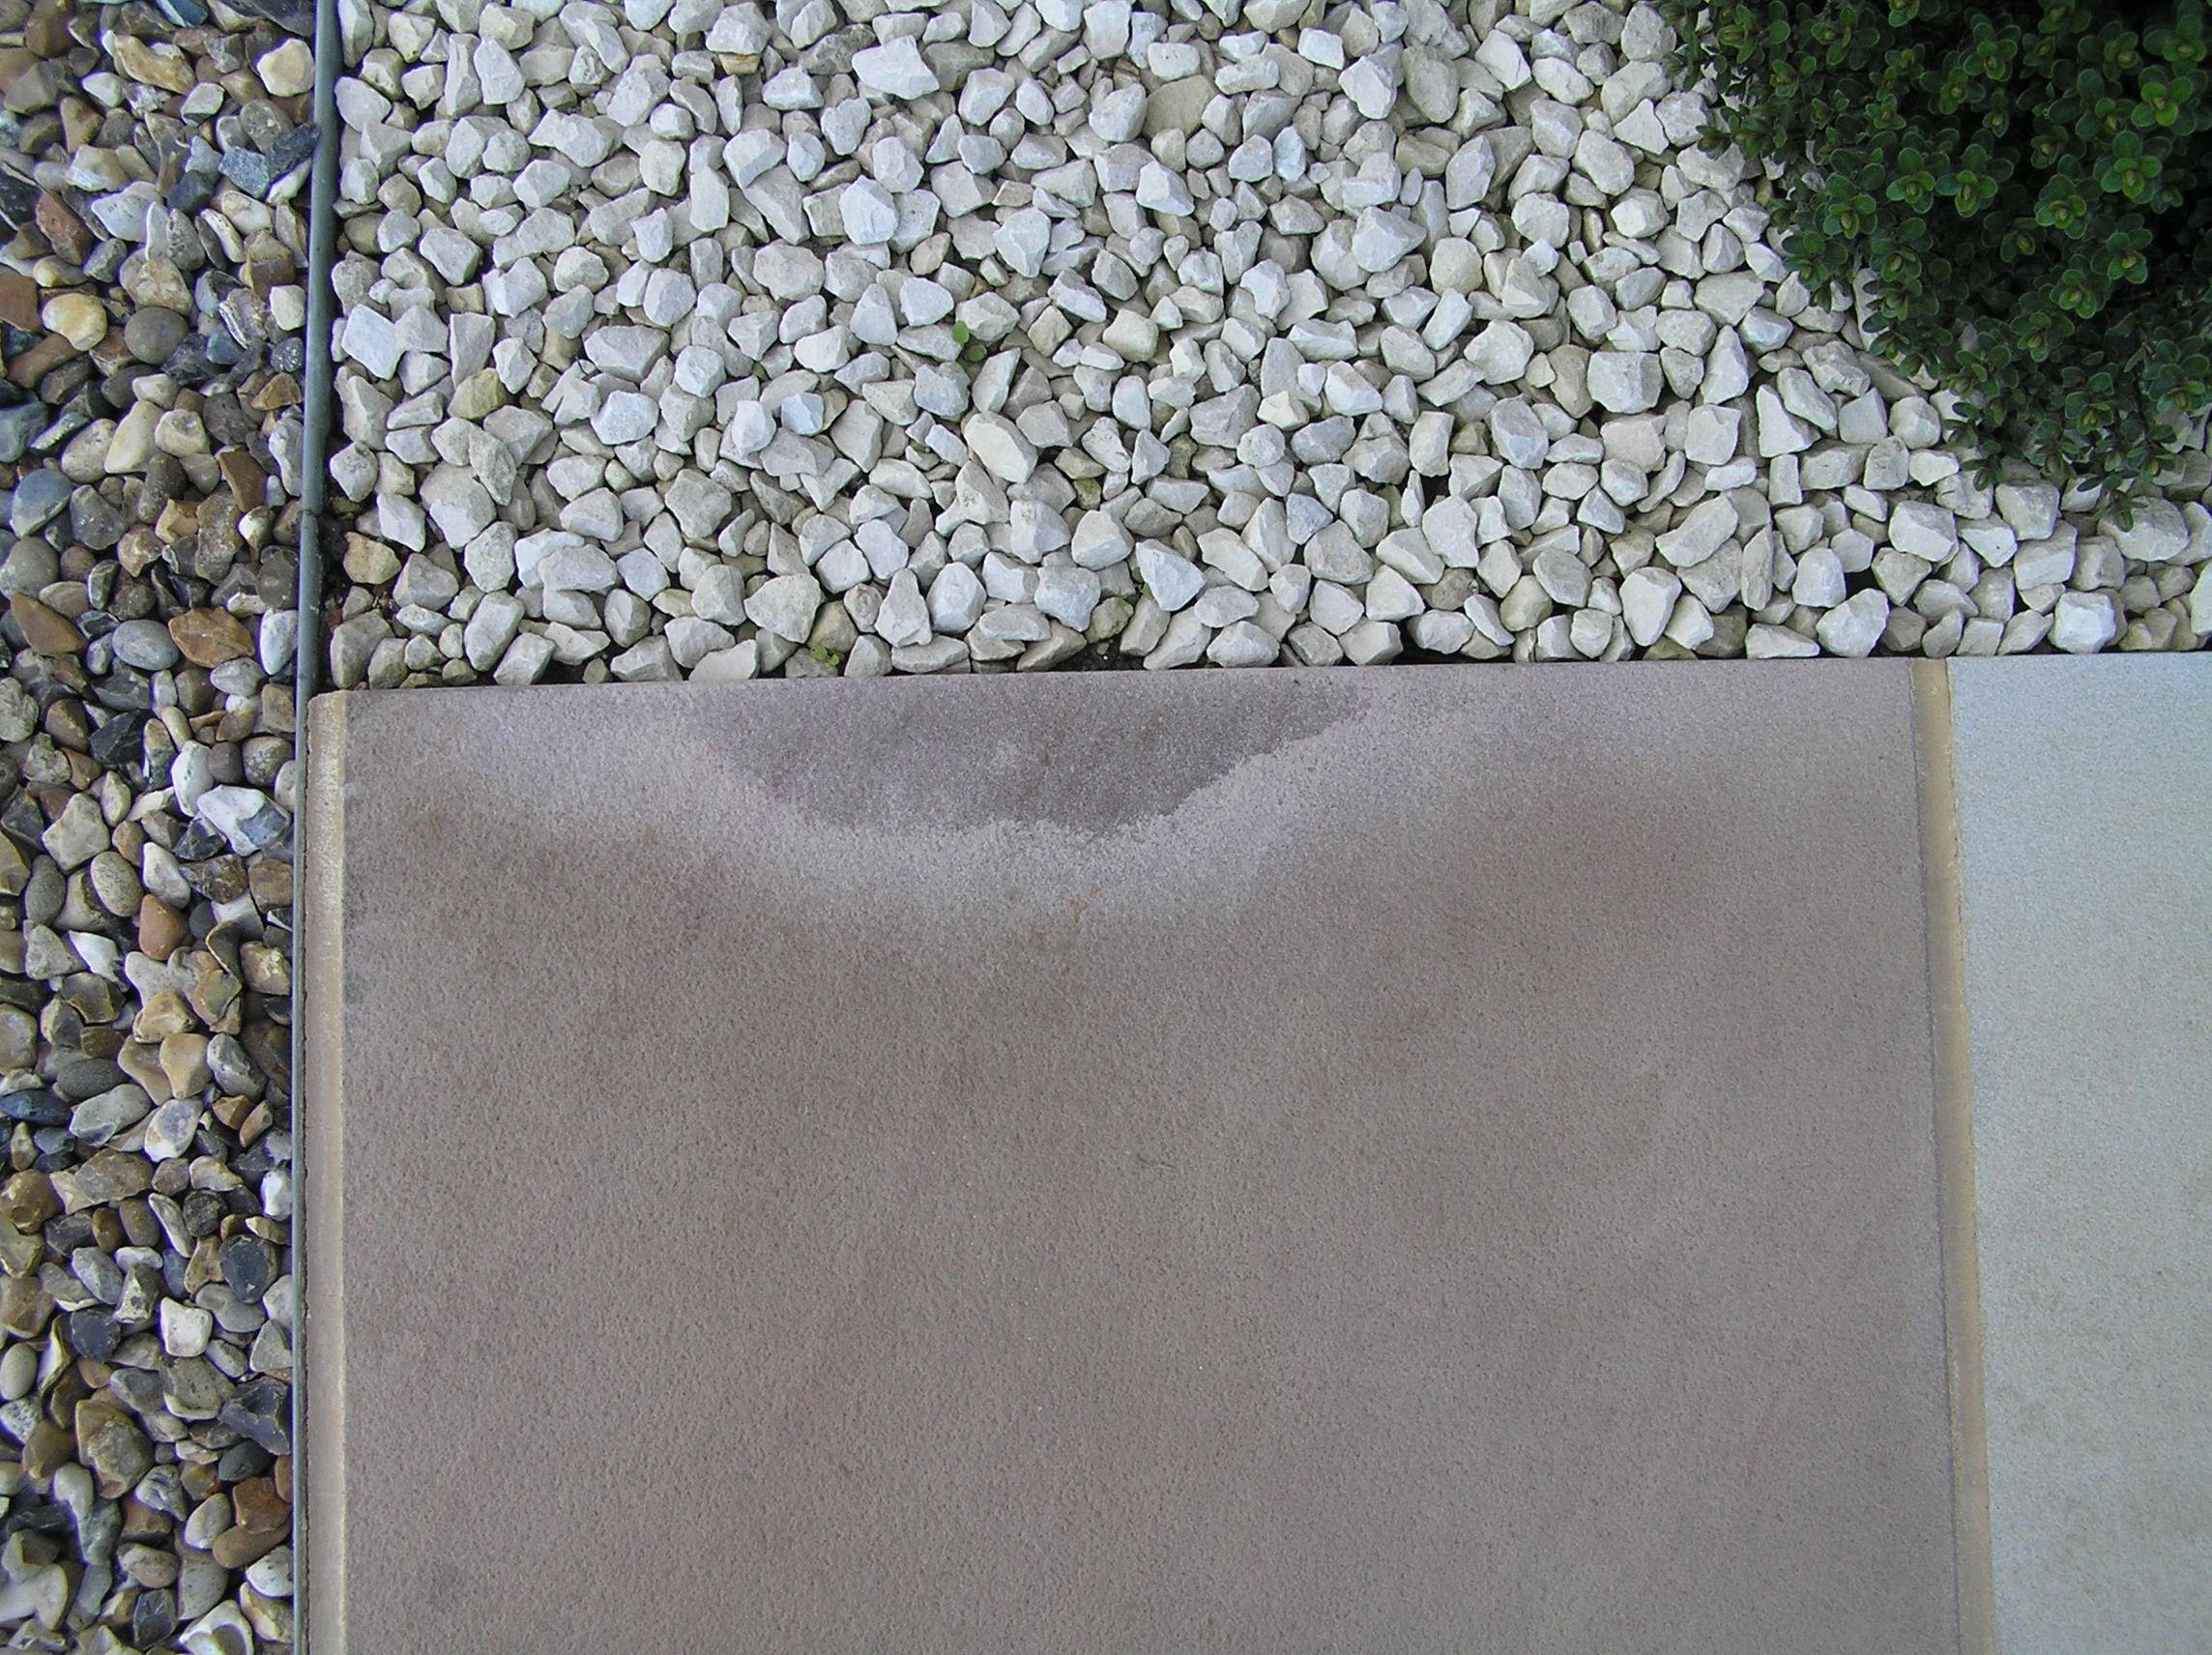
I had a small piece of horsetail growing up next to the sandstone path leading to the house. I put a small amount of salt (NaCl) on it to kill it, as I often do for horsetail growing on its own. Unfortunately I didn’t know how damaging salt can be to sandstone until I searched the internet. The effects of de-icing on sandstone buildings in some Scottish cities is well documented. It’s a pity I hadn’t heard about it and this is the result. Needless to say I won’t be de-icing my paving with salt this winter.
 1 point
 -
yep ?1 point
-
Plenty of room inside for insulation then ?1 point
-
Ping pong poms ?. Out of all the Brits I met out there, a high proportion of those that came from the north of England were staying permanently, those from the south not so much. I could speculate the reason why, but I doubt it's valid. ?1 point
-
A couple of pics

 1 point
 -
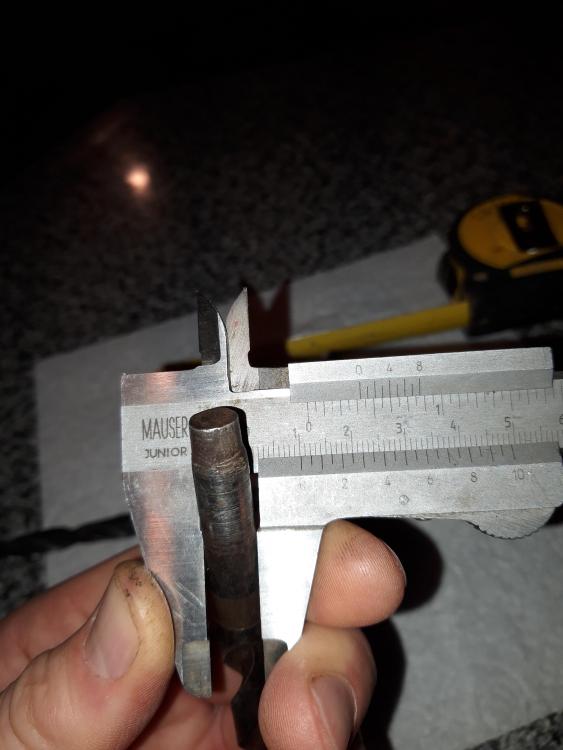
I've drilled it out to 10.2mm (M12 tapping drill). It's a tad off centric but spins nice on a 10mm drill as the video clip shows: Video: Will try and get in the post Monday.
 1 point
 -
I had a huge amount of rebar in my 90m2 raft. Two layers of A393 mesh, perimeter cages and lateral cages criss crossing the middle. Steel cost £2.2k Rebar for the ICF house on top was only used above window and door openings. £200 Amount of rebar varies depending on brand of ICF I believe.1 point
-
This is the transmitter unit I used https://www.ebay.co.uk/itm/433Mhz-Wireless-Transmitter-EV1527-Learning-Code-Encoded-for-Arduino-AVR/292030436727?hash=item43fe5ed577:g:QwkAAOSwB-1YpWii You simply choose a code with the jumpers, then when you apply 5V dc, it transmits. This is the receiver. https://www.ebay.co.uk/itm/1-Channel-Wireless-Relay-433MHz-RF-Remote-Control-Switch-Receiver-SRD-DC12V-10A/192470066162?hash=item2cd01c23f2:g:uJAAAOSwSfNal7~H This runs from a 12V dc supply. The first time you use it, you turn your transmitter on and then press the button on this module, that teaches it your chosen code. Thereafter you leave the receiver powered, and whenever your transmitter is turned on, this receiver module energises it's changeover relay that you can use to switch anything. There are plenty of other variations on this theme available.1 point
-
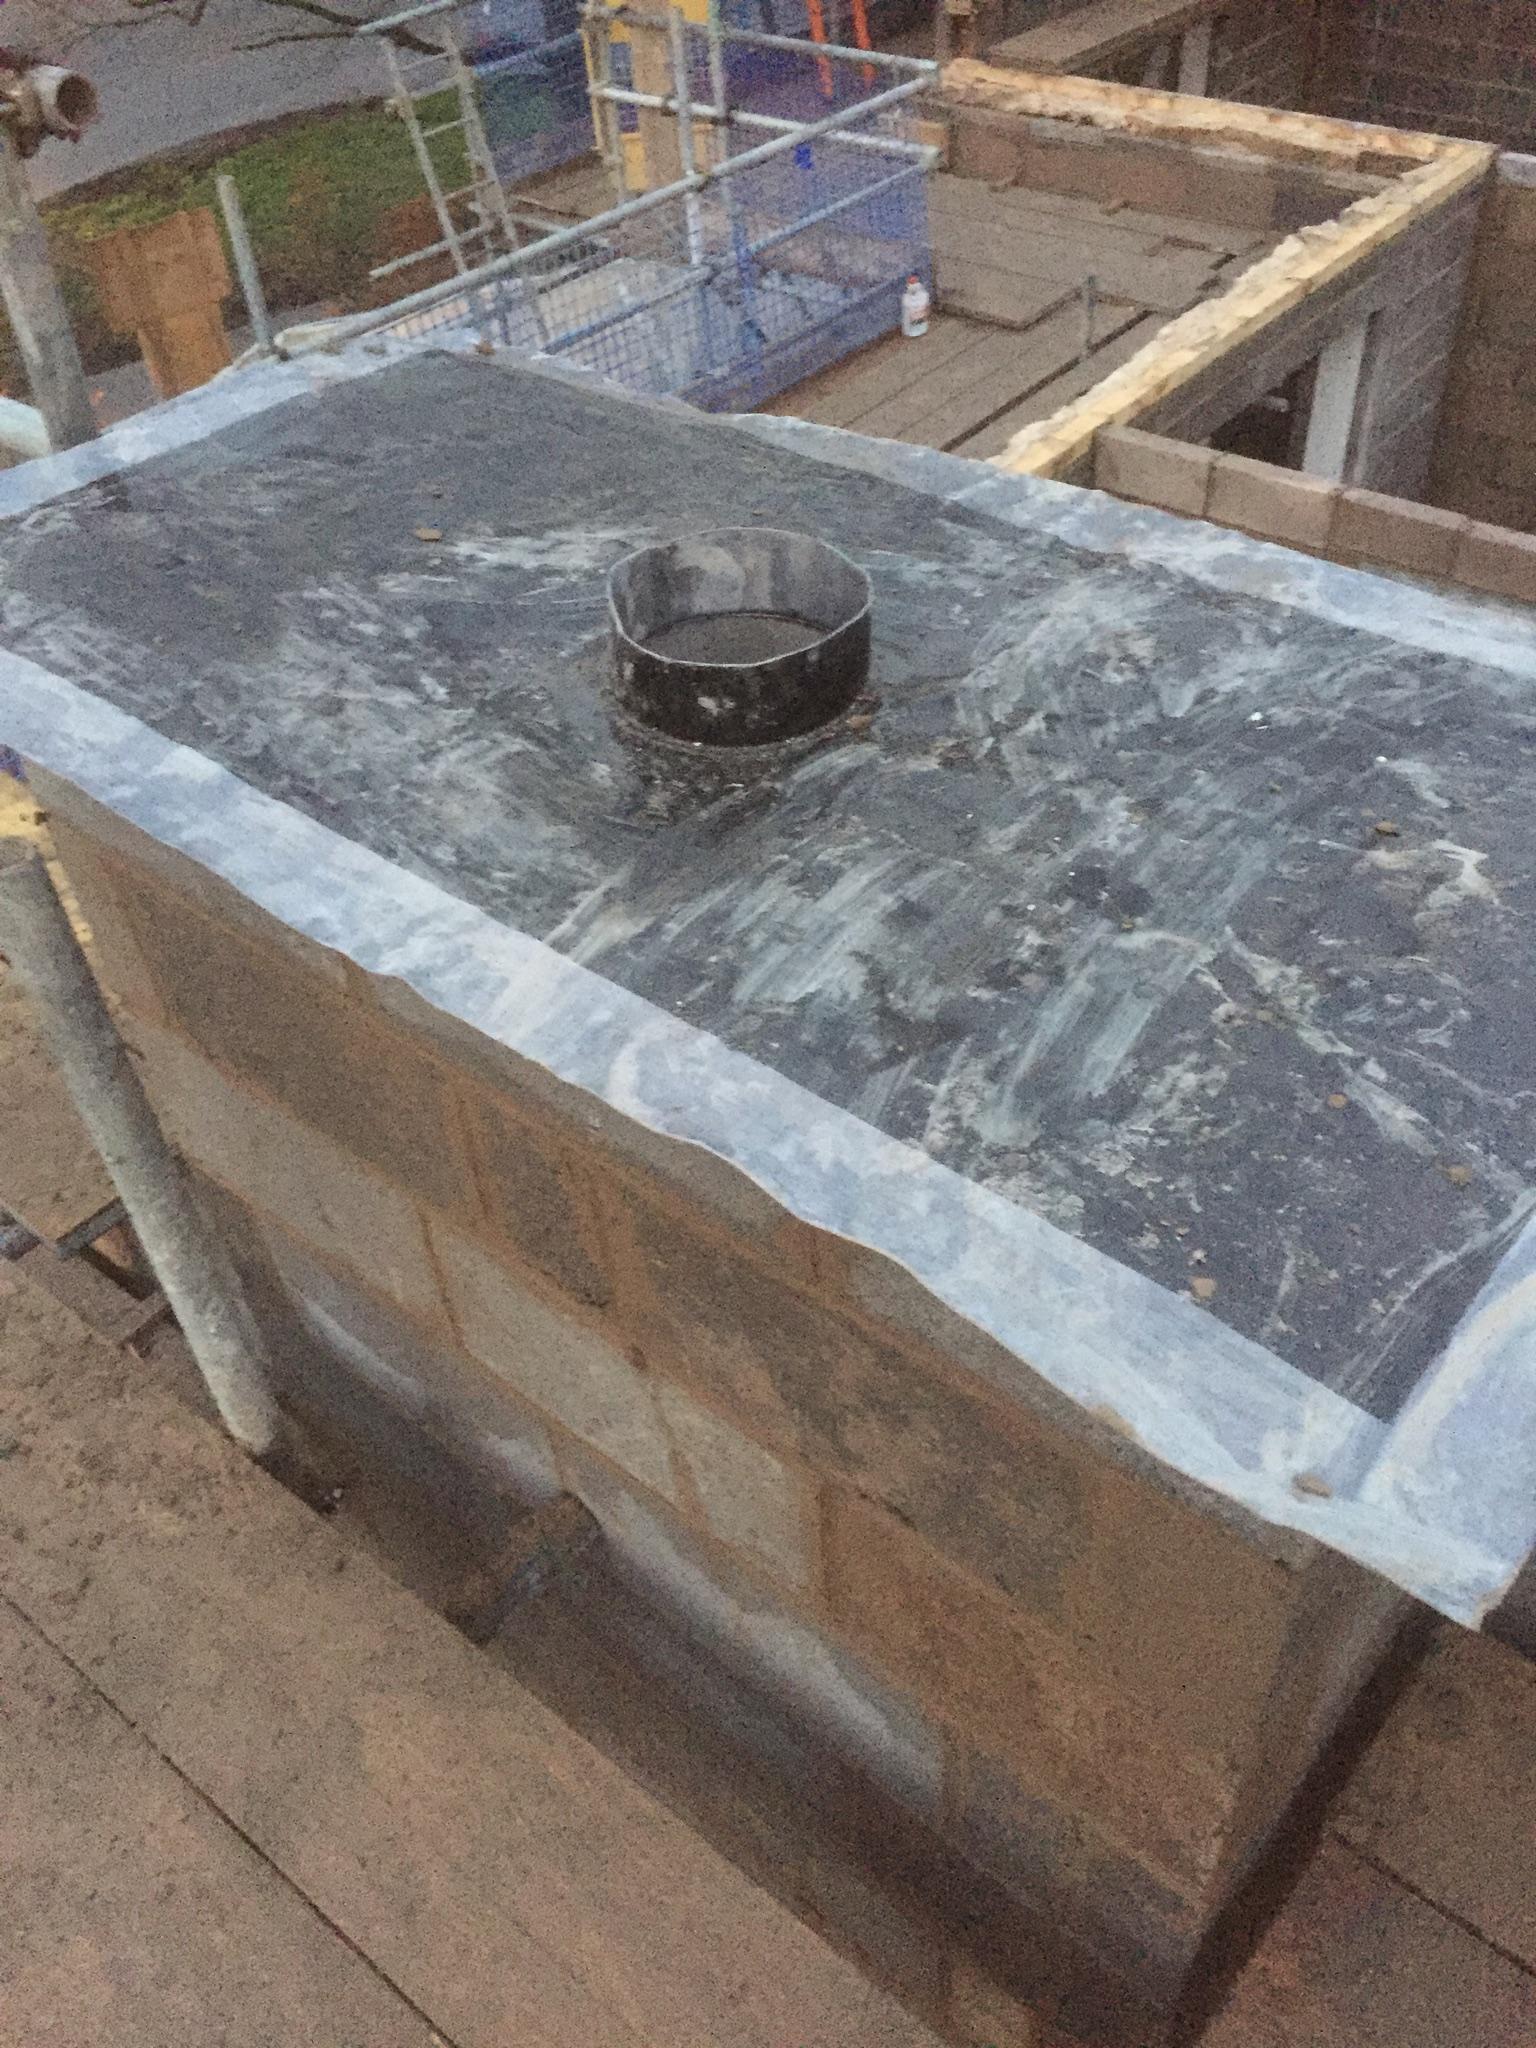
I needed a lead saddle and a tray for the top of the chimney with a 200 mil upstand I found a chap in Cornwall who made and braised these to order and posted them out to me For not a lot more than what it would have cost me to buy the lead1 point
-
Just shows you have to be on the ball and inspect stuff when it arrives, if that fails x years down the road you would be stuffed, I installed a Vortex and very pleased with it.1 point
-
carbide test for moisture -- that reminds me of how we got all the pike out of a pond when i was a boy an old ginger beer stone flagon -- with screw in stopper-- put some carbide in it from a pot holers lamp --piss in it --then chuck it in the pond 10m ins later -- BOOM-- like a wartime mine -and stunned fish floated up to top just make sure it sinks or its a hand grenade .1 point
-
If you look through his whole site it is very informative. I’ve seen one of his surveys and they make your average home buyers survey look like a comic. This bit is very true : Every damp problem has a specific cause, and it is usually easy to fix that cause - for example, faulty guttering, external ground levels too high, concrete / cement render trapping moisture on outside walls, and so on. Our survey will outline any problems, and suggest solutions, which never include injection damp proofing! The silane based chemicals can’t work the way they are described to, yet I’ve seen them suggested where wholly Inappropriate by bank and mortgage company surveyors that suggest you can “fix” damp into this way. As he says repeatedly, find the cause of then problem first ...1 point
-
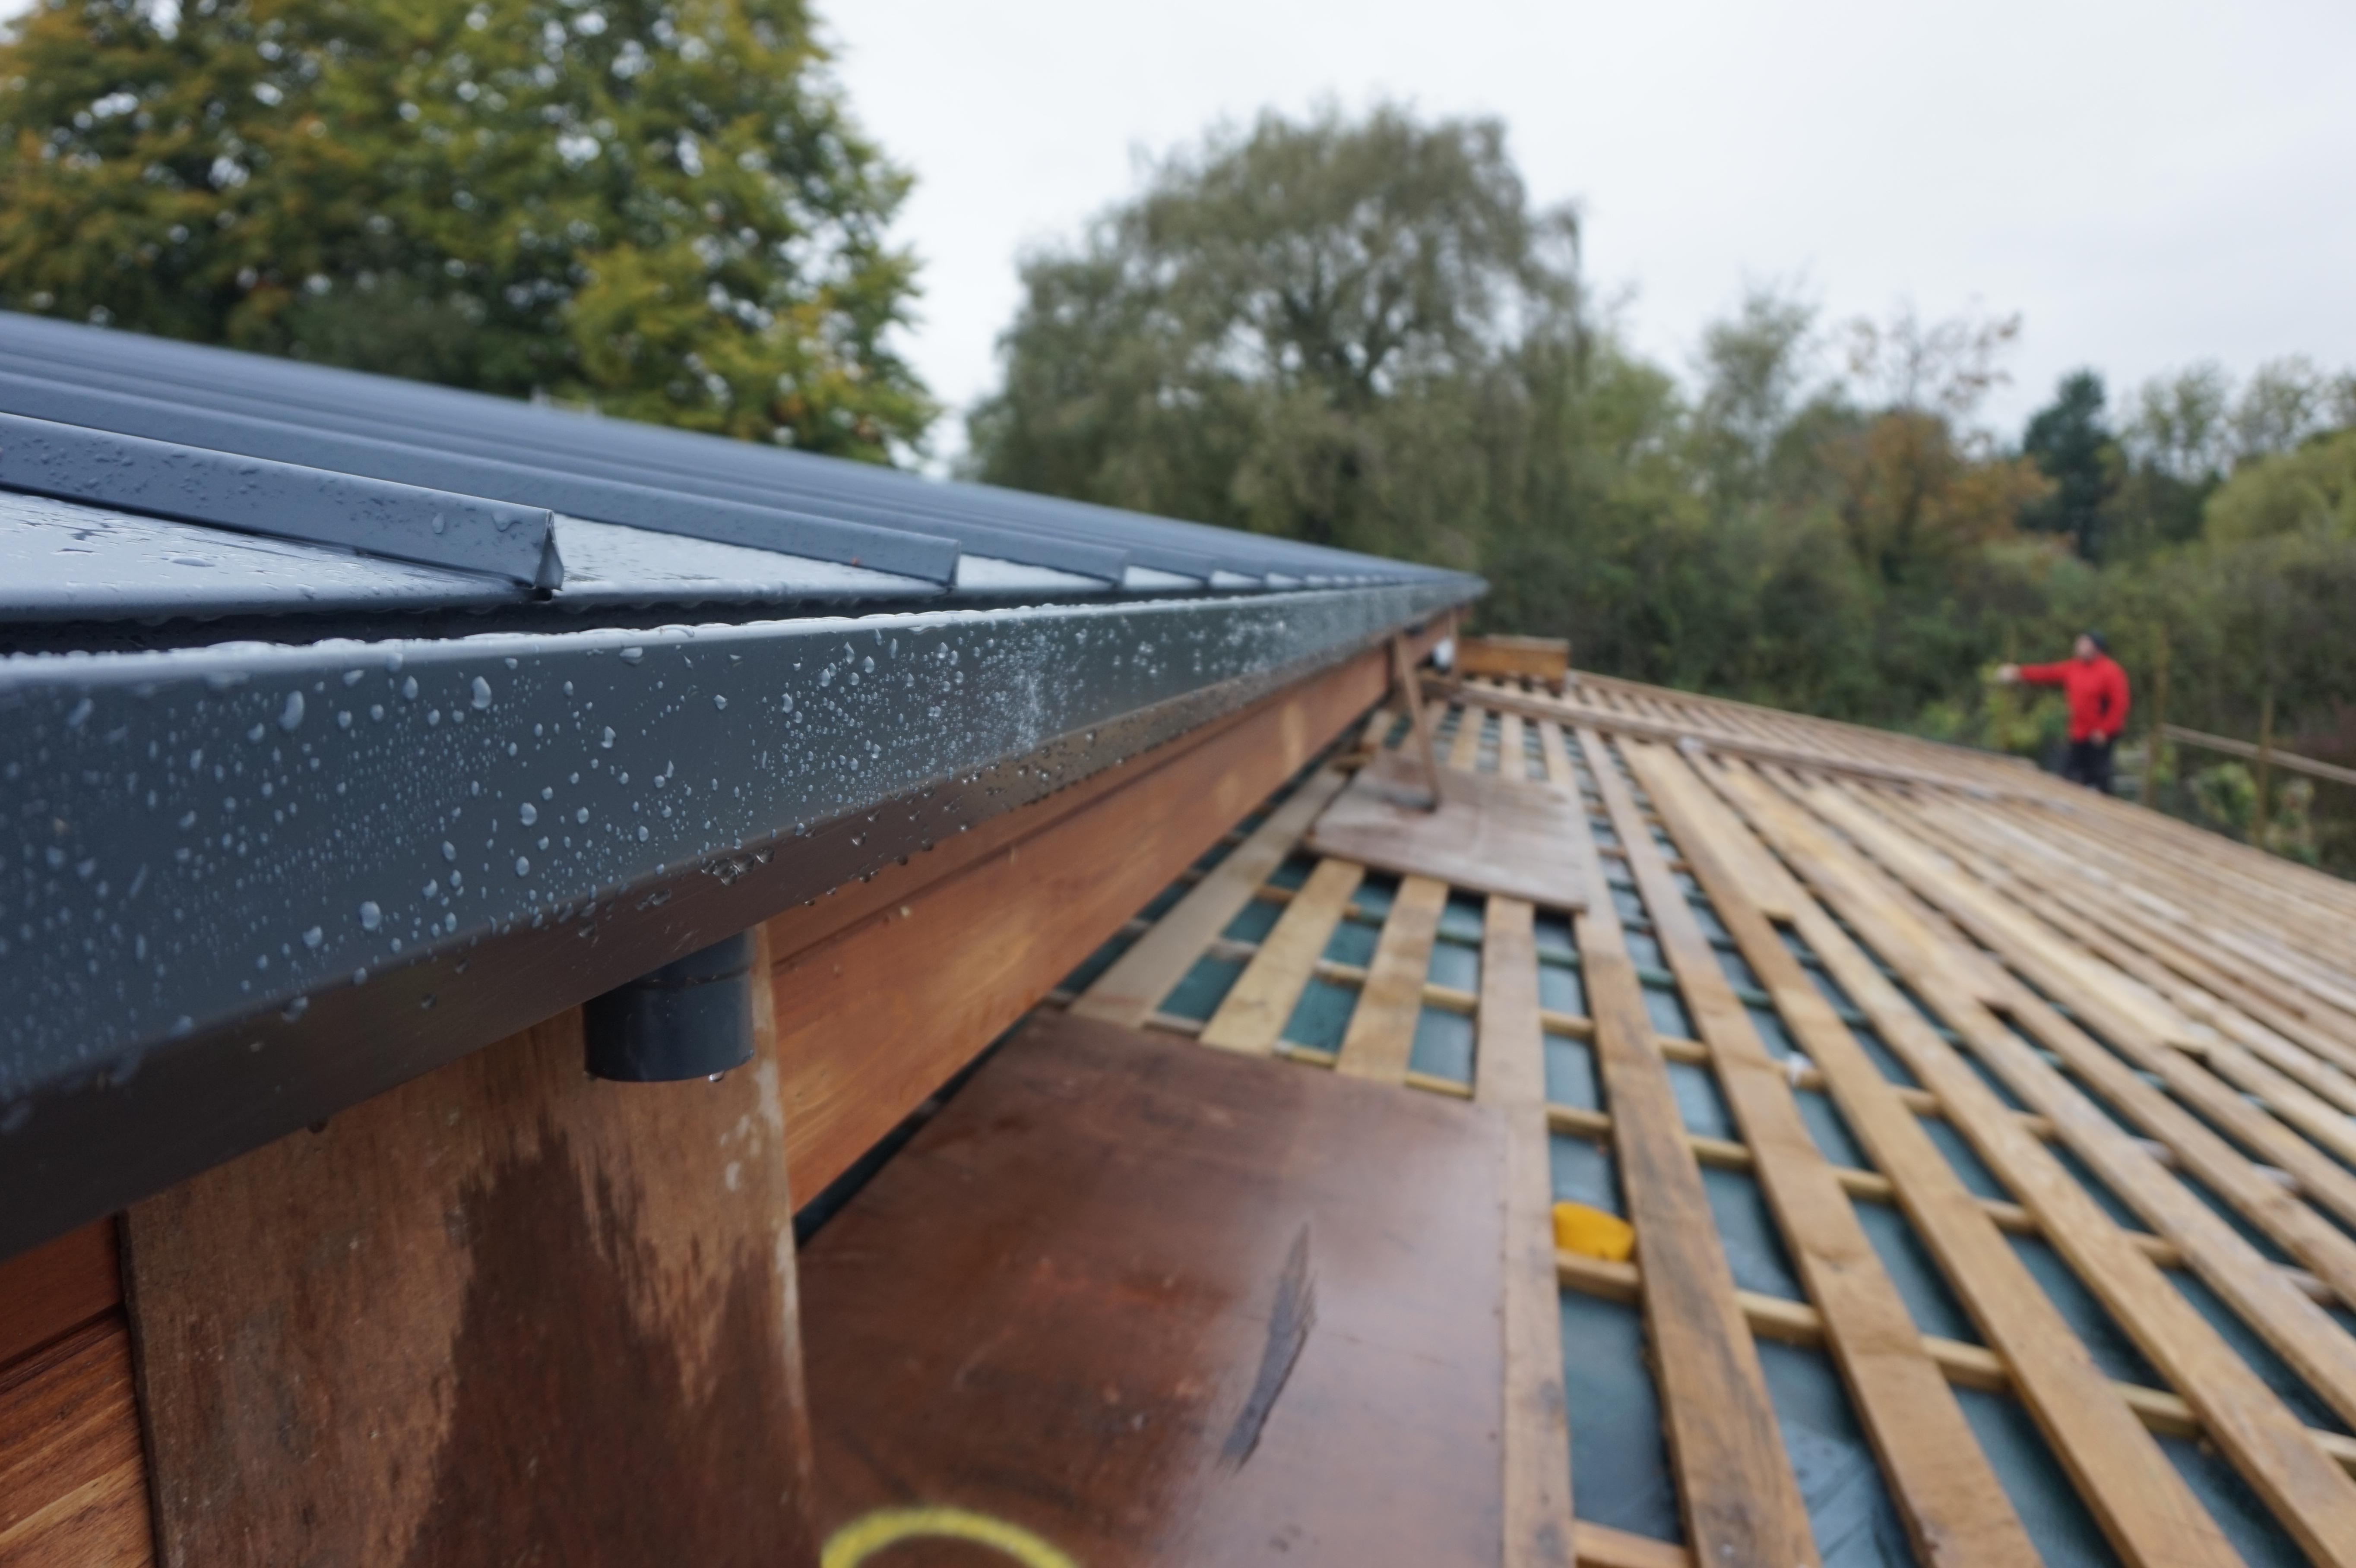
Didn't like the zinc/butyl stuff, but Leadax is superb stuff, very nice to work with...1 point
-
it used to be free but has now been updated and you have to buy it. this is still free http://slateroofers.org/downloads/lead_flashing_guide.pdf1 point
-
Yes, you can do this yourself, but what's needed depends on where you are. Wales, for example, insist that sprinkler systems are fitted, England, Scotland and NI don't (yet). Worth reading the Approved Documents that cover fire safety, as although they are a bit tedious, the solutions are pretty straightforward, but are dependent on the layout of the house to some extent. All the Approved Documents are here: https://www.gov.uk/government/collections/approved-documents The one you need to focus on is Part B, but bear in mind that there are some interactions with other parts of the building regs, for example the fire door provisions in Part B (if required) also have to comply with Part M, regarding disabled access. These may look a bit daunting, but a great deal of the content of the Approved Documents doesn't apply to many dwellings, so it helps to just pick out the bits that only apply to dwellings, and then those bits that only apply to your particular style of dwelling (for example, the regs for a three storey house are more onerous than for a single or two storey house). The key things I noted for our 2 storey house was to make sure that any habitable rooms that were on the same level, and not connected to a main entrance lobby, had an independent means of escape from fire, either by another door or a window large enough to use for escape. The same applied upstairs, with both bedrooms needing windows that opened with a big enough space to use for escape. Linked fire/smoke alarms will be required, that are positioned so that all occupants can hear the alarm and be woken by it if it goes off. Best to use a heat-triggered alarm in the kitchen, linked to smoke alarms in other areas (saves getting false alarms when the toast gets burned). We have a heat alarm in the kitchen, linked to a smoke alarm upstairs on the landing, high up, and positioned so that it can be clearly heard in both bedrooms. Not expensive to install (maybe £50 for the alarms plus some wiring). Worth getting alarms that take a PP3 backup battery, rather than a built-in for life battery, as the latter need replacing after ten years. If a lithium PP3 battery is fitted to the other type all that's needed after ten years is a battery change.1 point
-
If you go with lead, there used to be a little booklet issued by somebody like the lead workers guild or something very useful tells you a lot of boundaries to work within to save expensive mistakes. I think it was free.1 point
-
Lead every time. I had never used rolled lead in my life until earlier this year. To be honest, there are a lot of good instructional videos on YouTube and if you have a good knack for making things and working with your hands you should be grand. The trick is also to work in about 4-5' lengths max, for several reasons, however, the most important being expansion and contraction, big long pieces of lead will crack or split. Long pieces are also difficult to work with and are heavy to work into place and get up onto the roof! I actually found lead nice stuff to work with, I enjoyed it's malleability and it's compliance to be worked into some odd shapes. I scored it with a sharp Stanley knife and used tin-snips to cut it. I used pieces of 2x8 and 2x4 as formers and a piece of 1.5x1.5 and a foot long as a sort of press. Keeping the lead indoors and warm before working it will help no end or outside in the sun (too late in the year now). I dressed our lead down over the profile of the roof tile on warm days and you could almost do it with your fingers although I found that the shaft of a hammer was good to gently tap it down (lead beater was too big) the result is a row of nice little dressed down sections tight to the tile. I used diesel as patination oil.1 point
-
Lead all day long The alternatives are cheaper But won’t last as long1 point
-
Here you go Peter, little video of a nice and simple chunky contactor to give you a volt free set of contacts to do "something" if you lose power. Amber beacon in the shed window run off a solar trickle charged battery?1 point
-
Depends how confident you are with lead, it’s not as forgiving as the alternatives, and as you said more expensive if you mess a bit up.1 point
-
I used guttercrest looks the absolute dogs. Cheaper than that horrible lindab stuff.
 1 point
 -
Interested in getting thoughts on extract for high kitchen utilisation..... my other half uses the kitchen (~4m x 4m, 2.7m ceiling) in a commercial capacity and we currently have a 'big boy bertazzoni' ? 800m3/hr extract which makes some noise on full tilt! To be honest, it's never really used on full power, only on minimum when something is boiling on the hob. Useful the odd time on full power when things get smokey as folk above have mentioned, but there's also an openable window for those 'incidents'... I'm thinking 2 extract points would be a good idea here, perhaps one closer to the cooking source, plumbed into the back of the cooker hood (I can get at this through the chimney void behind it.) and one in the ceiling corner as per normal. Any thoughts? Still looking at sizing the unit, perhaps a Blauberg SB250 for our 3 bed semi (~110m2, 1 bathroom) which would be slightly oversized as we only need 39l/s as per the regs. I'm loving this forum, lots of useful information and tinkerings ?1 point
-
They wouldn’t have ya.0 points
-
Yes, the stapler was just to stop you running away, but we used to to repair the damage after as well.0 points
-
Give me the address I will come and pinch them tonight.0 points
-
It's all very well having these dark sky areas for you stargazers, but you should be grateful for all the light pollution from towns and cities - how else would those stars be illuminated for you to see them? ?0 points


This leaderboard is set to London/GMT+01:00