
Leaderboard


Popular Content
Showing content with the highest reputation on 06/24/19 in all areas
-
I sincerely hope there won't be any future DIY for quite some time. The build has cured me of any desire to do DIY .2 points
-
The best suggestion was Ask Nick and I claim my £5.2 points
-
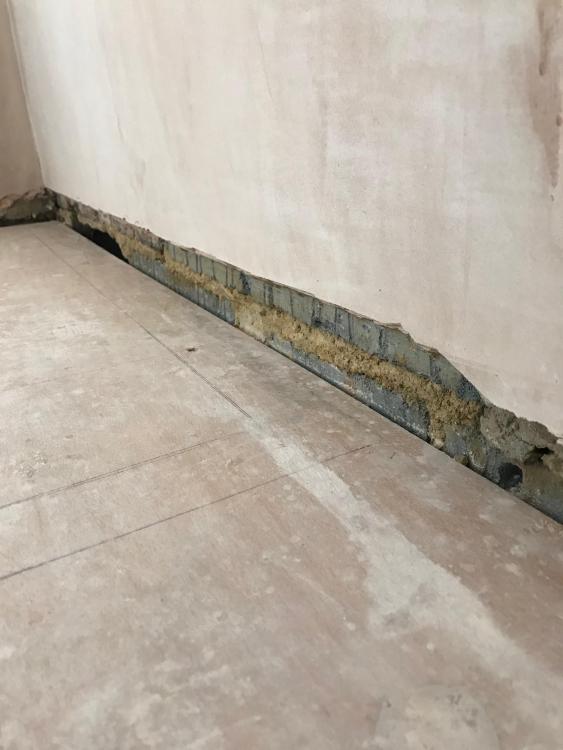
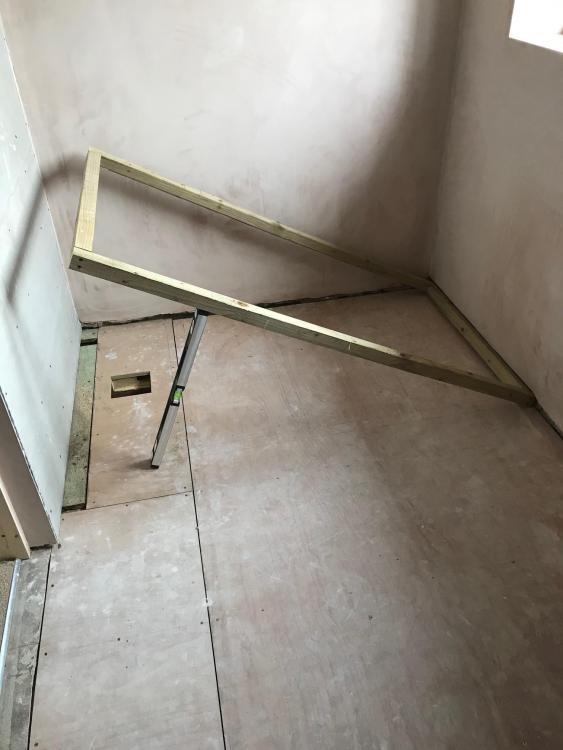
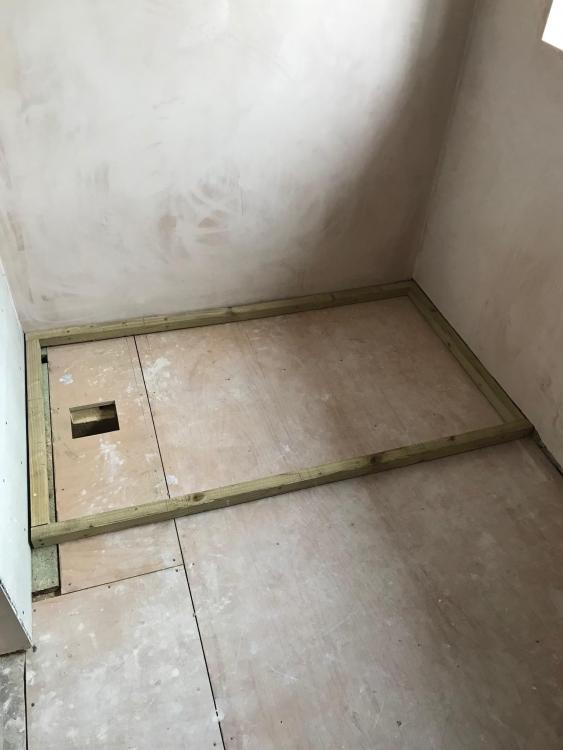
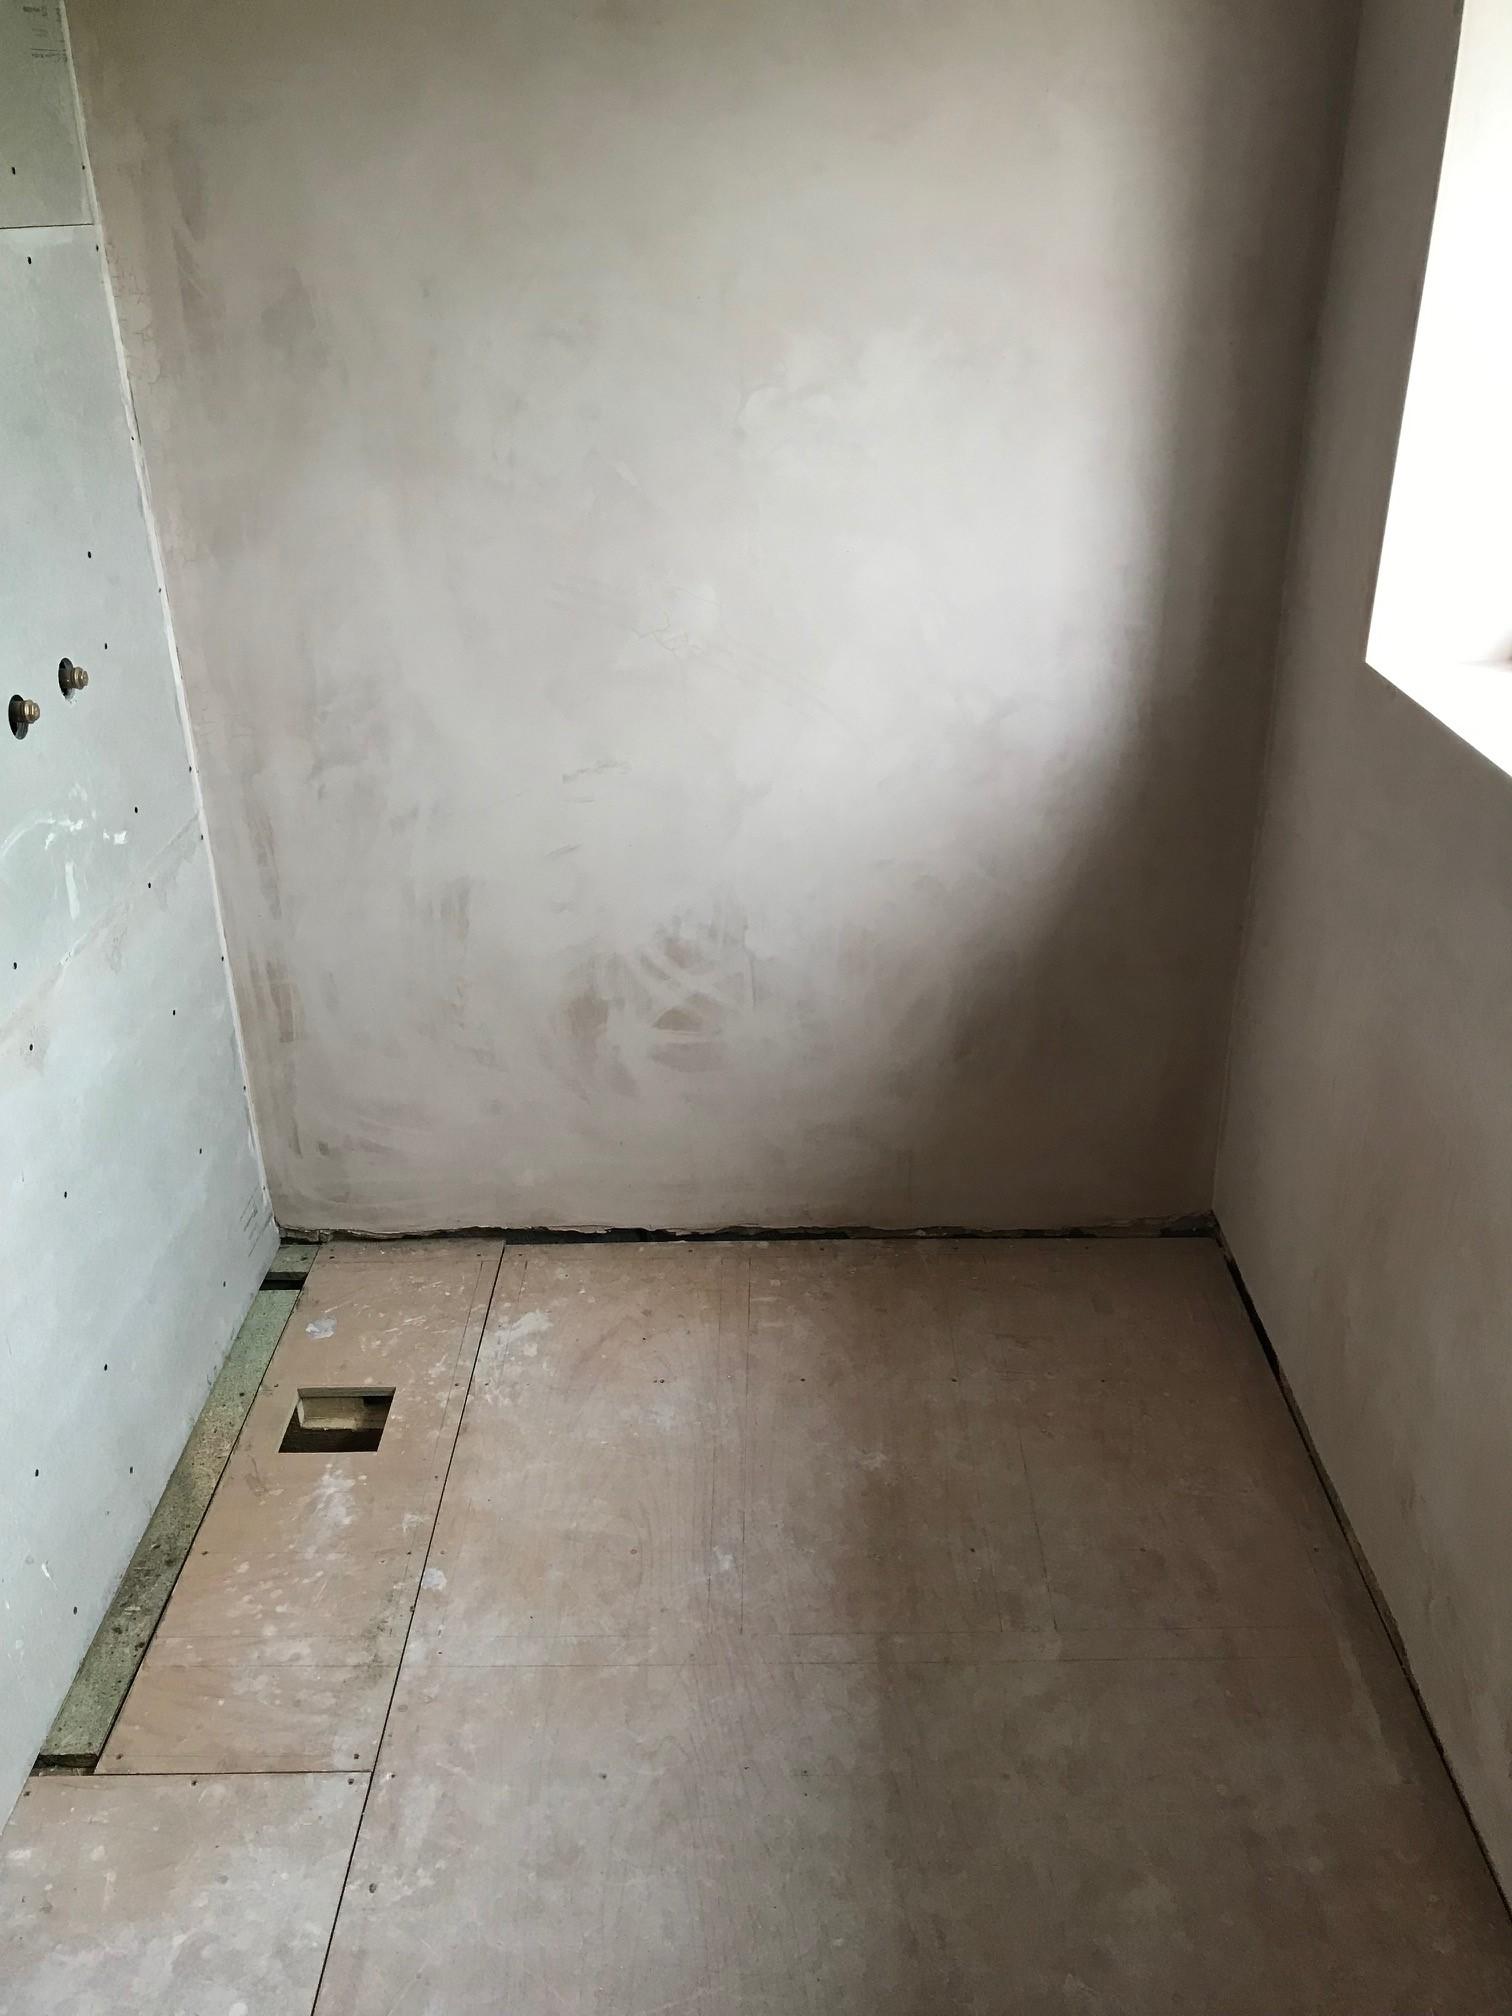
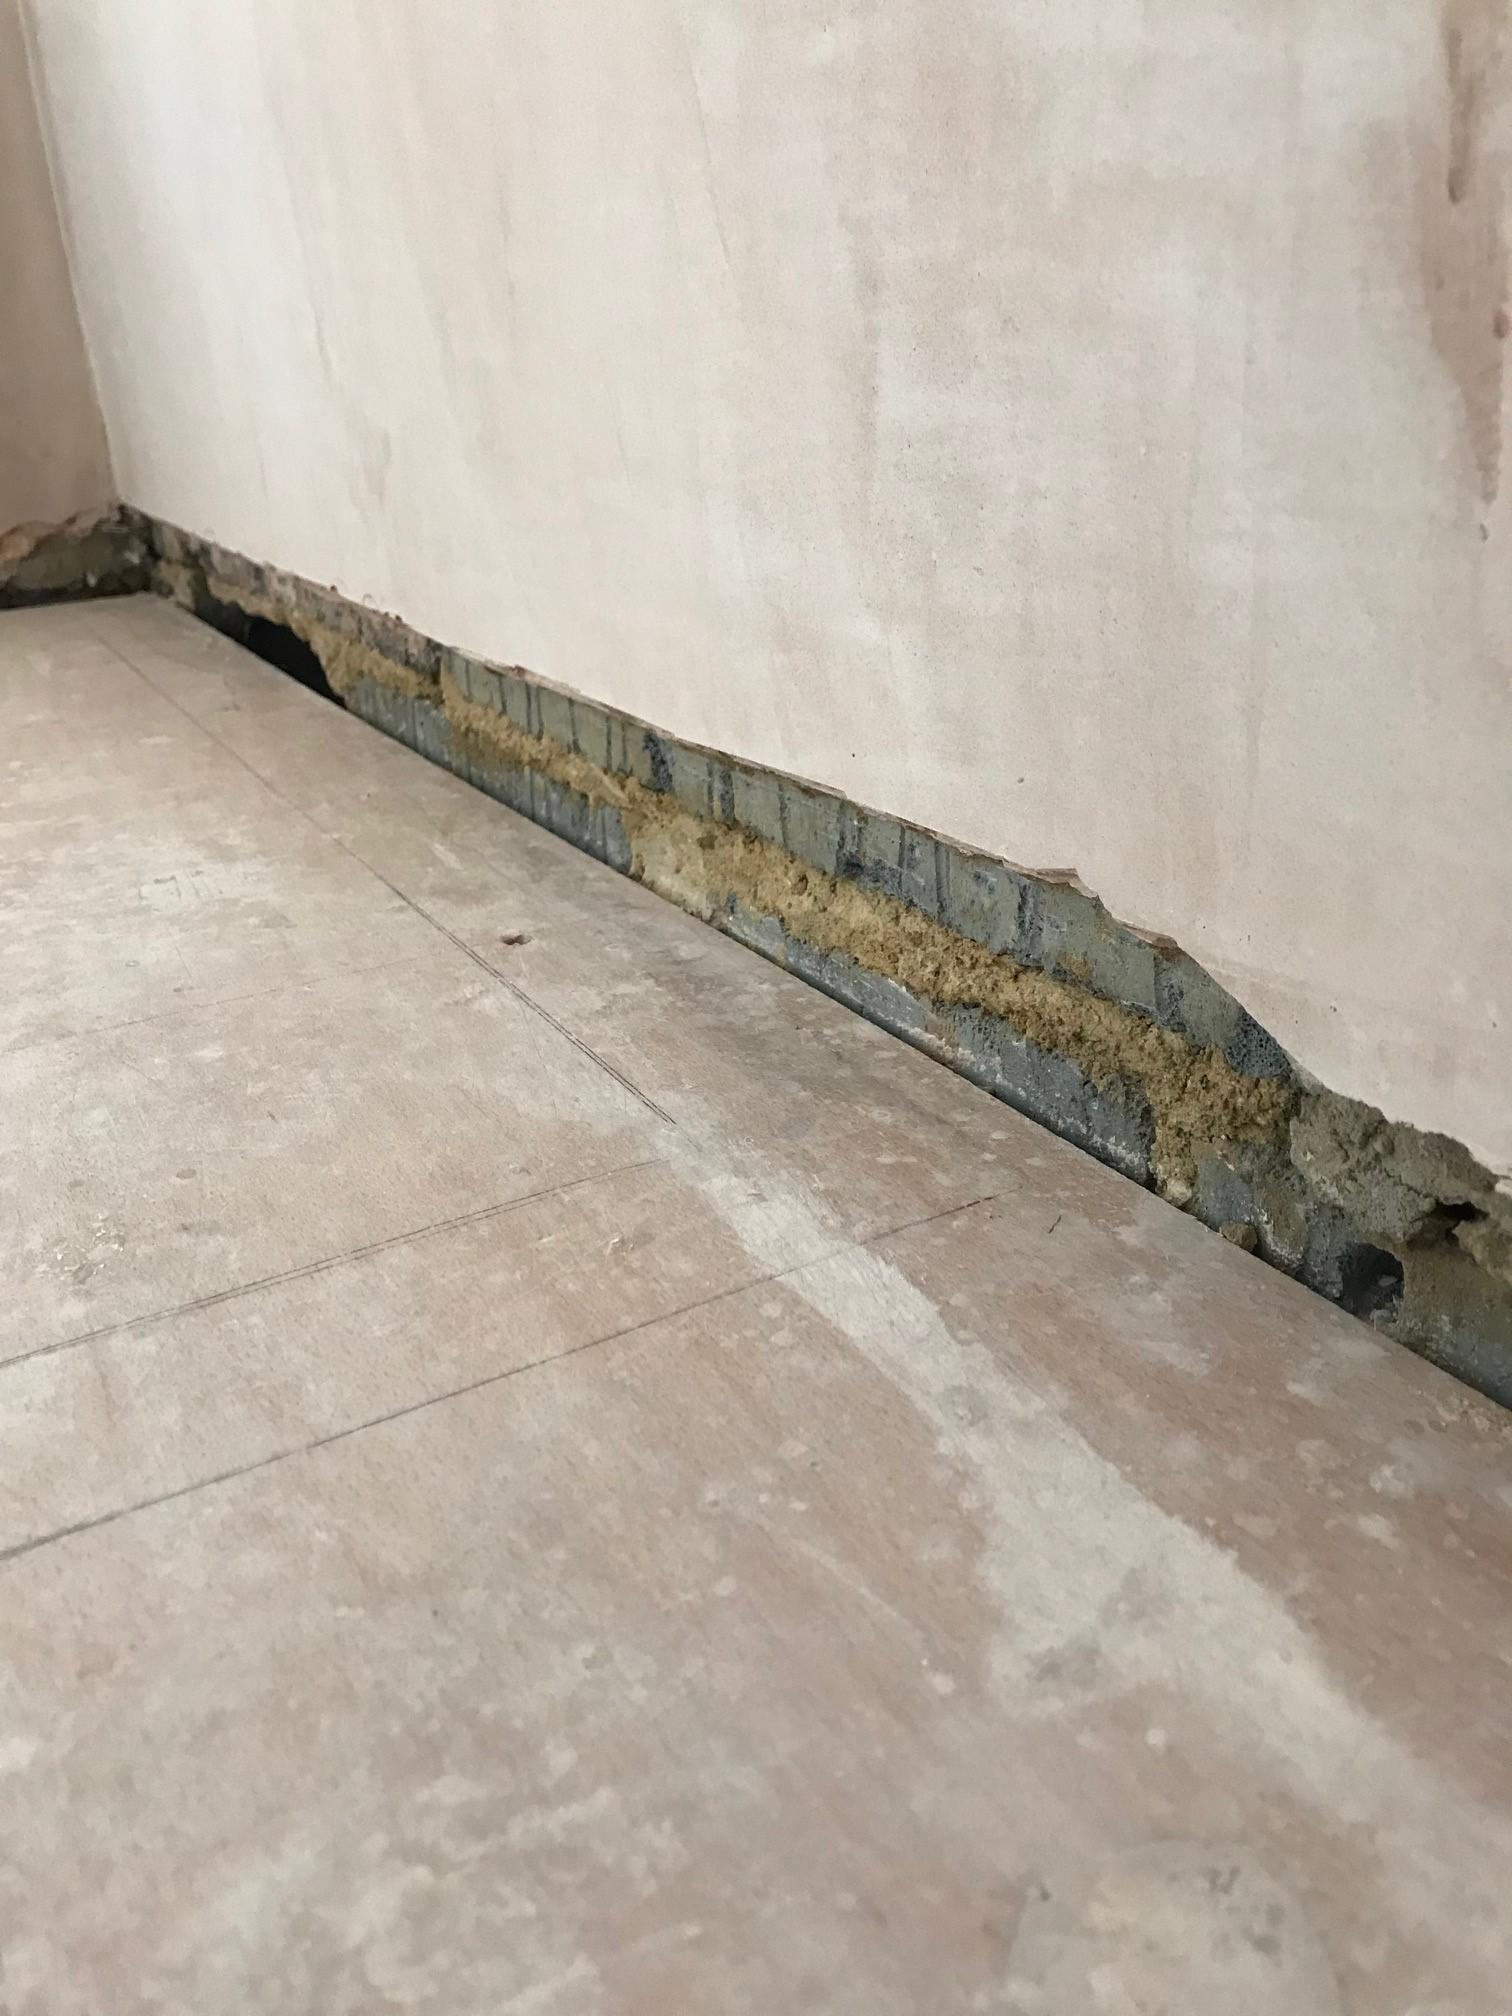
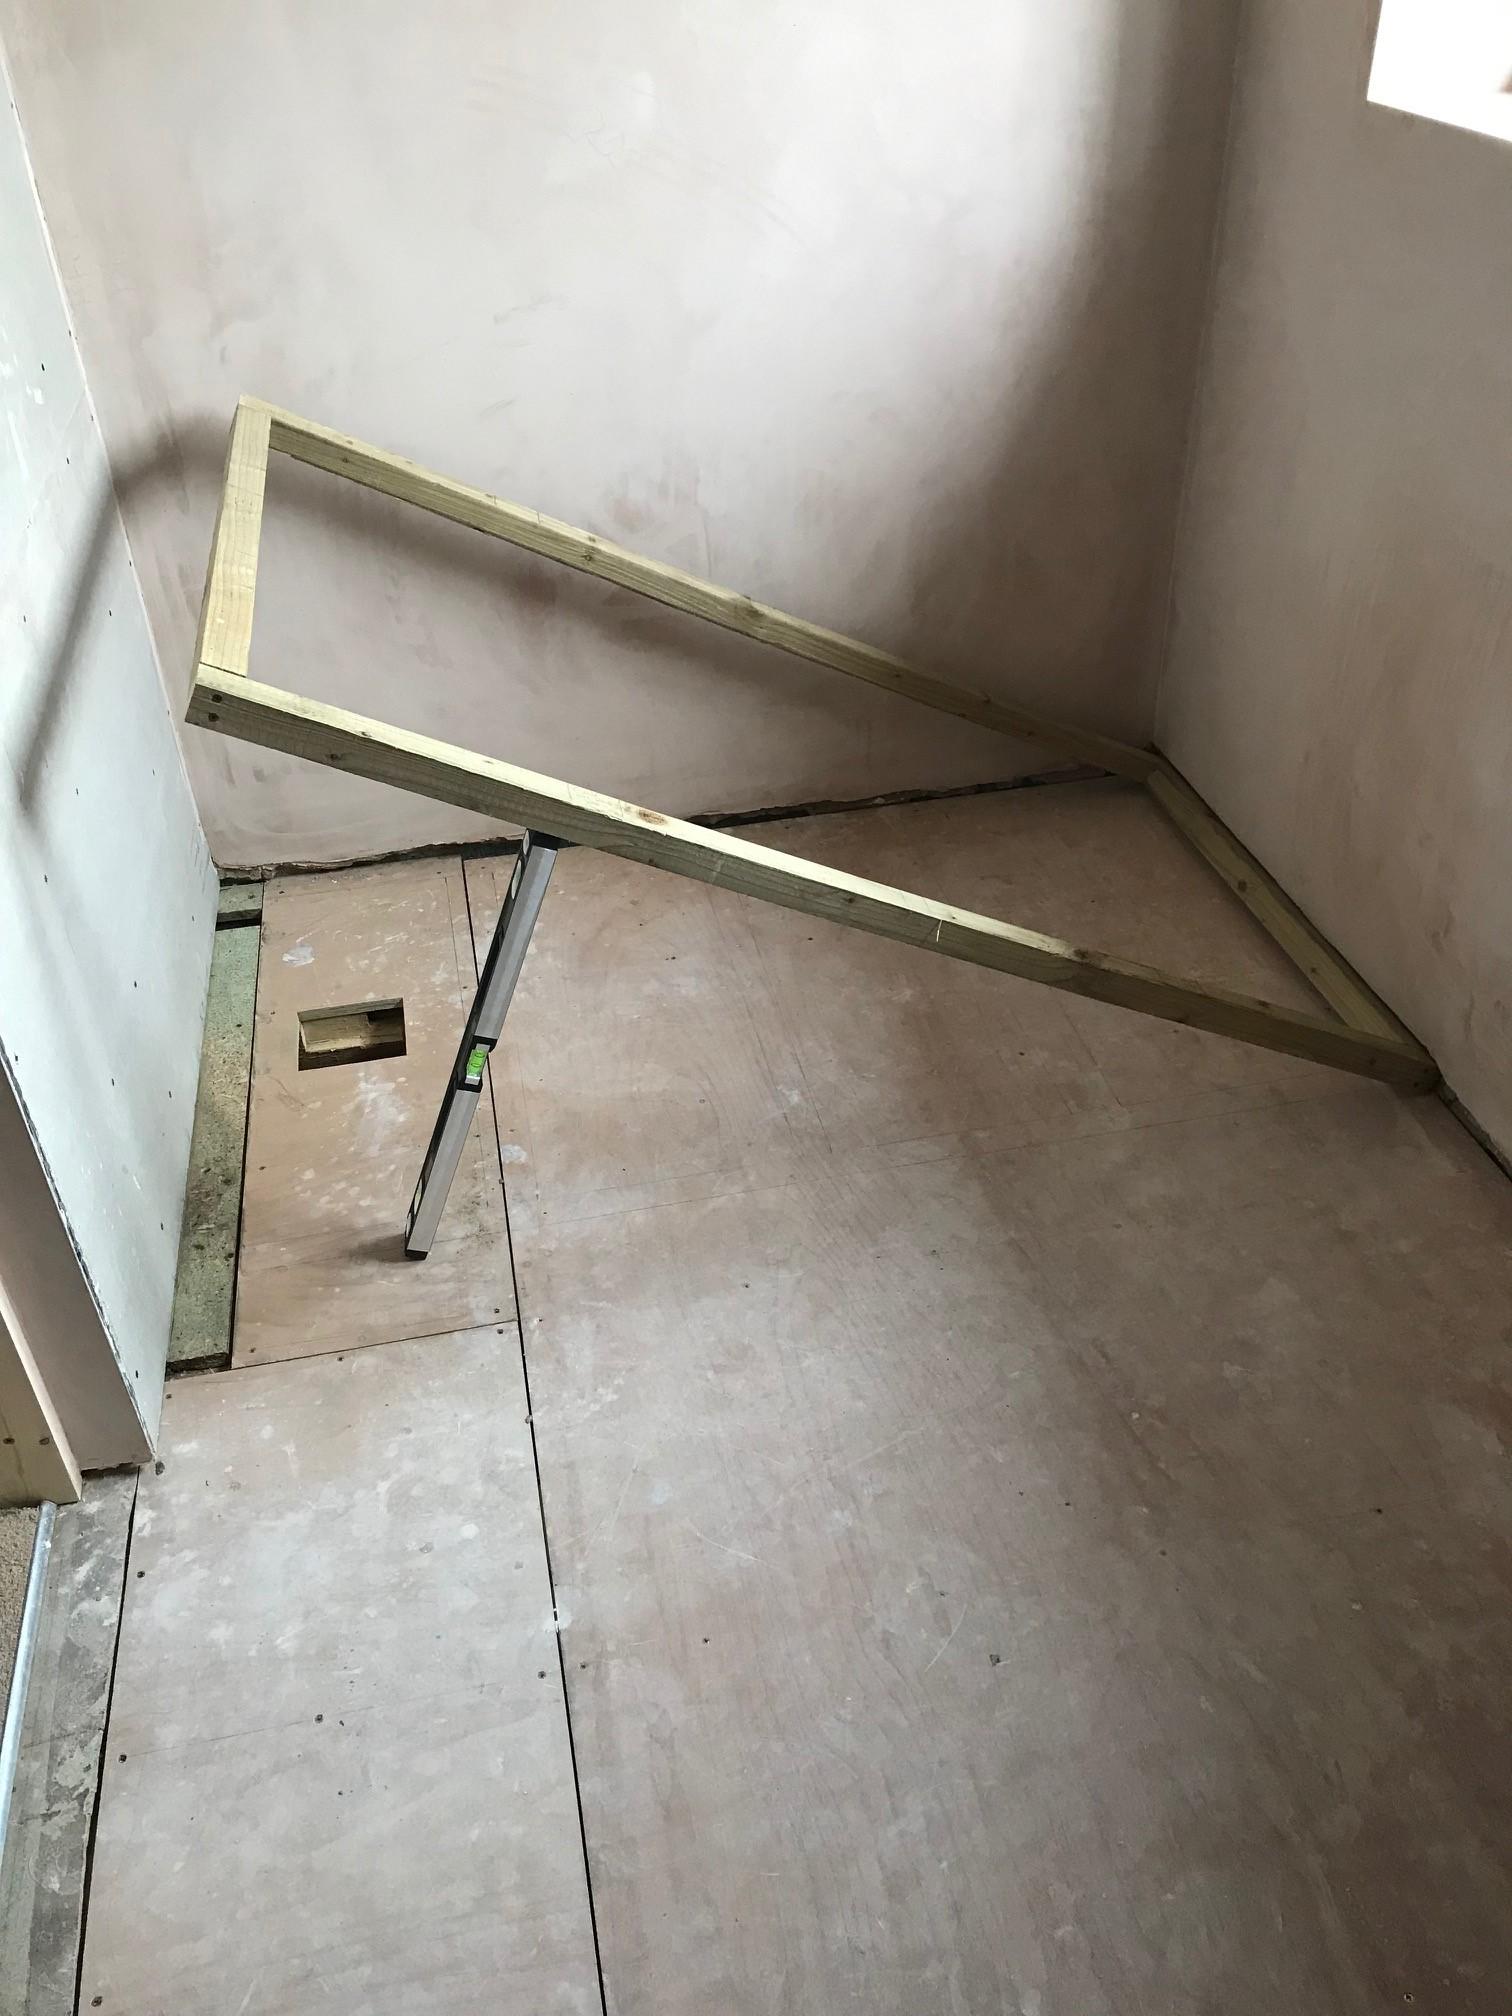
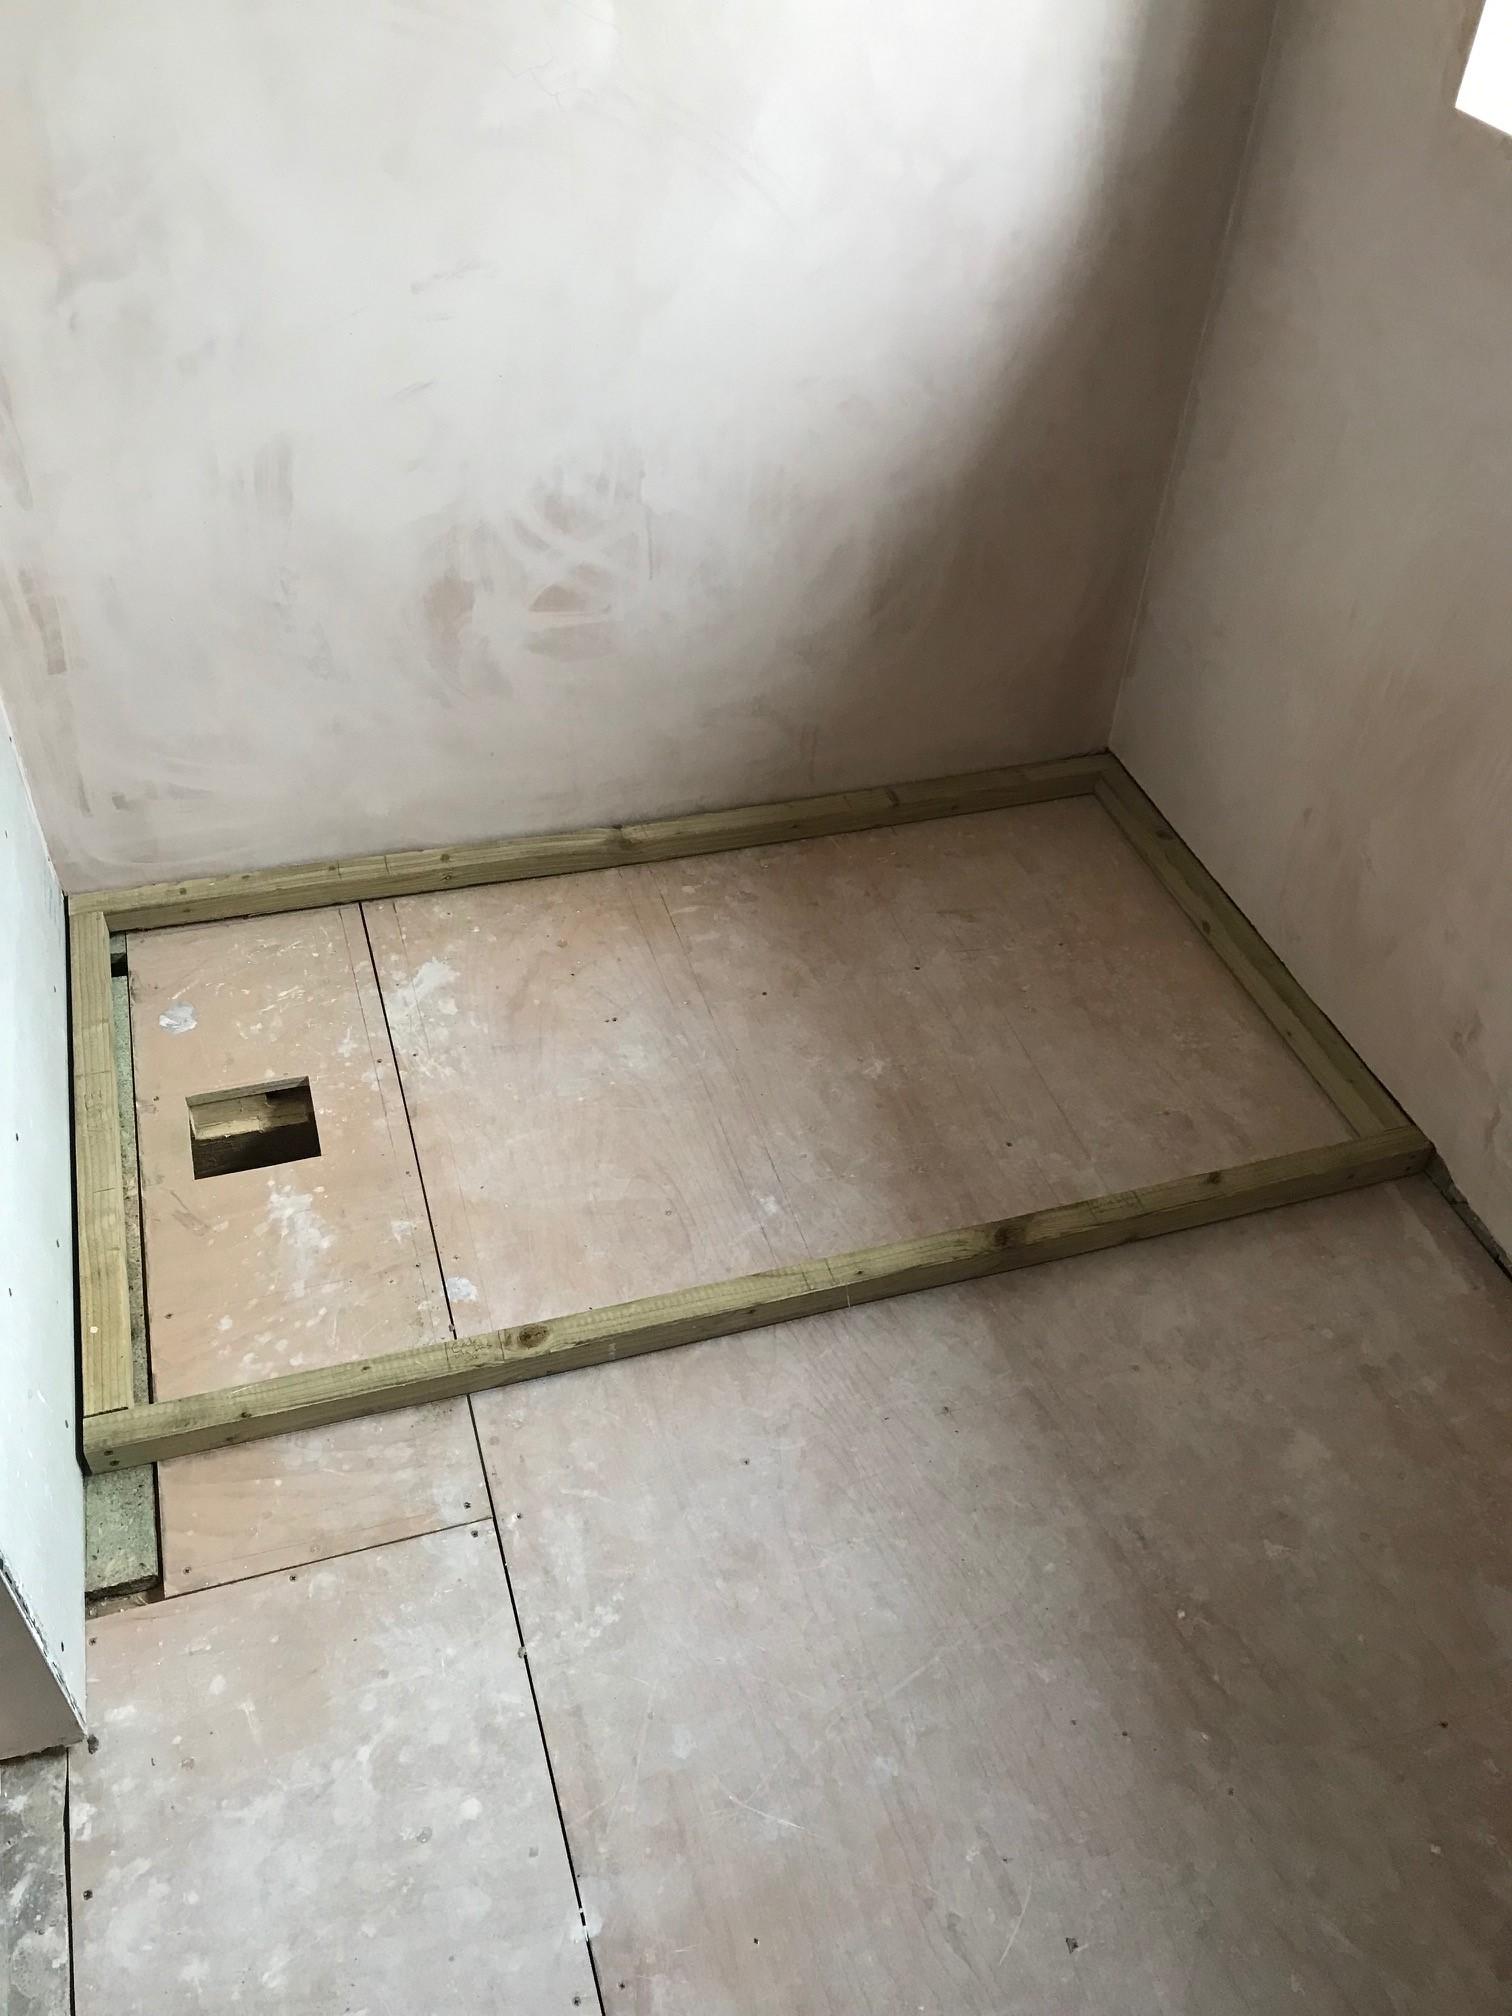
Hey people thanks so much for the ideas ? This was my original plan but the wall bows out at the shorter newly plastered end ? I know exactly what you mean but lowering all 4 props at the same time would result in whatever hair that is left on my head gone forever ? but from this idea I am going to use the waste hole in the floor to hold one end of the tray up. See pics below ? As in the pics below I have made a mock frame that replicates the tray exactly and from this I have realised that no I cannot lift vertically from the front edge as the newly plastered wall on the short end bows out. The manufacturers instructions say to use a Acetic Silicone or Polyurathane to seat the tray so was planning on using CT1. I have some Aquaseal which I planned on using on all 3 walls top to bottom and also applying to the 18mm ply floor area in the tray footprint, the plywood has already been SBR'd but the more protection the better eh ? I'm using 600x300x9mm tiles, wanted panels but wifey didn't like them. --------------------------------------------------------------------------------------------------------------------------------------------------------------------------------------------------------------------------------------------------------------------------------------------- So this is the area I'm working with: I have cut a channel just a bit thicker than the tray into short wall near the window as in pic below I plan on applying the CT1 to the floor then moving the tray end into the channel I cut and propping the tray up at one end with a 2x4 which will be poking through the shower waste hole - see pic below , I also plan on applying Silkaflex to the edges but don't know if I should apply this once the tray is down or whether to apply a small amount before lowering the tray? Once the CT1 and any Silkaflex has been applied I'll run down stairs and man handle the 2x4 post and lower the tray into position ......easy What could possibly go wrong ?

 2 points
 -
Thermal Store tends to be a higher storage temperature and also needs to have a higher storage volume for the same DHW volume. As the store temperature is higher, heat losses are higher. You can get them with custom amounts of insulation - Newark Copper let you specify and you can also get it to 100mm or more if requested. If you want to not have a whole house softener, consider something like a combiphos unit, or even fit a double inline filter unit and go 5 micron then siliphos in a pair of 10" filter housings. I'm filtering at the main sink and a drinking water tap using a 10" filter with activated carbon inserts. They are about £15 for the unit, filters are much cheaper than a Brita.2 points
-
I used a 40 to 50 adapter out of the shower trap and ran all my waste pipes in 50 to a main 110 within the house. I was advised 50mm tends to get blocked with crud a lot less than smaller sizes.1 point
-
Our minds think alike, due to its position it needs to come out of the top, the box I am building sits below the roof of the shed, I have moved the box far enough away that if i build a small section of removable lid I can extract the bulb, ........ I have not put the gutters on the shed roof yet and only now realise that I did all my measurements to the edge of the tin roof..... ,, FFS ! I better remember this tomorrow morning !1 point
-
I paid £200 all in for a mornings work.1 point
-
@jamieled from travis Perkins price was inclusive of delivery. I am very happy with them. Been playing with the plumbing today, all good fun.
 1 point
 -
? My phone has a mind of its own Vertical1 point
-
No - that sort of pushfit seal is fine underground.1 point
-
I paid £250 plus VAT for my air test.?1 point
-
It's like pva on steroids. Looks ths same, smells different but is waterproof whereas ordinary pva isn't.1 point
-
Is is just central extraction or a full blown mvhr system? I am not surprised it gets stuffy with the ventilation turned off. I think it was Jeremy that plotted CO2 levels in his bedroom at the old house. Yes it was, here you go There is not much you can do apart to tell them the cause of the high CO2 is them breathing with the ventilation turned off. Tell them to turn the ventilation back on, or stop breathing......1 point
-
No idea on how much, but I have this chap lined up: http://www.macfarlane-surveying.co.uk/contact He's done a fair few local to me and we used to deal with him when he worked for the council.1 point
-
50mm is 50mm ... outside of a socket is probably closer to 56mm but that is wall thickness. This is the adapter you need underground. Put it so the adapter is at the top of the tee branch to stop it collecting crud ..... 50/110mm adapter1 point
-
Your fine with a render board Base coat and mesh It’s worth adding viticulture expansion joints As most structures move Especially TF I normally add a stop bead to intern comers Ive render many thousands of metres on TF and concrete Rarely have any issues with cracking1 point
-
Well I'm on a different tariff, which gives 4 hours of cheap heating overnight, 2 hours during the day and 2 more in the evening. I believe it's similar to 'Economy 10' on the mainland. As I recall, the peak element will only come on once the heater decides it's more than 50% depleted and has fallen 2 degrees below the desired room temperature. The heaters are however VERY well insulated, and are never hot to touch, barely even warm in fact. There is considerably more insulation than older heaters I've had. On Economy 7, certainly down in the warmer area I am, I don't think the peak element would ever need to come on as the retain heat so well. I've had them in for 3 winters now.1 point
-
Its been on about 18 months now and is perfect as you say. Its streets ahead of the ordinary k-rend type stuff I have on the block garden walls. @Moira Niedzwiecka has the same alumasc vented facade system, different colour render to me and hers looks lovely too.1 point
-
No.1.... use 50mm not 40mm No.2.... can you not get a 110mm direct under the shower and save yourself the hassle ..?? No.3... strap boss is a no-no, use a tee and a reducing insert if you have to.1 point
-
Make sure you have really good access to the unit. I loft mounted a Vent Axia Kinetic Sentinel Plus and the only way to get at the filters is to disconnect some of the hoses and commando crawl to the far end of the unit. I doubt the new owners have ever cleaned the filters. It was a struggle for me to do.1 point
-
I'd solvent weld into a boss.1 point
-
All of the above Seal with two coats of SBR Leave overnight to dry1 point
-
I was asking about this over here too... Smartply Pro-passive OSB3 is tested / certified for airtightness, and also its tech data states it is a vapour barrier / vapour control layer. So it seems either use a cheaper/non-certified OSB if you want vapour open, and risk it not being airtight, or use the Pro-passive and deal with it being VCL. I think in practice it doesn't matter too much as even an "vapour open" wall construction generally calls for the inner layer to be the least vapour permeable (e.g. by factor 3:1 called for the Cotterell Passive house handbook)1 point
-
its to avoid creating a slip plane in a masonry wall. Edit: Extract from BS 8215
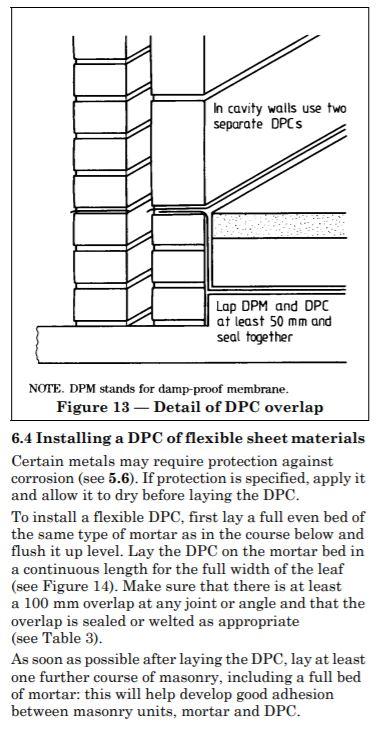 1 point
 -
The point was that a) Heller's presentation of the raw data was flawed to start with so the rest of his article should be taken with a pinch of salt and b) that with just this simple correction the raw data doesn't disprove global warming anyway so his theory that the adjustments were added just to cover this up is not supported. As to your other points, and has already been said on this thread IIRC, if volcanoes, solar variation, human aerosol emissions and CO₂ are taken into account models get a fairly good match the last century or so's climate. If CO₂ is left out then it's impossible to get a good match, so no, the graph doesn't seem to disprove a link between CO₂ and global warming.1 point
-
@romario fold over both sides, stick a 215mm DPC on top then lay your mortar and blocks. You don’t need mortar under a DPM or DPC. If its difficult to get it to stay, use some lengths of duct tape to join both sides together and then get the DPC on top.1 point
-
A tired one lol.1 point
-
Use meths or similar to clean any contamination / mould release agent off the bottom ( underside ) of the shower tray prior to installation1 point
-
If water gets that far you’re screwed, tanking or not. Spend every effort on the junctions between the tray and wall, and maybe have a read of of my methods in this thread;1 point
-
Only as long as the board will go back down to the floor, but not ideal as you'll break the tanked seal. Go with option 1 IMO. Youll also not be able to get screws back at the absolute bottom of the board, so maybe not a good idea at all.1 point
-
Get on with it then All sounds / looks good from here. If you tank the wall up to 300mm and leave it dry, then fit the tray, you'll need to use cement to patch that wall in after. Mask the tray with insulation tape, so the trowelling doesn't scratch it. I assume you know to peel the protective layer off just enough to expose the edges / top 30mm or so and leave the rest on for the moment?1 point
-
If Greenland is an outlier why is it the most studied epicenter of global warming concern? Indeed, which raises the question why the climate change alarmists use every forest fire or hurricane as evidence of global warming. The whole debate has succumbed to fanatical tribal believe mechanisms not experienced in the UK since the religious conflicts at the time of Elizabeth I.1 point
-
@epsilonGreedy You are showing just one area of the globe there, and an extreme environment as well. If you constantly go looking for the outliers then you are just reinforcing your biases. There was a study a few years back about some glaciers that had increased in length and volume. This was used as proof that climate change was not happen, in fact I think they stated that it showed cooling. It was soon pointed out that in this special case, there was more rainfall in the region. Rainfall goes up when the world is warmer. It just happened to be dumped on those 4 glaciers because of the local weather patterns. There is a reason why we use different words for weather and climate. You really need to ask yourself what you are trying to prove here.1 point
-
Well I am different from most on here, I don’t have any qualifications, I didn’t do a passive house spreadsheet thingy, frankly I didn’t do any calculations at all, perhaps I am lucky but I just went with what I thought was right. (Sucks finger and sticks it in the air ?). What I did do was listen to everyone on this forum, particularly @JSHarris who has done a wonderful blog, I even went to visit his build to see it in the flesh. @SteamyTea told me of a chap in Cornwall who built his passive type house by going with his gut instinct and it turned out really well. Regarding my DHW tank I listened to the resident expert @Nickfromwales who even got a few of us a decent discount when we bought them. Yes it was a gamble, but I would not change anything apart from fine tune my MVHR and heating parameters to get better efficiency. (And I may go to E7 in the future).1 point
-
The 2 issues are a thermal store needs to store water at a hotter temperature, so that alone means higher losses. Then just about every thermal store I have seen is a copper tank with spray foam insulation, which you can get in different thicknesses but they tend to have a weak link around the connections. Compare that to a Telford Stainless steel unvented cylinder which has the inner stainless steel tank, and an outer solid jacket with the gap full of insulation. This seems to give a better insulated cylinder with no weak point around the connections. Lag all the pipework in and out well and I get very little detectable heat loss and the room with the tank is not noticable warmer than other rooms. I wonder why nobody seems to make a thermal store of similar construction and lagging?1 point
-
And don't buy a TS ?1 point
-
That seems to be the really hard part about this whole house building thing! The wife pretty much does that. An insulated bath can be enjoyed for hours apparently...1 point
-
Nope, definitely saw it on some tv programme1 point
-
OK, what exactly is the question? From the above it sounds like you've dry fitted it into place already, as you sate it's a tight fit. Are you able to lift it vertically from the 'front' edge and hold it there whilst you squeeze some goop underneath / over the floor? You can buy some clear rubber / silicone hose and tape it to the silicone gun nozzle to get into the back / far corners whilst the tray is up at an angle for eg, but that can be done away with if the tray will go fully vertical. Needless to say, you shouldn't be doing this on your own, so don't be a dick and get some help. Just someone to hold the tray from dropping whilst you squirt the goop about. If using CT1 / similar ( thicker than silicone ) then you'll need £2 coin sized blobs every 100mm to support the tray sufficiently. Anything less will not support it whilst the goop cures, for eg, if it was silicone used then the tray would just naturally drop as the silicone displaced, so the tray would not necessarily stay level but just follow the floor as it displaces too much. Prior to fitting the tray, have you tanked 300mm or so up the wall? You using tiles or panels?1 point
-
@Vijay surely you are winding him up?!1 point
-
Talk about the long way around! What about a hole in roof and crane it in!? bought a pair of glass suckers off eBay for a tenner. Used them once then sold them for a tenner to the plumber who fitted the tray with me. There is no way simpler that allows you to manoeuvre tray with trapping fingers1 point
-
Just to add another thought, small holes in the floor (4?) acros downstairs with blocks up through the holes, put the tray on top of the blocks with enough space to lay the adhesive/mortar, lower the acros evenly. Just trying to think out of the box. ?1 point
-
Buildzone provided my warranty and also carried out inspections for their own purpose to ensure that the building was fit for purpose when the warranty was issued. I am in Scotland and the LA cover the building control inspections (sounds the same as NI) so this was all arranged through them.1 point
-
Same here and I did 3. One is a tiny bit off level I think but it doesn't affect operation and you wouldn't notice u less you stared at the water and carefully watched the flow towards the outlet.1 point
-
I had to get our180kg bath up stairs last week. Hired a genie lift for a day to get the bath onto the first floor, then made a trolley with 8 castor wheels from ebay to move it about. If you are physically struggling to to move the tray by your self a trolley is a great way to move heavy objects about. Once in position you could remove the trolley and leave the tray on top of a couple of bits of wood ready for applying the adhesive I was also really impressed with the genie lift, one of those things in life that just works
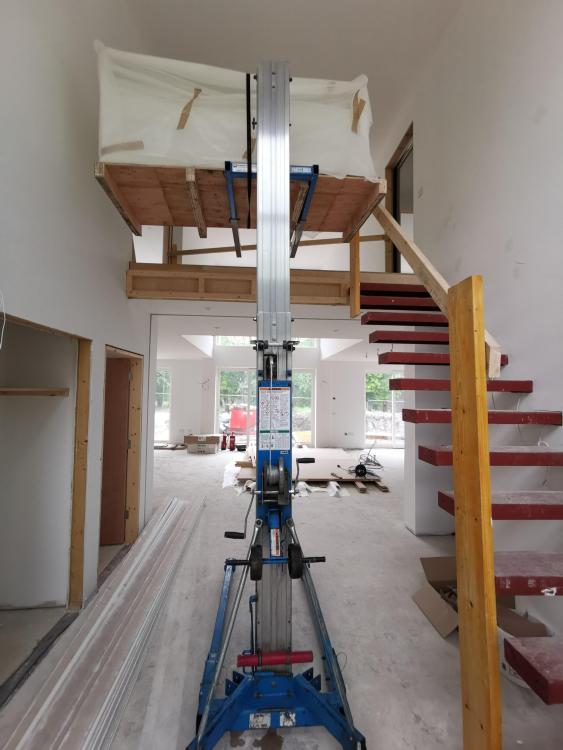
 1 point
 -
Units are never included in the data set, other than as a header to tell the CAD package what they are. All entities are just expressed numerically. Back when we first got CAD at work (AutoCad, running on a DOS PC, pre-Windows by a few years) we used the new CAD/CAM system in the workshop at our parent establishment for manufacture. Our drawing office designed a new form of Mk46 torpedo tail nut (which includes the motor exhaust valve) using the new CAD system. They were really proud of the thing, which was to be machined from stainless steel. It's dimensions were such that it should have comfortably fit in the palm of the hand. A few weeks later we had a phone call, saying that there was a truck with a delivery for us, and did we have a forklift available to unload it. Lots of scratching of heads, wondering what the thing was, until the pallet was unloaded. There, in all it's glory, was a beautifully machined tail nut around 3ft in diameter, weighing around 1/4 of a ton. The CAD file had been transmitted to the workshop minus the unit header, so mm had turned into the AutoCad default of inches, making every dimension 25.4 times too large...1 point
-
I would stand it up at the back, lay the mortar / sealant and lower the front down. The purists will say the back couple of inches might not have much muck under it, but that's what I did in our last house and it never gave problem.1 point
-
Don't do what I did. This is our's in place (it's 2000 x 900 and weighs about 70kg): The stupid way I chose to fit this (it's a tight fit between the walls from left to right in that photo) was to slide the tray in place, spaced up on battens, then lift the right hand side up, propping it in place with a bit of 2 x 2. I then mixed up some mortar, spread it on the floor (being exceptionally careful to not nudge the prop), then I took the weight of the thing and pulled out the prop. I'd intended to lower it carefully on to the mortar bed, but this was not to be. I got it within about six inches of the floor then dropped it. By pure good fortune it happened to end up dead level in both directions, so I just left it and went home, thankful that it hadn't fallen on my head...
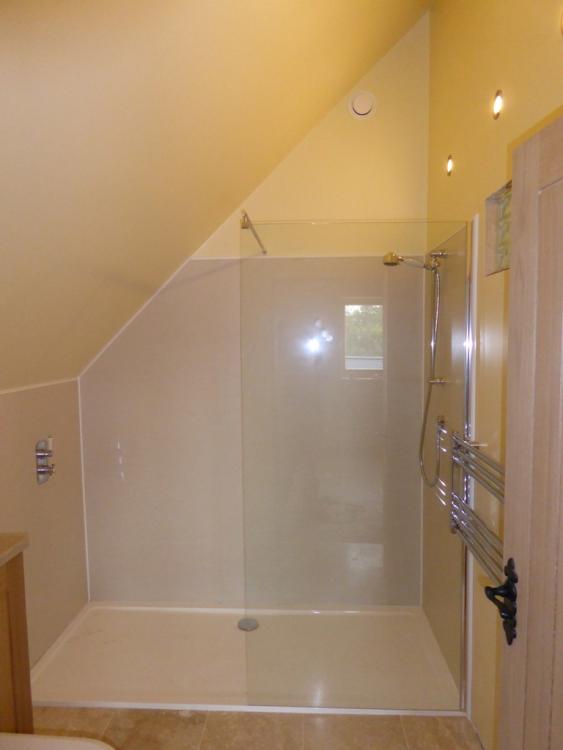 1 point
 -
I hired a joiner and bought one that is designed to be like stone resin but lighter. Being constructive I think hinging it down from the front edge over a small batten using some sort of restraint, and 2-3 people might be one way. You could mount the small batten on something like a 2'x6' piece of board, and stand on it to stop it moving. If it silicone you should have space to adjust it for a bit. Nick will know. F1 point
-
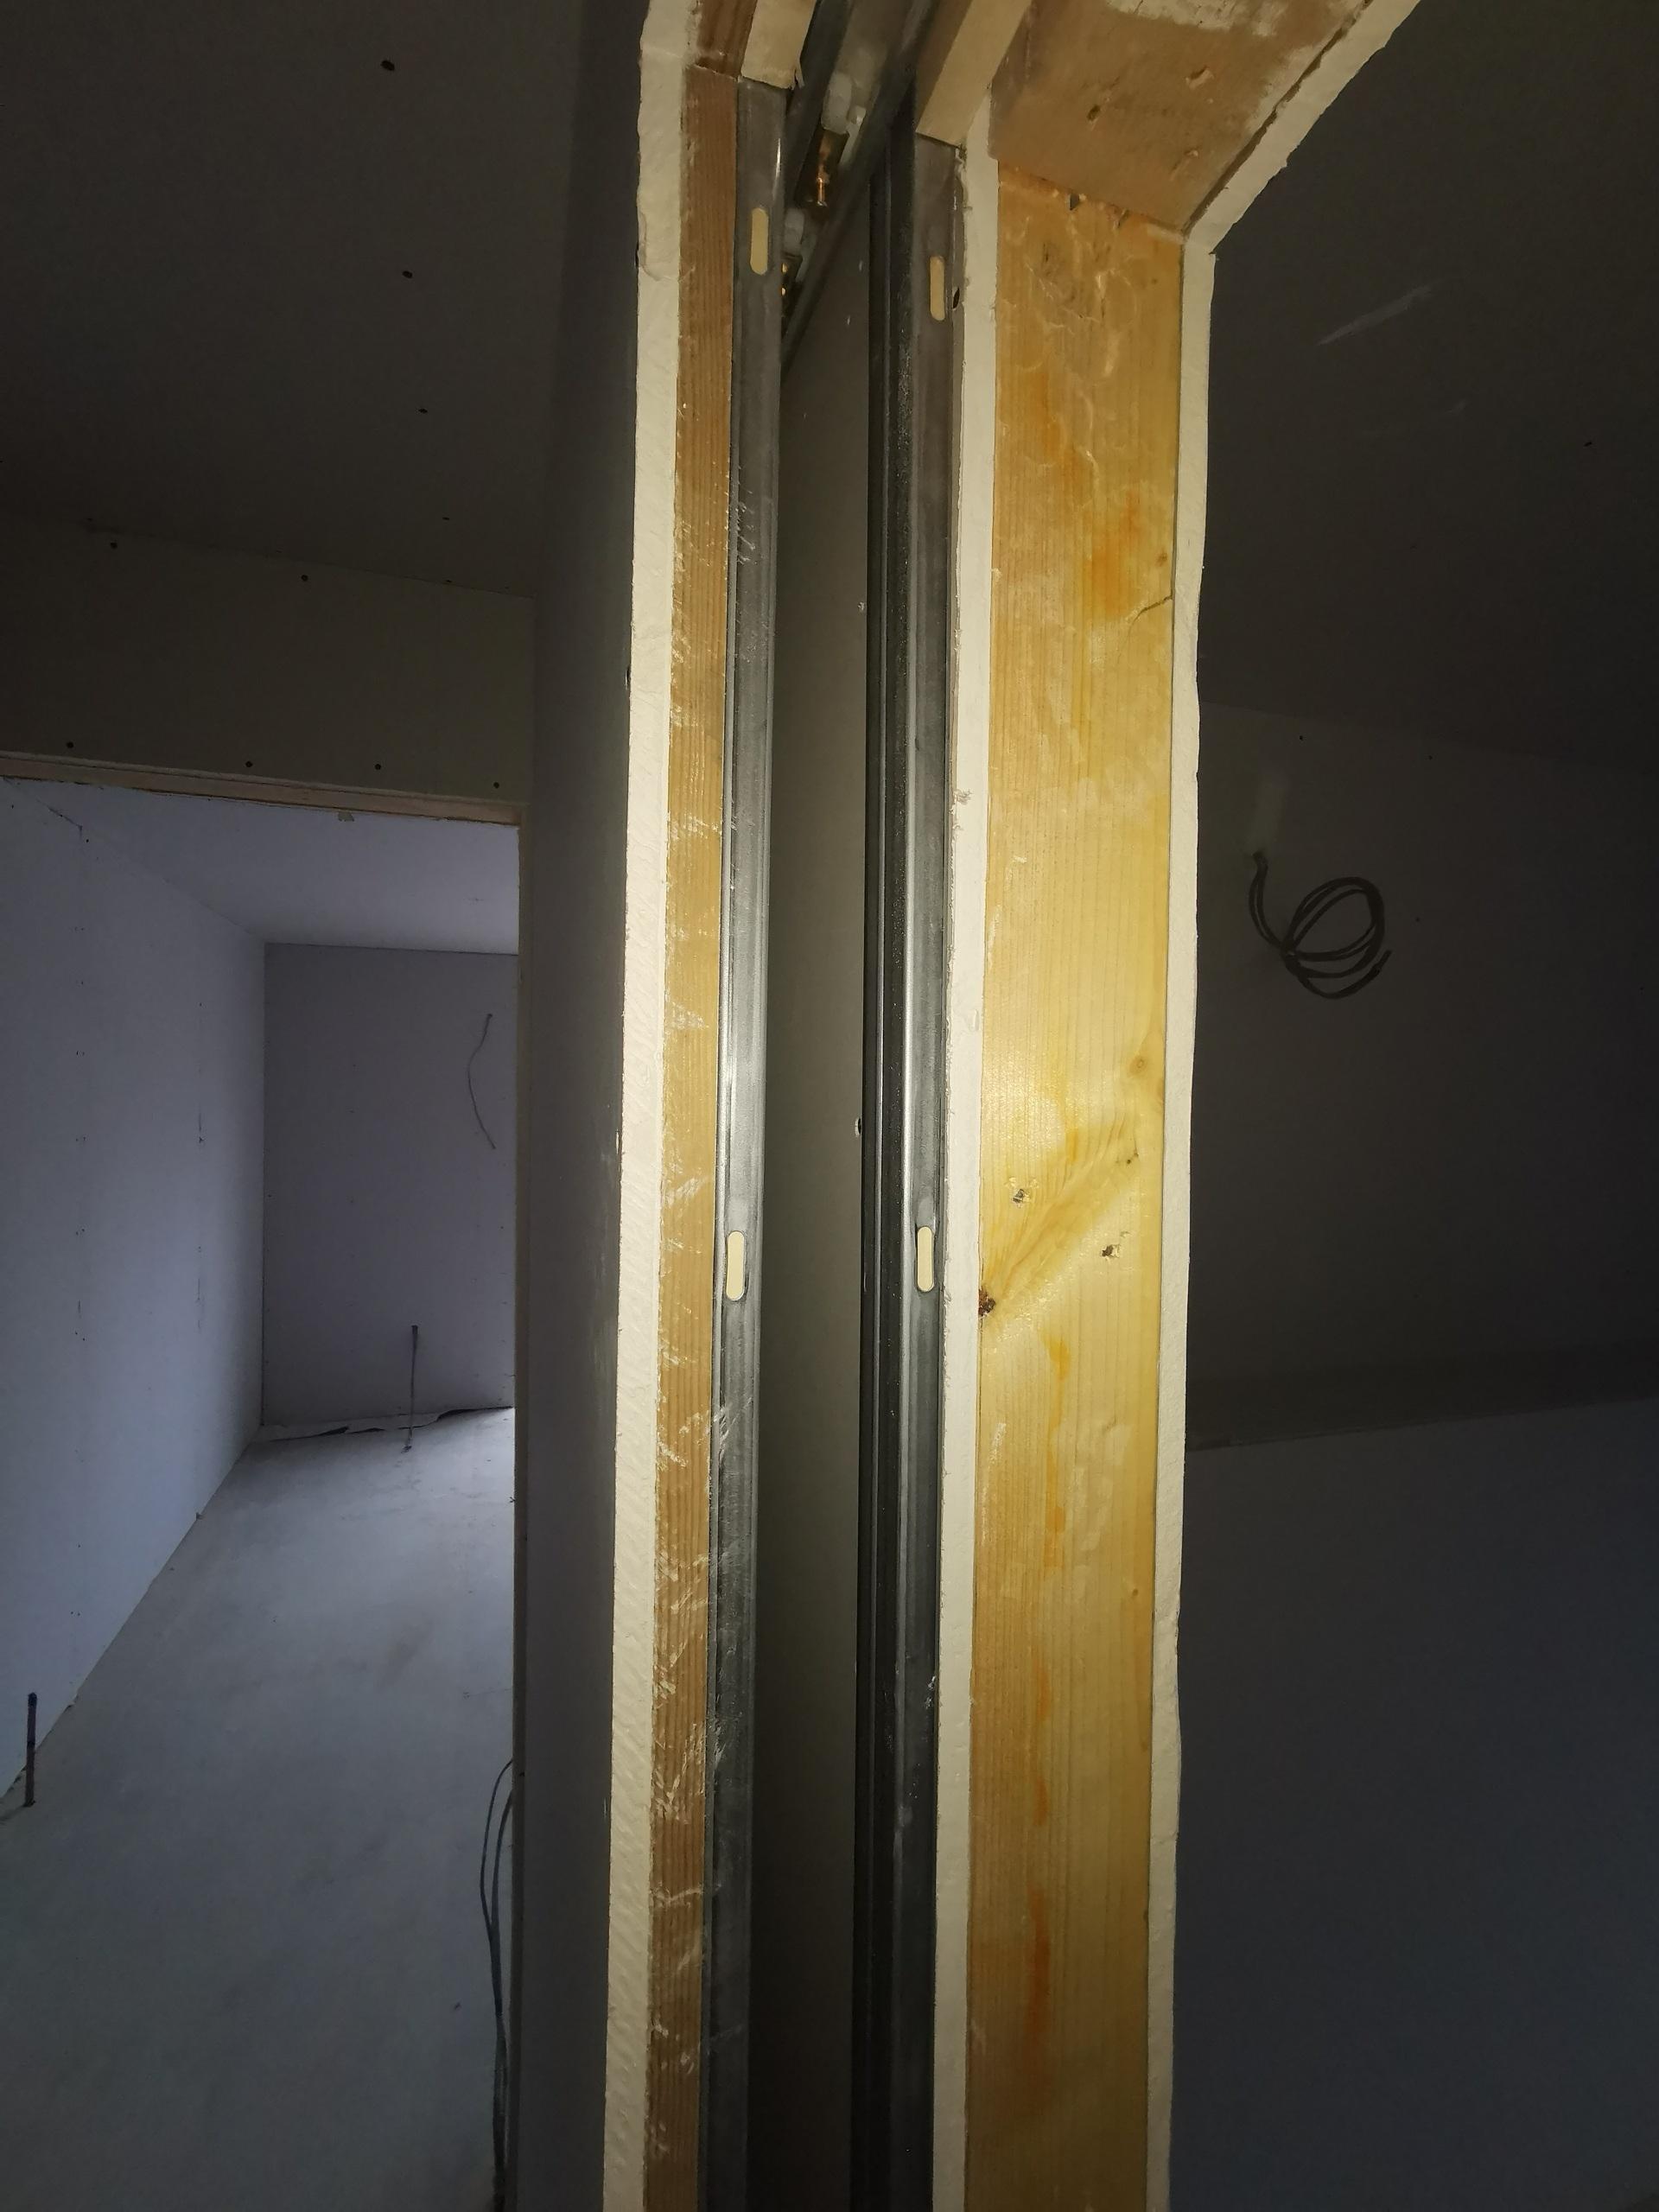
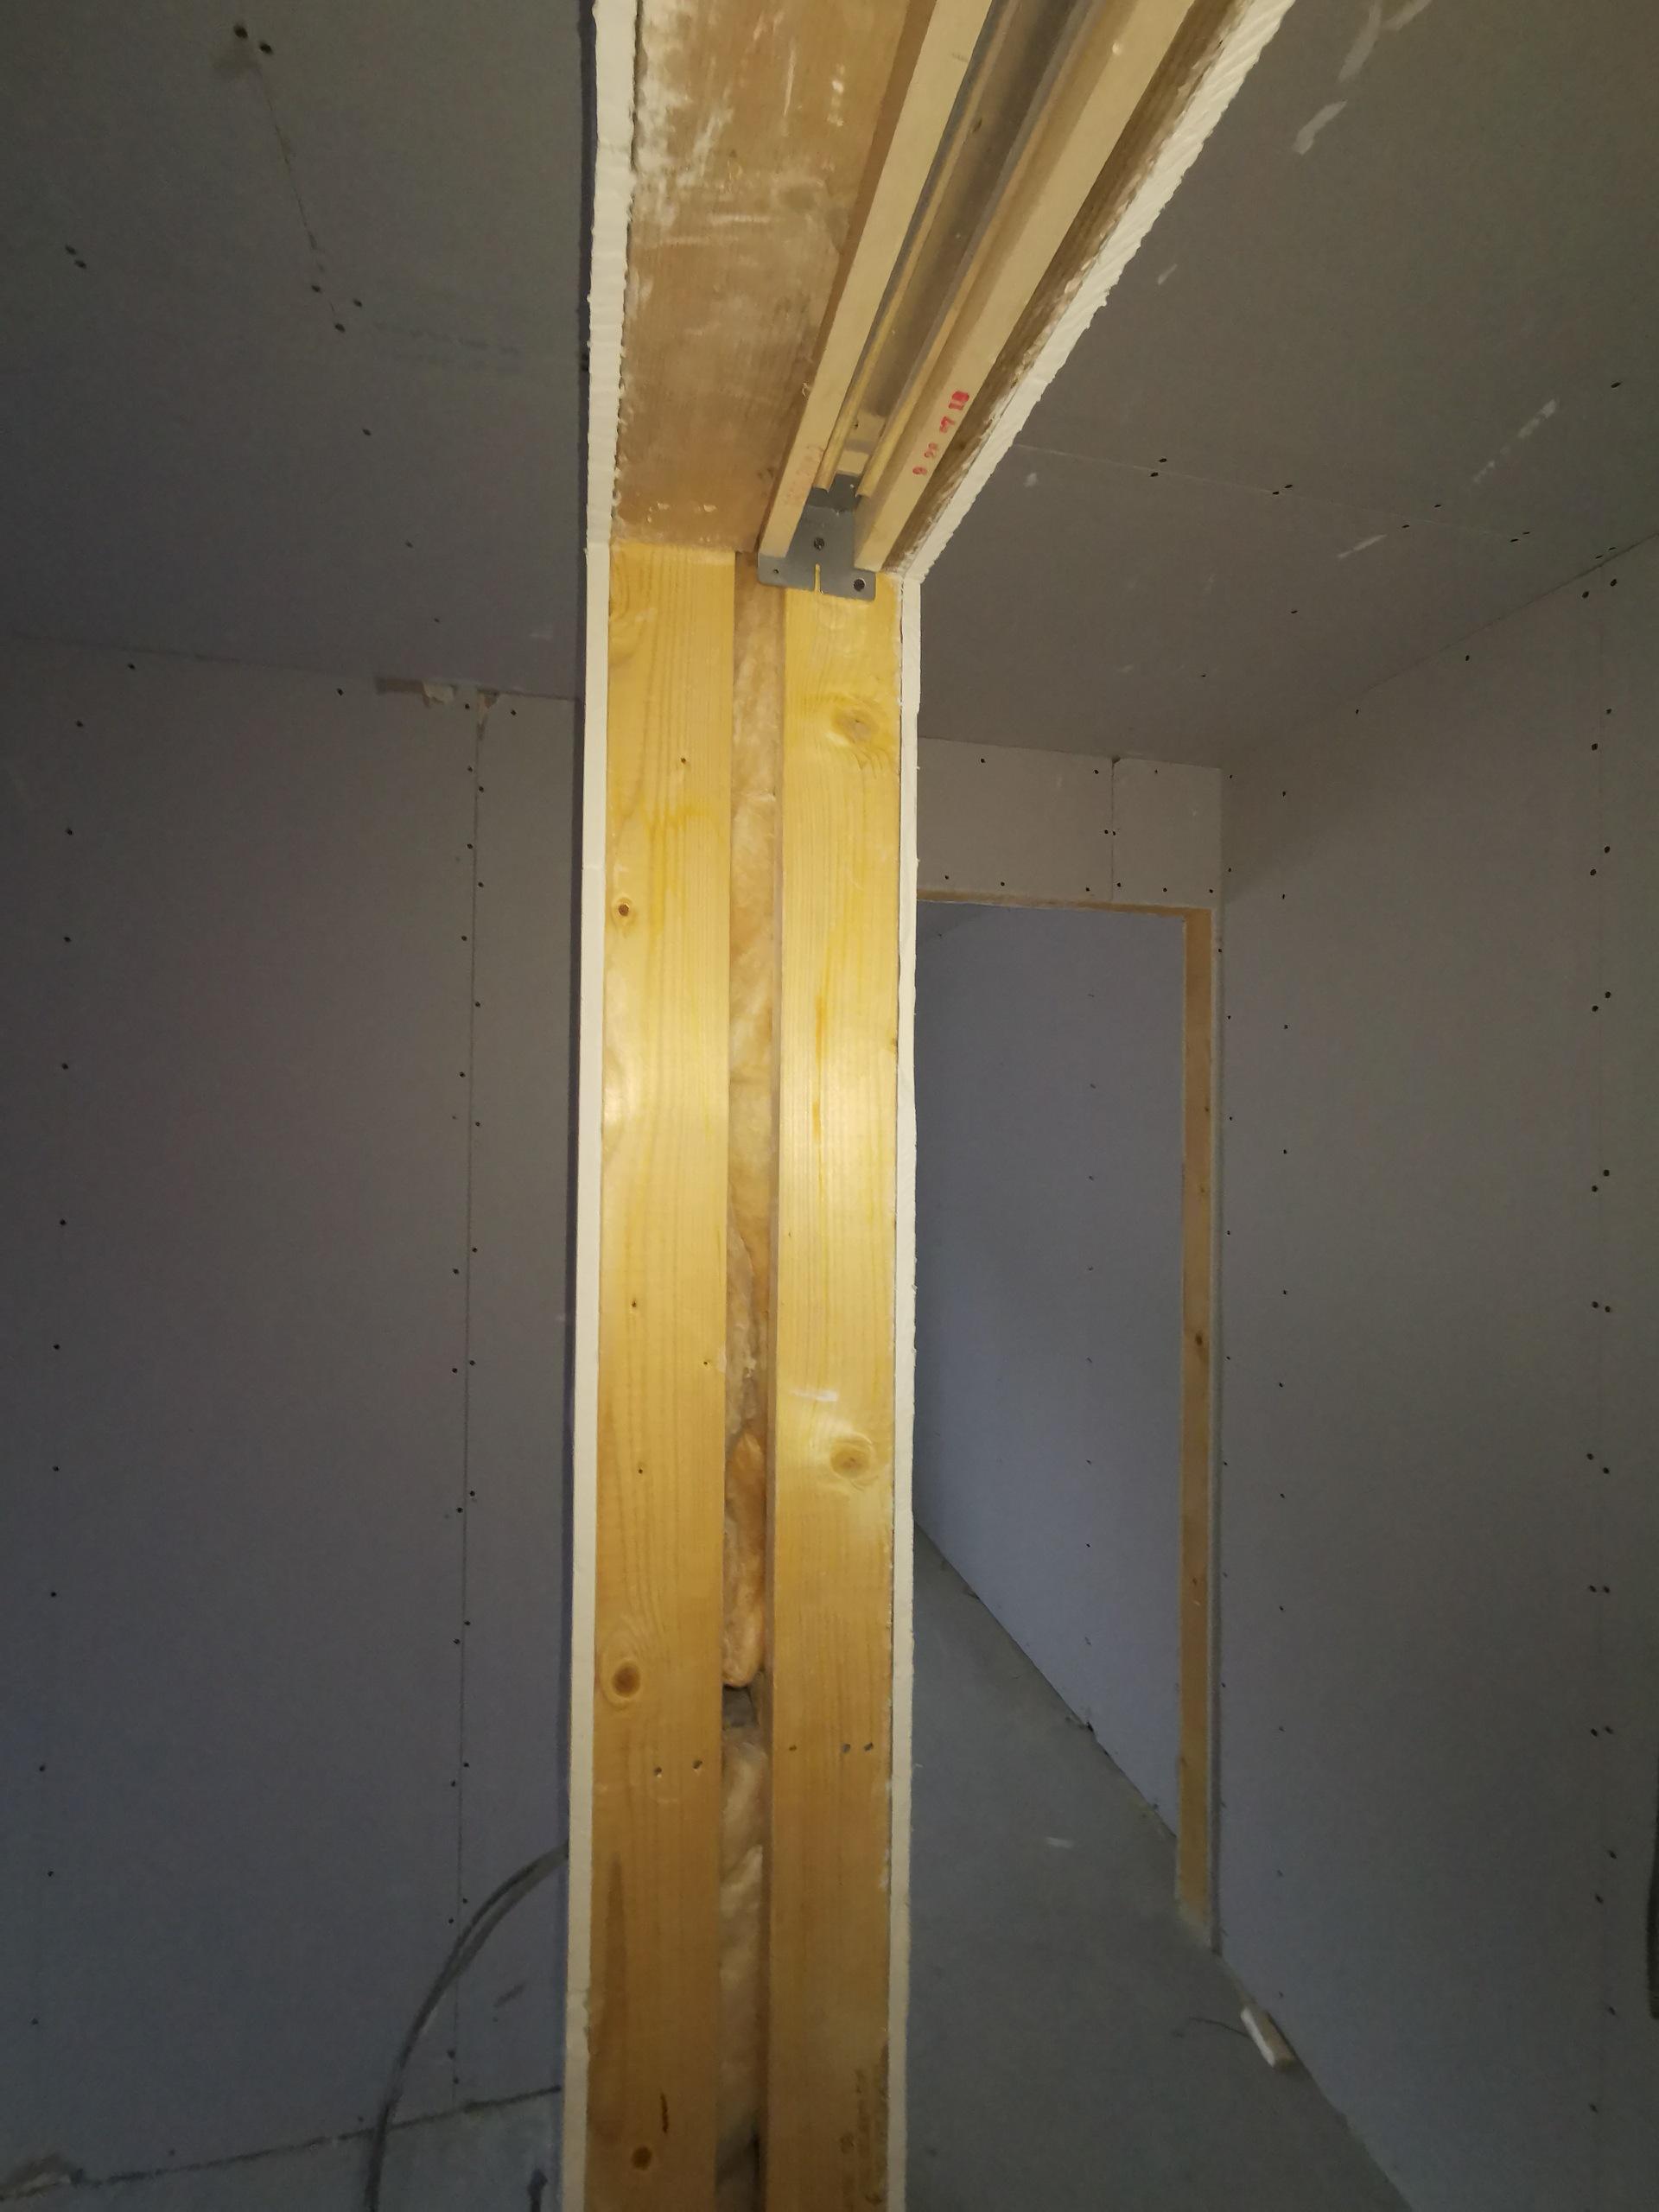
I have just had two of these fitted: https://www.coburn.co.uk/product/hideaway/ My joiner really doesn't like pocket doors and said this one is the best of a bad bunch (from his experience) The frame is encased in the middle of a 90mm partition and loos like 20mm. Obviously this approach takes up more space, however the wall is still fully insulated and feels very sturdy


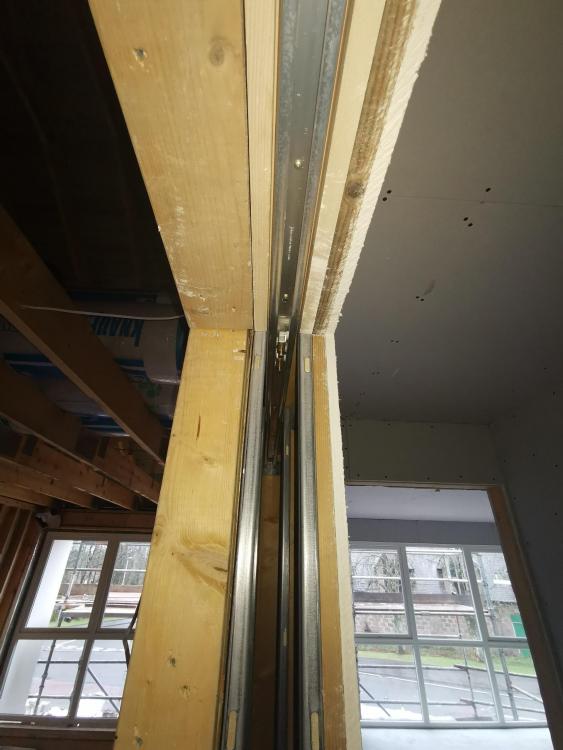
 1 point


This leaderboard is set to London/GMT+01:00