
Leaderboard


Popular Content
Showing content with the highest reputation on 02/21/19 in all areas
-
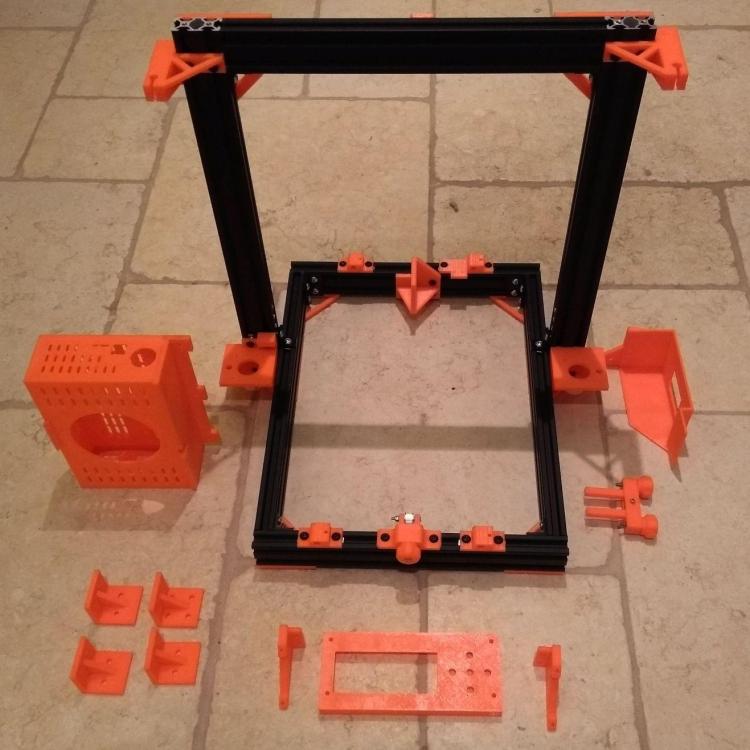
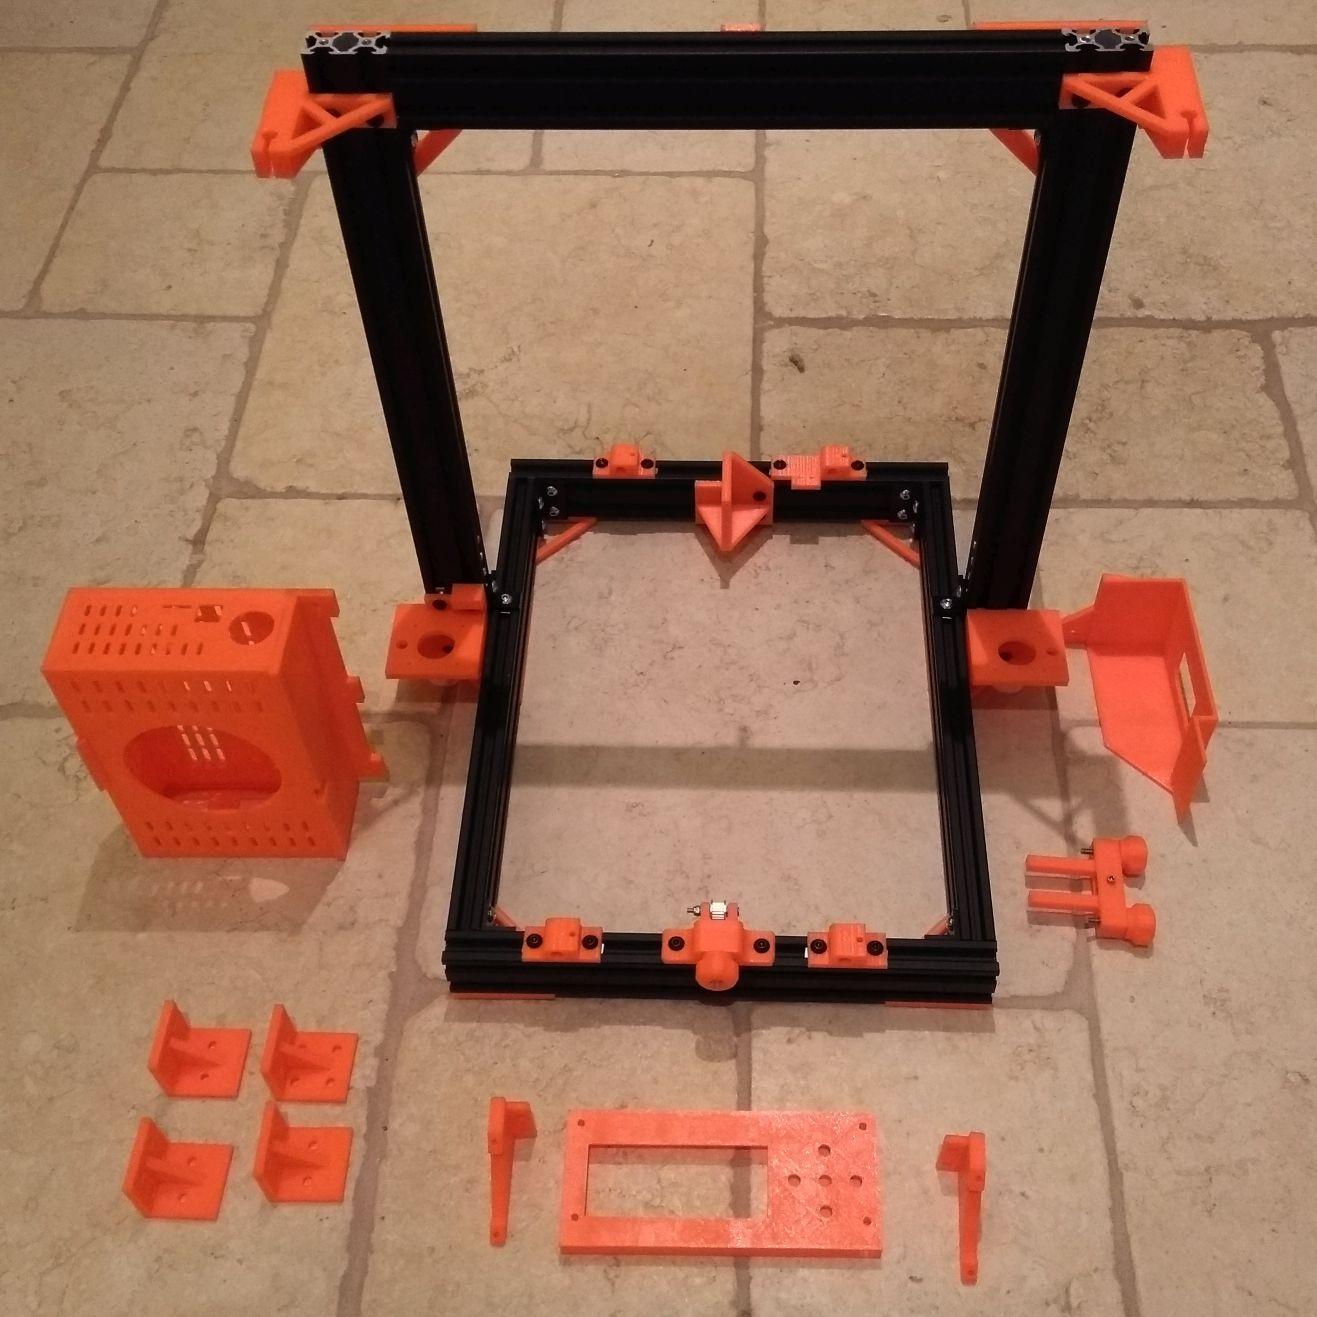
Update: I've now almost finished printing all the parts needed to upgrade my cheap Anet A8 to a metal frame. The log on the printer says it's taken about 65 hours of printing time!! Not sure I believe it. That might be the total time I've had the printer on? Still it wont be much different as I don't leave it ON when not actually being used. I've gradually learnt how to speed up the printing process but this is clearly the big issue for 3D printing. If you are "time poor" then a faster printer would definitely be a better purchase. The box on the left for the control electronics was meant to be printed in two parts, a 5 sided box and the lid with hole for a fan. The main part should have taken 9 hours to print. In an attempt to print it faster (6 hours) I turned up the speed too much and had issues with the stepper motor skipping after about 2 hours. Second attempt also failed at a slightly slower speed. In the end I decided to salvaged the back from one failed print and broke the rest of the box down into 4 separate sides in Fusion 360 and printed each separately, then super glued them together. Most of the parts are from this design https://www.thingiverse.com/thing:2263216 but I took parts from several other designs (the belt tensioners, electronics case, LCD mounting brackets, PSU cover) as people have improved these elements since the original was published. Think I have one more part to print before I tear down the original printer and transfer over all the rest of the stuff.
 3 points
 -
Quick vid...£150 and I'll stick any label on it you want!2 points
-
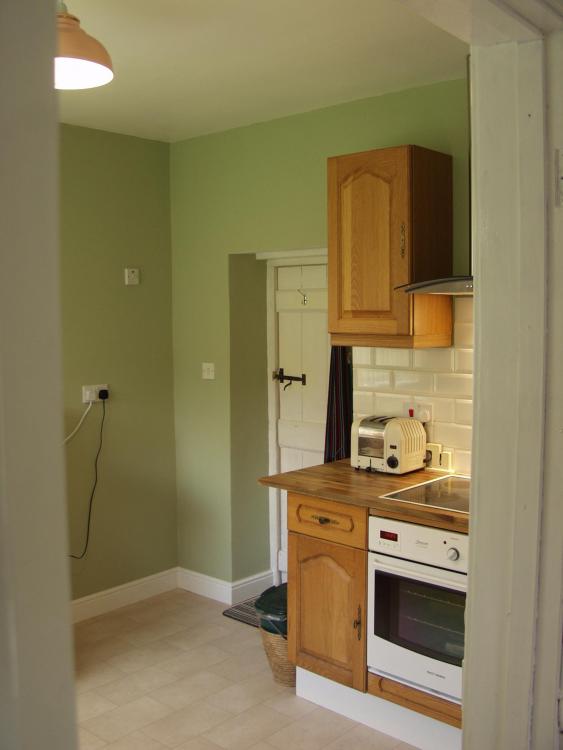
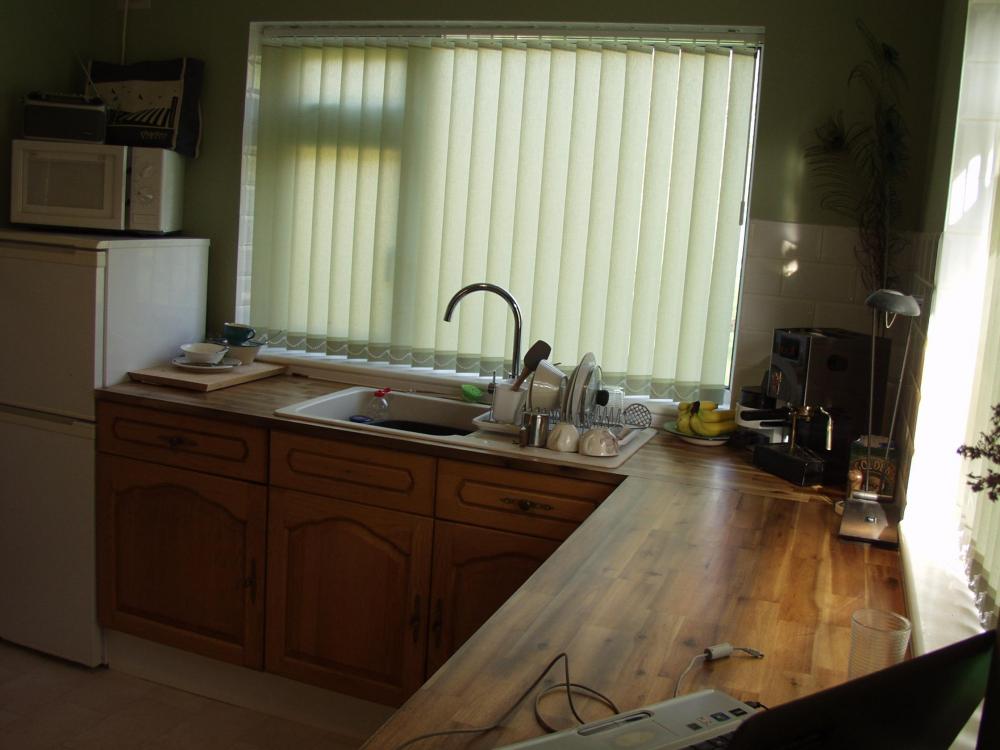
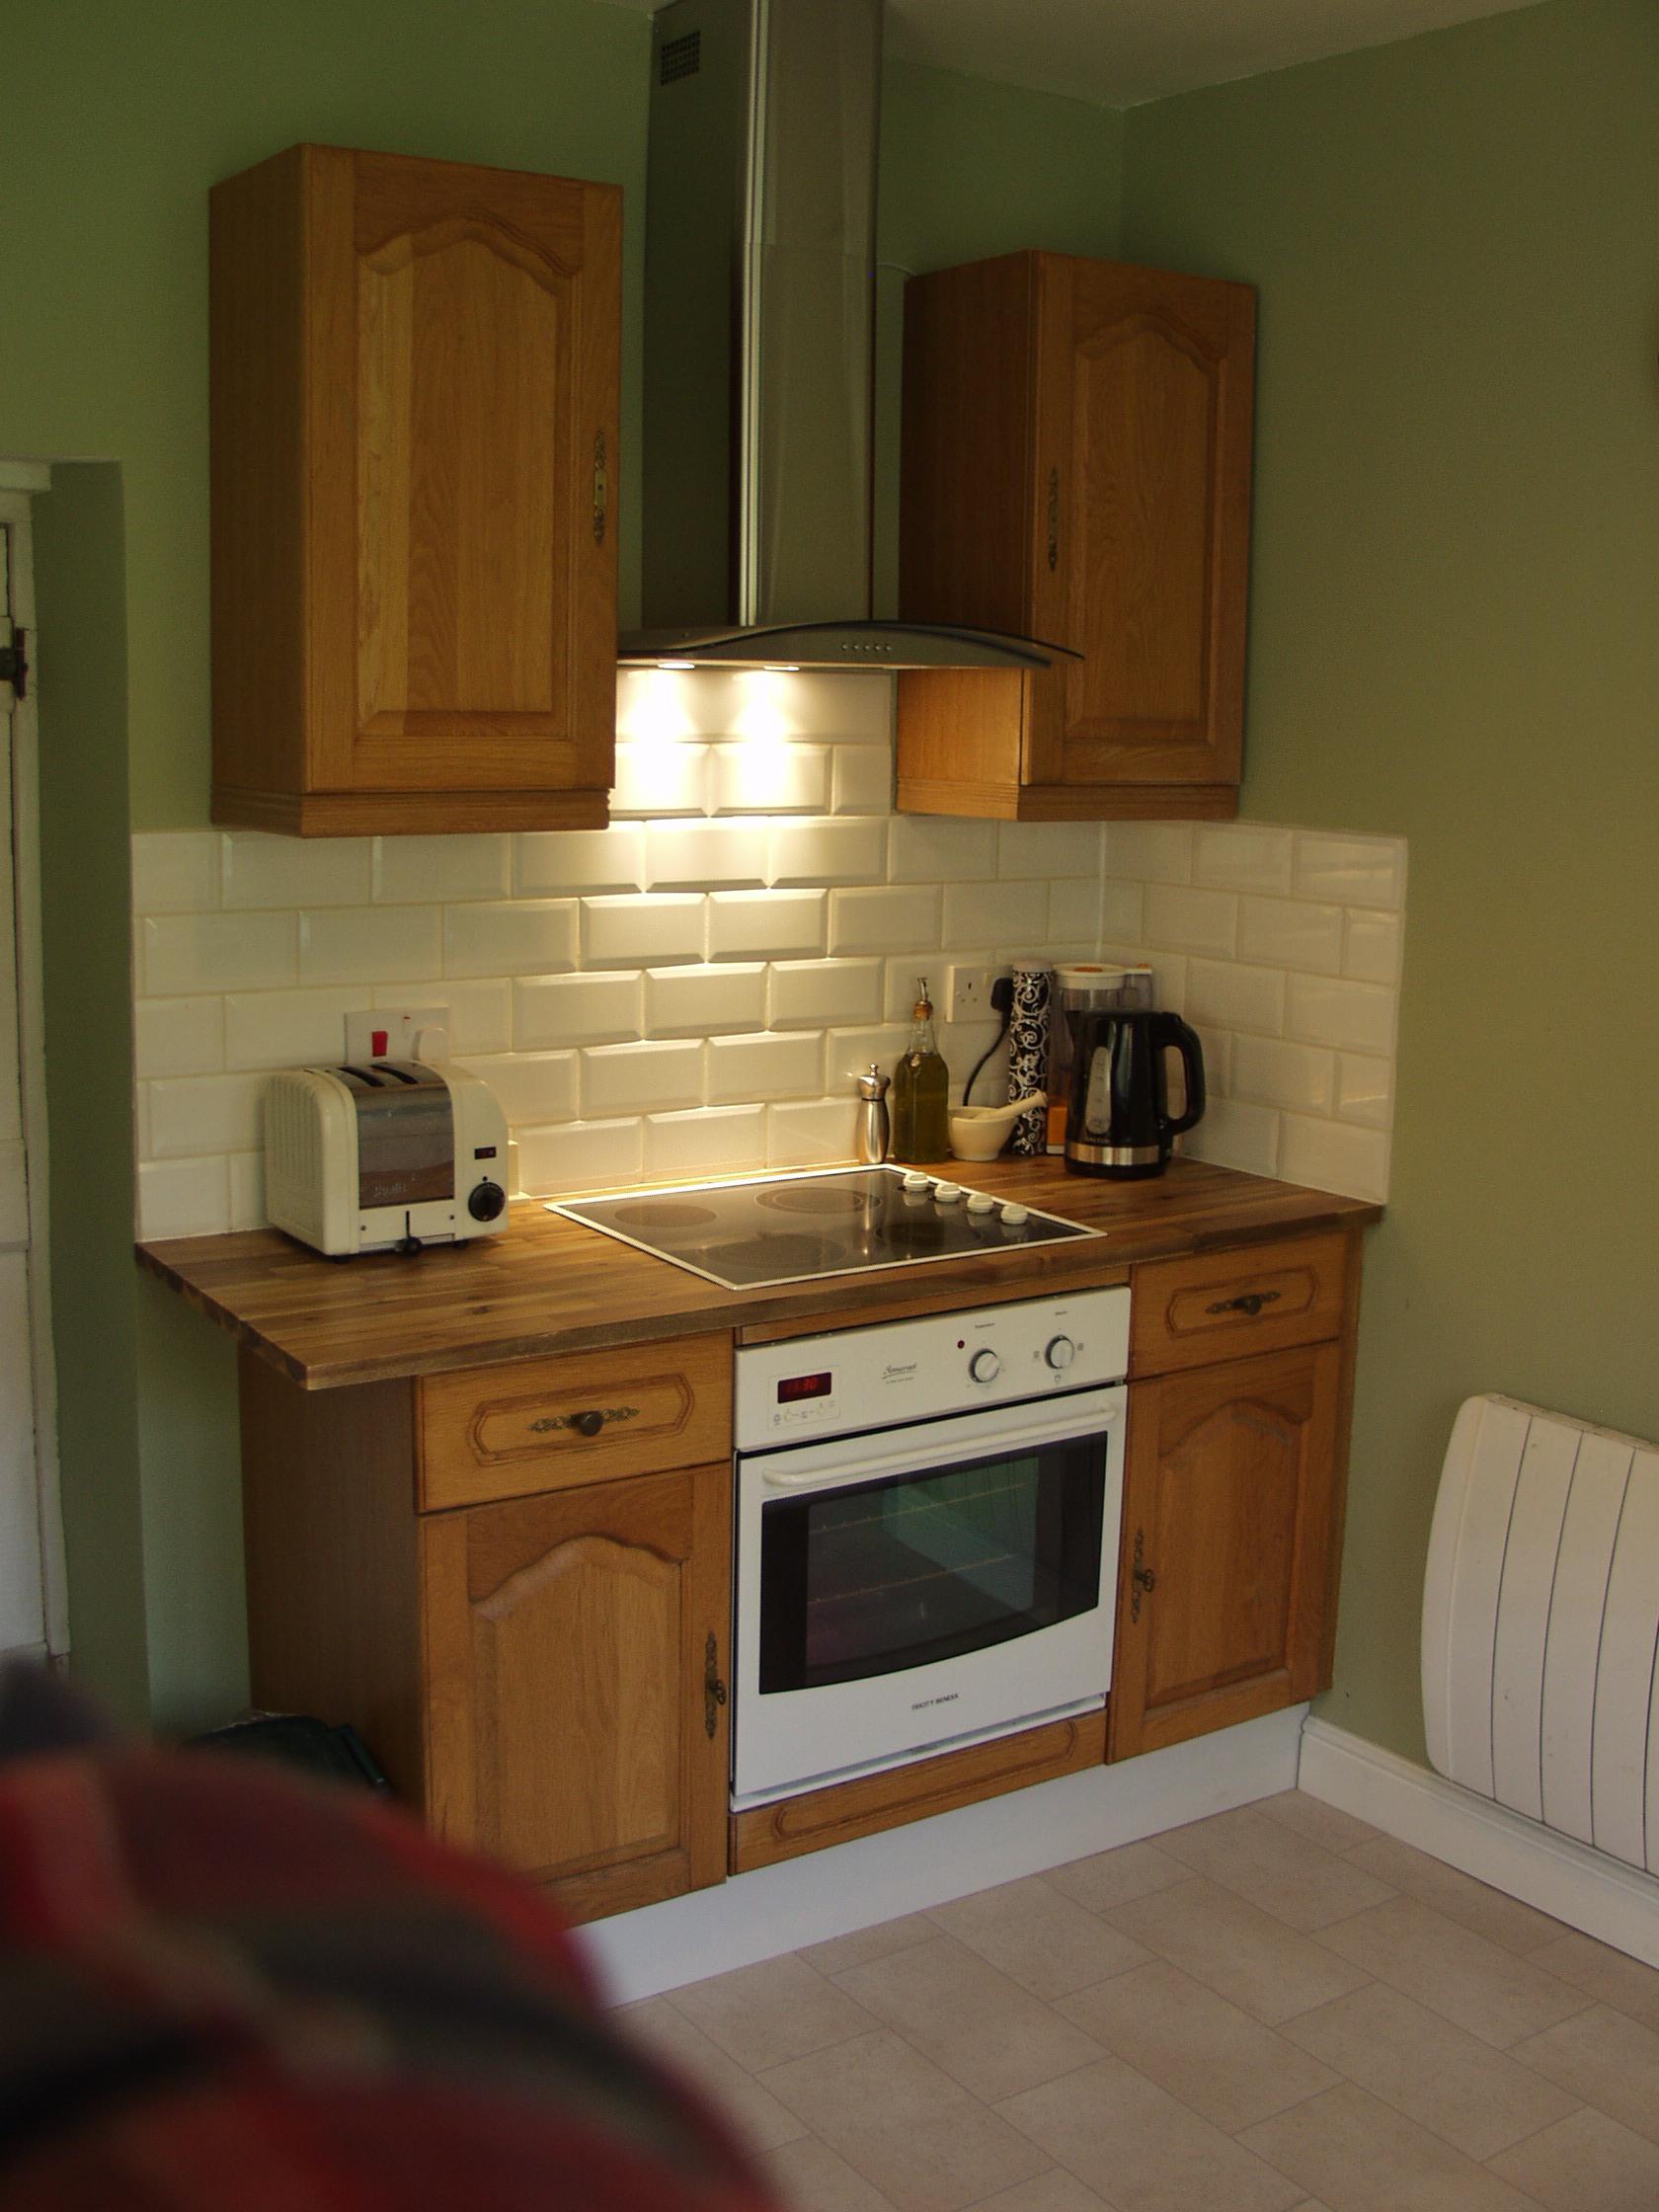
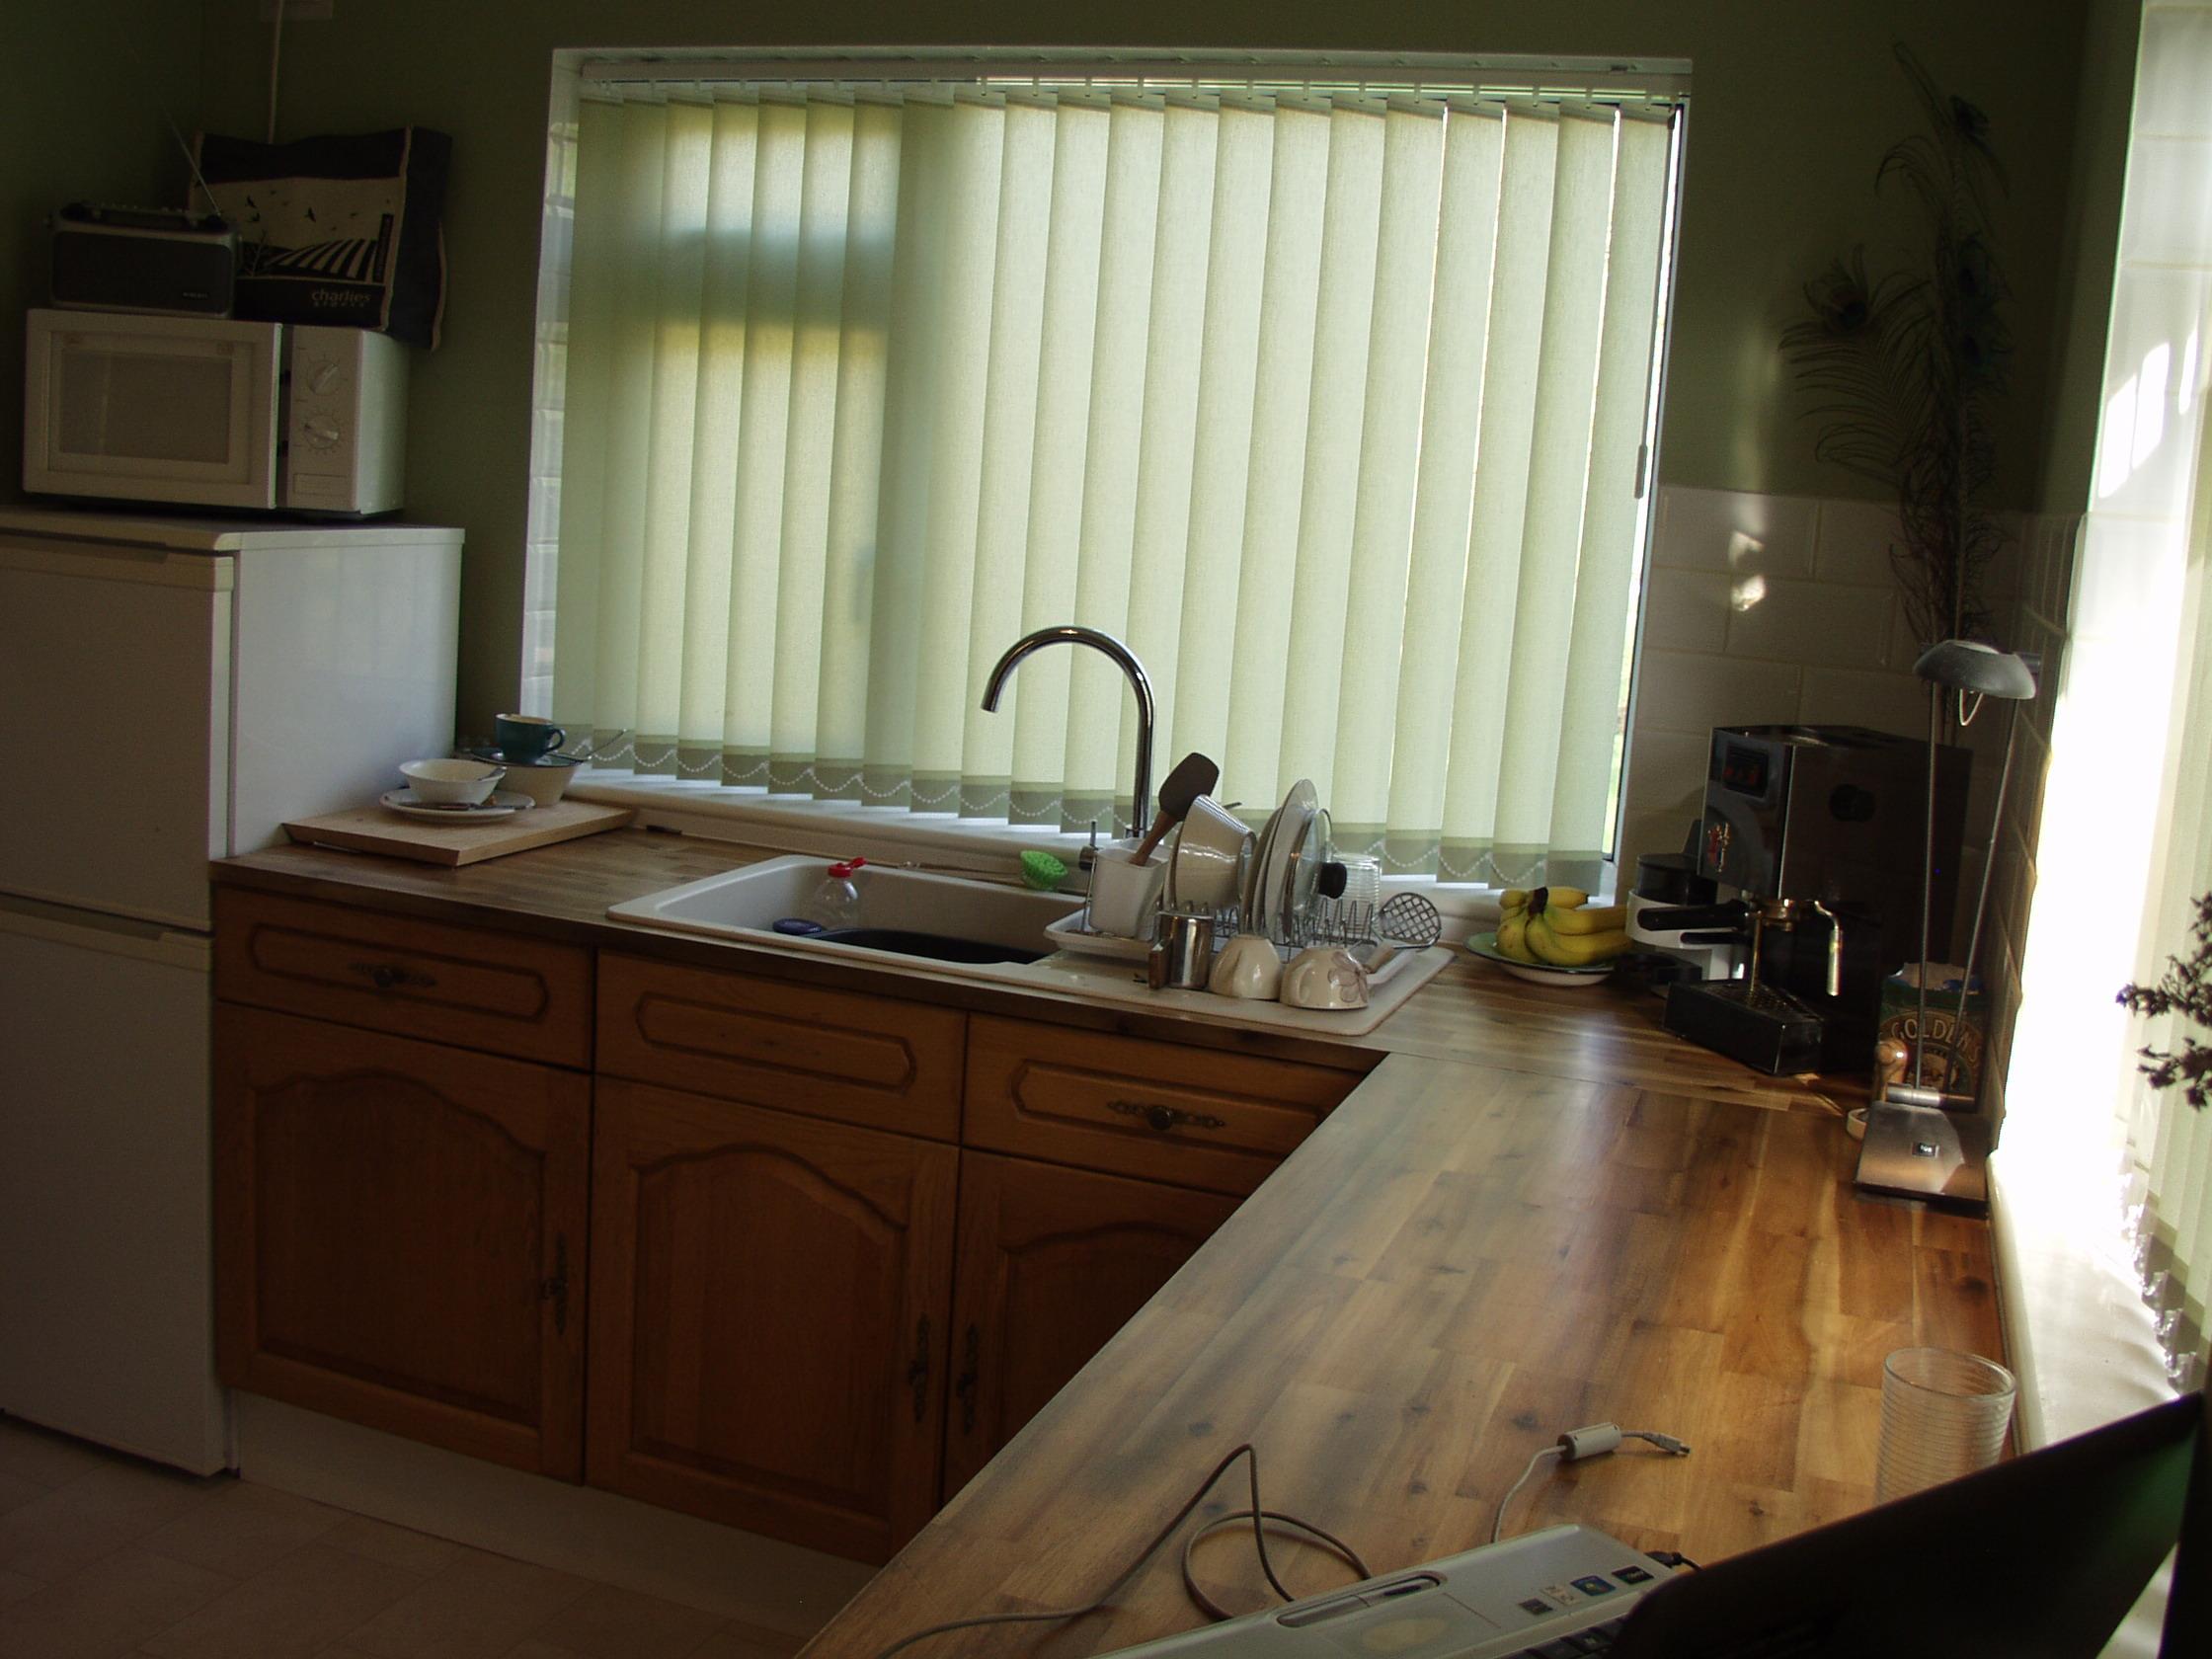
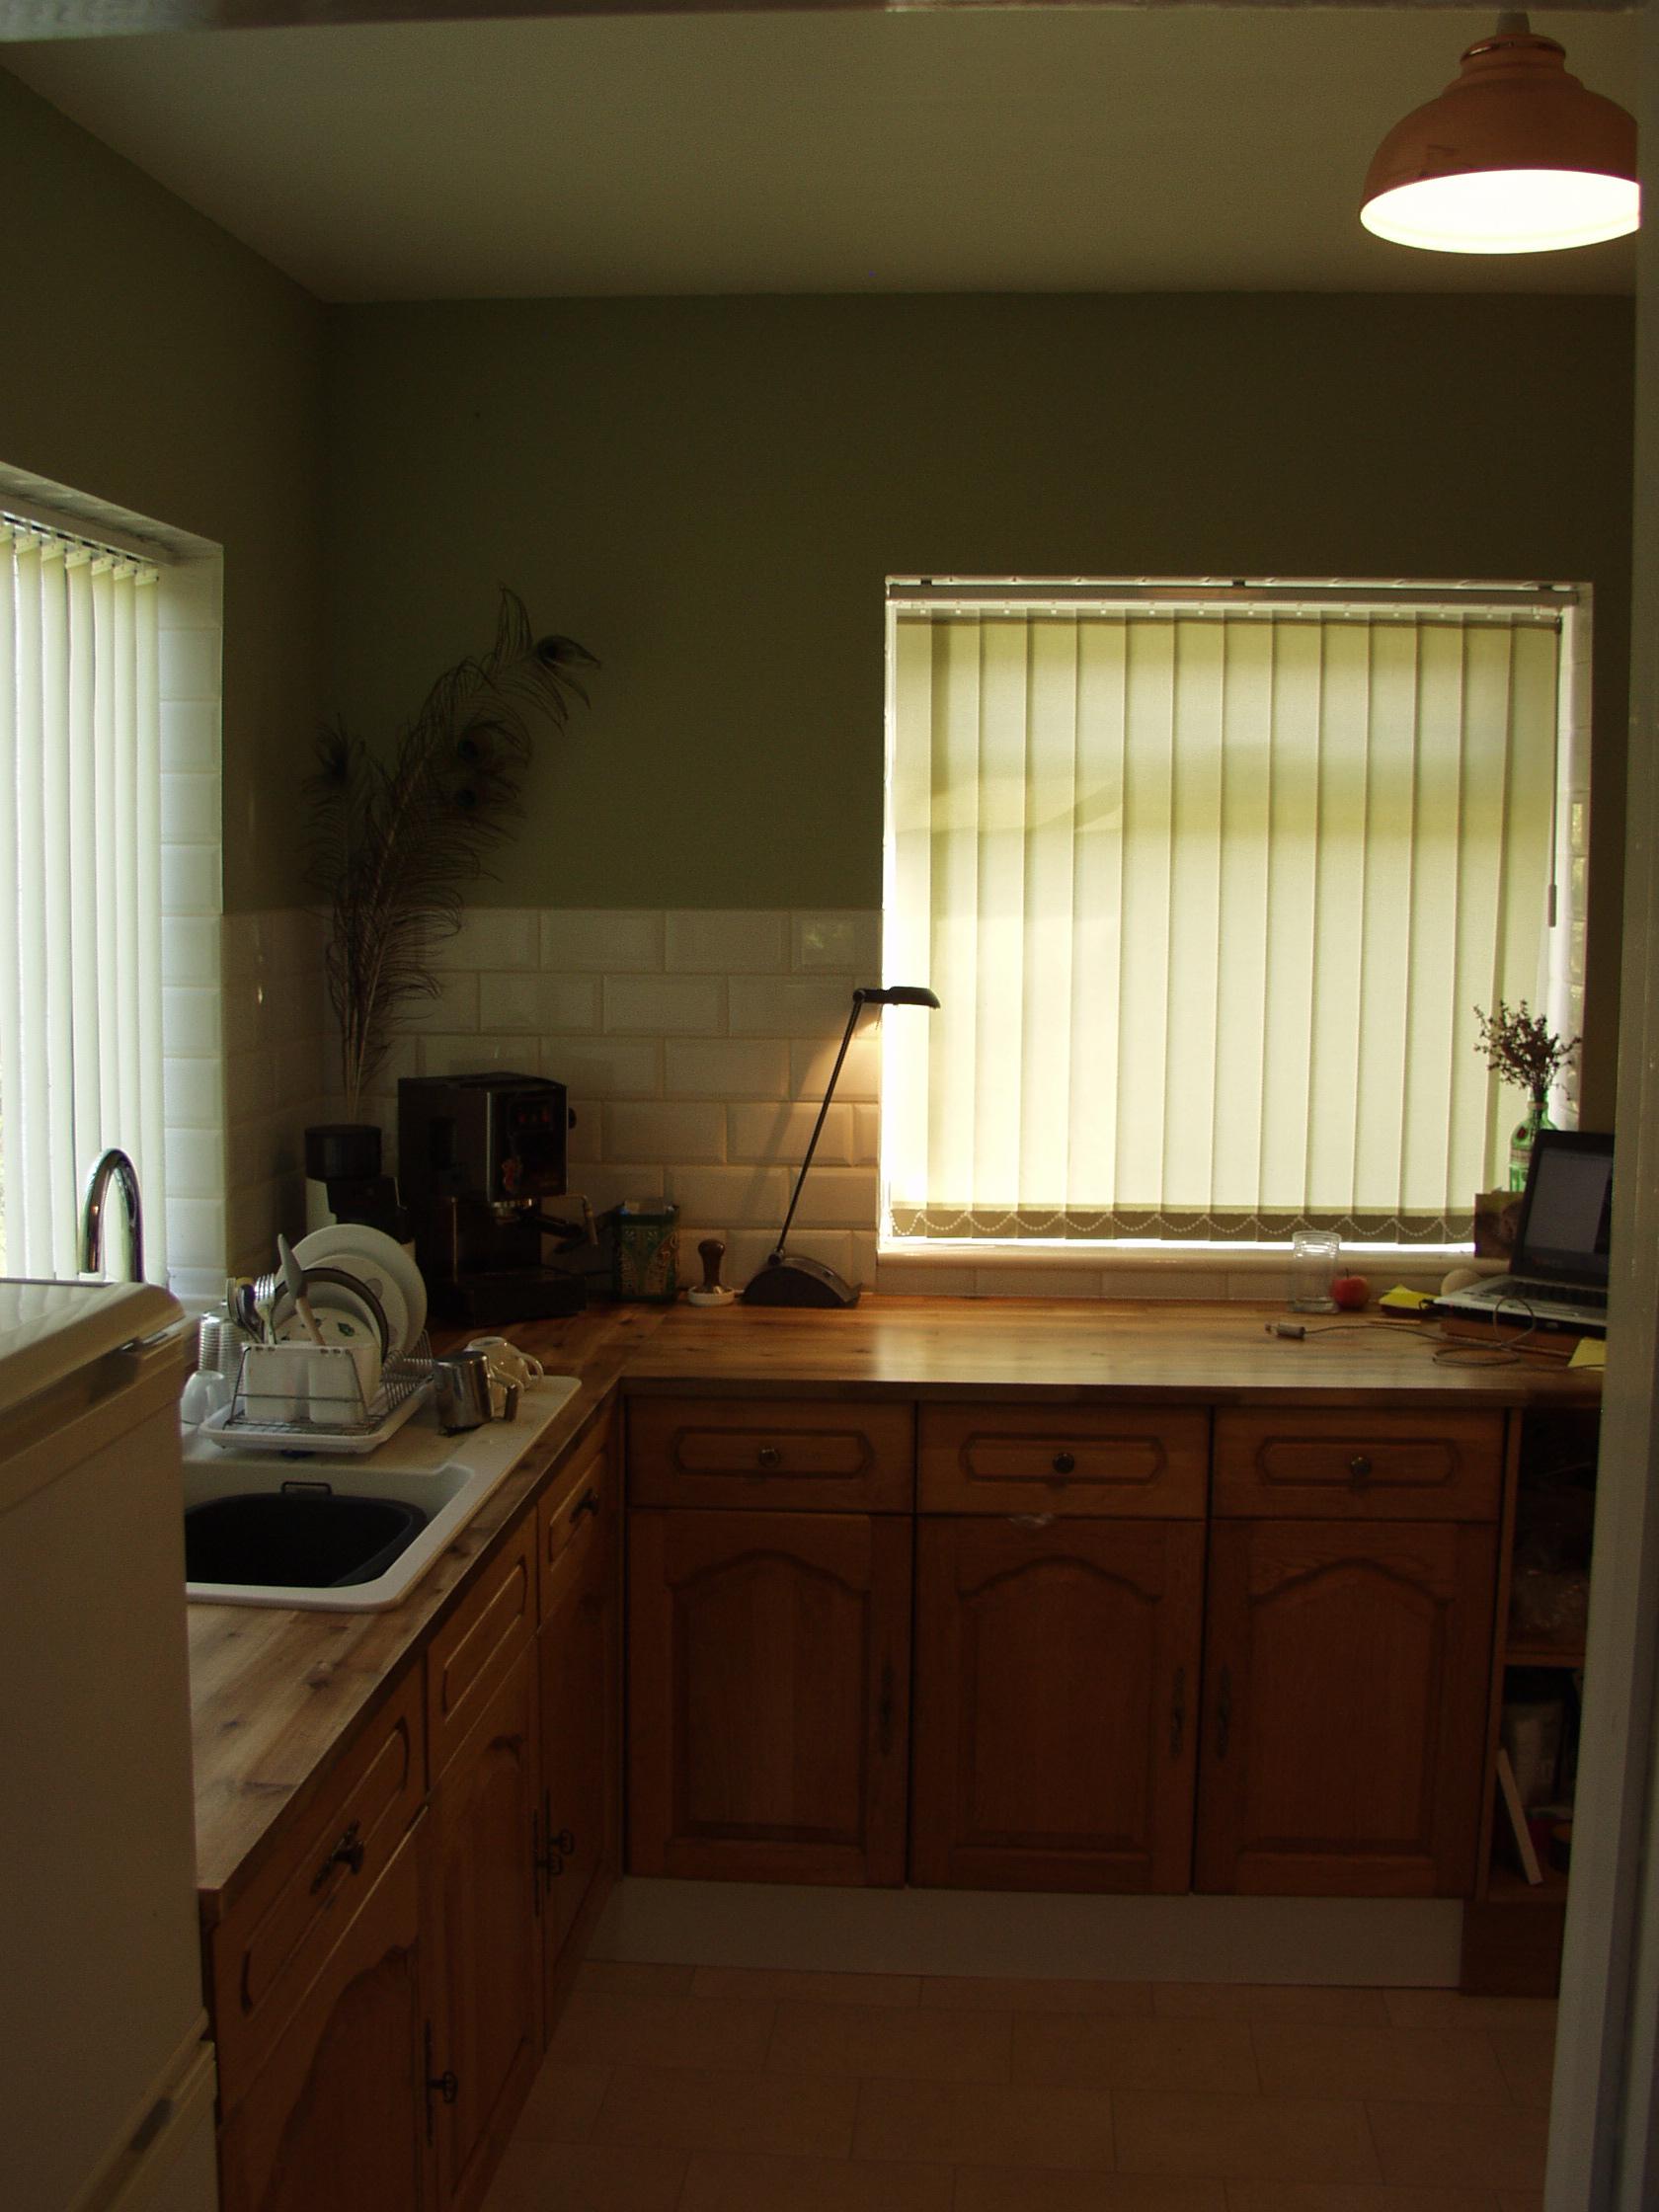
I'm calling the kitchen- FINISHED godammit! (cos I'm already onto a new small job I need help on!).. & a few final pics of the results. So a -MASSIVE- thanks to Onoff (especially so).. & to PeterW, newhome, JSHarris.. & Ferdinand et al all who encouraged me with kind & helpful comments.

 2 points
 -
hers another system for you econekt.co.uk/wp-content/uploads/2016/02/ECONEKT.-ICF-Elements-Brochure2.pdf see page 20 construction video of flooring www.youtube.com/watch?v=pdb5MqjSr9Q&index=16&list=PLIwx_CpmS37PPaGLSVS4fa6rEH1gcf5B12 points
-
This is a toughie. How about a Post It note, sticking out at the side? Or anything pushed up against the end and overlapping. F2 points
-
There once was a couple from Kent On money saving t'were bent A big pile of spoil At which they did toil Went Edit: Sorry, not that kind of riddle!2 points
-
I'm installing 4kw of solar PV. As we're in a National Park and the planner asked for an in roof installation. This is what I asked of the supplier - "I'm looking to install a 4Kw solar PV system. As we are in a National Park, so all black panels and an in-roof mounting kit has been specified. The panels will be split 50:50 over a south and a west facing roof. There is some slight leaf shading from some adjacent trees." This is what they suggest - We could supply the following IN-ROOF 3kWp Solar PV Kit systems; Solar PV Kit Options 14 x Canadian Solar Mono 280W (All Black) solar panels 1 x Solis 4.0kW Dual tracker inverter 1 x GSE Integration in-roof mounting kit (2 rows of 3 in portrait and 2 rows of 4 in portrait) 1 x All cables, clips, generation meter, AC/DC isolators Is this the right kit for the job, will the inverter handle the shading. Any other comments?1 point
-
It's 3 weeks since my last blog entry and, as usual, things have been moving at a pace. The difference with the most recent round of work, though, it that the building is starting to look like a liveable house rather than a construction site. This is largely due to the glory coats of plaster and paint, but far more than that has been keeping everyone busy. The boarding started in earnest before Christmas and so the plasterers were in bright and early in the new year. We've got through an astonishing amount of board of various types - I thought I'd calculated reasonably well and had a mahooosive delivery of the stuff a while back, but it all seemed to disappear and the building was hungry for more. I bought all the board from Sydenhams as I found their price to be competitive. I've used standard 12.5mm plasterboard on all external walls, 15mm acoustic on all ceilings and internal walls, moisture board for bath/wet rooms, and pink fire board for the garage walls and ceiling. The garage is attached and so building regs require a fire door (FD30, sourced from Enfield Doors, though I've since found cheaper suppliers when looking at other stuff) and fire board throughout the garage, but only a single layer as there is no habitable space above it. I've had a board lifter on hire as it really helps the team position the boards up onto the ceilings without dropping anything on themselves or damaging either themselves or the boards. Here is the board going up on the lounge/dining area towards the kitchen area. The orange frame is the plaster board lifter. The black thing outside the window is my sewage treatment plant tank, which will be installed in a couple of weeks(ish). Looking in the opposite direction towards the lounge area: There have been plenty of plasterboard offcuts and so we have followed @JSHarris's tip of stuffing as much of this into the stud walls before boarding over. Double bubble - increasing the heat retaining ability of the house and no paying expensive disposal fees on waste plasterboard. As well as the boarding and plastering, first fix is underway, getting all the wiring, sockets and switch positions in and running vast amounts of cable through the building for all sorts of stuff. It's not just a case of chucking the cable in, he's done a great job of working out the flow of the building and the people in it, and how the building's circuitry should function best to suit them. It's a pity that it isn't more visual, but suffice it to say that at the last count, something like 2.9km of cable has gone into the building. It's in there somewhere! The room that forms the greater part of the ground floor is the kitchen/dining/lounge area and it's a very large space. From the outset, I've wanted to achieve some form of visual separation of the living area but without putting physical barriers in the way. It seems a waste to have gone to such great effort to create a lovely large space like that to then chop it up and close it in. I had inspiration for the solution from a couple of sources, the first of which is a tiny, crappy image on Pinterest when I was browsing cinema rooms. The second came about from chatting to another BH member, @Dreadnaught and a suggestion someone made to him to vary the heights of the ceiling throughout his proposed build. From this, I decided that I wanted a dropped section, like a frame, on the ceiling above the lounge area, with lighting recessed into the inner lip of the dropped section. Everyone pulled together really well to meet the challenge, and worked out what was needed from the carpentry, boarding, plastering and electrics contingents. The full ceiling was boarded out first, then the studwork frame put over it. The electrics were run through, then the frame was boarded and eventually plastered. Here's the completed framework and the first of the plasterboard going up. They're a cheerful bunch in their work! One thing I haven't skimped on is hire equipment to make the job of the plasterers and others easier. I figure it's a false economy to not get equipment like platforms and board lifters in as it will just cost me extra labour as the guys won't be able to work efficiently and possibly, not as well either. We had scaffold towers upstairs in the bedrooms for plastering and downstairs, we had a really big platform. I wouldn't do it any other way as the quality of the boarding and plastering is second to none. Once the studwork was boarded out, the inner ceiling section was plastered. The inner lip of the frame had an upstand added to it to make it appear more substantial and to hide the rows of LED lights behind them. We're going for a range of lighting intensity here, achieved by increasing amounts of lights, rather than dimmers. There will be 3 rows of LED lights hidden up there and we've used a car headlight analogy for want of better descriptions - the selection is dipped lights, main beam and rally lights. These are the only ceiling lights in this area as we plan to have floor lamps for specific task or reading lighting. Once the inner ceiling was plastered, the framework itself was done the following day. This photo is some way on from that, as you can see. By this stage, the whole of the downstairs main room has been done and recesses formed for the spotlights at the other end of the room. Not too long after this, the kitchen arrived from DIY Kitchens. Lovely quality units and everything is going together well. It did mean, though, that I had to get on with the painting up the kitchen end so that a start could be made on installation. A paragraph or two on painting is appropriate here. I put a brief post into the main decorating section here on BH regarding spray painting, but it deserves repetition. I've planned from the outset to do the painting myself. I'm competent and it's nice to get some hands on involvement in the build. But, and it really is a big one, there is a vast surface area to cover in this house, and the vaulted ceilings upstairs are really quite intimidating for a vertically challenged person such as myself. Mind you, I think a vault of 4.7m would make most people ponder their method of attack. I decided that by far the most effective approach for me was to spray the mist coats to seal the plaster and continue with white for the ceilings. I wasn't sure at that stage whether I would also apply the colour coats by spraying, so adopted a 'wait and see' approach. First off, masking takes ages, even with a relatively empty house, as that spray will get everywhere and anywhere. Once the masking is done and you've familiarised yourself with the sprayer itself, though, the speed of coverage is astonishing. I was able to comfortably do one large room per day - both mist coats and a couple of extra ones on the ceiling to get it opaque and full white. It was messy. Really messy! Especially as when I first got going I had the spray pressure a little too high, the mad angles of the vaulted ceilings meant that my nozzle was never going to be held at a constant 90 degrees to the surface, and it's just a messy process regardless. In addition, there is a vast amount of moisture in the air, particularly as we had plaster drying at the same time. I hired a commercial dehumidifier for a couple of weeks to help with this and it was very effective. I bought all my paint from Brewer's Decorator Centre, who are mainly based along the south coast of England. I opened a trade account with them and got 20% off the entirety of my first order, so I put everything I could think of onto that, including my antinox floor protection mats. Very useful they were, too. I used their contract matt white for the mist coat and ceilings. It's white, but not brilliant white and it's lovely. Very chalky, easy to sand and gives a nice highly matt finish. Also cheap as chips. Here's one of the bedrooms, masked up and sprayed. Here's another bedroom with that ceiling. My scaffold tower came into its own for reaching up to those heights. Then, finally, the kitchen area with its mist coat. The sprayer is the little beastie sitting on the plasterboard. I popped over on a weekend to also put the first colour coat on over at the kitchen area, whilst I could still get in easily before the kitchen started going in. I'm having splashbacks between the wall and base units, hence the odd looking finish level with the paint. These were all the kitchen units as they arrived, prior to painting. Everything was really well packaged and came with the doors on and drawers in. The delivery crew were pleasant and efficient, so all in all, a good experience. Moving away from painting and plastering, the ceiling plan for the lights was marked up on the floor, along with speakers and smoke detectors before the boards went on so that there was no guesswork involved in what was running where. Here's the marking plan: This is what the kitchen units look like at the moment. I made a cock up in ordering, purely out of ignorance, and I'm waiting for a few end deco panels to arrive. These didn't even occur to me as they will go between units and appliances to give a better appearance from face on. It made perfect sense when it was pointed out to me, so things have halted temporarily until those and my worktops arrive shortly. In the meantime, it's looking good: We also now have spotlights in place: Finally, for the curious, this is what karndean flooring looks like. It has been laid upstairs and the downstairs will be finished in a couple of weeks. Upstairs, it was all laid on ply that was feathered in at the edges and downstairs will have a latex feathering coat to level the floor and provide an even base. Next up is more of the same. The final session of boarding and plastering, lots more painting, the end of first fix and moving onto second fix. Outside, we need to get cracking on the rainwater goods, perimeter drain and exterior cladding. The cladding is due to arrive next week, so it will be interesting to see that and figure out the system. I hope to be able to report back on over height doors soon, as well, and my endeavours to find these at a reasonable price, but that's all for now. There's painting to be done.1 point
-
Best layout I had was the wc so you sat side on to the end of the bath. Came in well handy when I had food poisoning...1 point
-
Part of our thinking, is the utility / wc links through to the garage. So if you are working in the garden, enter via the garage and the WC is 2 steps away in the house.1 point
-
I got a metal work kit from here http://www.ratrig.com/ . It included standard "2040" (20mm x 40mm) extrusions (cut to length), some metal L shape corner brackets, and a bag of allen key head bolts and "T" nuts. The two vertical extrusions came with the holes at the bottom end already tapped M5 (which I was expecting I would have to do myself). No other holes or processing is needed anywhere. Each joint between extrusions has at least one L shape metal bracket and one printed plastic bracket. You might be able to omit some of the plastic corner brackets but they have alignment ridges that help keep everything square even if the metal bracket is probably providing 90% of the strength. It seems there is a whole sub culture out there of people rolling their own 3D printer and CNC machines. If you know what you are doing you can buy partial kits containing a controller and stepper motors from Amazon and roll your own frame, rails and linear bearings etc. Most 3D printers seem to use the same standard heater block and nozzle also available on Amazon. Have a browse around that Ratrig site and you can find several different frame styles, some of which are intended as upgrades or to roll your own. I'm still exploring Fusion 360 but I'm amazed how powerful this software is and its free for home use.1 point
-
Chateauneuf du Pape in there was less than a tenner!1 point
-
I have the whole house version of the Combimate, (cost £135.80 inc delivery and a years Combiphos) where you fill the container completely with the Combiphos balls. They are £25 per 800g delivered and need changing once a year.1 point
-
It's the difference between a Trabant and a Rolls Royce. They both do the same thing, but the quality, and the price. The cheap one does not look very deep to me, I am not sure it would have worked for us. The treatment plant outlet was 700mm down and then another 100mm ore more step for the sample chamber, you will be looking at about a metre down.1 point
-
Micro Inverters allow you to convert the output from a single panel. If they are in different levels of shade, the micro inverter itself regulates just the panel it is connected to. Dual input inverters take two panels but potentially limit to the lowest output panel - If you know how your shadows fall across the roof from fixed structures, it can sometimes benefit from staggering the panels so you lose less output. I would go with micro inverters any time as you don't need optimisers etc and routing the power becomes one of a lower current AC voltage rather than a higher current DC.1 point
-
both the velox or Isotex floor system is hollow so you get some insulation and service voids see here forum.buildhub.org.uk/topic/7398-anybody-using-velox/?page=31 point
-
Vent axia solo plus. Been subject to loads of redesigns over the years. Still available. Can't remember how to get the cover off though.1 point
-
This is almost exactly the upper floor build up I have. Exactly as above, without the insulation your UFH will be trying to heat almost 300mm of concrete/screed and react extremely slowly. Ideally use liquid screed and keep the thickness down to 60-70mm, just above the minimum to cover your UFH pipes. This way the system reacts faster and you spend less on screed. You need the screed to put the UFH pipes into, to get rid of it you would need some kind of cast in situ floor, you can do that with the Thermofloor above but this is the kind of unusual way of doing things that builders don't like.1 point
-
@Adam2, I myself like the idea of concrete because of the acoustic benefits, so i get why you would consider it. Not sure it it would fit your situation but have you considered the Thermofloor system from thermohouse. There are probably similar solutions. The thing that bothers me in terms of buildup which you wouldn't get with say posi joists, is the service void. Mind you, I guess it's swings and roundabouts. https://thermohouse.co.uk/thermofloor/1 point
-
This will make the UFH very slow to react. Also there will be heat lost to the ceiling below. The optimum concrete / screed or whatever is probably between 50 and 150mm, with a bit of insulation under to stop the heat going downwards.1 point
-
We have 14 x 280 panels split over 3 roof areas (east, south and west) and also suffer some slight shading. We have SolarEdge inverter and it is noticeable how some panels on the part-shaded sections perform far better than others. If we had not gone for SE then I estimate energy generation could be down by as much as 10% on some days.1 point
-
Having read it again I agree. I think I'm going to have a lie down In my defence I've had so much bloody "non-standard" behaviour from my Sunamps that I'm no longer quite clear what the hell they do!1 point
-
If you want a solid upper floor ,and i,m not saying that is right or wrong --look at Isotex or Velox floor systems1 point
-
@Mr Punter, it's as safe as any other, and has the newer green RCBOs fitted, which were replacements for the ones that used to regularly burn out in the earlier models. My two charge points just have DP Type A RCBO protection, as when I installed them that was all that the regulations required. The additional protection offered by a TT island, with DC capable RCD functionality, didn't become part of the regulations until this year, when the 18th Ed came into force. Before that, there was an IET guidance note that referred to having a DC-capable RCD protection device, with a TT island, but that was only mandated for installations that were partly paid for by an OLEV grant. Any installation that wasn't grant funded didn't have to comply with the IET guidance note.1 point
-
this they could have addressed 20 years ago by making all buses and taxi,s etc go to lpg been running lpg cat D9 dozers +other earth moving equip in gold and diamond mines is SA for 30years +-- and now ecu tech has advanced its even easier then when we were fitting lpg to volvos 25 years ago not as clean as electric --but major improvement on diesel I remember when cats were going to become mandatory 1991,but some car makers wanted go clean burn instead saab +ford did a test put filter on both induction and exhaust of a car fitted with lean burn guess which was blackest after a day in london traffic yep it was the intake filter --not the exhaust --they were cleaning up the air by burning it well now you have vehicles needing ADD BLUE -and cats that catch particles ,but have to do a regeneration now and then --which turns particles into CO2+water so you still get the pollution only later so the solution has been there for 20years+ I know you don,t get round the NOX problem totally with lpg or CNG --but its very good stop gap till electric REALLY becomes vaiable for all its all about vested interests ,as always1 point
-
Is the brickwork already built? What background are you fixing the cladding to? Looks like a simple vertical flashing cut into the brick courses & dressed behind the cladding.1 point
-
Mine are 70mm. They are tiny little lights. I have downlights of some sort everywhere. We didnt have a big enough void so we had to cross batten to get our depth, reduced our ceiling height marginally but has made no difference.1 point
-
@Russdl make sure that you have a very clear agreement with your TF supplier who is responsible for what when it comes to drainage etc. Like Jeremy our agreement with Trish @ MBC was that I was responsible for the exact placement of the drains, not MBC -- though they did provide the labour. The process that we agreed was that they laid the sub base layers and binding sand layer and the EPS perimeter -- which I then surveyed to validate levels, trueness, etc. MBC had previously sent me the AUTOCAD files, and I used a free autocad viewer to take distances and X,Y positions of the foulwater risers, etc. so that we could position these to the nearest cm or so. As with Jeremy this saved a lot of grief after the frame was up because the risers were correctly positioned relative to the frame. We cut the drain runs in, checked the flow rates with a bucket test and then made good and completed the EPS former. You might consider another trick that @Stones did which was to terminate all of his risers with a female fitting about 1-2cm below the slab finished level. (See his blog.) This allowed the slab crew to power-float over the top of them. It was then a simple matter to go around a day later when the slab was still green and chip off this 2cm layer, exposing the female coupler. We used a few 110mm runs as access pipe to thread water etc. into the service cupboard. This is also a good idea, but if you do this then consider using slow bends or even slow 45° bends to bring these up into the slab -- it's a damn sight easier pulling 25mm MDPE round a slow bend!!1 point
-
We have low profile down lights in our kitchen. They are barely any thicker than the plasterboard. I have a spare here in front of me and the maximum depth from the rear face of the front flange to the top of the spring that retains the light in place is a fraction under 20mm, so they project about 5mm behind a boarded and skimmed ceiling, perhaps 8mm behind a taped and filled ceiling.1 point
-
Indeed. So if new homes won't be able to have gas, what will they use instead? Don't tell me those in charge still believe that wood pellet stoves are carbon neutral or environmentally friendly? If so heaven help us. And if Electricity is to be the new fuel, then what is going to happen over the next 7 years to improve the capacity? Turning more homes all electric, and the growth in electric car usage, is going to impose some massive changes to the network, with little sign of much of a plan to deal with that. Or is there another side to this, the fact that North Sea gas is in decline and it's a case of wanting to reduce our dependance on gas so we are not held ransom to imported gas?1 point
-
Now all we need is for the government to have a forward thinking energy policy...1 point
-
It only needs to blind the gaps in the stone so you don’t need a lot. You can also use a layer of 25mm EPS below the DPM which does the same job1 point
-
Do not want to upset Wendy's fashion sense so it must be the recycling1 point
-
https://www.bes.co.uk/cistermiser-combimate-dual-fit-scale-reducer-17067 a lot less than £1711 point
-
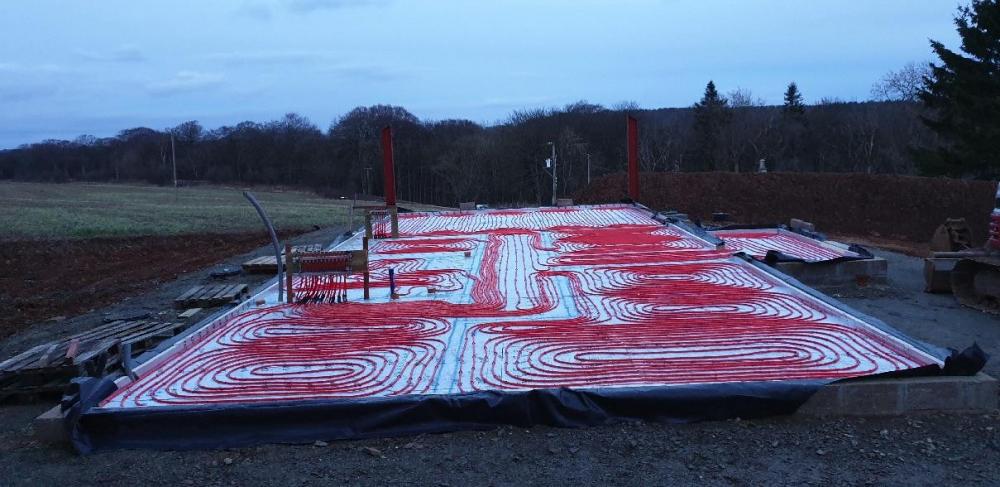
Well guys its been a while but today we poured the 100mm slab after fitting the Insulation and UFH Pipes, kit is due on site on 12th March so its all systems go now ! It was a bit dark on site tonight so I couldn't get a photo but there are now loads of others on the website, don't get too bored !! www.stationbrae.uk
 1 point
 -
I'm still happy to test samples to check whether or not the hardness is reduced by the Halcyan unit. Probably not worth it though, as they've already admitted that it doesn't, despite this claim on the FAQ section of their website (how they get away with this under the ASA rules I really don't know): FWIW, this is just plain nonsense. There's absolutely no scientific basis for stating that "minerals change shape". What is it even supposed to mean? Surface tension has nothing at all to do with hardness, either, it's caused by the cohesive forces that act to hold water molecules together as a liquid being unbalanced at a surface. In simple terms, a molecule in the centre of a body of water experiences equal forces in all directions from it's neighbouring water molecules, whereas a molecule at a surface only experiences forces from those molecules below and to the side, as there are none above. This tends to cause water droplets to pull into a sphere, just as it also causes a meniscus on a open water surface. It has nothing at all to do with hardness, which is caused by calcium and magnesium compounds in solution. I know that you are happy with your Halcyan unit, and that's great. My issue is that they make claims that it softens water, when it very clearly does not.1 point
-
Under floor heating going in up stairs1 point
-
@Mr Punter I'm not great at explaining how it is but this is what my water residue looks like on my large bathroom fixtures - this was from this mornings use so dried all day (its only seems to gather on large flat chrome areas) and the same fitting I have just given a quick wipe with a damp microfibre cloth. There is no hard calc and no scrubbing required.
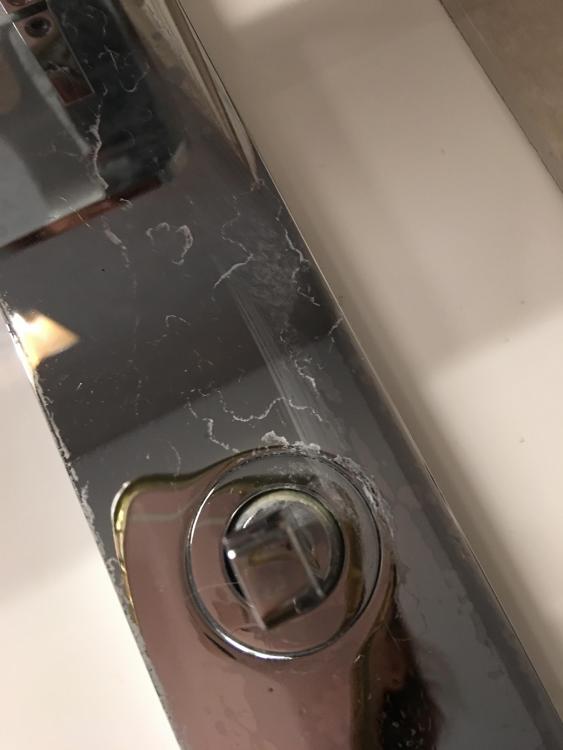
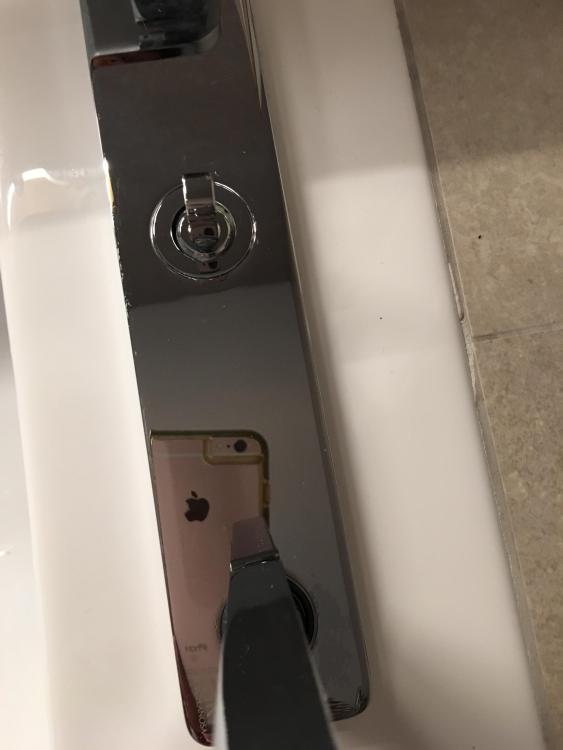
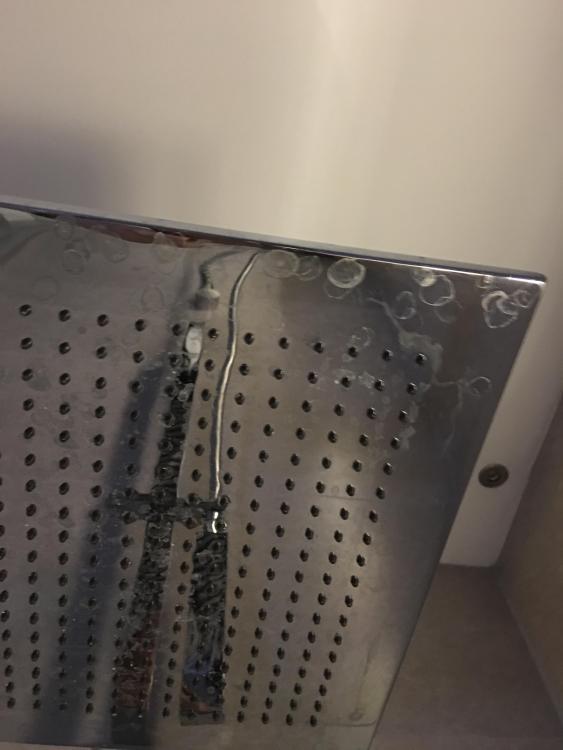
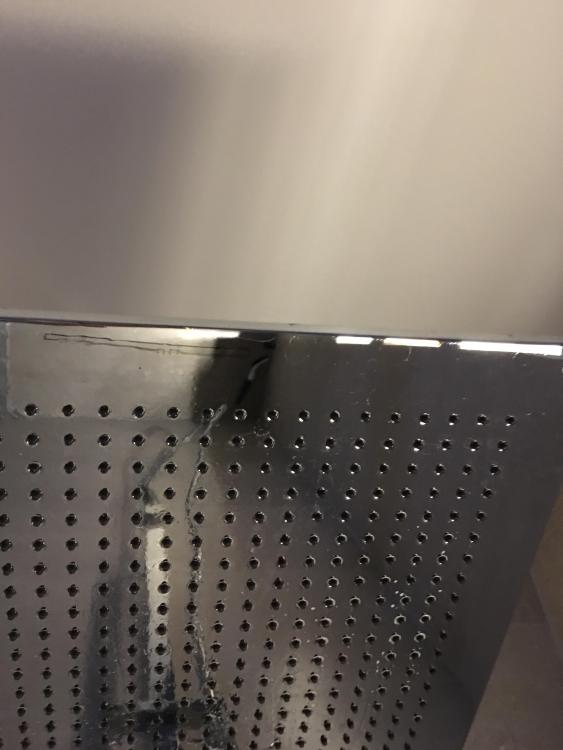 1 point
 -
Only just seen this thread.... I have riddled soooo much gravel in my life....I mean literally hundreds of tons.....life as a remote area walking track builder....... we make frames like what you have but put it at an angle, chuck spade fulls at it and the big stuff rolls down and the small stuff falls through. Good on you both.1 point
-
Found this statement on a TRA website. Note 1 Notching the bottom Chords of ‘Room in the Roof’ (Attic) Trusses to a maximum depth o 5mm is permitted in order to accommodate gable lateral restraint straps as required b Building Regulations.1 point
-
My misses thought I was up to no good when I told her I was looking for a “stud finder” ... ?1 point
-
I bought my 3G Fakro skylights from Europe for a big saving. PM if you want supplier details. GBP is weaker now so saving may be smaller if purchased today. Also got my VAT refunded for this under new-build.1 point


This leaderboard is set to London/GMT+01:00