
Leaderboard


Popular Content
Showing content with the highest reputation on 11/03/18 in all areas
-
The transformer arrived today and your unit is now working @Gav_P I will post it back early next week.5 points
-
Everyone gets that low point where you wonder why the fcuk did I start this. Just remember how much you have done and done right and in a year you will laugh at how you let it worry you. And letting of steam is always good. Don't keep it in as it will fester and then it will really get you down. Have a rant on here or give it to the first trade that tries it on. Whatever works for you.3 points
-
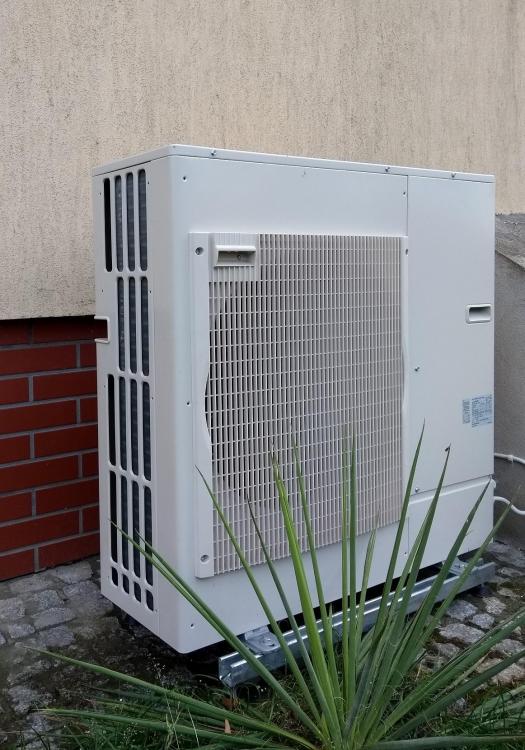
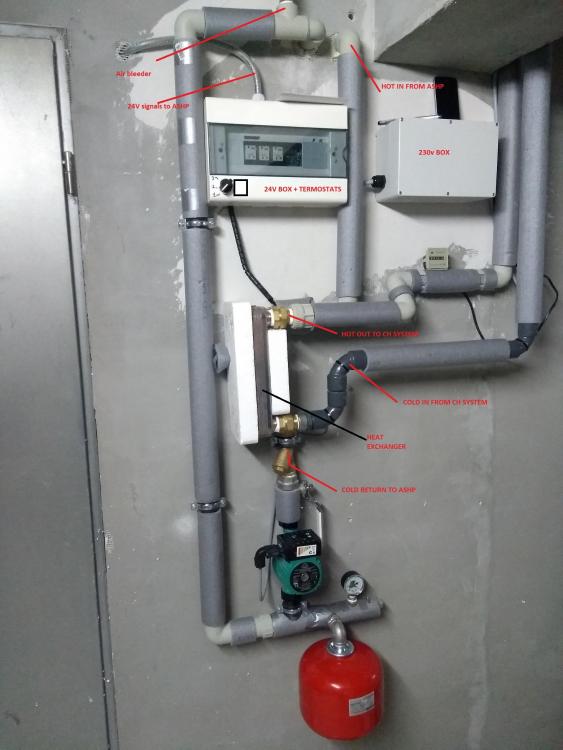
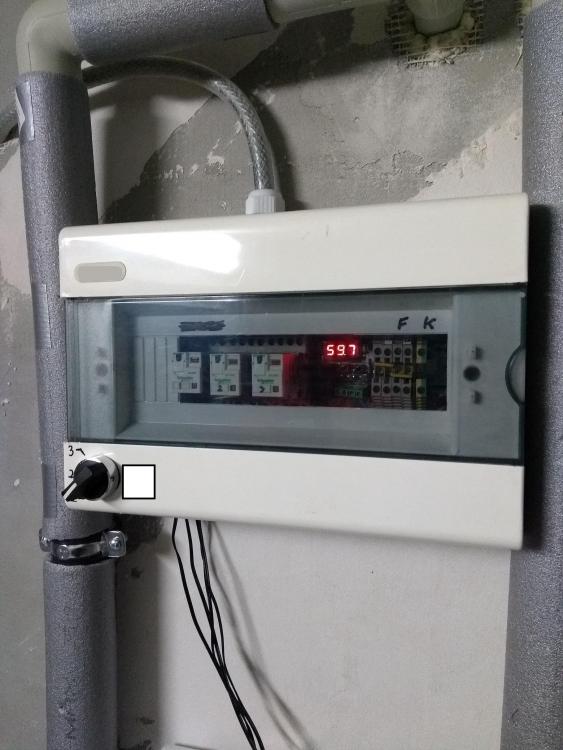
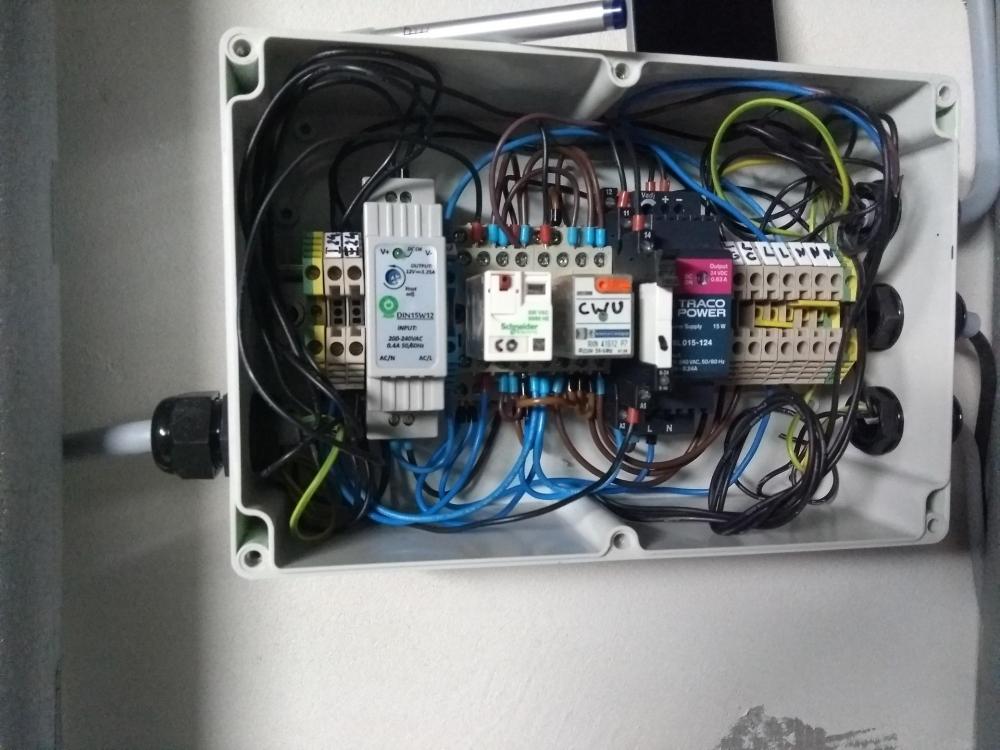
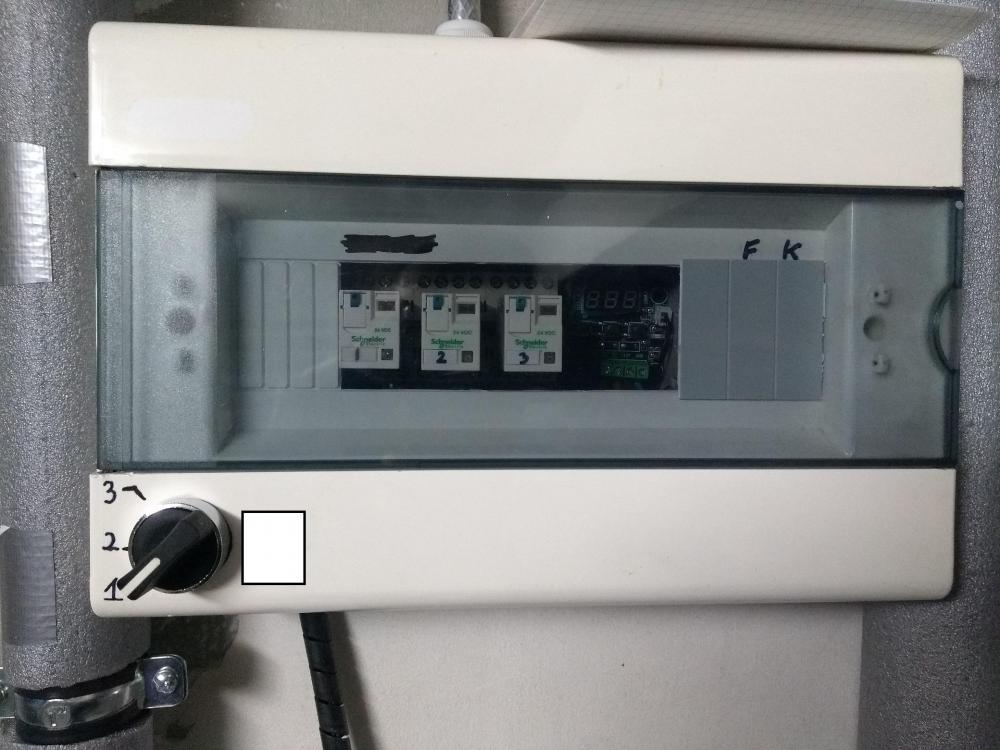
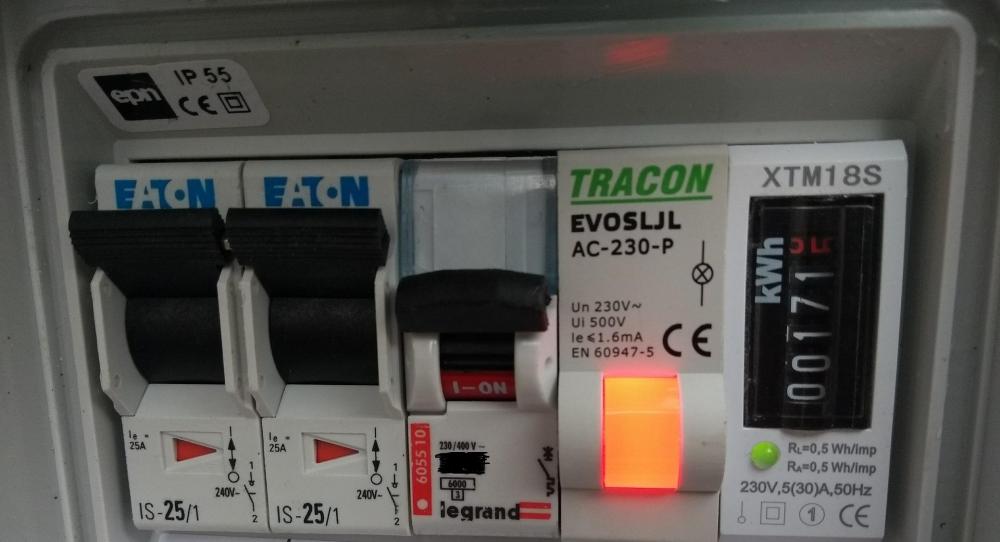
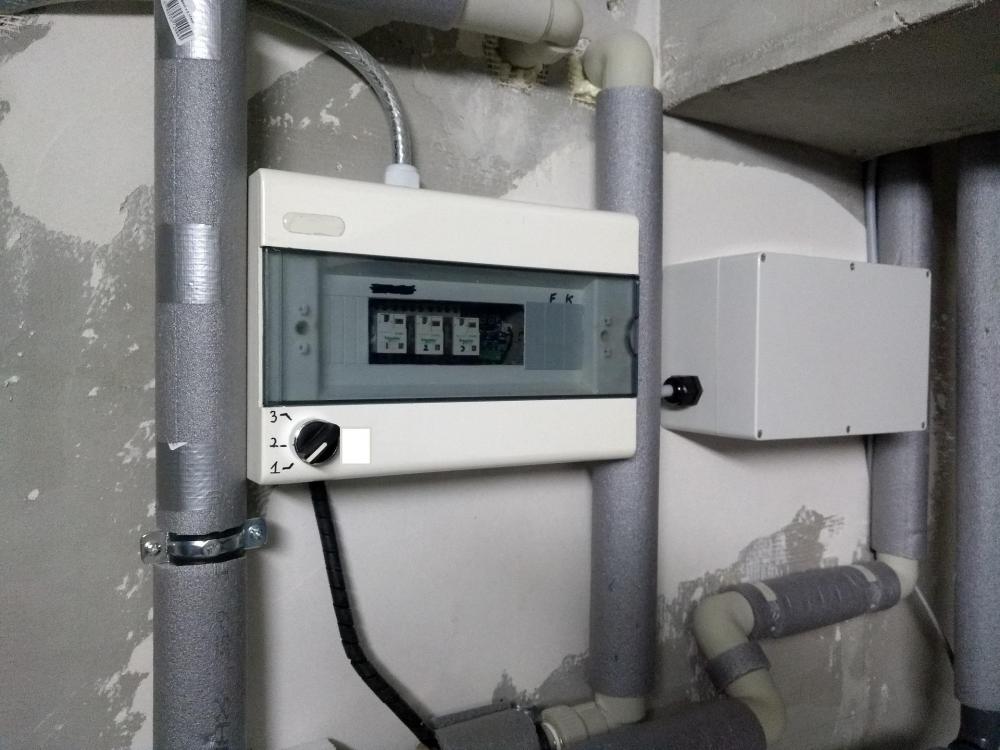
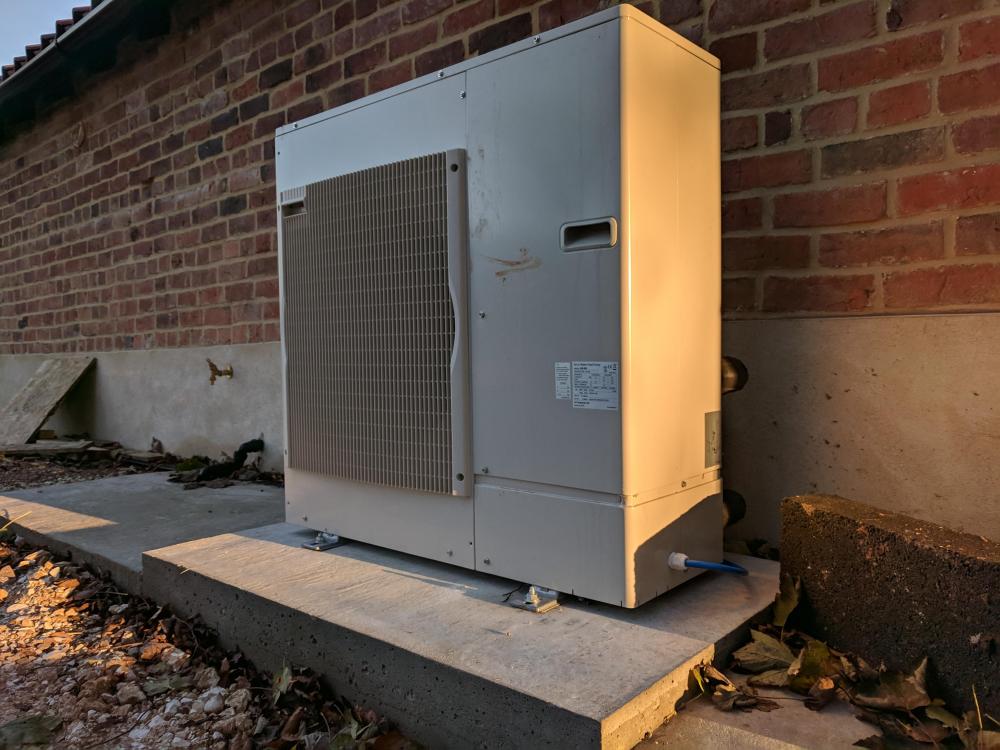
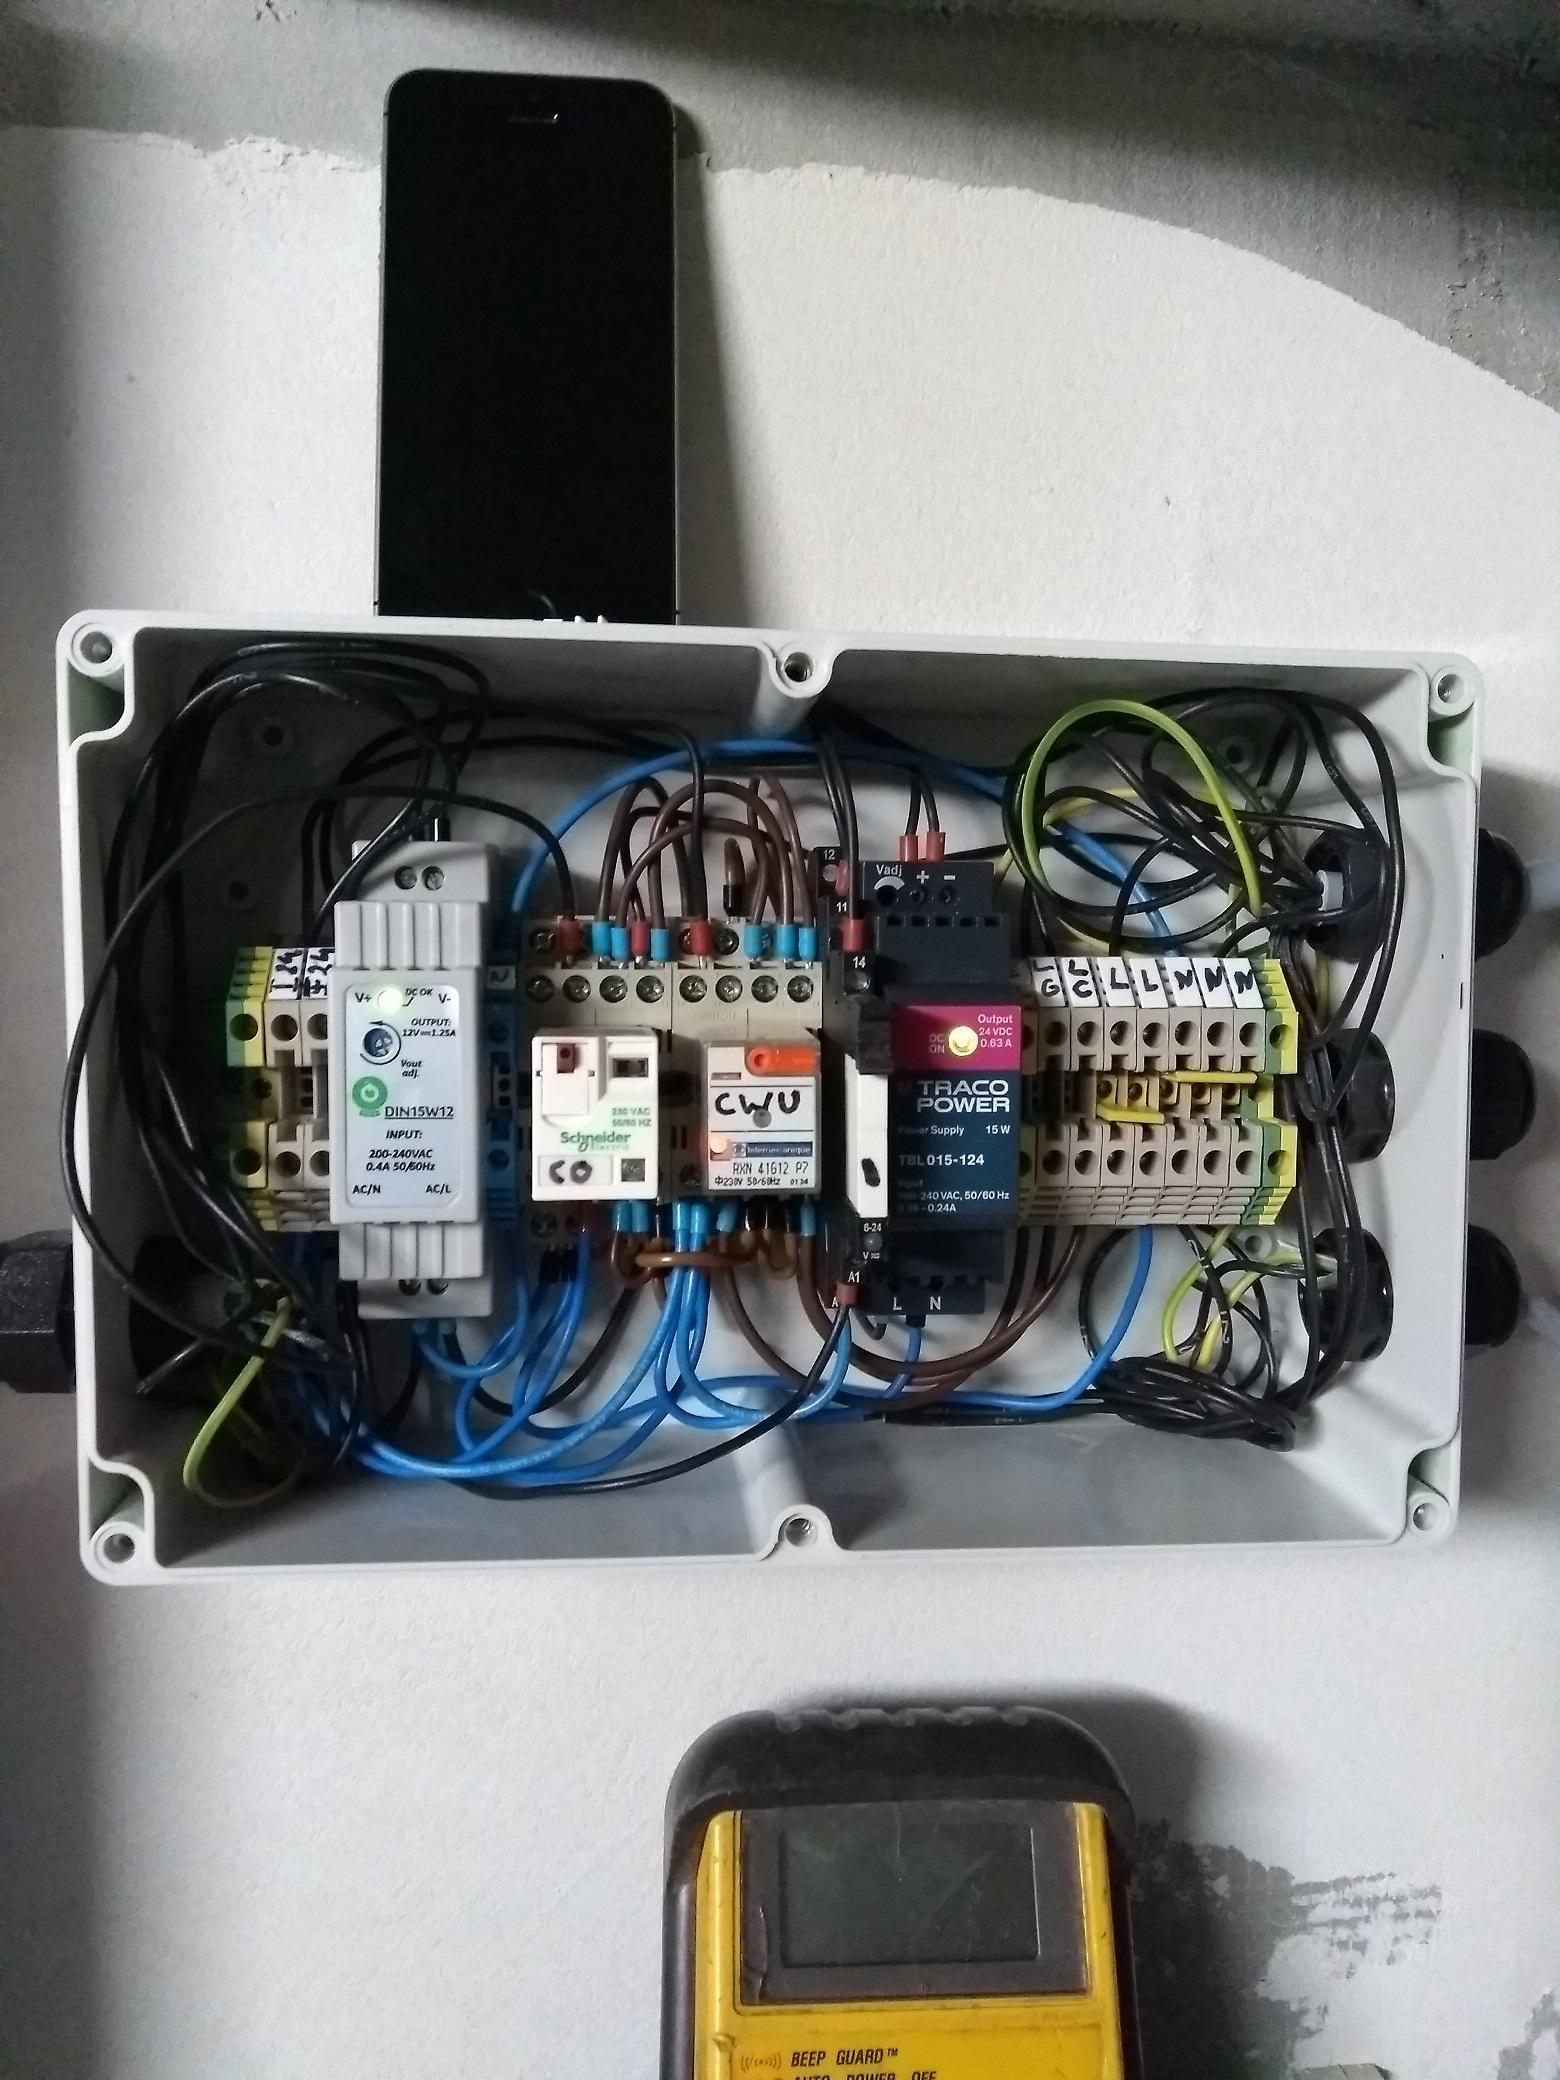
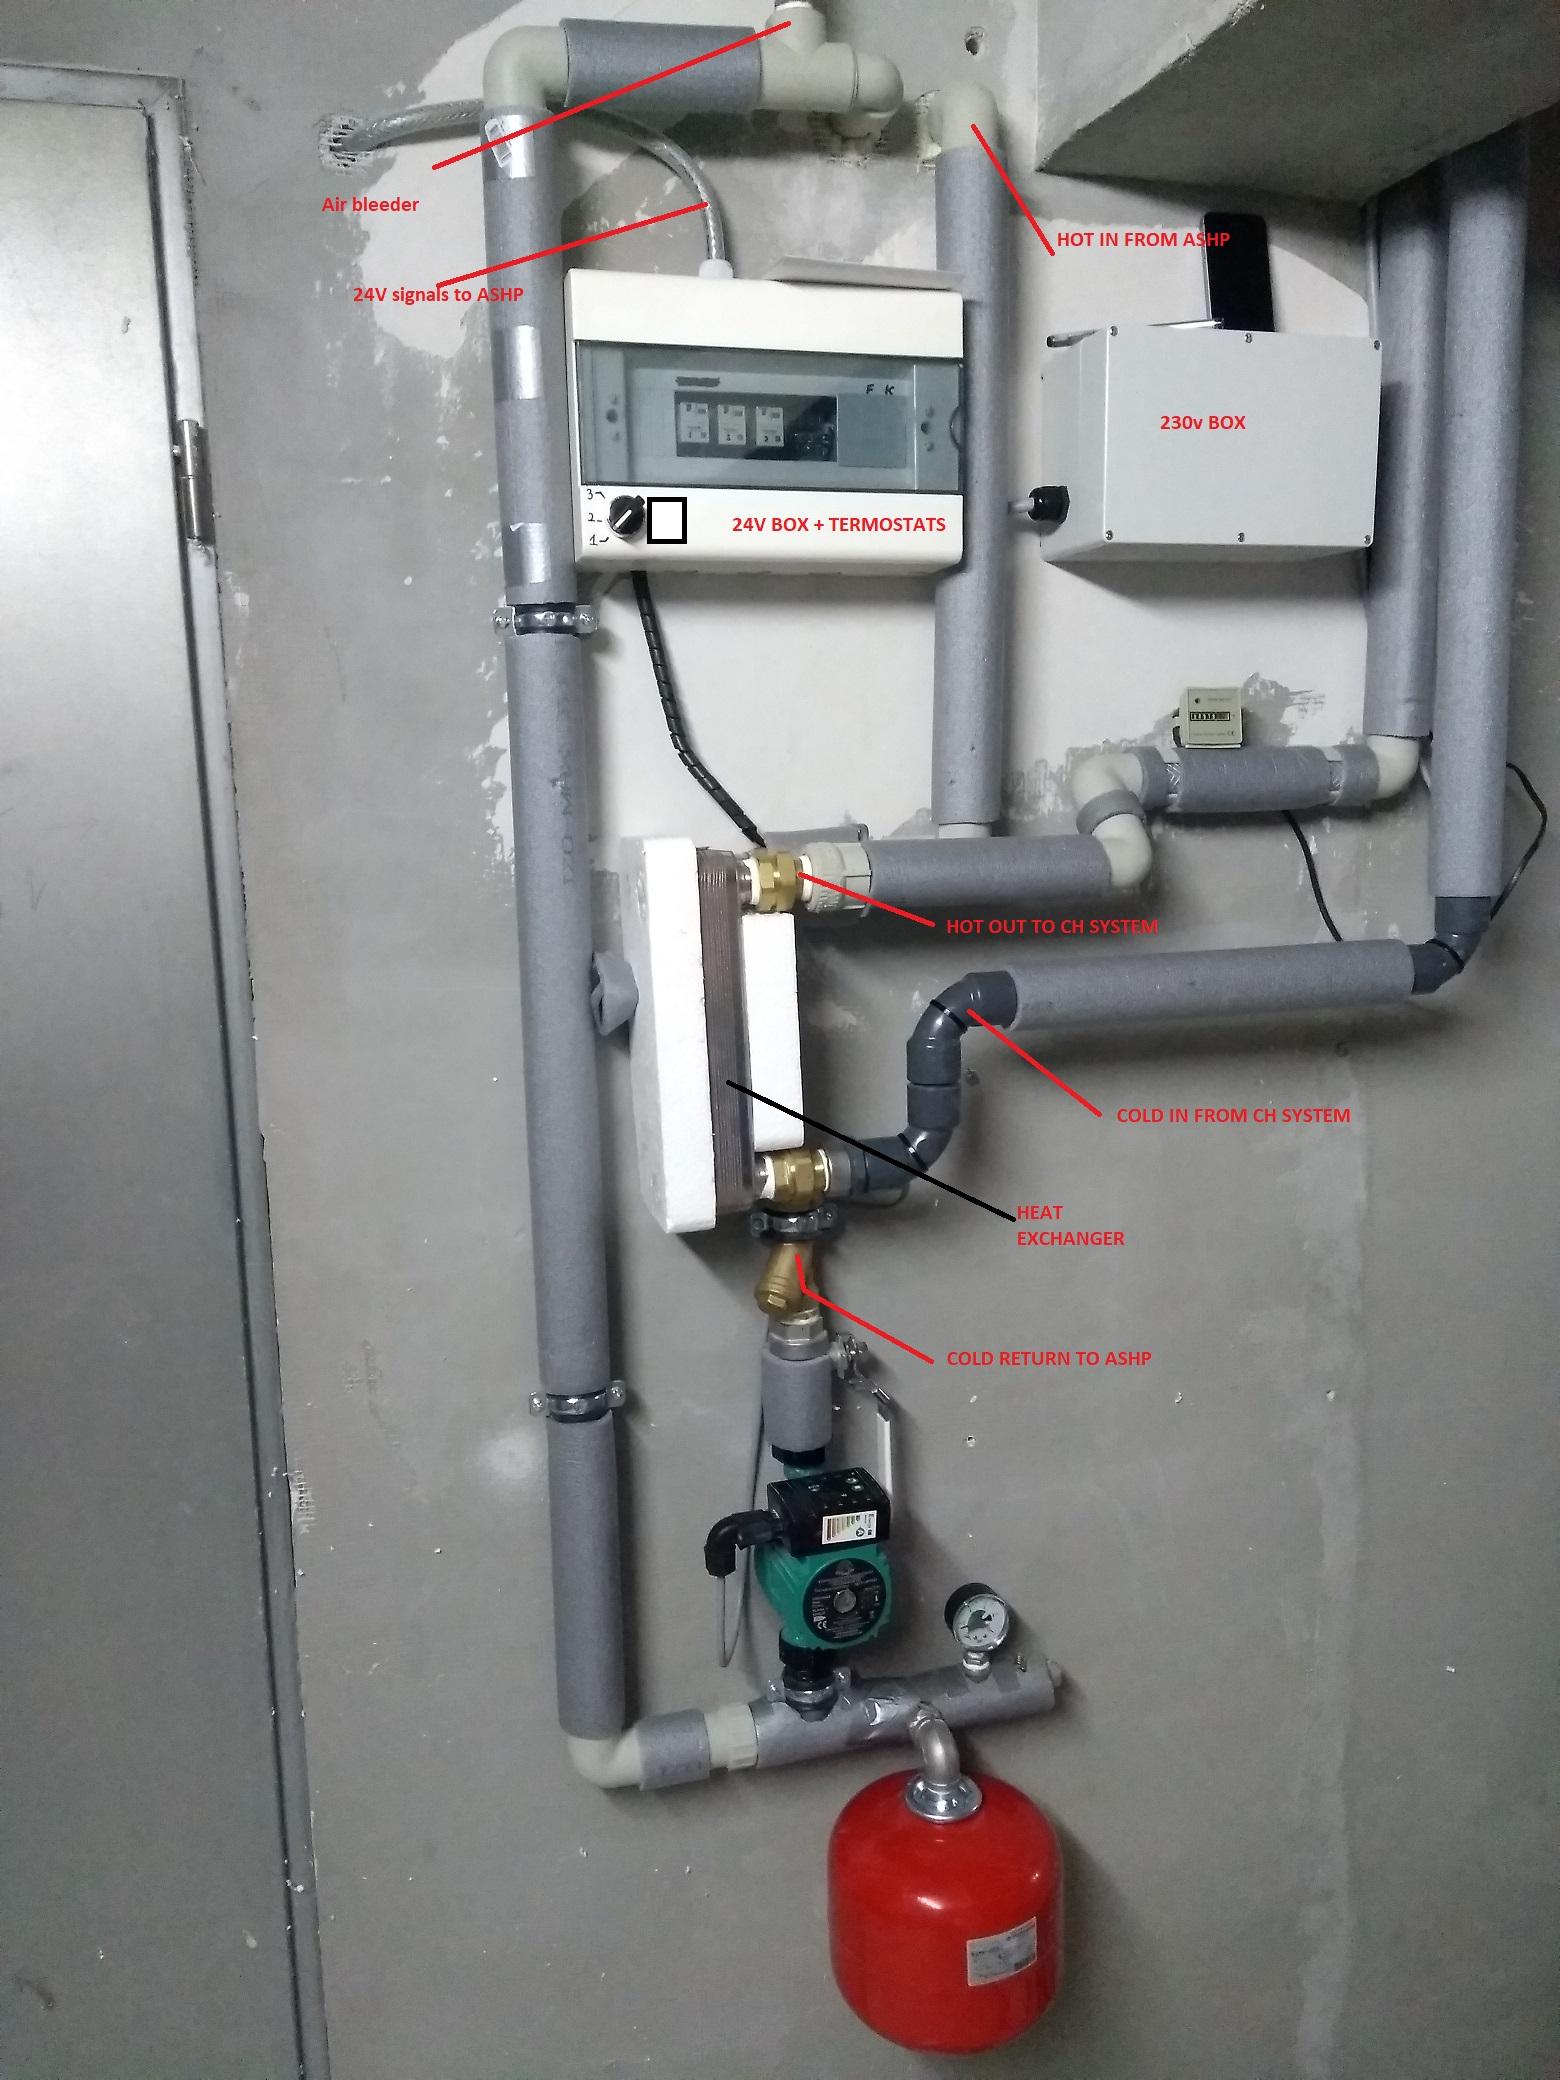
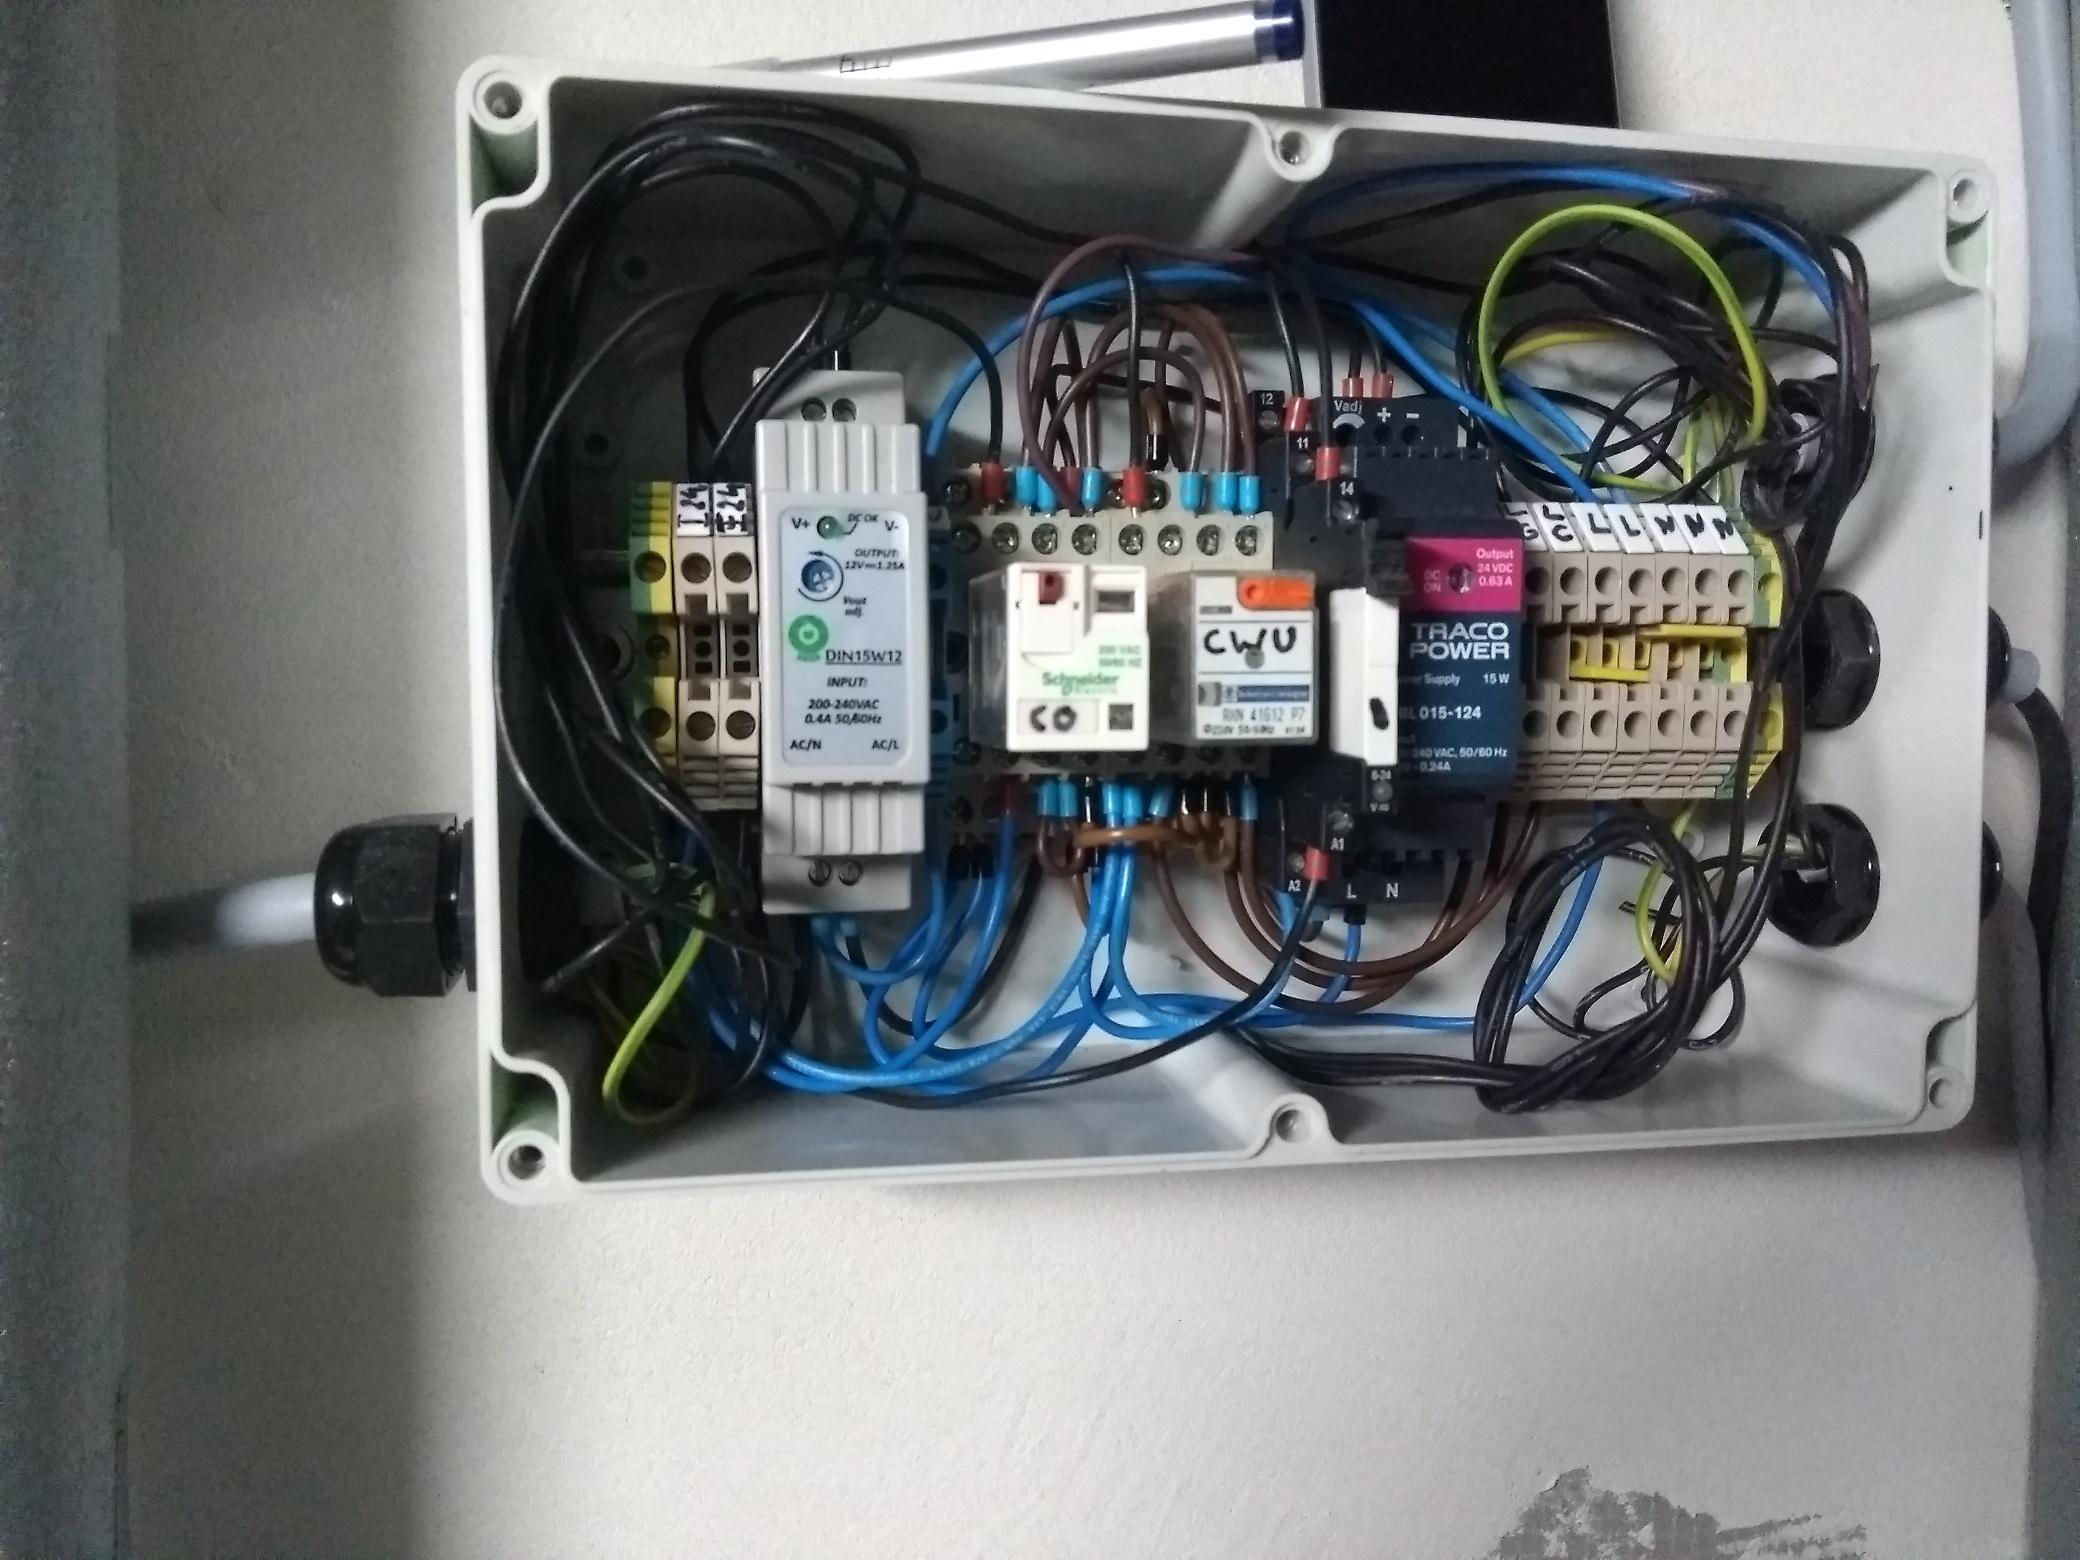
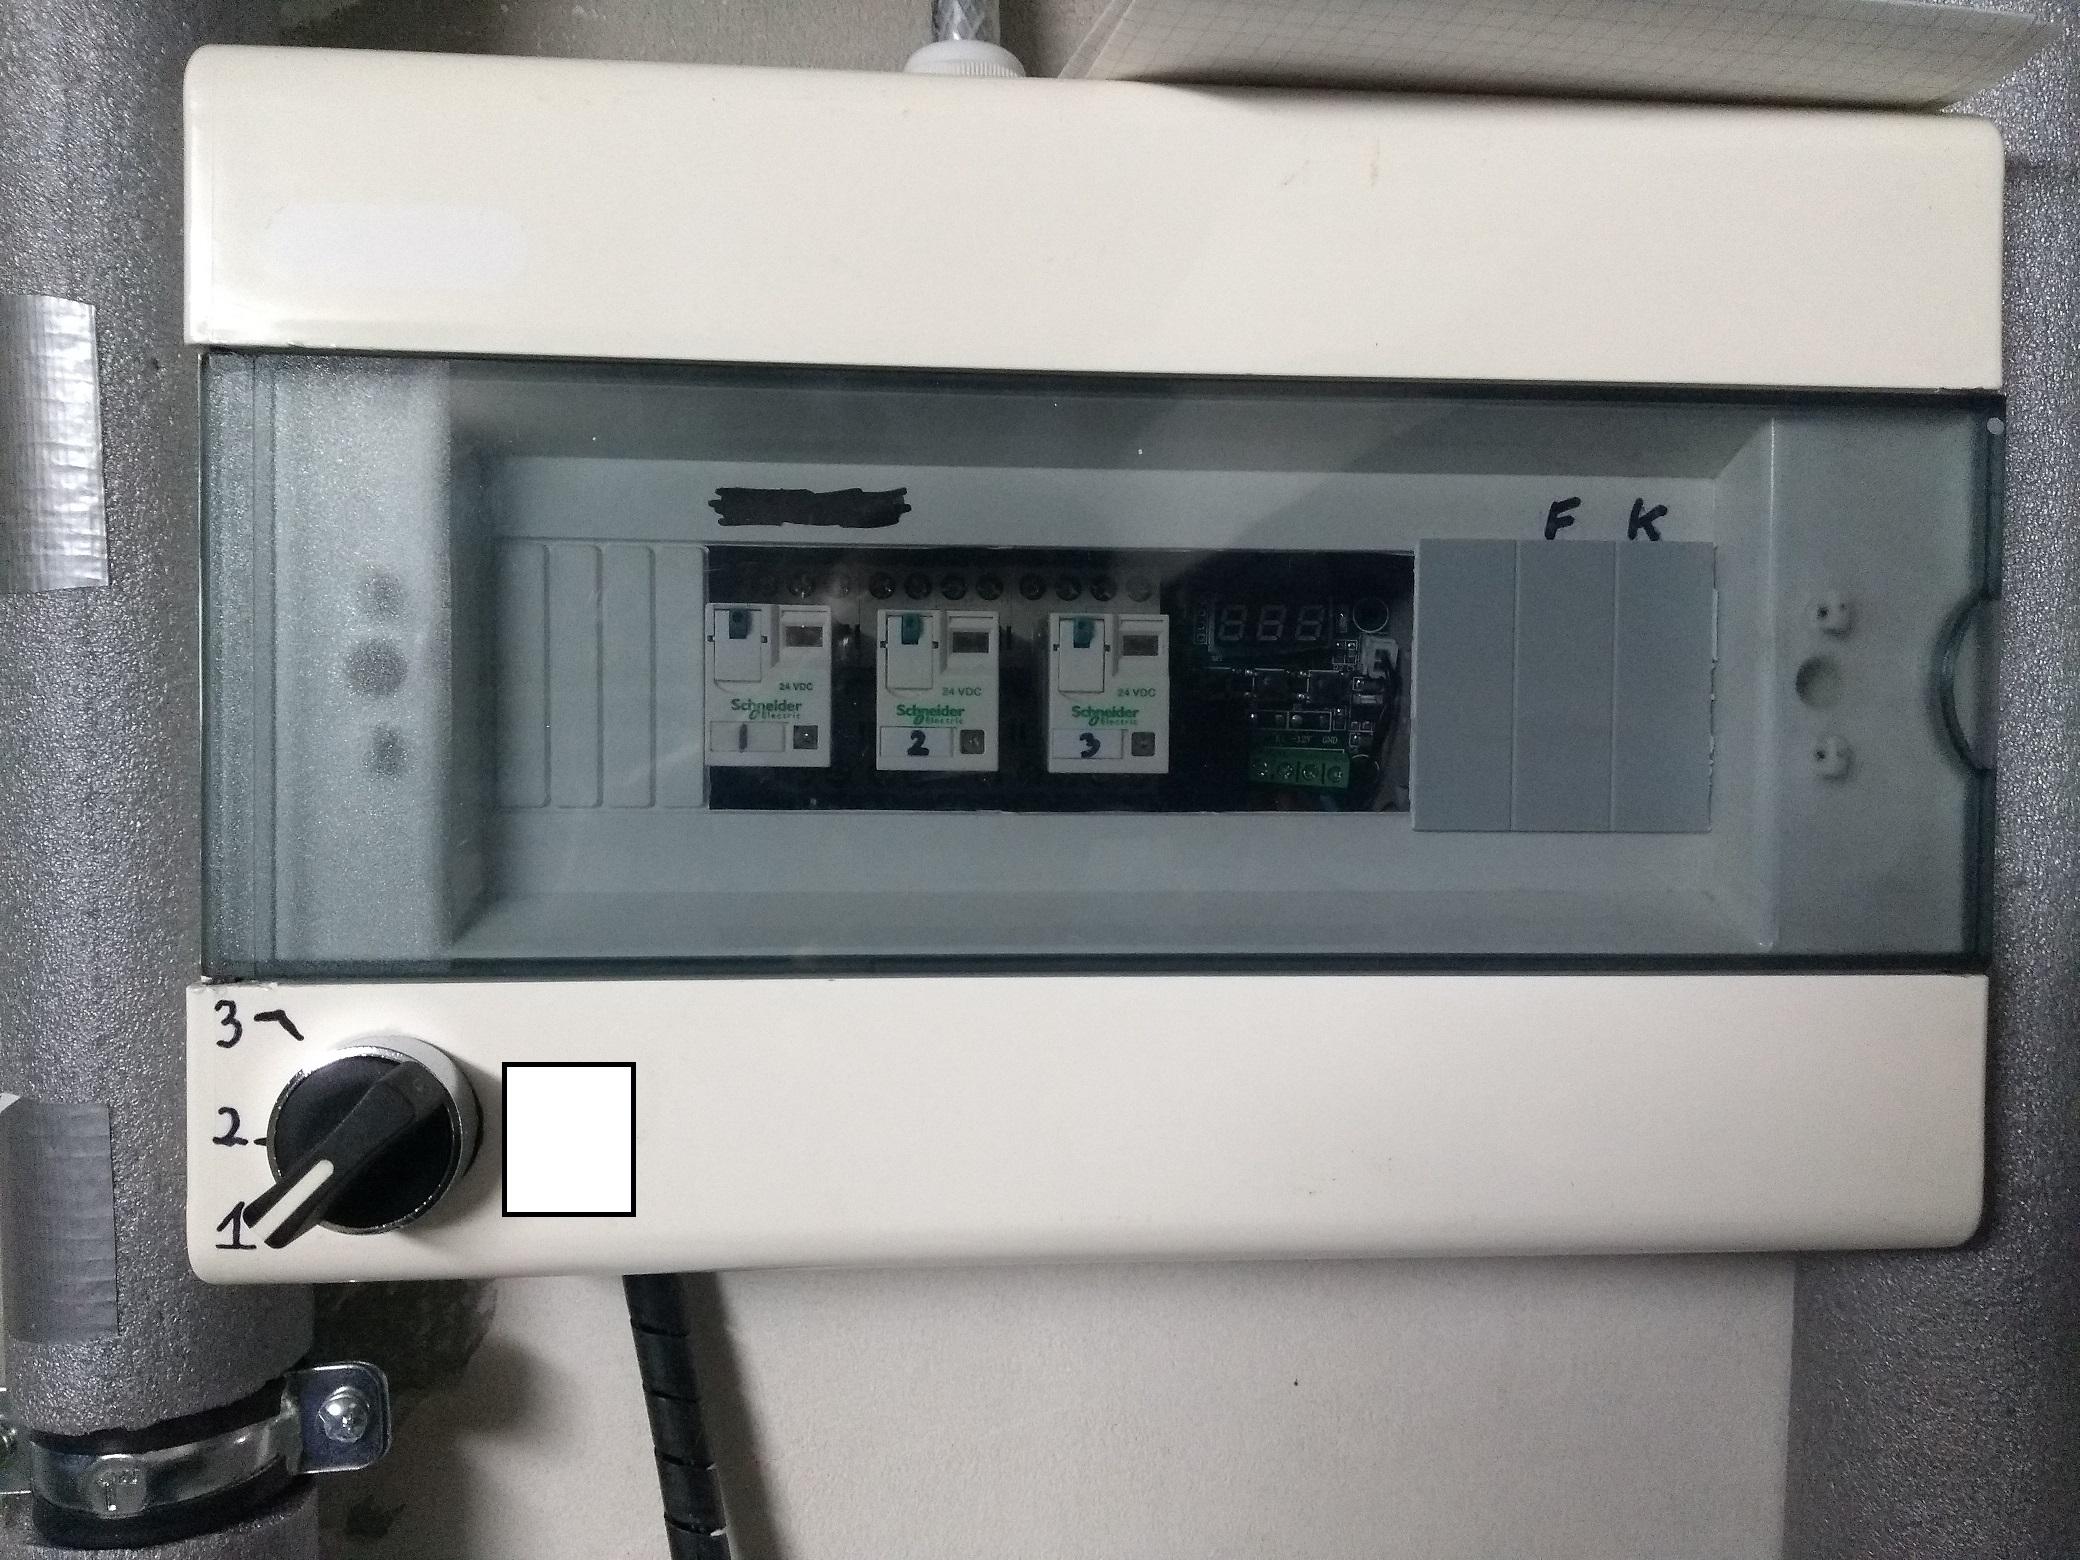
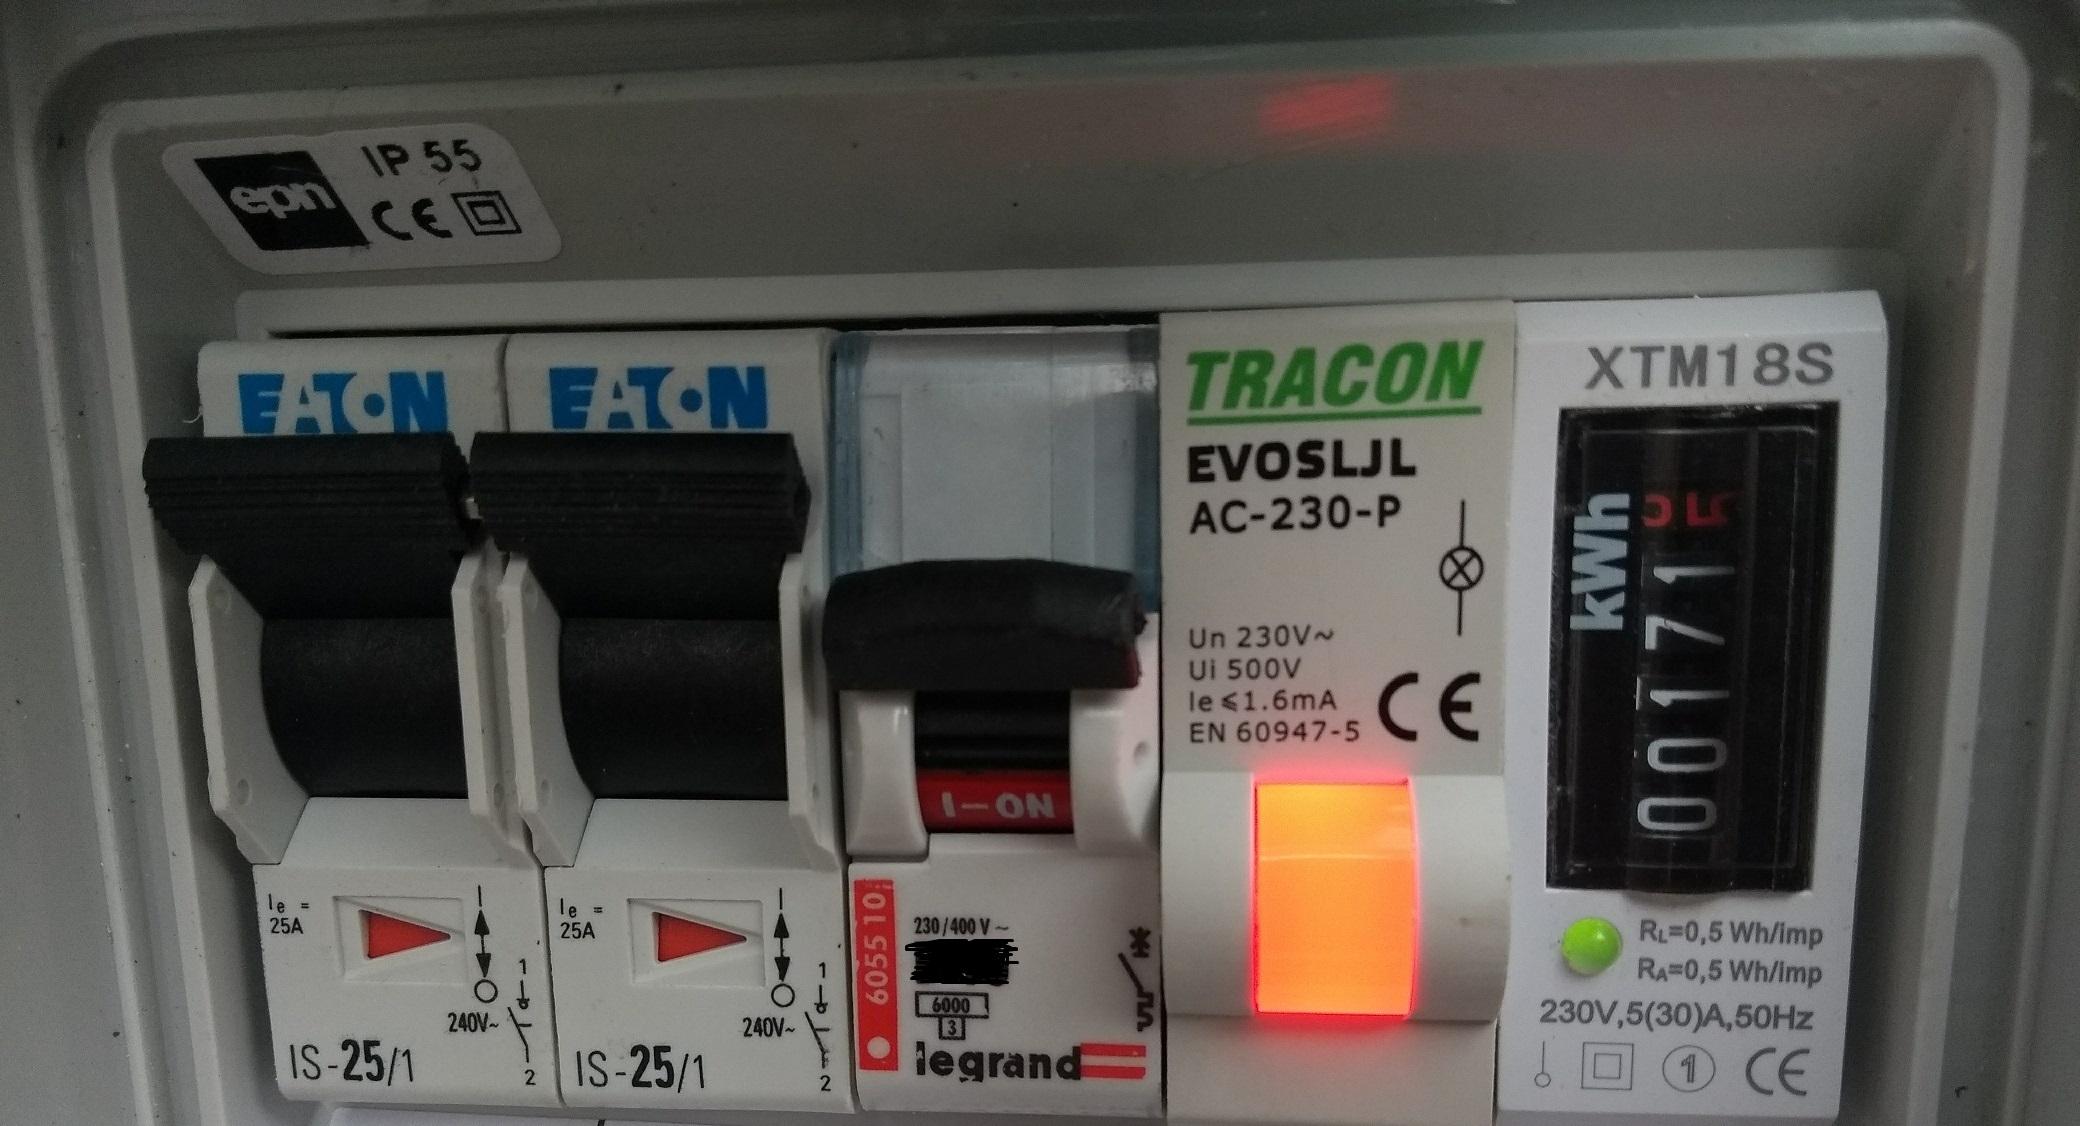
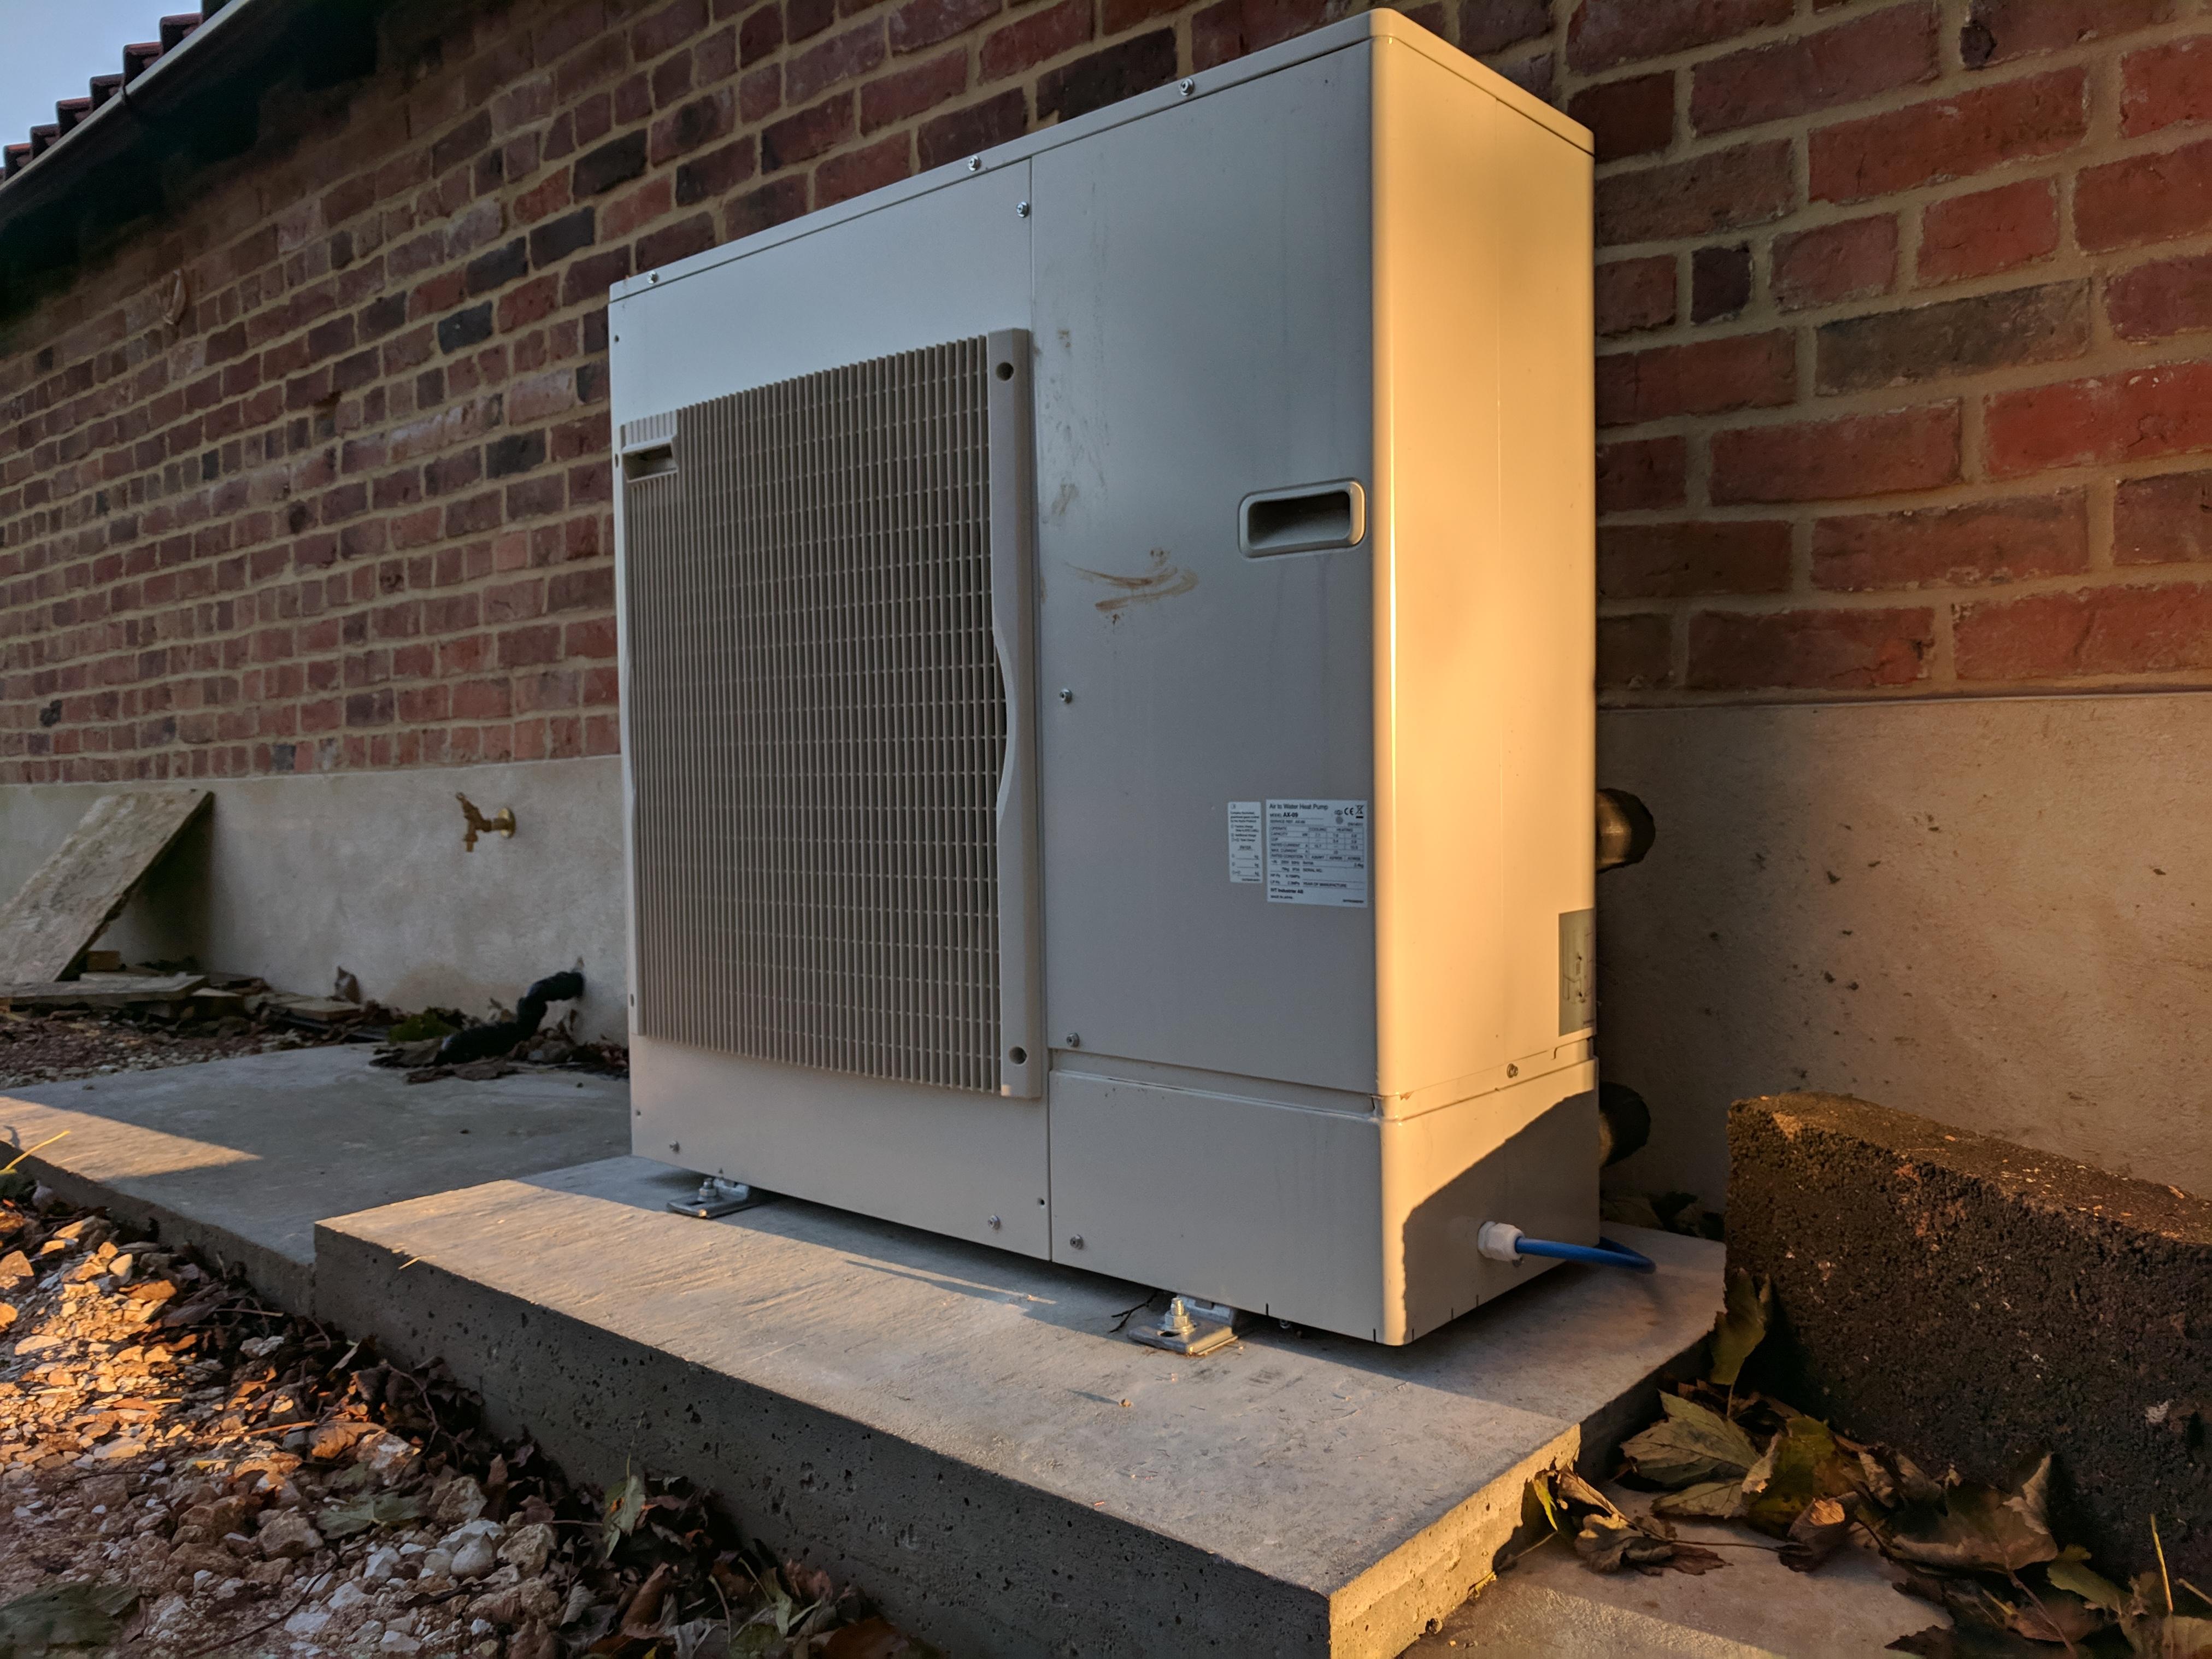
Now I will add few pics. Quick explanation to all - I am not based in UK or even in EU. I live in the middle of nowhere and Install is done with all possible materials I could possibly get on the market. It is done in resonable way and its safe for me for my domestic purpose. This is 1K£ project and I have sticked to the budget. There is one more connection box on the other side of the wall in my basement to which all this pictured is connected. I also heve there small knob and relays to switch between ASHP and oil boiler. At picutre no. 3 there you can see small hour counter sitting on the pipe. I have done some calculation - how many hours a day (including HW preparation) unit works and what is the daily power consumption. And this is something that absolutelly brings the smile on my face. - reading from the 2/11/2018 - 18,7kWh used, total run for 24h - 9,5h. 18.7/9.5 = 1.97kW 2kW to keep 22.5 degree of C at entire house! That is less than my kettle! Regards

 2 points
 -
I know how you are feeling @Christine Walker. I was pi55ed off to the back teeth with the build as once we physically moved in the motivation for hubby to get on and finish things seemed to wane and everything took forever. That was annoying but it would have been finished eventually, but then he got f***ing cancer that was the shittiest thing to happen ever and not only did it take his life it changed mine forever too. From the point of his diagnosis onwards it was pretty much down to me to sort everything in areas I didn't understand, with trades that let me down or ripped me off, in a self build that I had never wanted to take on in the first place. Somehow, just somehow you brush yourself off and get on with it, and as things start moving again nothing seems as bleak as it does during those low points. Resilience, strength and determination are your friends. There are people and processes, and sometimes just bad luck that will try to derail you and knock you off track but you will get through this I know because you have shown strength and resilience already to get this far. It might not seem better today or even next week but things will get better and you will put this behind you and move on (and in!).2 points
-
I think long term fatigue has a lot yo do with it, too, and it wears down your natural resilience. If you can manage it, a few days completely away from things might help. I managed to grab a long weekend spent with a load of girlfriends (our annual sewing jolly in Kent) and even though it was only a long weekend for me rather than a week, it really helped to unwind for a few days. Do whatever you need to recover - a few tears on your keyboard whilst posting here is a start.2 points
-
When you submit the rest of the stuff for the final inspection (air tests, elec and gas certs etc) you also submit a statement confirming that "Water consumption is less than 125 litres/person/day using fittings approach". You no longer need to do the calculator.2 points
-
And in a 'roundabout' way, therein lies the problem2 points
-
2 points
-
....if the weather man says it's raining! So goes the old song and me, too, by the end of this week. The roof itself has been watertight for a couple of weeks now, but there was still significant water ingress from the gulleys hidden behind the parapets formed at the top of the ground floor. However, my flat roof guys have been back on site this week and are working hard. Today they were finishing off the long, east facing balcony and also moving onto the south facing parapet; they will continue around the building and should have the main part of the house all finished off if not by Friday, then certainly early next week. This is a great relief as even though I know that the building would dry out, there is something deeply distressing about seeing puddles of water lying on the slab after rain, despite the main roof being on, so I shall be very happy to have this part of the build completed. Photos of the gullies and balconies to follow later this week. Stepping back to last week for a moment, some of the window snag list was ticked off, primarily the shattered panes of glass. One was in the south facing ground floor lounge area and the other was a unit in the north east bedroom. Norrsken were back exactly when they said they would be and got the main jobs completed so that things are set for the return of MBC. The remaining snag list are a few adjustments to the windows, for example where one of the lift and slide windows is too tightly fitted against the seal/brush and the frames rub when it's opened or closed, and then a few cosmetic issues such as shallow dents in the frames. We've agreed to complete the rest of the list once we're getting into second fix rather than get in the way of all the frame completion and first fix work. Last week also saw the return of Darren from MBC to fix my wonky wall, for which the solution was low tech but effective. A sleep deprived but determined Irishman with a very, very large hammer who was prepared to beat the crap out of a steel beam, and that's precisely what he did. So the problem wasn't so much the wall above the window, but the section that housed the apex steel that sat above the window and that, it's now been decided, has a kink in it. The wall above the steel section and the one below it are both plumb but the inverted V-section above the window isn't due to the kinked steel inside it. I'm assured that everything is structurally fine and that there's no danger of anything shifting in a detrimental fashion and after Darren did his stuff the top of the triangular window section is now only 3mm out, where it started at 12mm and more further up. I can easily live with 3mm and it will easily be lost in the cladding. There is now a kick on the inside, but Darren will put some packers behind the service battens to make sure that the final internal wall is plumb for boarding out and everything else that comes after. And so back to this week, where the first few days have all been about activity on the roof. As already mentioned, the flat roof guys were back on Monday and also back were the solar PV guys. The solar guys had to start by removing the optimisers from where they'd previously left them on the roof as they are all going into the loft space. The idea behind this is that the solar panels themselves are highly unlikely to fail but if any of the optimisers do, it will be an expensive job to get to them to make any repairs. It would involve dismantling part of the roof as well as expensive scaffolding to gain access. Instead, the cables have come through a penetration in the roof and the optimisers will sit in the loft space along side some MVHR equipment, meaning that things are far more accessible in the future. The inverter will be in the garage and the cable has been run down along the roof, going through the parapet and through the garage ceiling, into the garage where it will live with all the sunamps and other kit. This is the route it's taking, to the side of the roof window and underneath the membrane that will line the parapet gully and, eventually, the garage roof. My velux windows arrived last week, which was another relief. My roofer, Dylan, gave me a call to confirm that they were in and the days that his team would be back. We'd already agreed that they would be on site on the 30th to co-ordinate and work around with the solar guys and they all worked really co-operatively, as they have done all along. I'm biased, of course, but I think that my roof is looking really great and the solar panels are pretty smart looking, too. Here are the panels from the other side of the flat roof over the stairwell. And a closer view of the trays and panels. This is the velux window that's over the shared bathroom. It's very low down coming onto the flat roof, but Terence and the other roofers, Pat and Mike, had already discussed this and decided how to solve the potential issue by using some more membrane and glueing the s*&t out of it all. This is the same window from inside. The light from this will be the only natural light source in the bathroom once all the walls are in place, so it's good to see that it floods in from its west facing orientation. We have another 2 velux windows, one is in the already well-lit south east bedroom, which I'm claiming for my own room to do stuff in, so I'm delighted to have it full of so much light. You can also see the prep on the balcony with the membrane being put down. The other roof window is the north east bedroom which will benefit from the additional light given its aspect. Here's a pic of the guys putting the trays into position on the main south facing roof. The pole that's in the foreground of the picture is the one that until recently carried the electricity supply cable. That has now been buried and back-filled today and Openreach will be around on Friday to remove their equipment so I will be able to dispose of the pole in due course. This is towards the end of the day when most of the panels were on and the slates had been put around them. There's plenty more work to come this week. The flat roof team are continuing and the pitched roof team will be back on Friday and possibly early next week to finish everything up there. My groundworker, Keith, is on site now as well, and we're moving all the shrub and hedge related debris from earlier in the year. I'm currently thinking that bonfire night seems an appropriate time to light up, so I may have to buy some sparklers for the occasion. My fire rated door was delivered today from Enfield Speciality Doors and my neighbour, Drew, will be installing that for me. He works in construction and having seen the tidy work he's done on his own place, he'll be doing a fair bit of internal work for me as well as, possibly, the tier cladding on the outside in due course. It's worth noting that I paid a premium to Enfield Speciality Doors to jump the queue in their production schedule to make sure that I got the door in time for the return of MBC. It's the one to go between the utility and garage so it has to be in before MBC return and I was prepared to pay an additional 10% to make sure this would happen. I was chatting with another BH member recently and it seems that fire rated doors really are tricky things to get hold of, let alone within a reasonable timescale. If you also want one that's insulated and looks good, be prepared to take a few months over this, assuming you find anything. I'm fortunate as mine is only between the garage and utility and doesn't need to be pretty. I may add extra insulation later but, for now, I just needed the fire rated door. Soil pipes and other bits will be sorted out as well before MBC hit, then we can really take the brakes off and go at first fix. Yesterday's buzz of the week was the Hercules.1 point
-
In our last blog entry we completed the roof. Guttering was one of those areas in the build that I had never really given much thought to. After doing some research, and asking on here, we came across cast iron effect guttering from Brett Martin. Unfortunately the lead time to get the guttering to Skye was quite long (3-4 weeks). When the outlets and fascias finally arrived, the actual guttering was missing having been lost in transit. We had to order it again, waiting another three weeks for it to get here. Having placed the original order at the end of August the guttering finally arrived last week! Its now up and looks great. Whilst waiting for the guttering we decided to paint the soffits and fascias, putting on a primer first following by a couple of top coats. This took a few weeks, waiting for dry weather windows and painting whenever we got an opportunity. Our joiner fitted some fire stops today and he gave the okay for me to take down the majority of the scaffolding leaving just the gable ends. I was also able to take down the internal bracing. Weather depending the blockwork should be starting week commencing 5th November. Here are some photos of the house.1 point
-
Water tight I hope1 point
-
Yes, now that the first fix has been completed, the plaster boarding has started with the upstairs being done first. The builders will move downstairs an a weeks time or so. Whilst they have been boarding out, I have been installing the insulation for the partition walls, loft space and ceilings downstairs. The insulation being used in the loft space is 140mm - two layers laid at right angles to each other if that makes sense. The insulation used for the partitions is 100mm and the plasterboard for these walls has sound proofing properties, weighing in at 6 kilos more than the standard boards. You will see from some photos that we have also managed to install two full length oak beams. One for the sitting room and the other for the kitchen/family room. They look great even if I say so myself. They are not structural just aesthetic. Outside, the stone mason and labourer have been cracking on with the stone work. They intend to get the house done at head height before moving up as additional scaffolding will be required. They start the back of the house later this week. Enjoy the photos and I will be back in a couple of weeks, hopefully with a full boarded out house. Thanks for reading.1 point
-
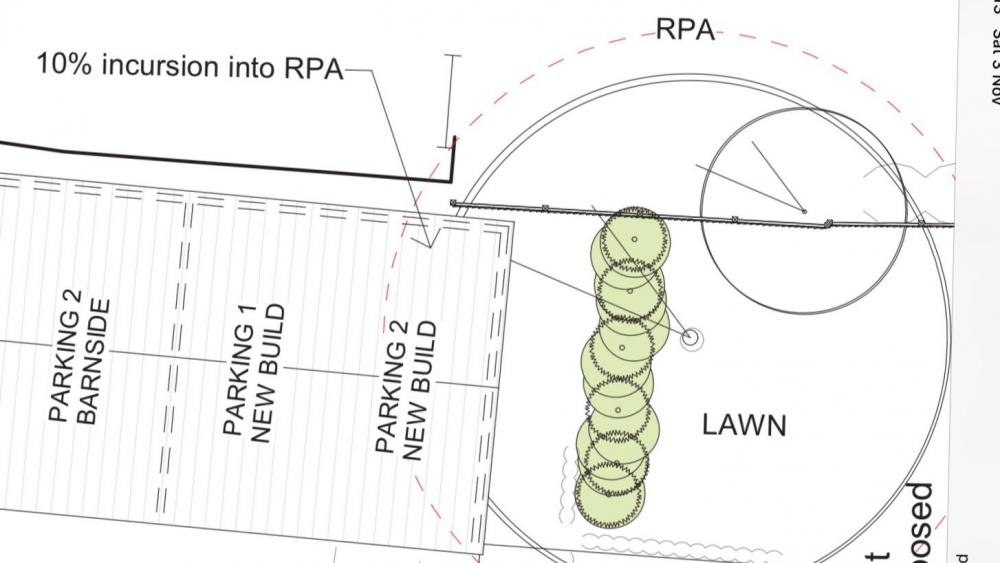
From the Woodland Trust’s website: How is a root protection area calculated? The British Standard 5837, RPA is calculated by multiplying the diameter of the tree at breast height in meters by 12 but is capped as an area with a radius of 15m. .... and then I guess my designer just calculated the area of the garage that was encroaching into the RPA and divided it by the area of the RPA to get to his 10%. You can find a copy of the relevant BS online in some places - it costs £224 to buy from BSI or just Google “Crawley BS5837” and you can see it for £0 ?. Have a look through that to see what is relevant for what you are trying to do but, for example, section 7.4.2.3 states “New permanent hard surfacing should not exceed 20% of any existing unsurfaced ground within the RPA.”1 point
-
Hi. We have trees with a TPO on them, as stated above we fenced them of with heras fence to give them a bit of protection. We also had to lay a no dig drive way through the trees which is a plastic webbing then filled with stones. It's pretty strong we have had lorries and a 36m concrete boom pump.1 point
-
We’re building in a conservation area and trees are protected. The tree officer said : “The proposed site plan indicates the rpa incursion of 10% of a single tree. This is acceptable.” So you can encroach into the RPA. The attached is extracted from our application drawings.
 1 point
 -
I have checked the distance from the wall 34cm at my place1 point
-
Yes, although he won't join here as he still seems to refuse to believe the truth behind what happened to Ebuild. I can understand that, as the individual who caused the mayhem is a very likeable and credible person.1 point
-
Hi, pictures above were added by other happy users of PUHZ-W90. Nothing to do with my install and my "customised" contoroller.1 point
-
I have just fitted two Horman doors myself from garagedoorsonline and they arrived on time and at a good price. When you have worked out the instructions to fit the first one, the second is easy!1 point
-
Ok .... RPZ is only required where it has been deemed as required on a tree within a tree survey to BS5837:2012 or the tree is within either a conservation area or has a specific or site wide TPO. All construction work “should” consider trees however a lot doesn’t. A ground level tree survey by a decent tree surgeon shouldn’t be much more than £300-400 at best, and you can do them yourself if you can identify a good tree from a bad one ..! Grey area with all trees is their “amenity value” and whether they do add anything to the landscape especially in an urban environment. I’ve come across a couple of councils recently where the tree officer has retired - usually an arborist by trade - and has been replaced with a graduate with a degree in environmental science ... sadly some of these are just past page 4 on the Ladybird Book of Trees and they don’t have a clue but are very influential all the same ...1 point
-
Must we resort to toilet humour?1 point
-
Crap idea ?1 point
-
We did this ... Bought the cheapest loo from one of the sheds, plumbed it into the main sewer, we had an old Khyam shelter that we erected over the top of it, shoved some handwipes and loo roll in it and it was good to go. I did however make the hubby clean it! ? ? ?
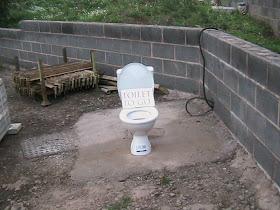 1 point
 -
We used http://novoferm.co.uk/products/garage-doors/insulated-sectional-doors/ They can finish in any RAL colour and have a 'woodgrain' finish so you should be able to match your desired colour pretty closely.1 point
-
He was much more than an idiot, he was a complete and utter PITA. His opening remark on his first visit (which was when the house was ready for the completion inspection) was that he'd never have passed the foundations, as it was "inherently unsafe" for a house to sit on a block of polystyrene foam. Things went downhill from there... He'd been brought back in part time, due to staff shortages, and if I had to hazard a guess I'd say he was in his early 70's. Thankfully, building control sensed there was a problem after his third visit and so sent out the head of building control to do the completion inspection. By that time I'd printed off every bit of evidence I thought might be needed and lined all the printouts up on the kitchen work surface, ready to be checked. The inspector didn't look at any of them, just walked around the house being generally complimentary, and only really checked the disabled access from the back door to the WC. He was there for less than an hour and we got the completion certificate by email around 4pm the same day.1 point
-
The snag is that the embodied energy in manufacturing them is still very high, although that will come down as battery manufacturers both reduce the energy intensity of the whole manufacturing and supply chain (including the mining side of it) and as they include a greater proportion of renewable energy to the manufacturing process (the Chinese are investing massively in this, and Tesla has done a bit by roofing Gigafactories with PV). The sums are pretty easy. A Powerwall 2 will cost around £7500 to £8000 installed (best guess at the moment) and the cells will have a calendar life of between 10 and 15 years, with the inverter probably lasting between 8 and 10 years. If off-peak energy is used to charge the battery pack, at a typical unit price today of around £0.07/kWh, and allowing for a typical round-trip efficiency of about 90%, then the cost per unit of energy delivered from the battery pack will be around £0.077/kWh. If the house consumes 2/3rds of it's total energy use during peak rate time, and if this can be met 100% by the battery pack, say 10 kWh/day (and that's probably an optimistic figure) then the cost saving per day from off-peak battery charging to offset peak rate consumption will be somewhere around £0.08/kWh, or around £0.8 per day. To recover the cost of the Tesla Powerwall 2 just using off-peak savings would take around 25 years, but the battery will be effectively scrap after around 15 years at the most, so will never pay for itself this way. If you add in excess PV charging as well, then that figure comes down a bit, but not a lot, given that peak energy use is during the period when PV will be generating very little. Last time I ran the sums for the Tesla Powerwall 2 against our requirements, with our 6.25 kWp PV array and lower overall energy consumption than your prediction, I came up with a return on investment time of around 20 years. Anything over 10 years doesn't stack up, as by then the battery capacity will have reduced significantly and the inverter will be at the end of its life (power inverters seem to have a typical life of around 8 to 10 years). For us, the 7.2 kWh Sofar battery system almost breaks even at the 10 year point, but not quite, as of a few weeks ago when I looked at the costs again. Prices of those systems are dropping though, whilst Tesla Powerwall prices seem to be increasing.1 point
-
It is all very good to care about the environment, you are doing that by building a low energy house, fitting PV, and an efficient means to store hot water (the Sun amp) However I am not convinced about the battery storage. I suspect you won't have that much surplus PV to charge it with. I keep looking at battery storage, but we are "not there yet" Even if all the electricity to charge is free, it still looks unlikely you will have paid back the capital cost by the time the batteries need replacing. What is the environmental cost of those end of life batteries to dispose of? The idea of charging them with off peak electricity is equally dubious. To get an off peak tariff you pay a much higher daytime rate and a higher standing charge. It is not just viable for this imho. I want battery storage for my own house eventually. I am still thinking that will eventually be a DIY built system with NiFe batteries. At least I know with those there is a reasonable chance of the batteries lasting until I fall off my perch so it should be a buy once system. One of the best things you can do to self use as much PV as possible is use the big appliances like Dishwasher, washing machine and tumble dryer one at a time close to the middle of the day. If you are out at work you would need to do that with timers.1 point
-
Interesting observations. I have just got a full week data on energy use in our house for a "cold" week, outside average temperature for the week 0 inside temperature 20. The heat pump used 87KWh in the week. If I assume a COP of 3, that would have been 261KWh for the same heat from a willis heater. That's a big enough difference for me to conclude the heat pump is essential. At that usage, if the temperature was 0 all year, the heating bill would be £678 with the heat pump it should be a lot less than that for a real year. The saving over just a willis heater will pay for my (very cheap) heat pump in the first year. The maths may be a bit different if you are paying a company £10K to install a heat pump for you (I know at least one person who paid more than that)1 point
-
Absolutely. If you're just about at Passivhaus levels (15 kWh/m²·a) and use the typically assumed 3 kWh/peep·day for DHW for three people in a 120 m² house then it's just over 5000 kWh/a. Even with full-rate electricity at £0.16/kWh that's “only“ £800/year. Add E7 or E10 or PV (remembering that the bulk of the use is for DHW which happens at least as much in the summer) and the ROI on anything more complicated begins to look a bit weak. Even the standing charge on mains gas will bite into any further savings to be made. I think an ASHP makes sense but it's got to be as cheap and simple as possible.1 point
-
Did you watch the first episode of grand designs new series a few weeks back. It showed how much of an issue this can be. Not sure if it's still on 4od if you missed it.1 point
-
If you are going budget, then I would use a floor standing back to wall pan so no need for a frame to hang it on. I am not convinced the wall hung ones give enough improvement over that to make the cost and extra work worthwhile.1 point
-
The housing for the air pump for my system can be either surface mounted or semi buried. I fitted ours semi buried and bedded on sand with the air pump standing directly on the base of the housing. The hum from the air pump can't be heard more than a couple of meters away and we live out in the sticks where it's pretty quiet.1 point
-
I’d let him get on with it and finish your bathroom.....1 point
-
An insulated raft is the way to go. The services don’t have to go under the slab, they could be kept to the edges with th3 right house layout. This learned report from the Museum of London might help https://www.mola.org.uk/sites/default/files/downloads/Mitigation of construction impact A4.pdf1 point
-
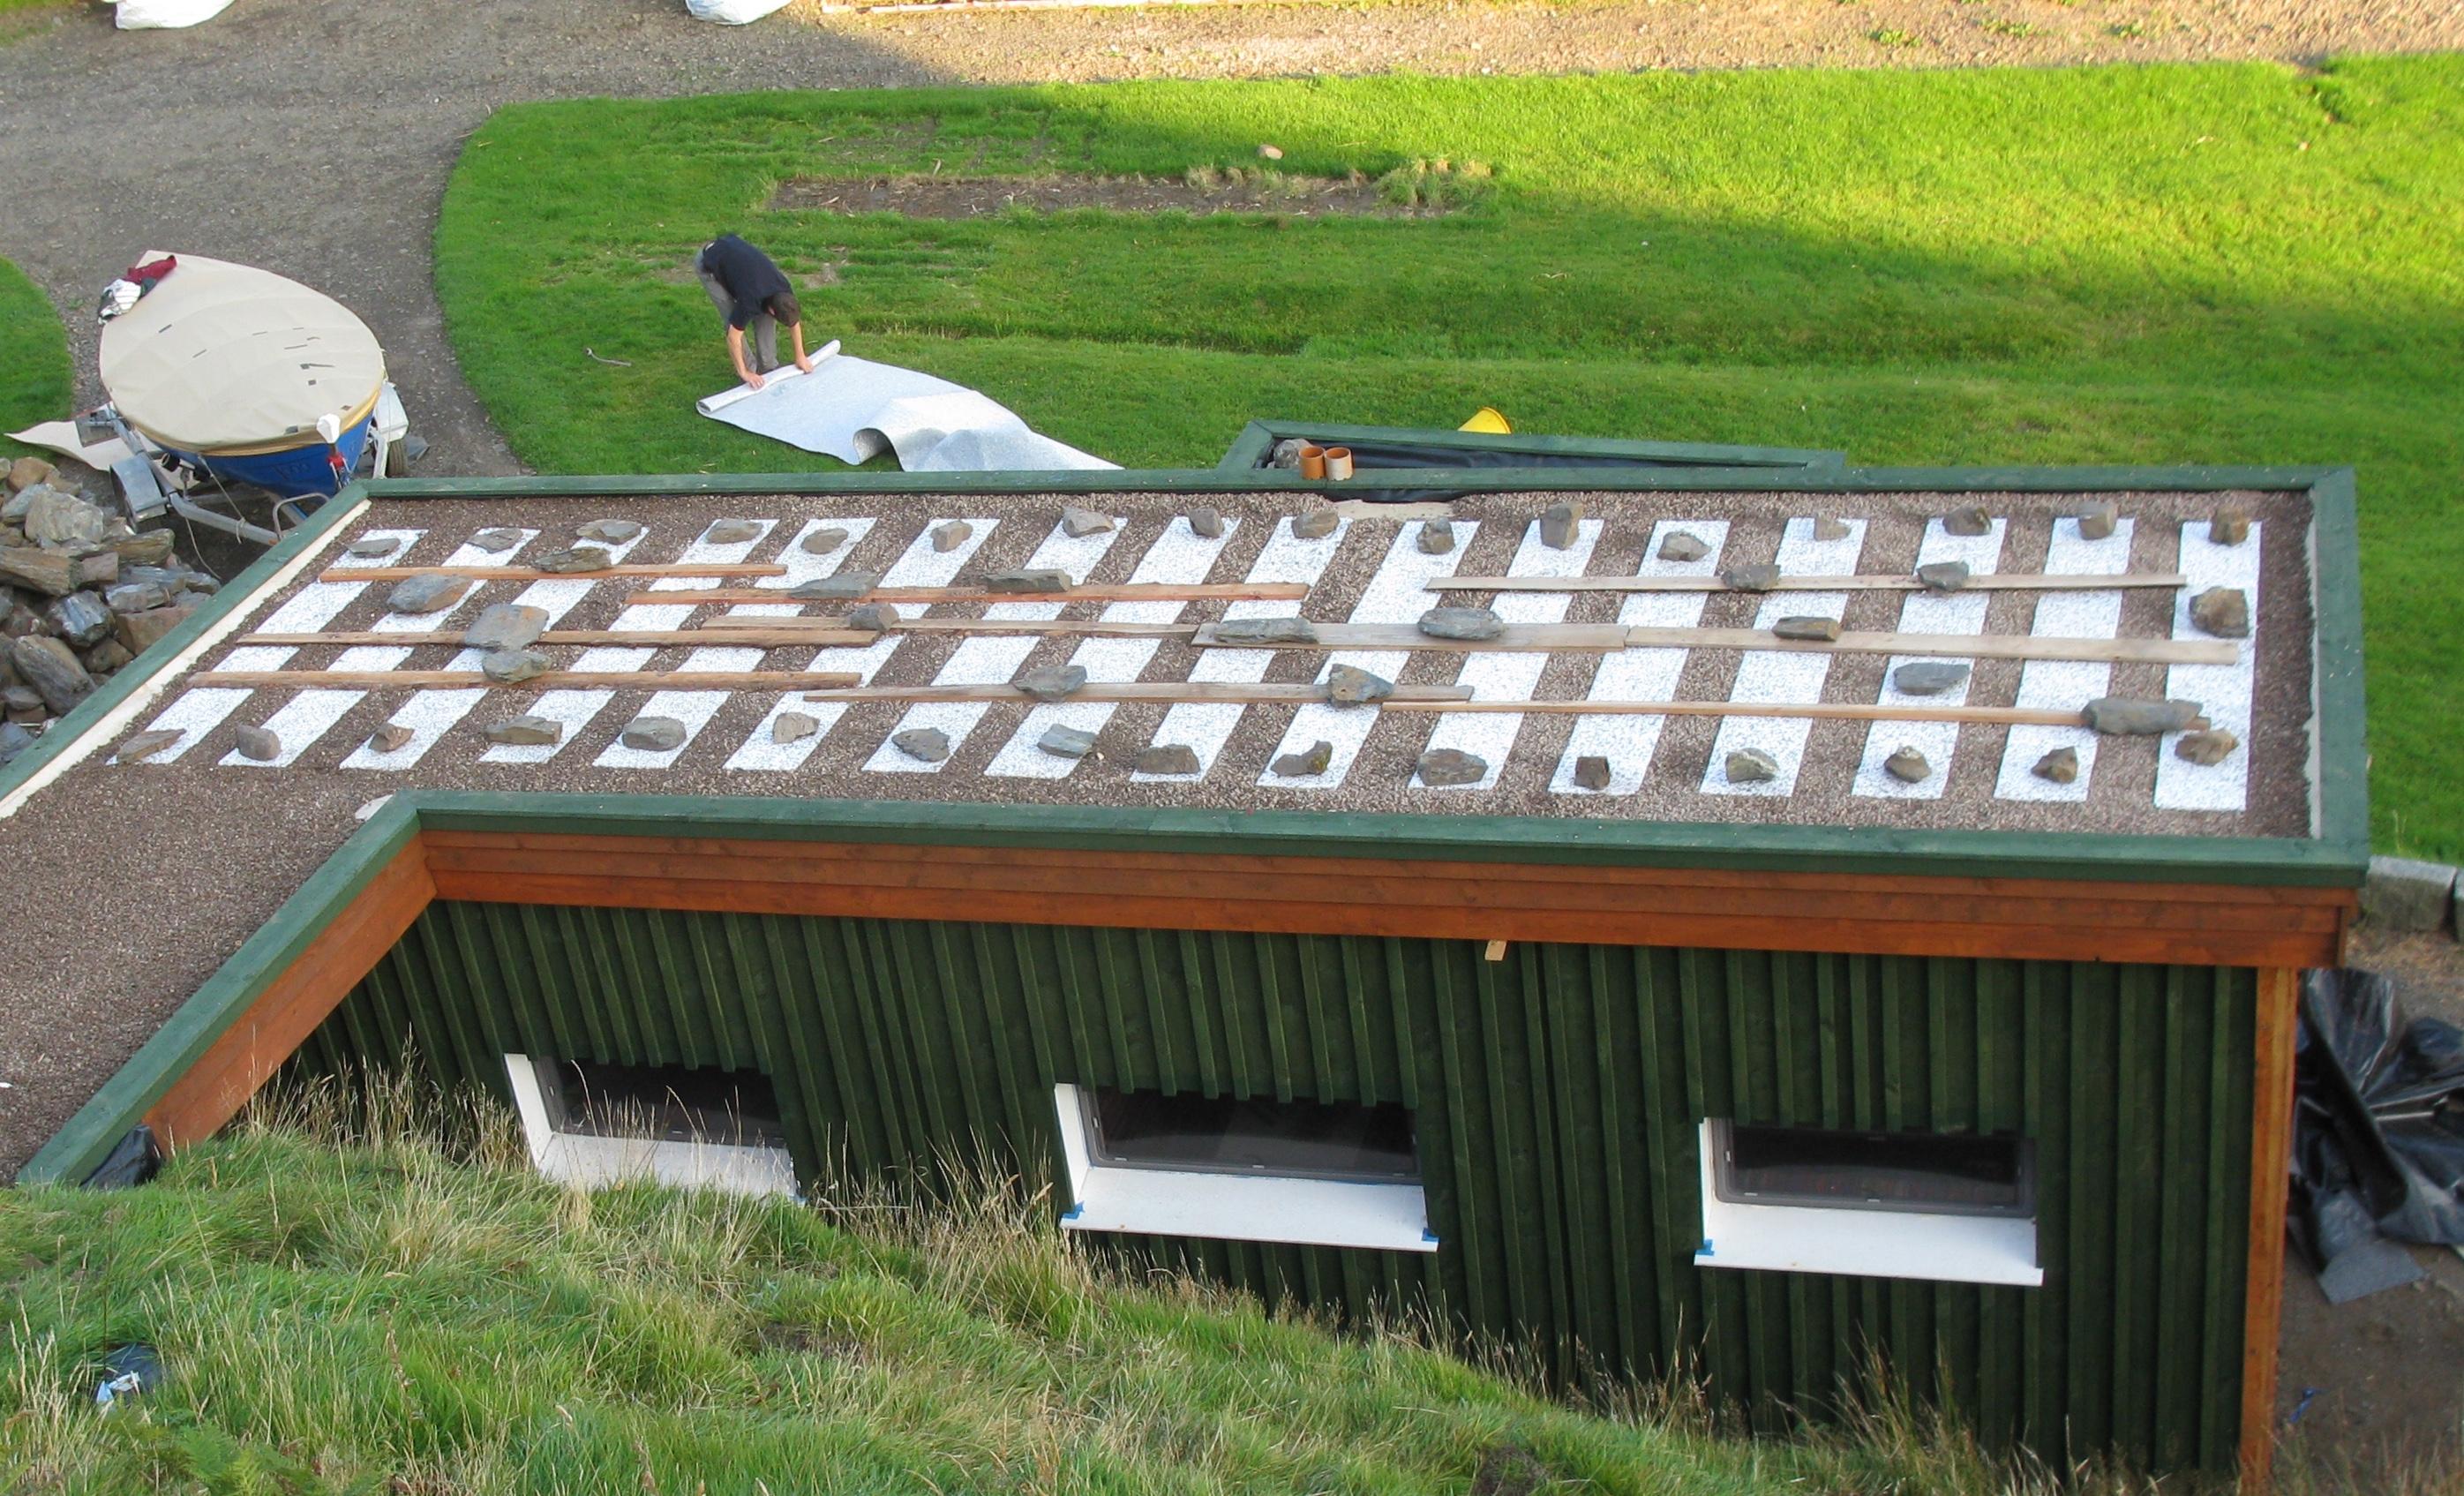
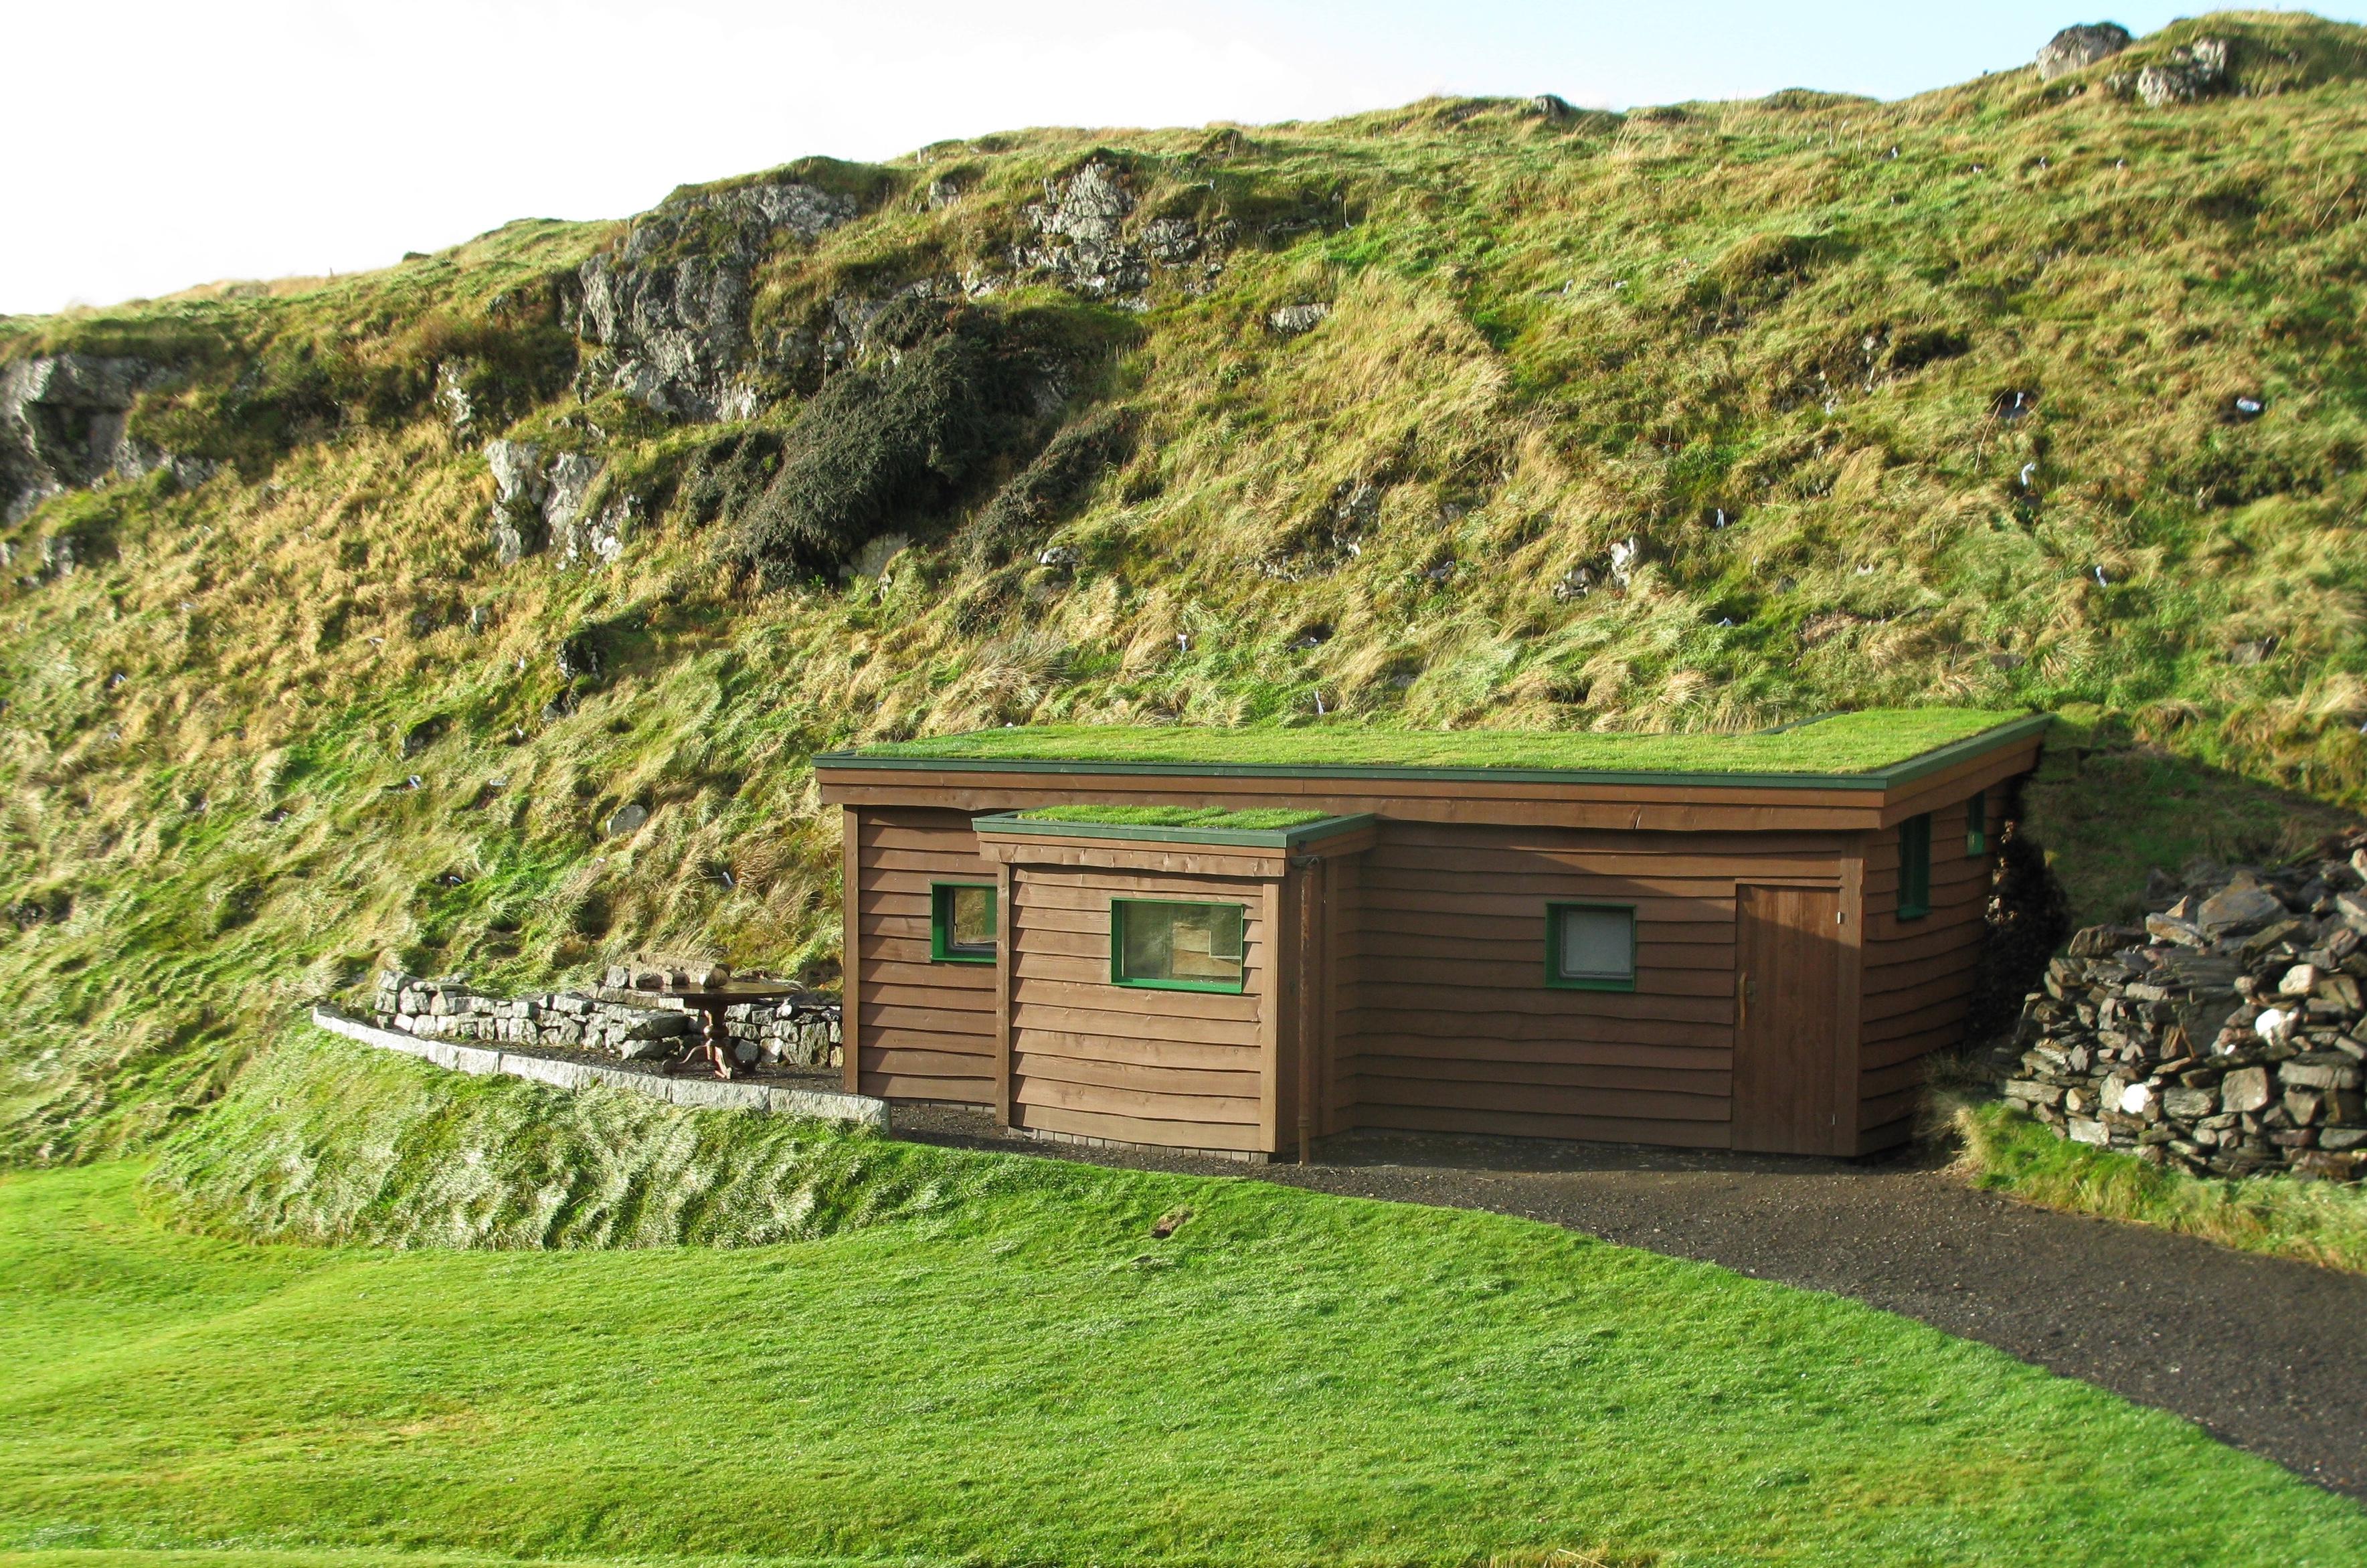
I turfed my cabin roof, the build up was. Vented void sarking boards underlay heavy gauge plastic x2 layer pond liner x 1 layer old wool carpet Ground fabric 25mm pea gravel for drainage and polystyrene to reduce weight More ground fabric 70mm turf this was a total diy job and done as a bit of fun. It works great and yes it dies back in drought but regrows within weeks. Stops the sound of rain and helps to keep temperatures stable. Heath Robinson but works great and people love the look.
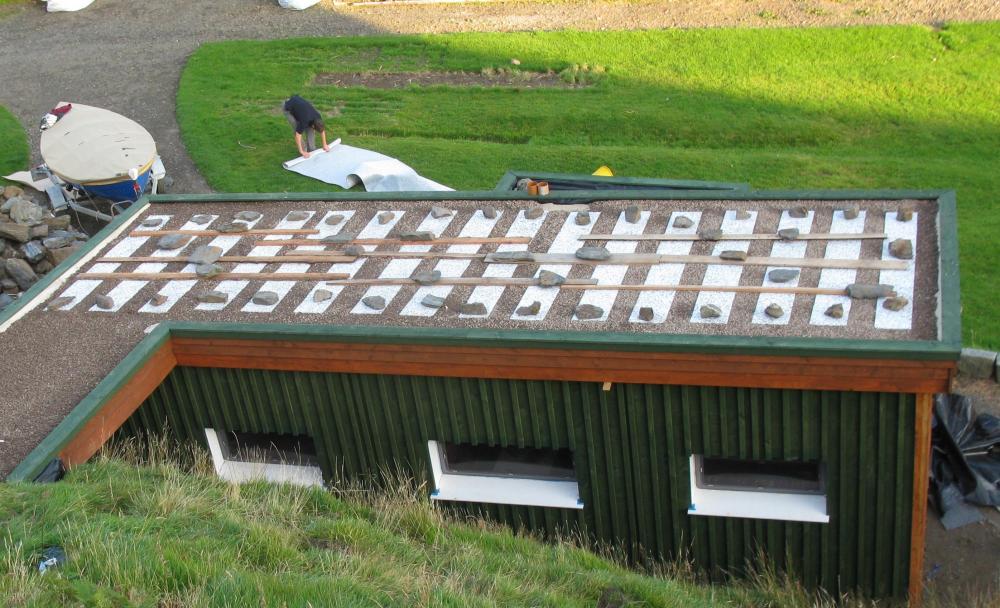
 1 point
 -
Getting remarkably housey. I've got to say, I'm astounded by the quality of the timber used throughout, it's all so much smoother and cleaner than I'm used to seeing. Awesome first week. really getting a feel for how the rooms are shaped now. Looking at the master bedroom last night Sandy couldn't help feeling that it was small. It's way bigger than what we're used to *but* felt short front to back. A bit of measuring later and we reckoned we could lose 200mm off the walk-in robe without worry, A quick word with the gaffer this morning and...Move a wall? no problem. done. just like that. I'm liking the hallway. There are a couple of large windows to insert here for a view out from the landing but for now the expanse of the sloped area looks great. I'd originally wanted Velux Integra Solars but as the TF co is just down the road from Keylite and they've now a Solar electric variant of their Polar UPVC windows we made a change.
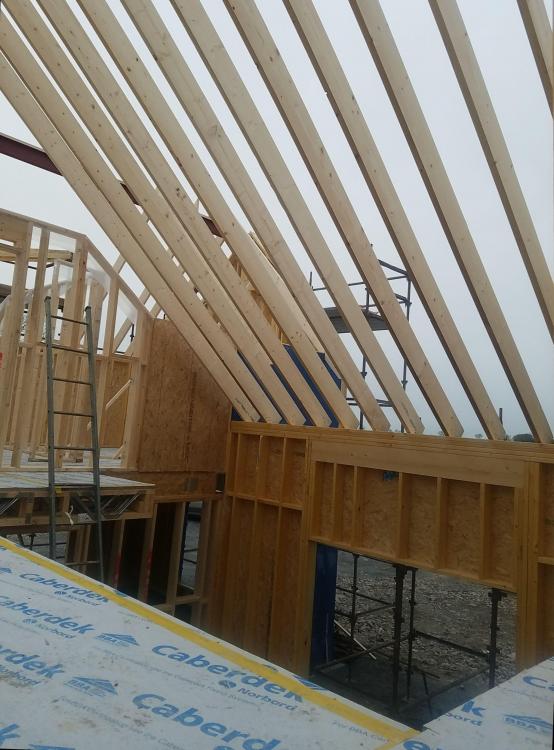
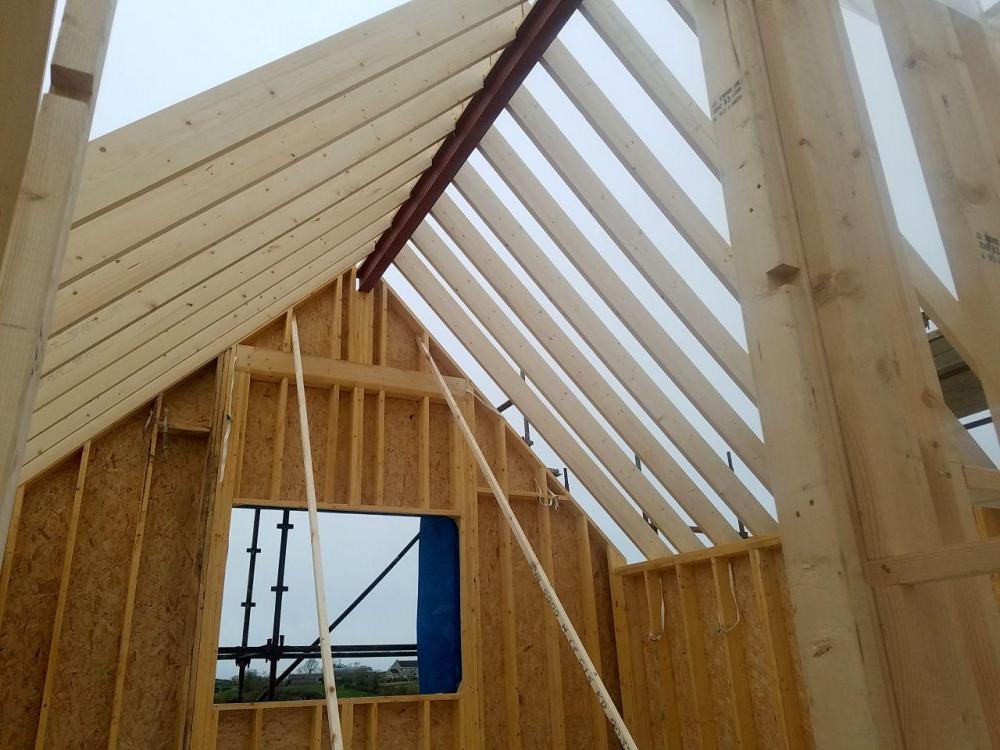 1 point
 -
wtf is this post about!!!1 point
-
There is a product called Liquid Weather, that I know nothing about but the name. http://www.liquidweather.co.uk/liquid-weather-for-paving-paths-patios-and-driveways/ Or could you try something natural to stain it and encourage lichen etc?1 point
-
Every self build seems to go through a low, not just those on Grand Designs. For us it was 18 months in, with a part built shell when the realisation hit us that the old house was not about to sell any time soon, and we were faced with a build we could not afford to finish. Once you get past the low point, accept things are not as you would want them, but they are where they are, you have to re group and re plan. We are now on course to finish the new house without the sale of the old one. It has taken longer than planned and I have done more of the work myself than originally planned, but one has to find a way to adapt and move forwards. Just talking to others and venting your problems helps a great deal.1 point
-
With pleasure ?
 1 point
 -
I have mine mounted vertically across my UFH manifolds. By the time that we are down to a sustained external temp of 0°C we need about 8hrs a day to keep our largish 4 bedroom house toastie. (Each deg C drop adds about 40 mins on-time to keep the house in balance). I will be fitting an ASHP next summer because the numbers work and it will be good for peak summer cooling, but the Willis will remain an essential backup component. Why? Because the ASHP won't be a mission critical component in our heating system, so I can take a far more relaxed attitude to maintenance / spairs, etc. At the moment, my Node RED system does a daily calc using the weather forecast, slab temperature profile, etc. to work out the heating profile for the next day - typically a solid block overnight during cheap rate and and extra top-up late afternoon if the weather gets cold. No other feedback. Dear simple. Good enough to keep the house temp better than ±½°C which is good enough for me.1 point
-
Blimey another month on there is a real sense we are getting there. So much so, we have given notice on our rental. We move in on Friday 30th November regardless! The main emphasis this month has been installing the treatment plant and drainage system. The treatment plant was initially installed, somewhat optimistically, without any anchors only for it to pop back out of the ground within 24hrs, despite being filled with water and the pit filled with pea shingle. Needless to say the second time round, it was anchored down and the pit filled with a lot more concrete than the first time. SEPA – [Scotland] had requested a soak away to be installed along with a 20 metre drainage channel 1.2 metre wide, before connecting to a field drain that eventually discharges into a nearby water course. I then had to register my plant with SEPA at a cost of £137. The local Building Controller arrived on site to test the drains and within 20 minutes or so, both the foul and rainwater systems were passed. As soon as they had been given the all clear, the landscaper and his team set about back filling the trenches and levelling the site ready for a Hammer Head driveway, boundary hedging and turf across the remaining plot. Landscaping can be one of those often forgotten costs and to assist others here are my quantities and material prices. I haven't included the cost of the turf as it is still uncertain as to whether or not it will be laid this year or next. That decision will be taken during the week. Patio mix slabs & single slabs 2265 Setts 540 MOT 3 x 28 tonnes 448 Sand x 6 tonnes 195 Cement x 40 bags 150 Membrane - 60 metres 150 20mm whin stone x 26 tonnes 650 Internally, progress has been frustratingly slow. I had a check of my records and found that the joiner / tiler had only been on site for 11 of the possible past 30 work days!! That said, we now seem to have a momentum building and the floor tiles have started to be laid. This in turn will allow the kitchen units to be fitted this coming week. The electrician will have completed the second fix installation by the end of this coming week and the plumber is booked in for the following week to complete his second fix installations. Once the tiles are down, the joiner will turn his attention to cladding the dormers. So, over the next 4 weeks the following needs to happen – Internally – Floor tile to be laid, grouted and sealed. Kitchen, utility room cabinets to be installed. Fitted furniture in the master bedroom to be fitted. Electrician to complete his second fix and to wire up the pump for the treatment plant. All sanitary ware to be installed. Final bits of internal joinery to be completed. Externally – The gable end stone work to be completed. The dormers to be clad. The porch to be erected. The chimney to be finished off. The landscaping to be completed. Open Reach to connect us to the BT pole outside the plot. What can possibly go wrong ??1 point
-
+1 for the Bora hob1 point
-
He's gonna love you lol !!1 point
-
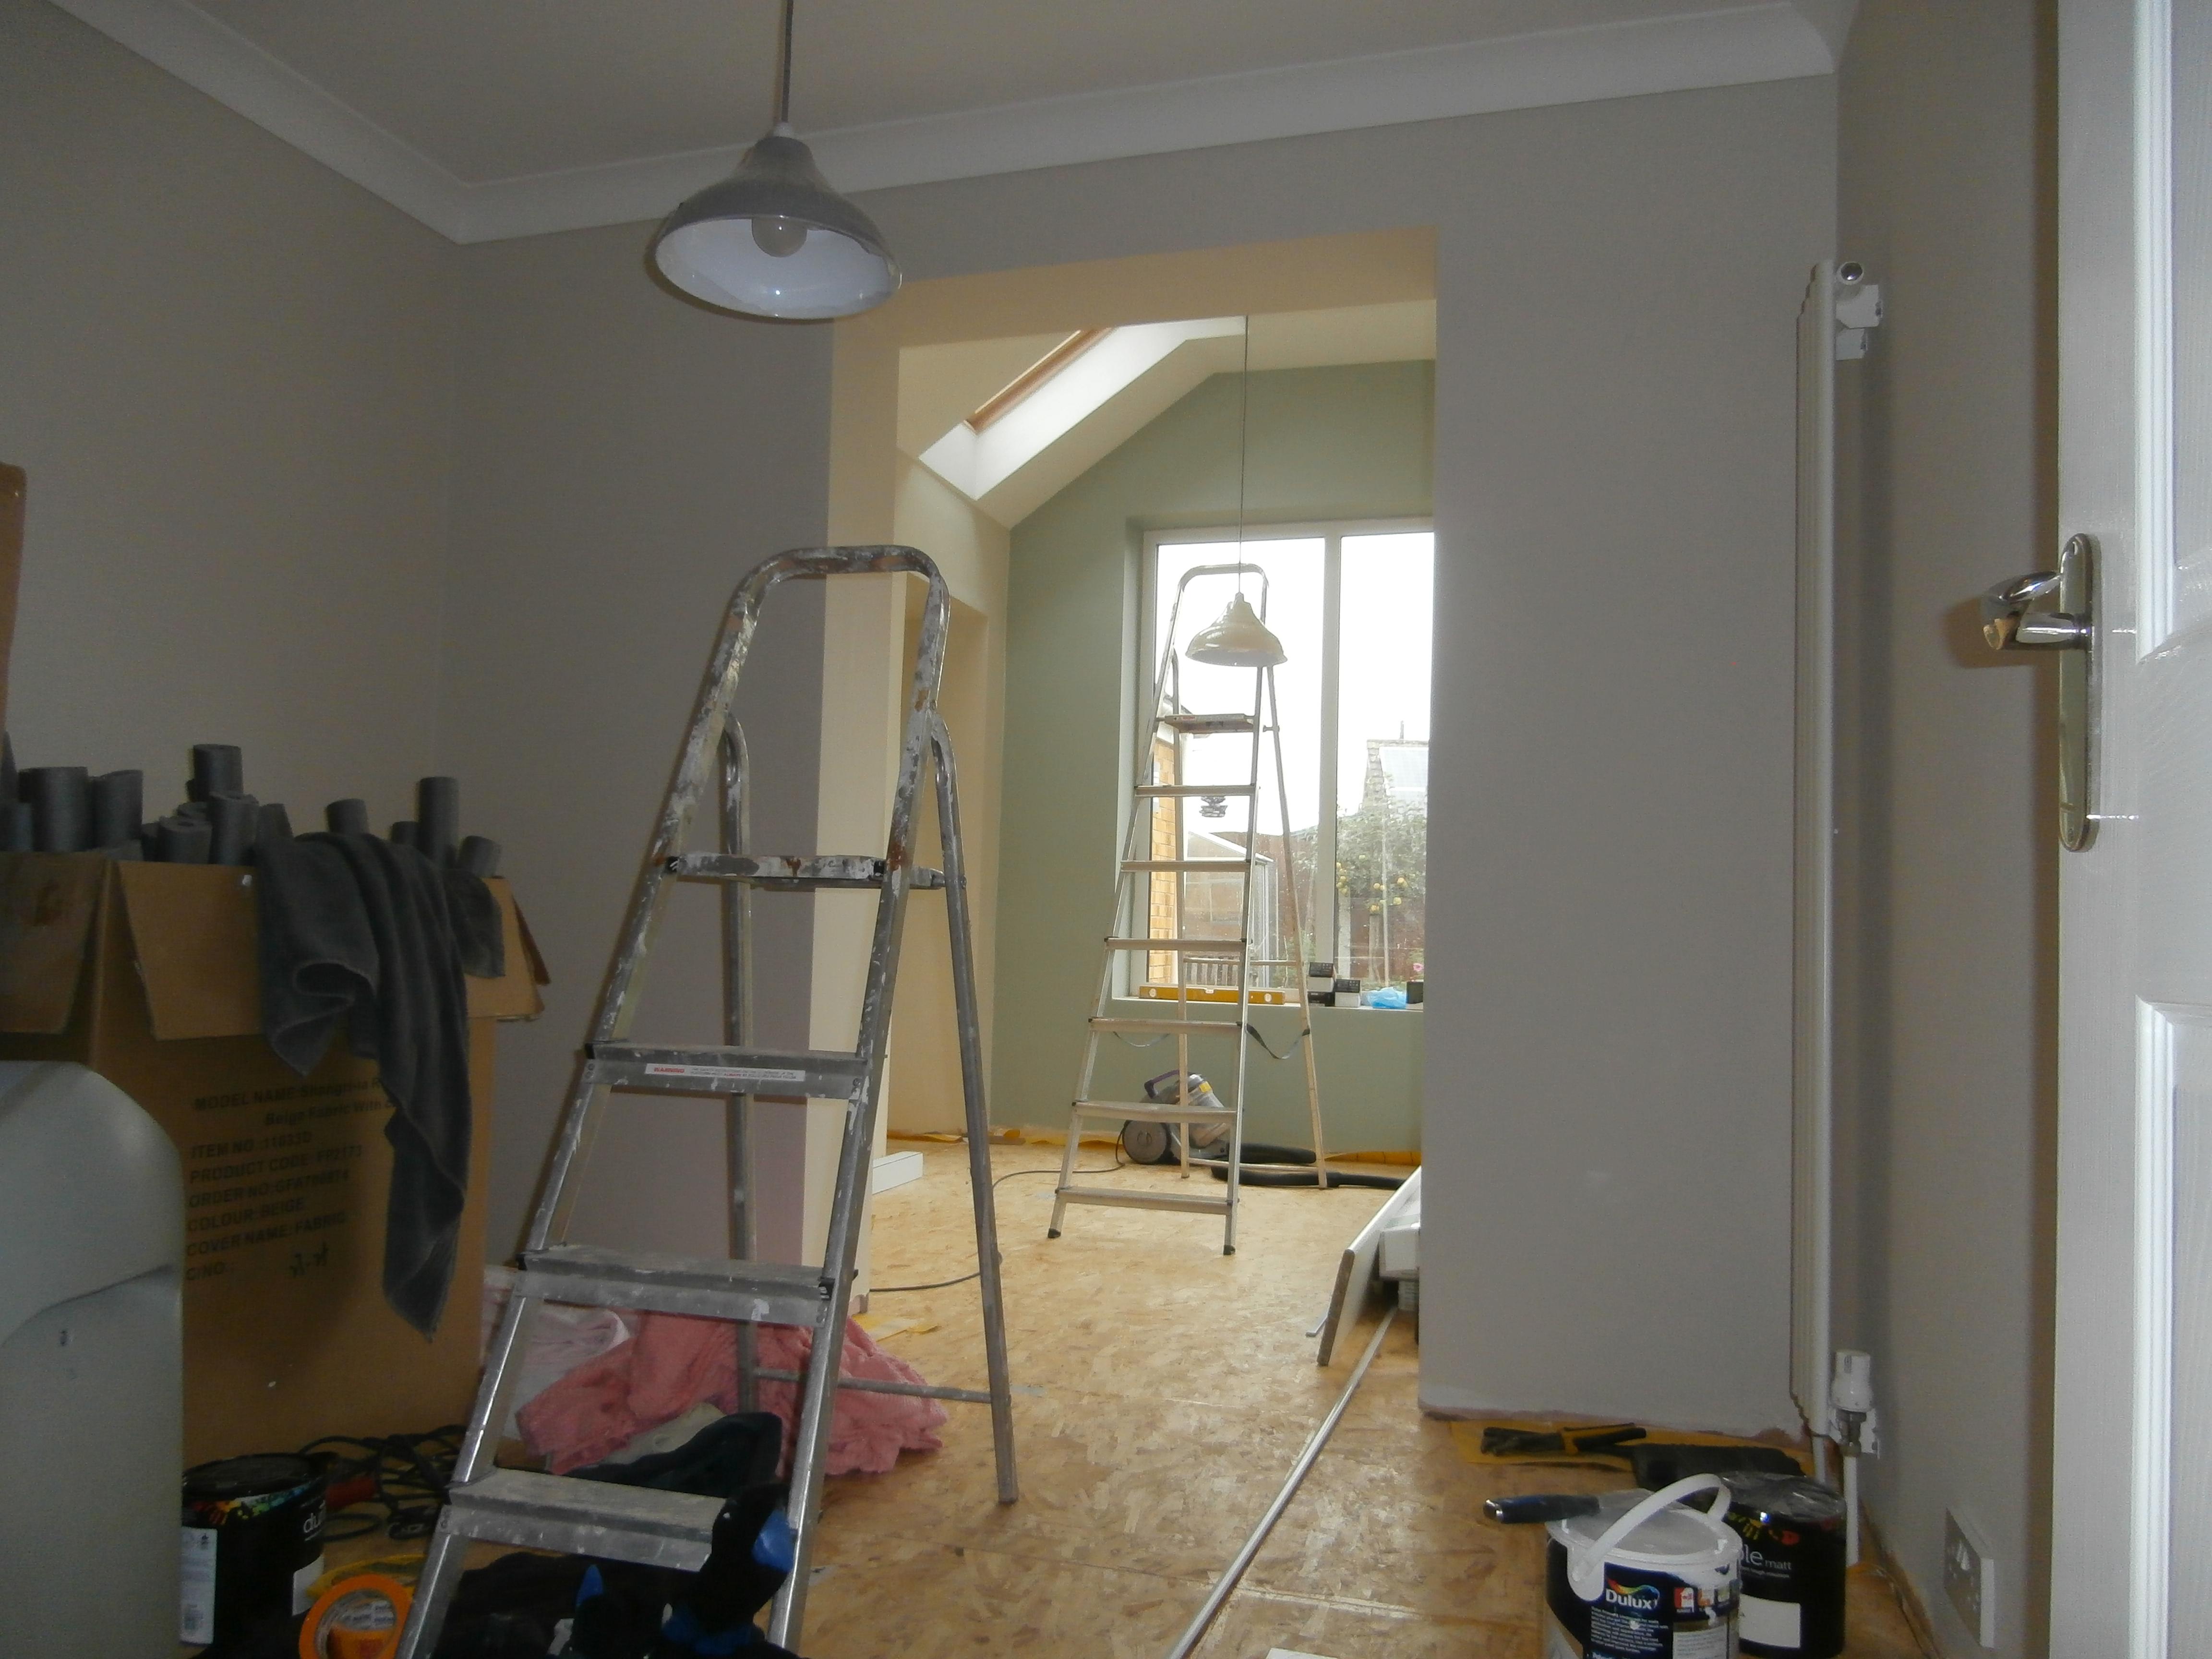
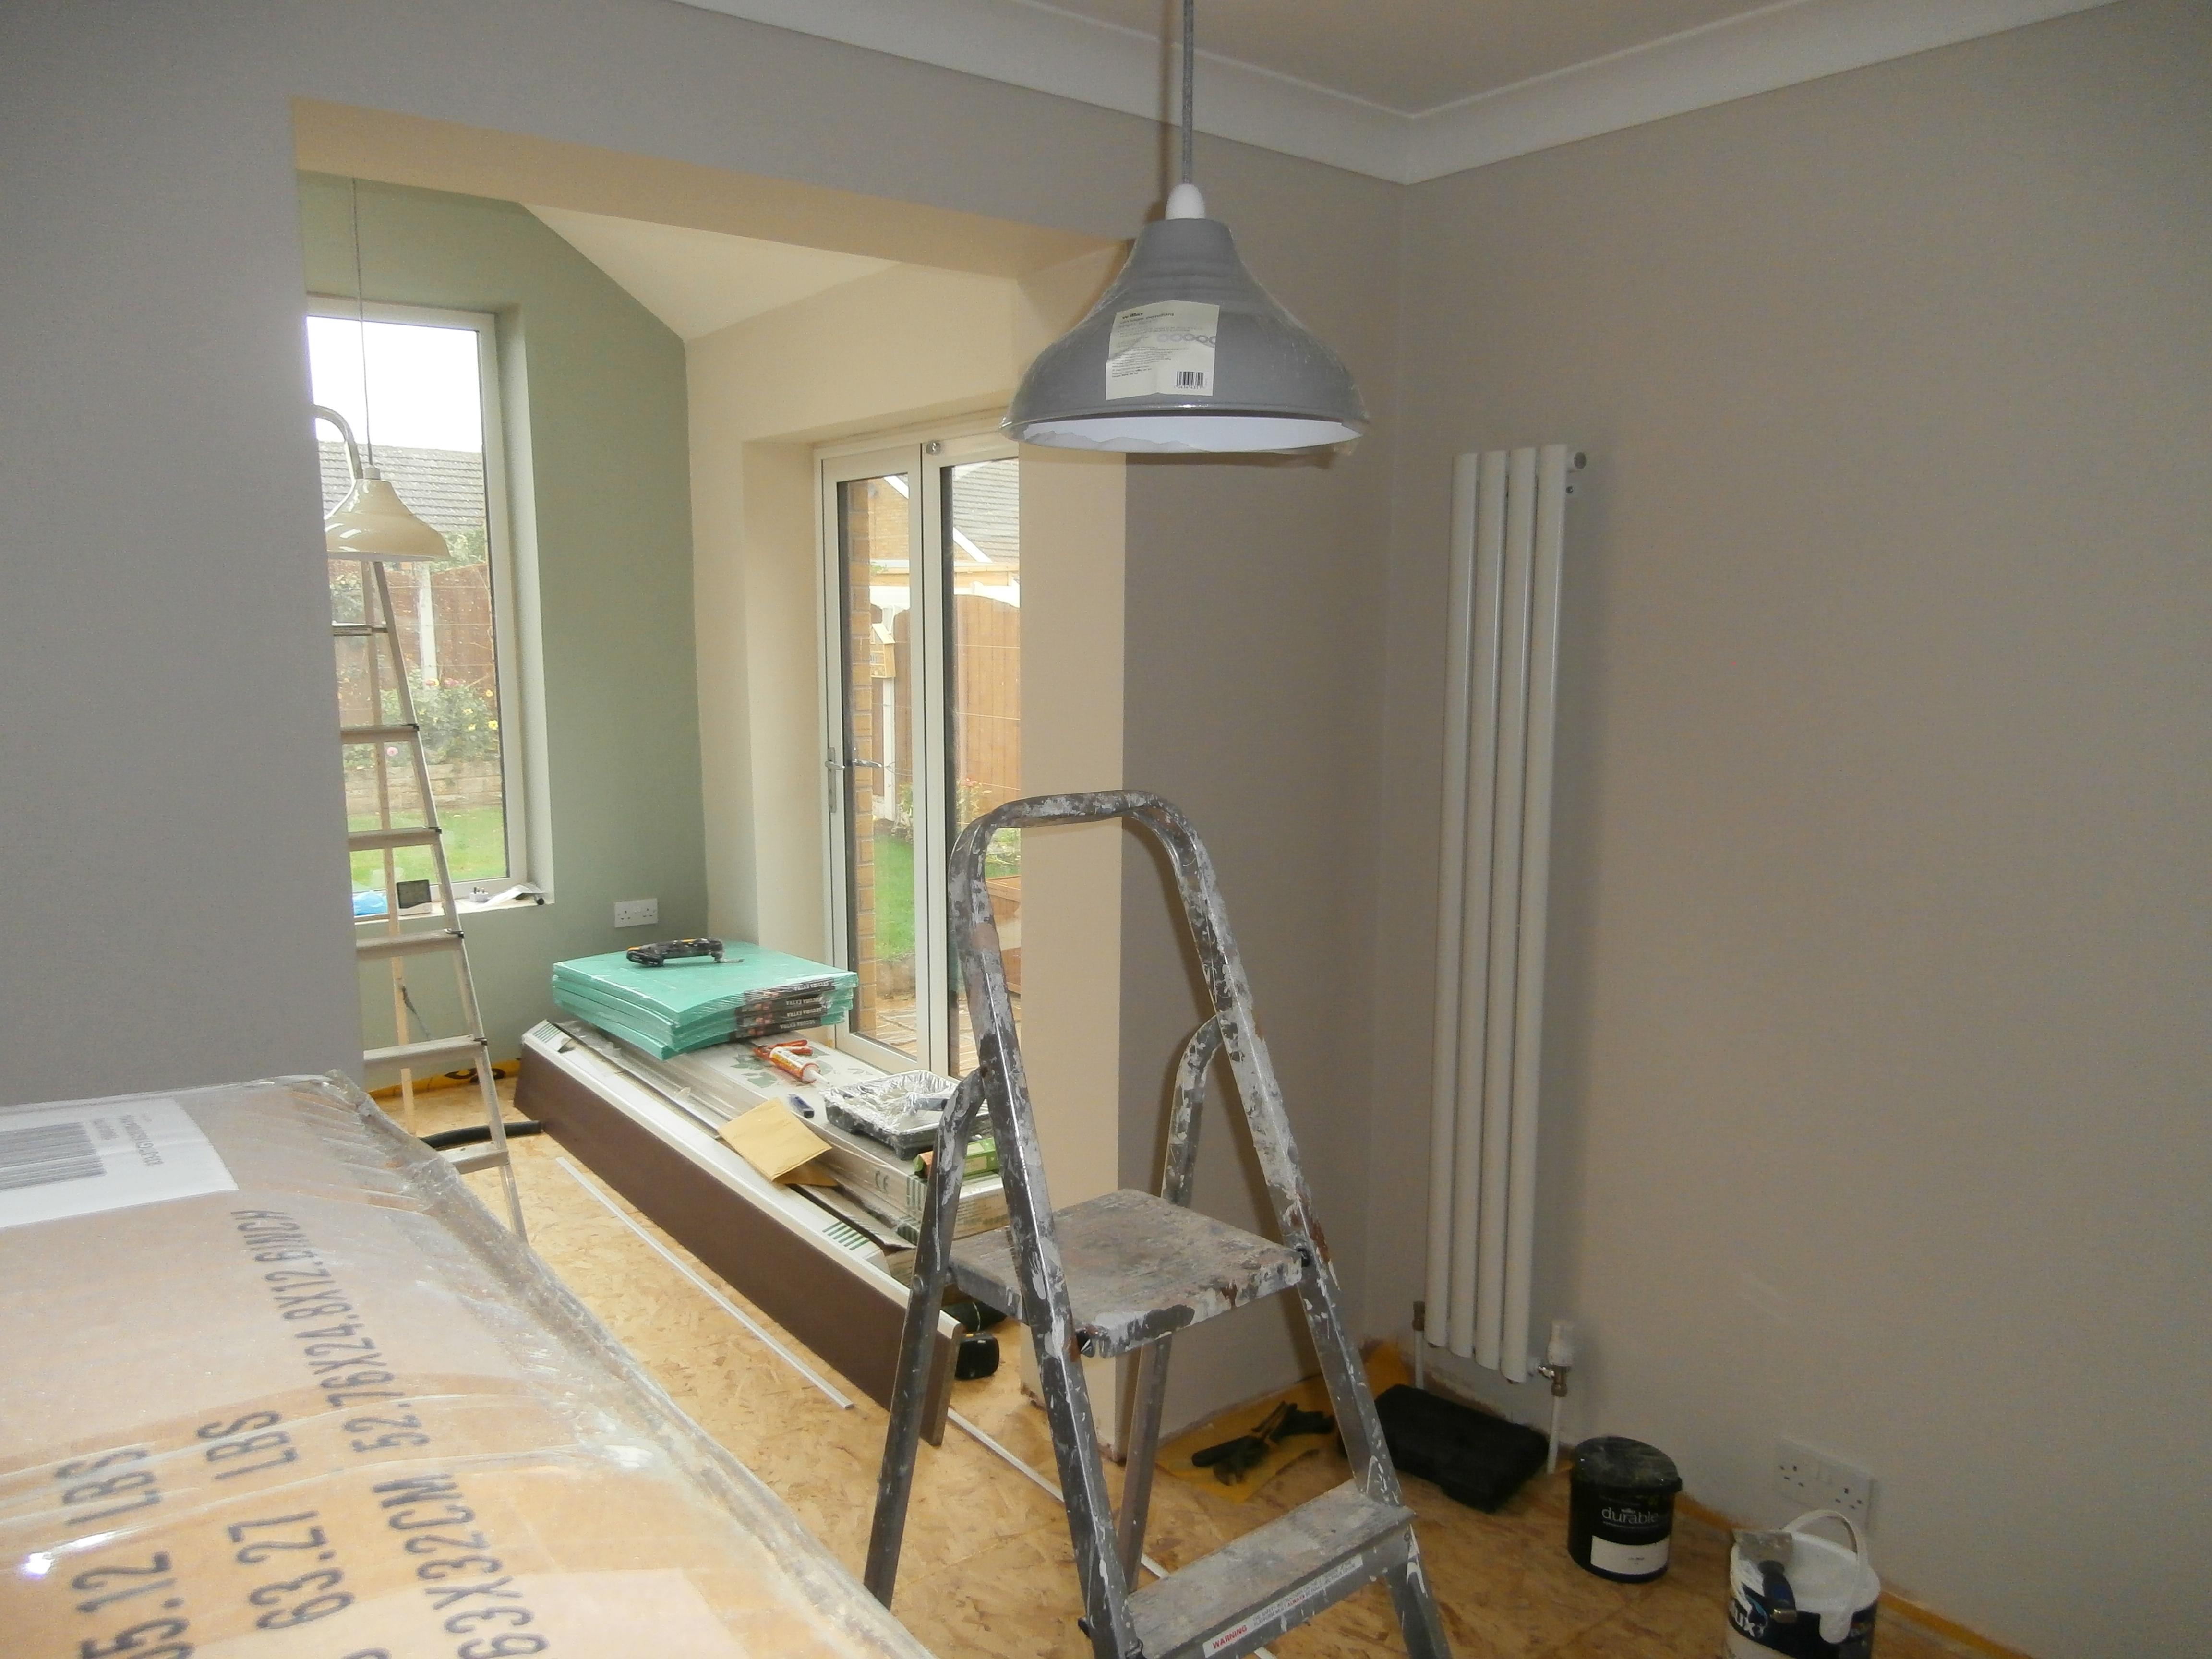
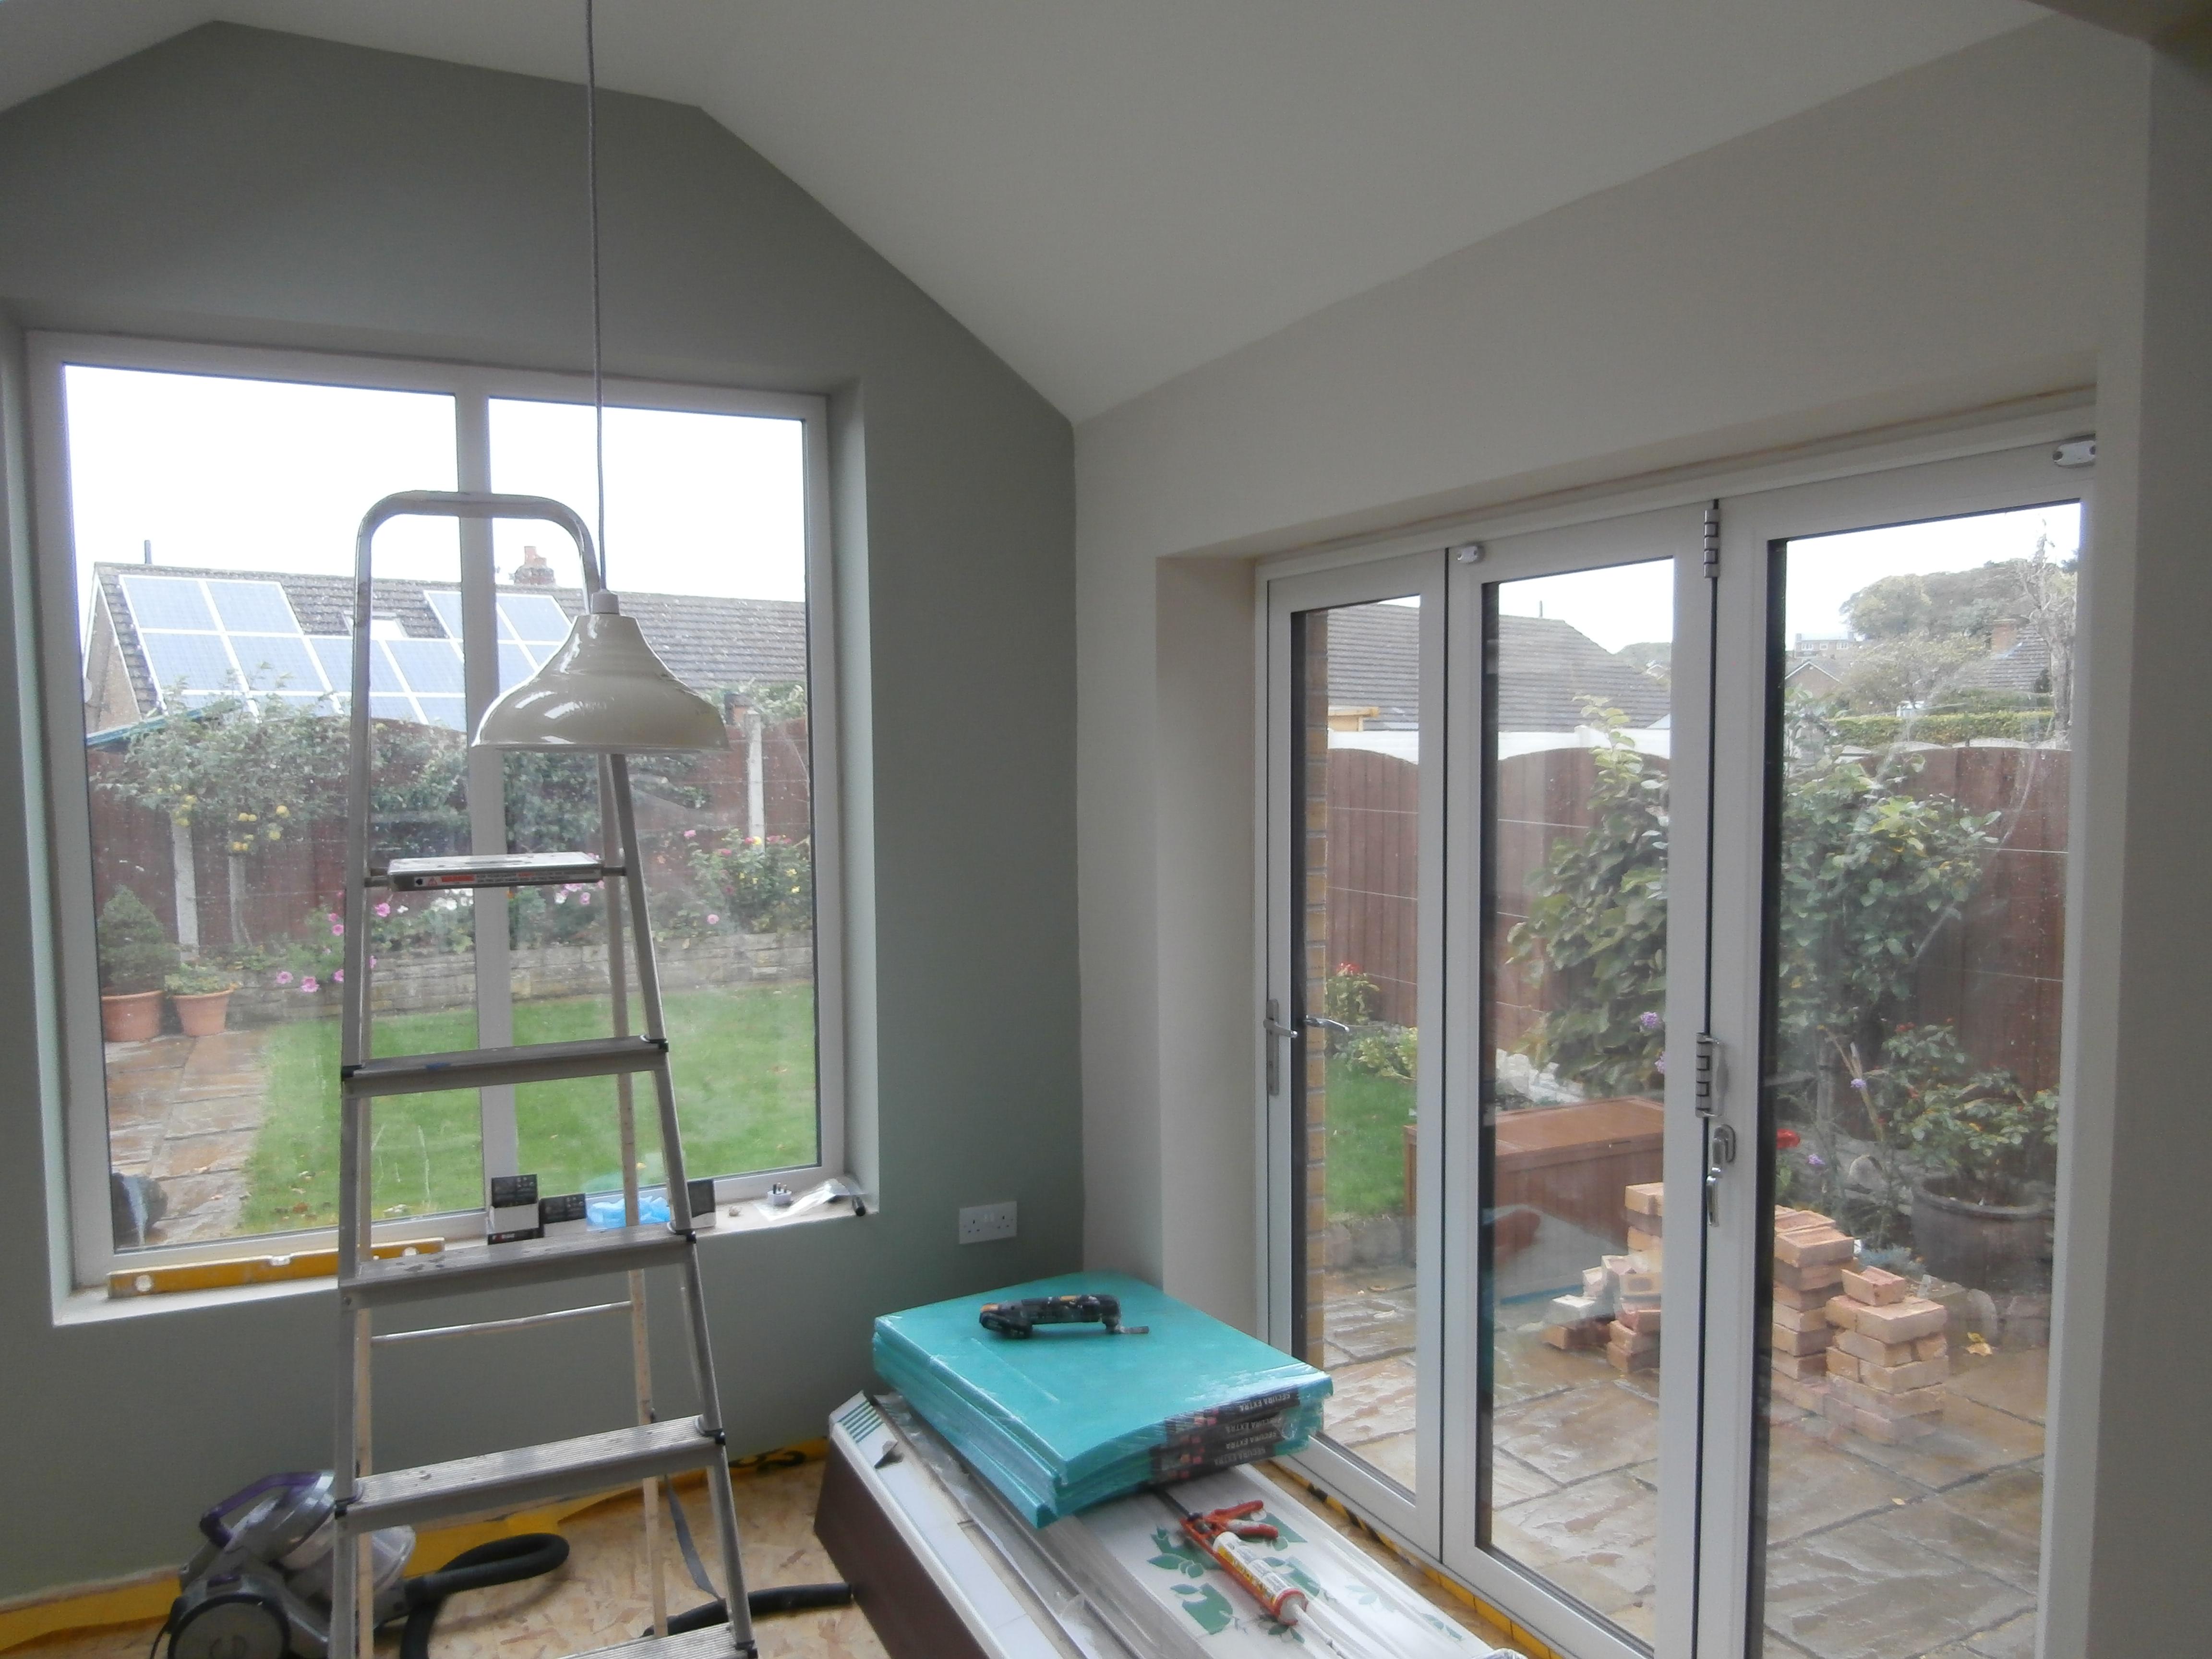
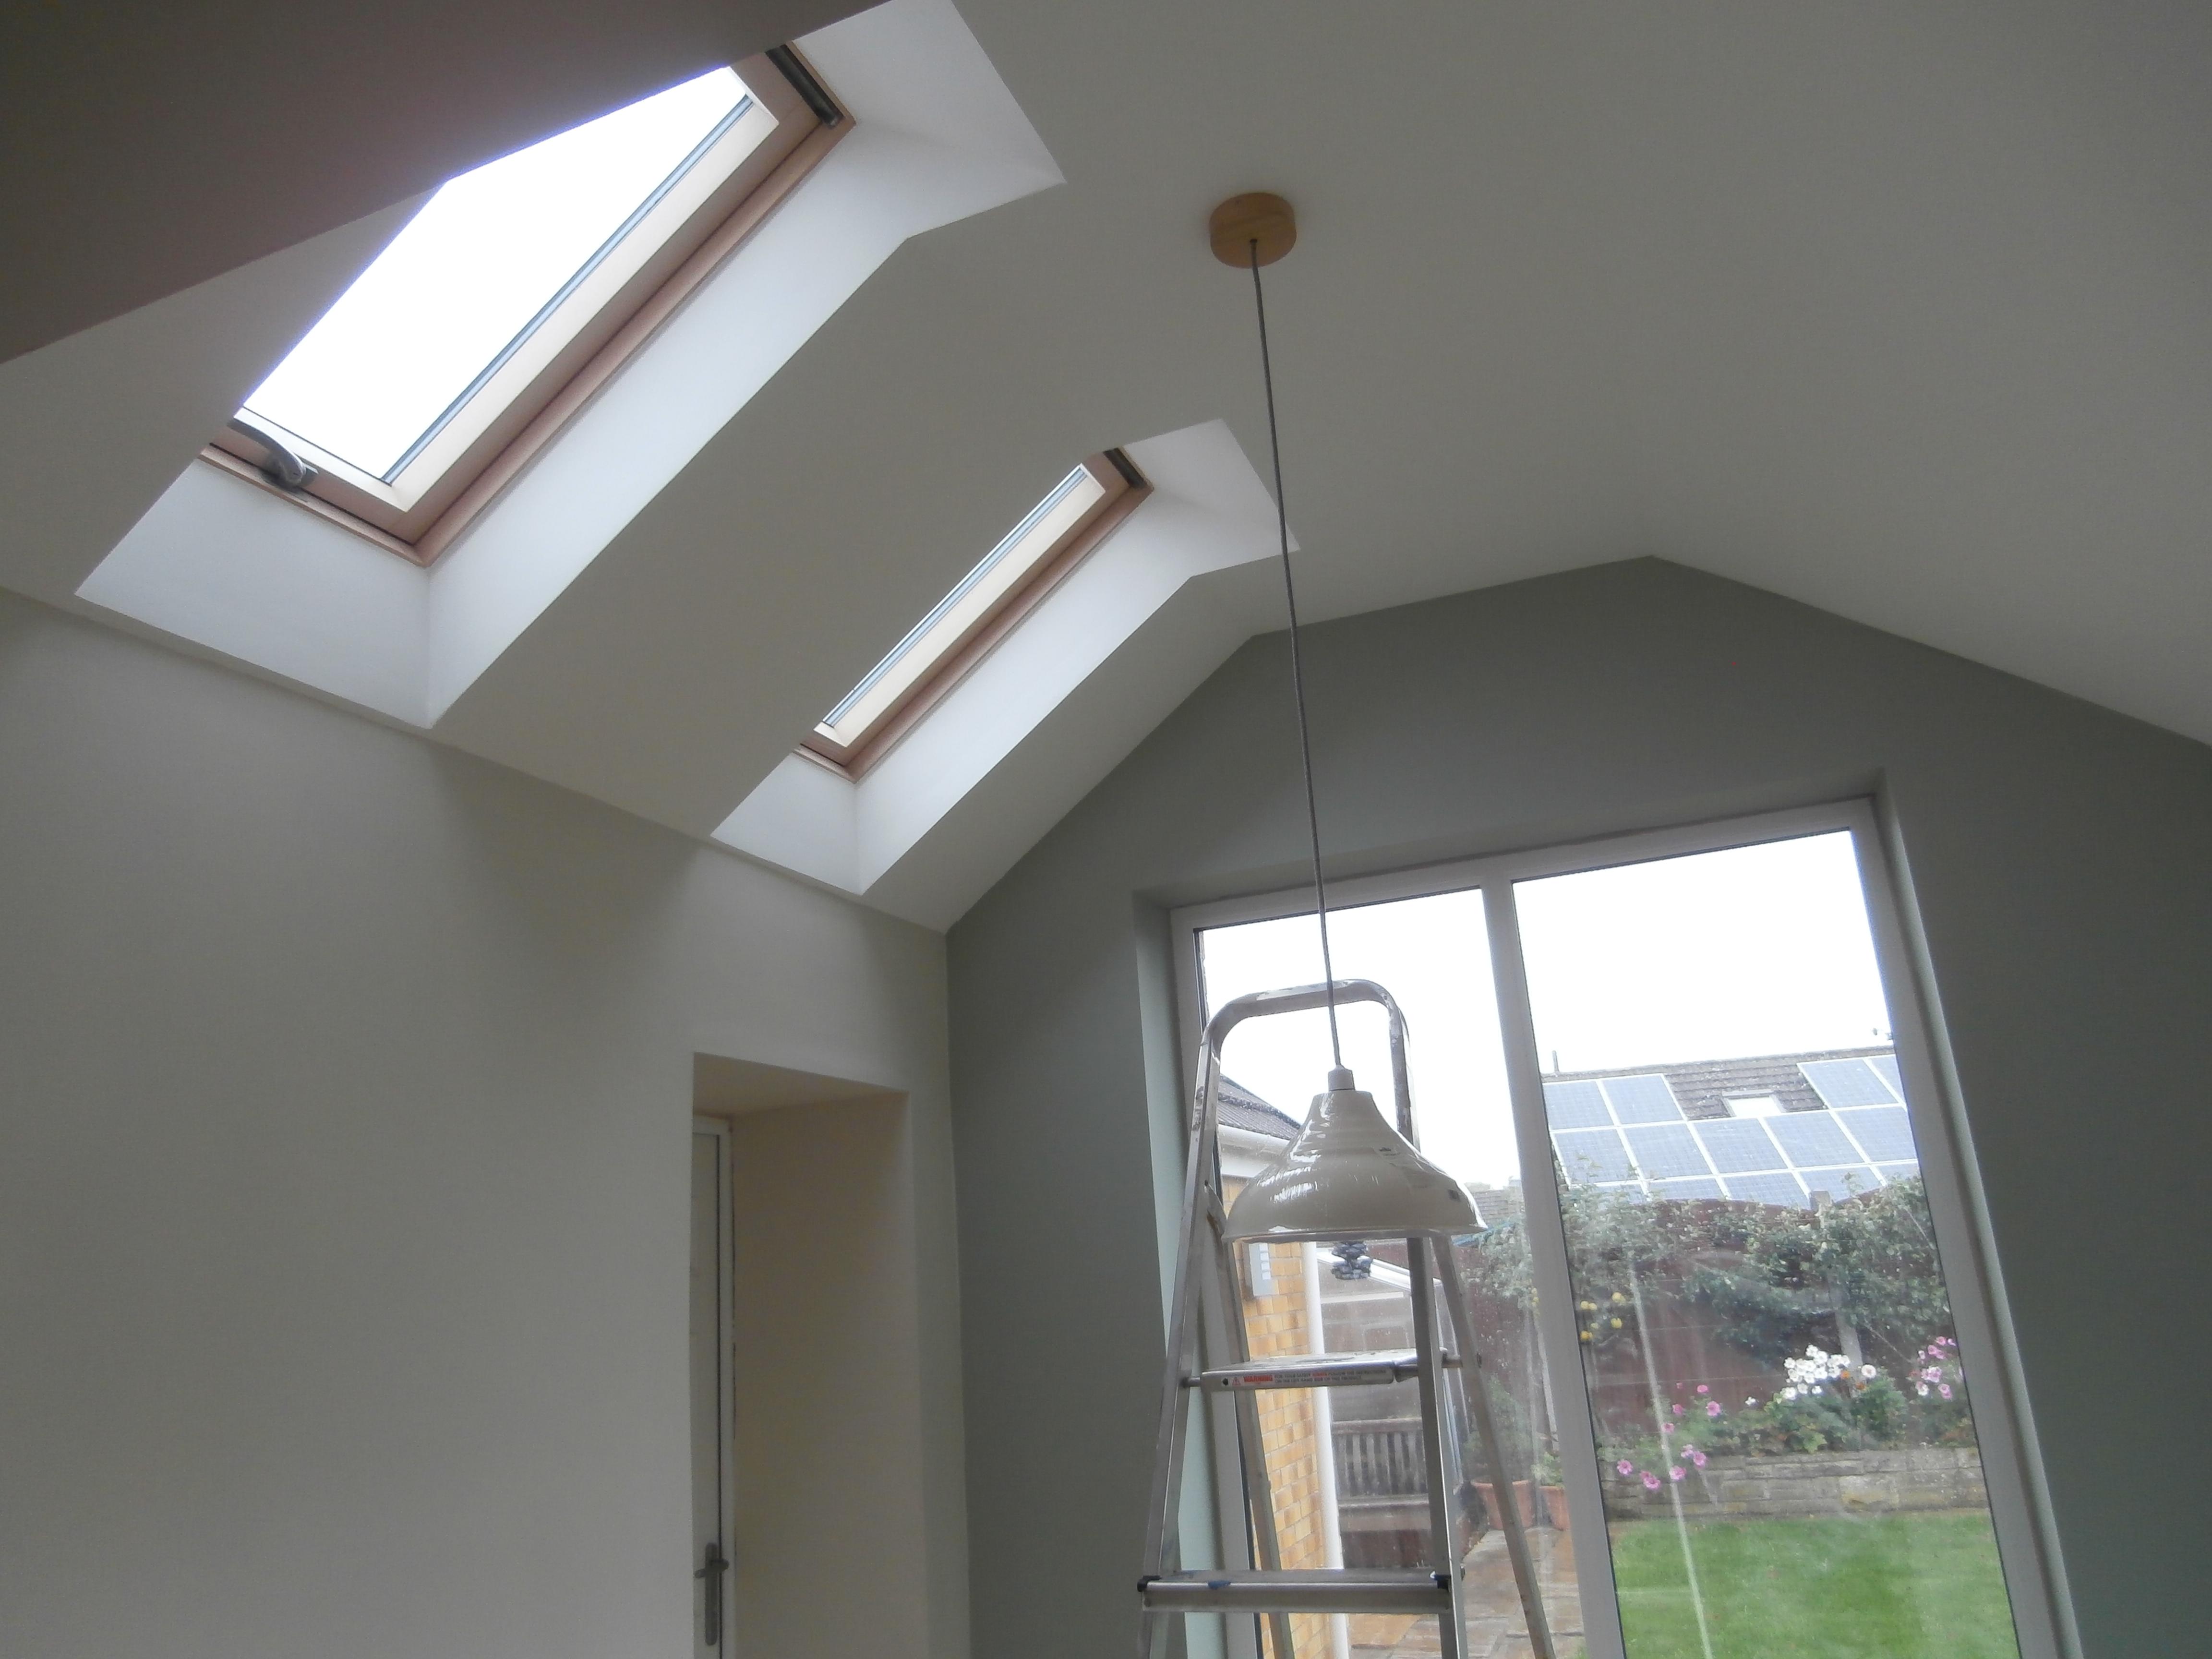
Updated photos as promised. The light fittings are lower than their final position, i've had to put the step ladders underneath them as I keep banging my head! lol Grey one is going to get put on a hook to move it nearer the radiator wall, and the other just needs shortening, i made it longer so that my wife couldn't say can you make it a bit longer, covering all bases and all. Big pile of wood flooring will hopefully be down very soon!

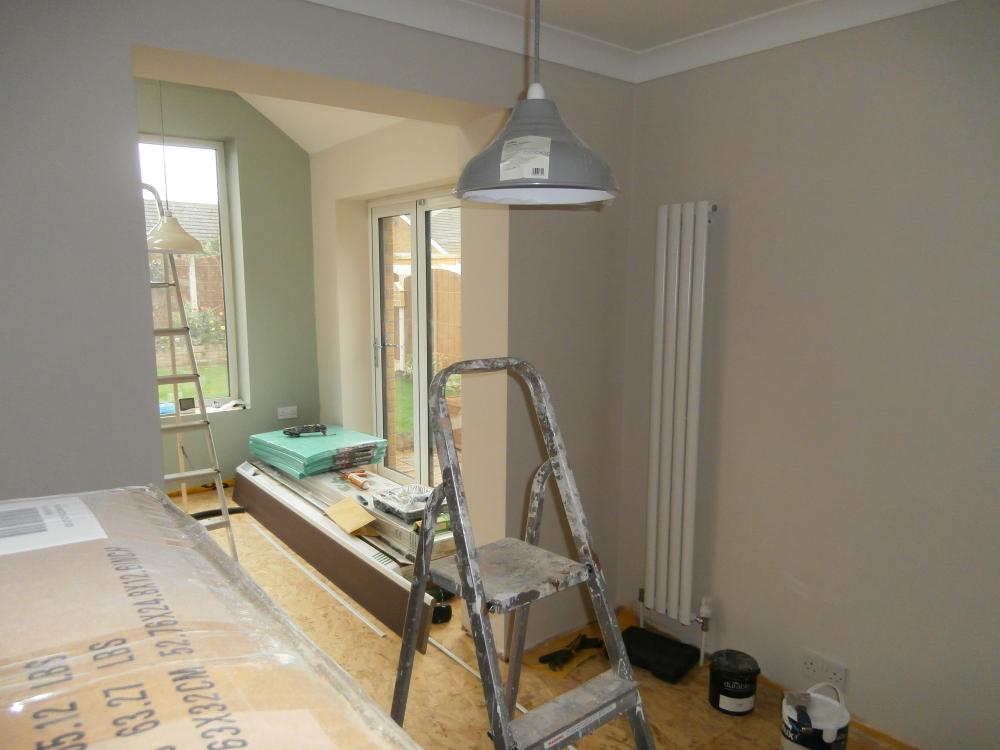


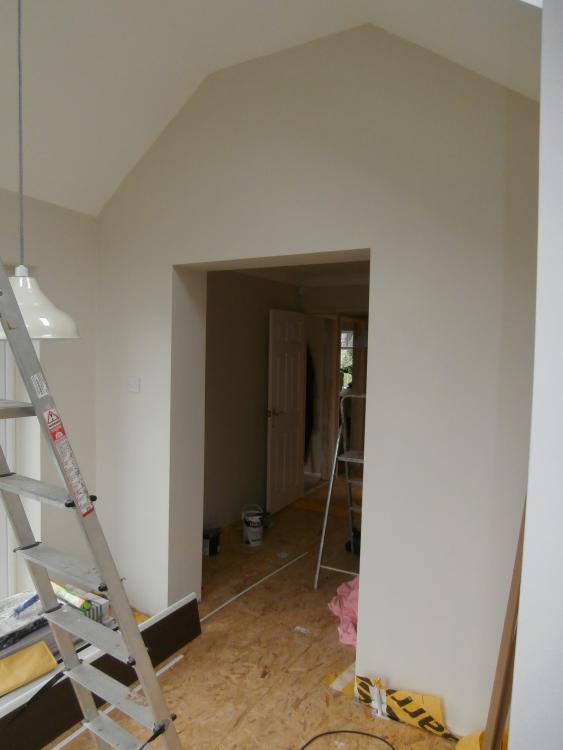
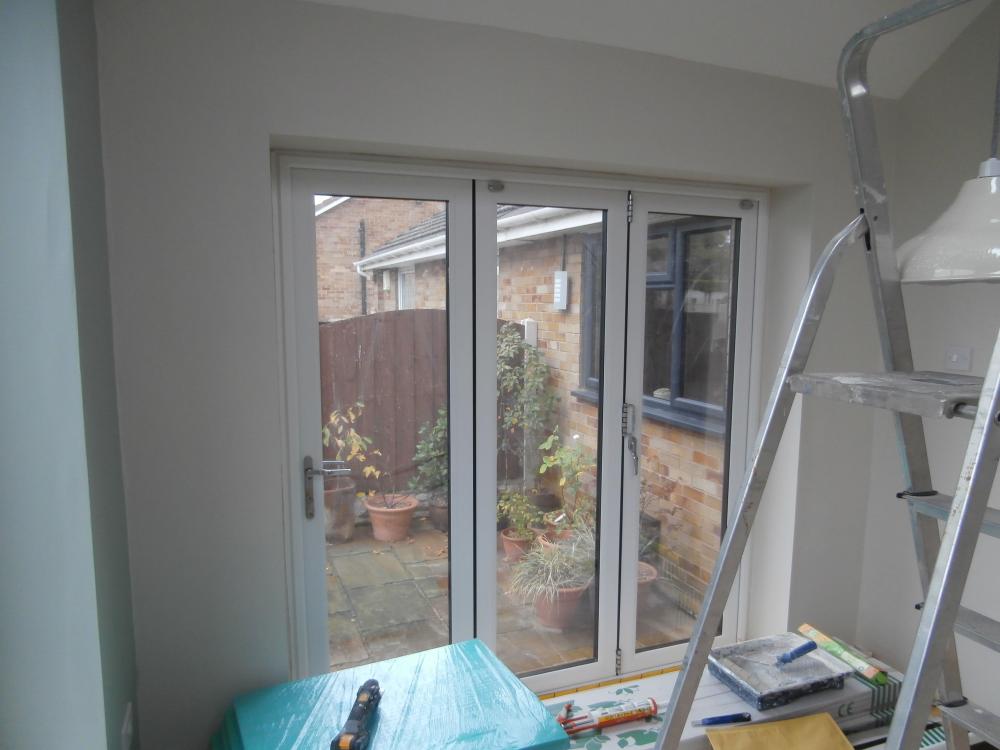 1 point
 -
Avoid the B&Q stuff, it really is dog shit. Im fitting vanity sinks and WC's in my current job purchased from there and the quality and finish is just disgraceful. How they allow stuff through quality control is beyond me. Utter shite for what they're charging for it. Looks great in those pics, just wait until you see what actually turns up.1 point
-
Hi @newhome the budget........... so many variables can be included but if I just include everything that has got me to this position thus far, stripping out all the professional fees, services and the cost of the land, we are currently at £1220 p.s.m. It does include such things as skip hire, toilet hire and electric meter cupboard, amongst other stuff!!!1 point
-
What a wonderful looking bit of work. It almost seems a shame to cover it all up. Love all the photos, as well, just so useful.1 point


.thumb.jpg.bac90f3bbf6868cf2118d010d936c99d.jpg)


This leaderboard is set to London/GMT+01:00