
Leaderboard


Popular Content
Showing content with the highest reputation on 05/12/18 in all areas
-
The ground works have moved on considerably, no doubt assisted by the fine weather we have experienced since mid April. The dwarf wall and base for the car port was always the priority as the frame itself arrives to site on Monday 14th May. The main house sub structure is almost complete – the ducting for the electricity cable and water pipes are in as are the drainage outlets. Over the next week or so the sub base will be completed. The TF is due to arrive Tuesday 29th May. You will see I have electricity going into the car port structure – this is where I will be housing the main electricity meter. Look close enough and you will see an additional piece of ducting. This will allow a return run back into the house. I have also allowed for water to be supplied to an outside tap in future. You may be able to pick out the orange temporary fencing. Installed to protect the tree as per a planning condition. However, more importantly, nesting in the long grass between the fencing and the tree is a pheasant. She is sitting on a nest of at least 10 eggs. I discovered this as I was strimming the long grass a week or so ago!! I have also attached an image of the trench in which we placed the water and electric ducting. One of the many reasons for joining this forum was to try and establish the likely costs for various elements of a self build. A s a complete novices it was important to us to try and establish such costs as we didn’t want to venture into something that was going to financially break us. So with this in mind, I am happy to disclose the cost of our ground works to the point displayed in the photos shown in this entry. Hopefully, others will appreciate it as I am keen to offer whatever information I can for the immense wealth of knowledge I have gleaned so far from this wonderful forum. Total cost so far for the ground works – Strip site and to do concrete foundations - £5500 To build to floor level - £4100 To prepare and concrete ground floor - £9000 [includes car port] Thanks for reading.7 points
-
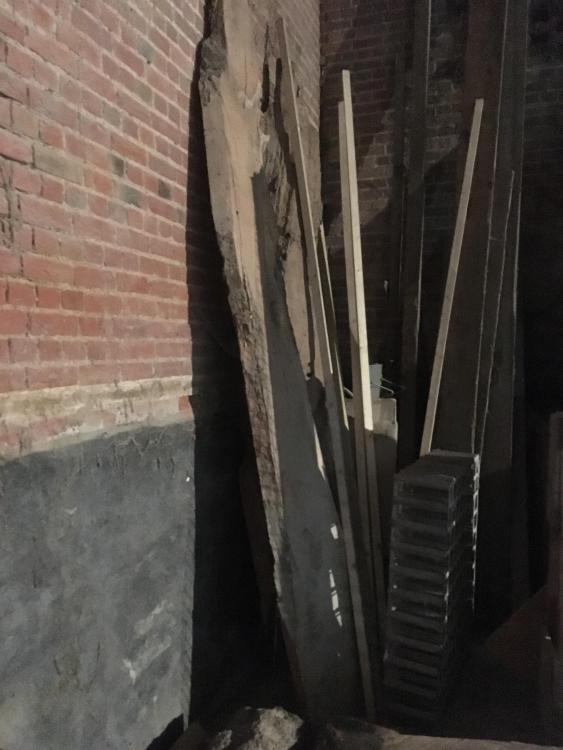
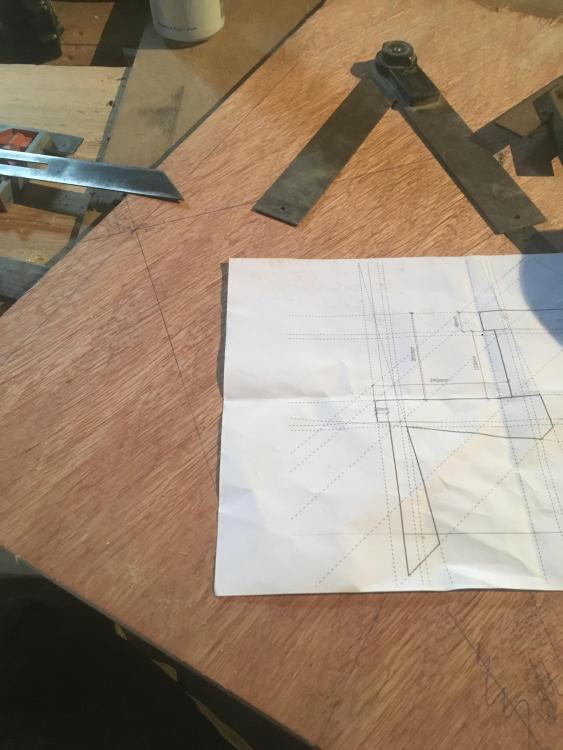
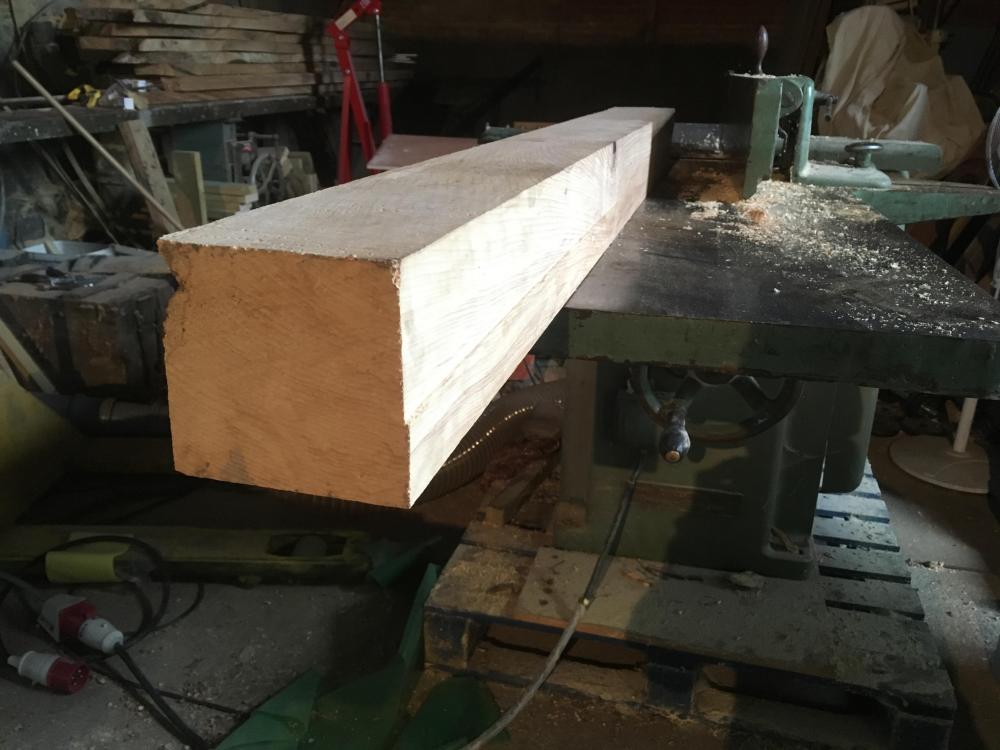
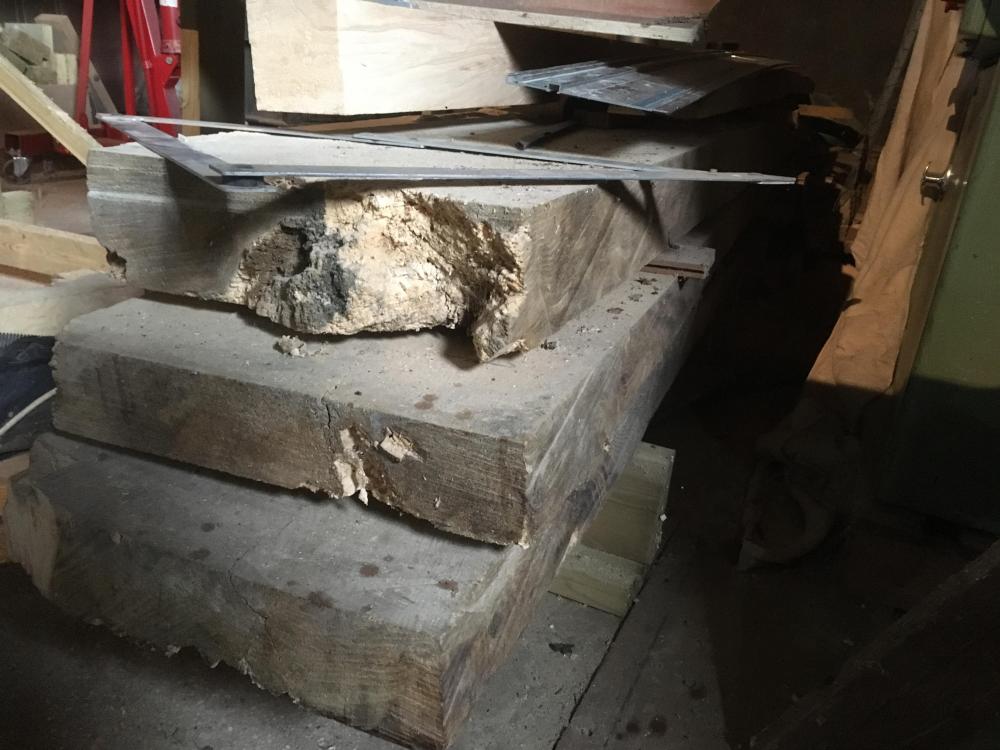
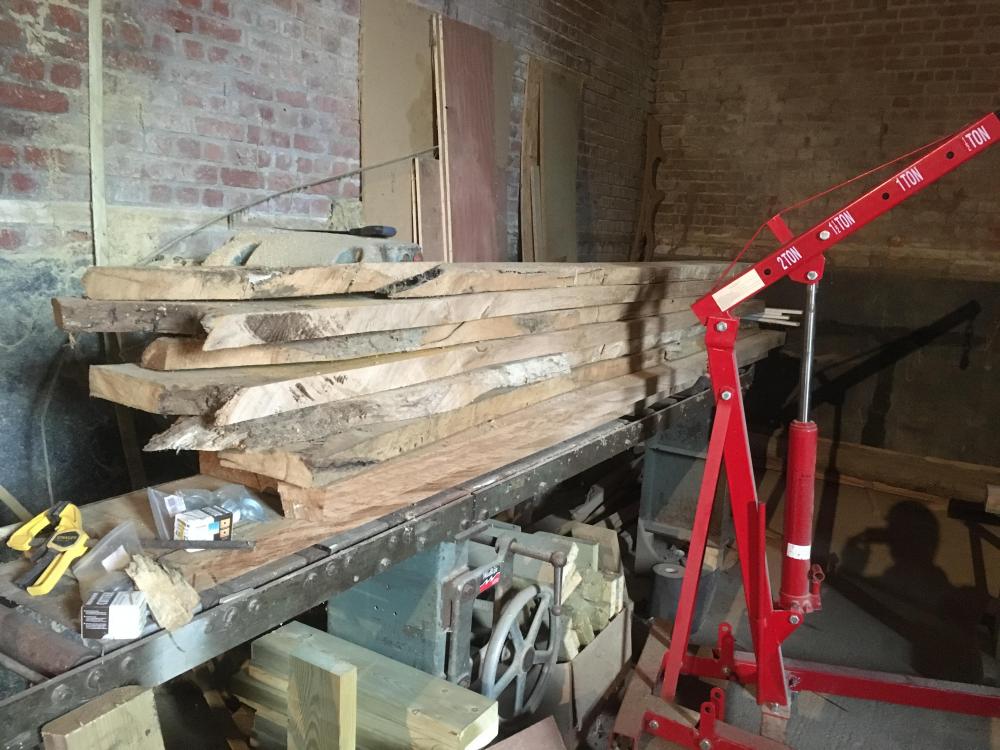
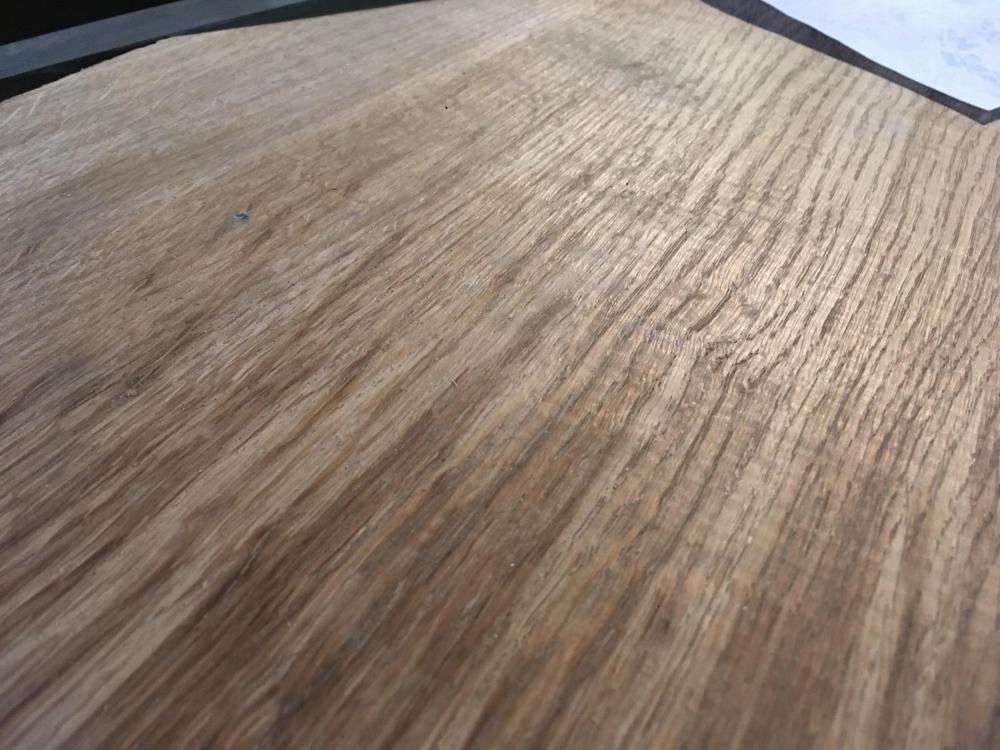
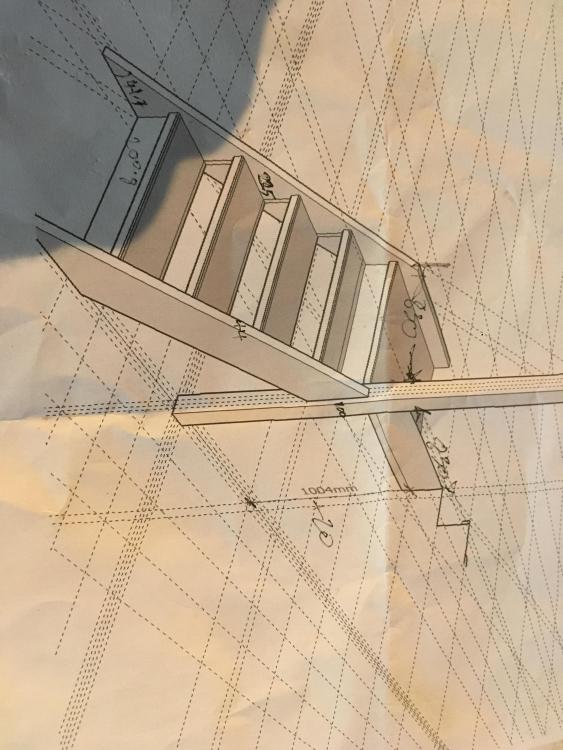
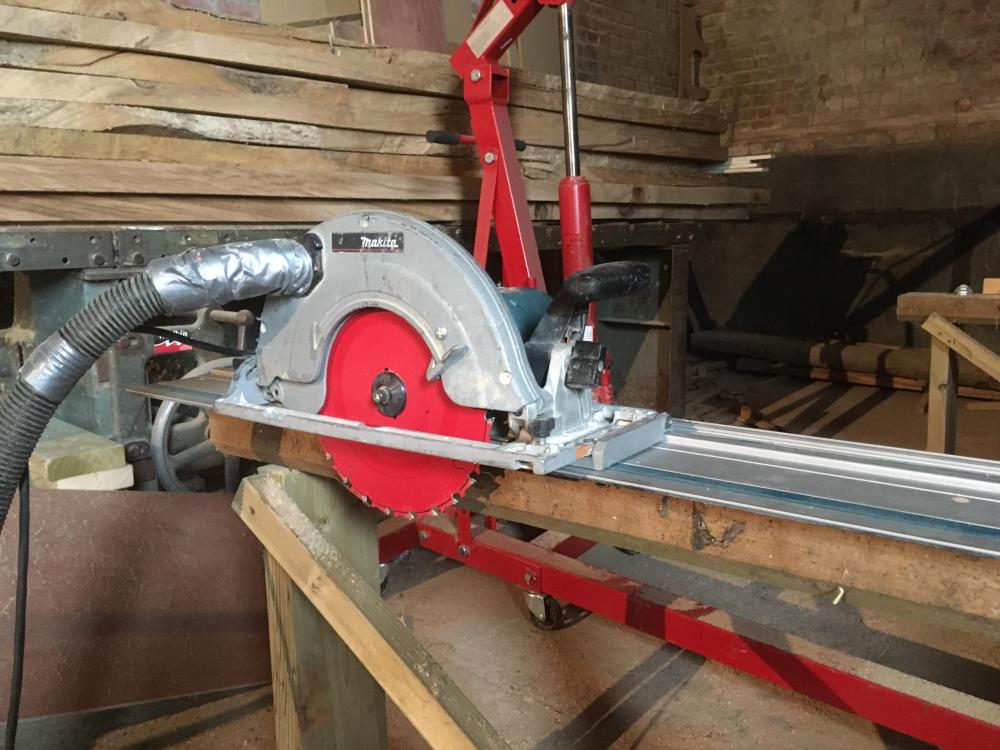
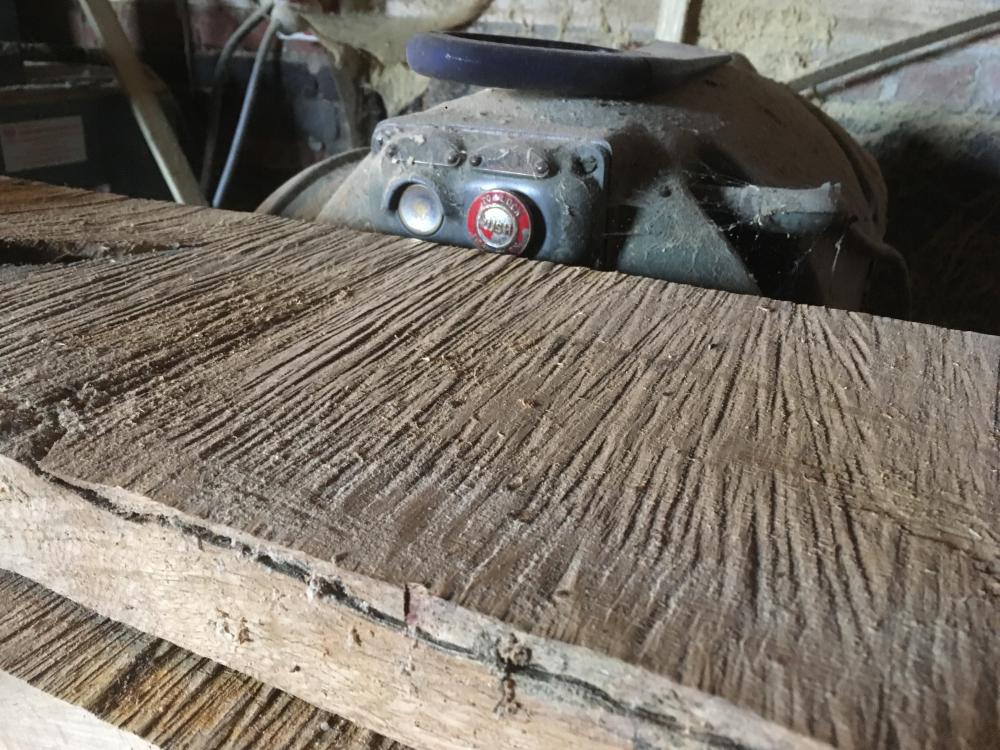
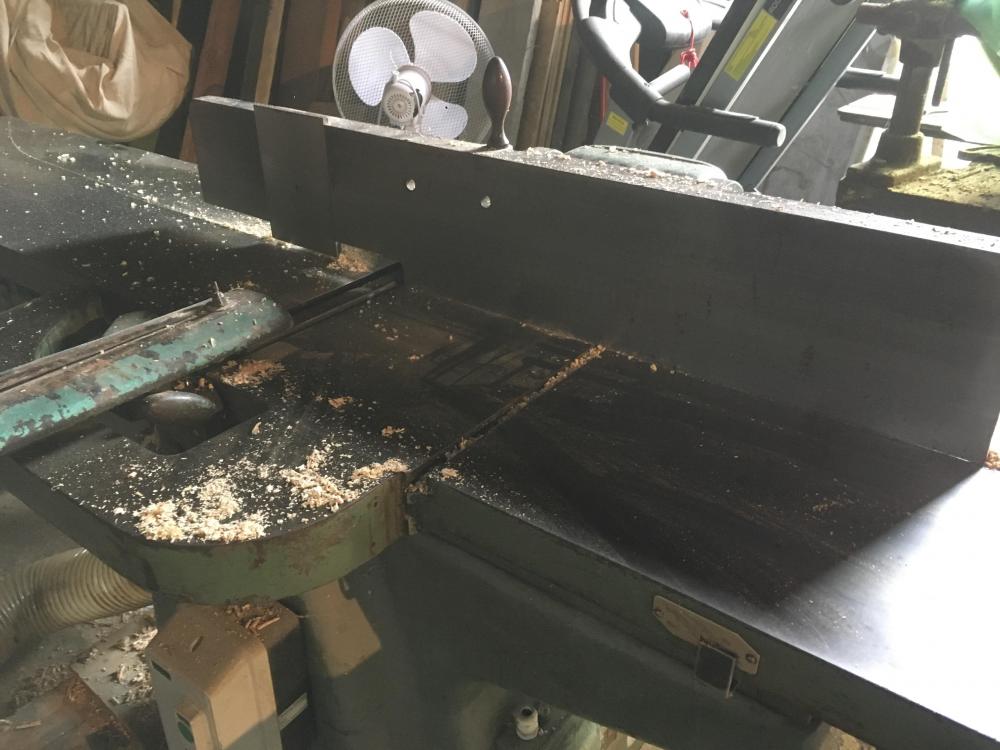
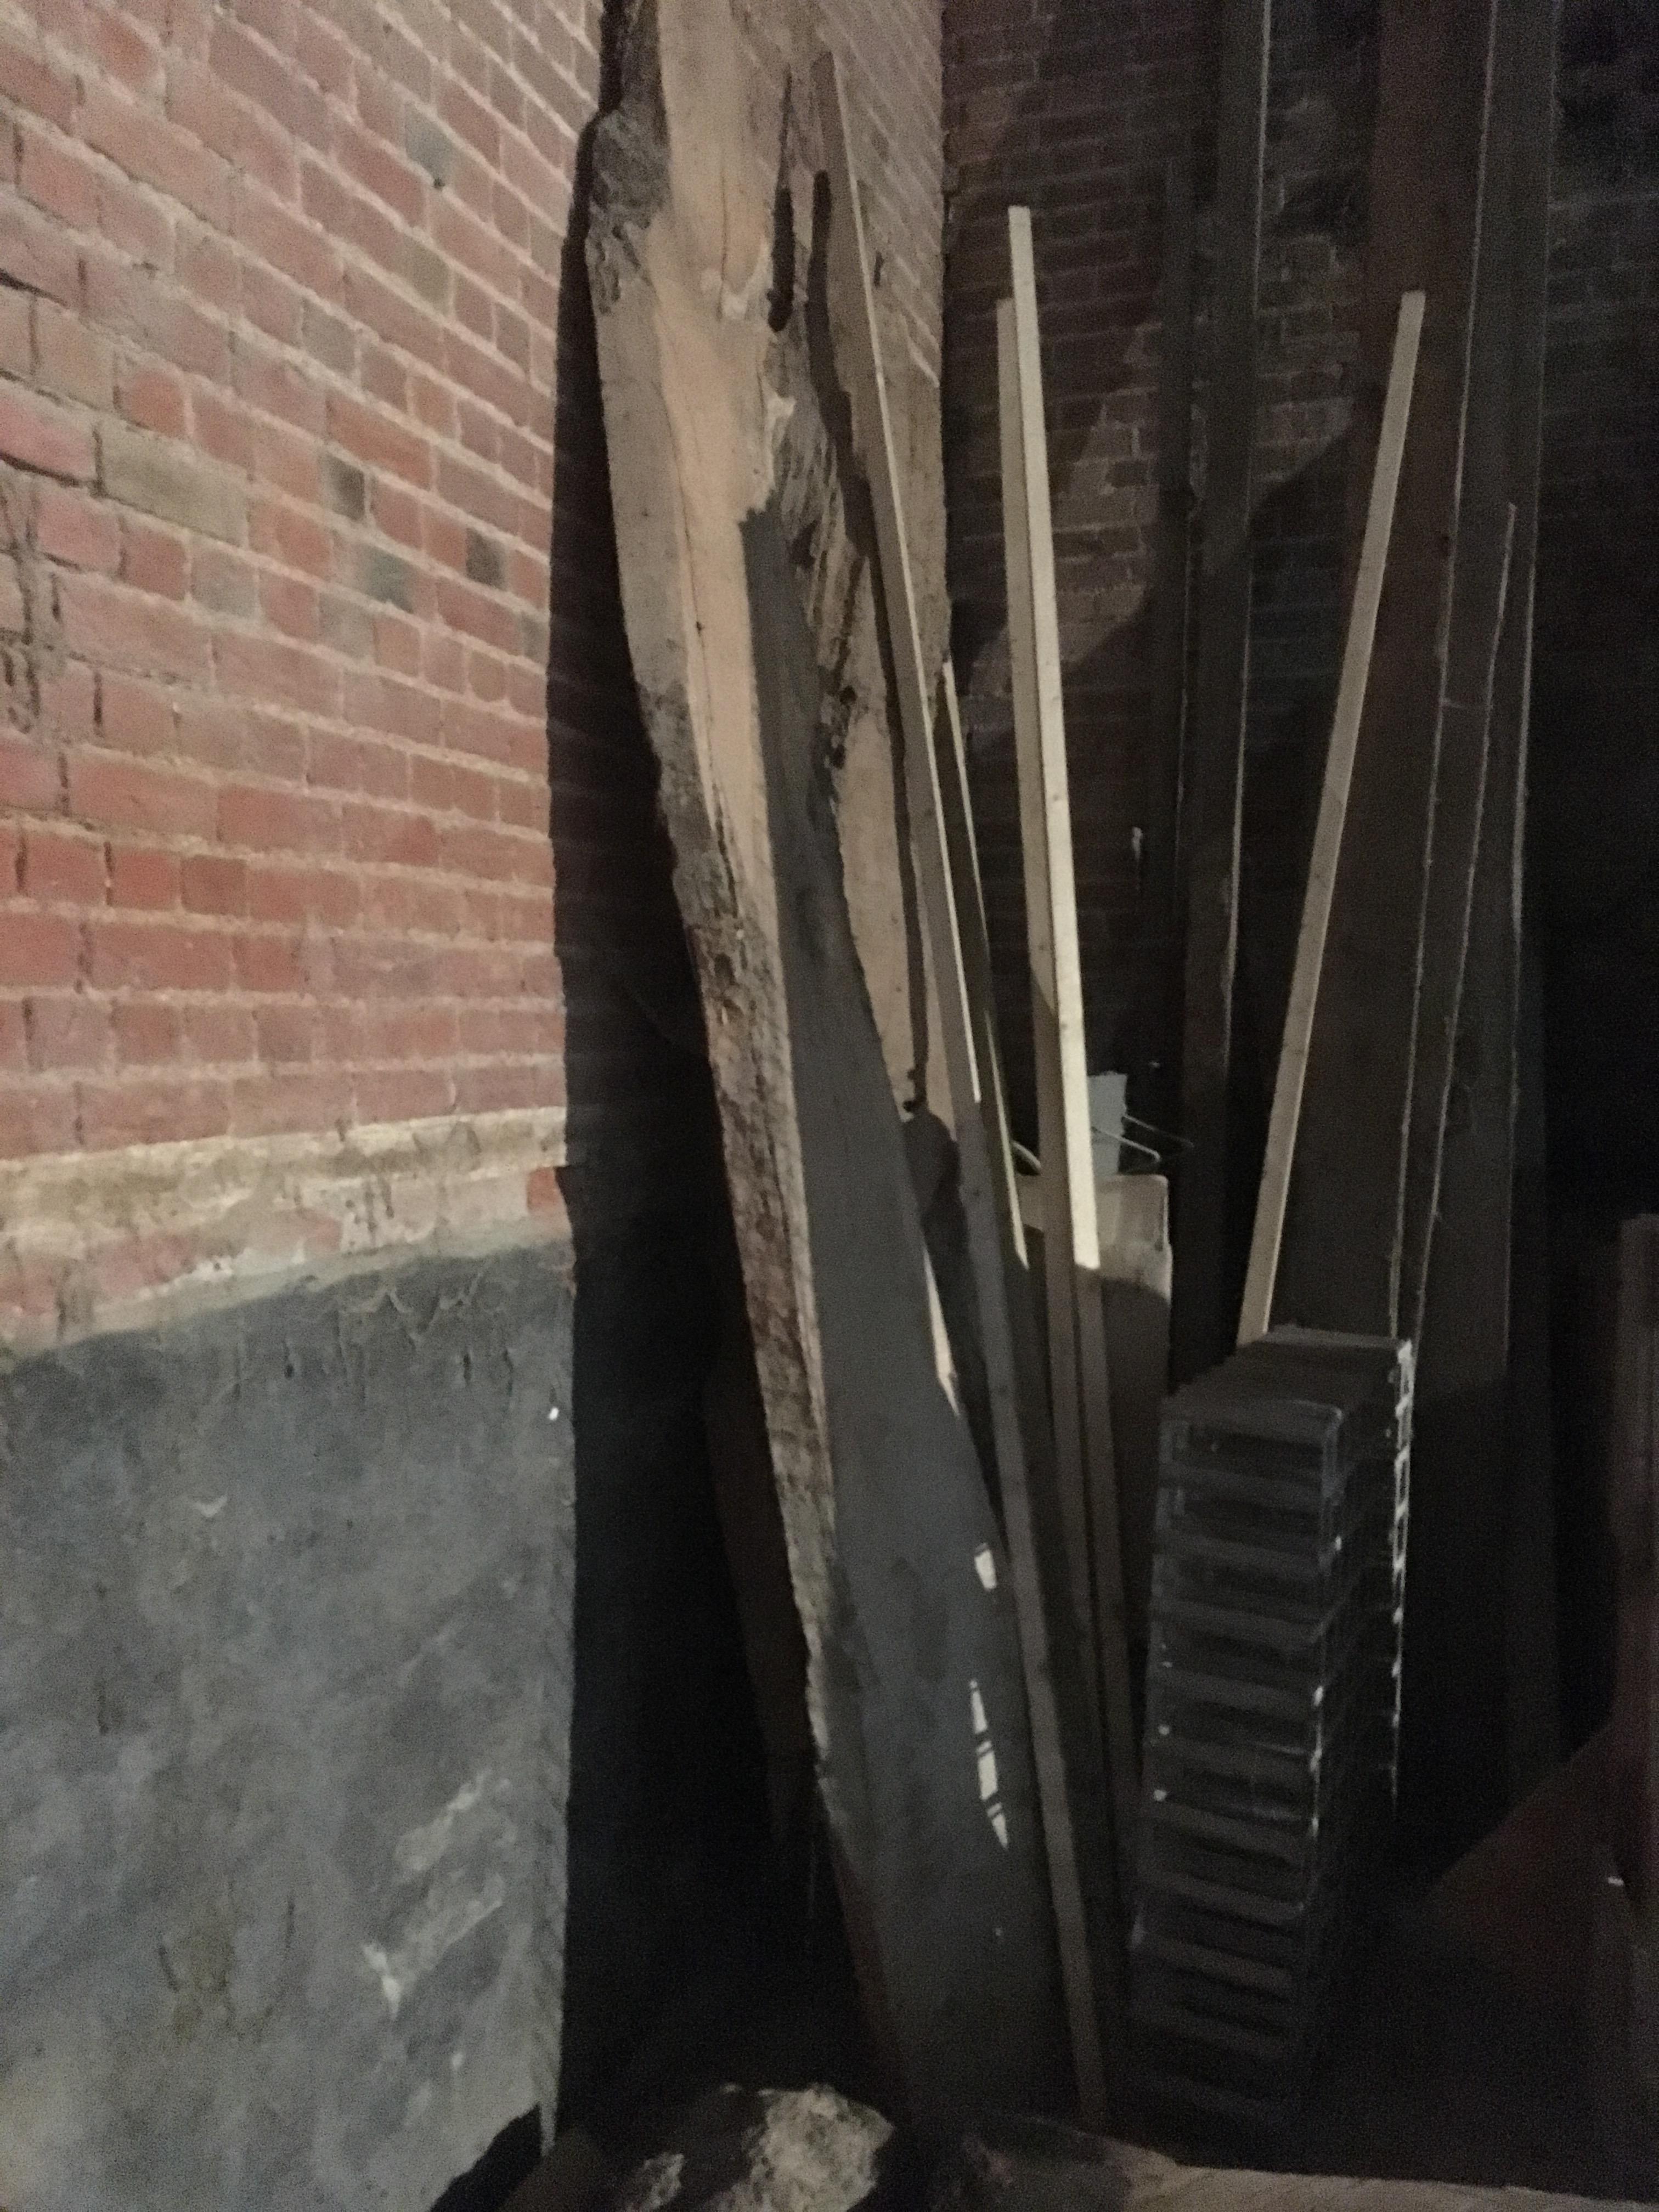
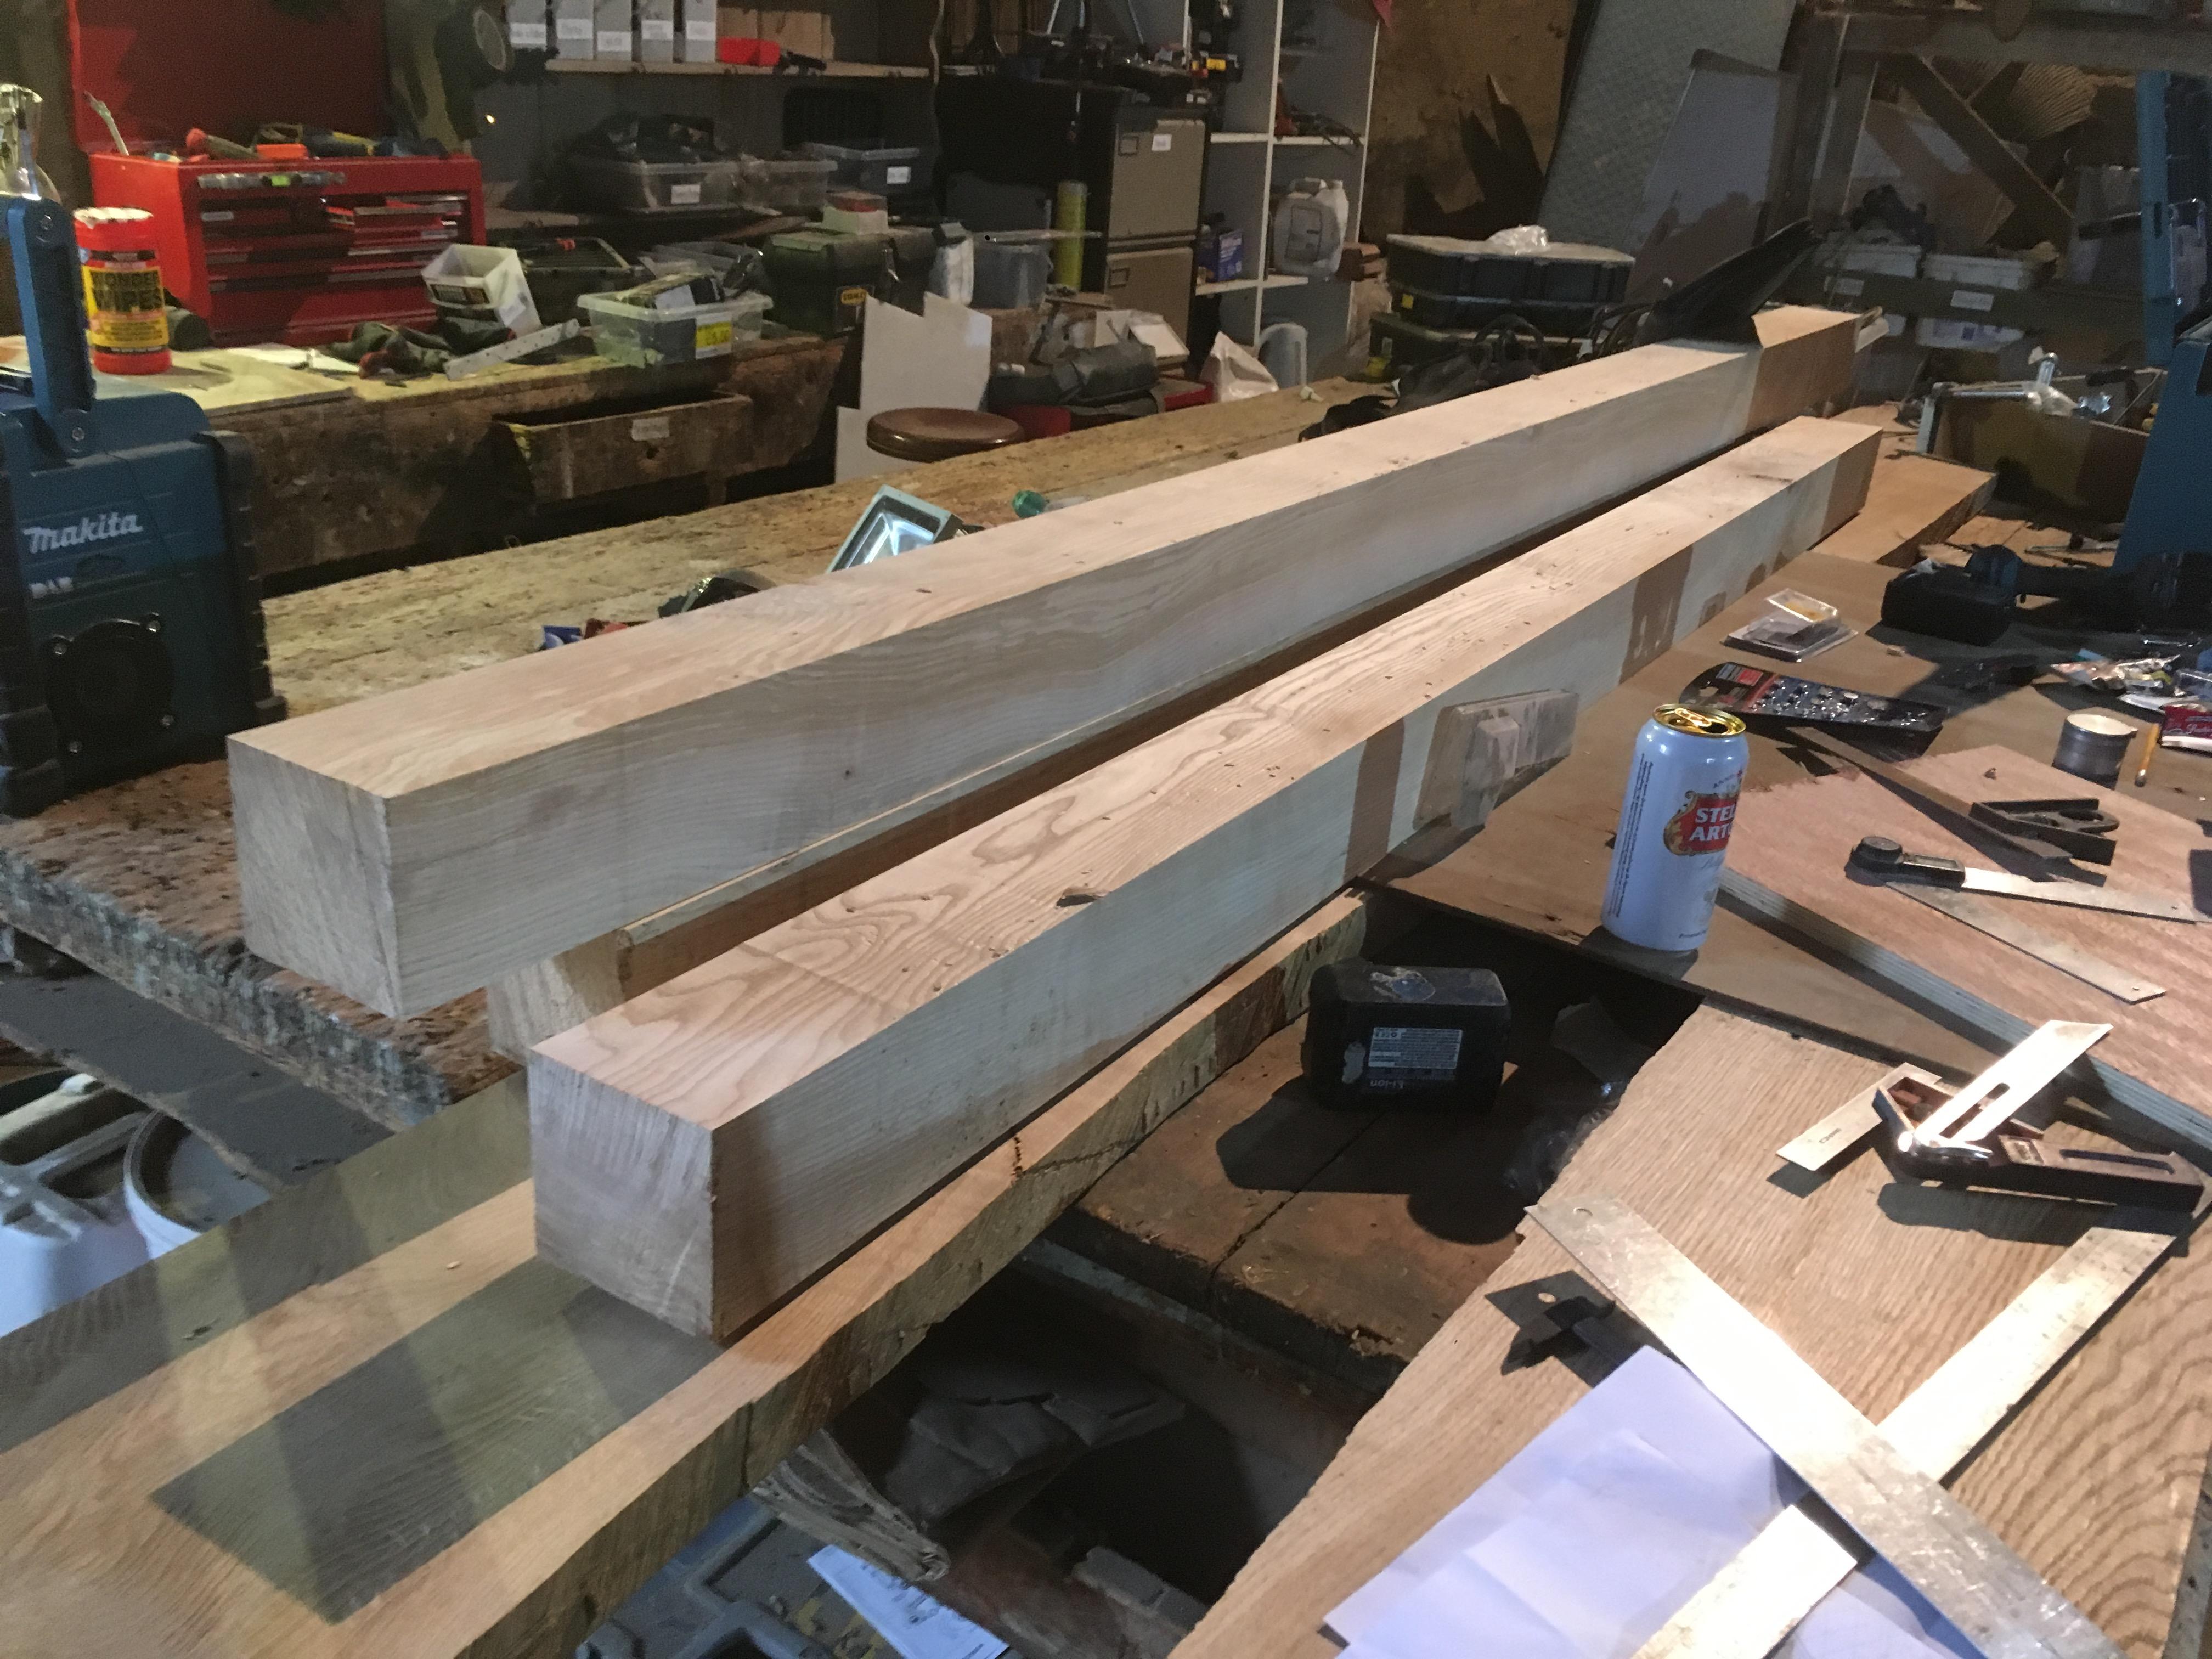
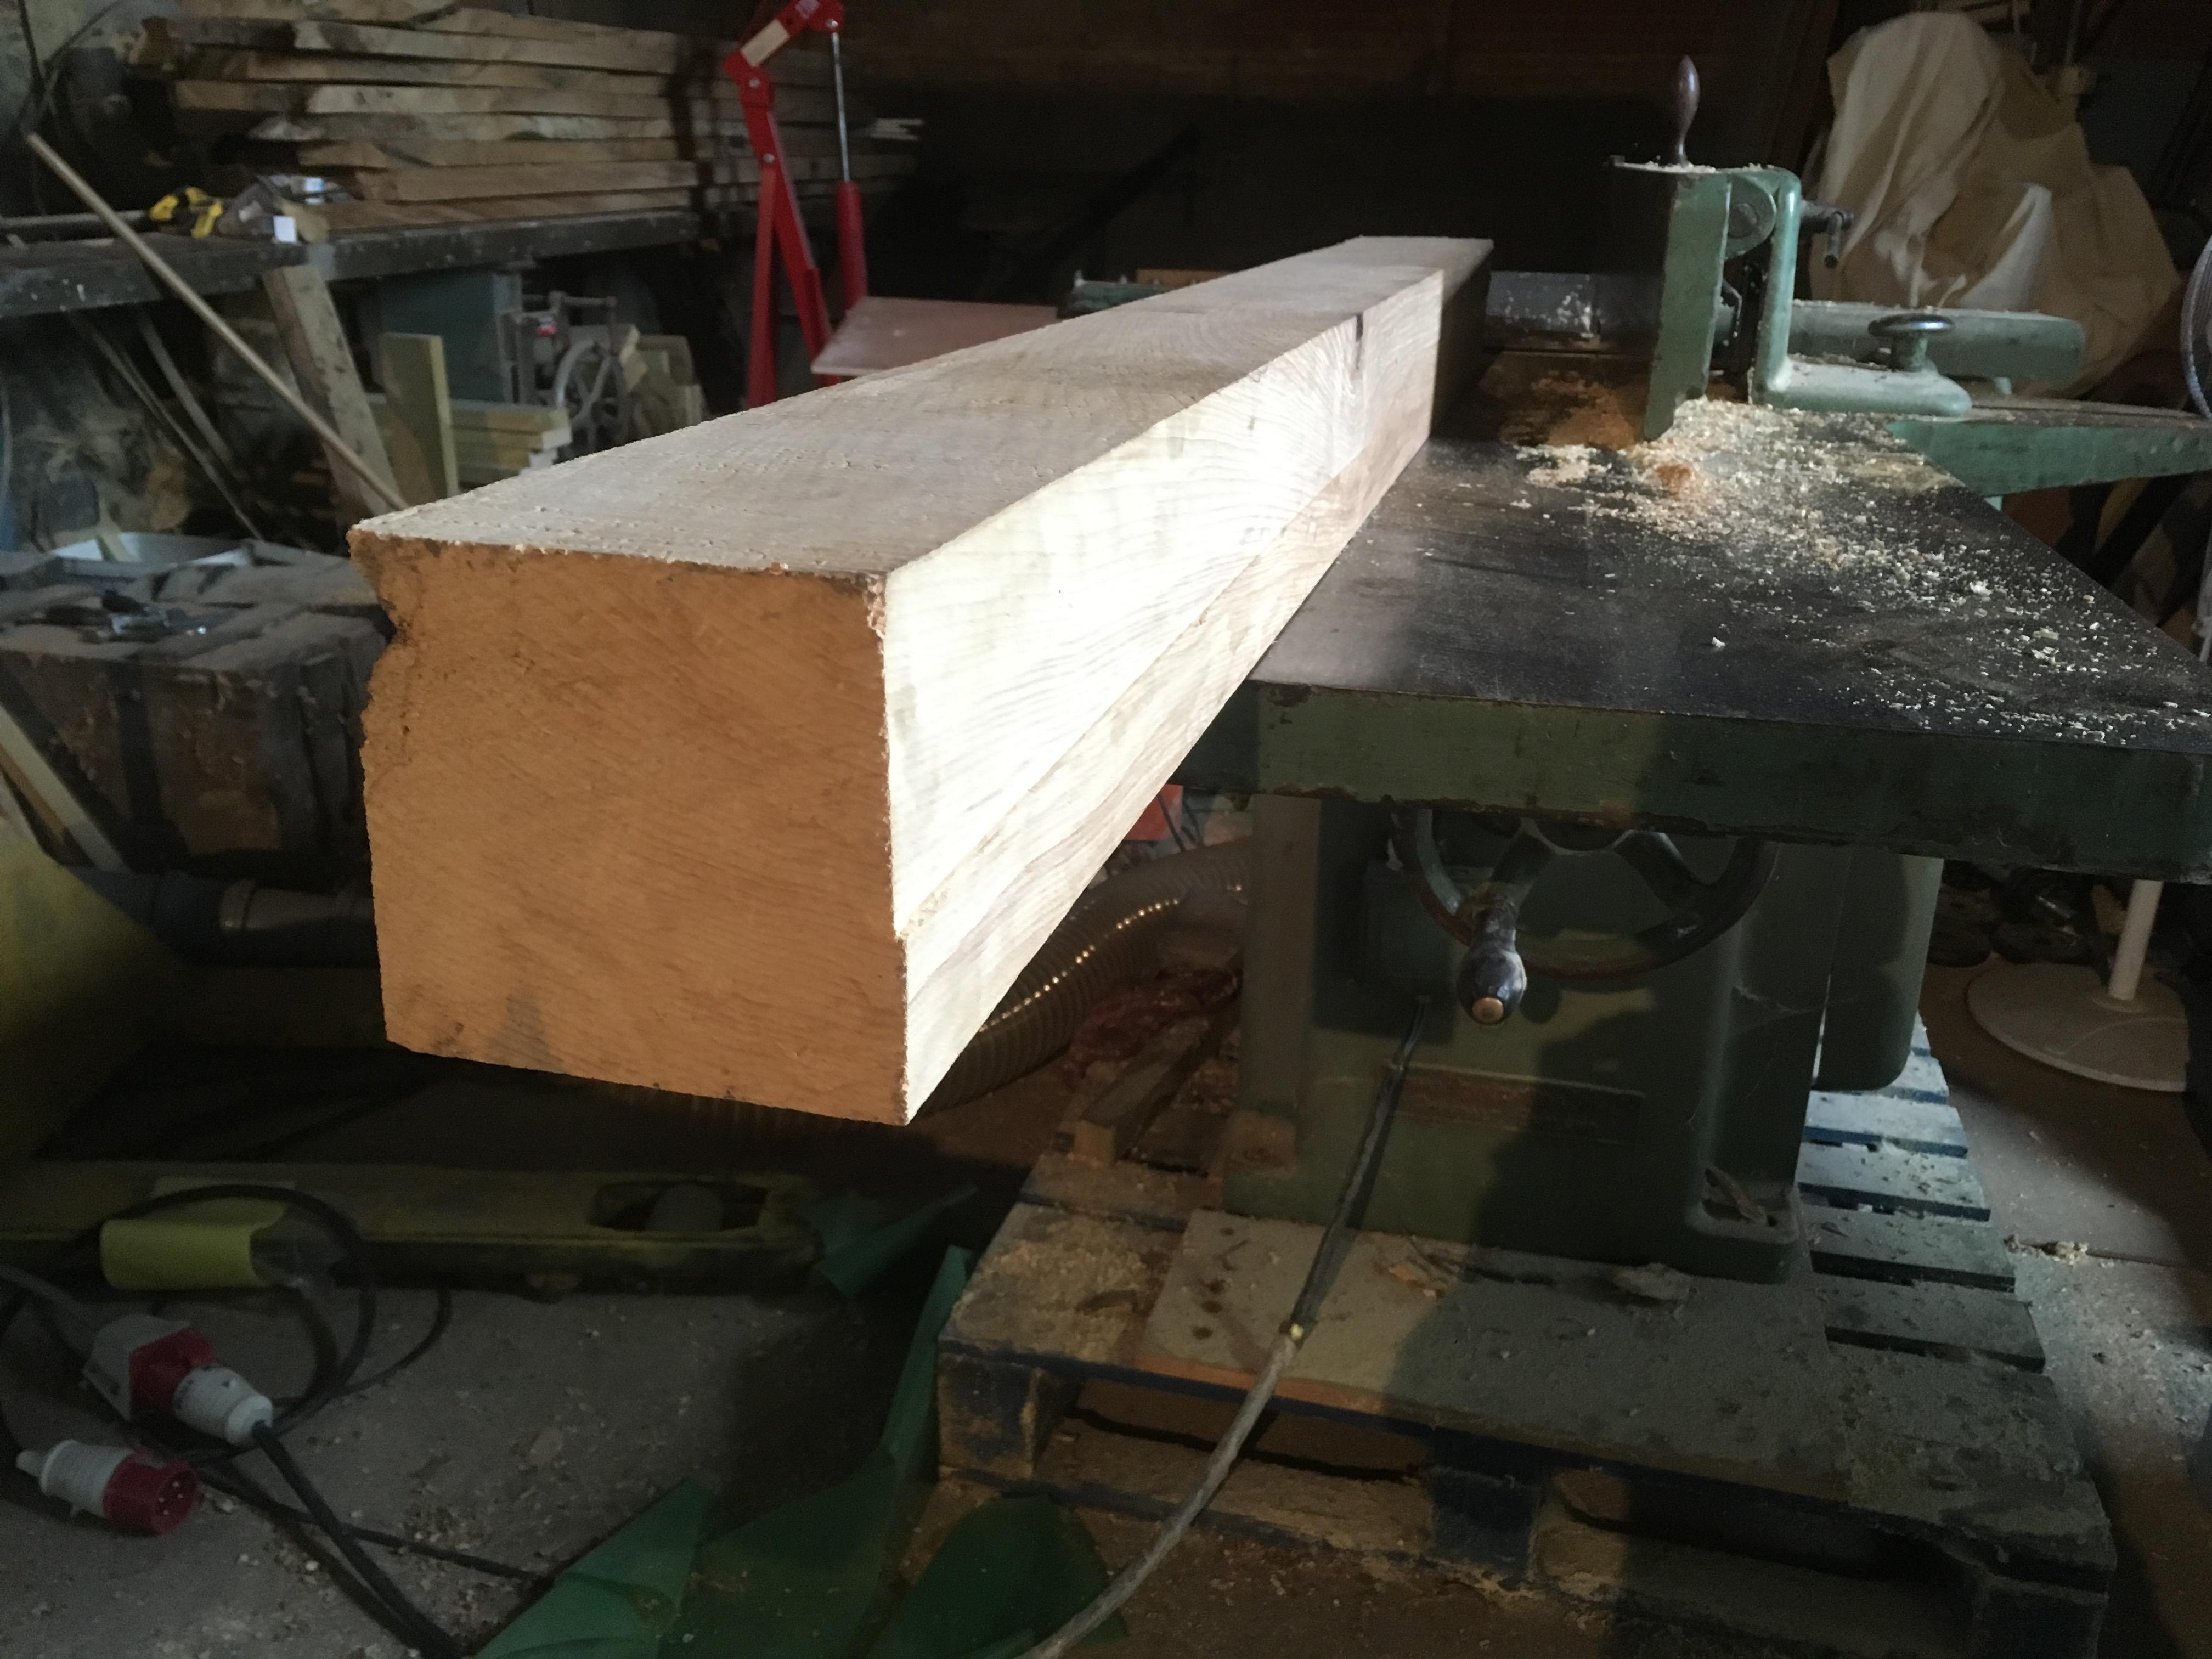
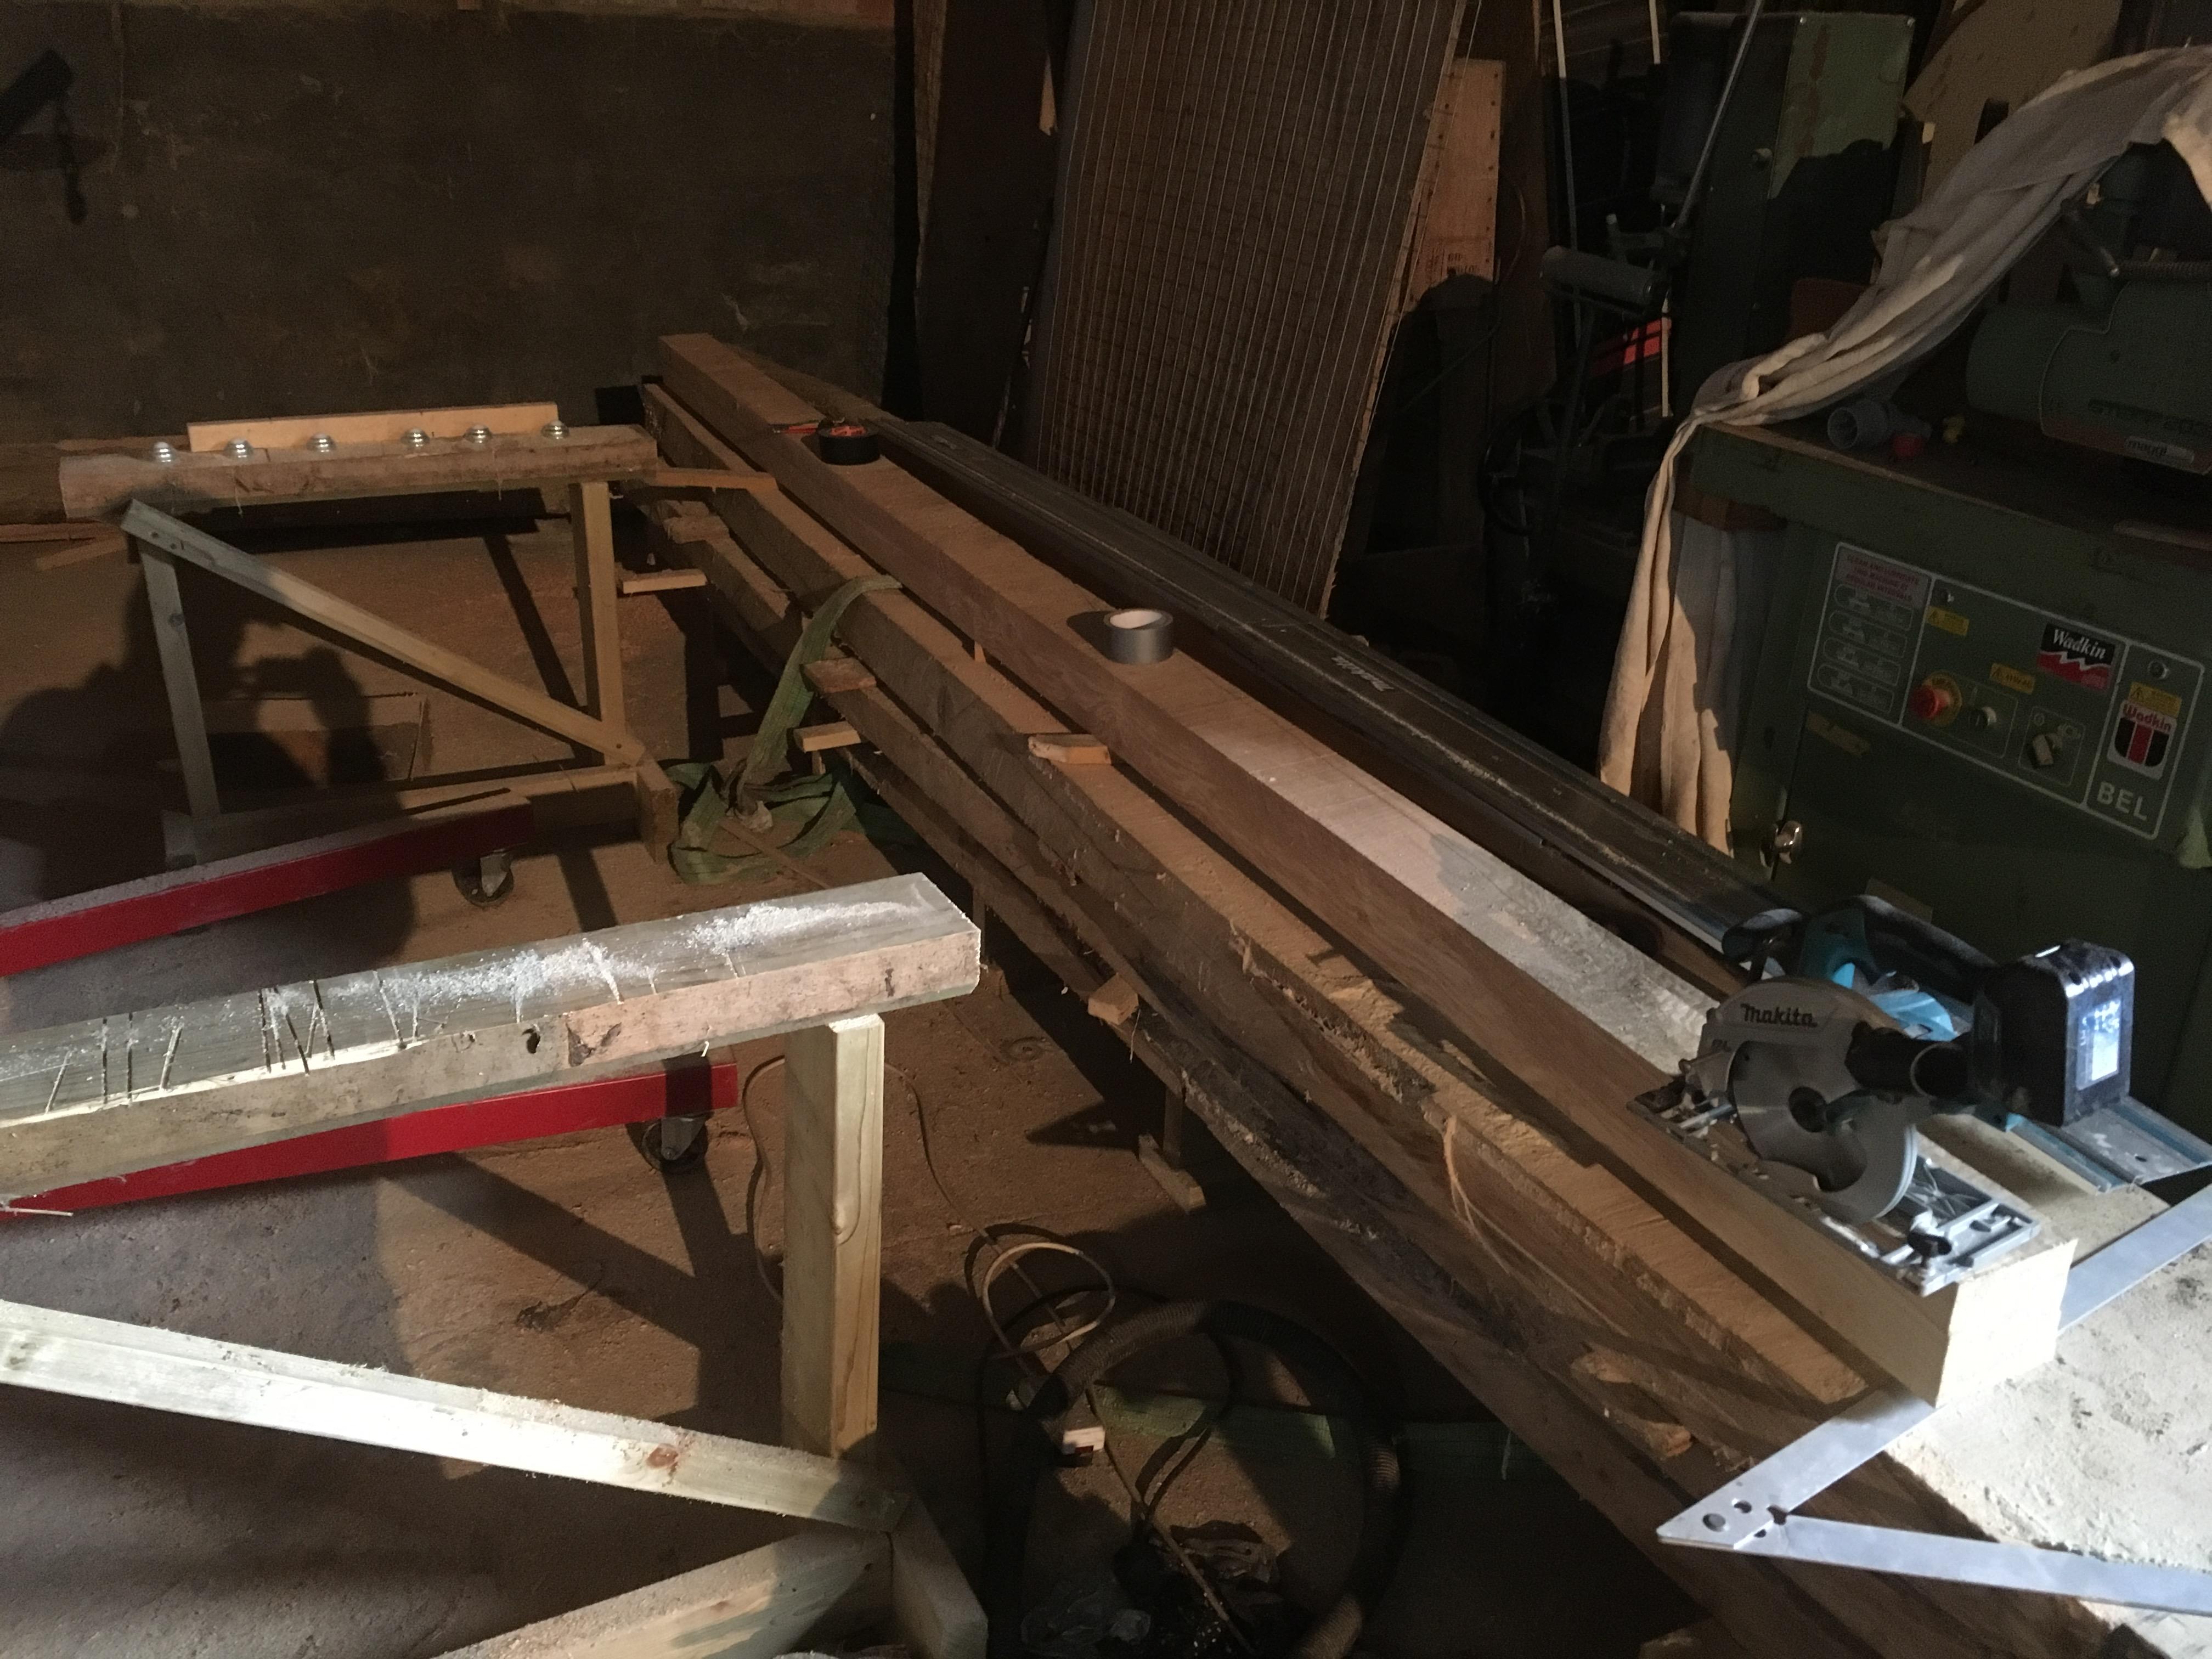
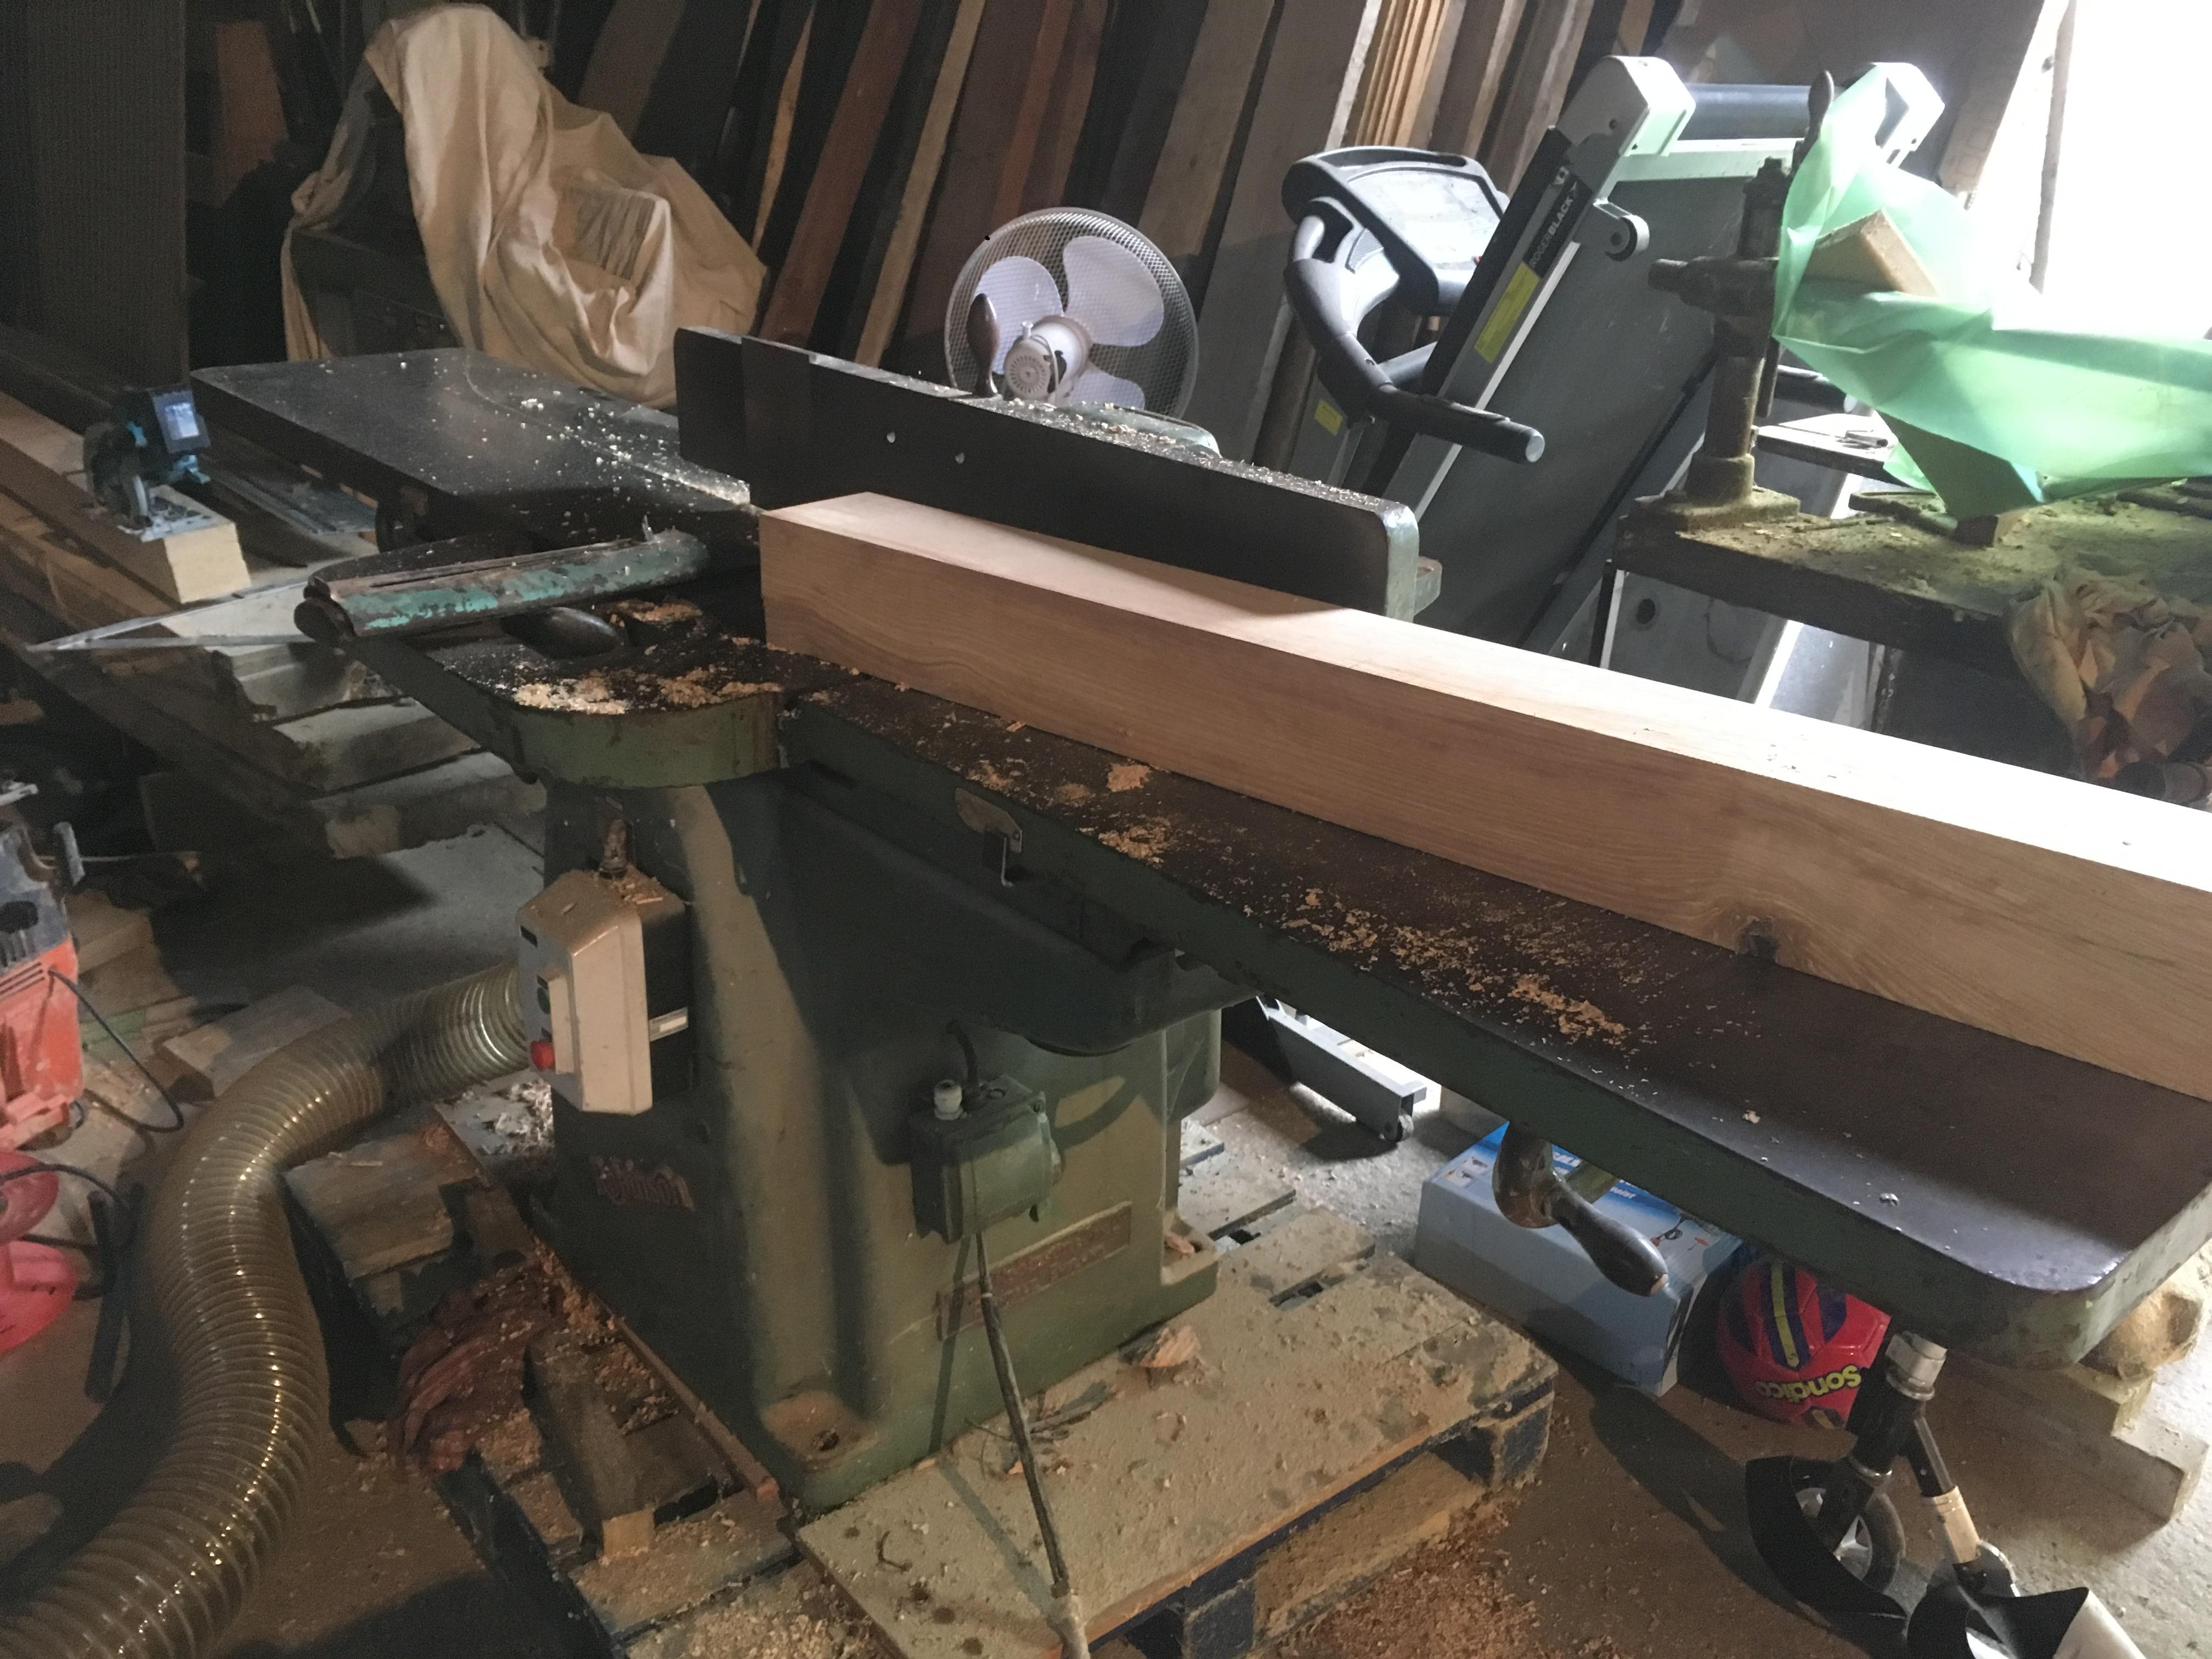
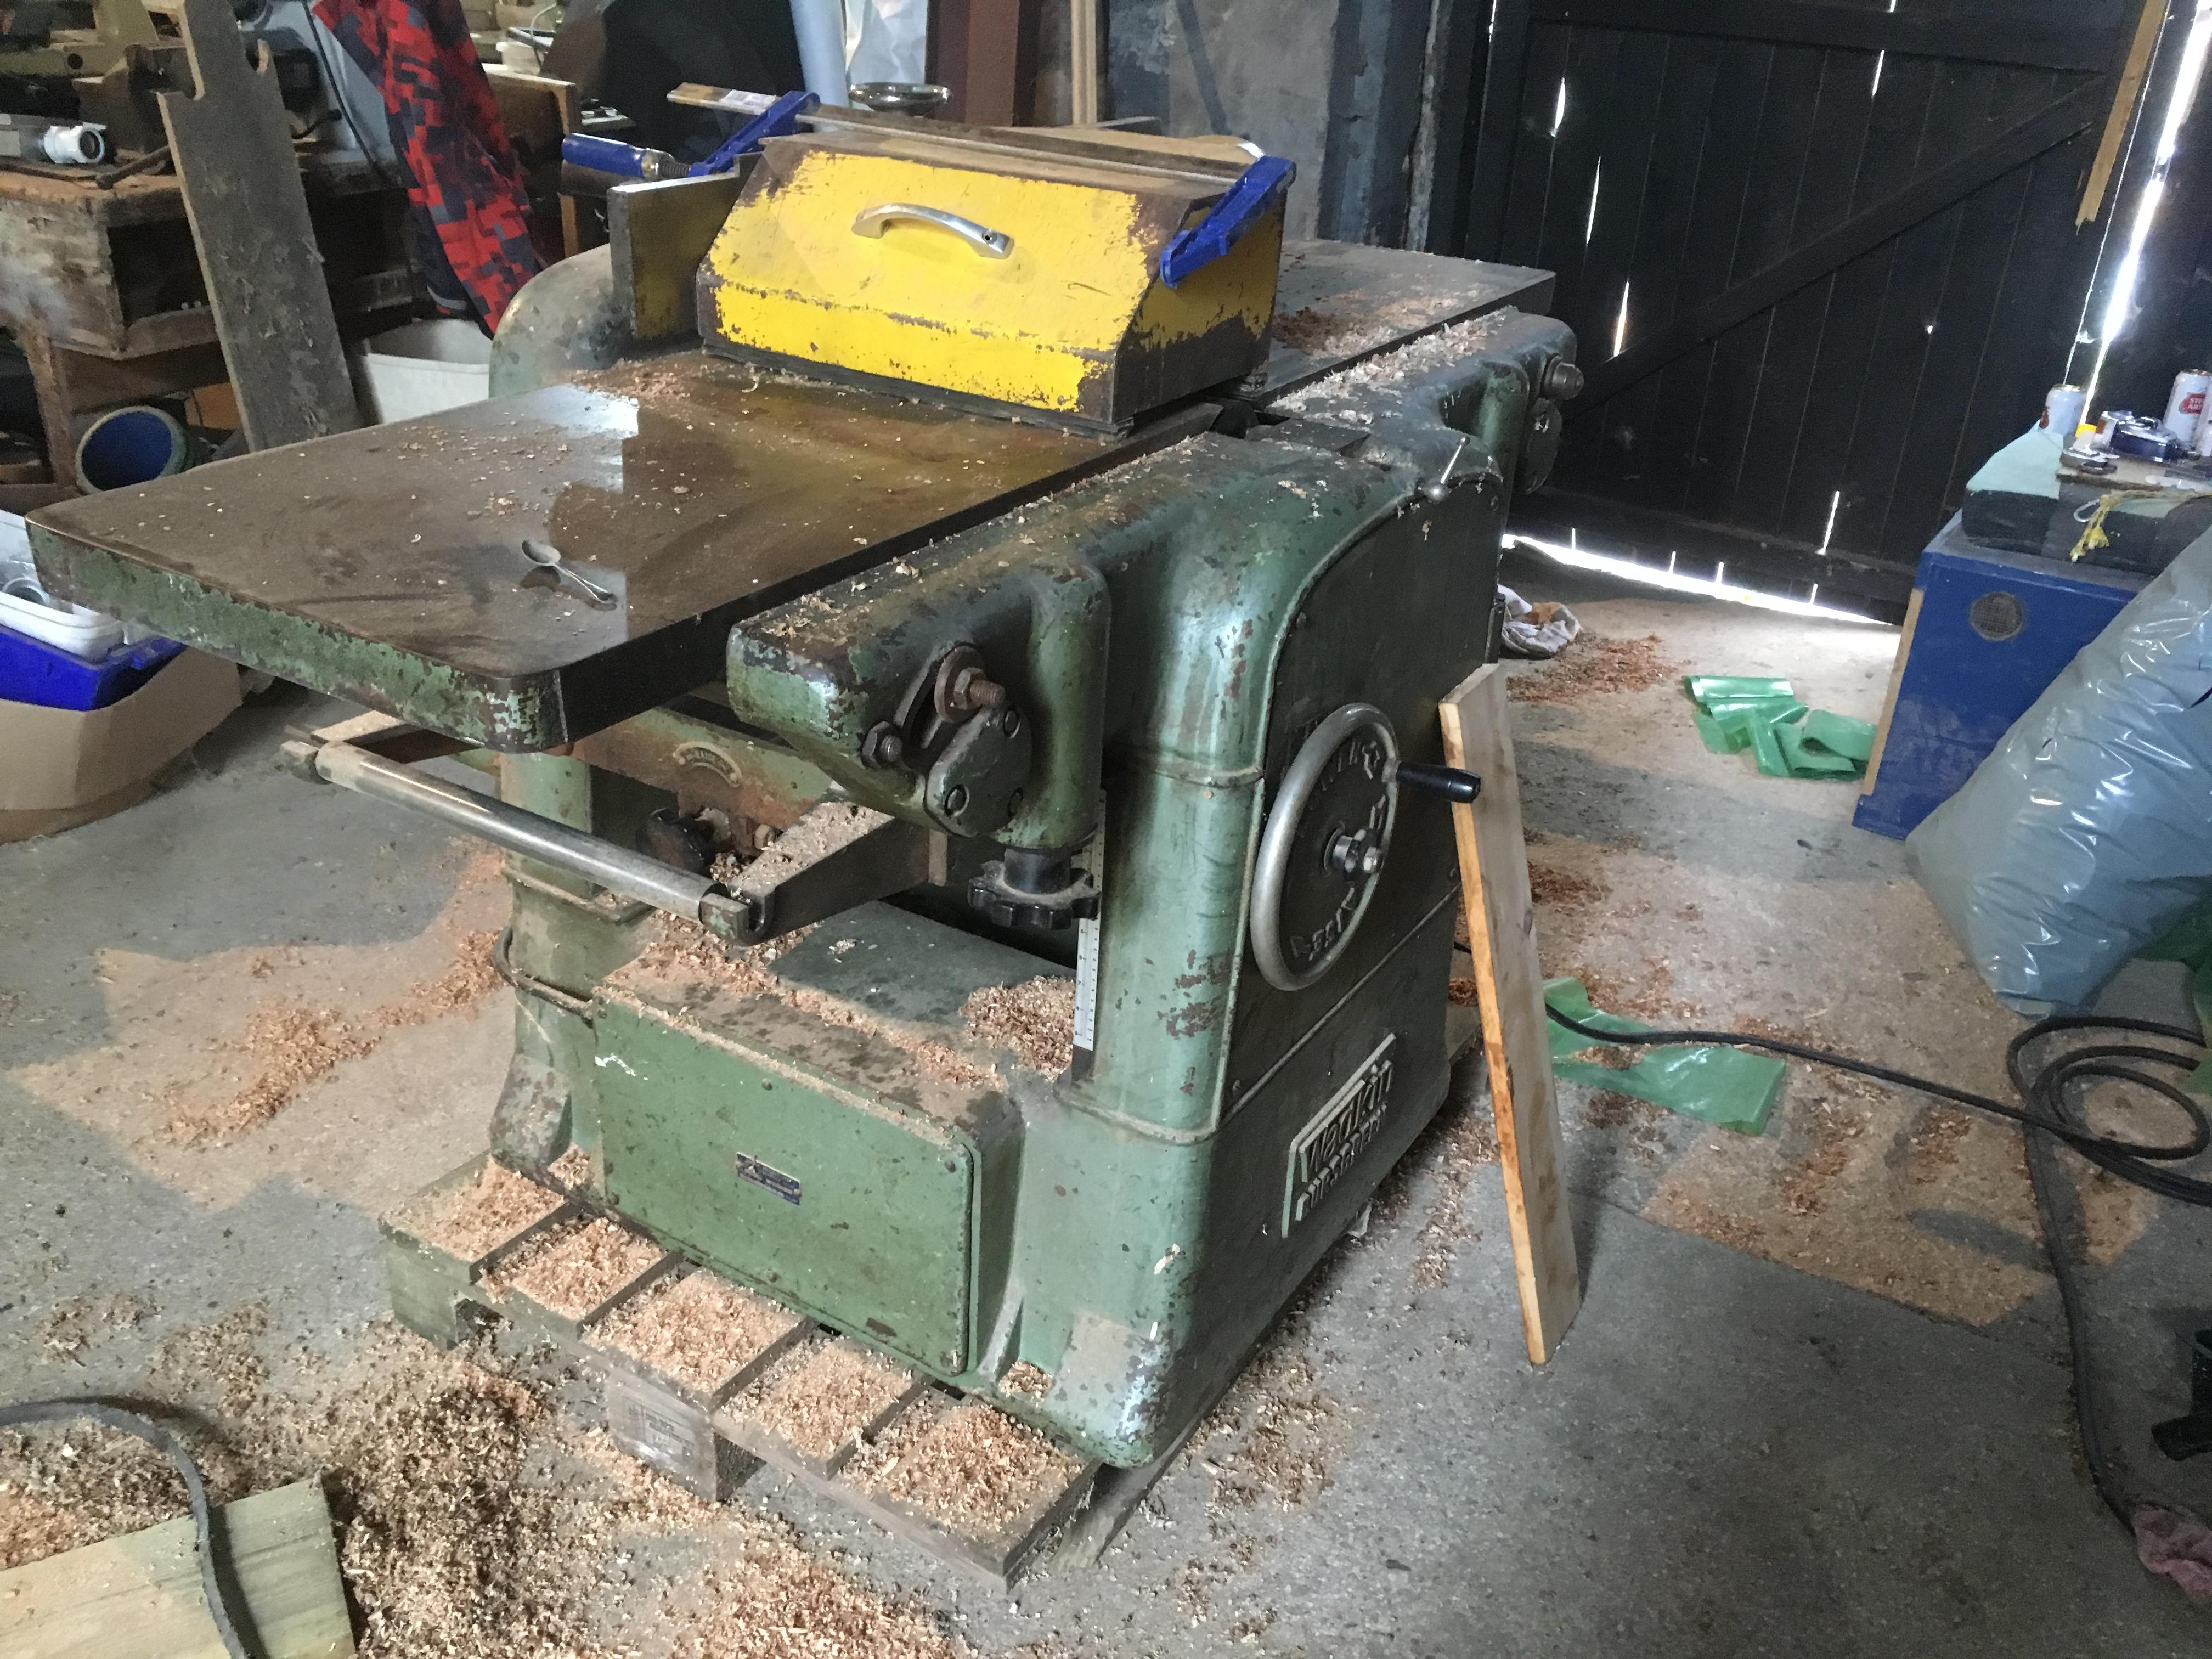
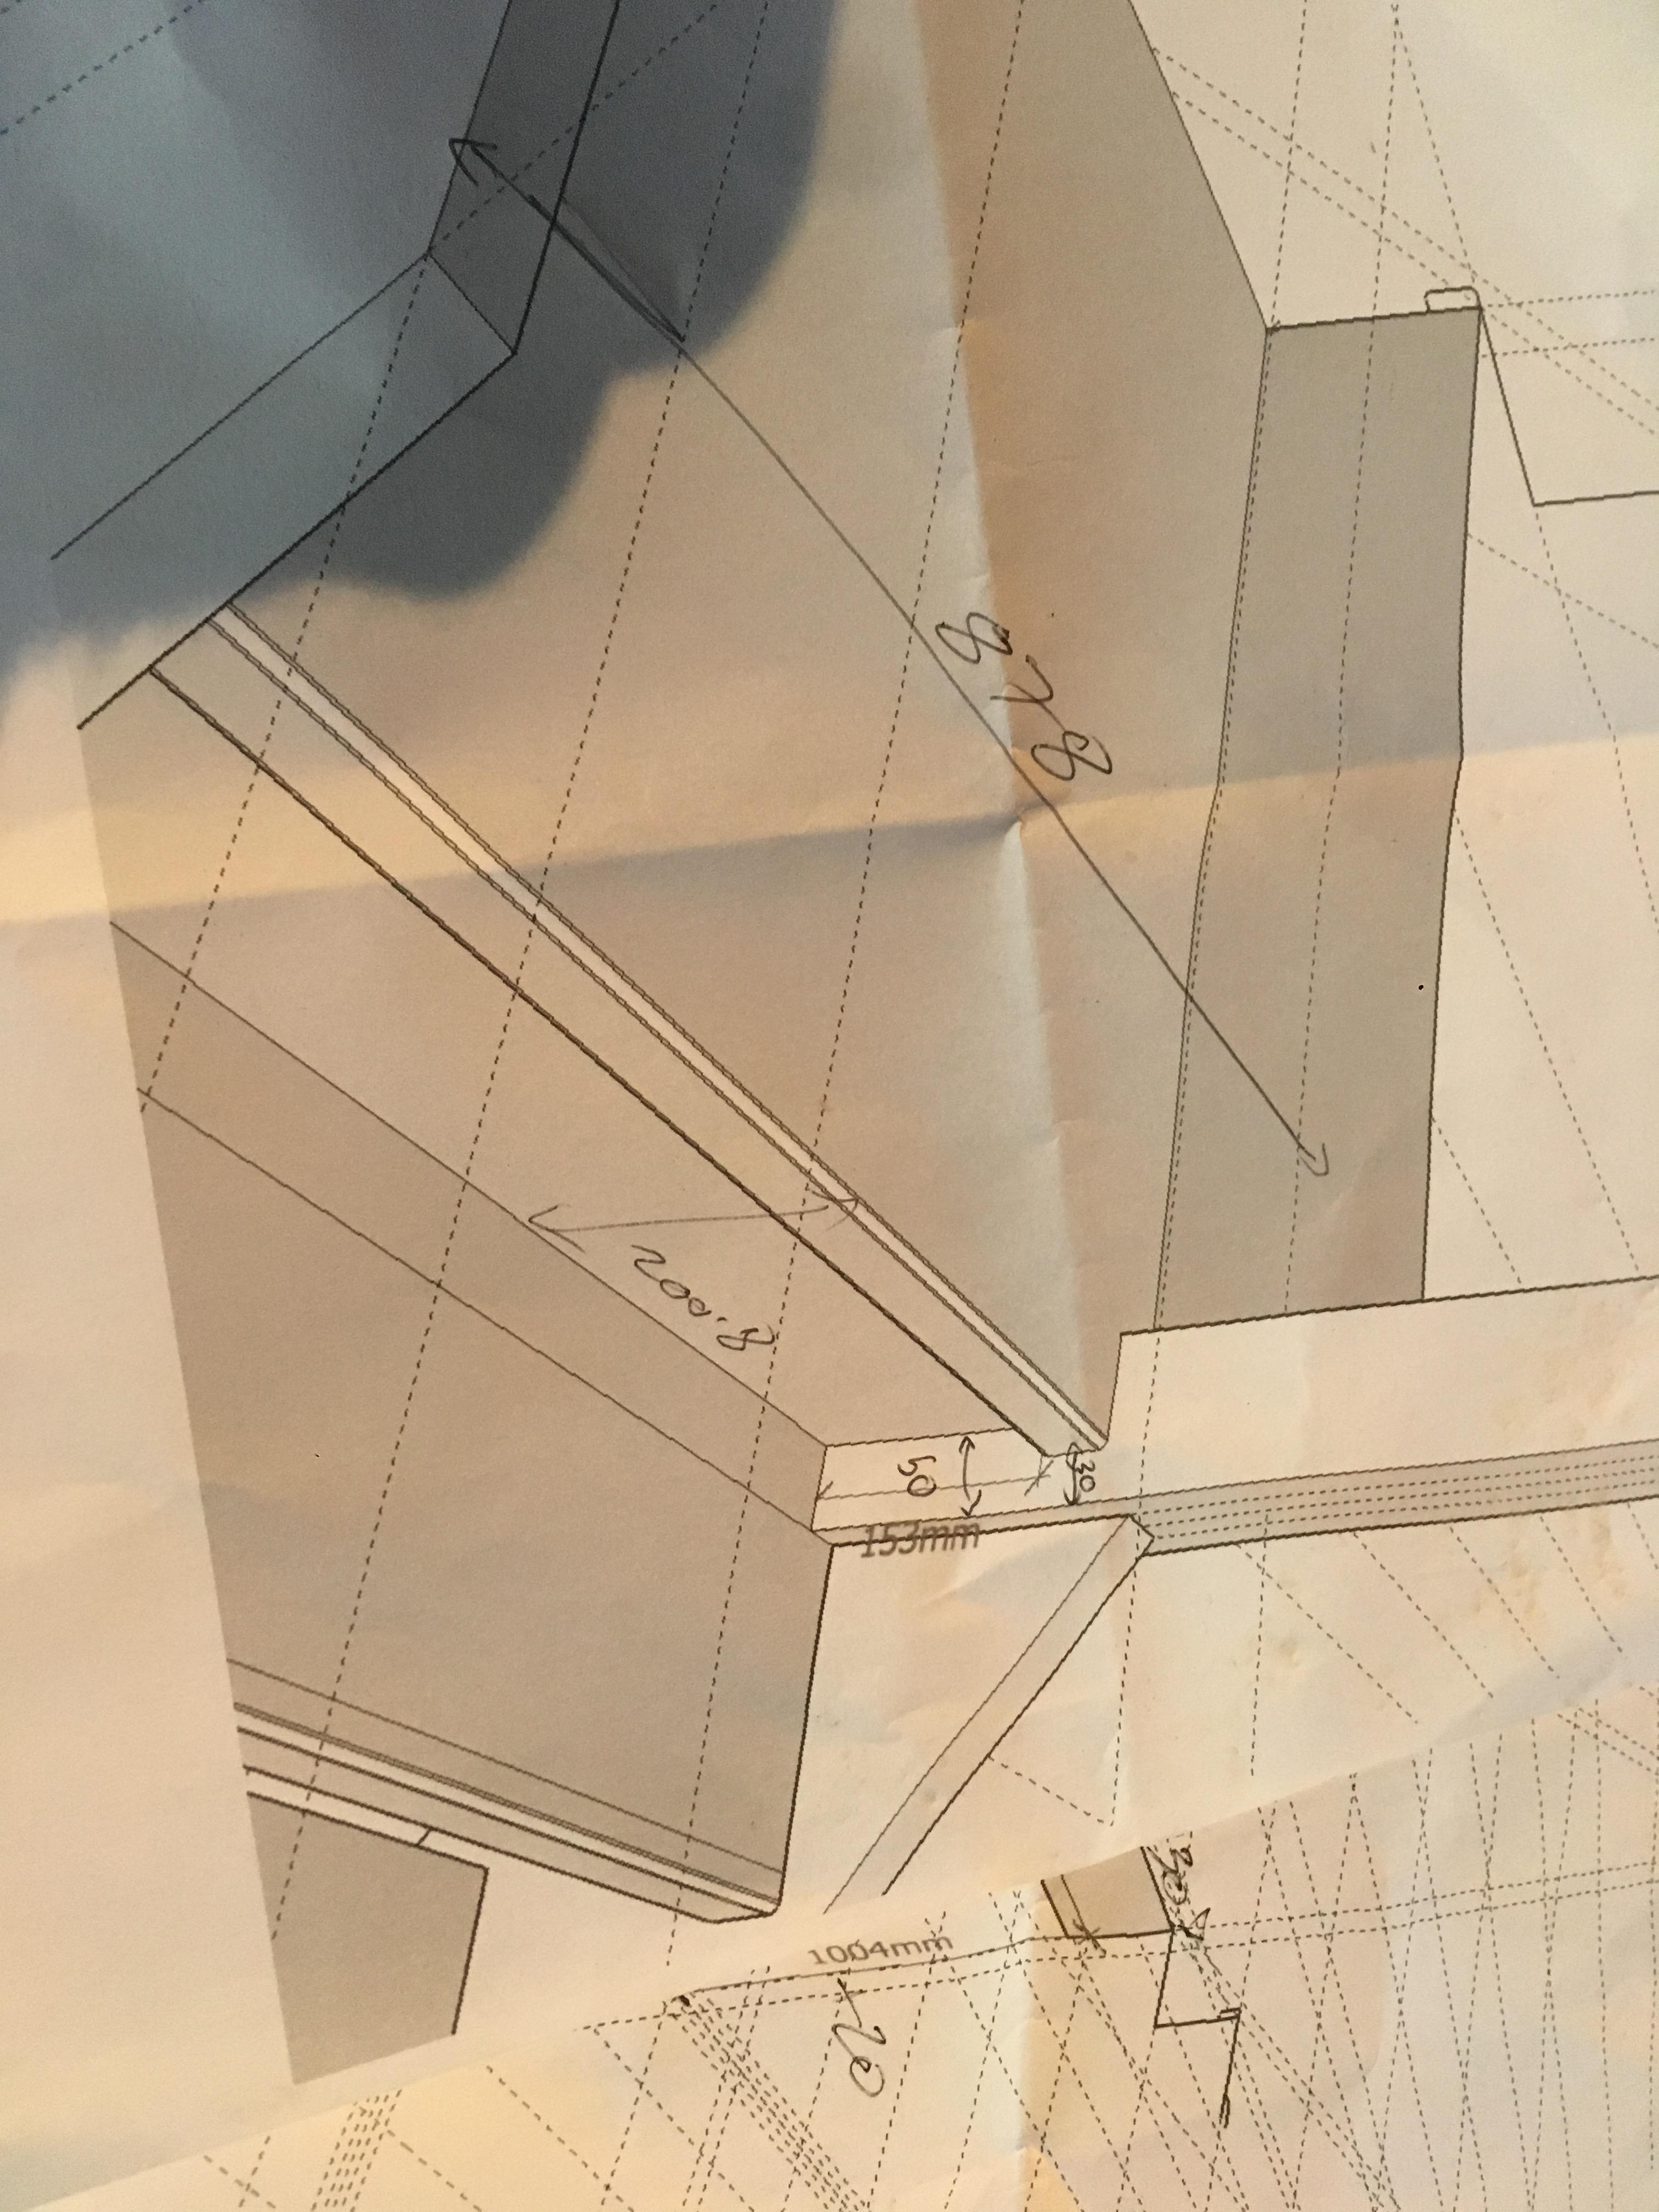
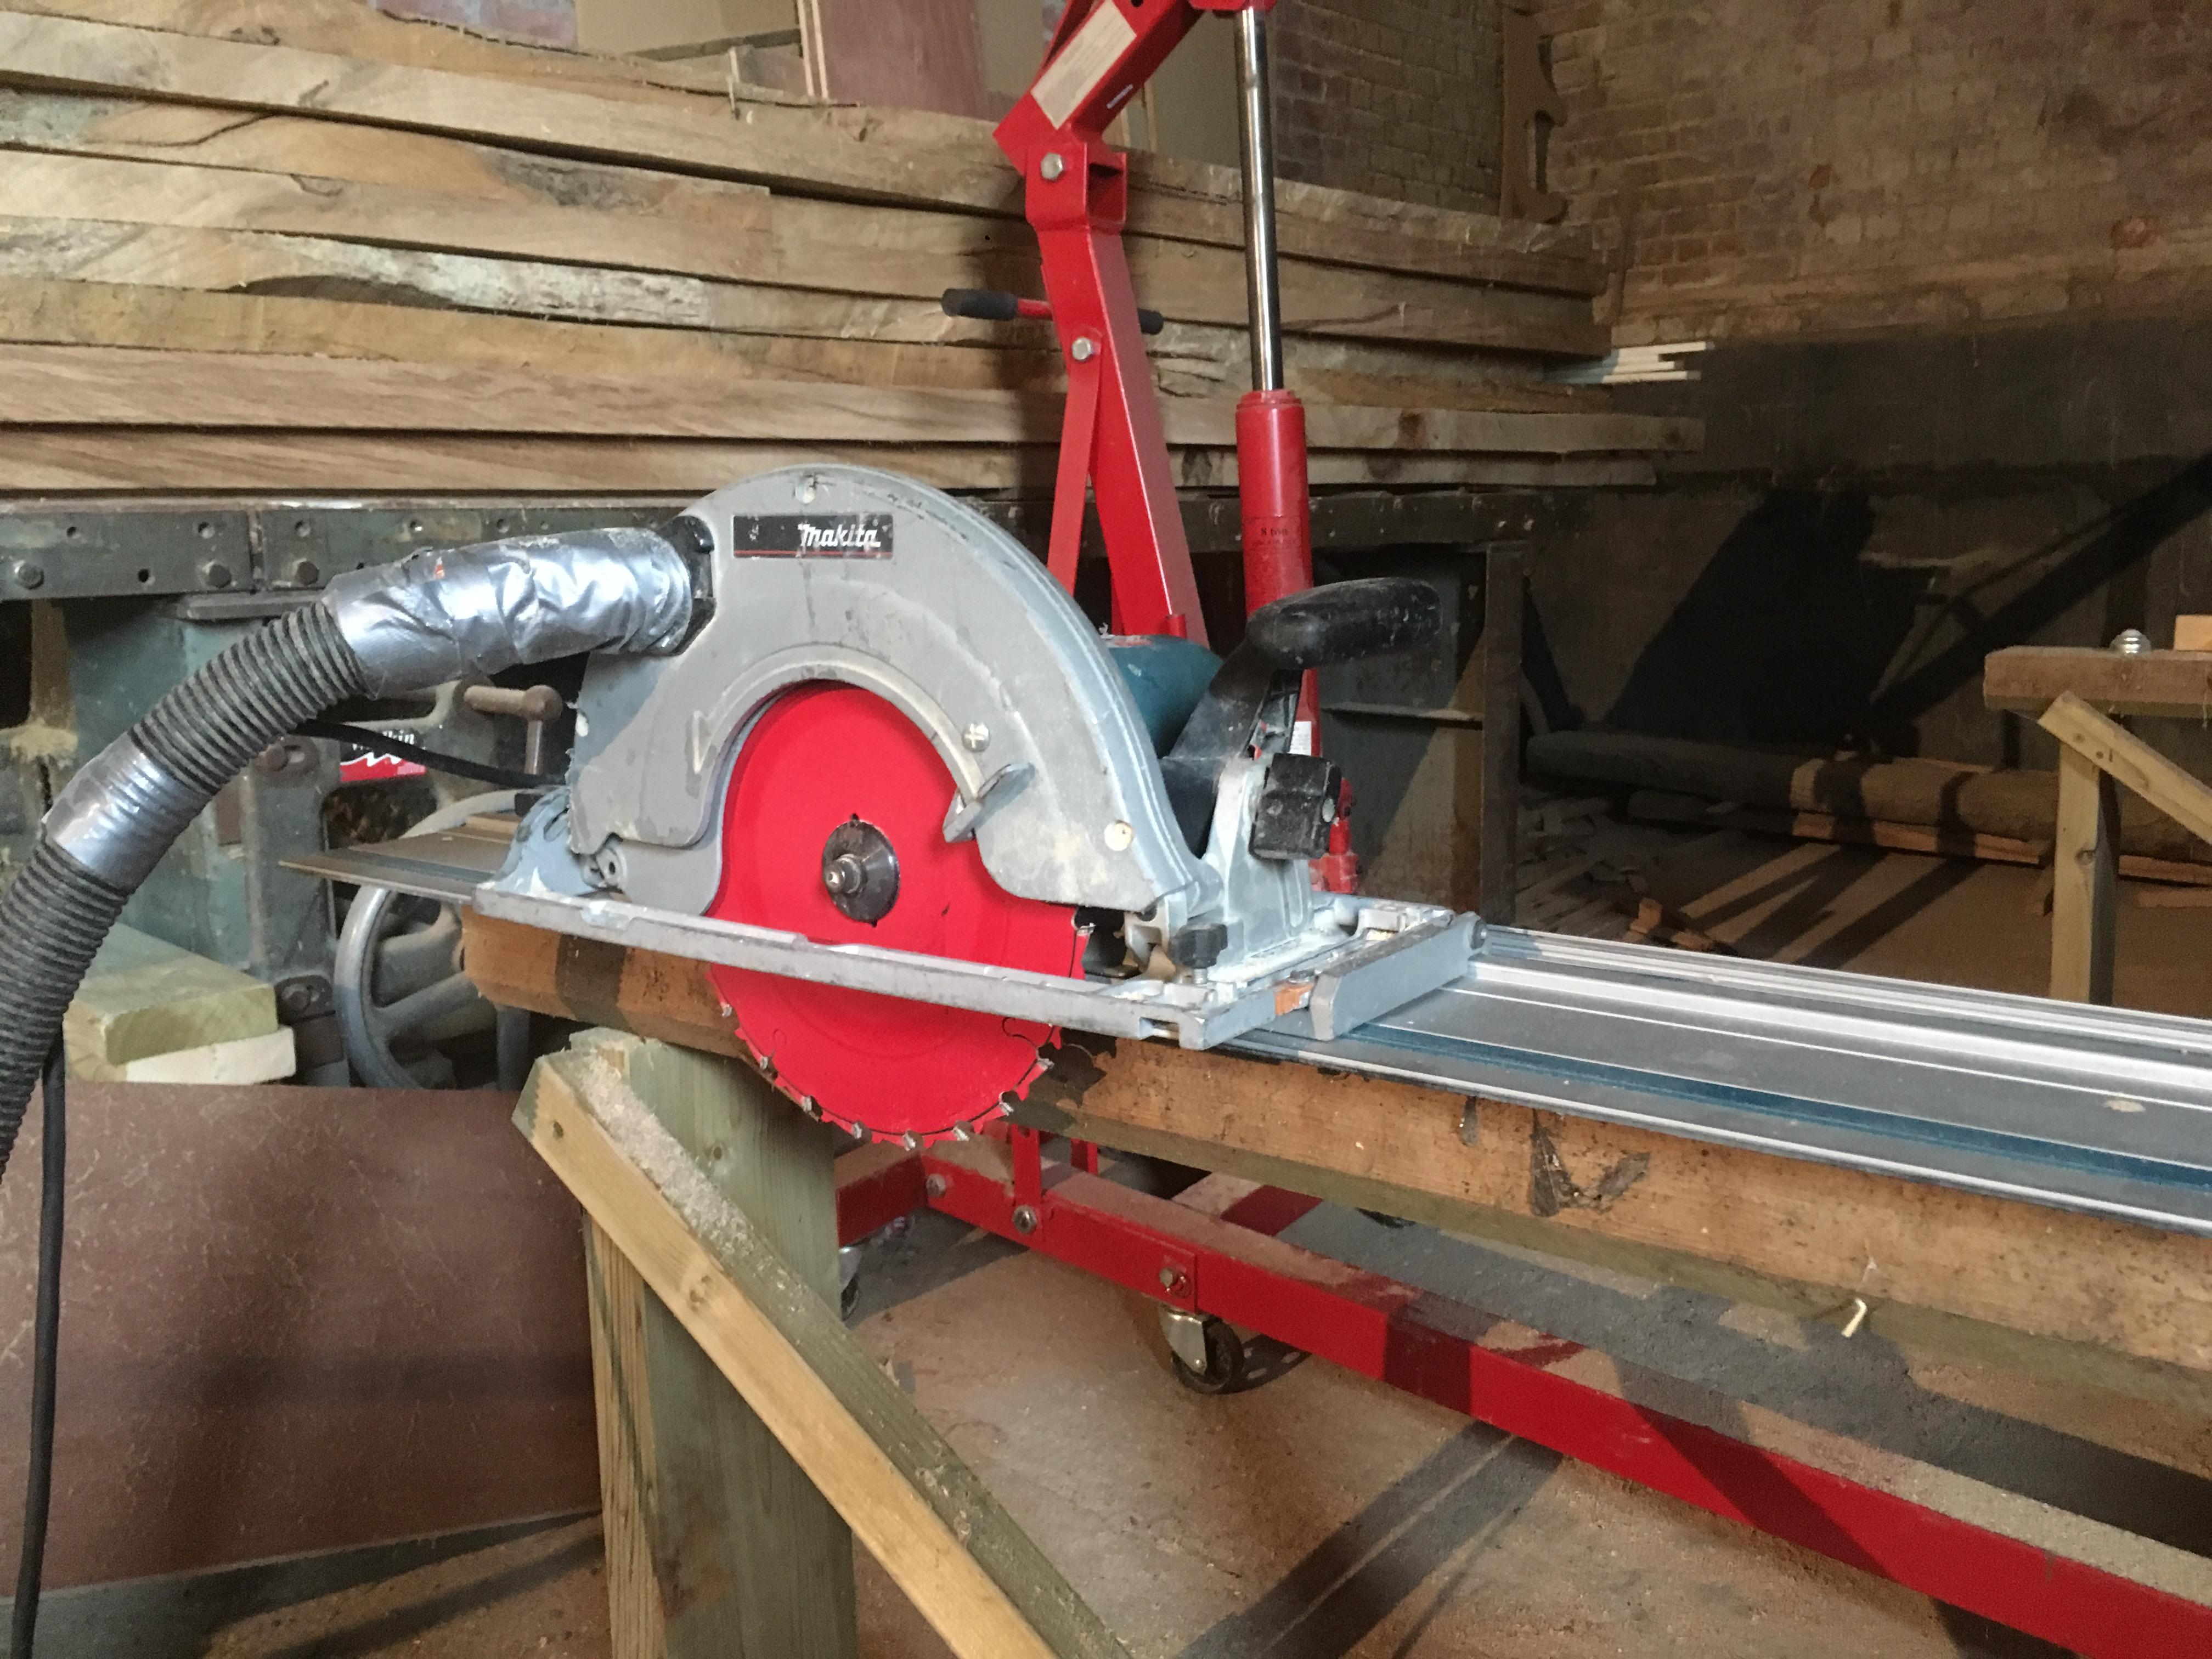
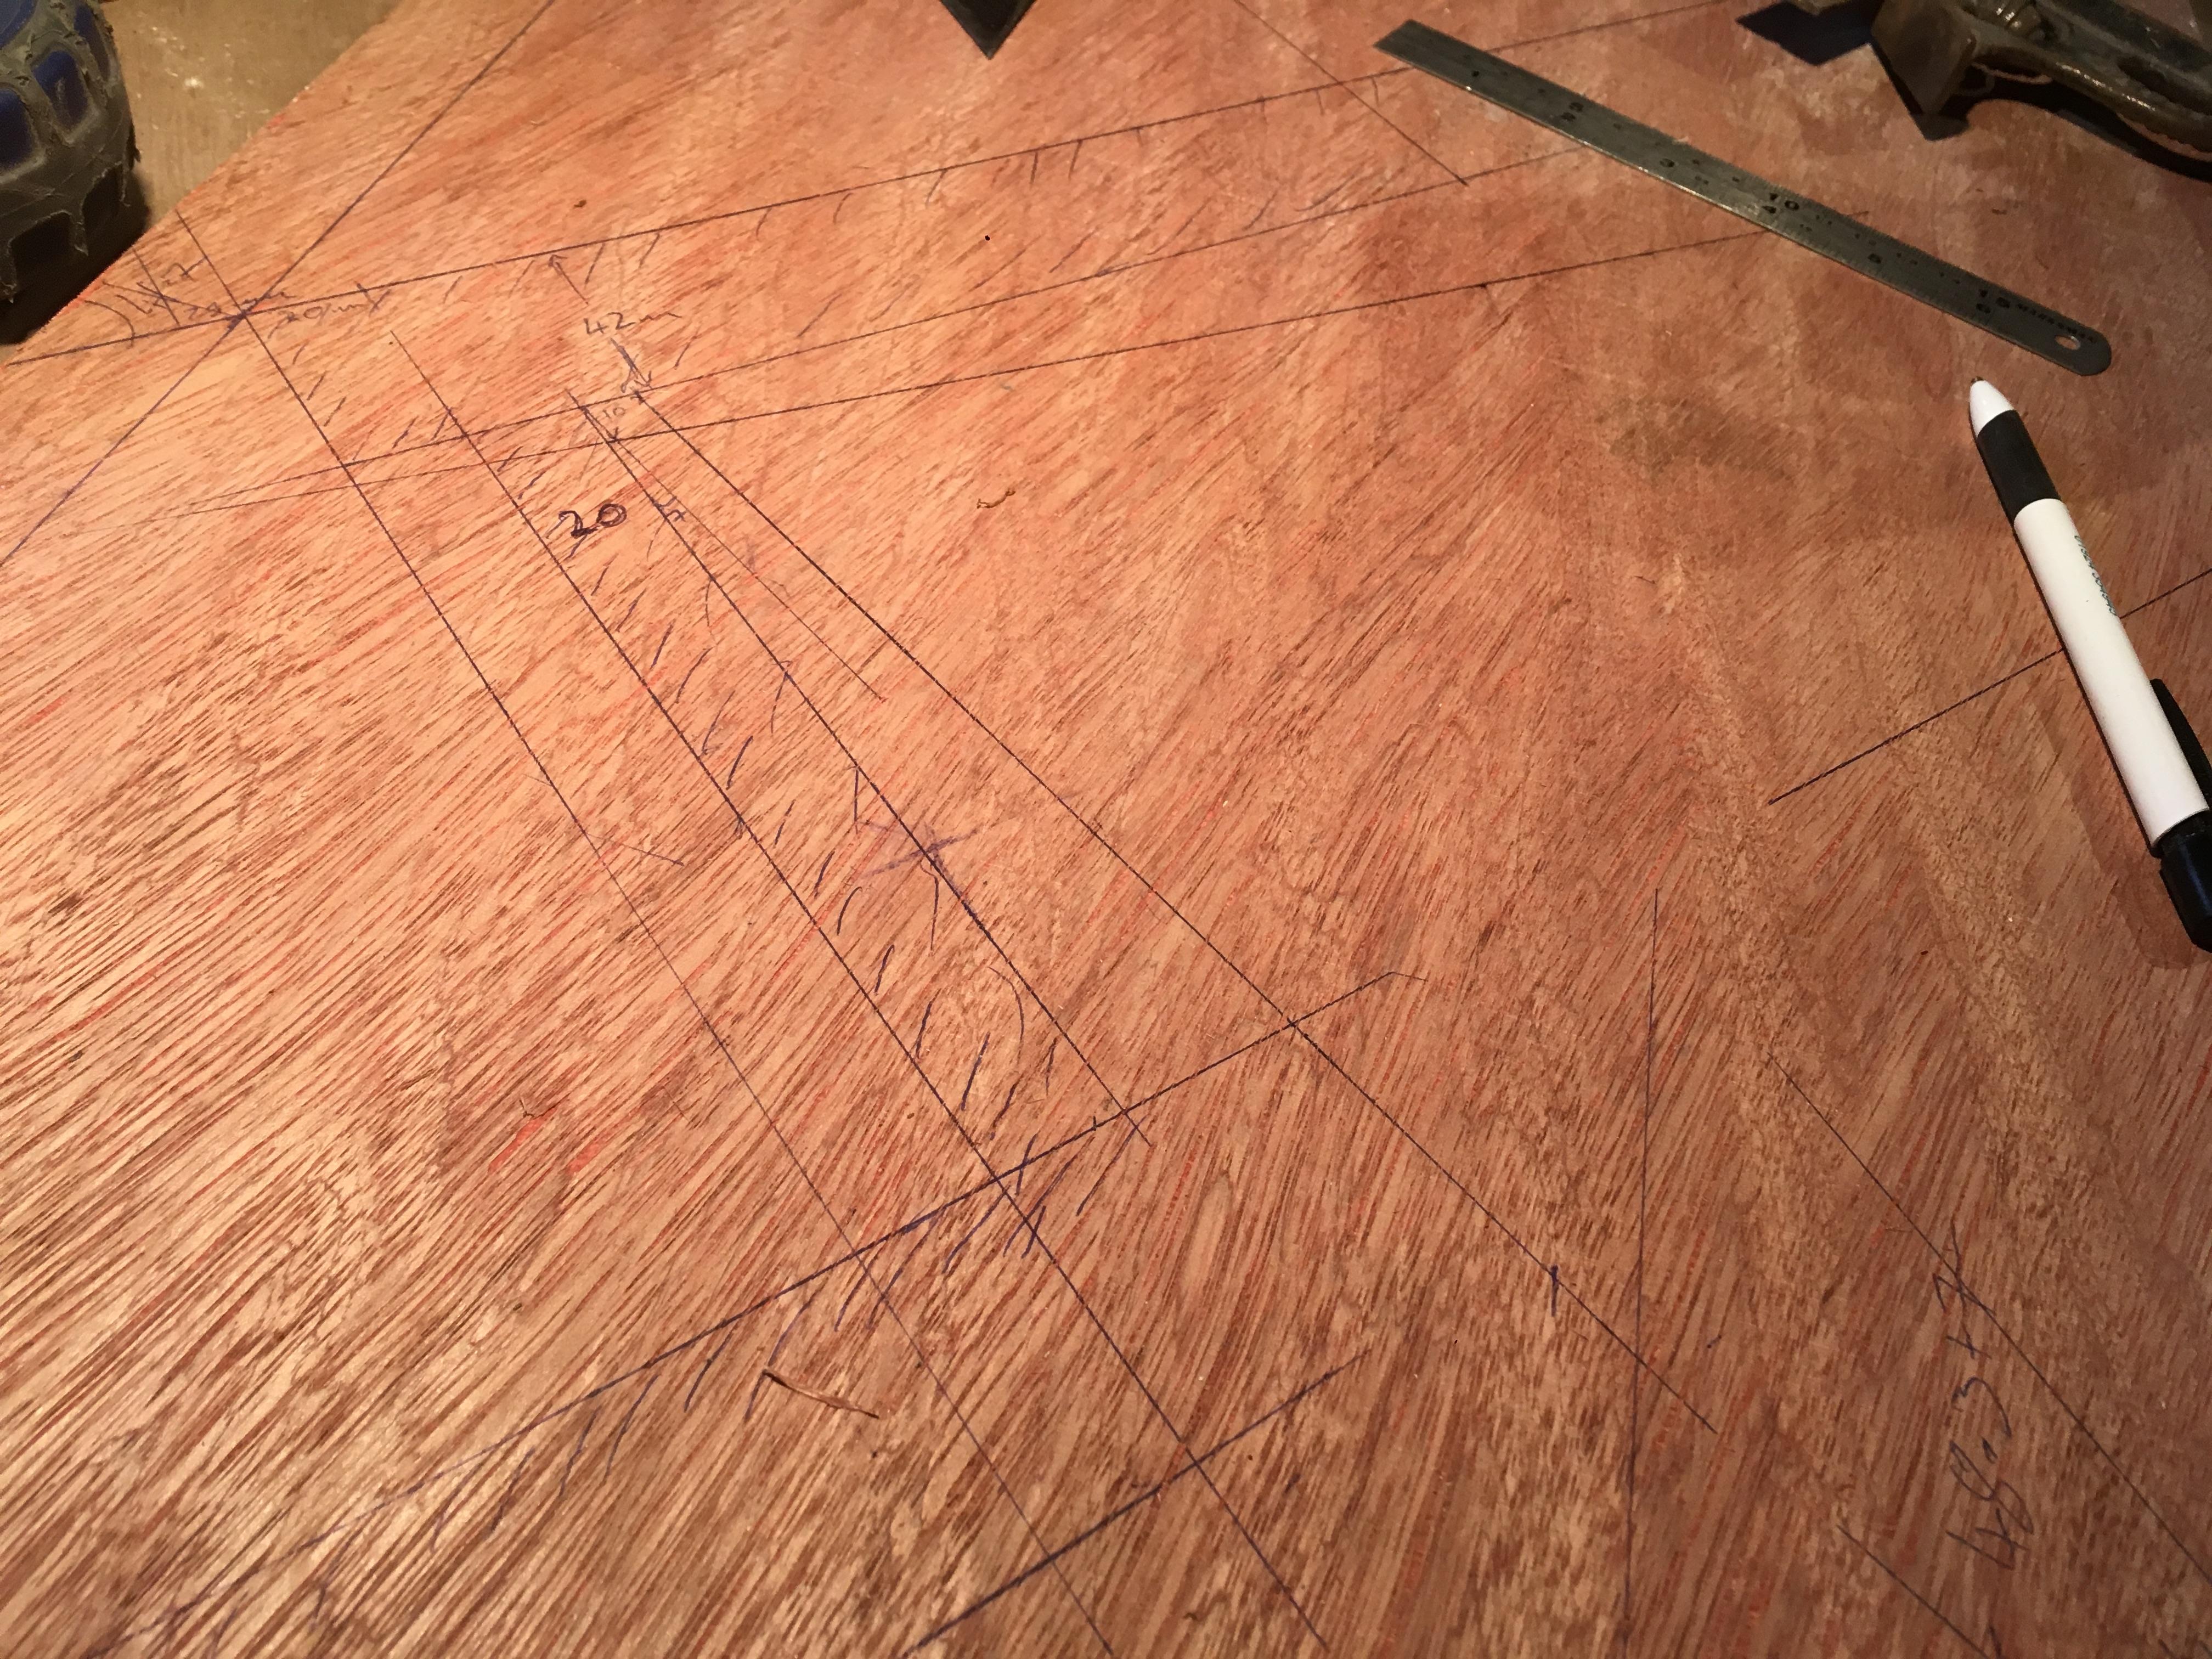
I was going to add this to the stage 1 thread but I feel it deserves its own thread. I am finally starting to make my staircase , all those years that the piles of rough sawn trees have been getting in the way are coming to an end. Yay. I should think some of you already know I started this project a good couple of years ago by cutting down a dead oak tree in the meadow. If not I will provide links to the beginning of the story when I get inside. But either way check out all the progress. The oak is starting out in roughly 55x600x3400mm planks that I slabbed with the chainsaw mill, From that they get laid onto some trestles and cut to useable widths with my skill saw and 3 rails connected together. i found these here little rollers very helpful when trying to get the full slabs into the rights place. Then I put under the little batten to stop it moving while I cut it. so we now have reasonable width 55mm oak planks. Most are over 300mm all have 1 straight side but otherwise they are very rough from the chainsaw. thats is how I left all but 2 lengths because I wanted to get my head around the newel posts. The 2 I put over the planer have come up very nicely so far, The strings treads and risers will be made from the oak if I can get enough out of it but it is looking promising so far. The newels and spindles will be ash. The ash started as roughly 120x600x3900 slabs so I am having to cut them from both sides with the saw but with the rails they are coming out rather well. as for converting the timber i have gone gone a little further with the ash. First job is to cut them to usable length. Then they get pushed over this overhand planer bow up until I get a consistent cut. Then I repeat the process on an adjacent side while making sure my new flat face is hard against the guard so I end up with 2 straight sides and one square corner. from there i take it and put it through the thicknesser useing those faces as references, this give a nice straight even thickness post. now I know what final thicknesses I can achieve with the wood I have I have started making the first jig for housing the treads in the strings. I say first because I will probably end up with at least 2-3 as the lower flight will have draws as risers. After the landing there will be a standard flight finishing with 3 winders at the top. I modeled it all on cad first to optimise the width so it finishes nicely after the winders. its all just lines on ply at the moment but I’ll be getting the router out soon, and thats about as far as I have got. I’d better get back to work


 5 points
 -
Very impressed, top shelf stuff right there. Even a can of wife beater, to aid thinking. ?? in my mind I can do stuff like this but I’m really just an amateur wood butcher.2 points
-
Wait for the plasterer. Then decide and lay the floor. Fit the stove and a kitchen, then move in. Then finish the other 90%2 points
-
I can’t understand why anyone uses a private BC local authority was less than £800 Private was simalar protect wanted a couple of days notice for inspections Local authority ring befor 10am same day visits2 points
-
Sorry bud, I don't think I would. Pretty sure it's Chinese not European made.
 1 point
 -
Quite impressed you smashed a triple glazed unit! We had a Gaulhofer glazed exterior door and it was delivered without frosted glass - a new glazed unit was shipped out and replaced by the installer with no issues. I'm sure Internorm can sort this - it must happen all the time in delivery, installation etc. Just put Eurovision on - will erase anything from your mind after a few mins..1 point
-
What a brilliant blog. I lived in Writtle near Chelmsford in Essex for 16 years, I left 7 years ago - if I was still there I'd be tempted to offer a hand. In fact I would be there! Def the pets parts unfolding here.1 point
-
5,400 topics and 95,000 posts and counting ... Unstructured data is a mare to make sense of unless you can use third party data mining tools to find patterns - tags are a low tech method and on the whole work well. If everyone who got a question answered went back and tagged their original post then it would be a gold mine .....1 point
-
I brilliant thread, all credit to you. I too used a stair box kit but did the landing and hand rails myself and I am well chuffed with the result. I built a straight staircase years ago so know how hard it can be. Keep up the photos and narrative.1 point
-
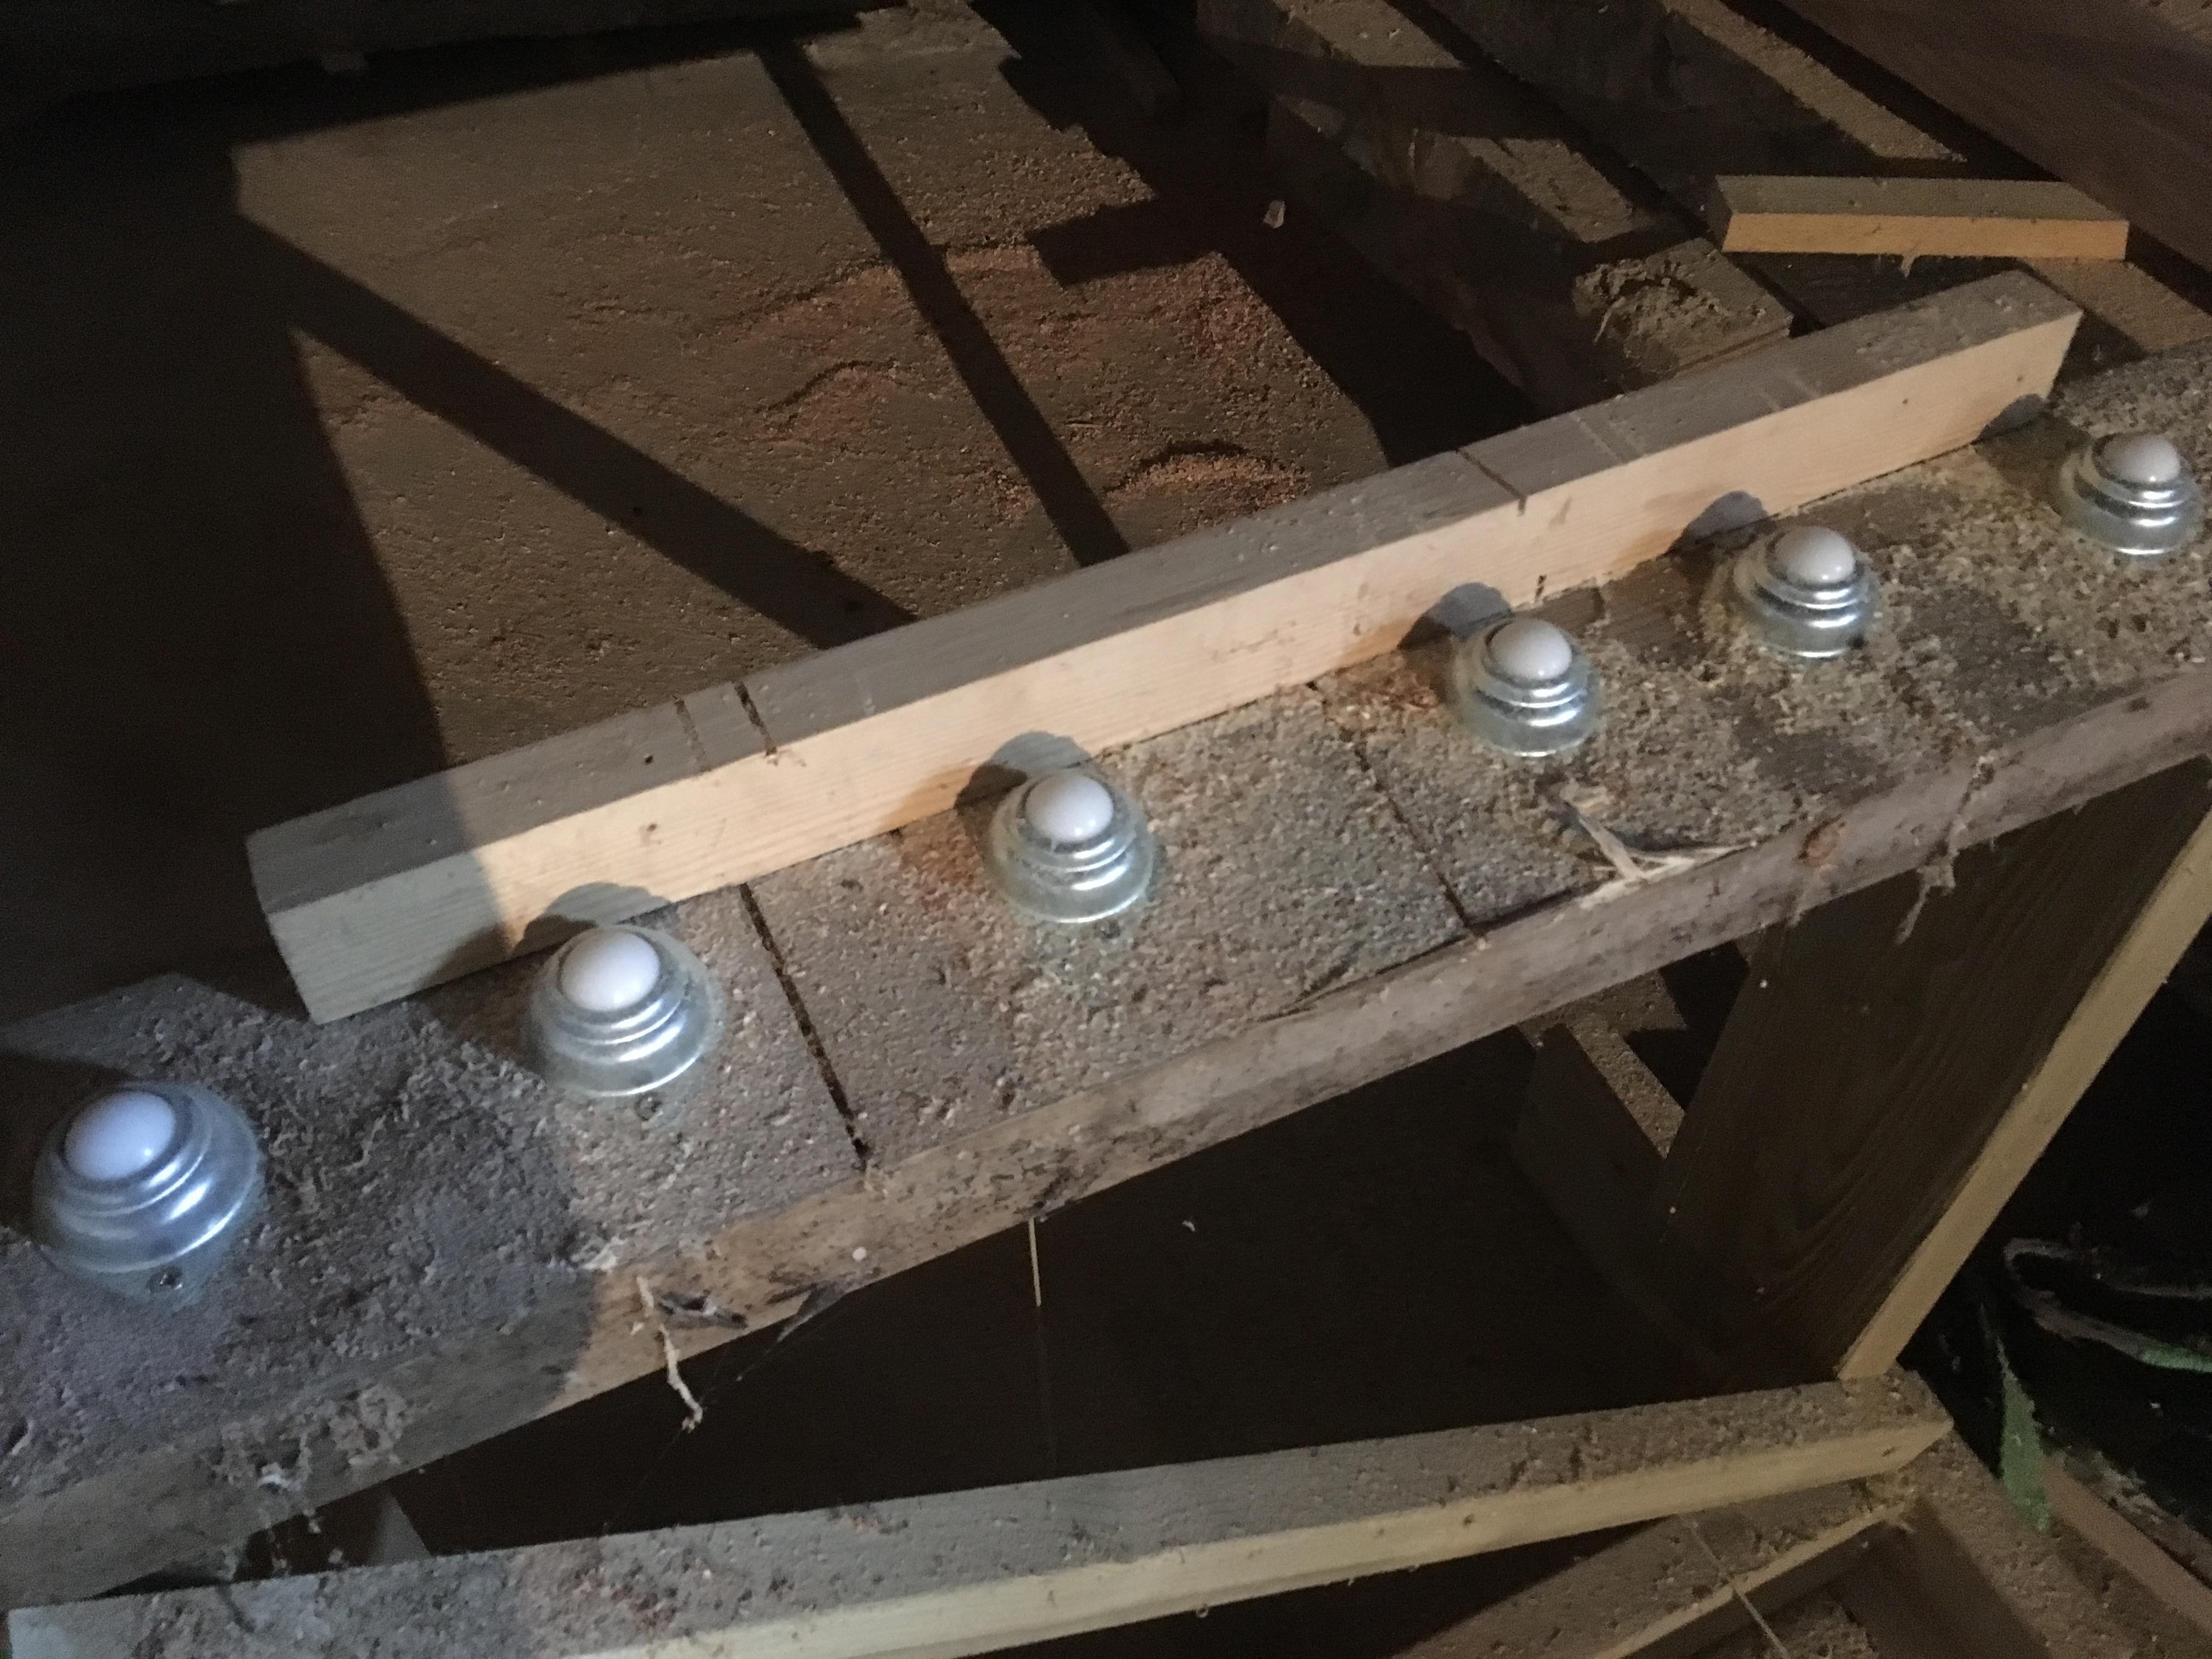
Yep and I only used these - cheap and easy, they fit under the mounts really well with a penny washer on top. Minifoot1 point
-
Great thread... You should get some apprenticeship candidates to get that workshop buzzing every day. Must be a social enterprise there in the making. First customer the local council, they supply lots of access ramps for clients who become old and frail and want to stay in their own homes...nah not serious just want to come and play with those big machines ??? Keep it coming1 point
-
Talking of U-boats this is a good watch:1 point
-
Yes, I have to agree I did enjoy the process and the decision making wasn't too difficult either. I'm sure that will soon change!! Thank you, yes, the builder has been good and the figures mentioned were what I budget for. Although having said that, I had forgotten the dwarf wall so that had to be included - but in the scheme of things not a problem.1 point
-
My identical Glowworm doesn't have AV pads either, and the MIs just say bolt direct to the concrete base. I bolted mine directly down with thunderbolts and there's no noise or vibration at all. If you look inside you'll find that the scroll compressor is mounted on internal AV mounts, which is presumably why the MIs make no mention of fitting the unit on AV pads.1 point
-
An awesome thread you beautiful man Damn you and your free tool collection, the stuff of wet dreams. Please add as much detail as time allows as this will be of utmost value! I used Kwikstep for the boys room, a total cop-out, but even that required a new brain and a second opinion Buildhub gold in the making, thanks for this.1 point
-
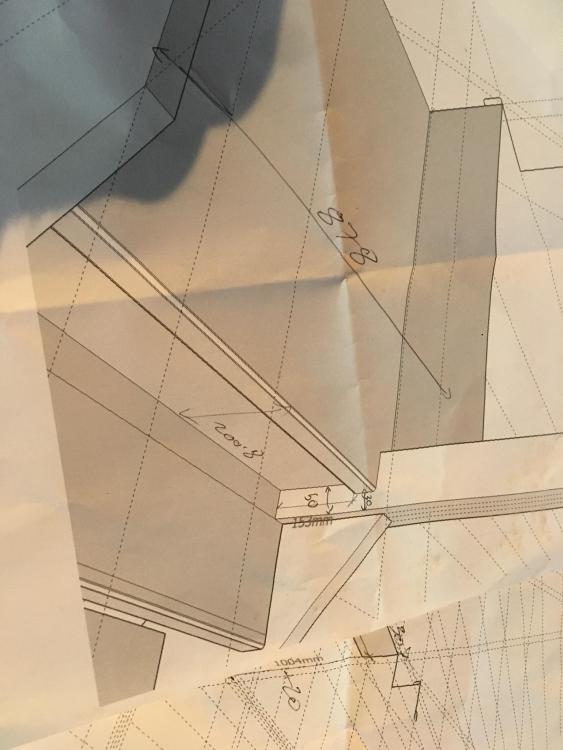
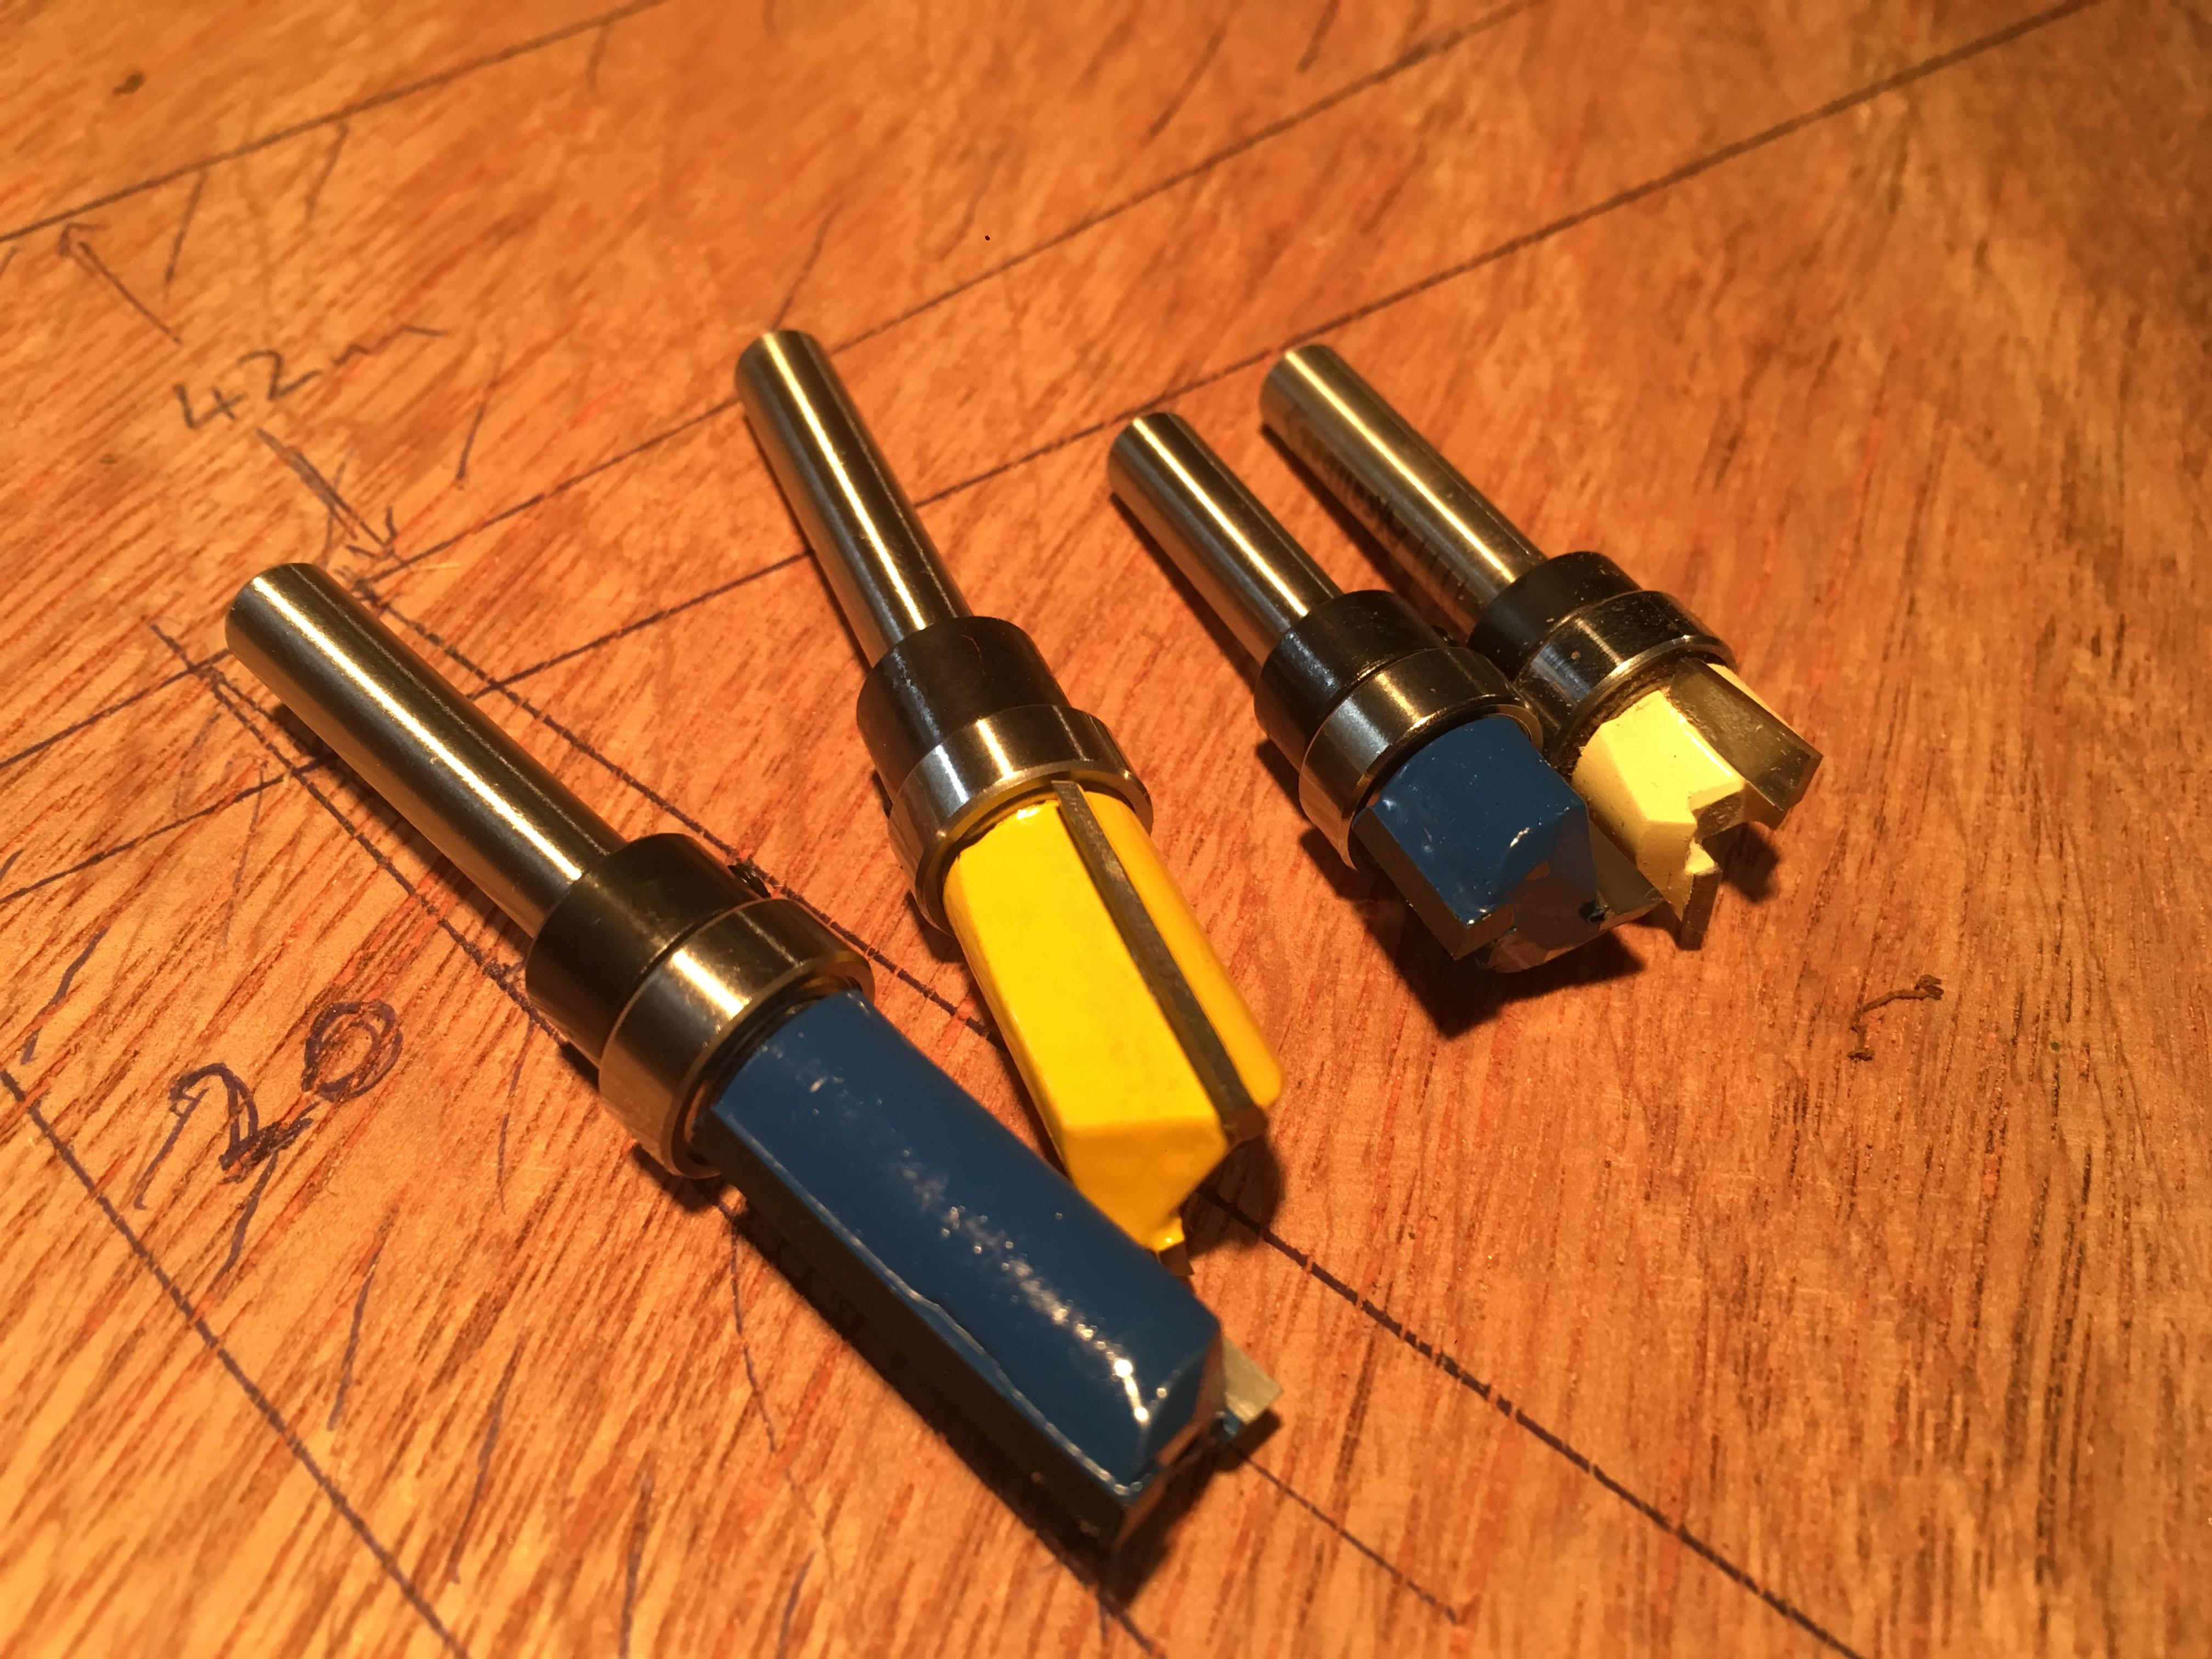
Well that’s it all on the ply. Now i I need to make it 8mm bigger so I can use a 30mm guide bush. Then I’m going to rout it out. I’ll do the tread first. Then transfer that to another jig with a guided cutter. Then go back and take out for the wedges and risers, thats the plan at least.

 1 point
 -
Last time I did this was college and that was only putting the bits together, not actually machining all the parts. Your only as bad as you allow yourself to be. Speed and problem solving only come from experience, but quality of work is your own choice no matter what level you are. Edit: it does help that I’m storing all this machinery for a friend ?1 point
-
That's looking great. I am sure that will be much more of a feature than my stairbox stairs.1 point
-
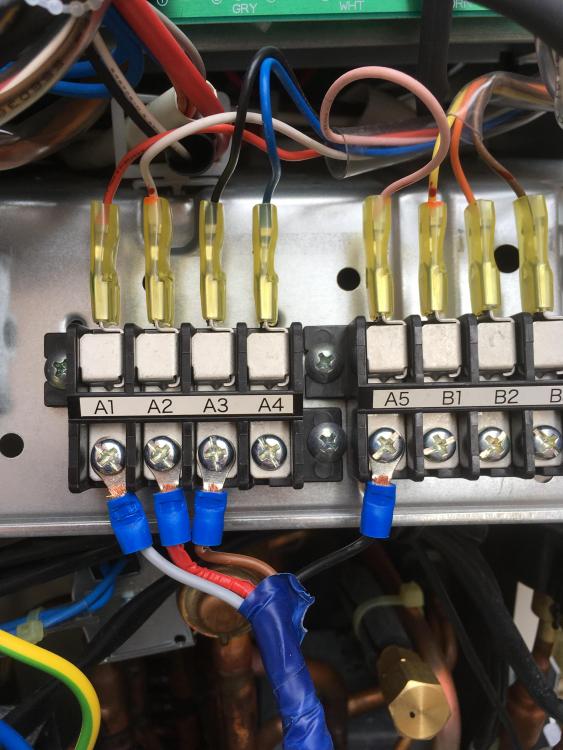
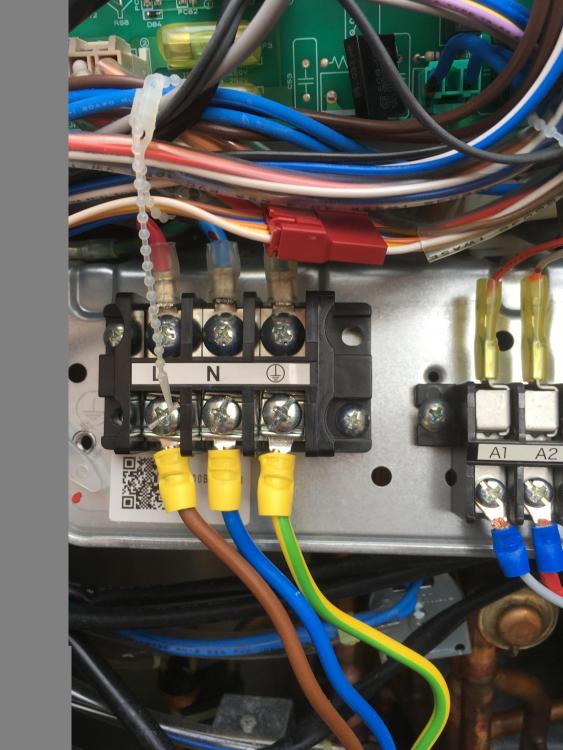
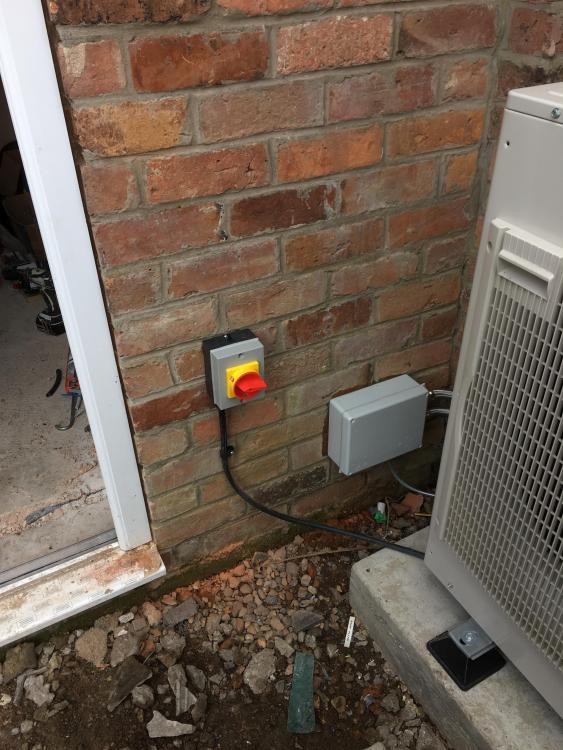
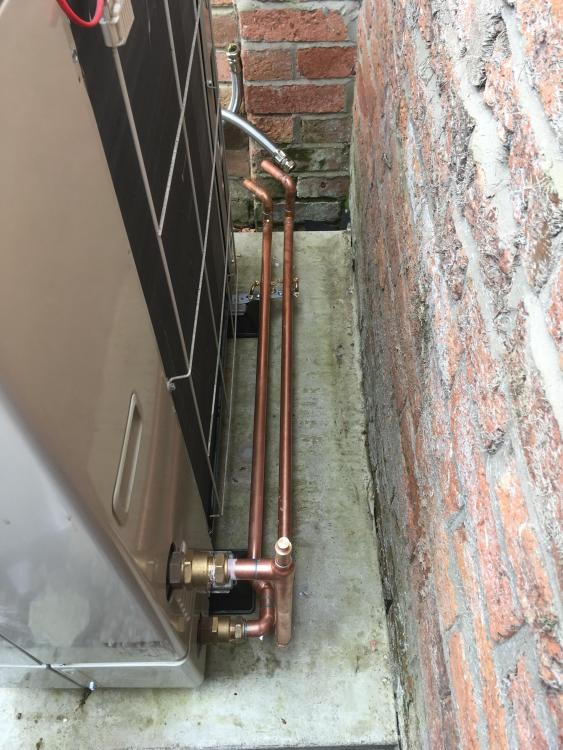
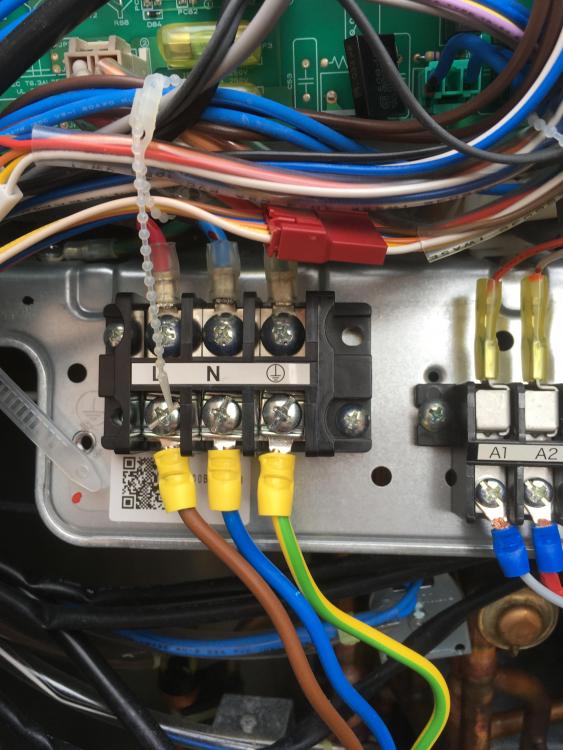
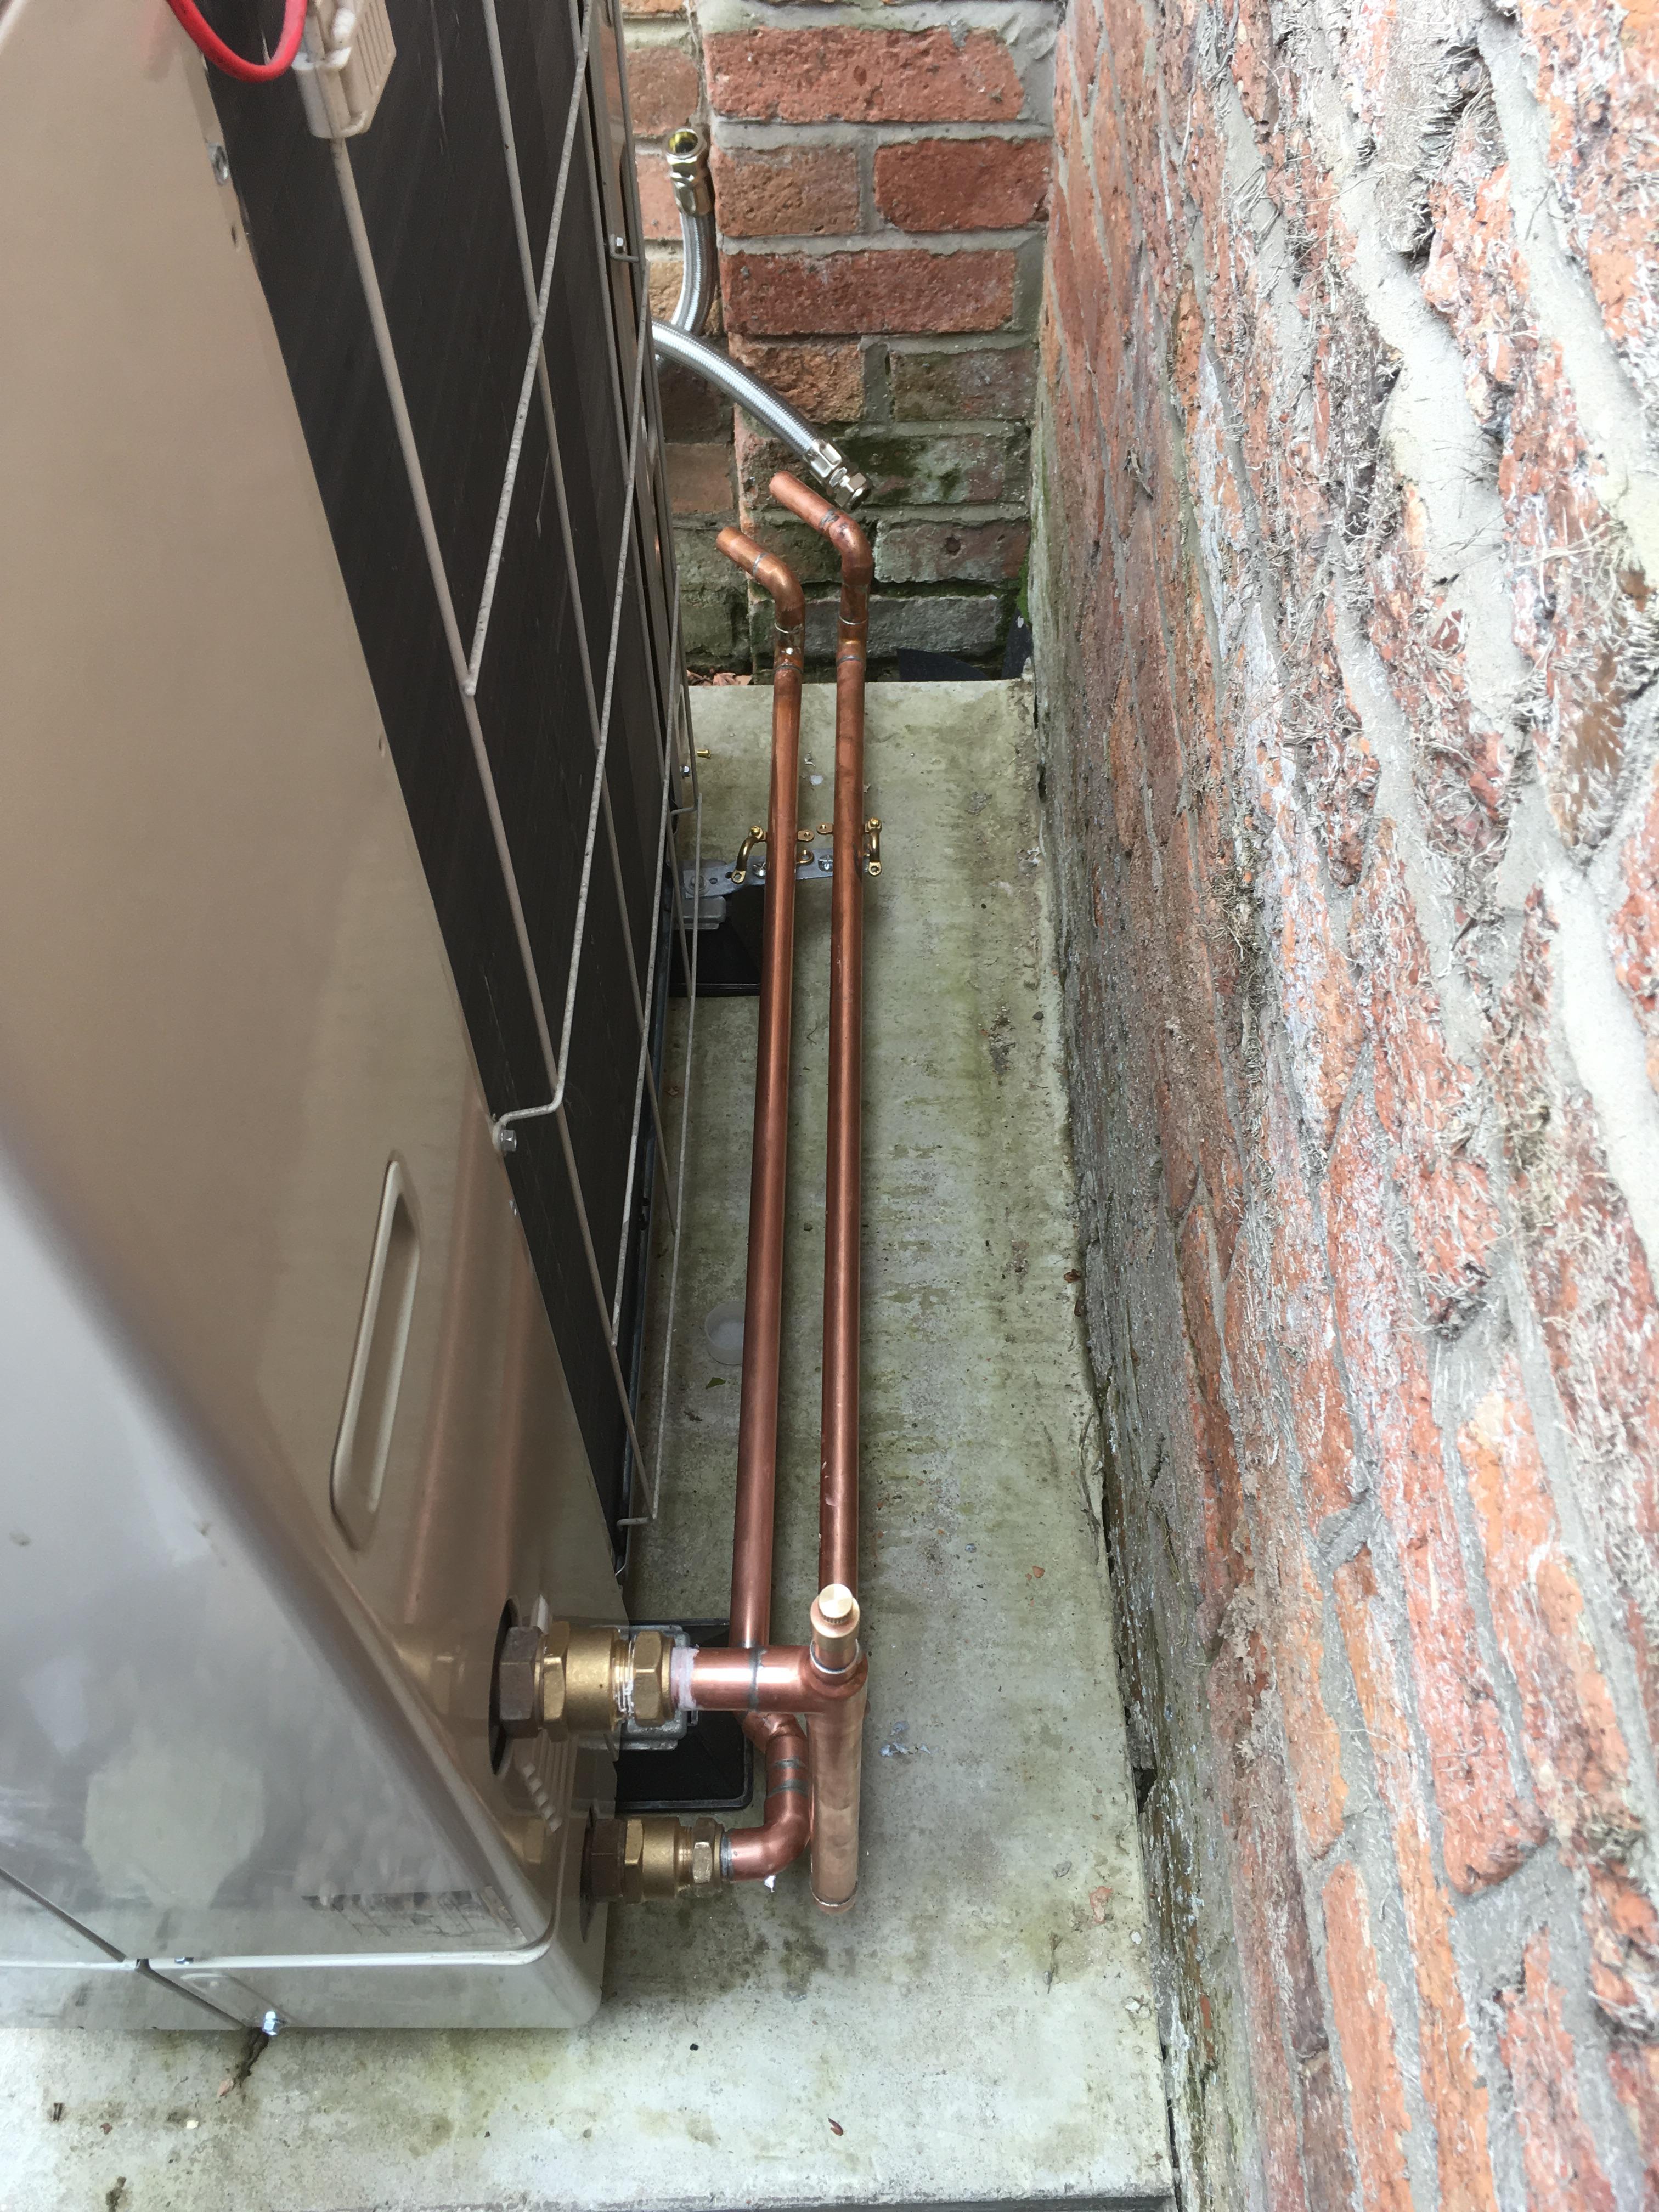
Ok so take the lid off and you will find terminals marked L N E P1 P2 A1A2 A3 A5 from memory. P1 and P2 connect to the pipe stat. L N E connect to the switched output from the time clock (via the room stat) A1-A5 go to the matching connections on the internal board. Need a 25a rotary switch and some flex to connect - I used HORN. Should look like this when it’s done. Time clock controls the on/off, room stat controls the room temps and then the pipe stat does the ASHP signaling. for ease - as I had to go one side to the other - I used copper and then use flexis to the termination at the house. Unit sits on Mini Pads from TLC Direct and were £2 each.
 1 point
 -
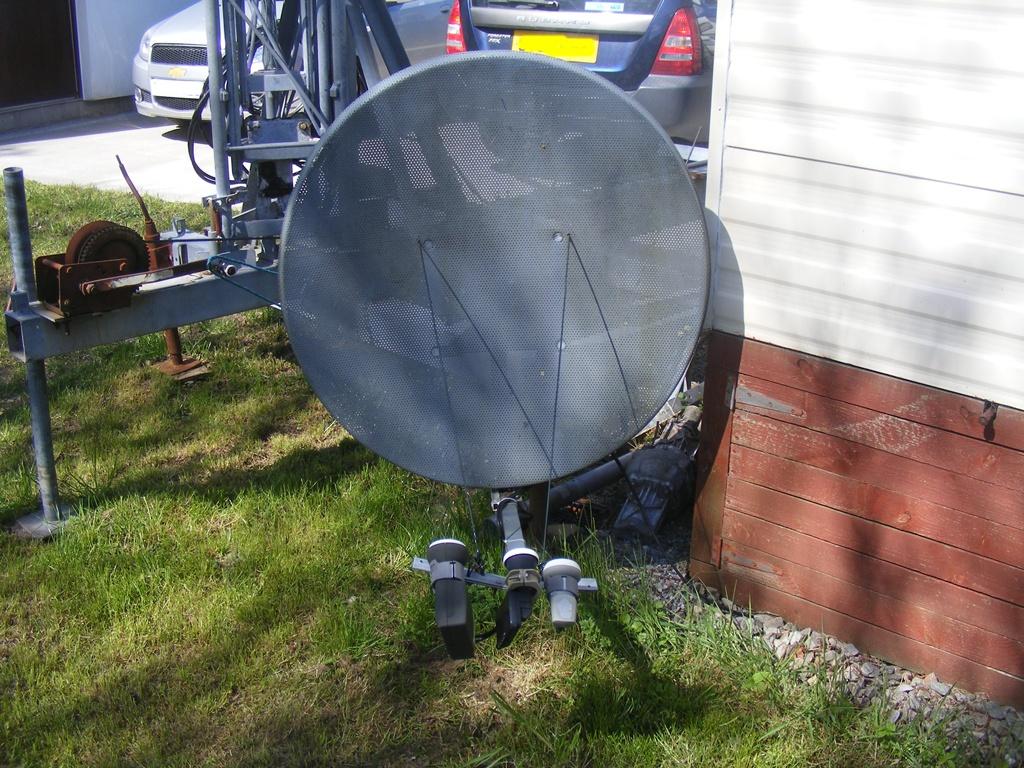
I bought a cheap'ish, fairly large dish (larger than needed for our area) and I was surprised to find that the LNB arm was made from a pretty robust alloy box section, complete with a built-in spirit level. The dish and mounting bracket seem to be powder coated zinc plated steel, and there's a neat plastic socket inside the steel bracket at the base of the dish where the LNB arm bolts, presumably to prevent galvanic corrosion. I bought it from ebay for around £40, complete with a quad LNB, and it looks like it will last for many years. TBH I was a bit surprised, as the quality of the powder coat and the bolts that hold it together look as if it may well have been made in Germany - it has that well-engineered German look to it. I'm no doubt that it would be fine in an exposed location, as long as the mounting tube was secured to something very rigid.1 point
-
The usual weakness on many dishes is the LNB arm. Not helped by the design of some is a U shaped hollow tube specially designed to fill with water and rot from the inside. I have 3 "guy wires" on mine,
 1 point
 -
Let's draw a line under this . Its a rental. £300 every 3-5 years upgrading a tv is deductible under depreciation. Just buy a half decent smart with USB, wifi, hard wire it to the BB router, have freesat, mount a dish ( try doing that with bigger bolts ) and move on. Netflix and Digital radio and freesat = problem solved. Put the TV you have in for the immediate and get some revenue if that's the issue, but the suns about to shine so........... Get it rented out ! Chop chop. @Onoff any reason that threaded bar can't be used to stabilise the dish if it's that battered by wind ?1 point
-
A lot of tv's have a "Hotel mode" that disables all the setup menu's. Well worth investigating and enabling that if it has that function.1 point
-
Yes relaxed......another annoyance with my architects who imposed it on my build unnecessarily.1 point
-
Having shopped around I found that Arcon were the cheapest for what I needed.1 point
-
https://rover.ebay.com/rover/0/0/0?mpre=https%3A%2F%2Fwww.ebay.co.uk%2Fulk%2Fitm%2F3905604993791 point
-
Aren't they called feature editors?1 point
-
For England see page 30 of Approved Doc B: https://assets.publishing.service.gov.uk/government/uploads/system/uploads/attachment_data/file/485420/BR_PDF_AD_B1_2013.pdf Either the garage floor needs to slope toward the outside and away from the door into the house (no minimium slope specified) or you need a step of at least 100mm. The idea is to stop spilled fuel flowing into the house.1 point
-
I do need to decide on the first track I'll put through the Bluetooth speakers when the bathroom's done and I'm lying in the bath with a tall beer. Strobe by Deadmau5 probably, 10 and a half minutes of relaxation. Long intro then it builds into a bangin' choon. I like listening to it on my own in a darkened room with a drink in hand.1 point
-
Or as therapist’s notes.1 point
-
Switch on, download, cook a meal, pop down the pub, comeback, restart. Put it in its place. Don't let it control you. Nay borra, Jimmie.1 point
-
Totally gutted. Through sheer stupidity I've managed to smash one of our Internorm triple glazed panels - I'm trying to numb the pain with alcohol but it's not having much effect. Please someone, tell me it's an easy fix and I shouldn't fret about it. The OH is saying not to worry but I can't help but...0 points
-
0 points


This leaderboard is set to London/GMT+01:00