
Leaderboard


Popular Content
Showing content with the highest reputation on 10/12/17 in Posts
-
This is what I am ending up using for this bathroom: Shower panels for 3 of 4 walls: Multipanel Classic range from AB Building Products. 4 x 4x8 Aqualock panels in Blue Eiger pattern, adhesive, corners, trims and profiles, and silicone. = £650 approx. (Actually £610) Bath 1600 x 850/700 L-Shower bath with Screen from Cheeky Bathrooms: http://www.ebay.co.uk/itm/172603618735 = £265 Taps / Waste Wickes Kuban bath filler: http://www.wickes.co.uk/Wickes-Kuban-Bath-Filler-Tap-Chrome/p/209438 = £40 Bath swivel flip plug and overflow: http://www.ebay.co.uk/itm/391493900884 = £22 Cube Chrome Bathroom Basin Sink Mono Mixer Tap & Slotted Sprung Pop Up Waste = £35 http://www.ebay.co.uk/itm/Cube-Chrome-Bathroom-Basin-Sink-Mono-Mixer-Tap-Slotted-Sprung-Pop-Up-Waste/332383435828 WHB / Loo Wickes Positano Loo, Cistern, WHB = approx £170 http://www.wickes.co.uk/Products/Bathrooms/Bathroom-Suites/Contemporary-Bathroom-Suites/Positano-Suite/c/1001012 Floor Square of Vinyl from B&Q = approx £25 Cabinet Budget £75 Radiator Budget £50 Actual £38 for 900 x 450mm. Screwfix. Shower Still to be chosen. Likely 9.5kw Electric. Budget £100-125. Actual twin head mixer £80. Other sundries, trims, plumbing bits, silicone etc. Budget = £60 Total = just under £1500 for all materials.2 points
-
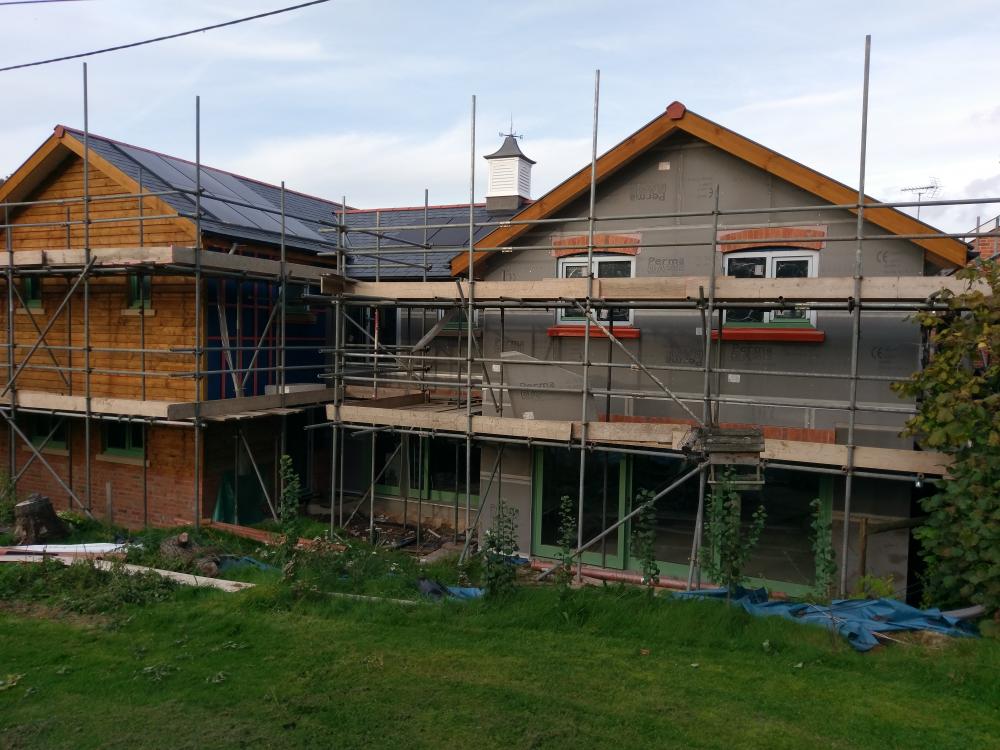
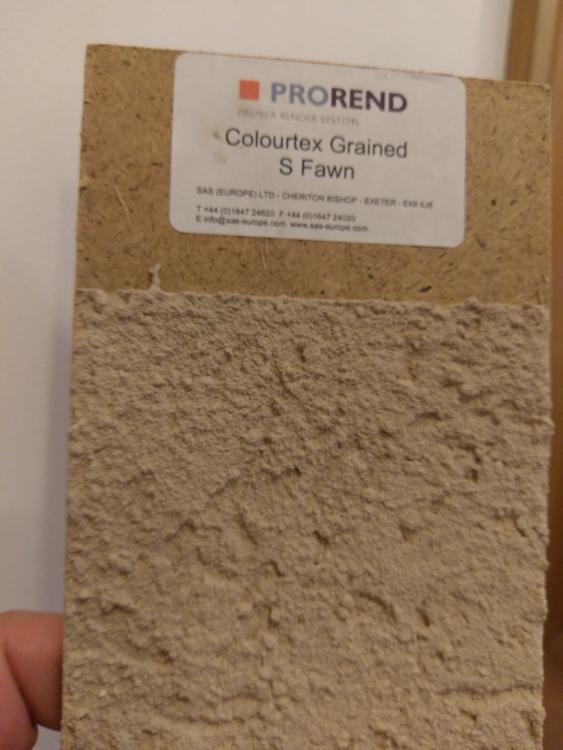
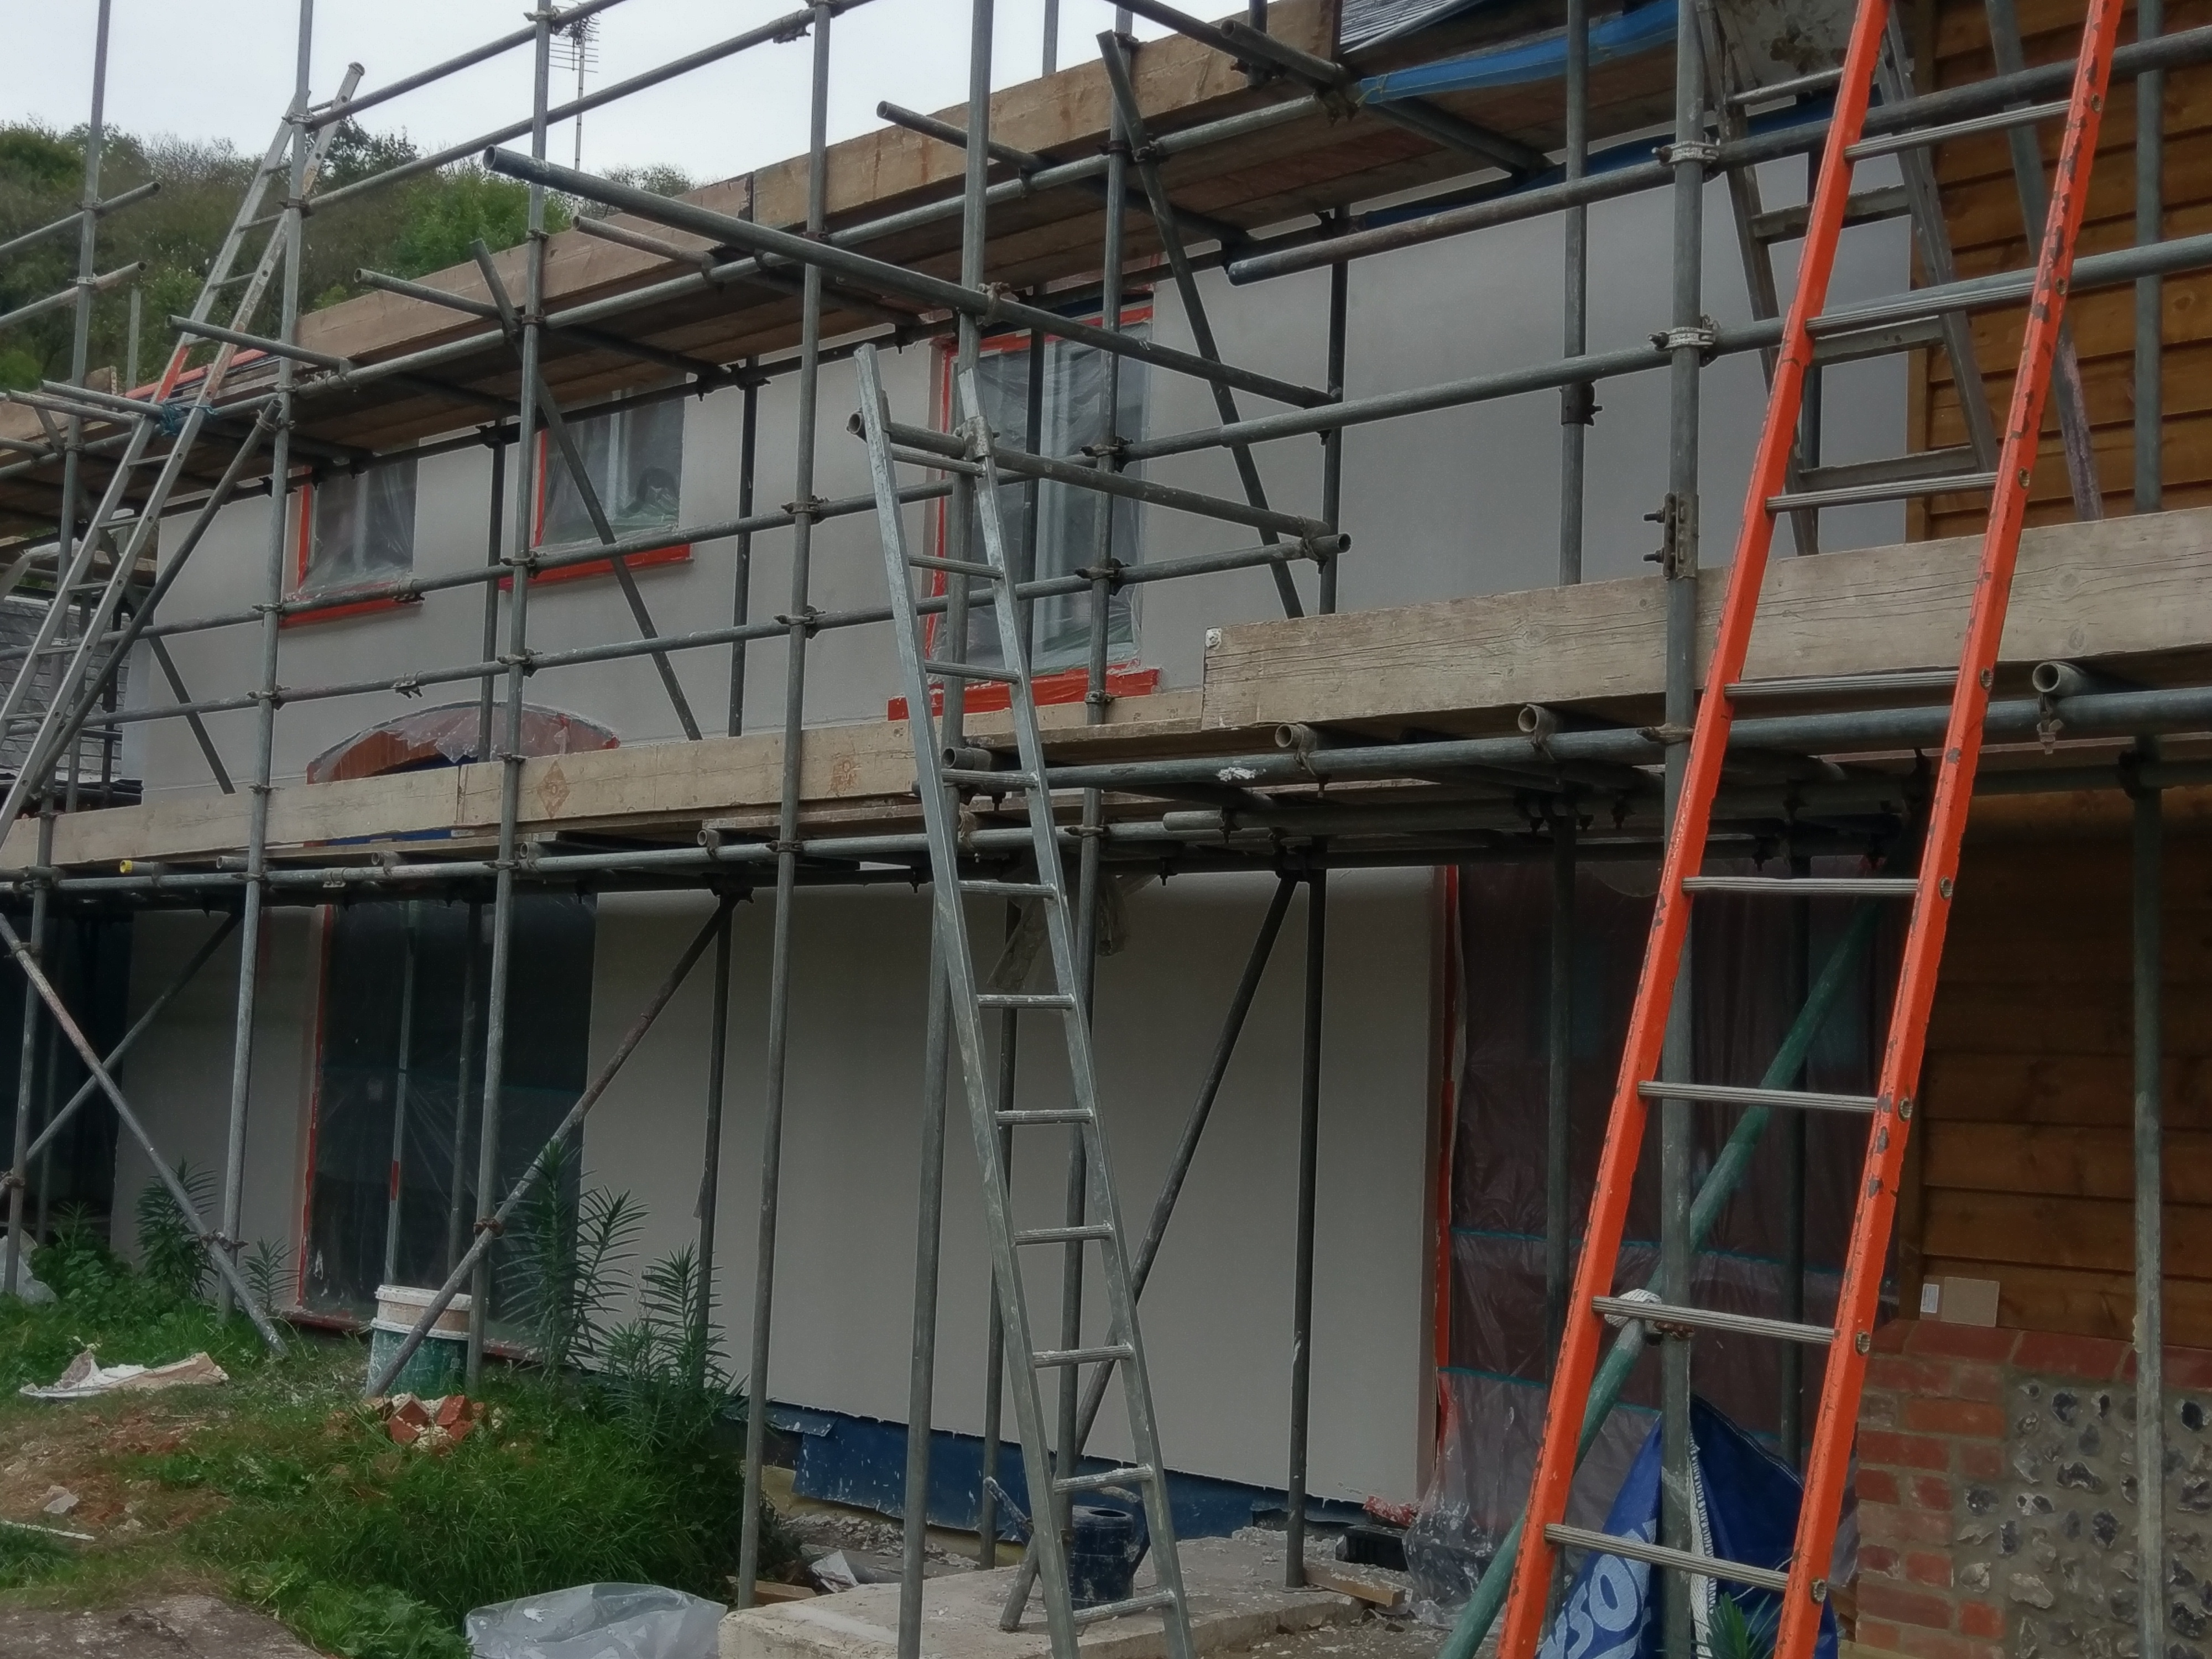
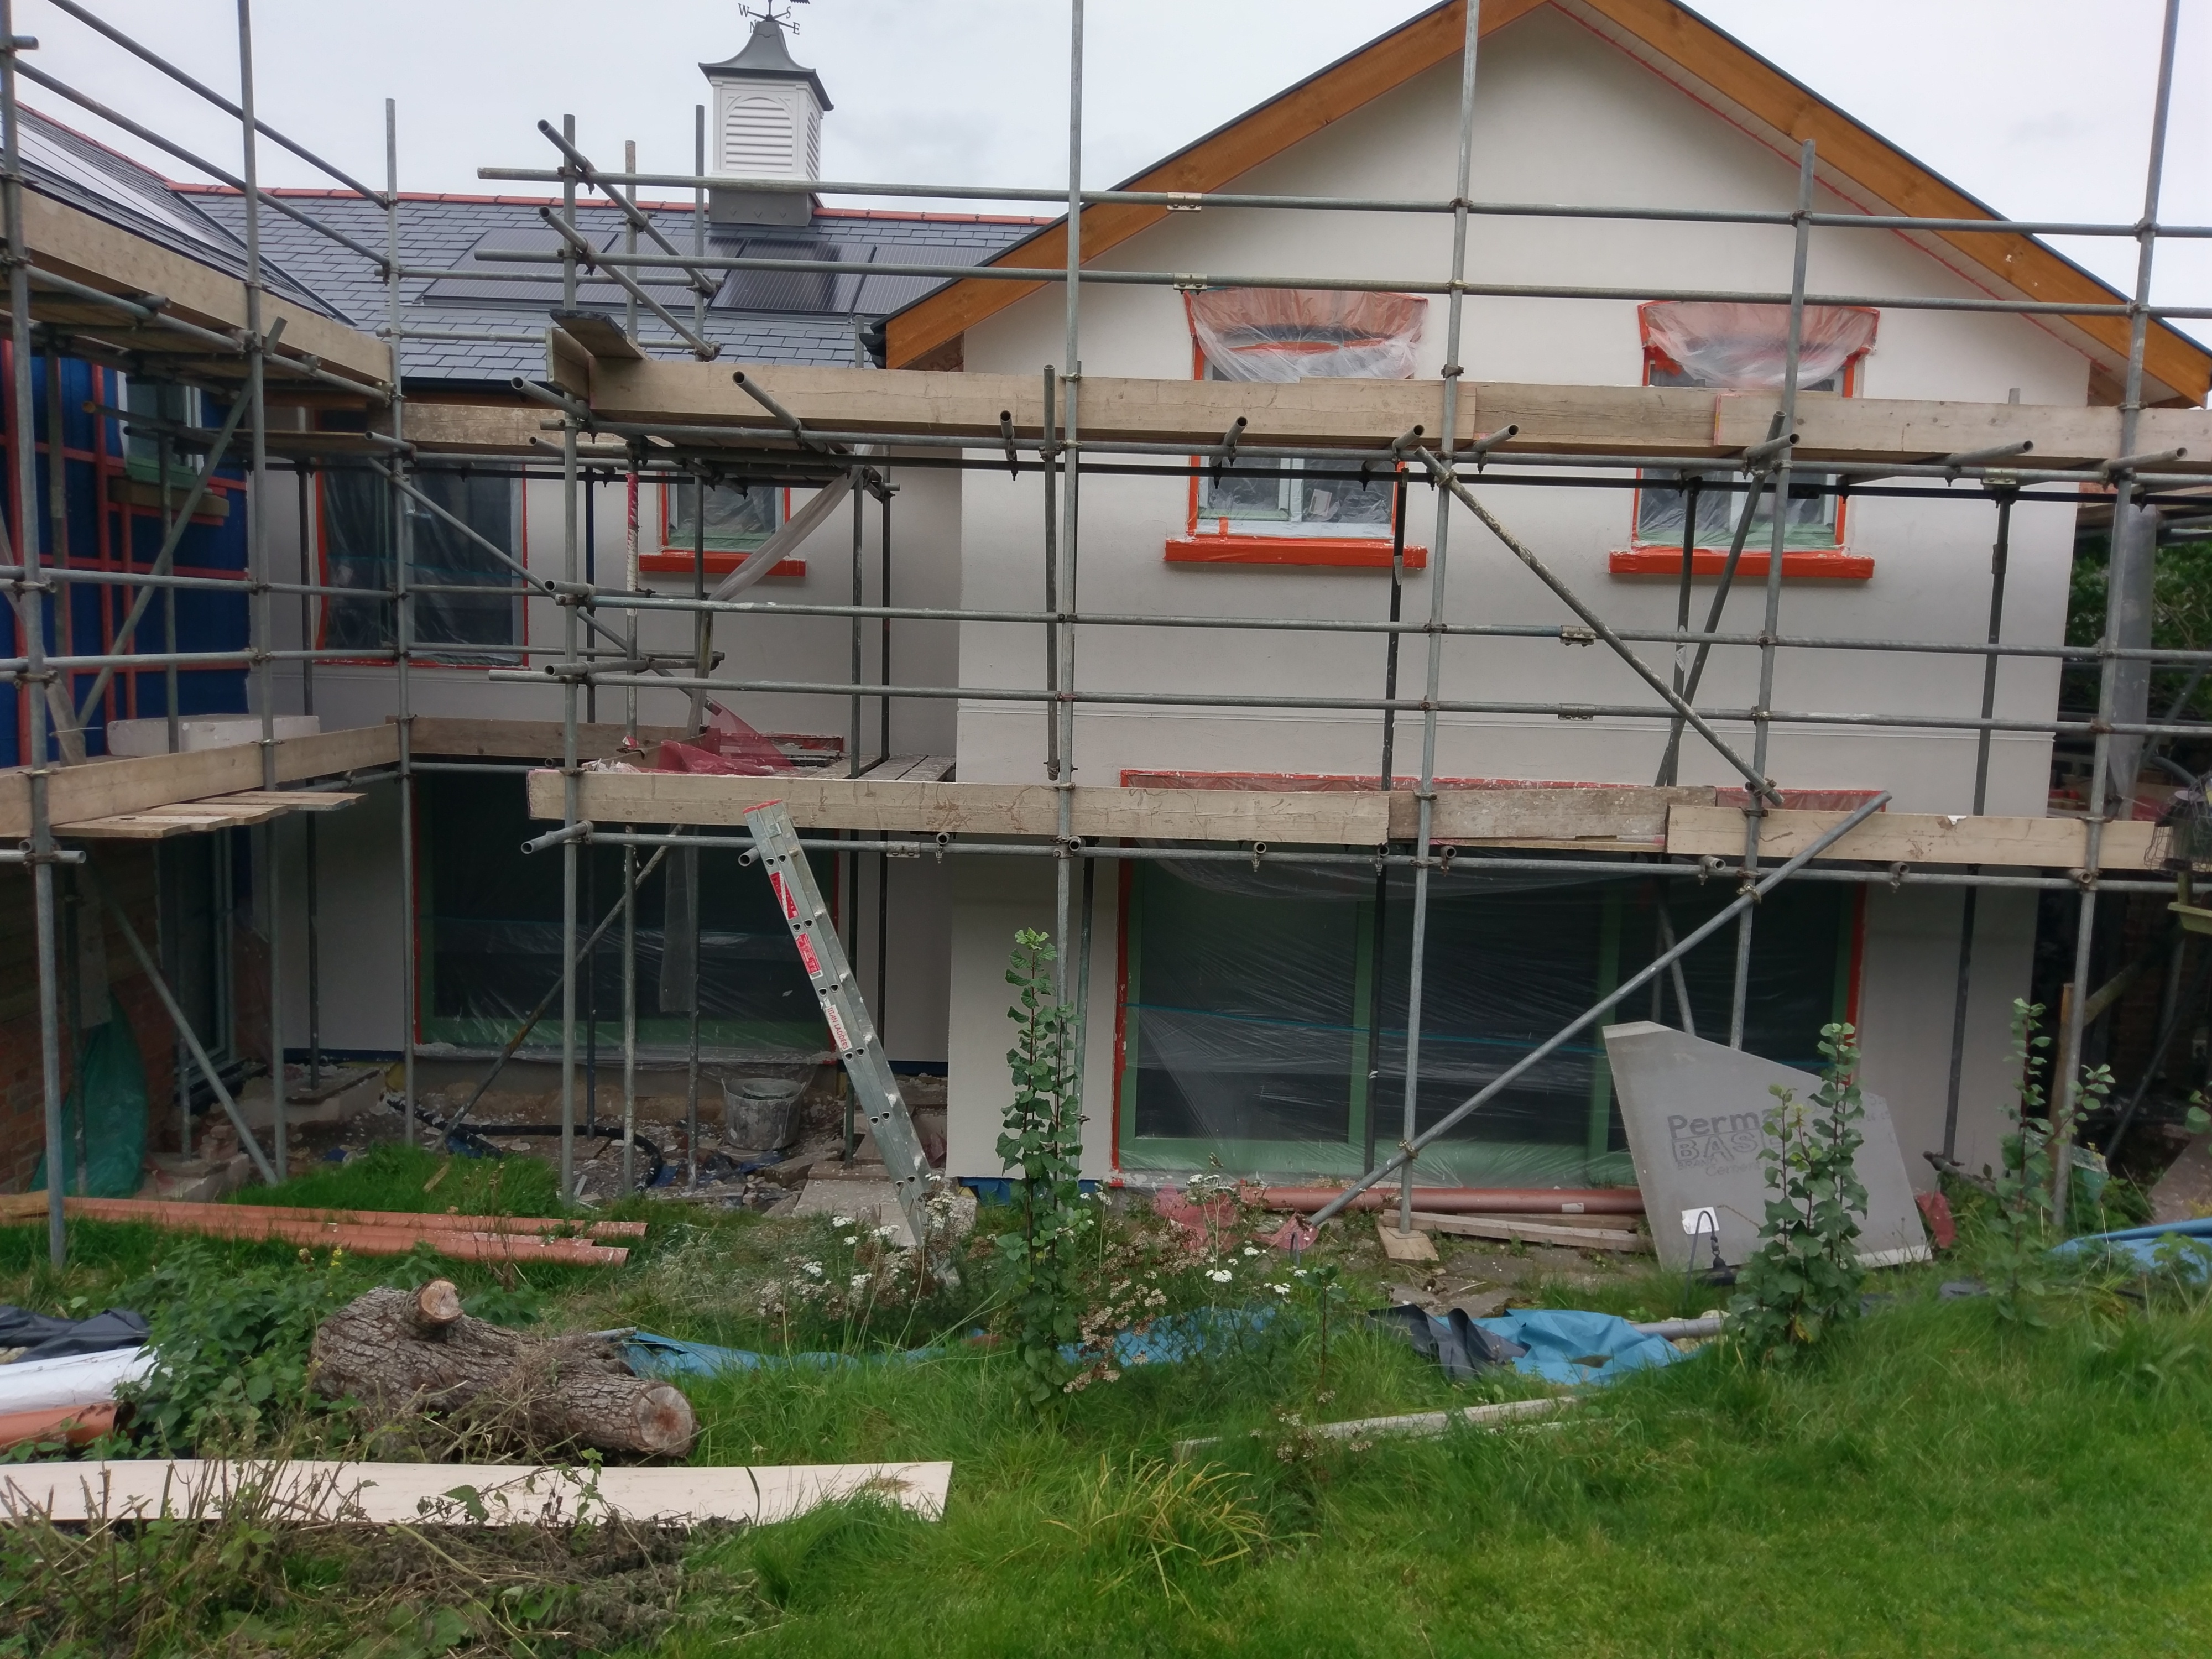
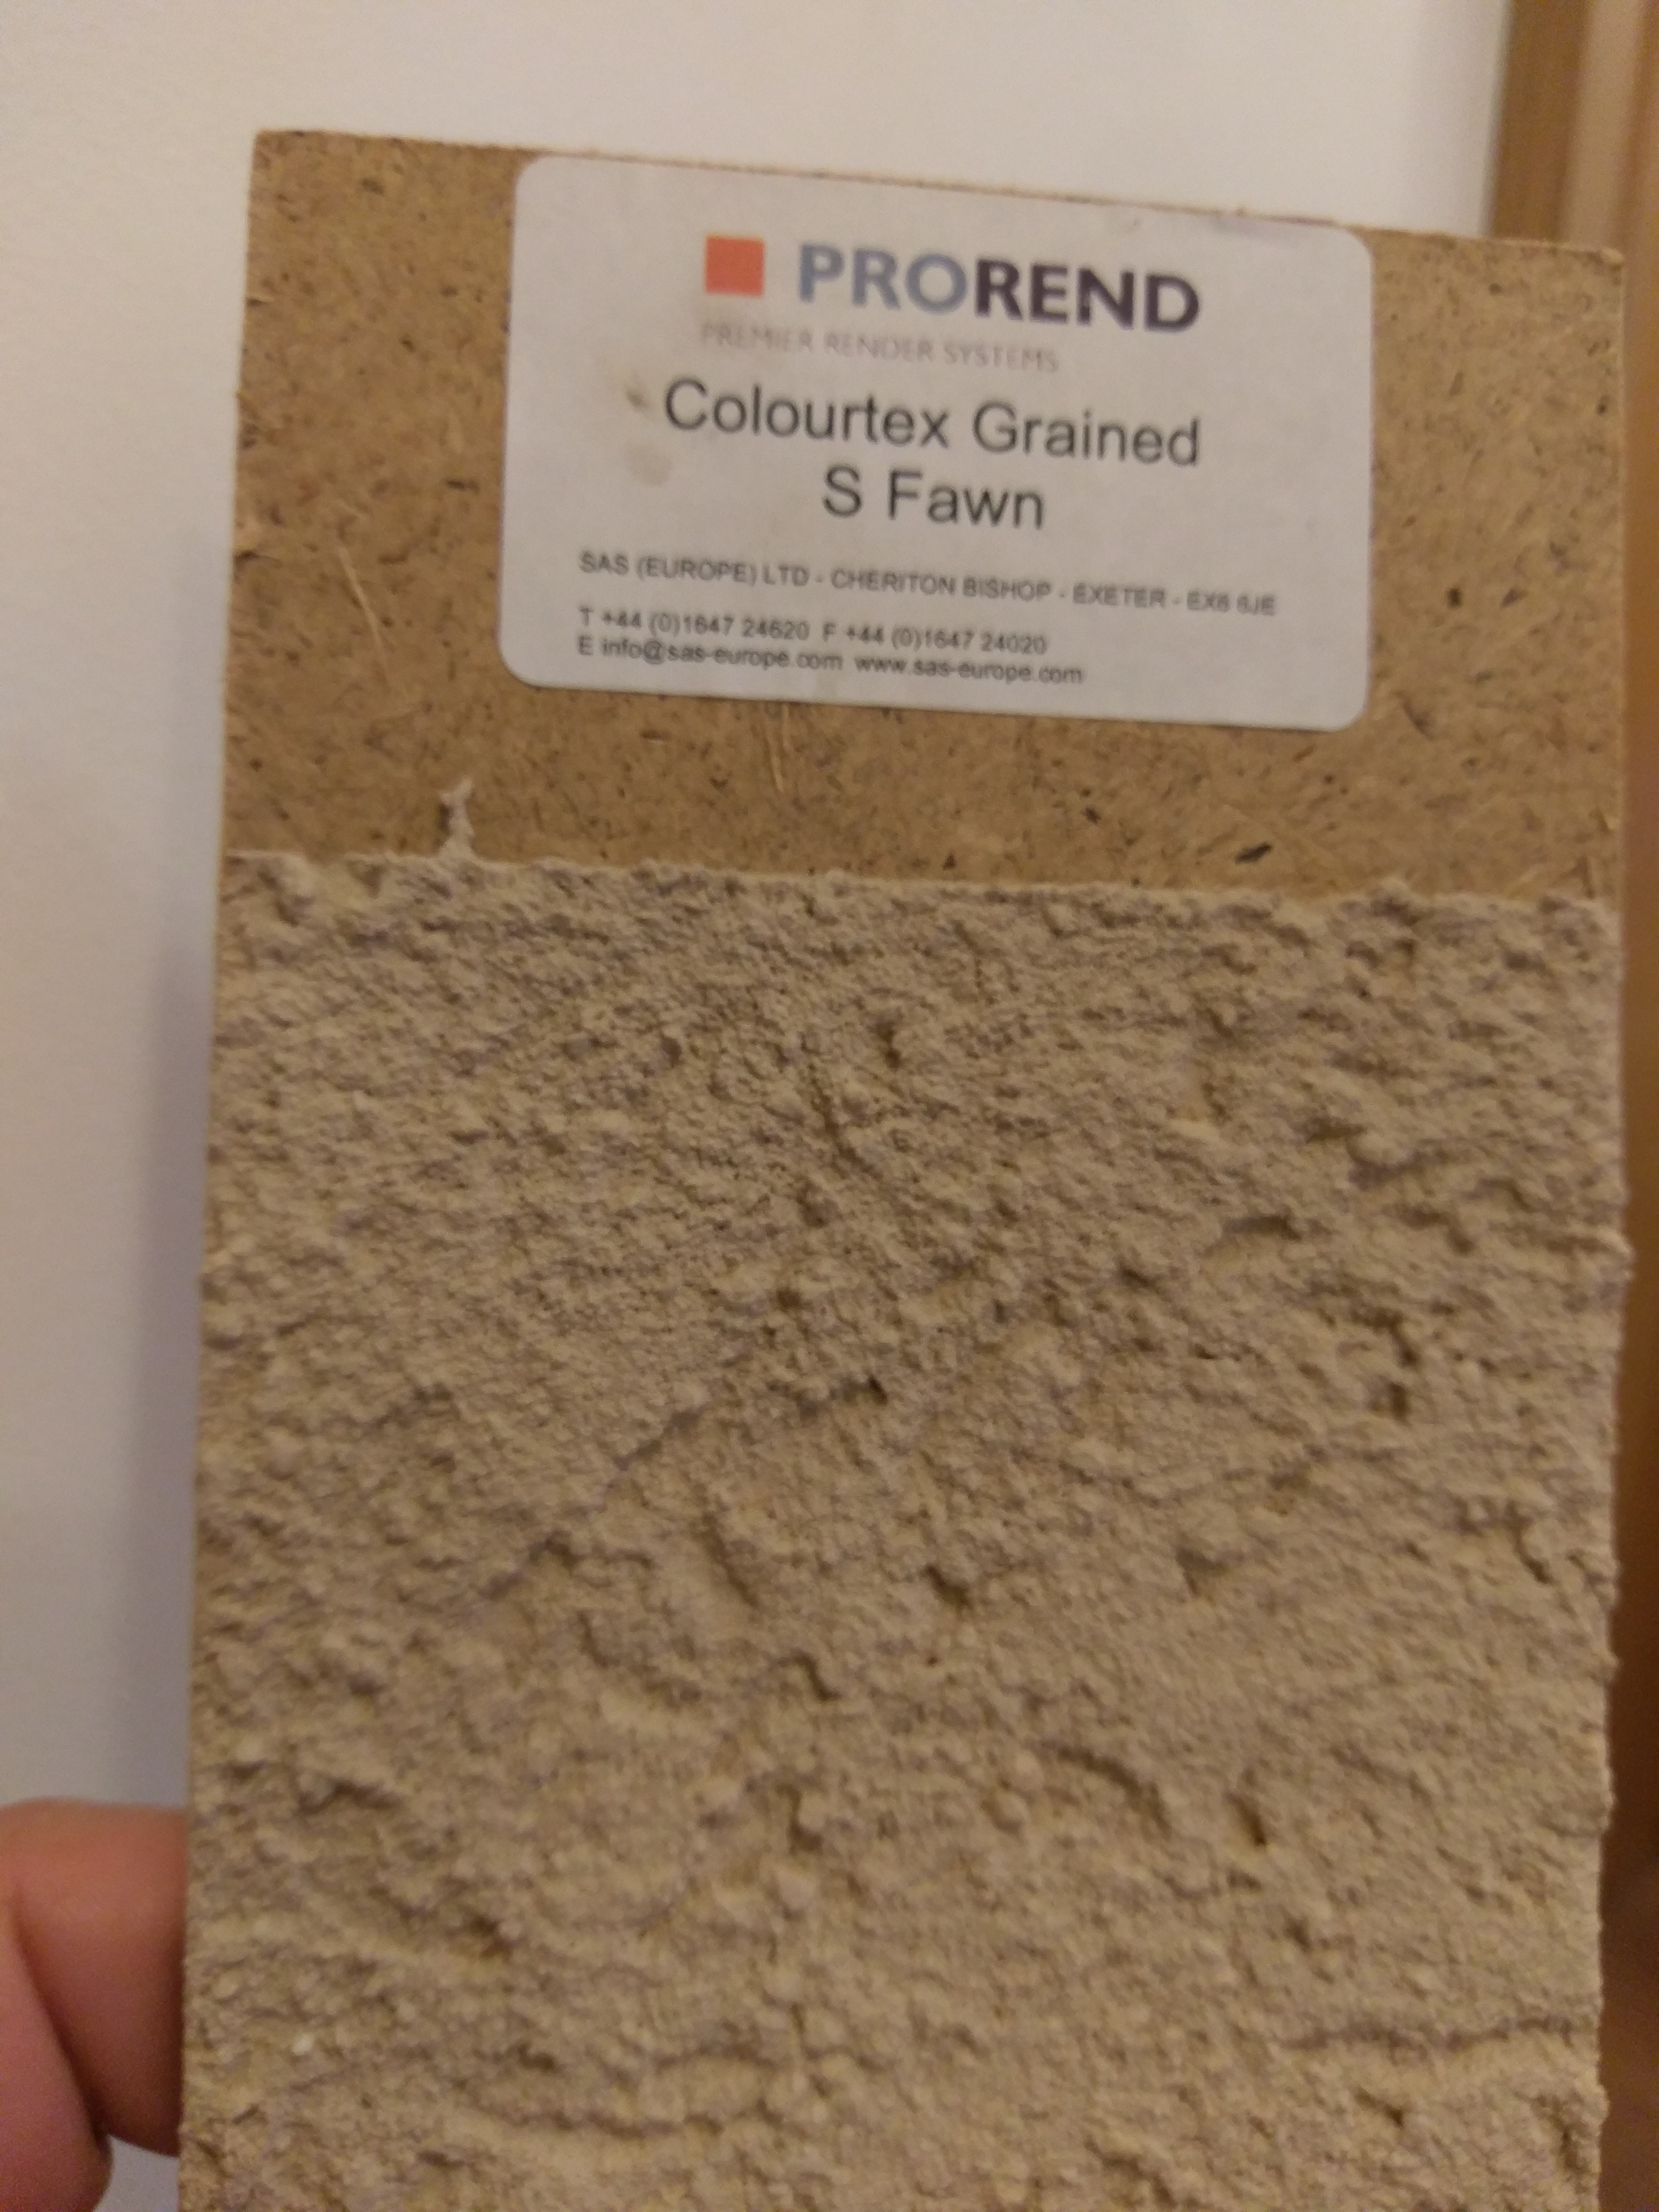
The render is finished Took a lot longer than they quoted but it has come out better than expected. The fake arch heads ready for render Base coat Finished just need to tidy up The colour will lighten to a fawn and it was getting dark so it is not that pink


 2 points
 -
B&Q have a big saw and will cut to any size you want to within half a mil. Use 25mm MDF and good screws with flush hinges and you're in DiY heaven.1 point
-
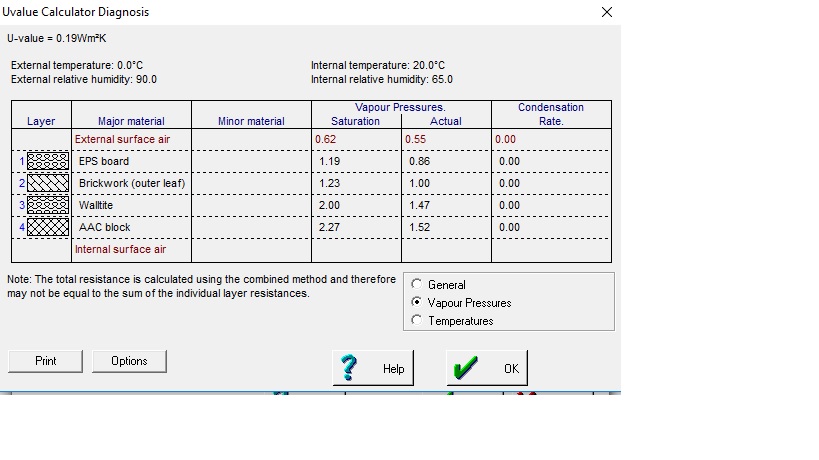
Yes, here is a condensation analysis. Since dense concrete block does not produce interstitial condensation with a filled cavity I assumed that the OP would be referring to AAC block (lambda 0.18W/m.K) which does, after all these have been around for a very long time
 1 point
 -
If visually acceptable airbricks top and bottom would do The people who supply Icenyne usually have access to a closed cell polyurethane as well. Walltite, a spray applied closed cell polyurethane has a vapour resistance sufficiently high (306 Mn.s/g.m.) that interstitial condensation would not occur. There are a small number of companies that use polyurethane for cavity wall insulation, it is usually used where wall ties have failed as it sticks the two leafs together. Interstitial condensation happens in this case for two reasons, 1) the lightweight block is sufficiently thermally resistive to significantly lower the temperature of the brick outer leaf. 2) polystyrene has a significant vapour resistance, typically 100Mn.s./g.m that it causes the water vapour to 'dam up' on its warm side in the outer masonry leaf, in comparison with high density fibre batts at <10Mn.s/g.m These two effects combine to push the vapour pressure above the saturated vapour pressure for the location, causing condensation. Without a cavity venting solution, which really just increases the temperature of the outer masonry layer 150mm of EWI will lower the temperature and increase the vapour pressure in in the outer masonry leaf causing even more condensation1 point
-
I don’t understand how you can have interstitial condensation if you’ve 100mm of external insulation. Interstitial condensation is a risk when you use INTERNAL insulation not usually external. What’s the full proposed wall buildup including thickness of the cavity and other layers? Personally I’d consider 150mm external insulation. The cost of external insulation is mostly labour for fitting the insulation and then rendering. The difference in cost between 100mm and 150mm is very small. No way you’d have an interstitial condensation risk with 150mm external insulation although I doubt it’s possible with 100mm either. I'd also pump fill the cavity to stop thermal looping.1 point
-
Agree with above - vent cavity negates effect of EWI. As regards condenaation it not just if it occurs - also how much, is there a net build-up over the year, are moisture sensitive materals adjacent. Suggest you get the insulation or the render system manufacturer to look at this for you in accordance with relevant BSs - the Vesma calc looks very rough and ready and is not using correct values in the bit I can see - not sure what's going on behind this!1 point
-
Ventilating the cavity to the outside would obviously completely negate the EWI, if you could ventilate to the heated space it would solve the problem at about a 10% loss of thermal resistance for the whole wall. If the cavity fill is a low vapour resistance material, such as any fibrous/cellular insulation and the EWI is polystyrene there is an interstitial condensation risk in the outer masonry layer. If you could change the EWI to dense fibreglass/mineral wool batts then the reduced vapour resistance should eliminate the condensation risk (assumes render reasonably vapour open).1 point
-
That sounds like something we need. We also hope to keep it simple by using existing window openings for new door entrances and hope not to need too many pillars.1 point
-
How about a bath with a door in the side?1 point
-
http://www.renewablesfirst.co.uk/hydropower/hydropower-learning-centre/how-much-power-could-i-generate-from-a-hydro-turbine/1 point
-
I can answer the first, but not the second, question. Those DIN rail timers have no circuit protection capability at all, so need to have an upstream MCB as the very minimum, with an RCD before that if it's a standard split CU. I've used mine in CU housings that aren't being used as CUs, because they are often the cheapest way of getting a DIN rail wiring box. For example, my ASHP, UFH and DHW control box uses a small CU, fed from a fused spur, that contains four DIN rail mount relays, a DIN rail mount 12V power supply and some DIN rail mount cable junction boxes. Not only was it a cheap way to get a DIN rail box, but having a see-through lid allows me to see the relay LEDs.1 point
-
Using these generic ones from ebay
 1 point
 -
Our bathroom UFH was a very last minute decision, sparky and me were hastily removing the plasterboard on a Sunday ahead of it being plastered the following Monday to get the conduit in for the stat and mat I got cheap 100W/m2 mats off eBay (from a reputable seller) and also picked up the 6mm backer board, sealer and latex from there too. Tiler put it all down in less than a day (all 3 bathrooms). I binned the stats that came with the mats and got nicer ones from the underfloor heating store, plus a cheap digital multimeter and damage sensor - this is a handy box that clips onto the mat cable during laying and will beep if there's an earth fault or breakage. Take pics of the mat location and note that the heat does not spread far so you need to get the coverage spot on - also be aware if you need to cut into the floor at a later date for traps for free standing baths etc. Each mat is self contained, the stat has a timer, so no central control needed.1 point


This leaderboard is set to London/GMT+01:00