Leaderboard
Popular Content
Showing content with the highest reputation on 11/17/24 in all areas
-
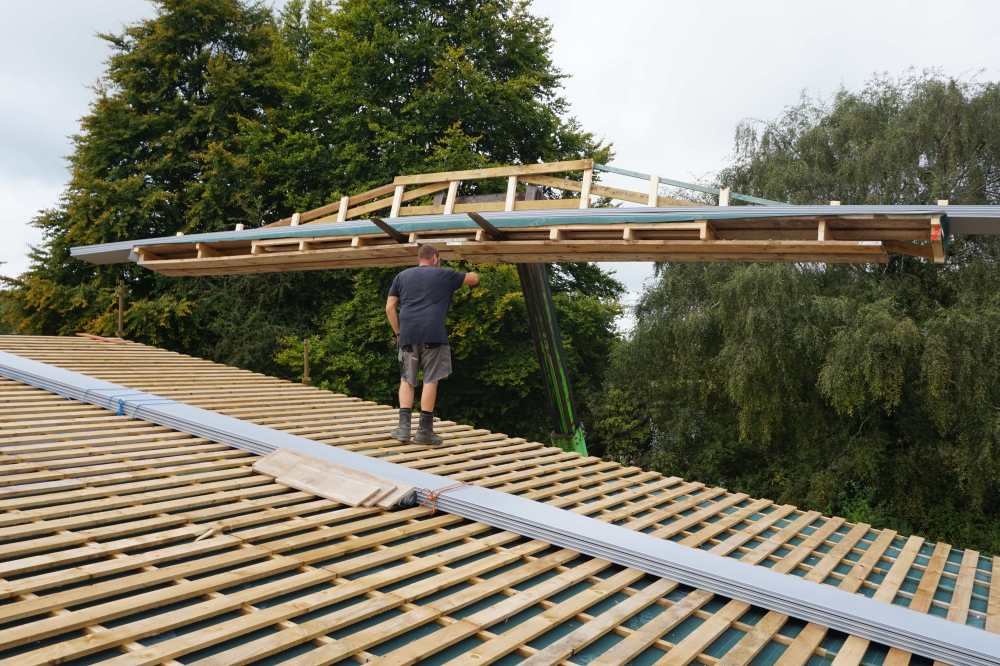
Once again it's been much longer than it should have been since I last posted with my last entry being July, wow where has that time gone. Back then we were building the walls for phase 1 and installing the window and door lintels. Back then it was warm, unlike now and building could be done in shorts and T shirts Once these walls were built then it was time to think about a roof, even though it is going to be a temporary one for now as the whole house will have the final roof at the same time. This part of the conversion is designed to look like an extension as it did on the original. So, the South wall is higher and this 'hooks' on to it. We also have on-site building inspectors checking out their new home Then we had to start getting the rafters in situ, allowing for the overhang on the sides and end. The roof 'ladder' was built from the wood that was used to line the windows whilst building. These did take a long time as the roof is 4 degrees so slightly sloped so each block of both cavities times 2 had to be cut to the exact size required The weather wasn't always kind, but we did have some visitors to check out what was happening. Eventually, it was finished with the temp roof on. Windows covered for now as this will become our storage shed for a while During this time, we also had to move the stables. From this, already part demolished, not sure where the original pictures have gone. To this to this, luckily moved by a local farmer. Not sure when the horses will have them back though. Next is to start on the East side of the main part of the build. Originally our SE said that we had to have 2.4m deep underpinning foundations. But, our BCO had on on-side meeting with the SE as he felt this was over the top. We dug some example trenches to show what the soil was. He agreed with the help of the dog that it really is sand in this area. We do have some clay further on where we can have stepped foundations But he has agreed that we can have 750mm where it's sand so we are doing phase 2 which will be the office, master, bathrooms and 2 bedrooms. It will be the plant, another bedroom, family room and pantry which need deeper foundations. We have started digging out for the 2nd phase so will post my next update in due course. Thanks for looking and good luck with your builds3 points
-
I did the structural and foundation design for @Russdl, just call him Russ. It was a great journey for me as a designer. At the outset Russ kind of knew that he wanted to use Geocell and he had good valid reasons for this, had researched widely and already has one self build at least under his belt. Key factors; the ground conditions, the shape of the structure (odd shape) drainage, boundary proximity, site access, muck away cost, the odd planning constraint and cost awareness. In summary this lead to a flat raft type foundation with masonry walls, EWI and cold formed steel roof joists supporting a warm flat roof. Russ build most of this himself and put in a lot of hard work sourcing and fine tuning the installation, his door insulated solution is remarkably good, I'm going to pinch some of this final (on site understanding) threshold detail off him! Ok the Goecell. Russ and I chewed the fat for a while. Me with my SE hat on, him with his practical hat and attention to detail. At the end of the day we ended up with a flat slab on the Geocell.. it is really simple. No edge thickening. His slab is pretty big so I added extra anticrack reinforcement near the doors and funny corners. The objective was to do the slab in one pour and avoid day / control joints as they would then translate up into the super structure.. and cause problems with the masonry design. Folks there is no free lunch and that is why all parts of the design need to be coordinated. What you do at foundation level can have a cost implication later on. At my end one trick was to use standard reinforcing mesh site bent at the ends to give the reinforcement anchorage. I selected the slab thickness to make it a structural slab (a raft) and no more. For the tecky.. my starting point was to have 0.13% of rebar which turns it into a structural slab (cf a ground bearing slab).. if you make the slab thicker is needs more rebar to comply with the minimum % for it to qualify as a structural (raft) slab.. I aimed for the thinnest slab.. and from memory this was driven by how flat you can get the Goecell and having enough of a bend on the reinforcing mesh to anchor it. Now the Goecell. It has a good bearing capacity cf a crappy CLAY soil. We know how the slab will impart the loads. We also know we just needed to provide enough compaction to consolidate the material.. no compacting it to death as this is counter productive. In summary, can be a bit hard to get your head around but you kind of need to lay Geocell in layers and give it a "shoogle" and not actually whack it to death. Russ is posting some of my drawings which I'm pleased about. I hope this helps give folk on BH some ideas / inspiration. Just remember that Russ' job is bespoke so just use them as a bit of food for thought. For old / historic buildings it is a pretty breathable matrix.. Historic England I think have a bit on this, lime floors floors and so on. In summary this sort of stuff floats my boat in terms of how as an SE /designer you make the best out of this type of product in a cost effective manner .. if the opportunity presents!2 points
-
2 points
-
There are three types of architects I can think of. The first, abrasive genius megalomaniacs, who design mega ego palaces, with teams of engineers stressing about how the thing stays up. Occasionally you end up with something remarkable like a Sydney opera house. Invariably timelines and budgets are constraints to be dismissed in the pursuit of greatness. (This, in my experience is where architecture education is solely aimed, which is what probably explain the second type) The second type who aspire to be the first but lack the brain power. They'll make beautiful renders and design house that the neighbours will say "wow the Jones used a flash Architect" . They spend all their time on social media promoting themselves, design roofs that will leak, bankrupt normal punters, wind up the planners, are too lazy to dig into details and outsource anything mildly technical. Copy and paste drawings from the Kingspan Rep who took them out for a round of golf Frustrate builders who insultingly don't have the ability to read their mind. Often they get fired half way through a project where they blame everyone else for the overruns and chaos other than themselves. The third type. Not an egotistic, more lightly to be in jeans and a tee shirt than a turtleneck. They generally don't need to advertise much as they have as many word of mouth clients as they can take on. They understand the planners and how to guide your project through with minimal fuss. They'll be realistic about budgets, recommend reliable builders. Importantly, they'll have that magic quality, of being able to blend the technicalities of a sound, practical house with harmony and flare that will be missed by someone of a solely more mechanical disposition. Someone who can work both sides of their brain.2 points
-
I would not be putting that in a post anywhere ,If i were going to do such a thing , getting administrators on here to delete it would be a good idea2 points
-
Ask @Pocster, he knows how to sort out roof lights. He has a special tape measure, and maybe some glazing.2 points
-
Don’t let water sit on the sealant regardless of how good it claims to be. We wipe down and dry the shower every time we use it. Done it for years and never had any mould problems.2 points
-
Ask your joiner how much he would charge for the alteration. If it’s less than £700 do it. If not go for the different size to suit your opening.2 points
-
Ok have you sounded this out with the SE and buildings Engineer? They may be as equally frustrated as you are. If they are willing to support you then one of the two can often have a quite word with the Architect on your behalf (you keep it at arms length) along the lines of.. we don't want to make a big thing of this but what about if we certify our bit.. and you do your bit... by way of the Architect's certificate.. otherwise the Client may instruct us to look more closely at your work and delivery.. and we don't really want that to happen as we are all busy! If an agreement is made in principle then any oustanding fee element can often be "made to go away" Your Architect's certificate is often separate from the JCT.. and that will depend on what kind of JCT contract you have entered into.1 point
-
For what it's worth though I wouldn't do standing seam at all and would just use normal profiled sheeting. @saveasteading had some professional experience of this being a better option.1 point
-
I think @Patrick did this. I'm not a fan of standing seam straight down on top of ply. It gives nowhere for the water to dry to if it gets in there. Normal sarking boards might not be the ultimate option either. As there'll be a membrane on top of them, you risk making a moisture trap between the membrane and the sarking. This isn't a issue with slates as there's plenty of air gaps between them. I would do something like. Standing seam, Closely spaced sarking boards but not touching, Counter batten along the line of the rafters to create ventilation gap. Roof membrane, Rafters.1 point
-
Yes the crux is definitely the long beams, how many and what size. I guess I need to phone a timber merchant and get some prices and work out the best bang for the buck from what is readily available. I will still ask my neighbour (who works for a steel company) about steel plates to make a filch beam. For a laugh I asked him to estimate for doing a steel frame for the whole lot and his answer was "do it in timber"1 point
-
I reckon your right @scottishjohn. You can get standing seam effect roof cladding sheets. I haven't seen them in person but the pics look convincing enough and are cheap as best I remember. https://skyclad.ie/cladding/standing-seam/1 point
-
How do you find them. Forget Google, go on your local planning portal and trawl through the lists of applications in your area for similar projects. It is time consuming. Make a list of a few of the architects you like. Read their interactions with the planners, if you can. It'll give a good view of who actually "gets" how the systems works. It's amazing how many don't. Knock on doors and get a report from the owners. Once you have a short list ring them for a quick chat to see if you actually can work with them. Pay one or two to do a rough sketch of their ideas with your budget etc in mind and you should be fairly close to a decision. Honestly, it would be easier to find a new spouse!1 point
-
I would work out the price for the area of grp you would need to lay ,maybe tin roof will not be that much more expensive ?1 point
-
How things can change on a six pence! After deciding to go for the ASHP, I had a couple of local firms in to quote. CVC did come back with a quote of around 20K but without a site visit, I was worried things could add up and that seemed too much. see the whole ASHP saga here; So next week, the new ASHP is being installed. And the unit is going in the back garden, under the kitchen window. This is not where I wanted it to go but the company were adamant that we could not have it at the front of the bungalow. And with certain changes in the pipeline, I am not sure now that we will be doing the extension at all. therefore I am going with the easy option for now. If at a later date, we DO decide to add an extension, we'll just have to move everything. 🤔 The reason for the big change is that the property next to this one came up for sale and after looking at it, we decided to put in an offer. It is larger than our current bungalow and while my parents need help and care, it makes sense to be next door, rather than a 20 mn drive away. It ticks all the boxes for our current situation, garage, workshops, as well as being next door so seemed the right thing to do. We now have a complete chain so are just waiting for it all to happen - hopefully January 2025. Fingers crossed! Looking to the future, we will have the option to choose which we live in and which we sell. OH prefers the new one already....... and we arent even in yet. 😁 I'll update things once the ASHP is in. I just hope it works as well as they say it will.1 point
-
Don't think I said this. Remind me. Have a look at this recent thread. The walls were previously done with kingspan PIR and plasterboard. I very much doubt anything was done about Airtightness. Look at how damp all the structure is behind the removed boards. Similarly note the rot in the timber lintels. A house that was internally dry for at least a century suffered these kinds of problems in just a few years because of inappropriate internal insulation.1 point
-
I'm not a chemist either, but it's also a matter of internal structure and physical properties, not just chemistry. For a good summary, see Lime mortars for the conservation of historic buildings, 2002, by Kerstin Elert, Carlos Rodriguez-Navarro, Eduardo Sebastian Pardo, Eric Hansen and Olga Cazalla . It's available to download (in Englsh) from the French Laboratoire de recherche des monuments historiques here . To pick out one section in particular: ...the unfavourable properties of Portland cement mortars [include] brittleness, high strength, and a thermal expansion coefficient which can be twice as large as that of lime mortars and most types of brick and stone. Its low porosity, and especially the large amount of small pores, might hinder water movement in masonry and cause damage due to the accumulation of moisture behind cement layers or to evaporation and deposition of salts in adjacent stones or bricks. Moreover, soluble salts such as calcium sulphates and sodium salts might be present in Portland cement mortar, which can leach out over time. Lime mortar, on the other hand, has a low efflorescence potential due to its relatively high chemical purity. Additionally, it has the advantage of allowing limited movement within the mortar joints and can undergo autogeneous healing due to dissolution and precipitation processes. Carrington and Swallow point out the importance of lime mortar being softer and more porous than masonry, acting as a sacrificial substrate where evaporation of water and associated decay from soluble salt crystallization could take place. Although the paper recommends aged lime putty for conservation use, I'd add that other forms of lime are more suitable in some cases. For example you wouldn't want to use lime putty on a damp background, where regularly exposed to heavy rain, or on hard stone; hydraulic limes would be suitable instead. As a rule of thumb, hydraulic limes (and NHL 3.5 in particular) also seem to be suitable for most buildings built within the last couple of hundred years, as well as being easier to use. Also not mentioned in that paper, the natural antibacterial and antifungal properties of lime can be beneficial in some circumstances - for example as a parge coat beneath natural insulation. It also doesn't mention that cracks in cement can facilitate water penetration (though, as above, it does mention that cracks in lime tend to self-heal).1 point
-
Okay thanks - no not really it will still be a decent opening and a cheaper skylight so win win 🥇I guess?1 point
-
Speak to the manufacturer or supplier.1 point
-
Heb Homes and Dualchas are sister companies run by two brothers with one running Dualchas and the other running HH. Dualchas is the architectural practice doing all the bespoke stuff whereas HH are focused on building ‘off the shelf’ designs in three types of houses in the traditional Scottish style of a Longhouse, Steading, and Whitehouse. I don’t know much about Dualchas and how they design and build a bespoke house. I assume they are much the same as HH kits so either a SIP or a CPS. I note that HH have recently changed their CPS system to the Sigma II twin stud system with blown cellulose insulation. That’s a step in the right direction and you’d expect better thermal bridging performance and hopefully air tightness albeit they don’t set themselves a particularly high bar compared to say MBC, I assume because it’s easier to make sure they achieve it. Regards their ability to build to near passive standards. I saw zero evidence in my dealings with HH on any real knowledge or ability in passive or near passive builds. Also the kit erection team they used for our build have no idea what passive is. Dualchas might be more knowledgeable on the subject however. Ultimately I think it would be down to you as the home owner to do all the relevant research and ensure it was built to whatever standard you were aiming for. I couldn’t recommend HH at all. I spoke with someone recently who is currently building a HH and their experience sounds exactly like ours so nothing seems to have changed over the last two years. I can’t comment on Dualchas so it might be better run. Generally though, their houses are very attractive and sit well in the rural landscape. They also make efficient use of the interior space . Our house is performing really well so far but this will be our first winter living in it. That said most of that is down to us rather than them.1 point
-
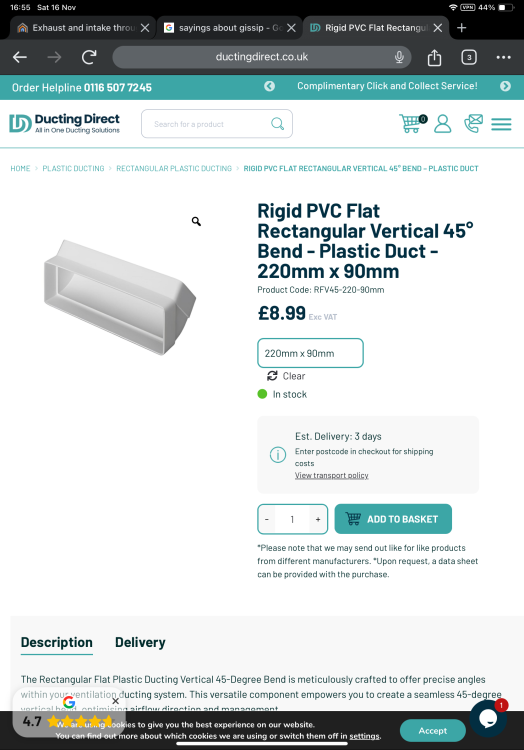
They use an auger, not an excavator dig your trench and lay the duct, leave the last 2m open they can cut the duct back and fit a swept bend on the end up the pole.1 point
-
By the time you are near to finishing your build you probably wish you had a crack pipe.1 point
-
That will be a big saving in time and money not digging out as much. We have just covered our windows up as well. I hope your enjoying it and not working too hard.1 point
-
I thought I'd publish some rough figures for the running costs for 12 months. Details. 85 Sq M bungalow. North Scotland -highlands All electric (heating/DHW/cooking and running * two self catering cabins) 4 kW South facing solar panels. 0.88 ACH EPC A103 Heating set to 20⁰C DHW set to 43⁰C Year to date: Total Electricity usage 3300kWh ASHP usage 890kWh heat and DHW don't know if Samsung gen6 can split the usage? Solar Generation 4254kWh Solar export (given away) 2359kWh. I'm happy with the house, and the heat retention seems very good for our budget build. Heating hasn't been needed since mid April, and has only been on around 6 days this autumn. Obviously my biggest issue is reducing our solar export. I have done nothing in this regard with the exception of manually loading shifting washing machine / drier / dishwasher on sunny days. My issue with solar diverter is that the meter is located 50M from the house (in an enclosure) the house is supplied separately from the cabins so I can't just monitor the house as the cabins maybe using power. I'm in the early stages of exploring using ESP-Now as a CT clamp monitor and building a diverter similar to how @ProDave and others have done. How do these figures look? *We had around 170 days of cabin usage which use electric for cooking/heating and the laundry.1 point
-
Just had a look at the spec of that material. Seems it is zinc coated, all be it not very thick. Zinc nanoparticles can be used as a filler/bulking agent with unsaturated polyester resins. Now this is reaching the limits of my knowledge of inorganic chemistry, but I suspect it is how some 'rustproof' paints are made i.e. the polyester sticks to the steel mechanically, then the zinc particles are pushed away because of the electrical charge difference, creating a coating of zinc. If I am correct (I with we had a chemist on here, one joined and then never came back), then assuming there is minimum damage i.e. scratching during installation, and it is not in direct contact with the GRP, it should be OK. The easy way to check is to get something that is zinc coated (corrugated steel) and whack some car body filler onto it. Then heat and cool it in water i.e. hot tap, then cold tap, hot tap, cold tap repeat while observing.1 point
-
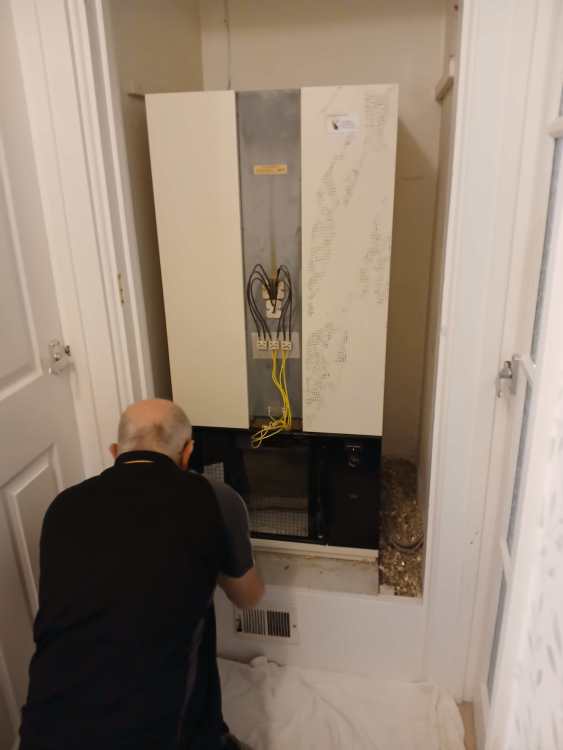
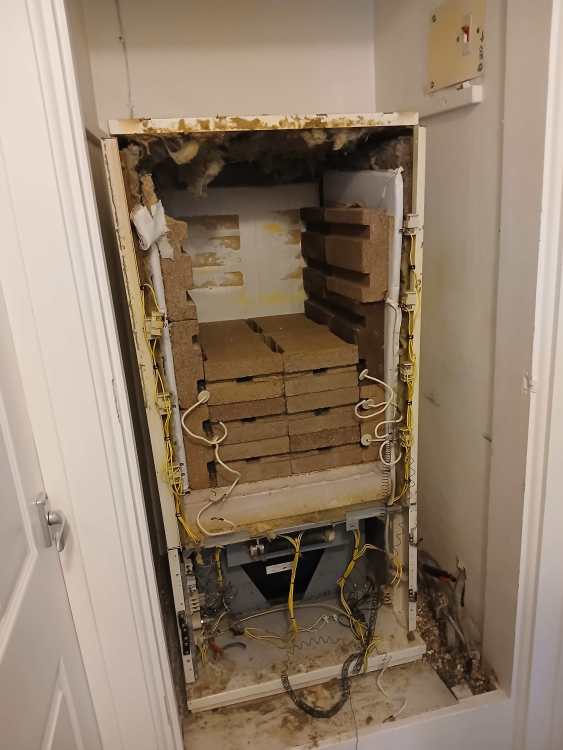
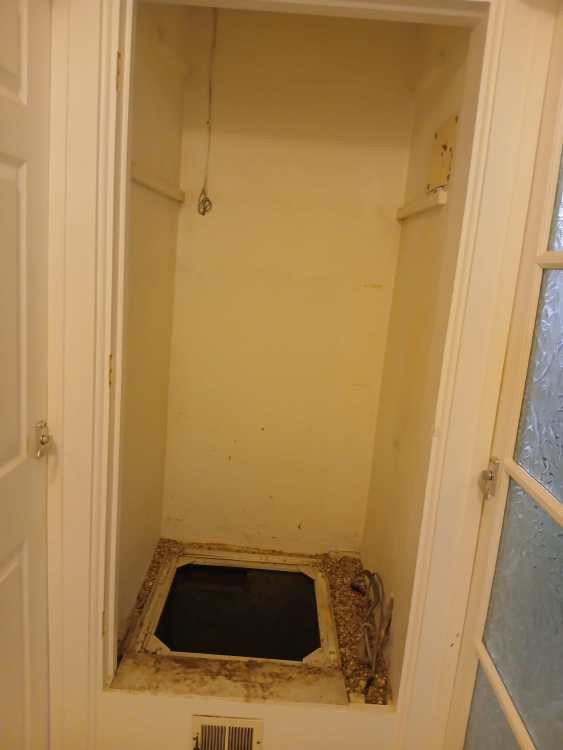
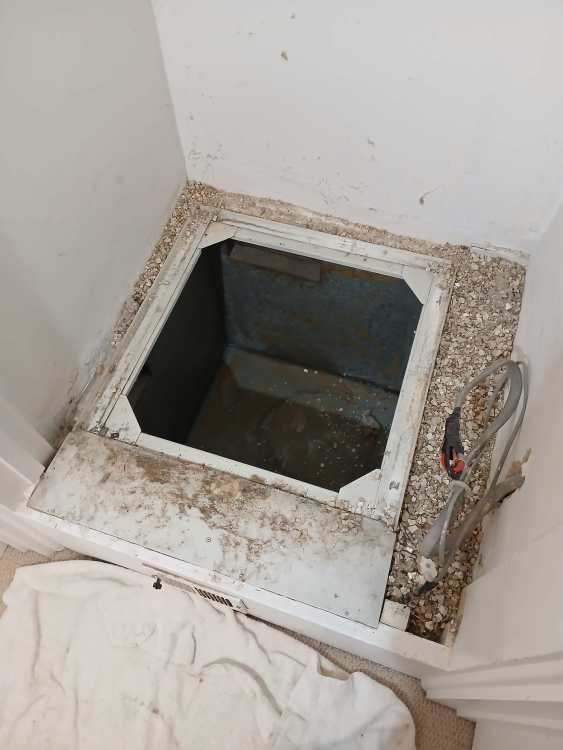
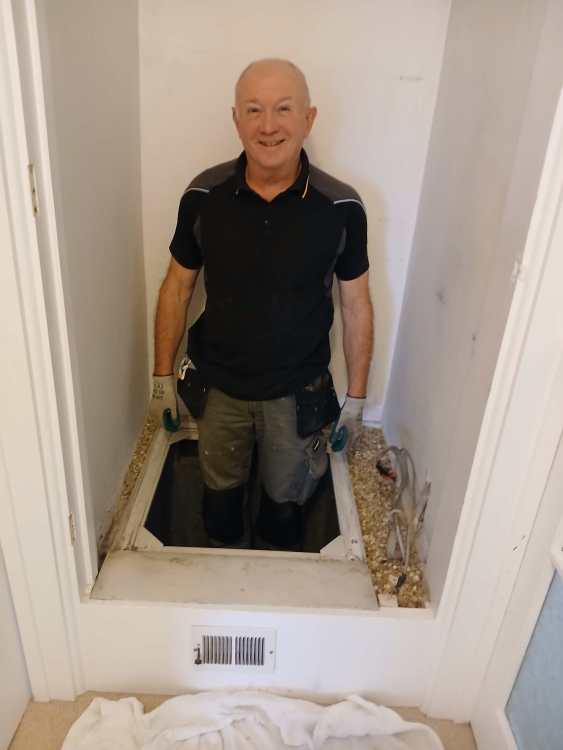
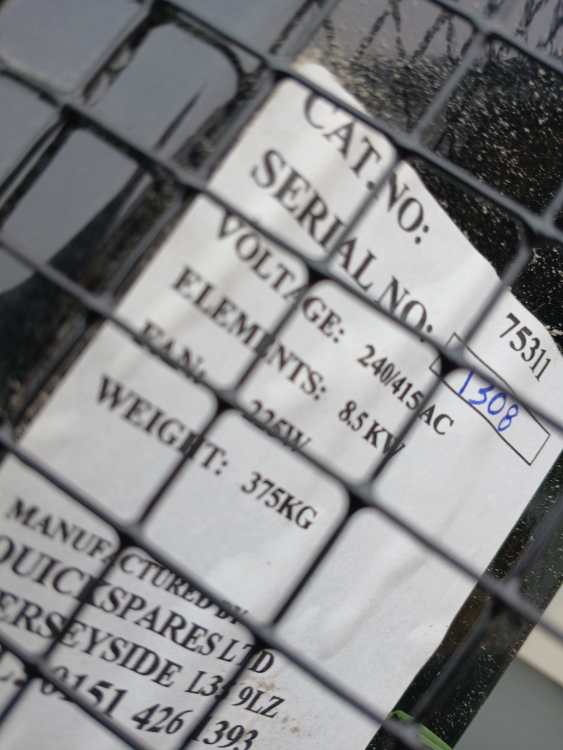
We were quoted £400 for removal of the old heating system so we decided to do it ourselves. Thinking it would take all day, it actually came out in a couple of hours. And we even got £10 for the metal at the local recycling place. 😄 Looking at the plate - it was an 8.5KW system - no wonder it used so much electric! There was a large box underneath, with the vents to the other rooms for the warm air. After speaking to the ASHP company, we left the box in place, just tidied up the space. They plan to bring some wood to sit the new system on. After holding up all those bricks, I am sure it will cope with a water cylinder. The plan is to use the bricks in the new garden and make a BBQ with them. they even have grooves for a rack.1 point
-
there is a huge backlog of podcasts that I found very useful. I am no longer a member of The Hub as it is too expensive for me. That has exclusive video content and more. but you can look at the podcasts for free.1 point
-
1 point
-
Another option would be a pre-app meeting. We simply sketched out roughly what we were planning and then booked an appointment with LPA. May cost more than planning consultant though depending on your LPA.1 point
-
1 point
-
This was the OPP that was on the land when we bought it. https://planning.dorsetcouncil.gov.uk/plandisp.aspx?recno=3780251 point
-
The plot we bought last year had OPP on it. This can be a relatively simple process - in our case the application was for a "Outline application for proposed dwelling" with simply a site plan (with no house shown) and a short statement. It was passed with all matters reserved meaning that all plans and statements would have to be submitted via a reserved matters application. So in essence it can be relatively straightforward to apply, it does not necessarily require a planning professional to do this. If you are simply looking to see if the principle of development is there then this is a way forward.1 point
-
I don’t really know the answer but the Geocell replaces the Type 1 and the standard insulation. Clearly it’s more expensive than Type 1 but how it measures up against standard insulation I don’t know. We used it for a detached garage and it worked really well. If I were to build another house (ain’t/wont happen) I would definitely consider it for the insulted slab over the PIR bucket.1 point
-
Yes. It is all covered in the building regs where graphs show grades. Let me know if you need help to find it.1 point
-
Here is the label off unvented cylinder Coil rating @ 15l/min/80°C: 19.4kW1 point
-
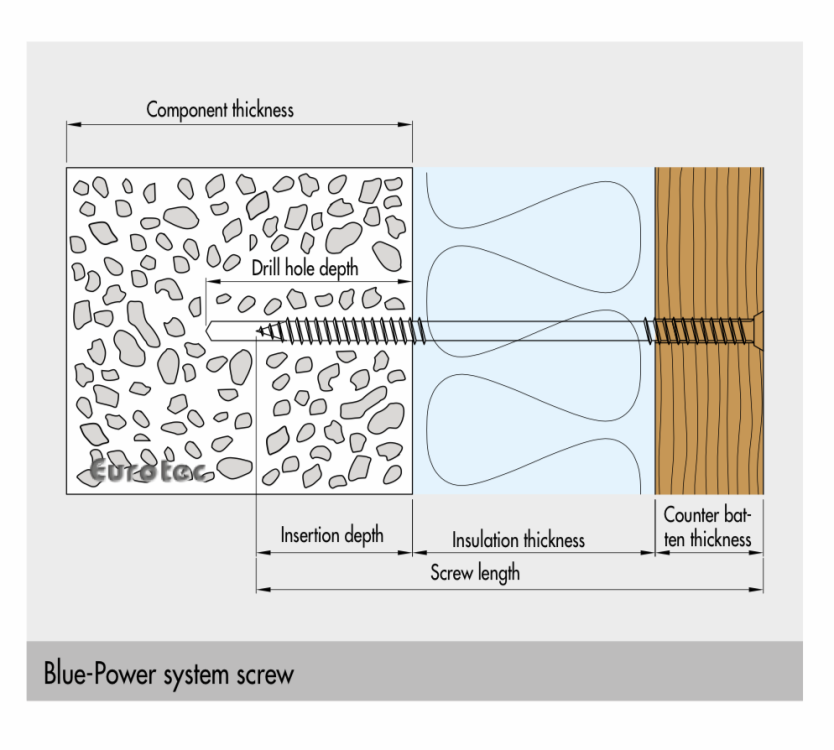
@Gus Potter, thank you for the model. If it is of interest here are some specifics from the data sheet for the Eurotec screws. https://app.nextpim.de/Cloud/6118eacef55a4834b44c3623/a3ba70a2-990d-432c-fb8c-08d79e6bb09c/Product_data_sheet_Blue-Power_Systemschraube_EN_06_2023.pdf For fastening timber substructures to concrete. When the system is installed on façade insulation, the insulation absorbs a proportion of the transverse forces. The insulation product must therefore have a compressive strength of at least 50 kPa at 10% compression. Static Values For fixing in Concrete C20/25 Tensile load bearing capacity = 2.5kN Shearing load bearing capacity = 0.75kN The manual from the ICF supplier doesn’t really go into any great details about fixing external timber battens. The two biggest challenges were finding a concrete screw long enough to go through a 25mm batten and 100mm EPS, + 50mm minimum fixing depth, and the need for some kind of external weather rating. The Eurotec screws are rated for C4 environments and appear to be designed for going through 100mm+ of insulation, then affixing into concrete. One of the things I liked about the Thermohouse ICF blocks was the specification of the EPS, they have a compressive strength of 150 kN/m2 at 10% compression, EPS density of 24kg/m3.1 point
-
I would avoid relying mostly on PIV in an old property and use MVHR or continuous DMEV instead. If there's a lot of moisture internally, PIV has to push that out somewhere, and that's likely to be into any gaps etc, where it may condense, potentially making any damp problem worse, whereas MVHR or continuous extract will help ensure more of the moist air is pulled out of the property.1 point
-
>>> why would i want an expensive architect plus a structural engineer and someone else drawing all the required drawings IMO you want an architect for ‘magic’, SE to make the judgements and calcs on construction methods and techniques and a detail person to worry the insulation, damp, ventilation, rain screen, BC regs etc. Anyone can do the drawings if they understand what they need to draw. That could be one person or four, or more. Maybe a planning consultant too.1 point
-
Just came across this thread and found it interesting. For the record, I retrained as an Architectural Technologist from 2009 to 2012 at UWE having spent a long time in IT. I had always had an interest in Architecture (having wanted to be an Architect from a young age only to be dissuaded by the careers teacher in the 70's) and we had always worked to varying degrees on our own houses. I stopped working in IT in 2005 and spent the next 4 years renovating a couple of houses (until the recession hit). When I say renovating I did nearly all the work, only the dark art of plastering and large scale brickwork was left to someone else. It was at that point I decided to scratch the itch that had been with me since I was about 8 and went back to Uni to study AT. I really enjoyed the course, and being in my 50's meant that I didn't have the callowness of youth and was happy to take full part in my course. I then spent 10 years or so working as an AT, working on relatively small scale extensions in our locality in Wiltshire. I had been self employed in most of my IT years and so the thought of going to work for someone else didn't appeal. So to the question in hand! I am of the view that you just cannot generalise in this arena. Titles play a part, education is not the same for AT as for Architectural courses, and as in any profession there are good and bad. What I would say is that my experience at UWE taught me that once the basics were taught in the first year (where the AT and Architectural degree students were taught together) that the courses diverged somewhat. There was a degree of pragmatism and practicality that was taught to us as AT students that gradually began to fall away in the Architecture courses, to the point that when looking at the Part II and III degree shows at the end of the course I was actually angry at what I saw. I suppose that there is no right or wrong in this discussion, its buyer beware in reality. Take your time in assessing the professional that you are going to use, look for and ask for examples of their work. The actual relationship with the designer is very important and like someone further up the thread said, one of the first things I said to anyone that took me on is that we wont necessarily agree on designs, it is an iterative process and as much as anything else I was there to guide people through the minefield of design to reach something that was as close to their desires as possible but was also possible both from a financial and technical standpoint. Some would come with plenty of ideas and others had no idea and simply left it up to me. One other thing to add is regarding titles! I spent so much time trying to disabuse clients that I was an architect, I was always very upfront about what I was qualified to do. On a scale of importance titles rank low, and as long as someone is not trying to pull the wool over their eyes with regard their qualifications then I think is low down the priority list of things to look for.1 point
-
0 points
-
Forever White in our bathroom for 5 years now is still like new. Tbh it's so ****ING cold in there I don't think mould can grow 😂0 points
-
By the time I have plugged then I could have implemented my new invention. The 300 mm off cut from my next rubber roof glued to 11mm OSB offcut propped up with a 25mm tile batten ( offcut) can anyone tell I’m at the end of my build and run out of budget? 😜😜0 points


