
.jpg.1cd6bef1c43268dd6b469df0b10354b2.jpg)
First it was Scotland, then it was Italy. Let's just build.

Entry posted by BotusBuild
1560 views
As I wrote the last blog entry, Scotland ??????? were beating England ??????? in the Calcutta Cup and we were all wondering when Lockdown 3.0 would end - we're nearly there apparently. We were also
- sorting out re-mortgaging to a lower fixed interest rate, - DONE, and we are paying about £200 a month less than before!!
- choosing insulated raft supplier - DONE, we went with Jackodur Atlas system
- determining steel re-inforcement requirements for the foundations - DONE and for the most part installed ?
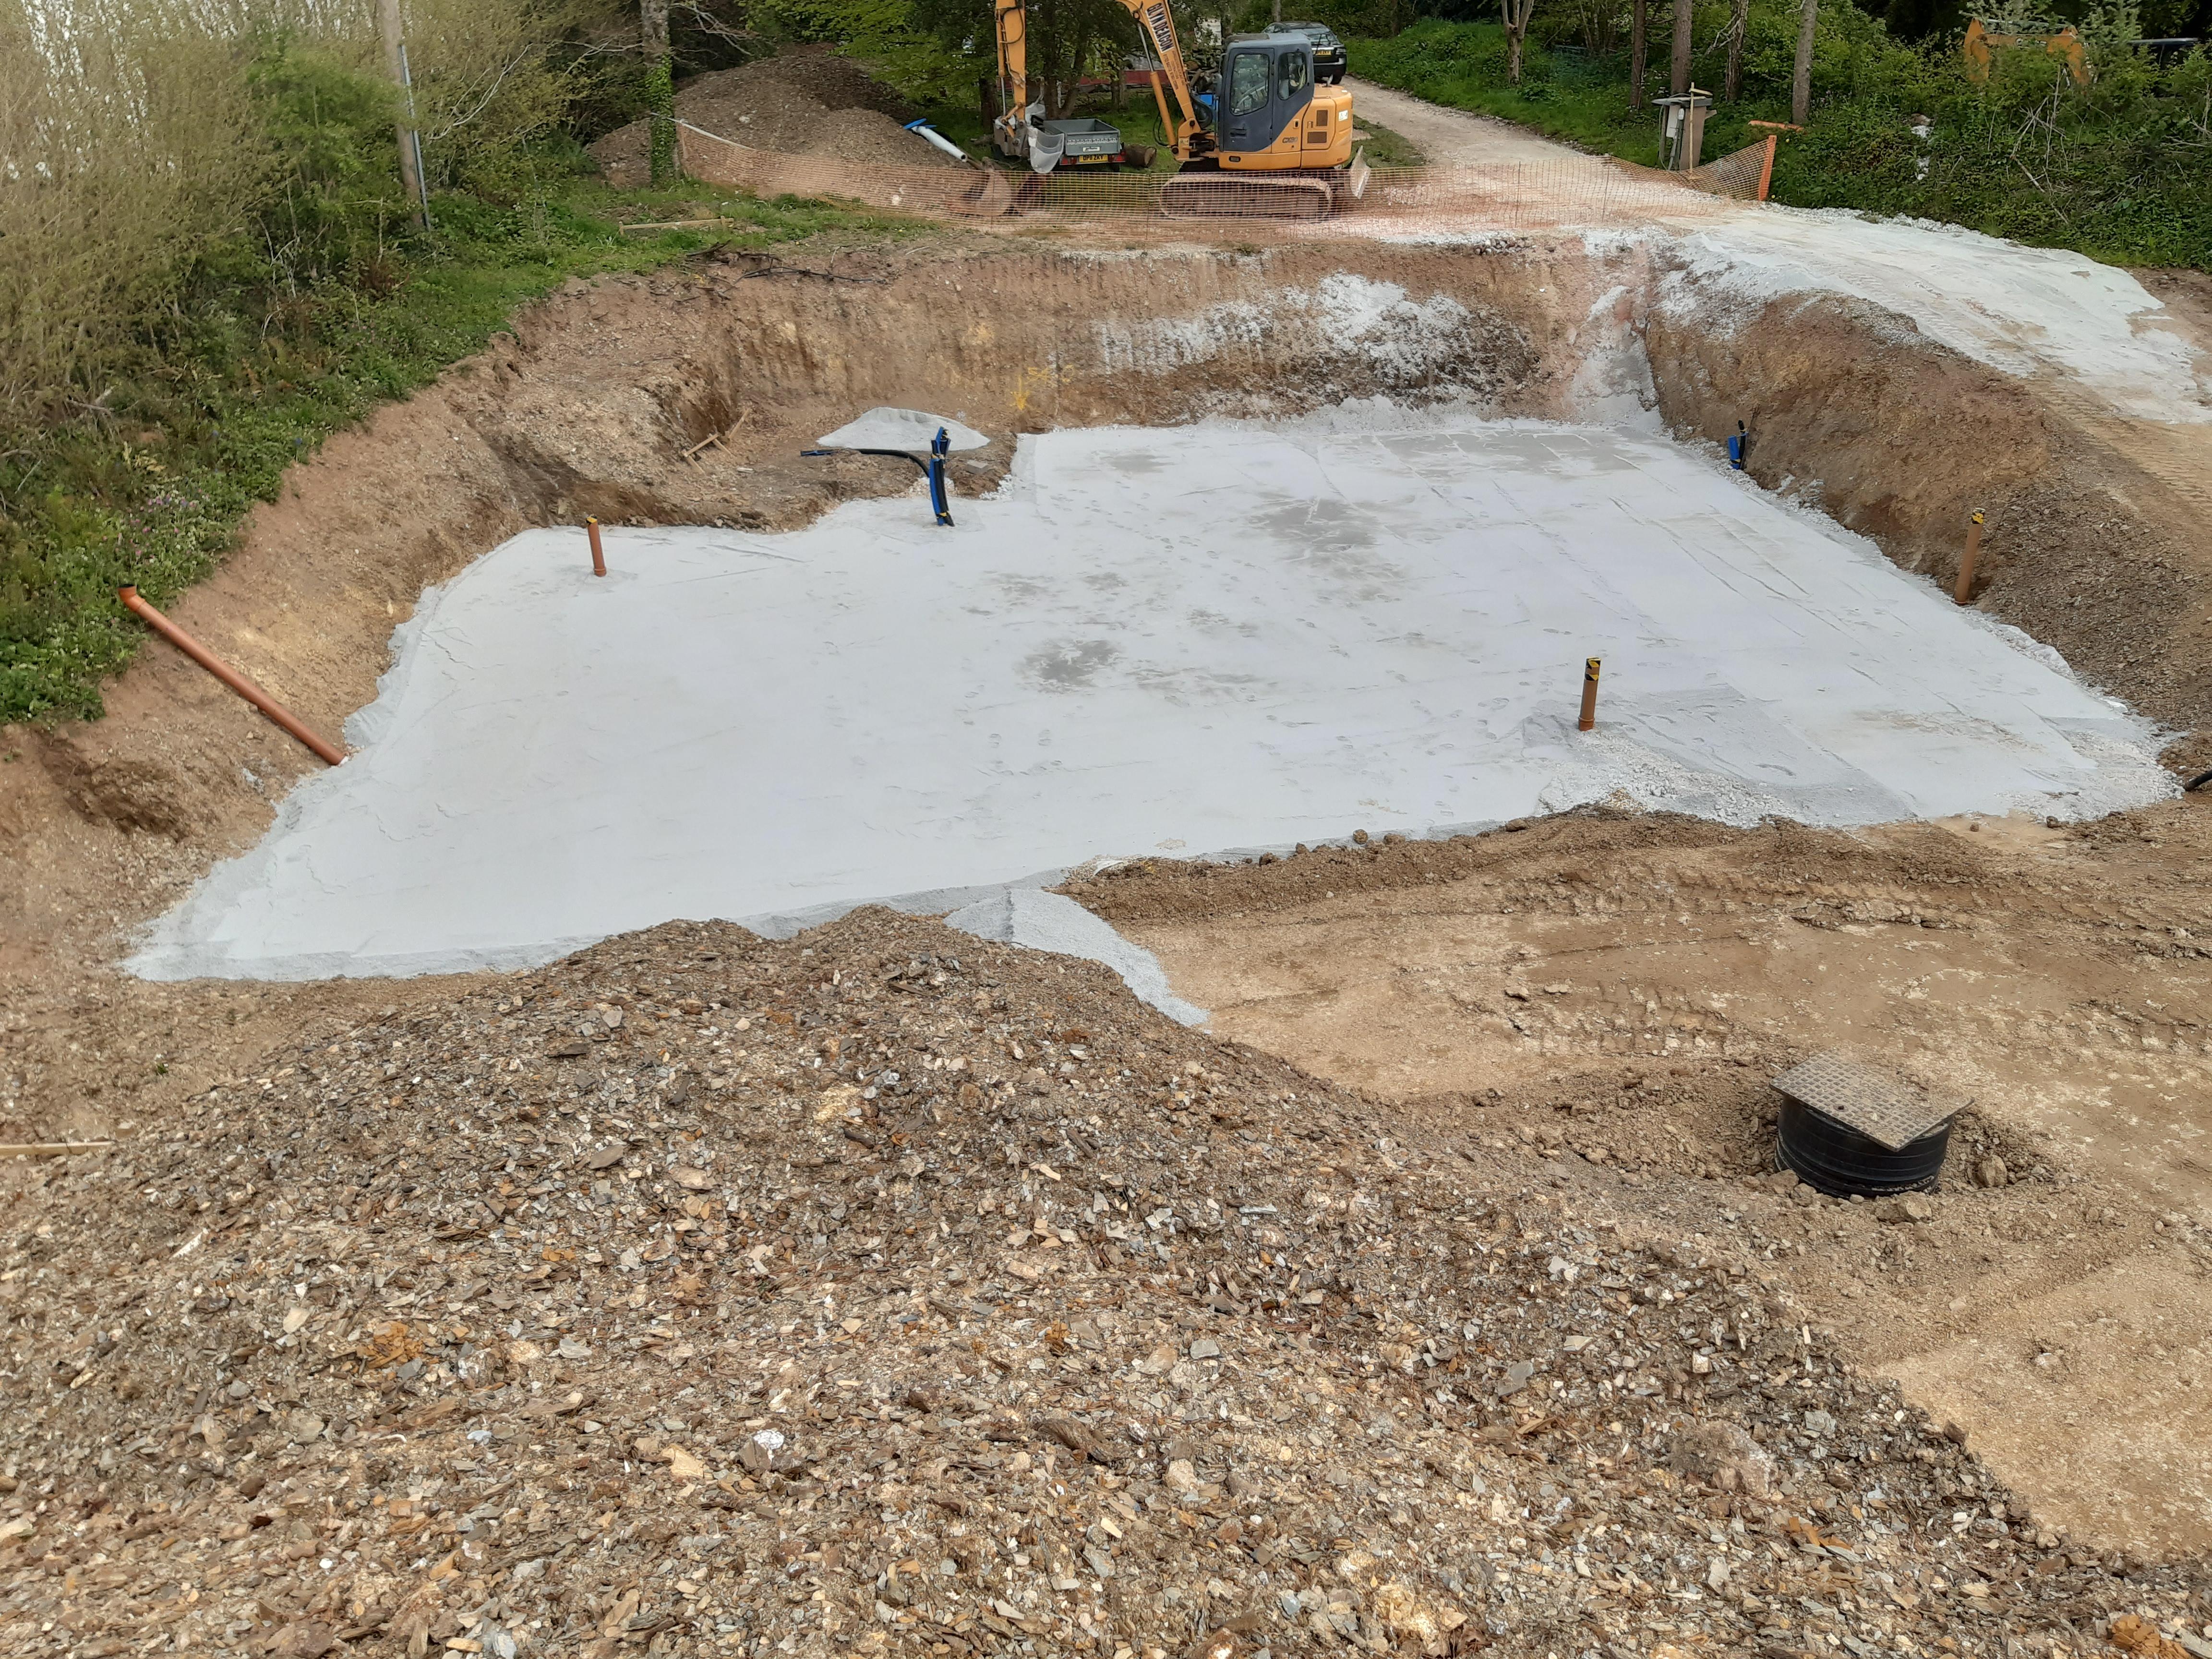
So, after more enforced delays, it was back onsite in May with the groundworker to get the stone and blinding sand in place ready for the insulated foundation system to be installed.
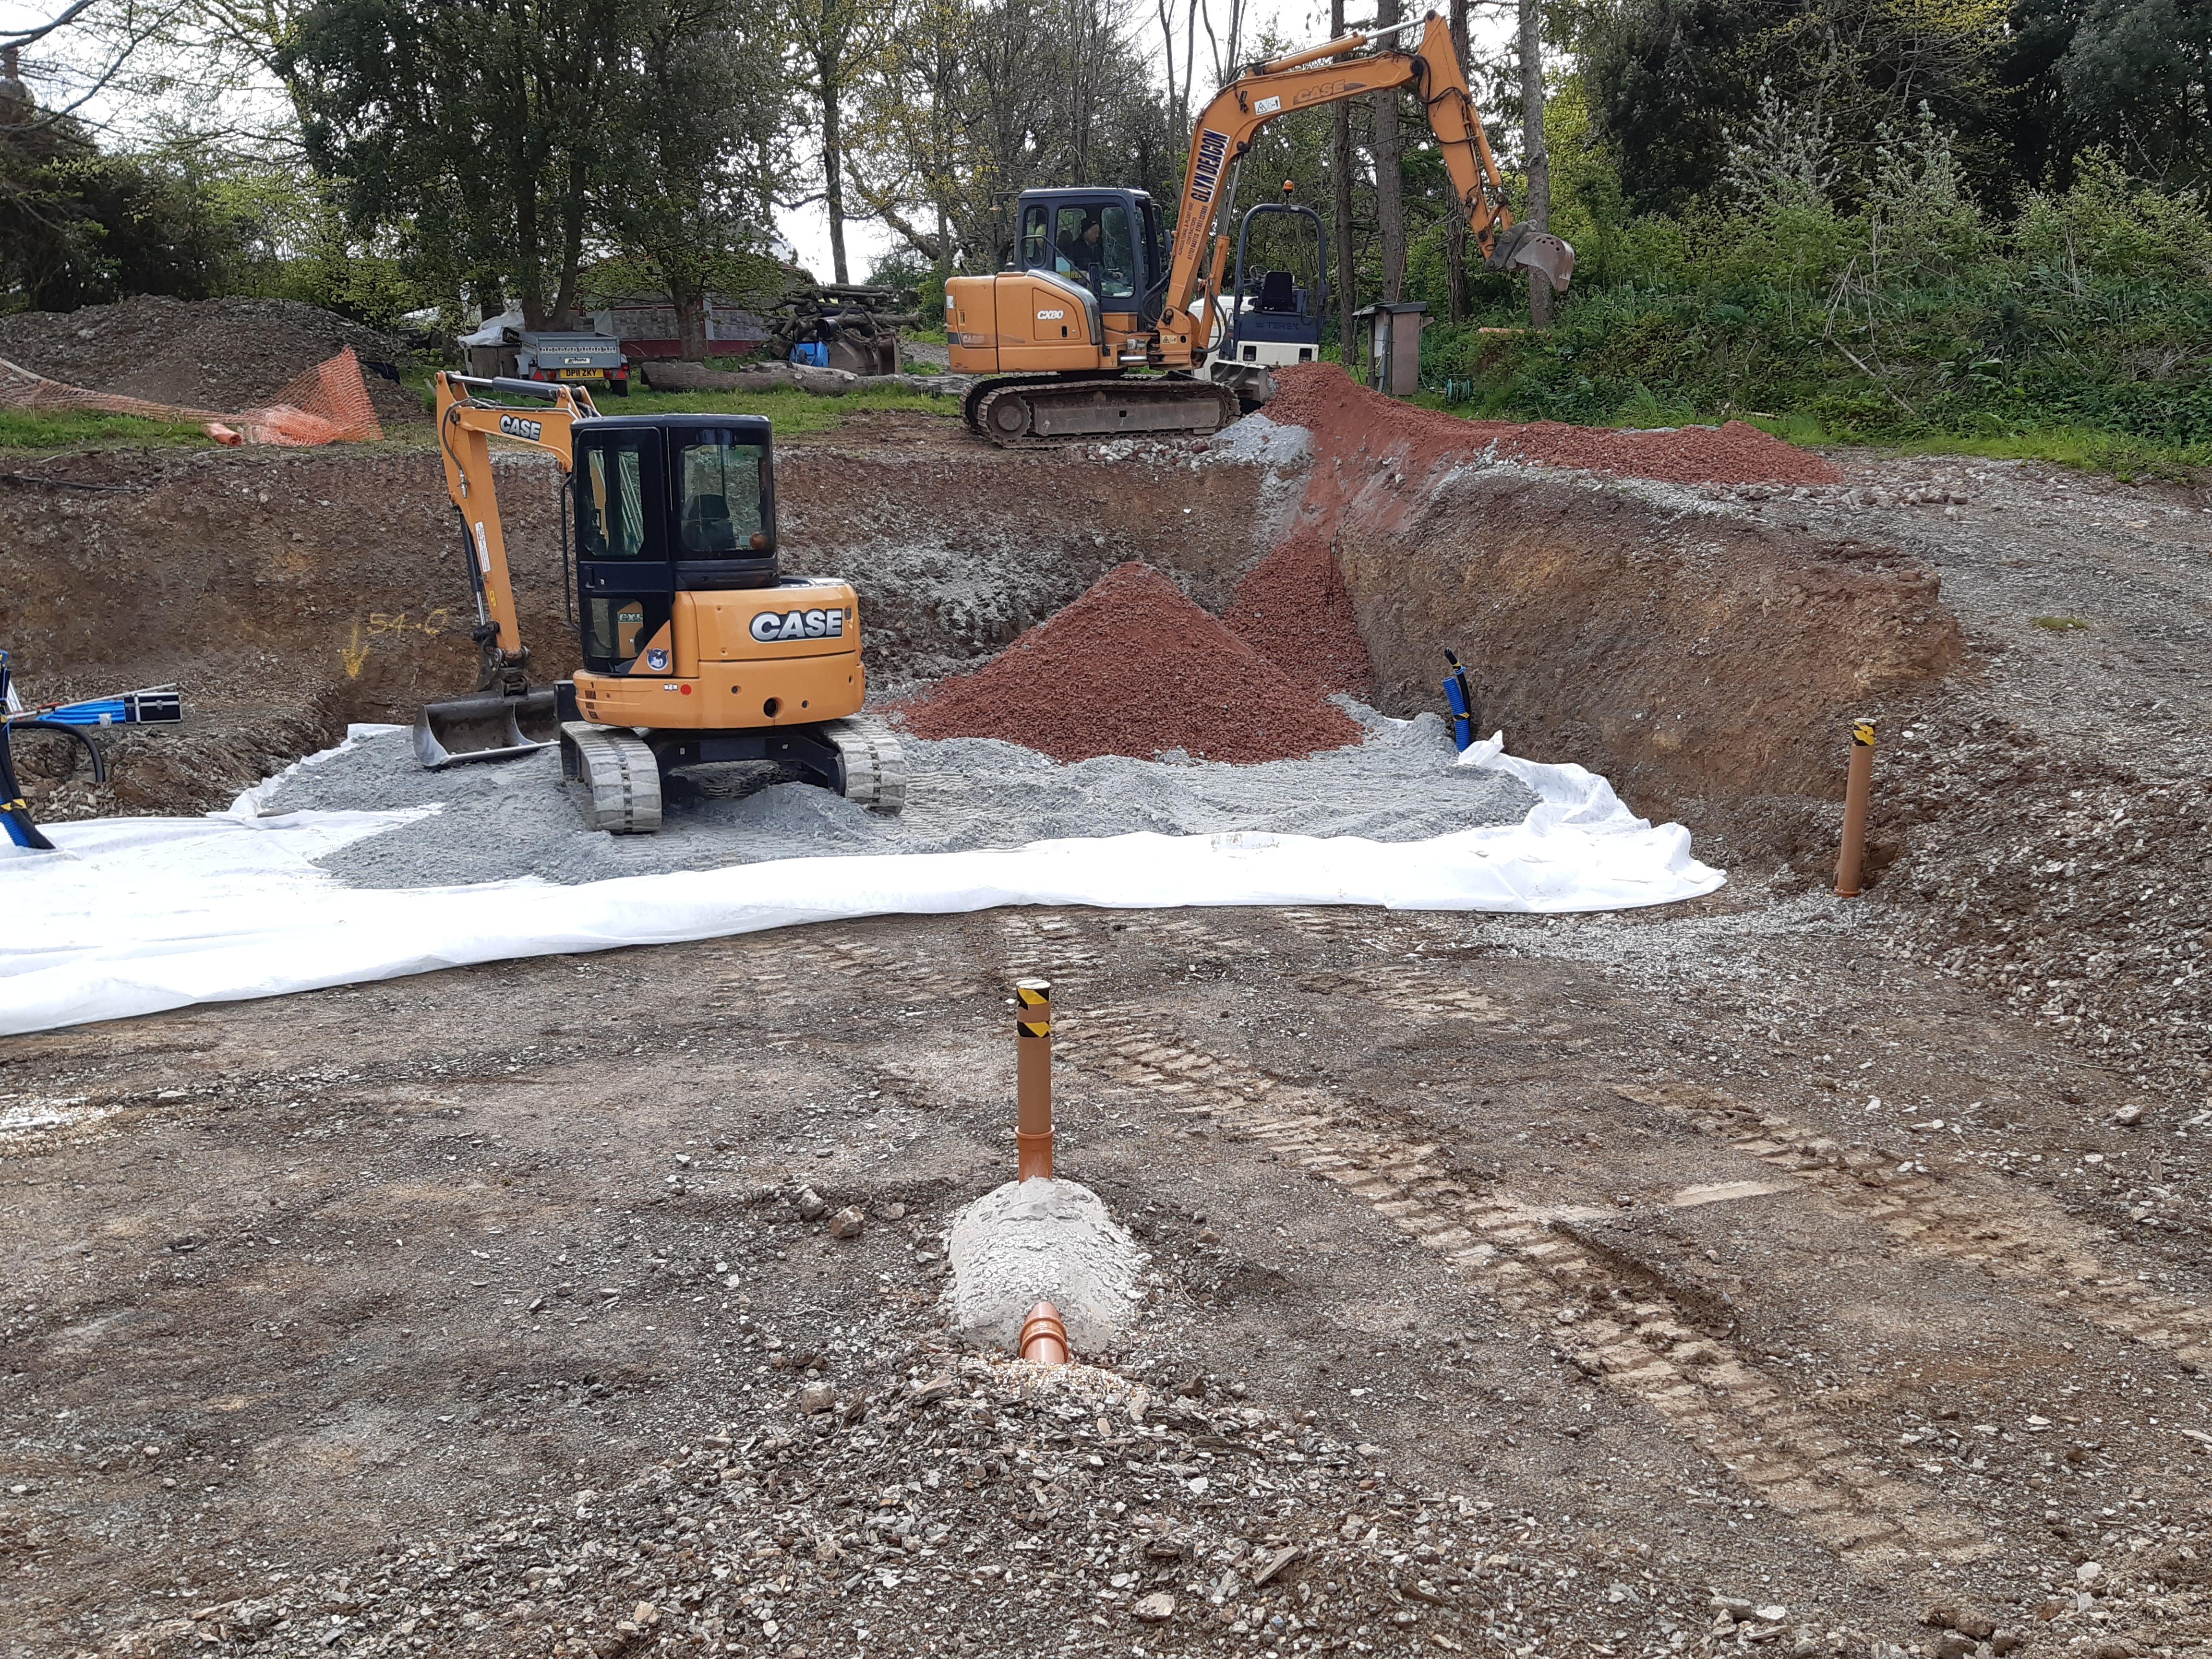
This involved about 80 tonnes of stone and 15 tonnes of sand being delivered - we have about 5 tonnes of each left over, fo which I have no doubt we'll find a use ?
(and before anyone asks, yes, it was rolled with an appropriately large machine at the appropriate time).
This all added to a sense of well being - we were in the fresh air, doing something beneficial (for us at least) and we were finally coming UP, out of the ground! Break out the party poppers ?
Ahhhhh - the insulated raft choice - it started out so simply having read the various comments in the forum, and Kore Systems it was going to be. I did then visit the Swindon self build centre and saw Jackon's stand and what seemed like a good system. Our SE had specified a 250mm thick slab throughout - no thin bits and thick bits - the Jackon Jackodur Atlas system seemed to fit the bill - a few calls, swap some drawings, commitment to delivery timescales, but with the flexibility I needed, a person onsite on day 1 to help. Quite straightforward. I won't go into detail, but let's just says Kore Systems approach was "our way or no way".
With a delivery to a local yard by articulated lorry and then our groundworker getting it on his trailer to go the last mile or so, we then proceeded to handball it all off the trailer. From delivery to the yard at 8:30am onto the ground by 1:30pm. The handballing was done by Mrs BB and I in about 4 hours.
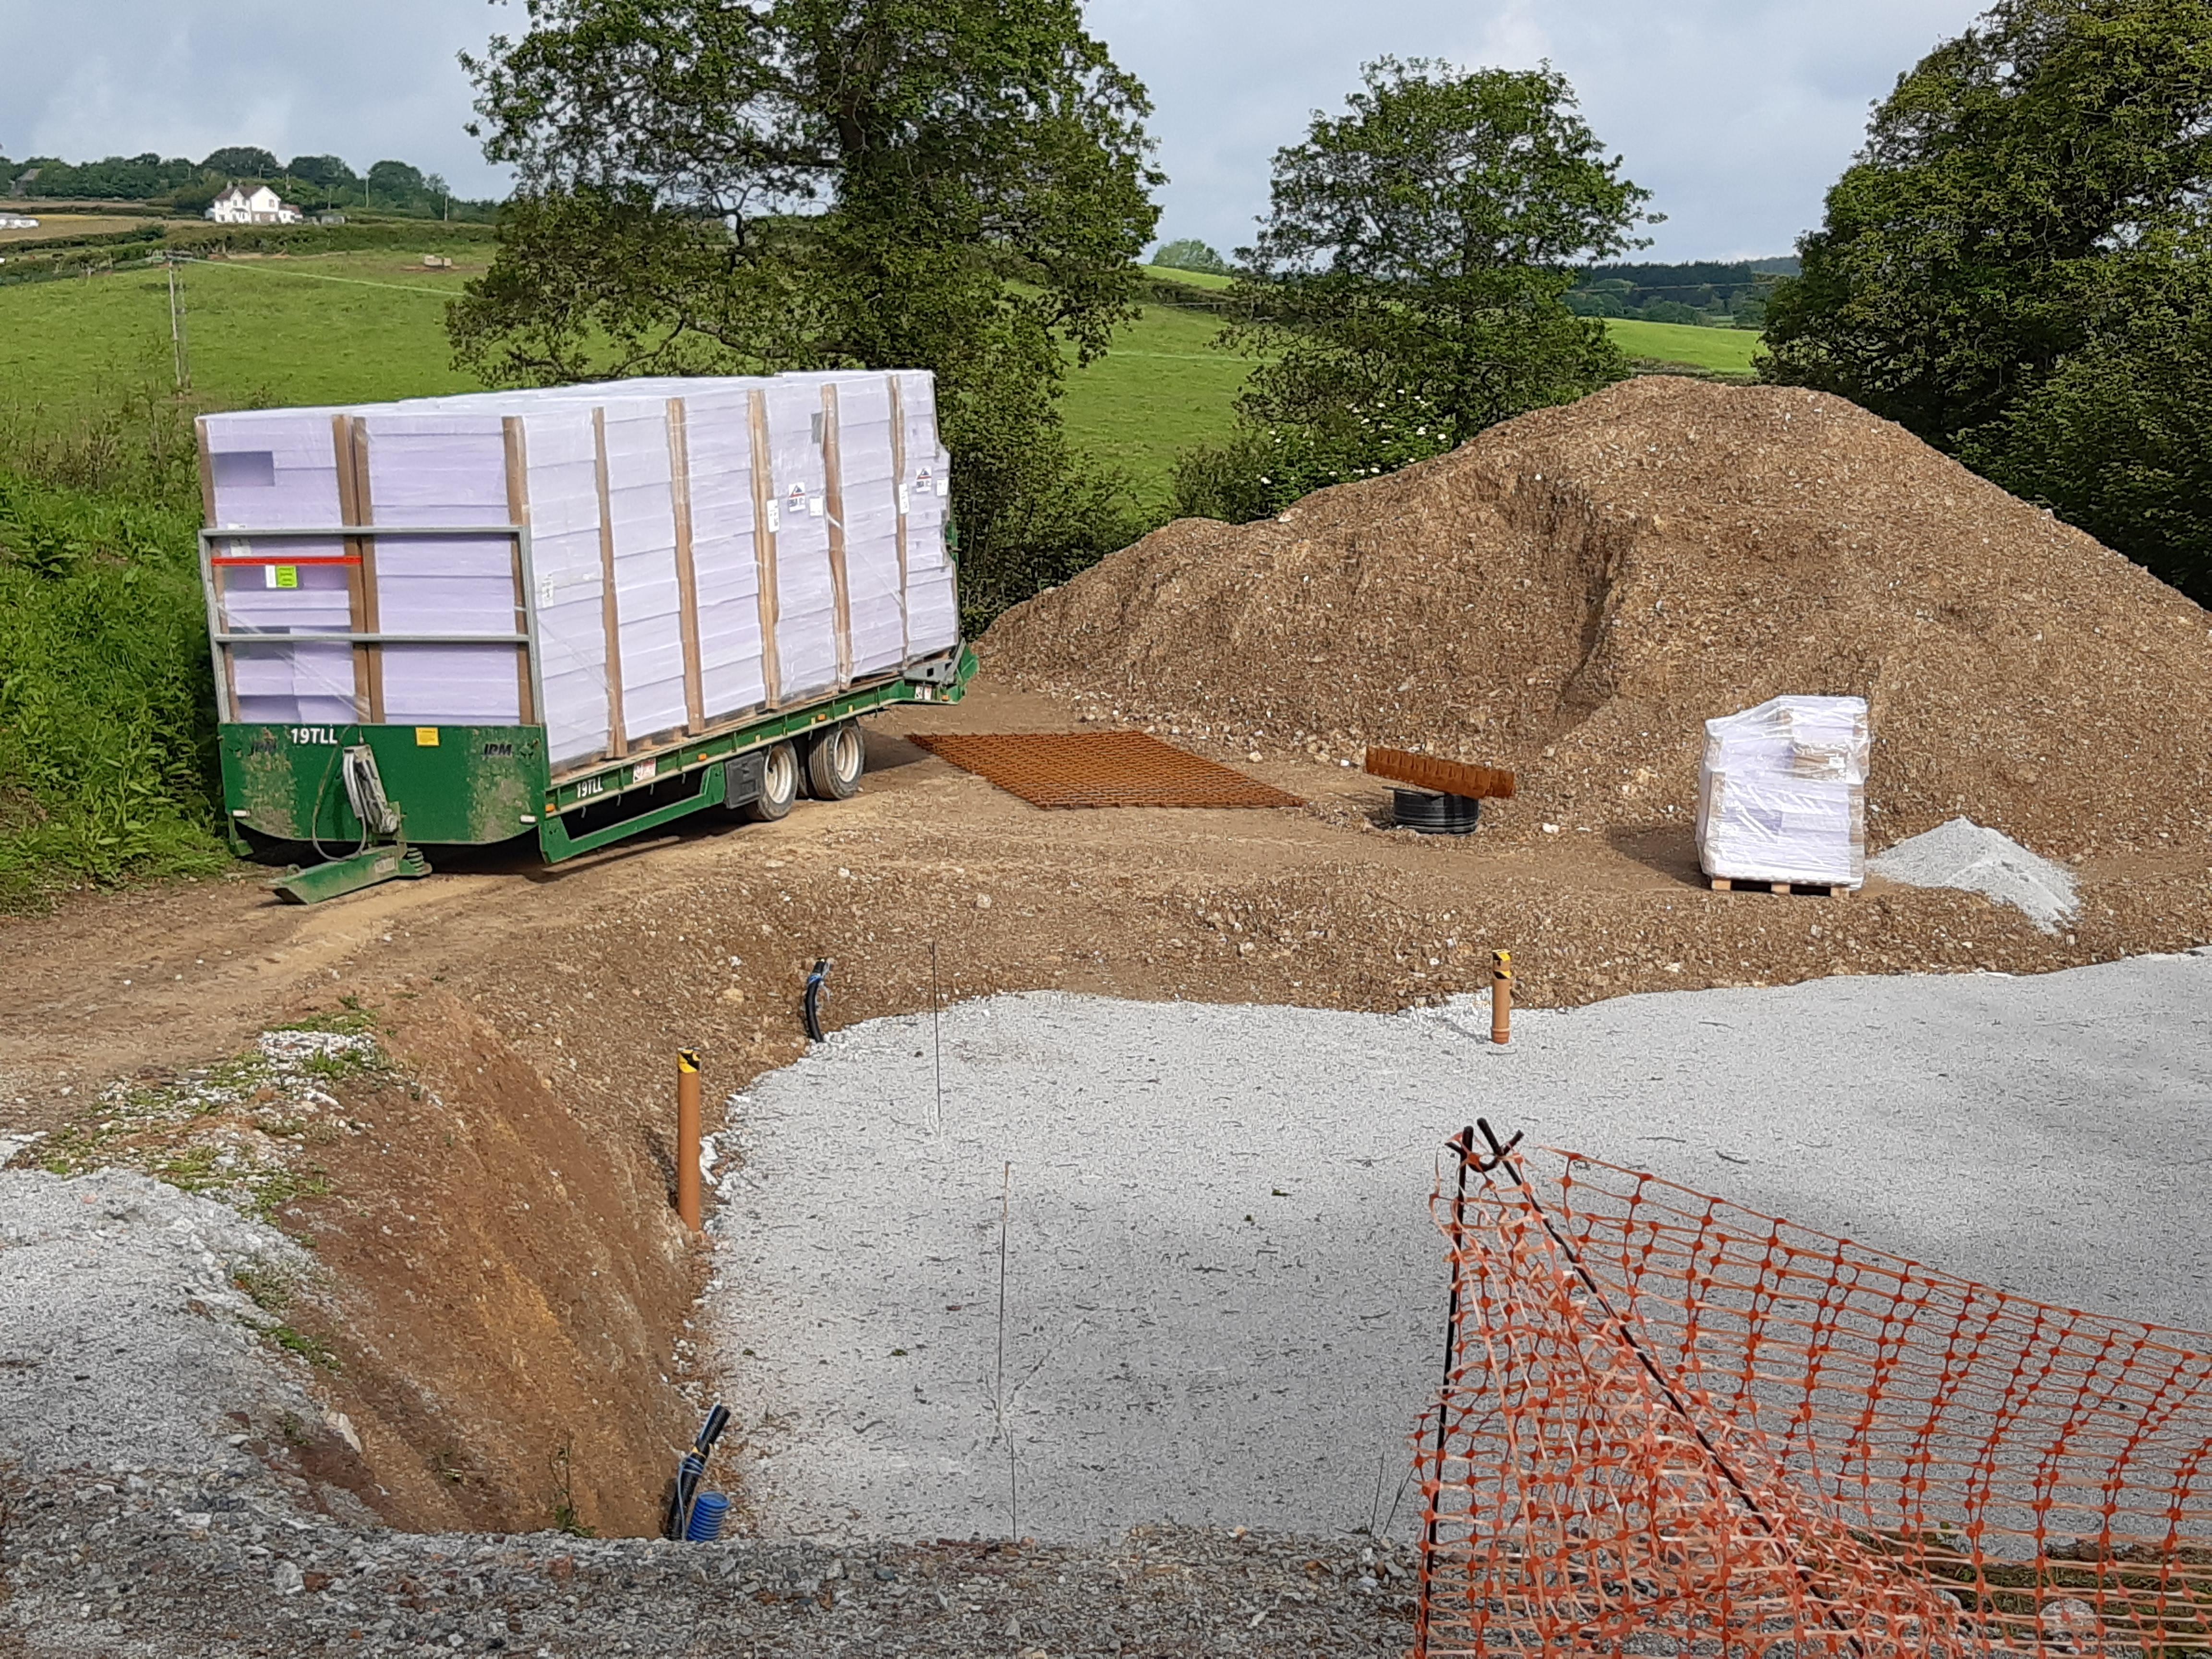
The insulation comes with a nice waterproof holder for the instructions and the plan to follow - think "a jigsaw puzzle with the special parts all numbered and shown on a drawing". All the other parts are standard, but if you work from pallet 1 through pallet 2 to pallet N, you can't go far wrong. The very nice man from Jackon arrived just after we had stopped for lunch and we began with laying the first two sides and three corners, and then Mrs BB and I carried on the following few days to lay the rest. We did come across one part while the man was onsite which had not been cut properly in the German factory - you should have seen the delight on his face when he realised he was going to be able to send a snottogram ?. It was easily sorted, but if he had not been onsite I can see that it could have caused a big time day - even with being onsite it took about 45 minutes for him to work out what had gone wrong.
Day 1: 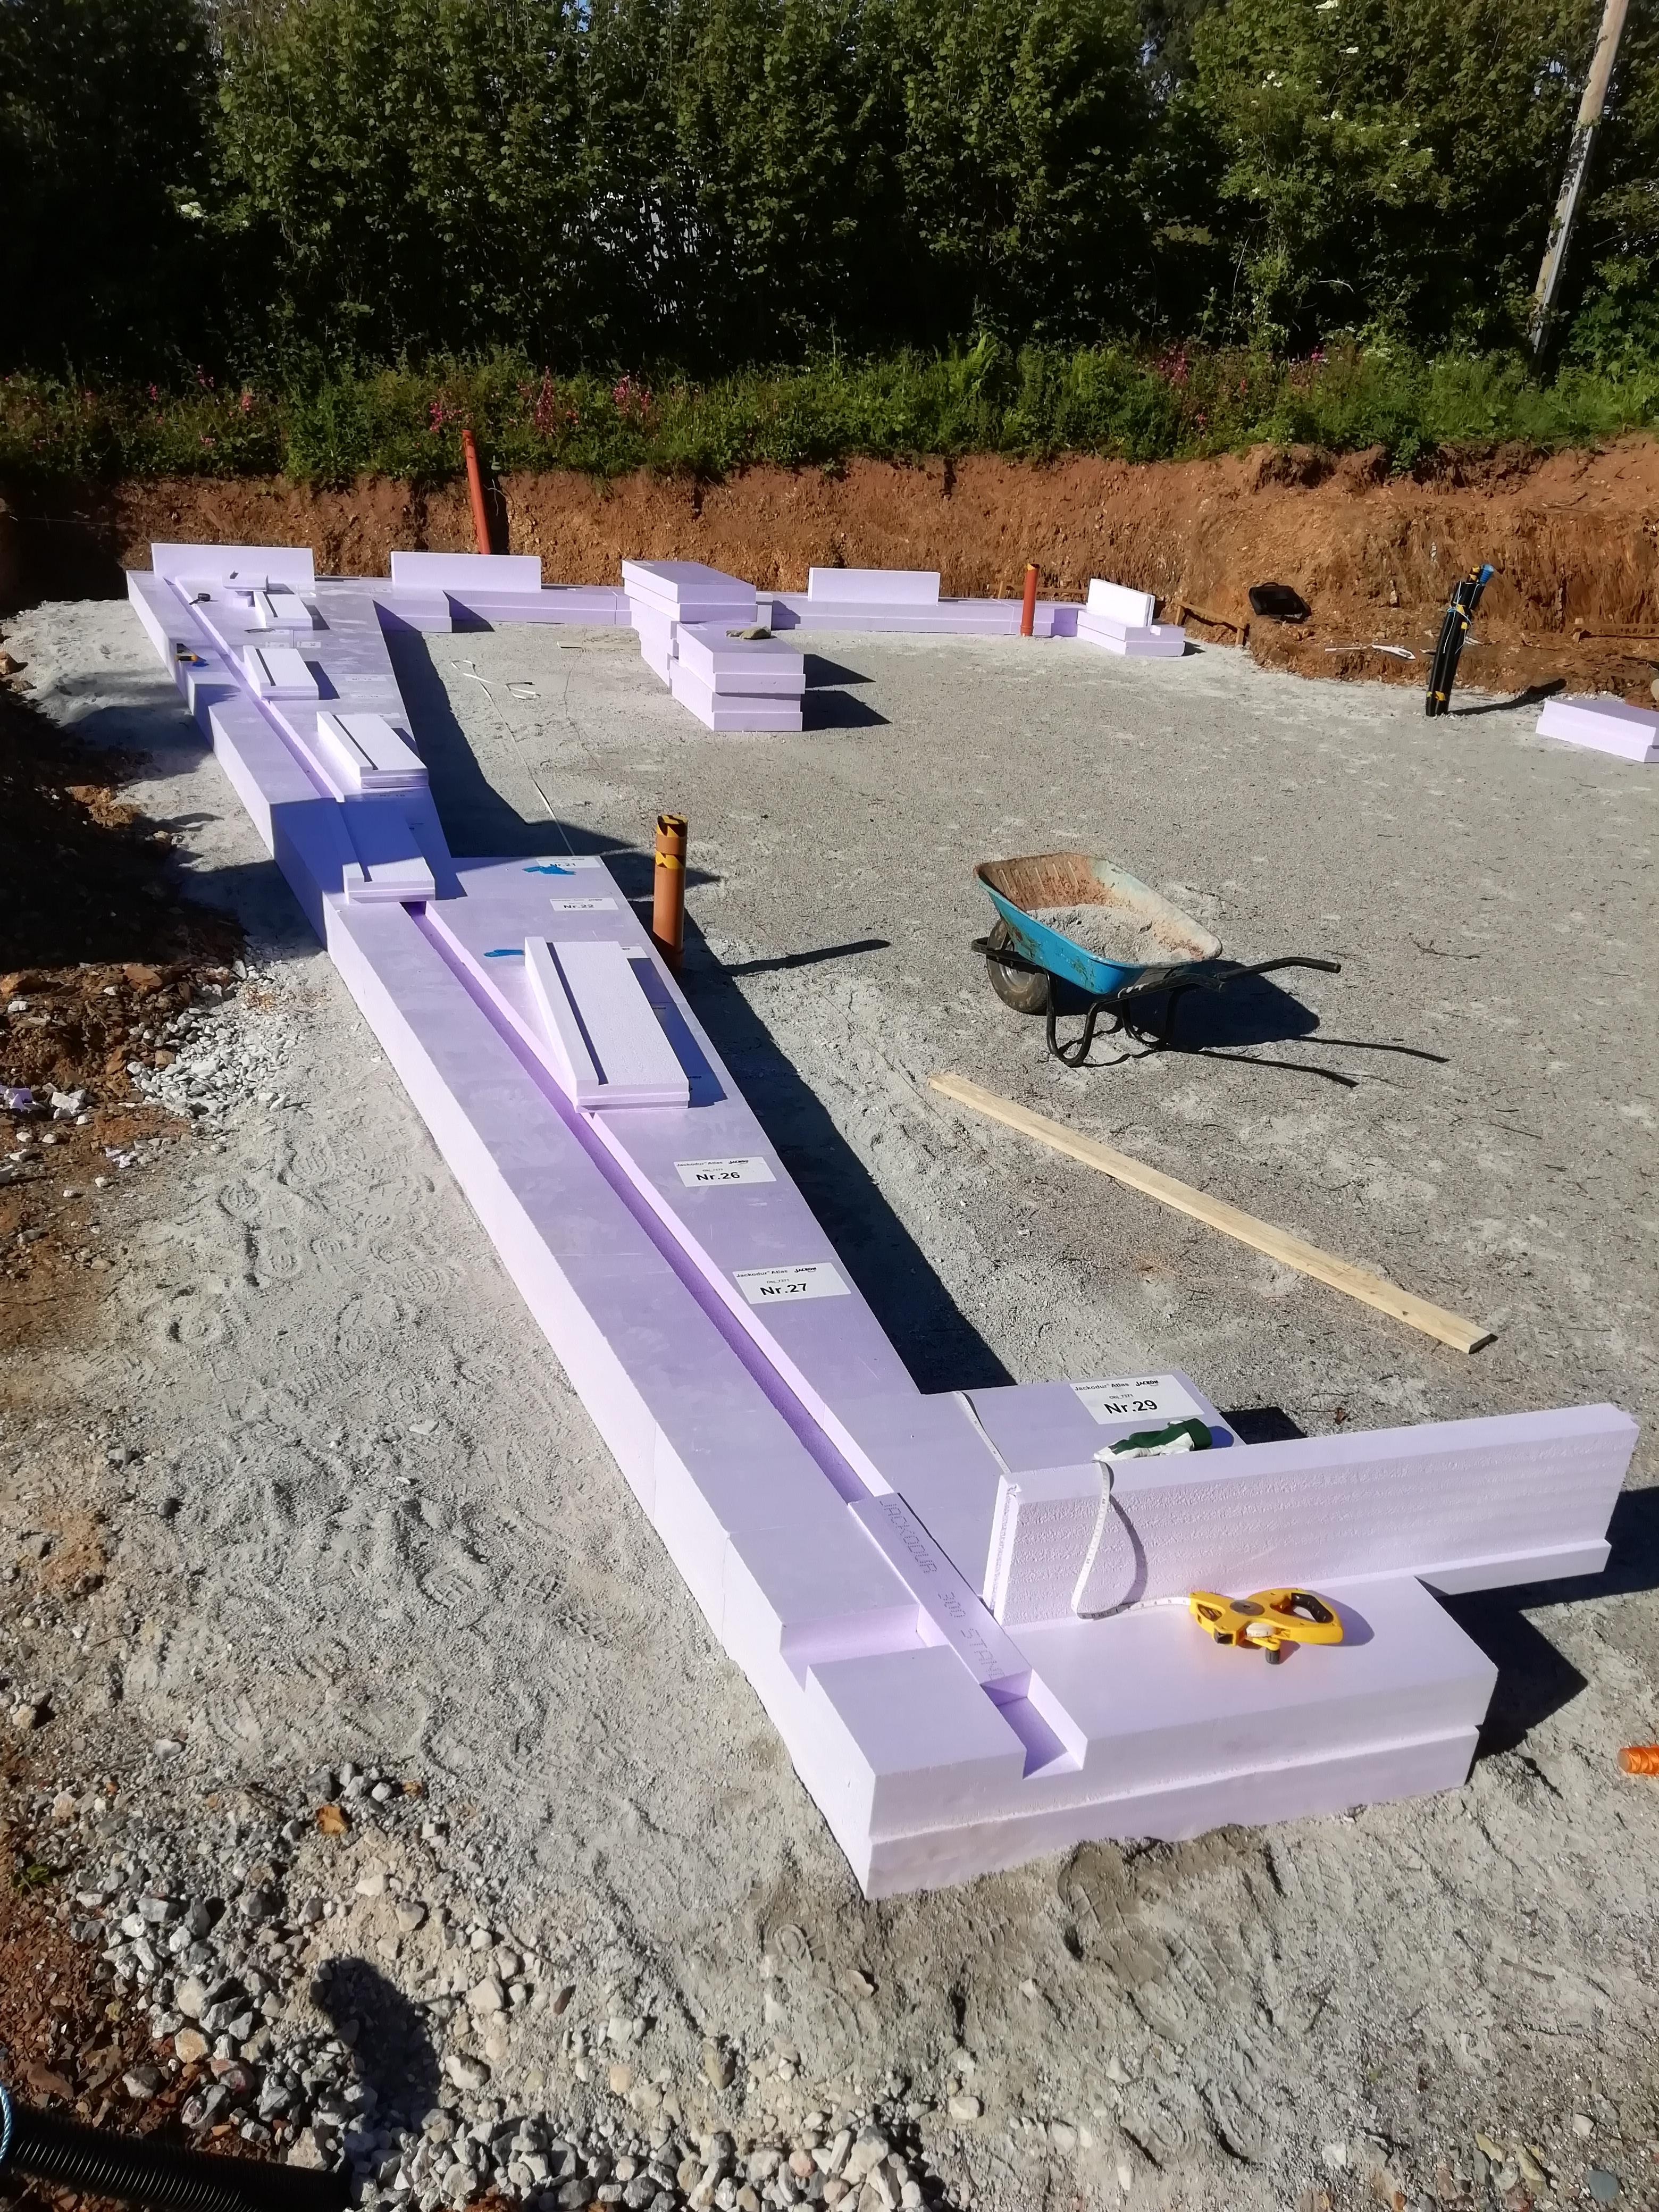 Day 2:
Day 3:  Day 4. :
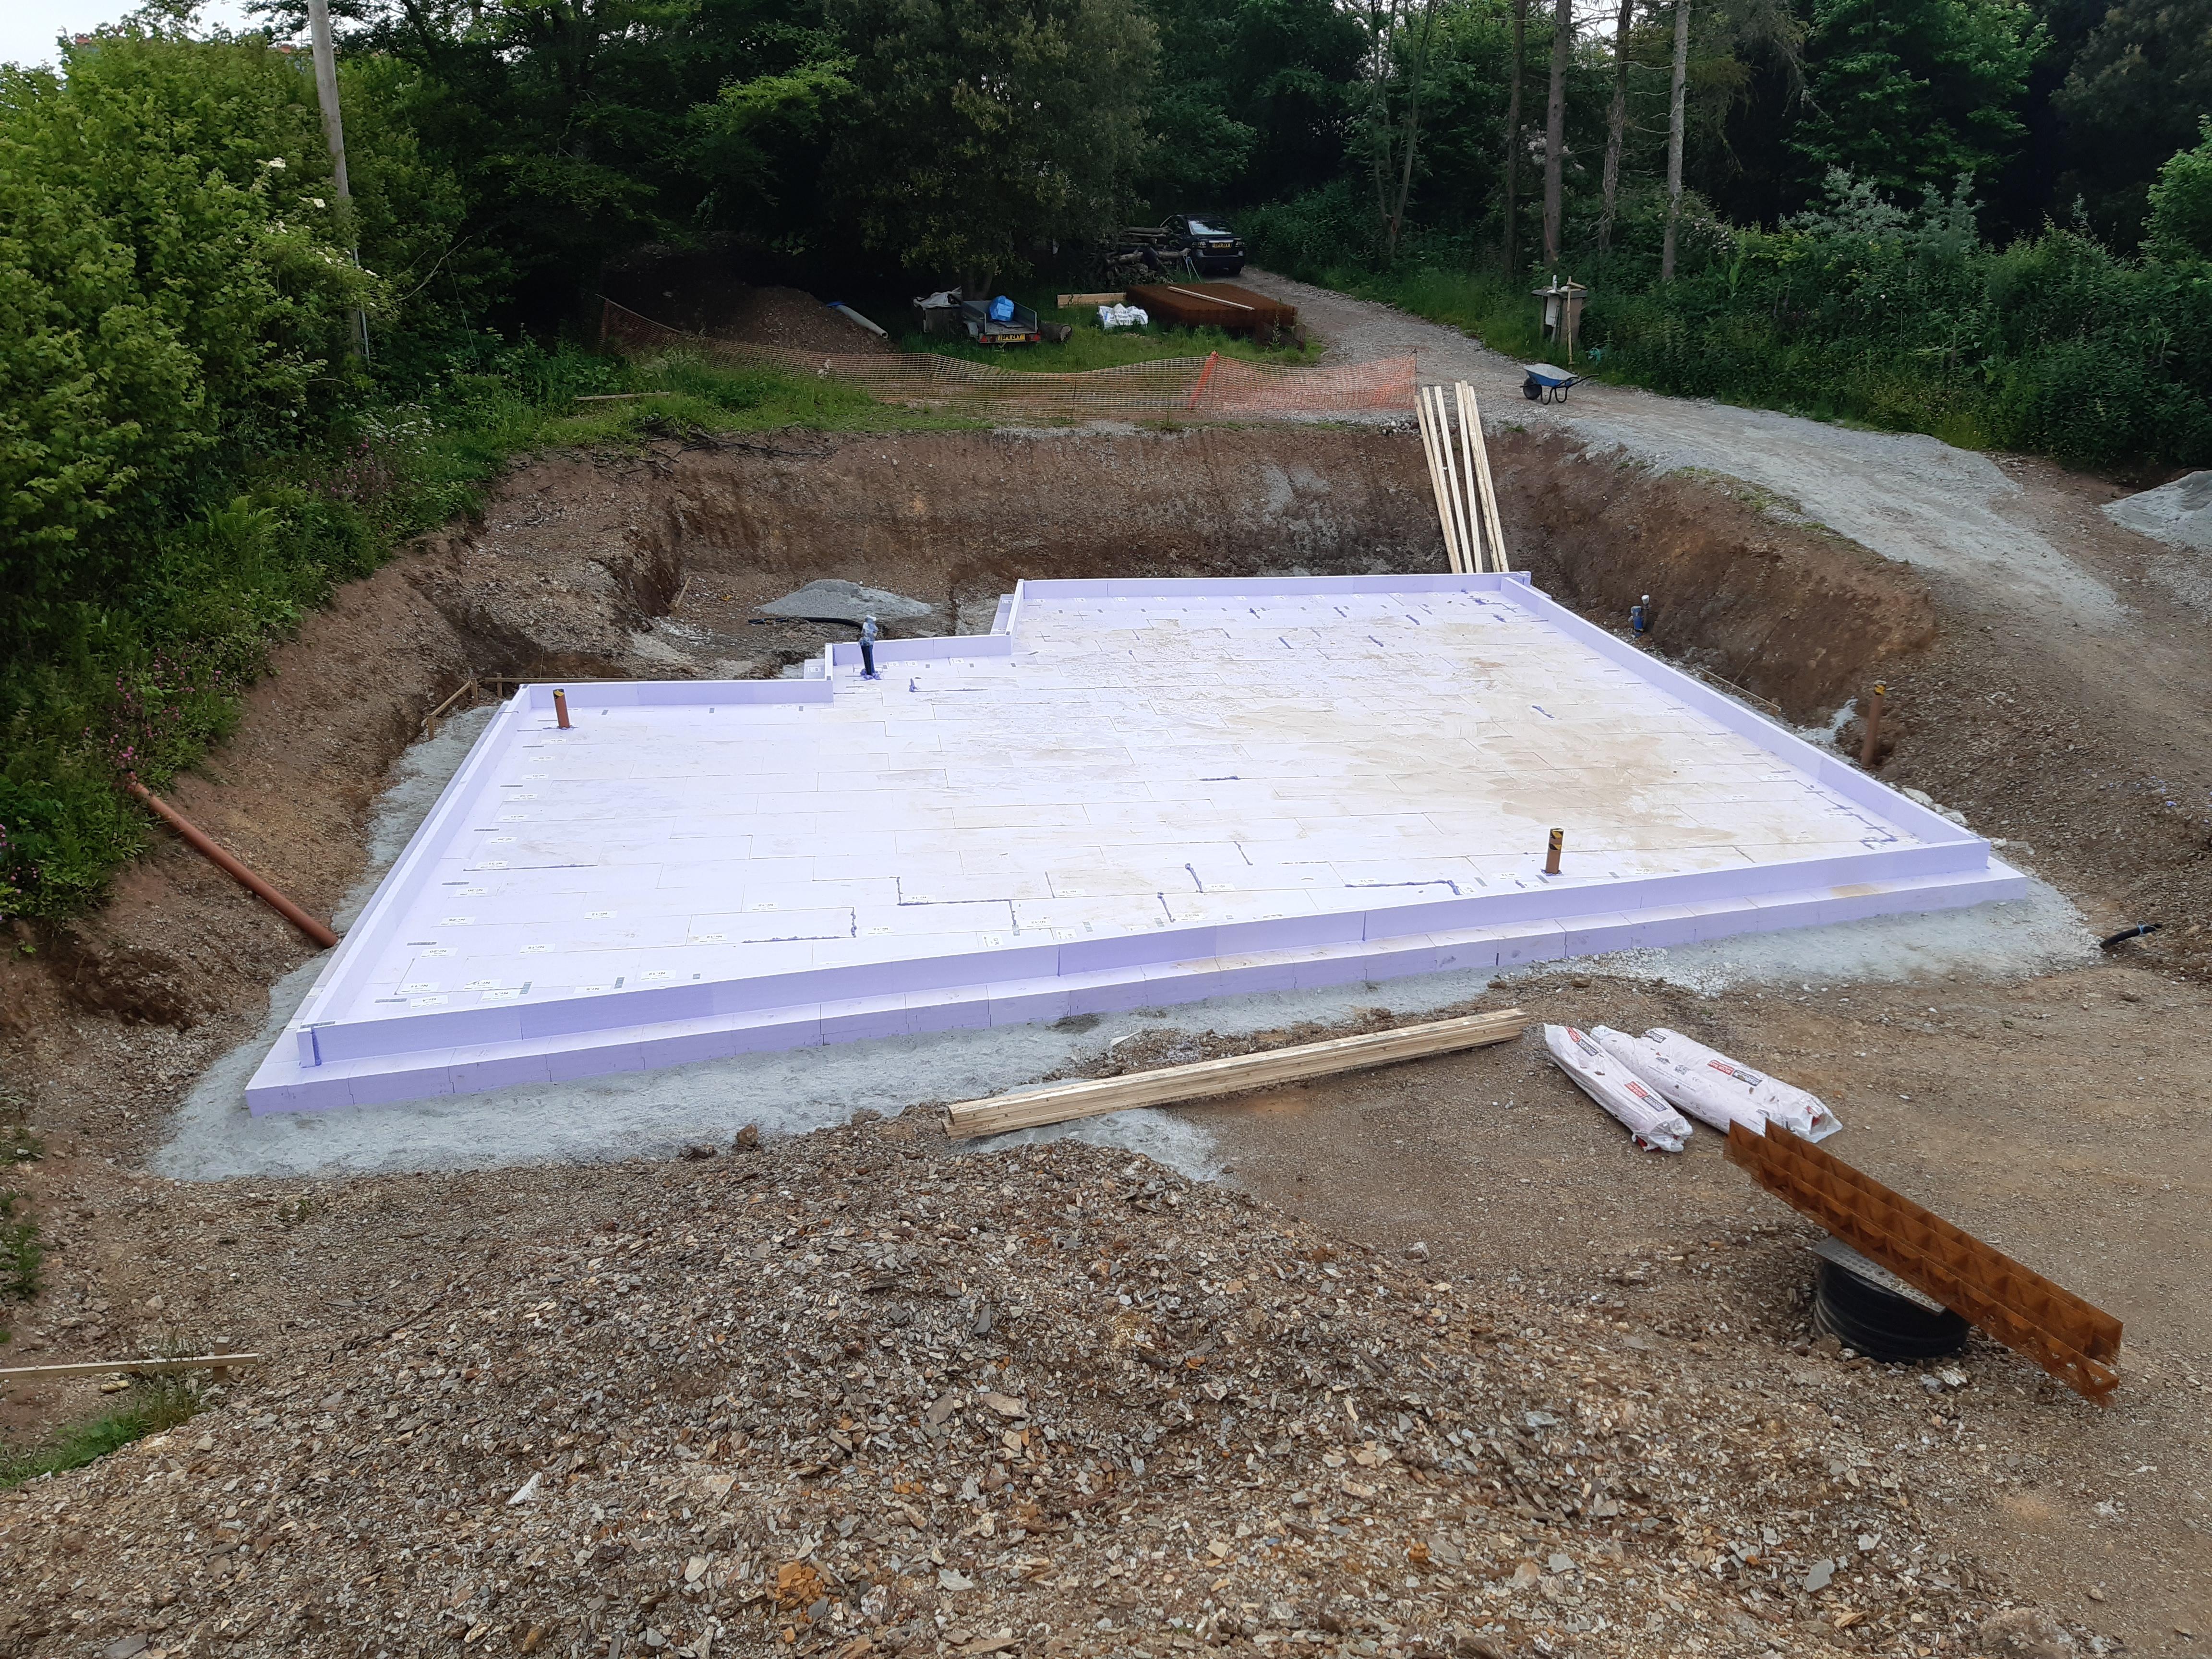
Next in was the combined Radon barrier/DPM, the first layer of reinforcing mesh, including a double-layer strip (see left hand photo below) around the 3 sides that will be retaining walls. During the laying of the re-inforcing mesh we suffered our first big accident when one of them caught Mrs BB on the shin and we ended up at the local A&E for her to have a few stitches applied - she is still talking to me ?
Over the last few weeks we have managed to get the time to put in the second layer of mesh, with the help of a good friend and one of our neighbours-to-be.
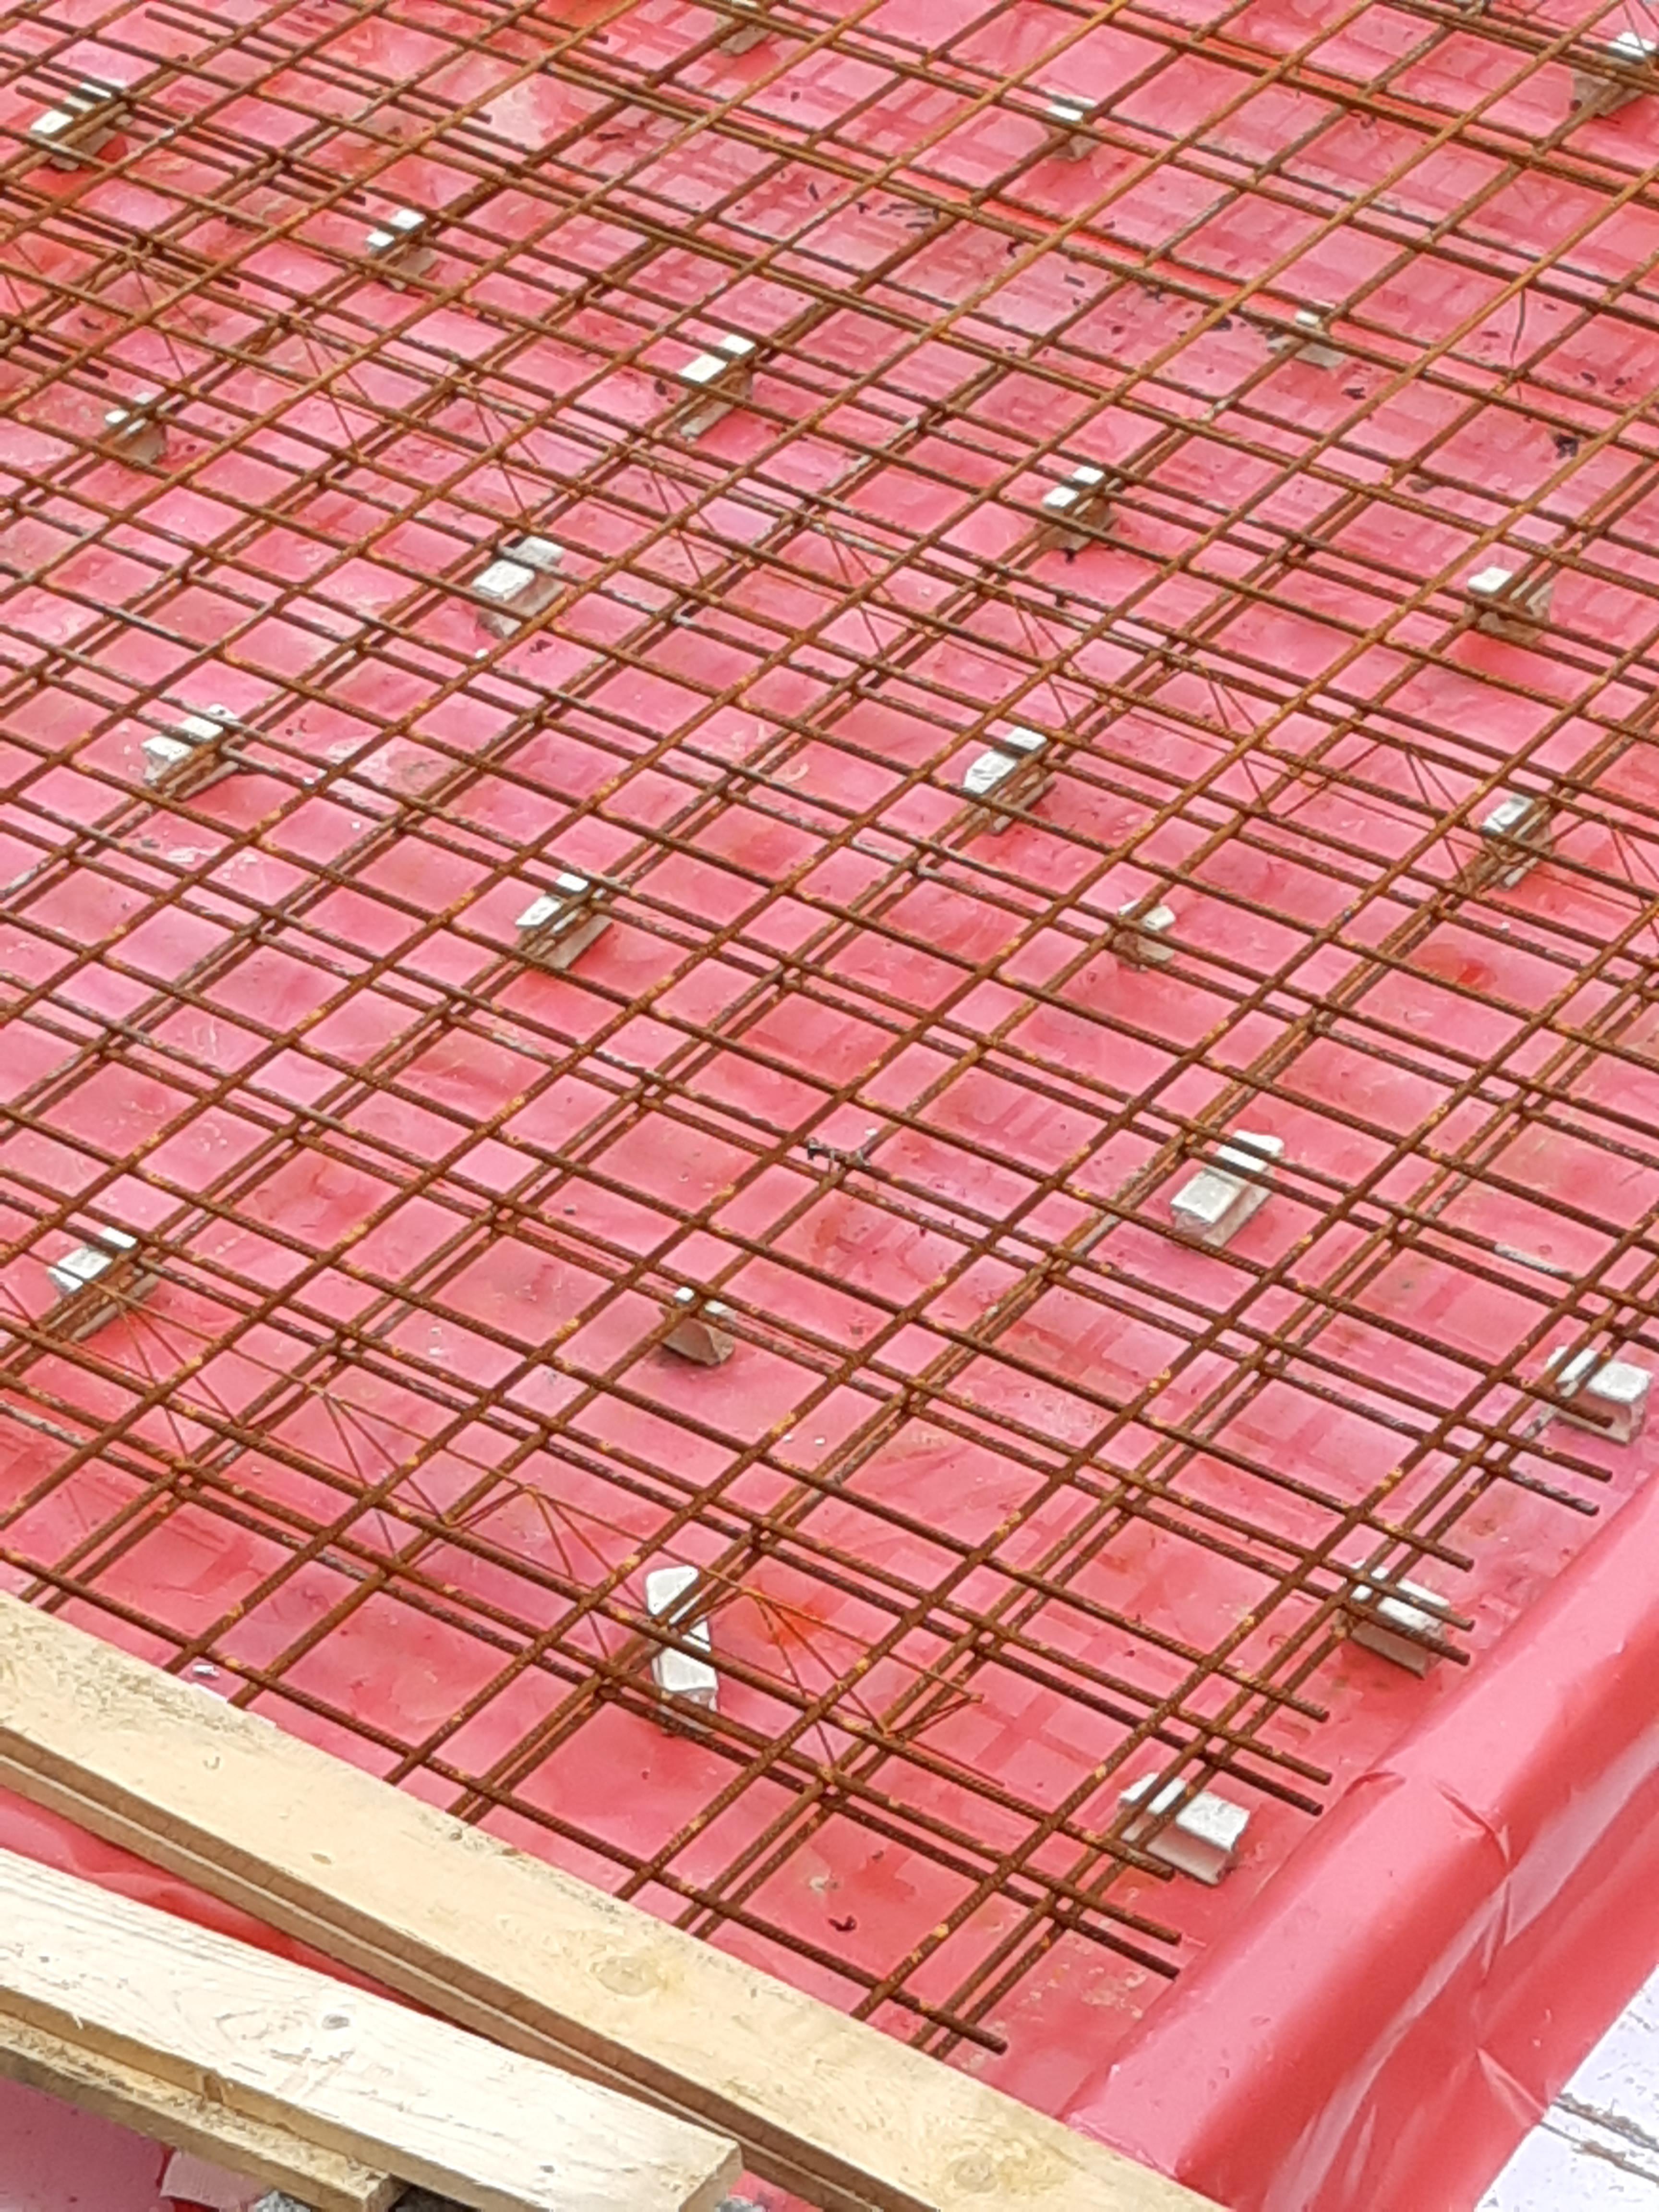
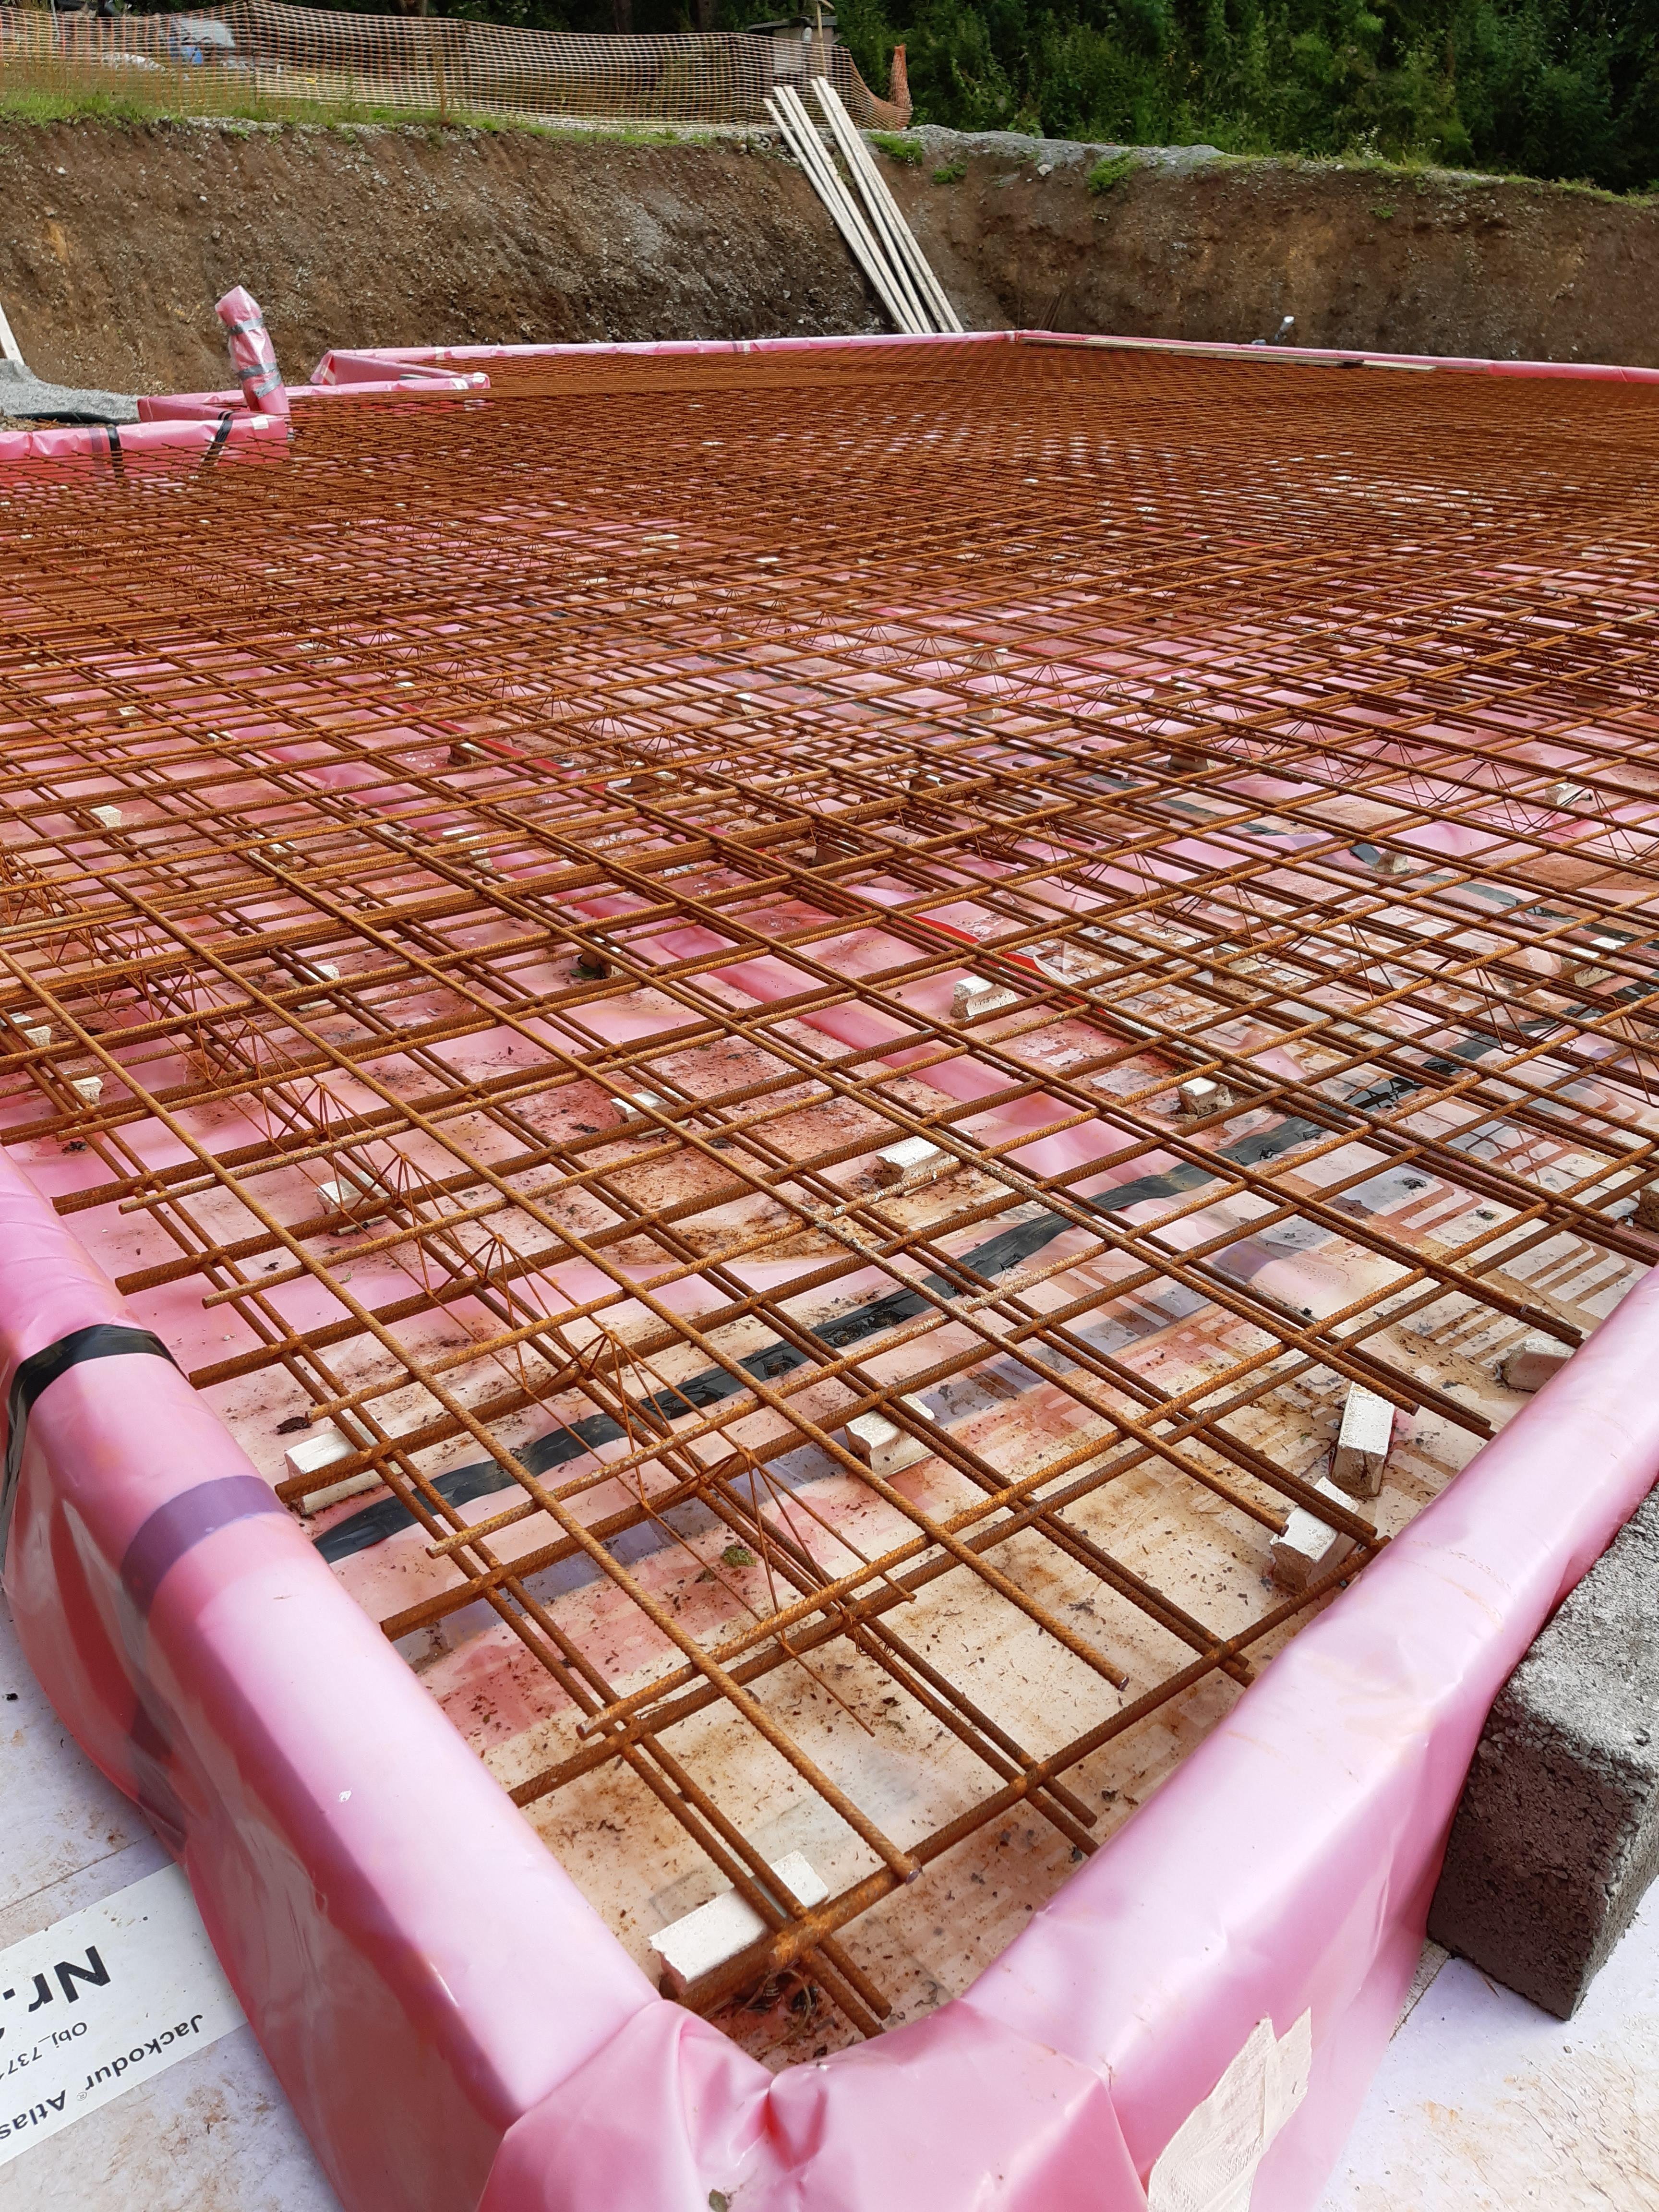
We're pretty close to pouring concrete, but just have the starter bars for the external walls and one internal wall to put in place, and two sets of bolts that will eventually have two steel columns attached to them.
Oh, and well done Italy ??. (he said grudgingly)
-
 7
7
8 Comments
Recommended Comments
Create an account or sign in to comment
You need to be a member in order to leave a comment
Create an account
Sign up for a new account in our community. It's easy!
Register a new accountSign in
Already have an account? Sign in here.
Sign In Now