
Piling & Ground Beam Completed

Entry posted by Andrew
2293 views
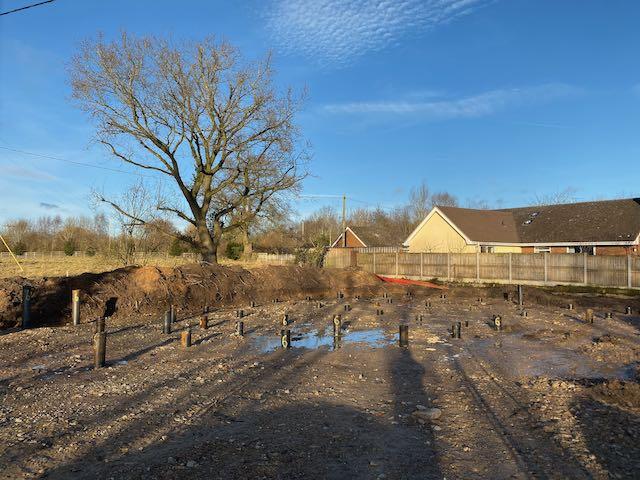
Time for another blog post as we now have 50 piles completed and a nice shiny ground beam linking them all together.
The pilers took 6 days to drive the 50 bottom driven steel cased piled into situ just before Christmas, this was two blokes and a fairly shiny new looking piling rig. The rig, in its simplest form, was a 500Kg weight on a string that was capable of being raised and dropped repeatedly. It had some very fancy hydraulic outriggers and a track that could vary its width, but ultimately it was a weight on a string.
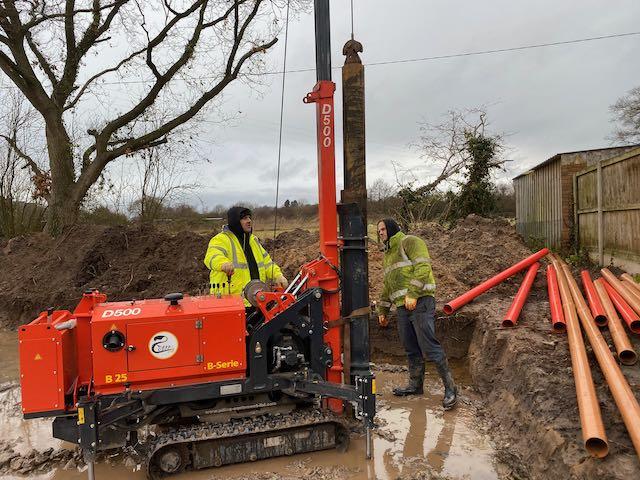
The pilers said our required loading on each pile (150kN) was fairly modest and explained how each pile would be driven to set. This involved piling away until either a new 2m section was needed to be welded on or the pile started to move less with each blow. When they felt it was getting there, they sprayed a vertical line on the pile and used a welding rod held at one end, to draw a series of 5 lines on the pile, one after each blow. If the spread of these lines was less than 100mm then the pile would be capable of taking the 150kN load. Interestingly I only ever saw this done when I was on site and watching, not one of the piles done when I wasn't there had the vertical white line and marks - I'm sure that's fine....
From a cost point of view, the piles were £1,200 for mobilisation then £127 per pile down to 4m, anything beyond that was £30 per meter per pile. In the end we had 27 piles at 5m, 2 piles at 5.5m and 21 at 6m, which was a total add-on cost of £2,160. So the total piling cost was £9,710.
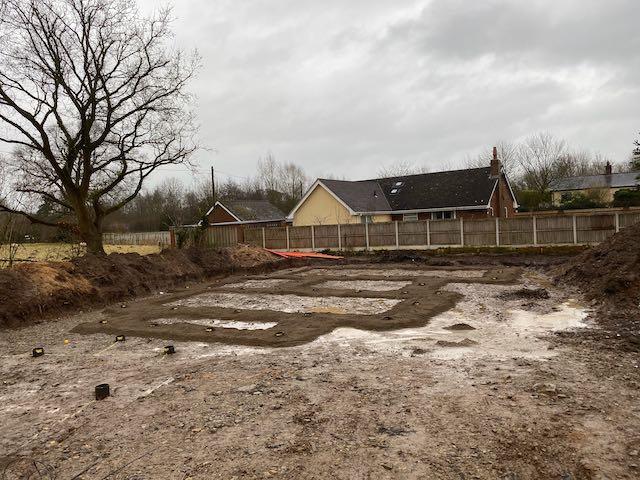
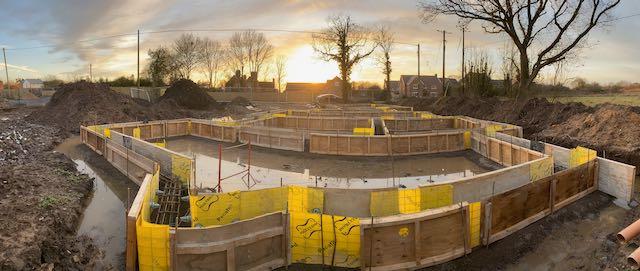
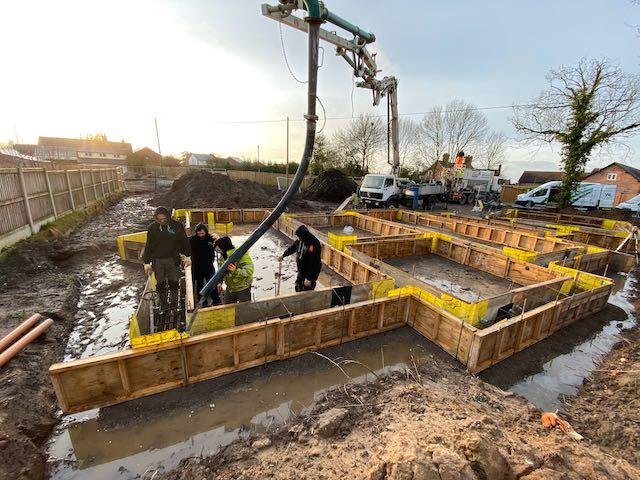
After Christmas the lads returned and were joined by another crew of 2 and the 4 of them started work on the ground beam. The original plan had been to excavate a trench for the beam and just set the steel reinforcement into the trench. When the pilers first saw the site they said this wasn't going to work due to the water and soft ground and we'd need to dig down to the bottom of the ground beams, so they could shutter the beam. After having a concrete blinding delivered and placed level around the route of the beam, they spent the next week placing and tying the rebar along with positioning the shuttering.
By the Friday morning it was ready for our first building control inspection. As we are having a Protek structural warranty, the idea of combining the warranty and building control inspections appealed to me. Protek assigned a private building control firm to oversee the inspections, so our approved inspector, a diminutive Welsh lady duly arrived to look at the work the piling lads had done. Happy with everything we were good to pour the ground beam the following Monday.
Monday arrived and the concrete pump and wagons arrived at 9.00am, ready to go. The pour was uneventful, but I was badly unprepared for the splatter so had to pop home and get changed into some clothes I didn't mind getting covered in concrete. In total, I think it was about 35 cube of concrete, so a fair amount went into the piles and beams. The lads returned the following day and took down the shuttering and much to my surprise took away pretty much all of their rubbish. That left us with the ground beam in all of its glory.
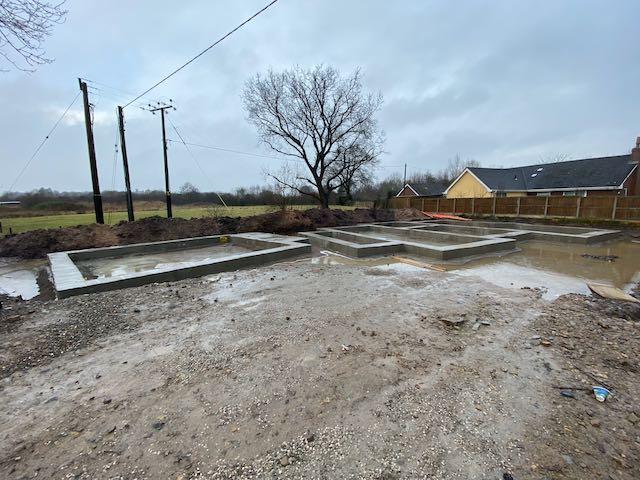
The ground beam was the most costly aspect of the endeavour. The cost for beam itself was £100 per linear metre, of which our beam was 124LM, for a cost of £12,400. The shuttering was unexpected (well not completely, but you can hope) and an additional £4,000. So the overall cost for the ground beam was £16,400, giving a total spend with the pilers of about £26,000. I'm including the costs in the blog as they might be useful for others as comparison.
I'm really pleased with the job that they did, the whole thing is obviously very solid and I know we have a decent foundation for the house. It's so substantial it feels like it should be able to be seen from space.

-
 8
8
-
 1
1
9 Comments
Recommended Comments
Create an account or sign in to comment
You need to be a member in order to leave a comment
Create an account
Sign up for a new account in our community. It's easy!
Register a new accountSign in
Already have an account? Sign in here.
Sign In Now