
Stairs and balustrade

Entry posted by Thedreamer
1503 views
Starting to put in the exciting stuff.
The stairs measurements were taken back in August and we then had to have a good think about what type of timber and finish we wanted.
The vaulted ceiling had a bit more structural work and being the most interesting feature in the house and we decided that this would be good place to invest in a high finish and we decided go with a solid oak stairs and balustrade with toughened glass panels.
Like many self builders we have adopted a fabric first approach and although not part of the building a good stairs to us is worth investing in.
Before we could install the stair we had to get rid of the internal scaffolding and before we could do this we needed to finish any awkward decorating.
In the summer I tackled the external painting and my wife is going to be doing the internal decorating. These bits were probably the most awkward in the house and with the caulking and painting done, the scaffolding could now be carefully taken down.
I was working on the day of the stair installation, but had a quick glimpse early in the morning when helping to lift it into the house. The installation of the stair and balustrade was done in a single day by two joiners from Inverness and the following morning I was excited to see what had been done.
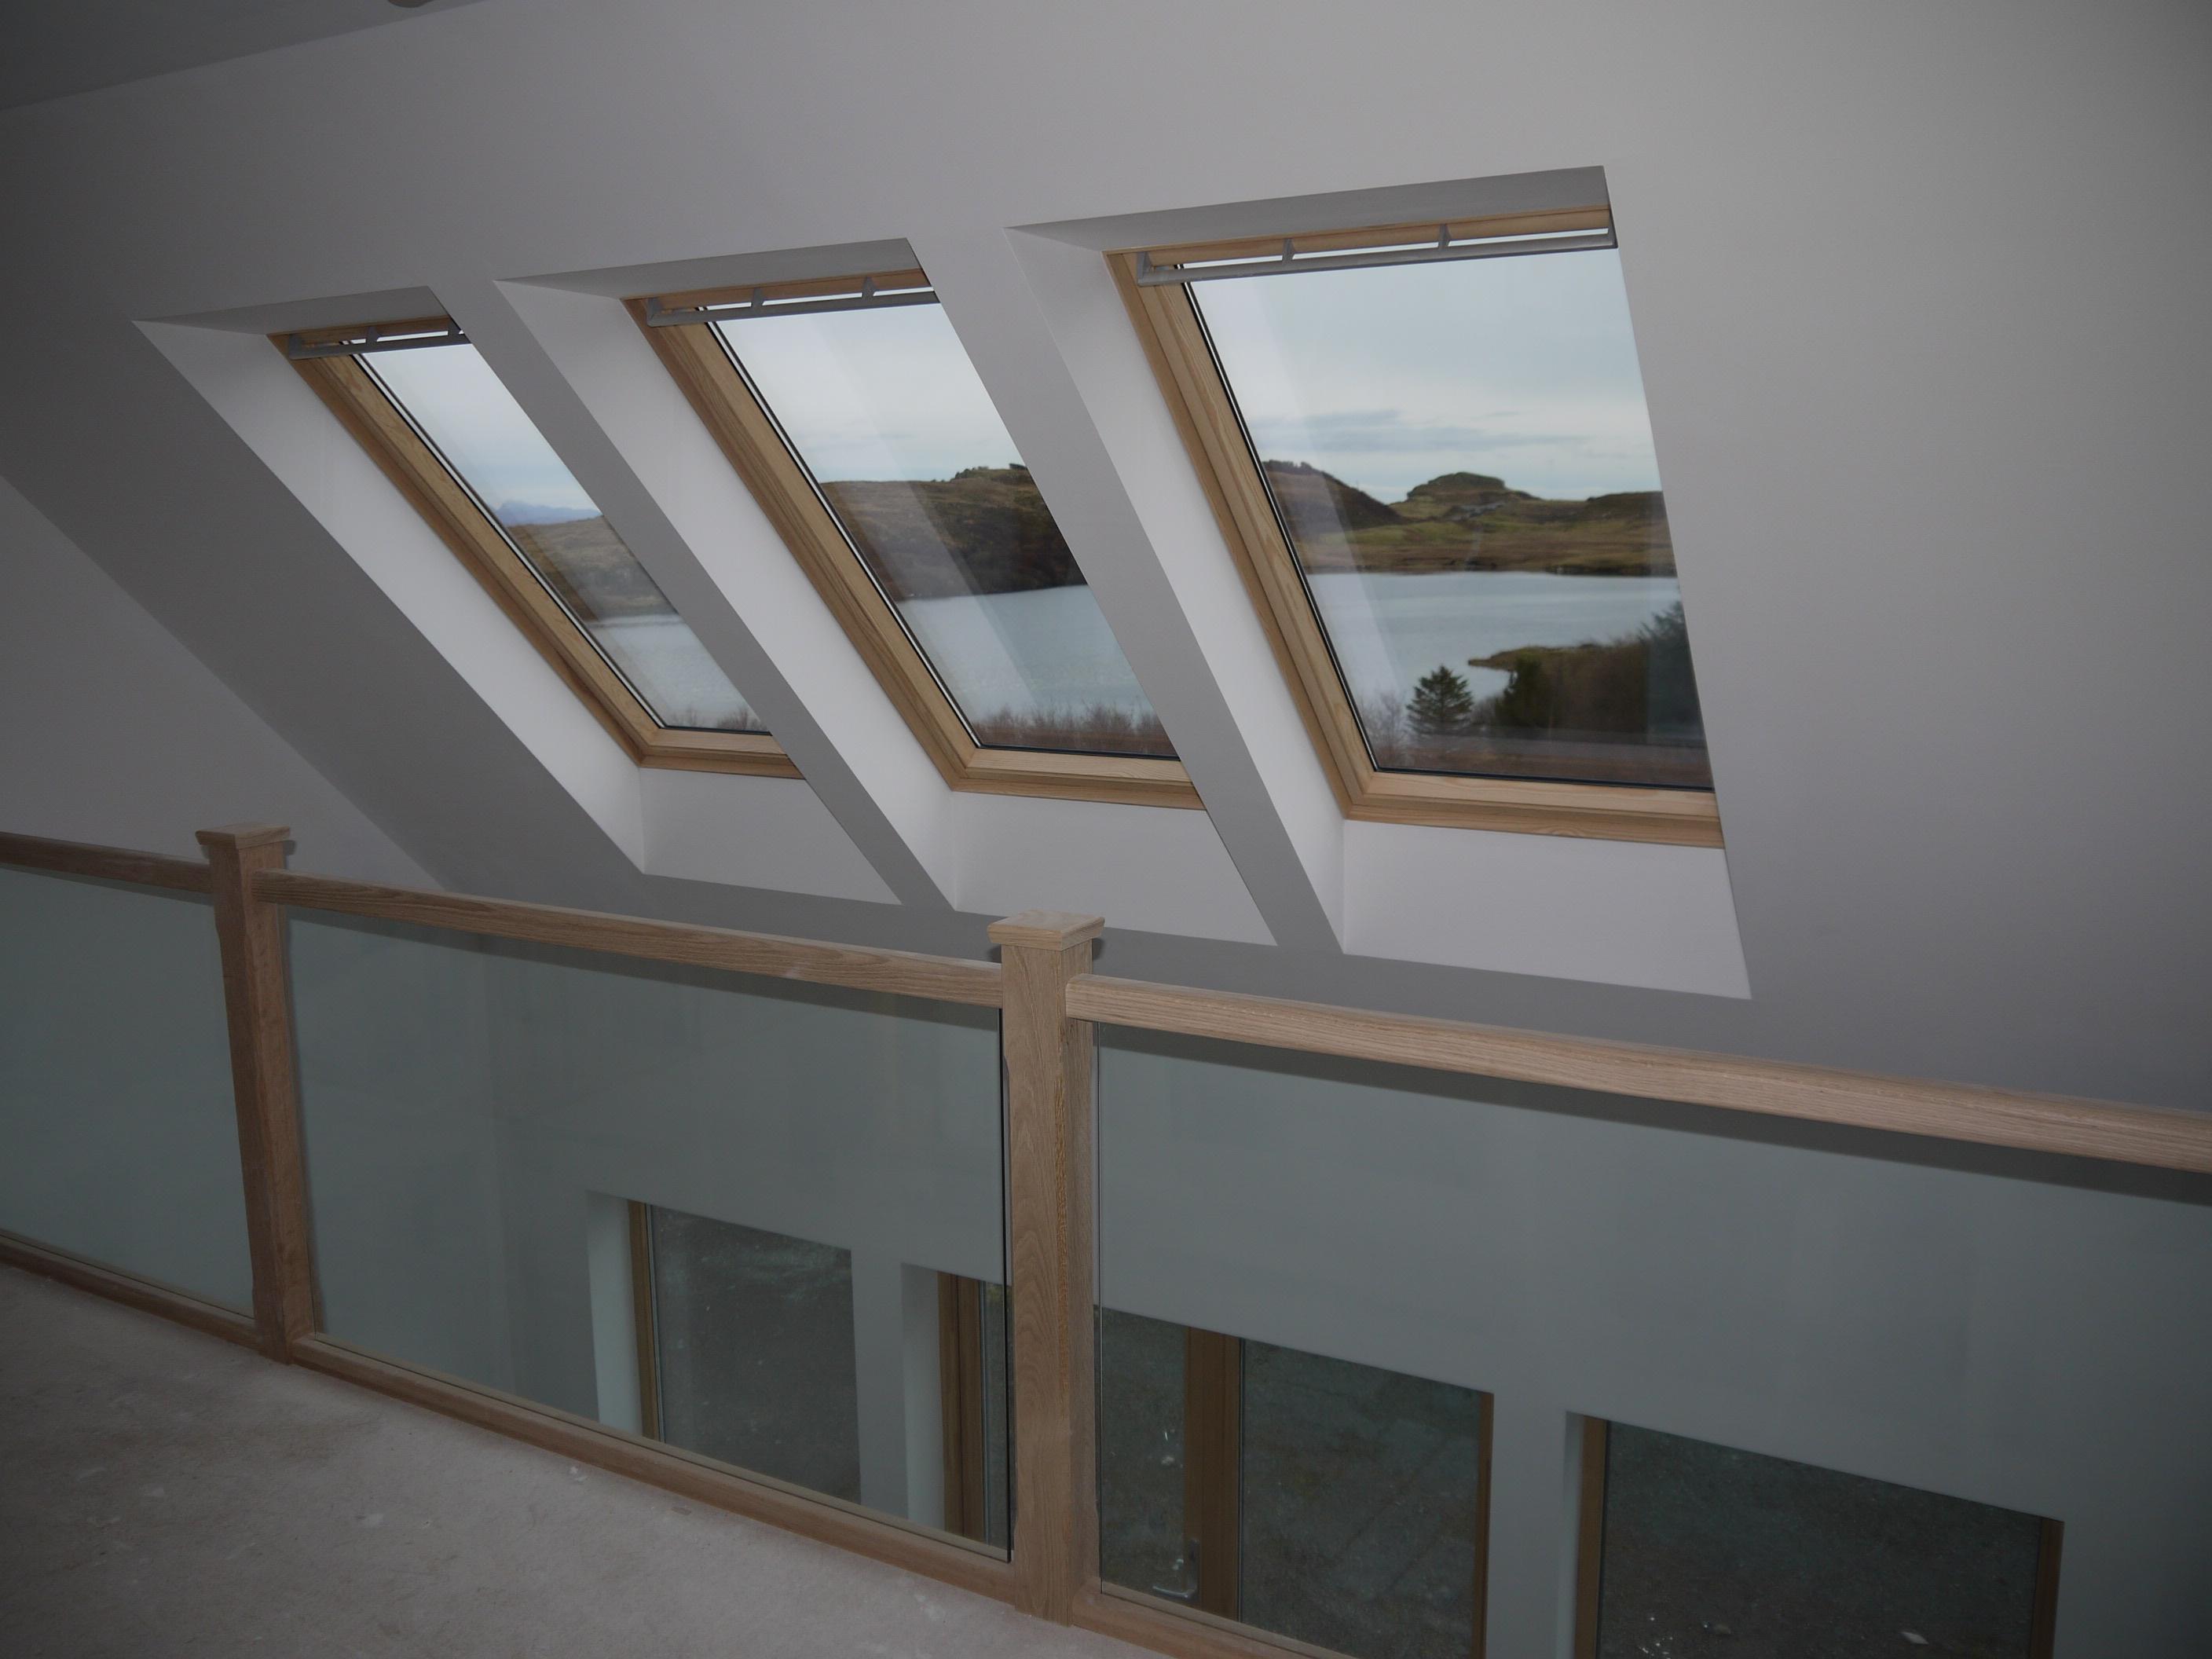
When I went into the house my eye was more drawn to the velux windows which were all covered in the most amazing frost. Here is the best photo I could take on my phone.

The three velux windows were like etched glass, hopefully this will happen again.
And here are some of the stairs and balustrade taken today.
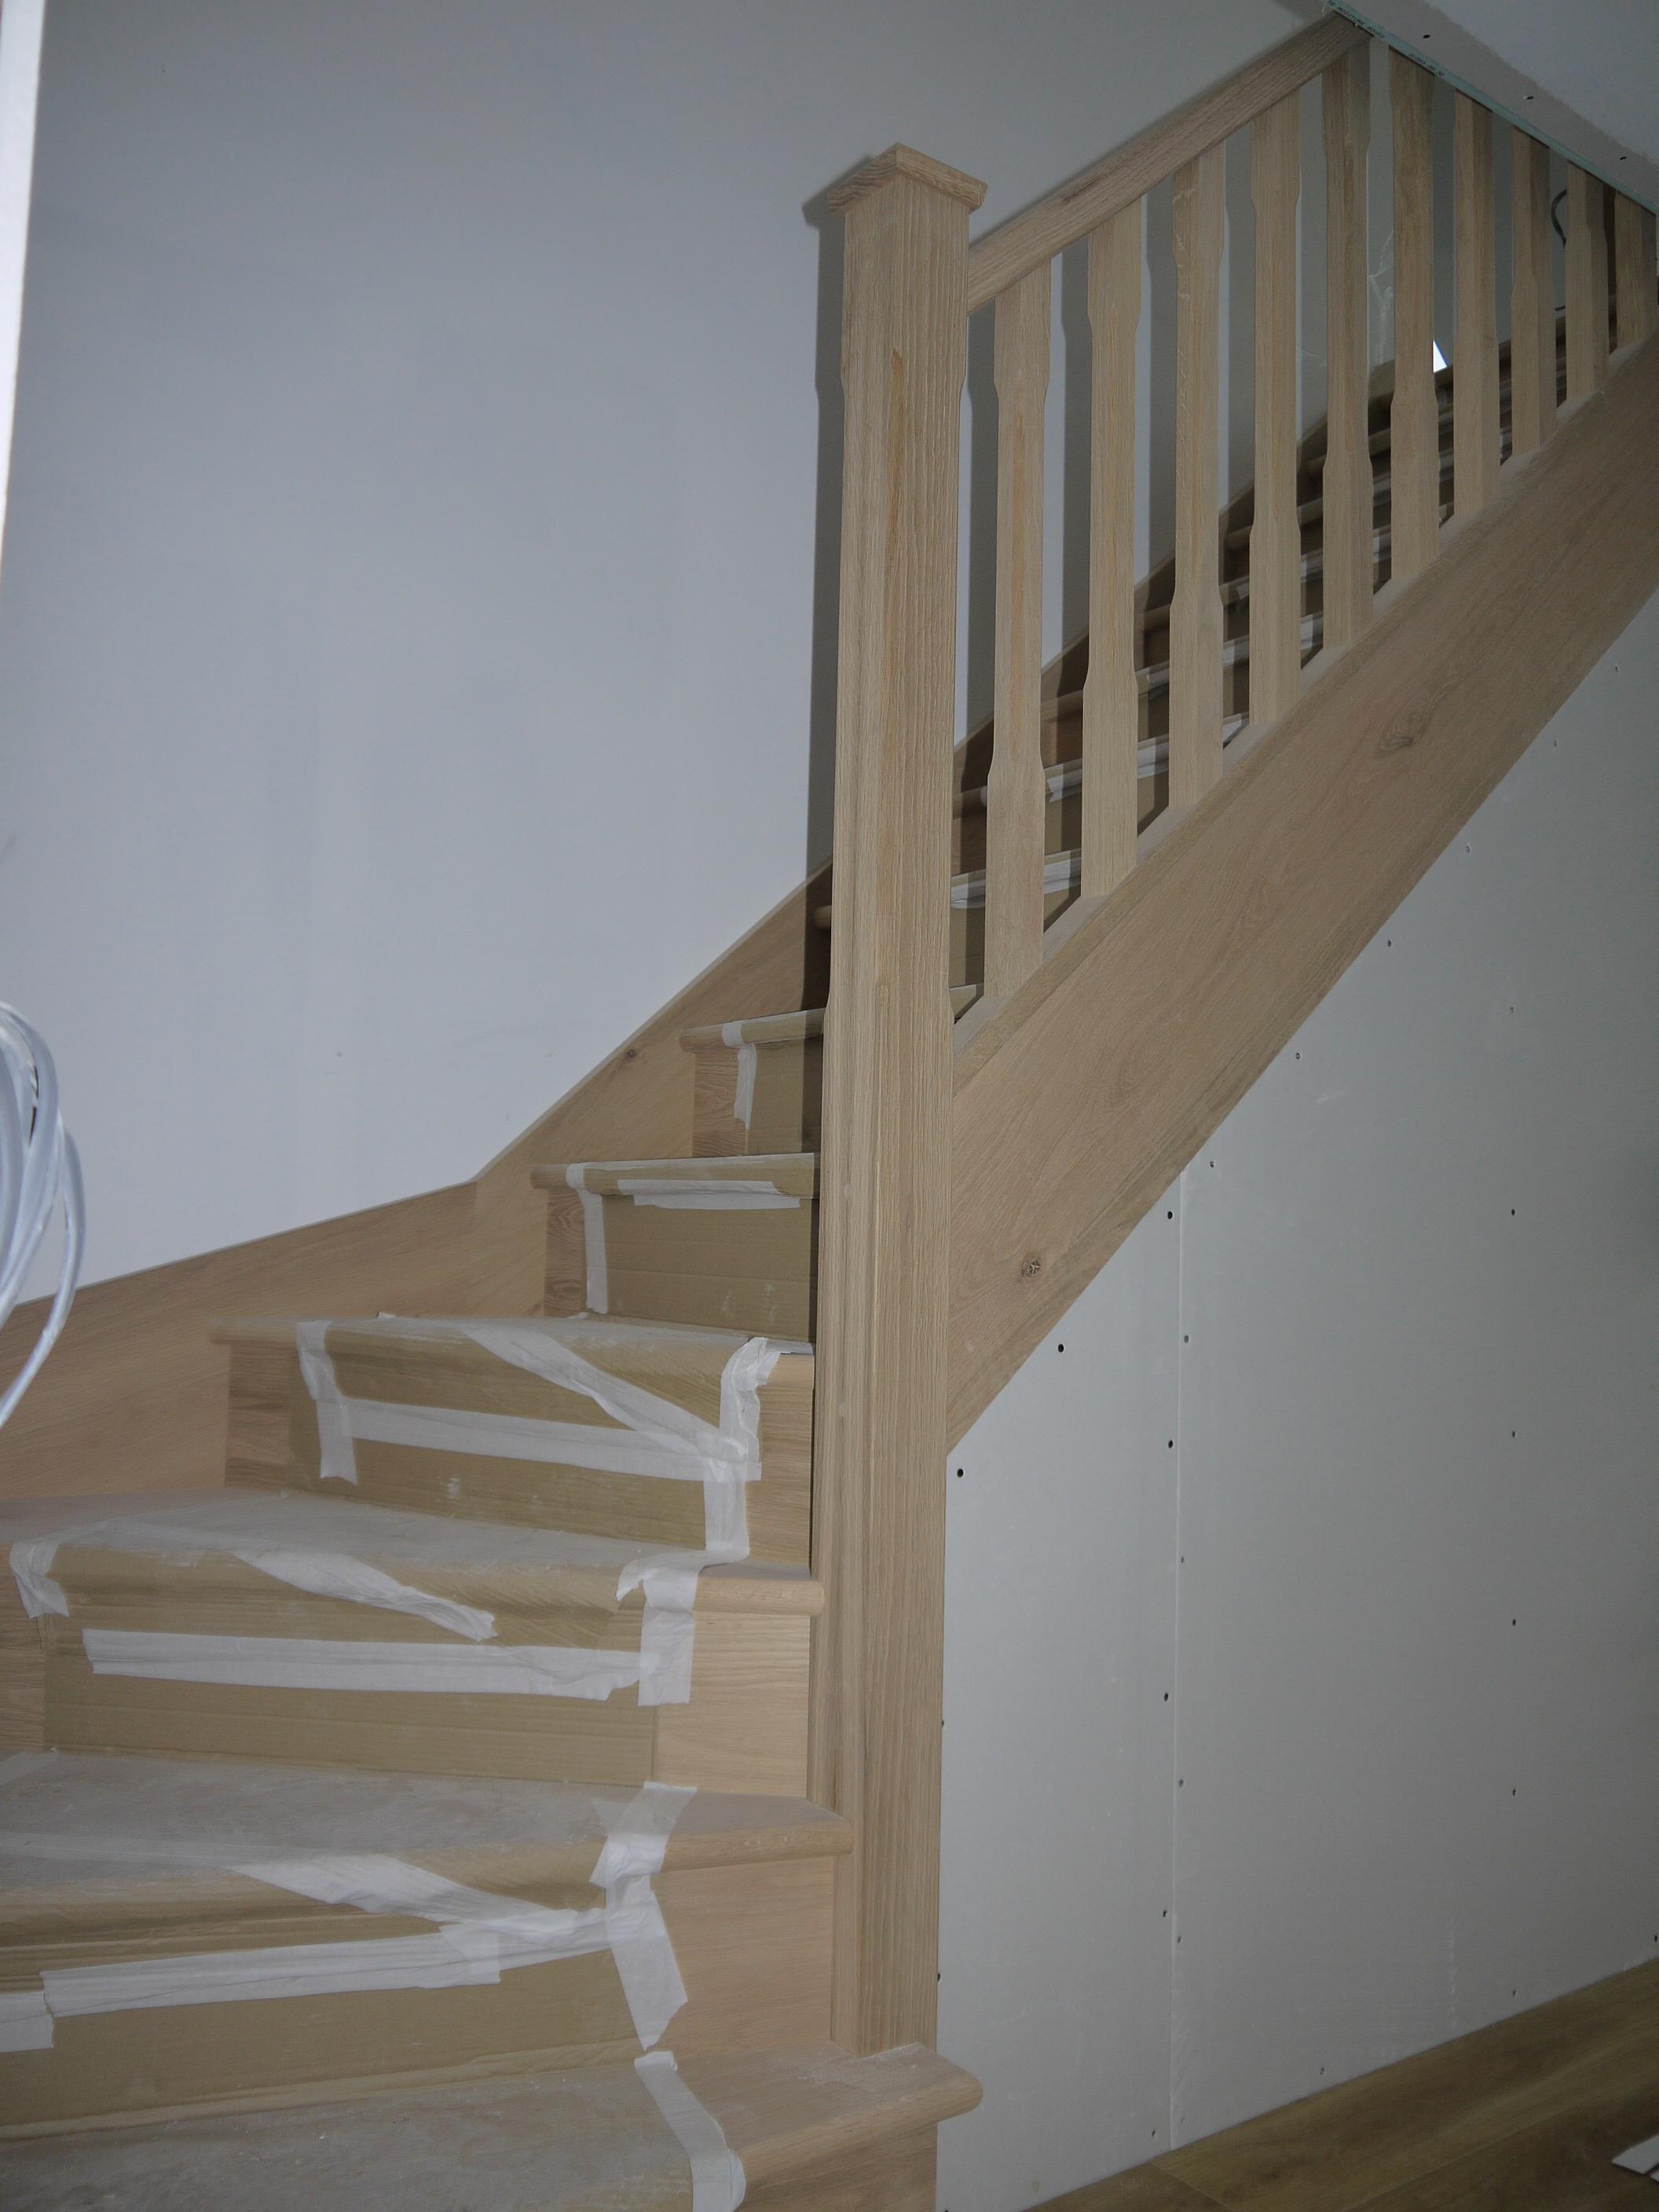

We are very happy with the installation. The stairs feel solid on your feet, easy on the eye and pleasant on the hand.
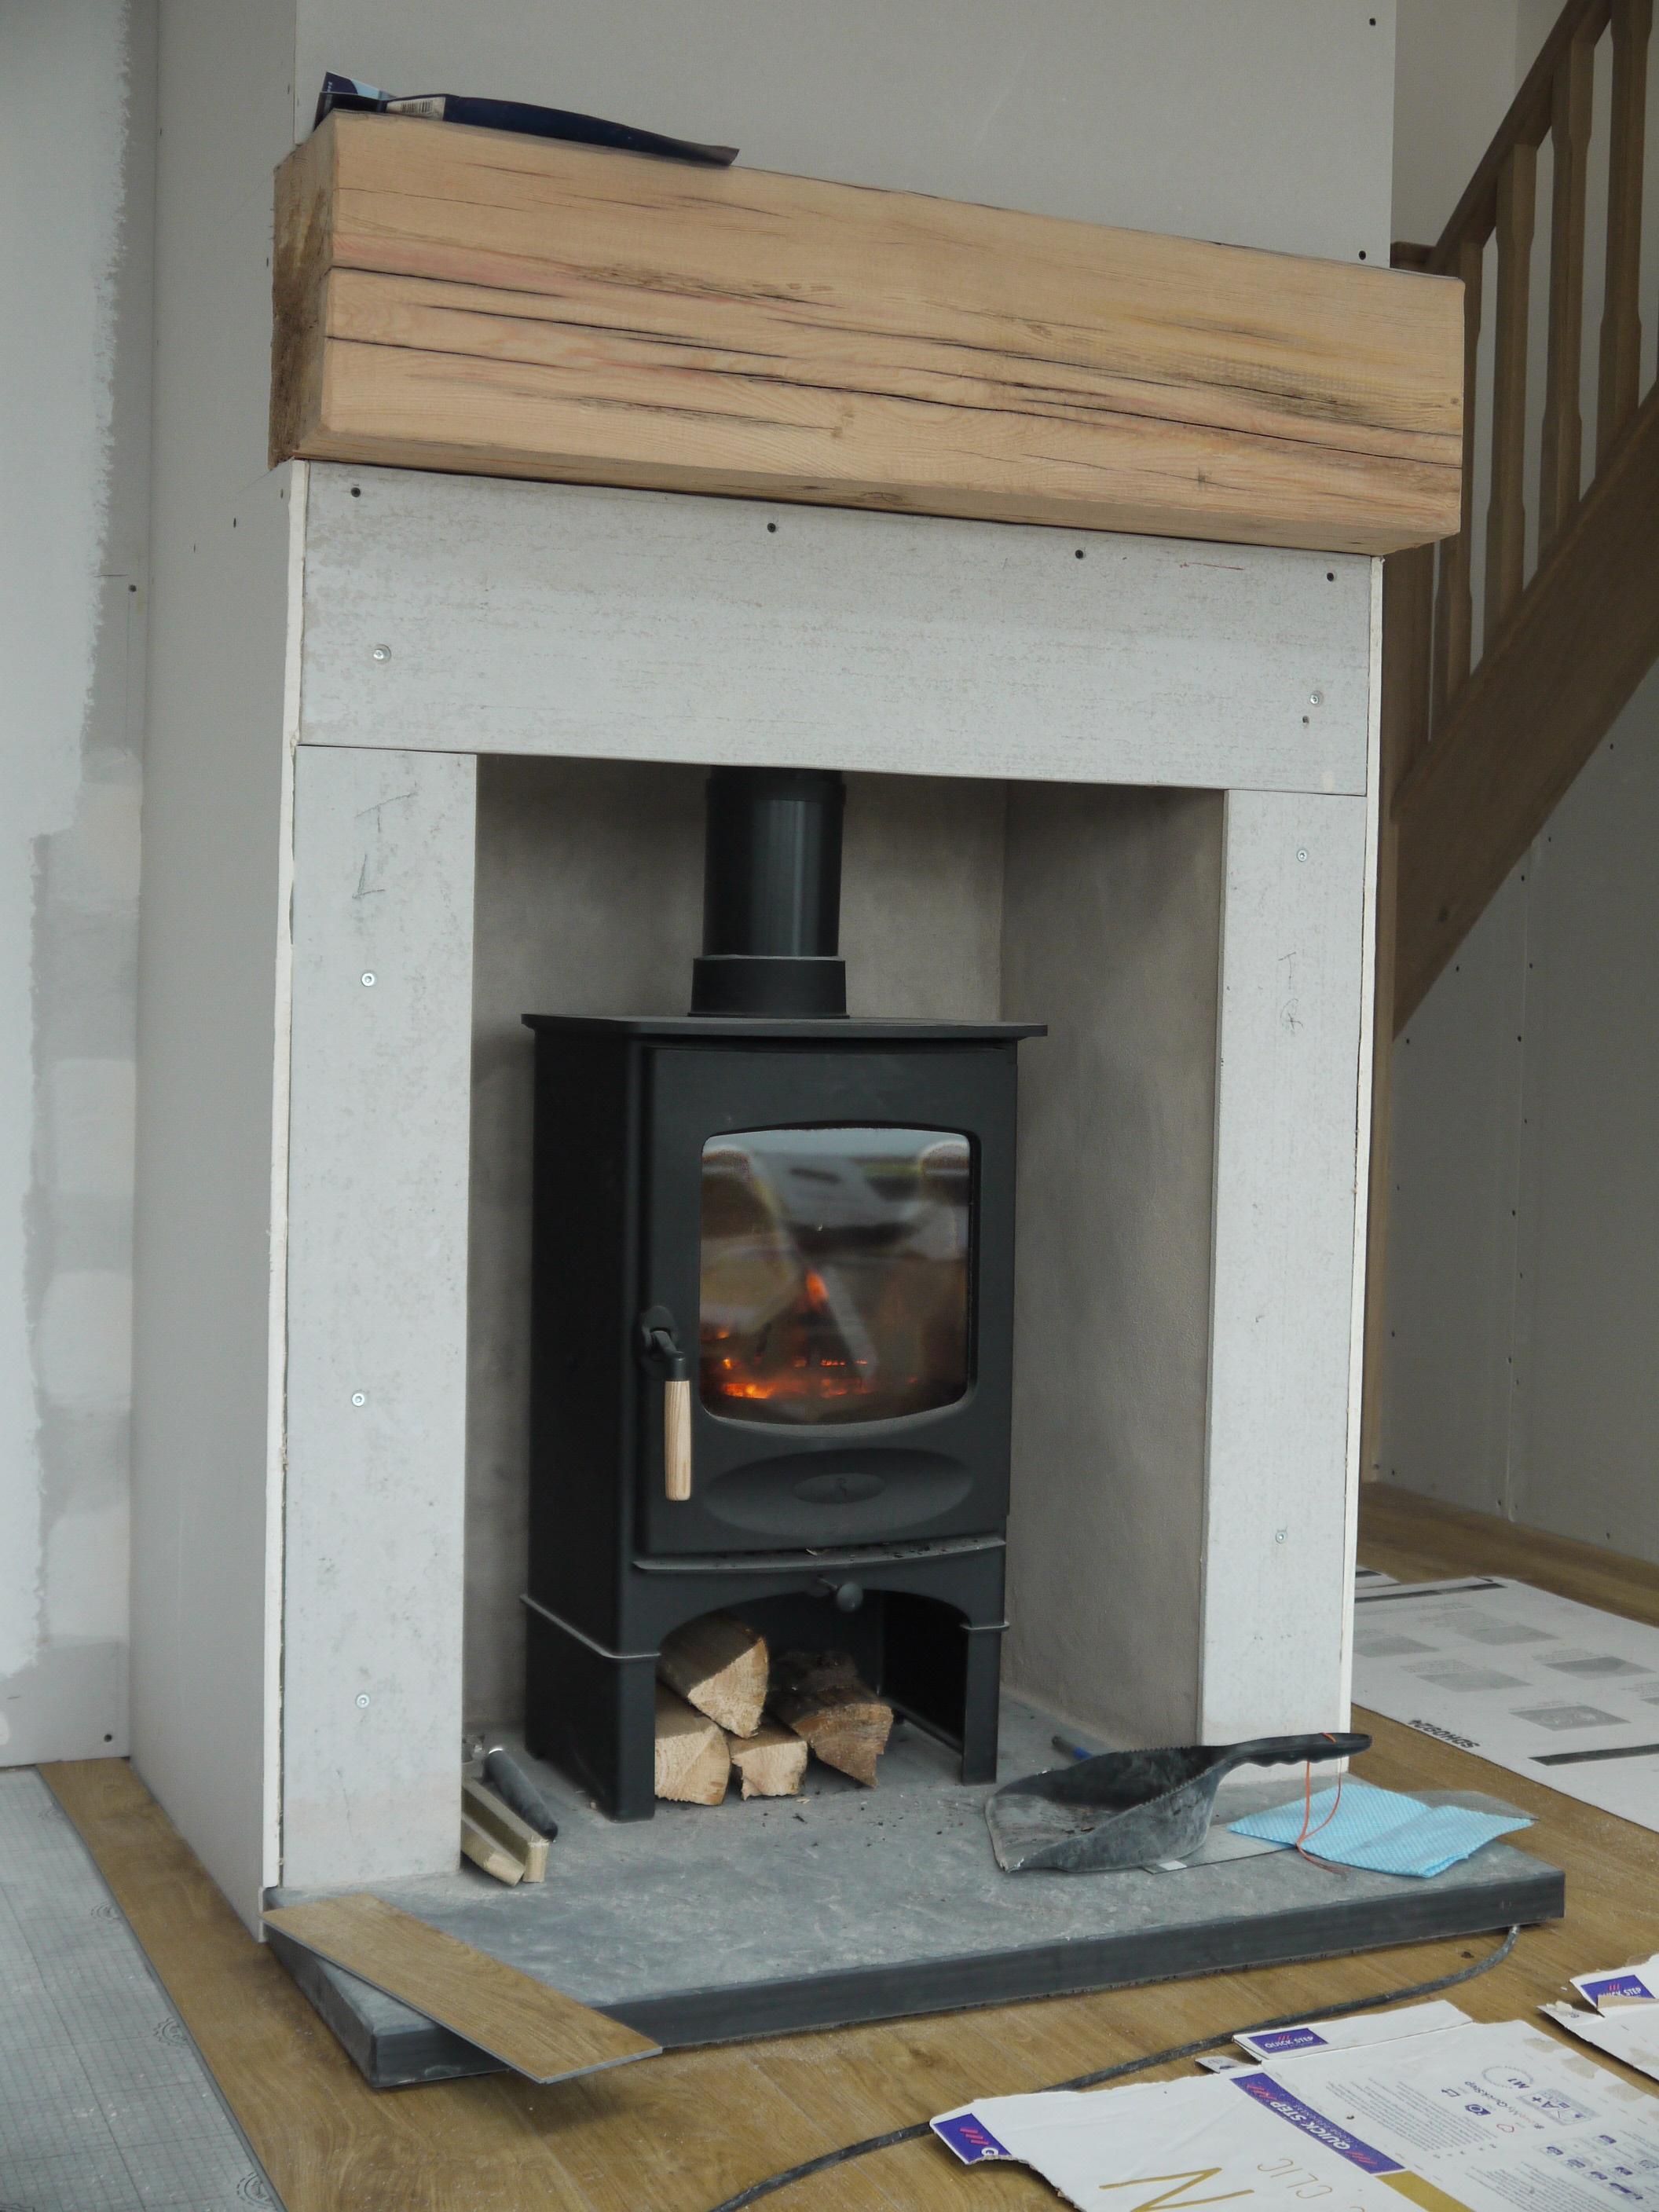
Finally, just to provide an update on my last entry regarding the stove. I did the first burn and was pleased with the results. The render/blockwork surround heated up well and retained a good temperature for a while afterwards.
The air feed for the stove also worked well. Our house has a suspended timber floor, but hearth/stove are supported on a small slab which had a pipe buried into the concrete to allow a direct air feed to be drawn from below the floor. A bit different but work well for us.
What’s next. At the point of posting this entry, as you might see in the photos, the kitchen and ground floor flooring are being installed and this will be covered in the next entry when this work is finished.
Thanks for reading.
-
 7
7
1 Comment
Recommended Comments
Create an account or sign in to comment
You need to be a member in order to leave a comment
Create an account
Sign up for a new account in our community. It's easy!
Register a new accountSign in
Already have an account? Sign in here.
Sign In Now