
Plague, pestilence and plastering

Entry posted by vivienz
1816 views
Okay, so I know that I promised another blog post soon way back at the beginning of December but it was busy on the build. Crazy busy, details to follow. As for Christmas, well, that didn't turn out as planned, and I had planned it so well.
Both OH and I were proper knackered by the time we got into December - me with the build, OH running our business by himself, so we planned some quality R&R by running away to Gran Canaria on Christmas eve for a week. A fly and flop, turn ourselves into zombies for a week then return all bright eyed and bushy tailed for the new year. You just know this isn't going to end well, don't you? You'd be right. 2 days after we got to Gran Canaria, Paul started to feel off-form, then he felt crap, then he felt like death would be a more comfortable option. Turns out he developed real flu, not man flu, but real, proper, can't get out of bed to pick up a £20 note that someone has dropped on the floor flu. Not great, but it got worse. On Thursday, I learned the hard way why all-inclusive buffet style food has such a poor reputation and I mulled on this whilst turning myself inside out and wondering whether, in my sickly state, I had the necessary co-ordination to take care of everything with only one WC and no handy plastic bowl available. Thankfully, I did and whilst recovering the following morning I thought that the worst was over. You just know this is going to get worse, don't you? It did. We just about managed to get home (thankfully flying into Bournemouth) with OH in an increasingly sickly state. Ever the prima donna and insisting on trumping my food poisoning, flu became something between bronchitis and pneumonia and OH was a very sickly boy to the extent that tomorrow will be his first day back at work. I banned myself from the build for a few days in the new year as I'd caught a cold, but I couldn't be self indulgent about it given my patient was worse.
So, if there's any justice in the world, we should be good to go for the next and final stint on the build but I'm all to aware that life isn't fair, so we shall see.
Enough of plague and pestilence, let's get onto the plastering bit. Actually, I'll come back to that because although in real time we are mid way through the skim now, a vast amount has gone on since early December when the cellulose was blown in as first fix got started in earnest and at a break-neck pace. The plastering has only started in earnest in the new year and I'd like to cover the first fix stuff that happened in December, given that this is the heart and circulatory system that will make the building function as a comfortable home.
We received our planning permission just over 1 year ago and I already knew largely how I wanted the building to function, as a result of reading so much here on BH. About the same time as PP was granted a BH contact was looking for consultancy work and I offered him some on this build. Although he had no prior experience in this area all mostly went okay and plumbing and heating systems were integrated into the build plan and were executed satisfactorily until the second fix and final stages.
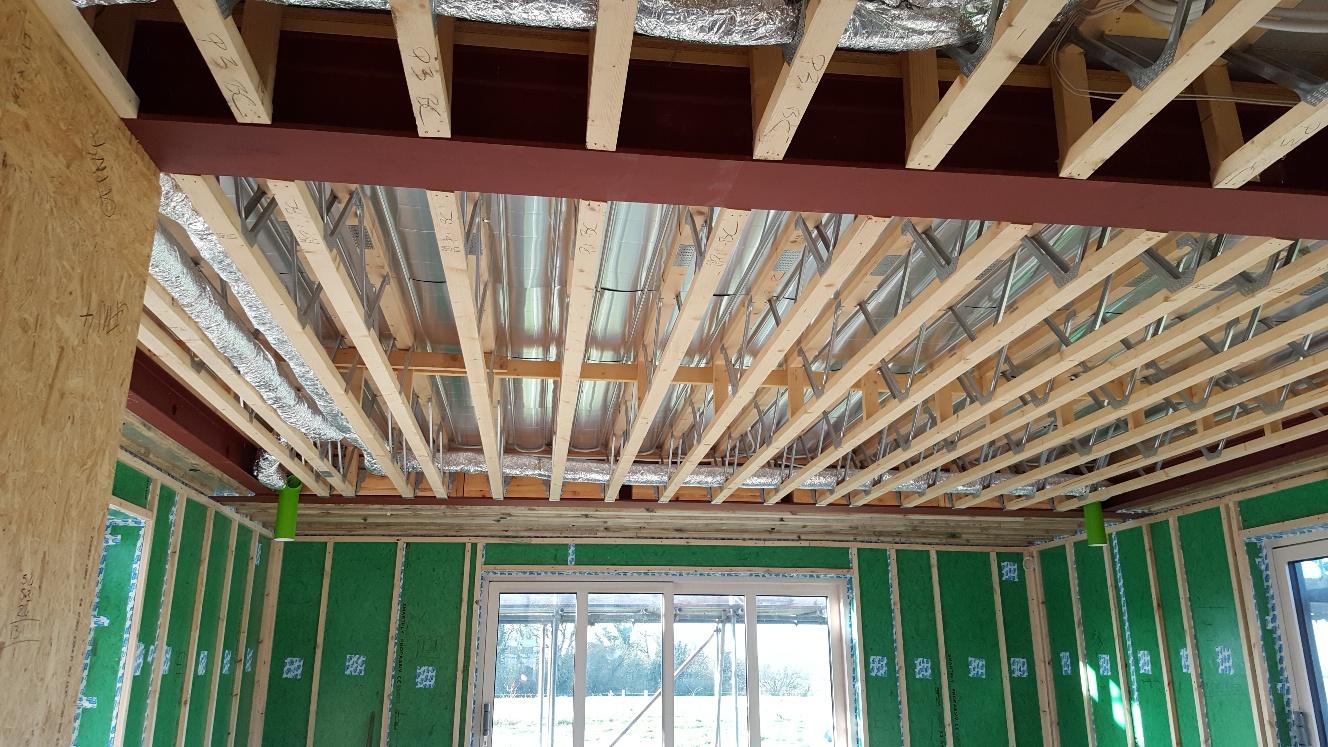
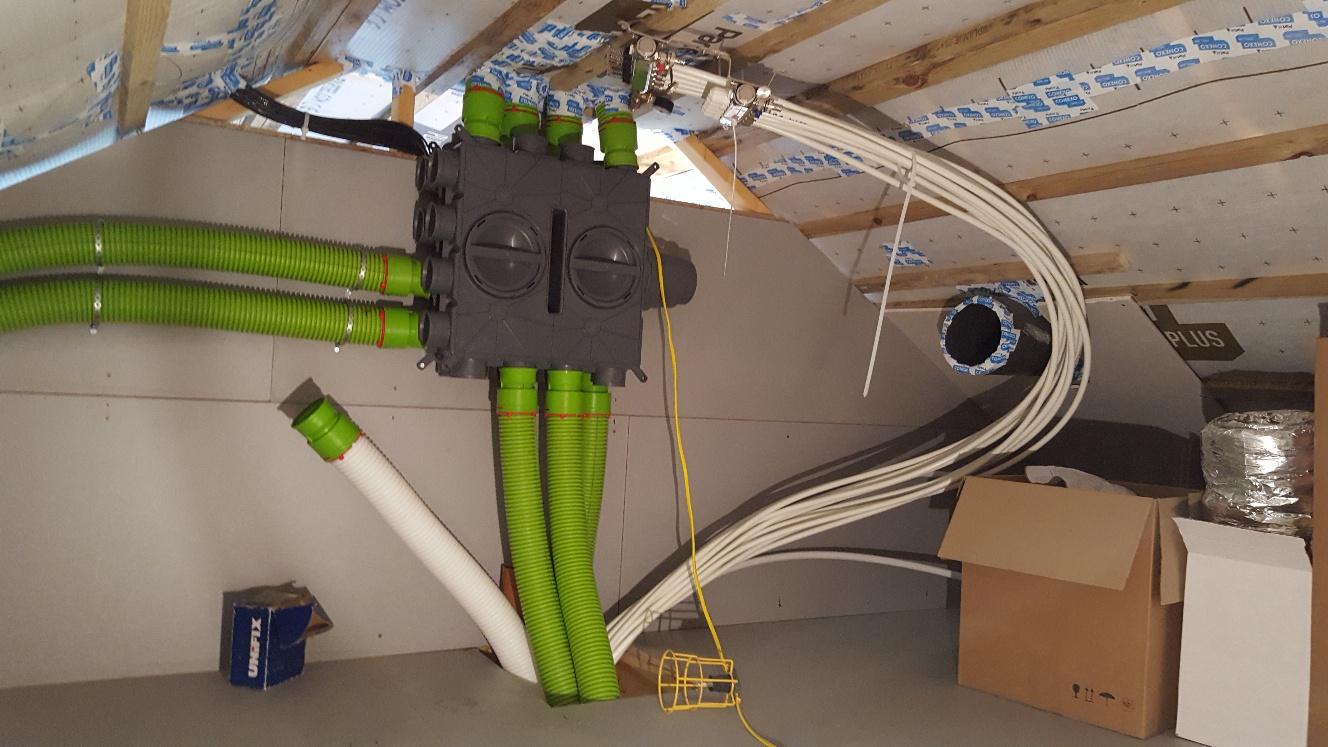
The nature of the first fix work means that it's hard to photograph the amount of effort that goes into it, but there is plenty. Initially, the team is focussing on getting all the MVHR pipes through the metal web joists and, in time, insulating them. Then there are all the underfloor heating pipes to be run through to the right places and the manifolds. We're having UFH upstairs as well as downstairs - the ground floor manifold is in the very useful cupboard under the stairs, the upper one in the loft space along with all sorts of other interesting things.
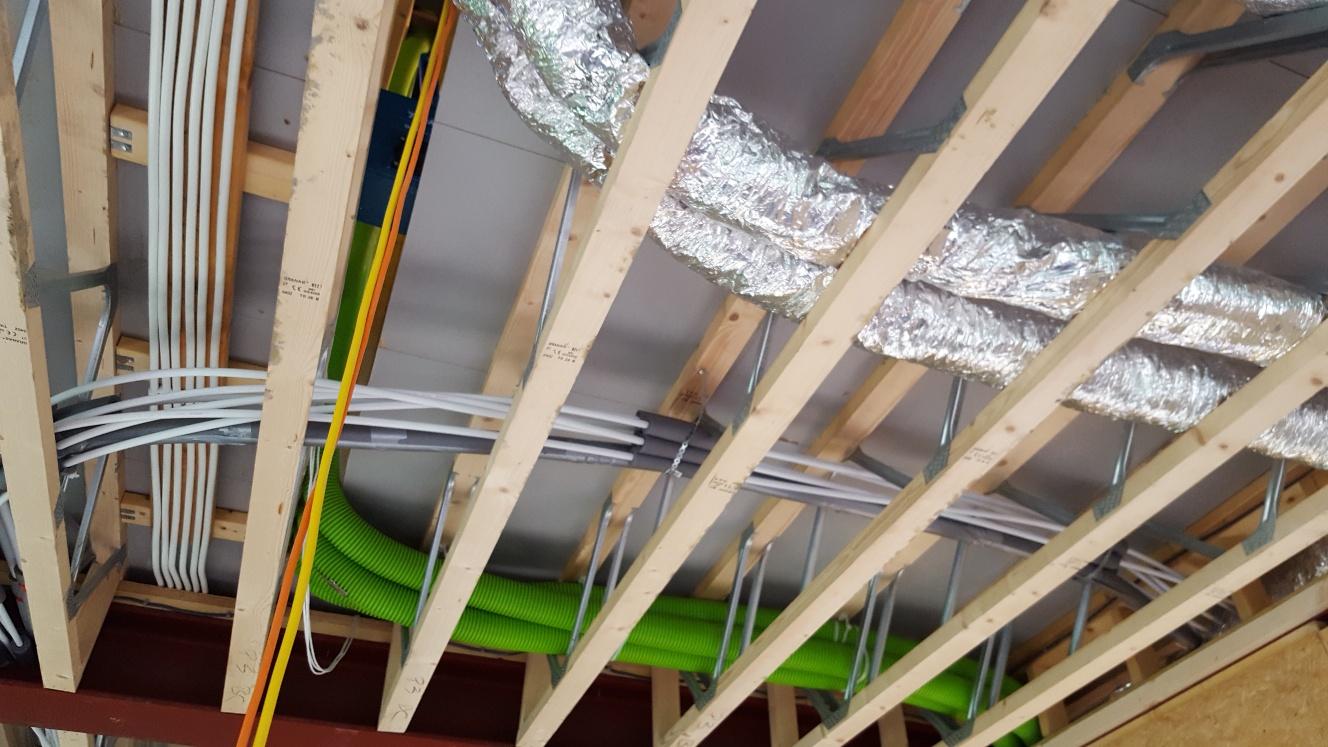
Here's a nice selection of the MVHR pipes, some insulated, as well as the clipped up UFH pipes that are insulated where they are tied together and in contact with one another.
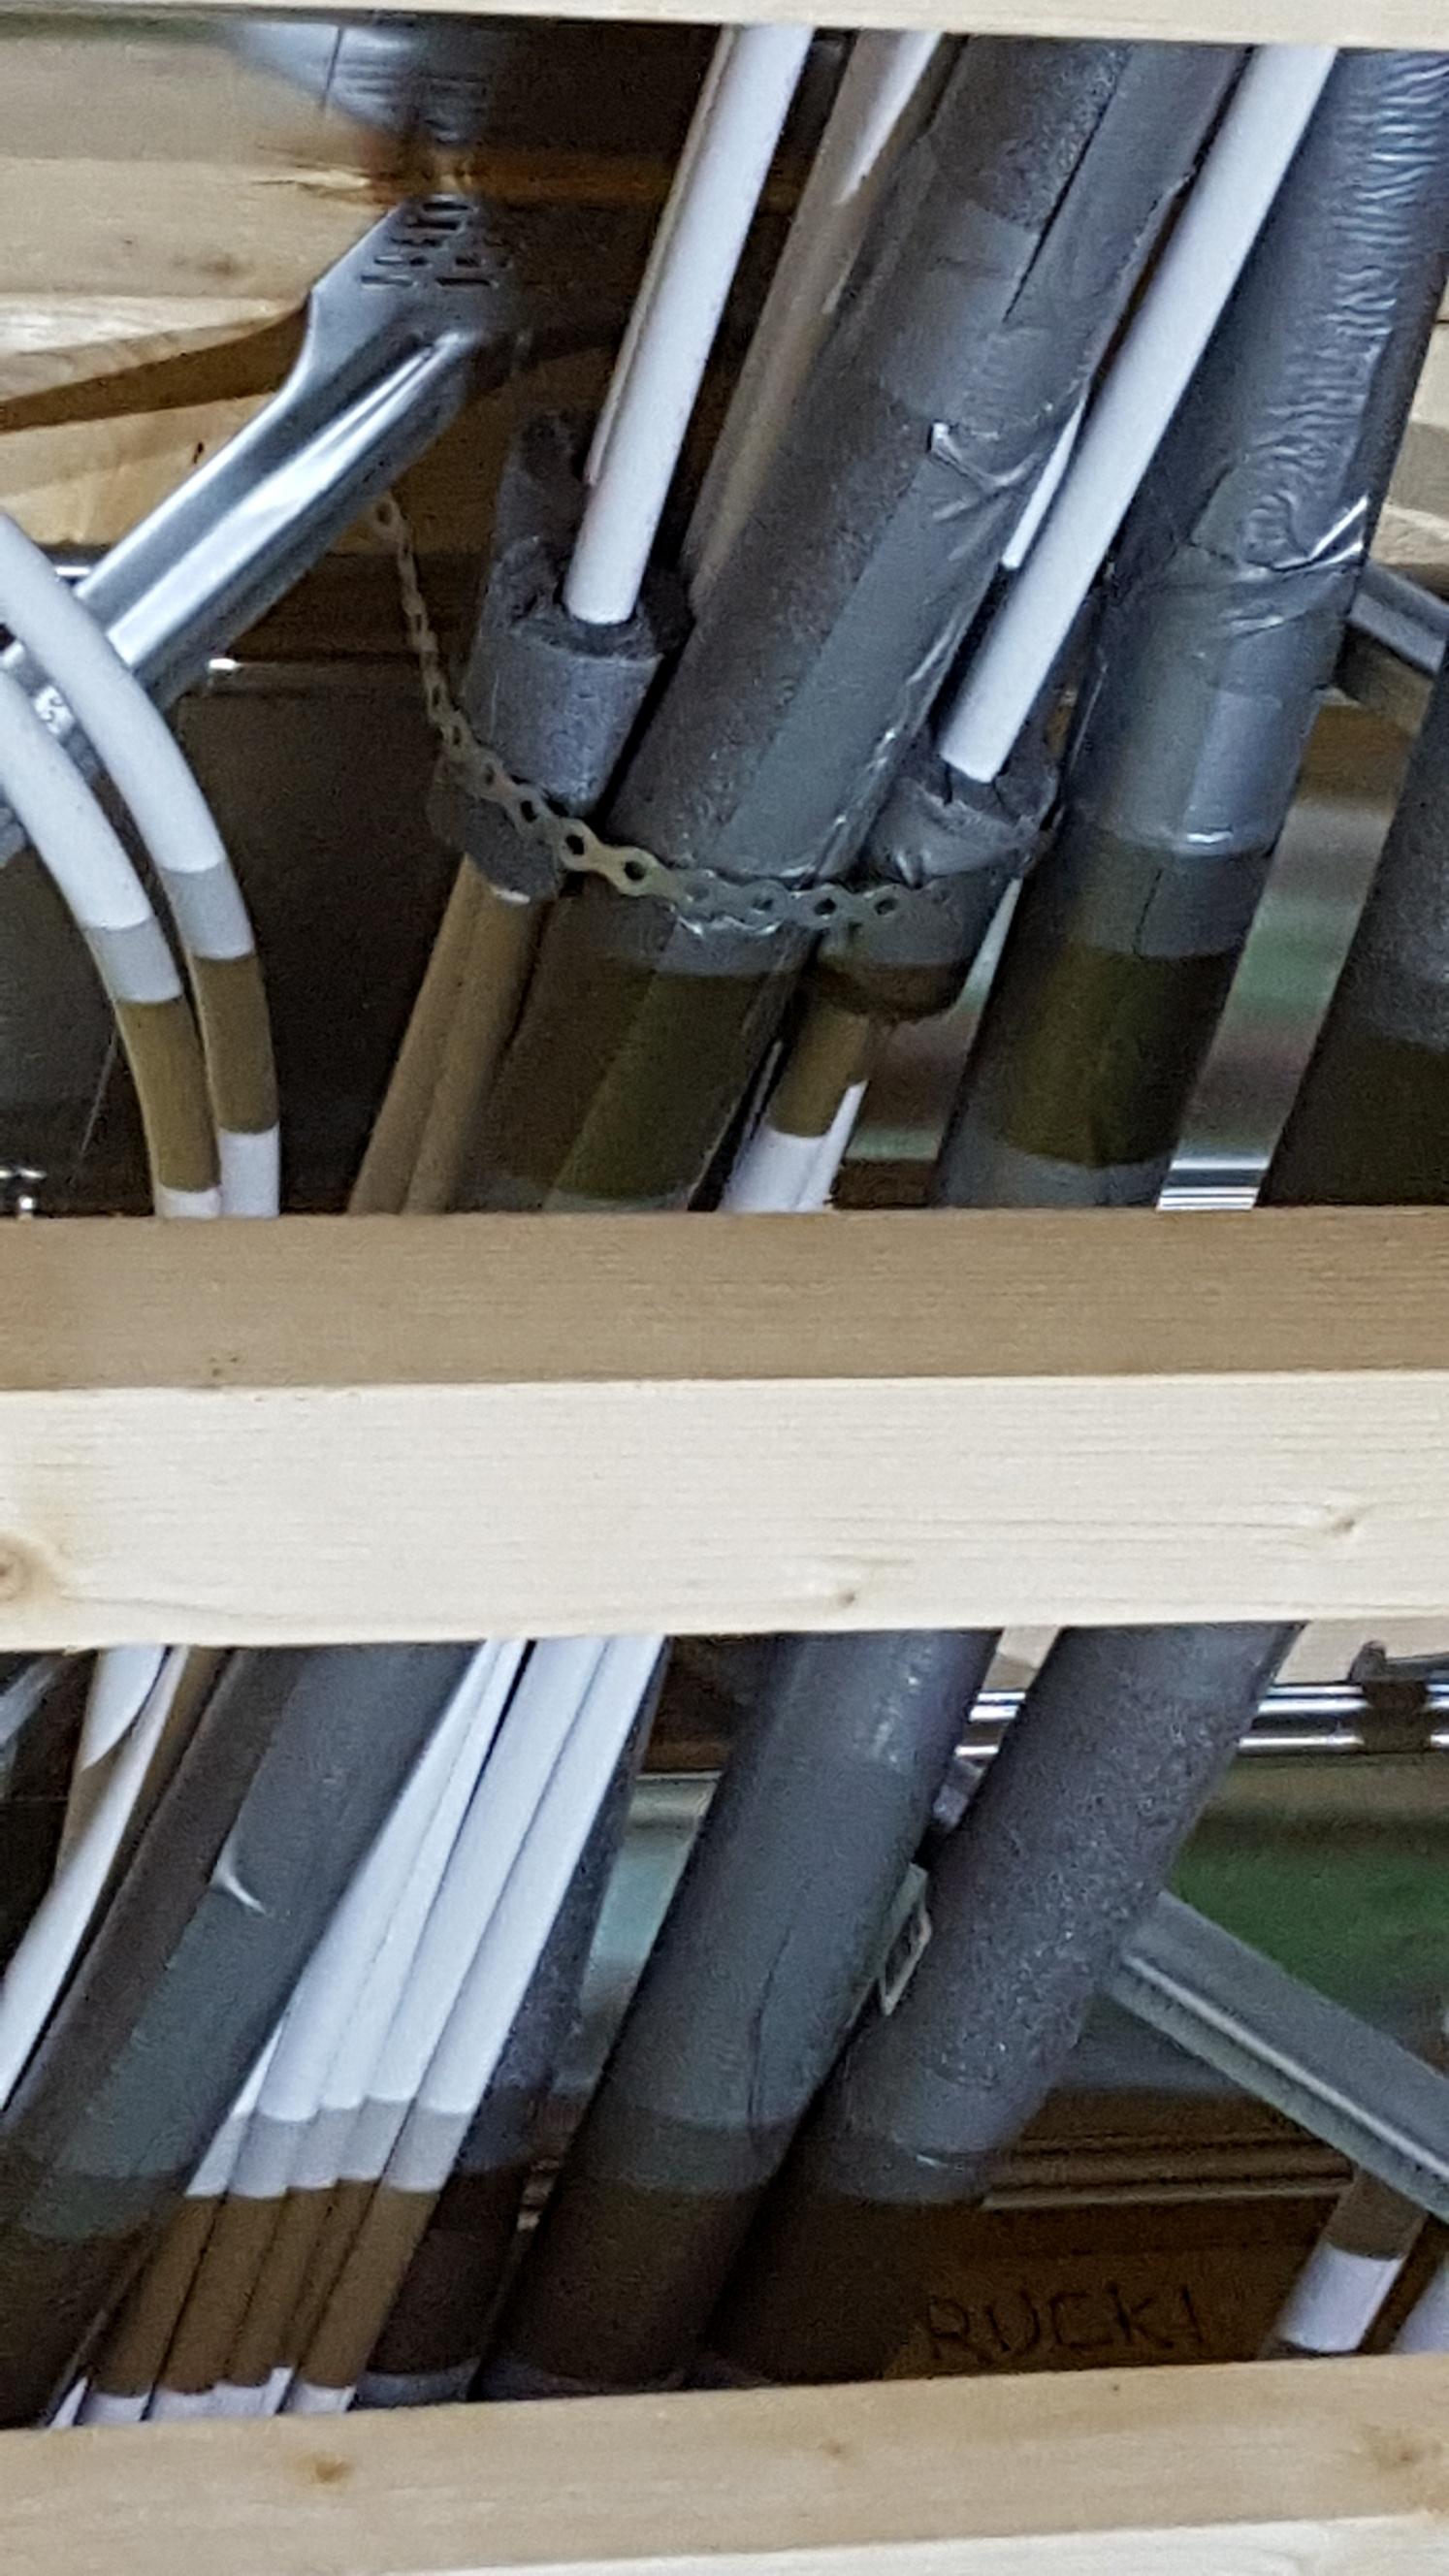
And here's a close up of the insulated UFH pipes.
Thought has gone into how air will flow around the building with the aid of the MVHR system. In particular, in the large open plan lounge/diner/kitchen area, and how to ensure that none but the stinkiest cooking smells make it out of the kitchen area. As a result, there are long runs of the MVHR pipework leading to plenums at the far end of the lounge area where air will flow into the room. The exhaust pipes for this area are (almost) directly over the hob on the island at the far end, so the airflow should ensure that all the cooking smells get sucked up and out over the kitchen area. Here's a photo of the inlet plenums either side of the window at the far end of the living area.
Originally, the architect designed the entire upstairs to have vaulted ceilings, including the landing. Whilst MBC were still drawing up their engineering drawings, we asked for the landing area to be boarded out to create a loft area as this would be an ideal space to stuff a load of plant, including the MVHR manifolds. On reflection, this was also a good decision as I think the proportions of that area would have looked very odd and felt like a vertical tunnel due to the height of the ceiling at that point (4.7m). The MVHR manifolds have been neatly attached to racked out sections in the loft area, making sure that room is left for the upstairs UFH manifold and, in time, the PV inverters. One note with the benefit of hindsight is that having an MVHR unit directly over habitable rooms, in our case bedroom and ensuite, should only be considered if the unit is going to be thoroughly sound-proofed. Ours was never given the promised sound-proofing measures and it's hellishly noisy without them, but we will be rectifying this soon. Here's the loft area back in December:

And the one on the west wall. You can also see the UFH manifold and the black cables from the PV panels that will be connected to the inverters.
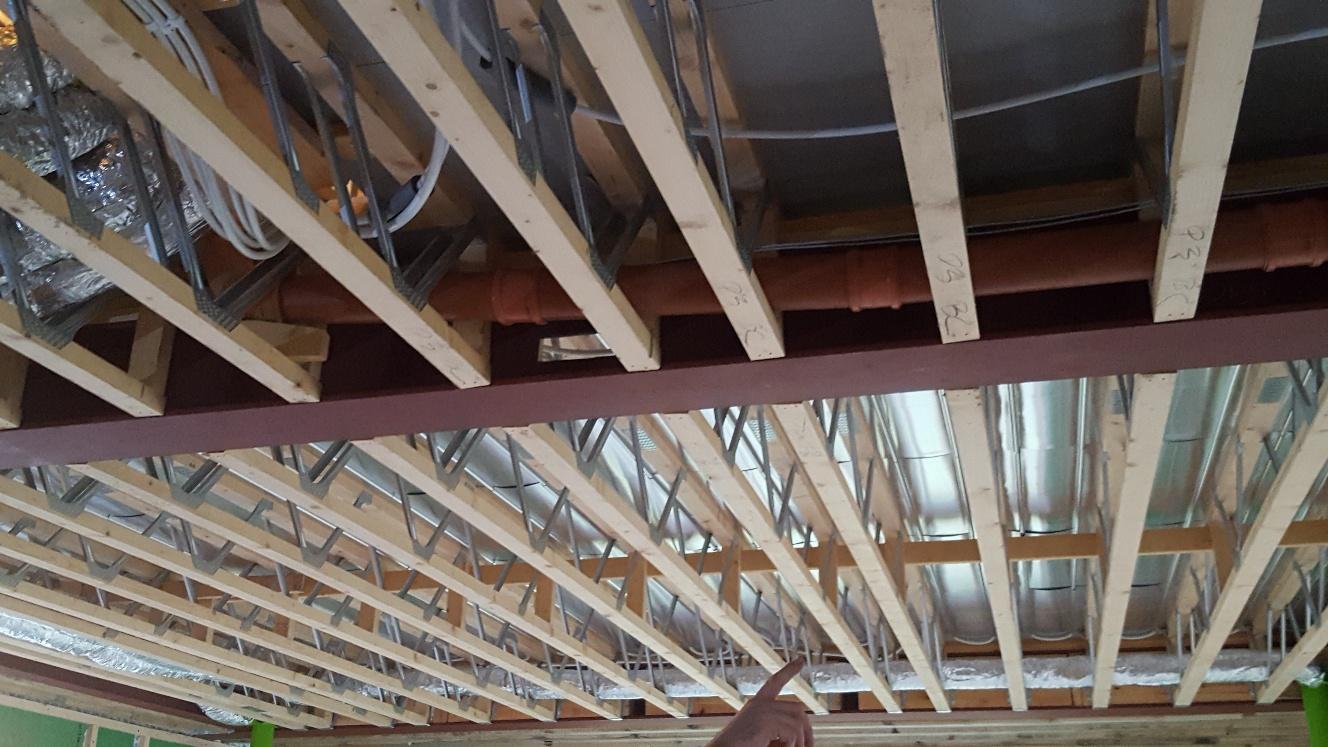
There were also the soil pipes to tackle and these were planned to get sufficient fall on them as they came through the web joists:
For anyone tackling a similar build, I can't stress too much the advantage of having your systems people involved from the very start. It means that any holes that need to be put through steel beams to accommodate pipework can be designed in and made at the fabrication stage. Even then, things can go awry and a couple of the steel penetrations were either off kilter or not in the right place, but the majority were where they needed to be and made life much easier.
An example of this kind of thing is the stud wall between the landing and the en-suite for the master bedroom. In order to be able to hide the various pipes that travel up to the loft space, MBC were asked to make this into a twin stud wall and specified the depth so that it would carry the pipework. Here it is. A bit tricky to see, but you can easily see the benefit of being able to conceal this bulky pipework into the fabric of the build.

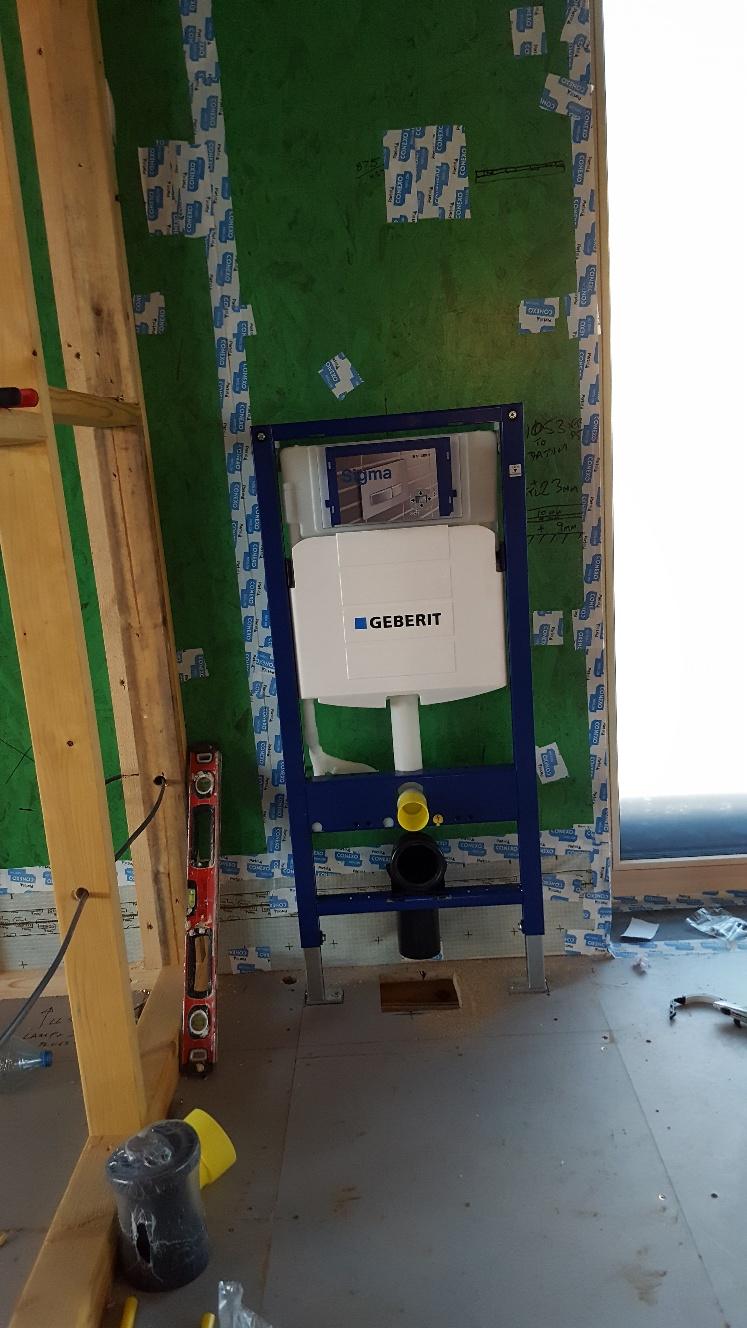
Speaking of concealing things, all the loos in the house are wall-hung with the cistern concealed in the wall. All you see is the loo and the flush plate, and so the framework needs to be put in before walls are boarded and plastered. Here's one such frame:
I'm on a bit of a catch up now so stay tuned for the next exciting episodes of ponds, brise soleil and vertical slate cladding.
Ta ta for now.
-
 10
10
7 Comments
Recommended Comments
Create an account or sign in to comment
You need to be a member in order to leave a comment
Create an account
Sign up for a new account in our community. It's easy!
Register a new accountSign in
Already have an account? Sign in here.
Sign In Now