Jump to content
  • entries
    26
  • comments
    247
  • views
    68754

Part 11 - Windows (at last!)


Stones

6178 views

With spectacular timing, our window order went in too late to beat the summer factory close down, resulting in a 4 week delay on top of the normal 6 - 8 week delivery time.  Better late than never, our windows arrived a fortnight ago, all the way from Poland.


Having a passionate hatred of UPVC windows, we specified 3G aluminium clad timber windows.  I obtained a few quotes from different manufacturers / suppliers,  but in the end, after pushing hard on price, we went with Rationel, (supplied in Scotland via ADW Ltd).  Without seeing them in person, it is difficult to appreciate the quality of the windows, but we are absolutely delighted.  They appear very well made, so much so that all of the joiners working on our build have so commented, and my builder has switched to Rationel as his supplier of choice.  


Performance wise, we have a combination of 4-20-4-20-4 and 4-20-4-18-6 triple glazed windows, with U values ranging between 0.7 and 0.9 depending on the size of window and an overall project U value of 0.8. Price wise, including the extra delivery costs relating to our location, we've paid £290 per sq metre for our windows and doors.  


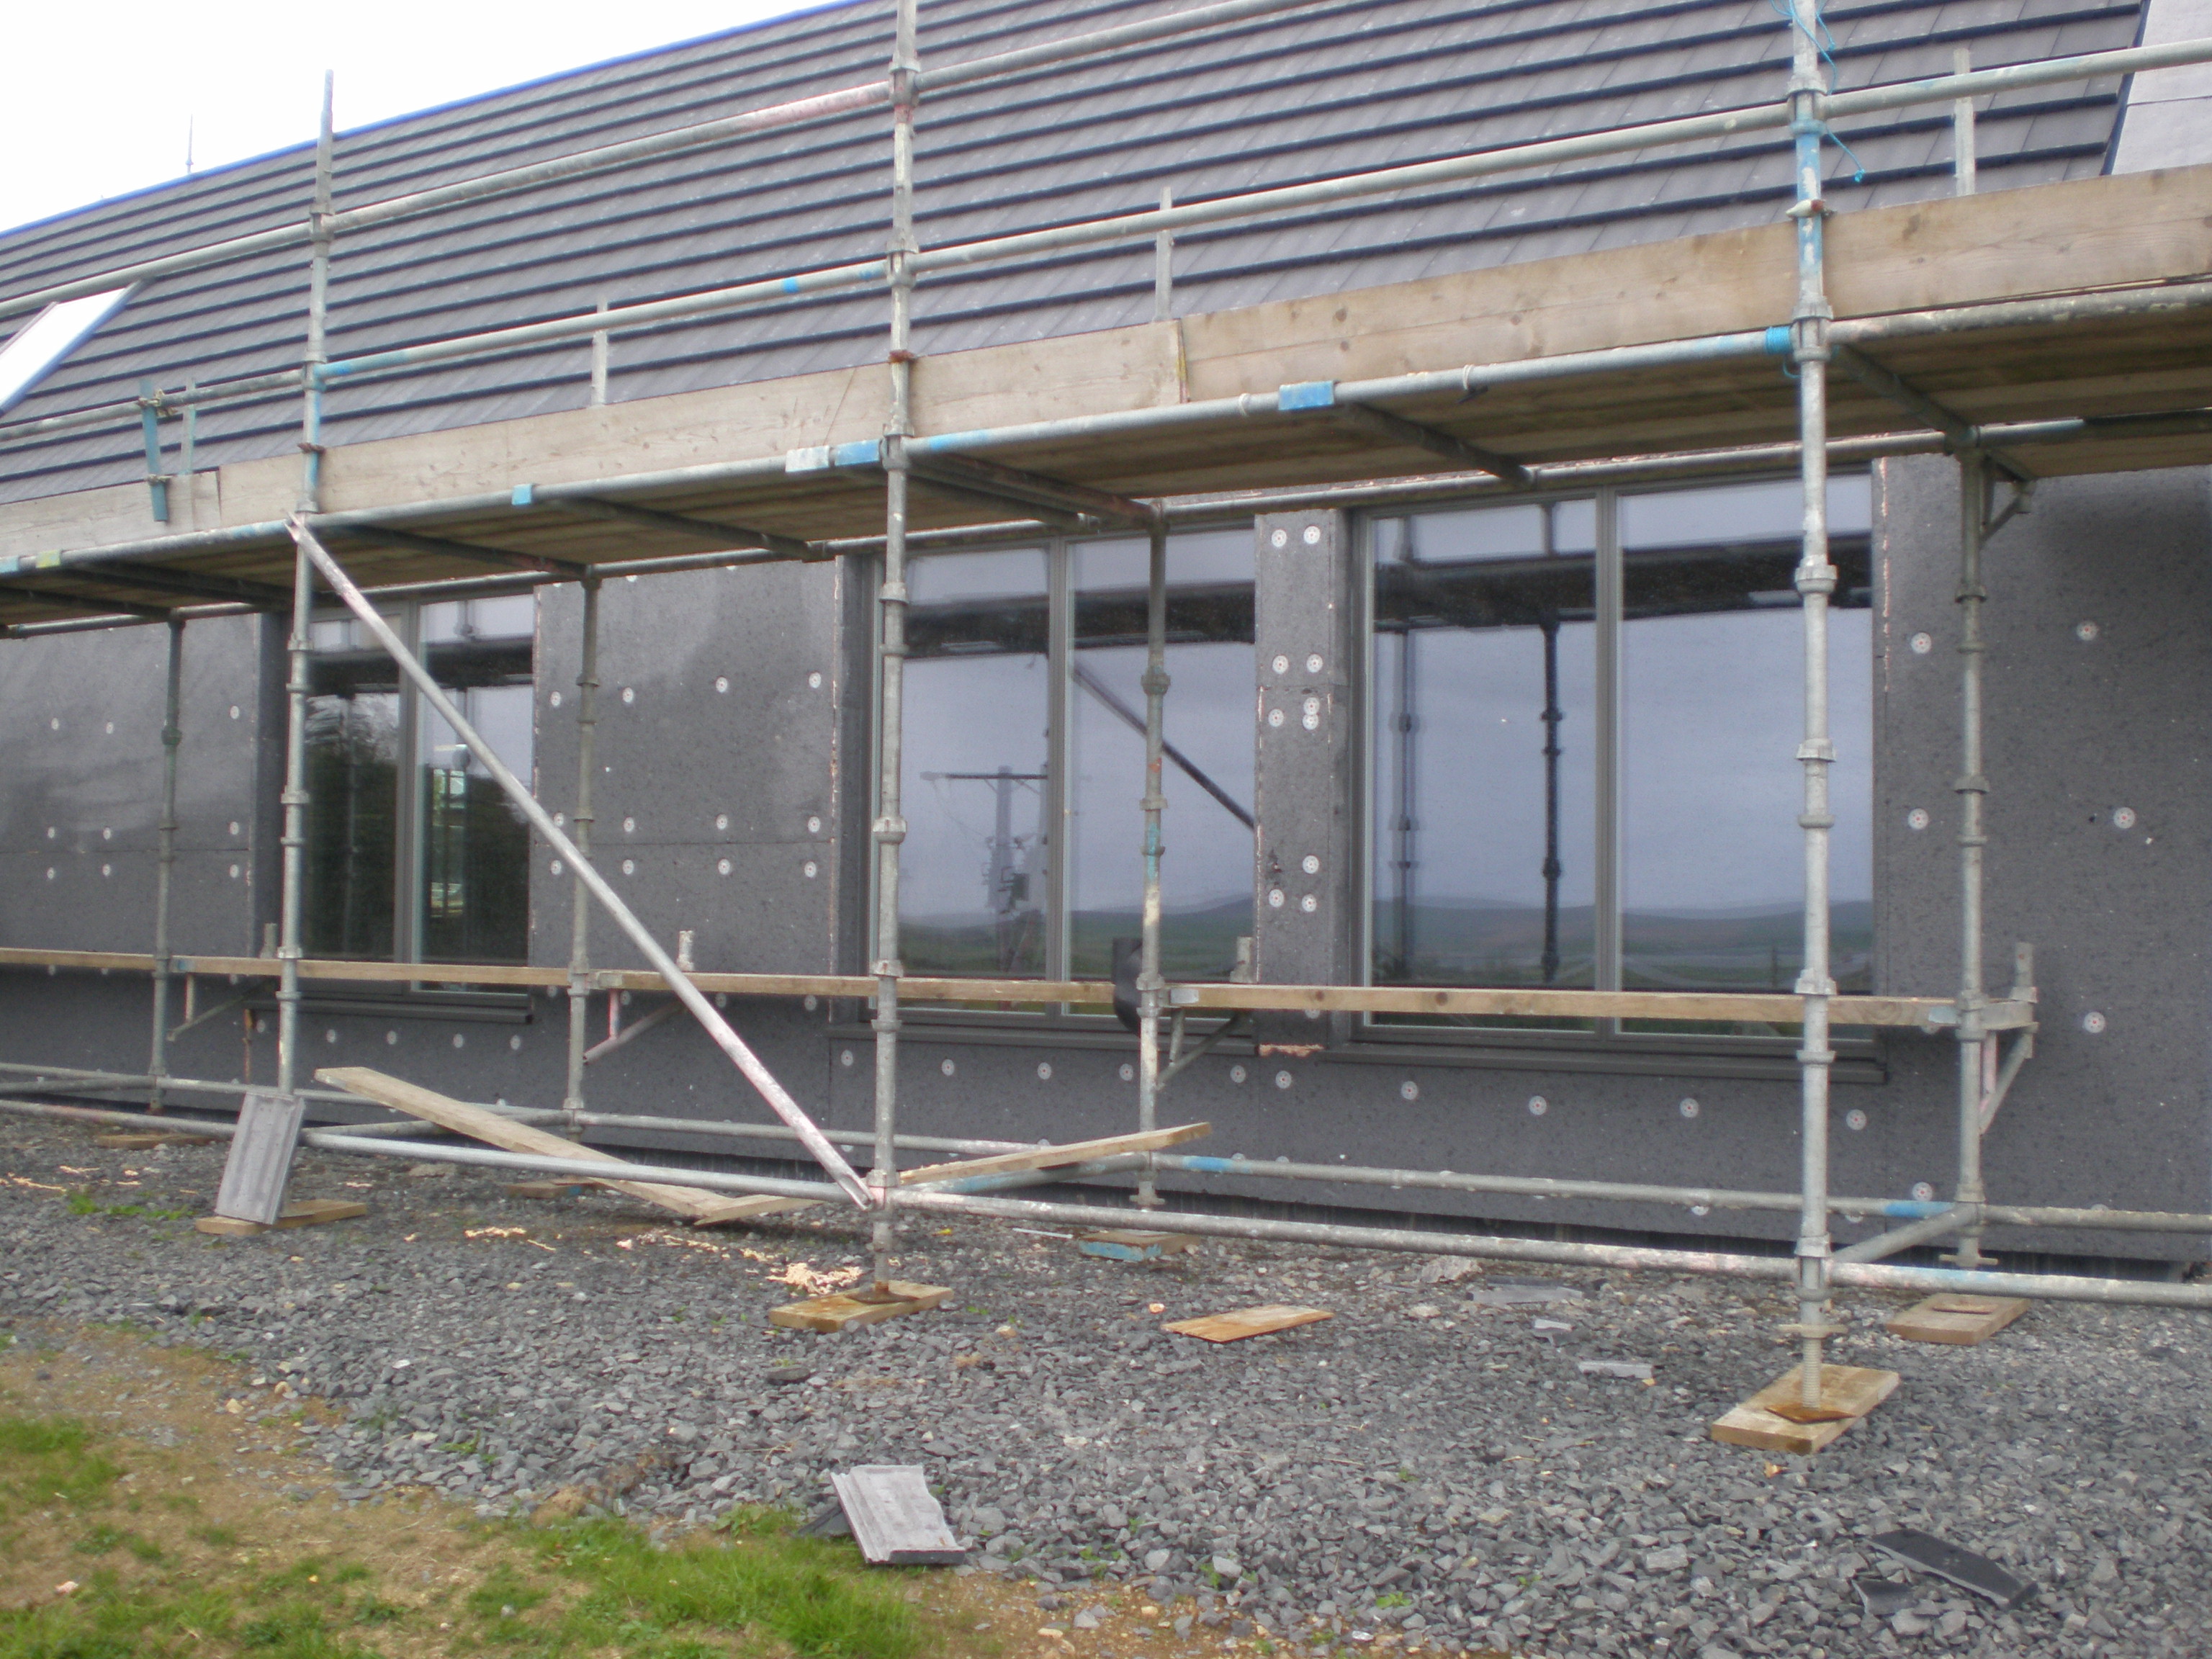
Fitting the windows took a couple of days.  Whilst the majority of the openings in the ICF blockwork had remained true, one or two were slightly out which meant the odd packer here and there to ensure the windows were level and plumb.  The windows have all been positioned such that they protrude 20mm beyond the outer face of the ICF block:


:P7280017.JPG


P7280018.JPG


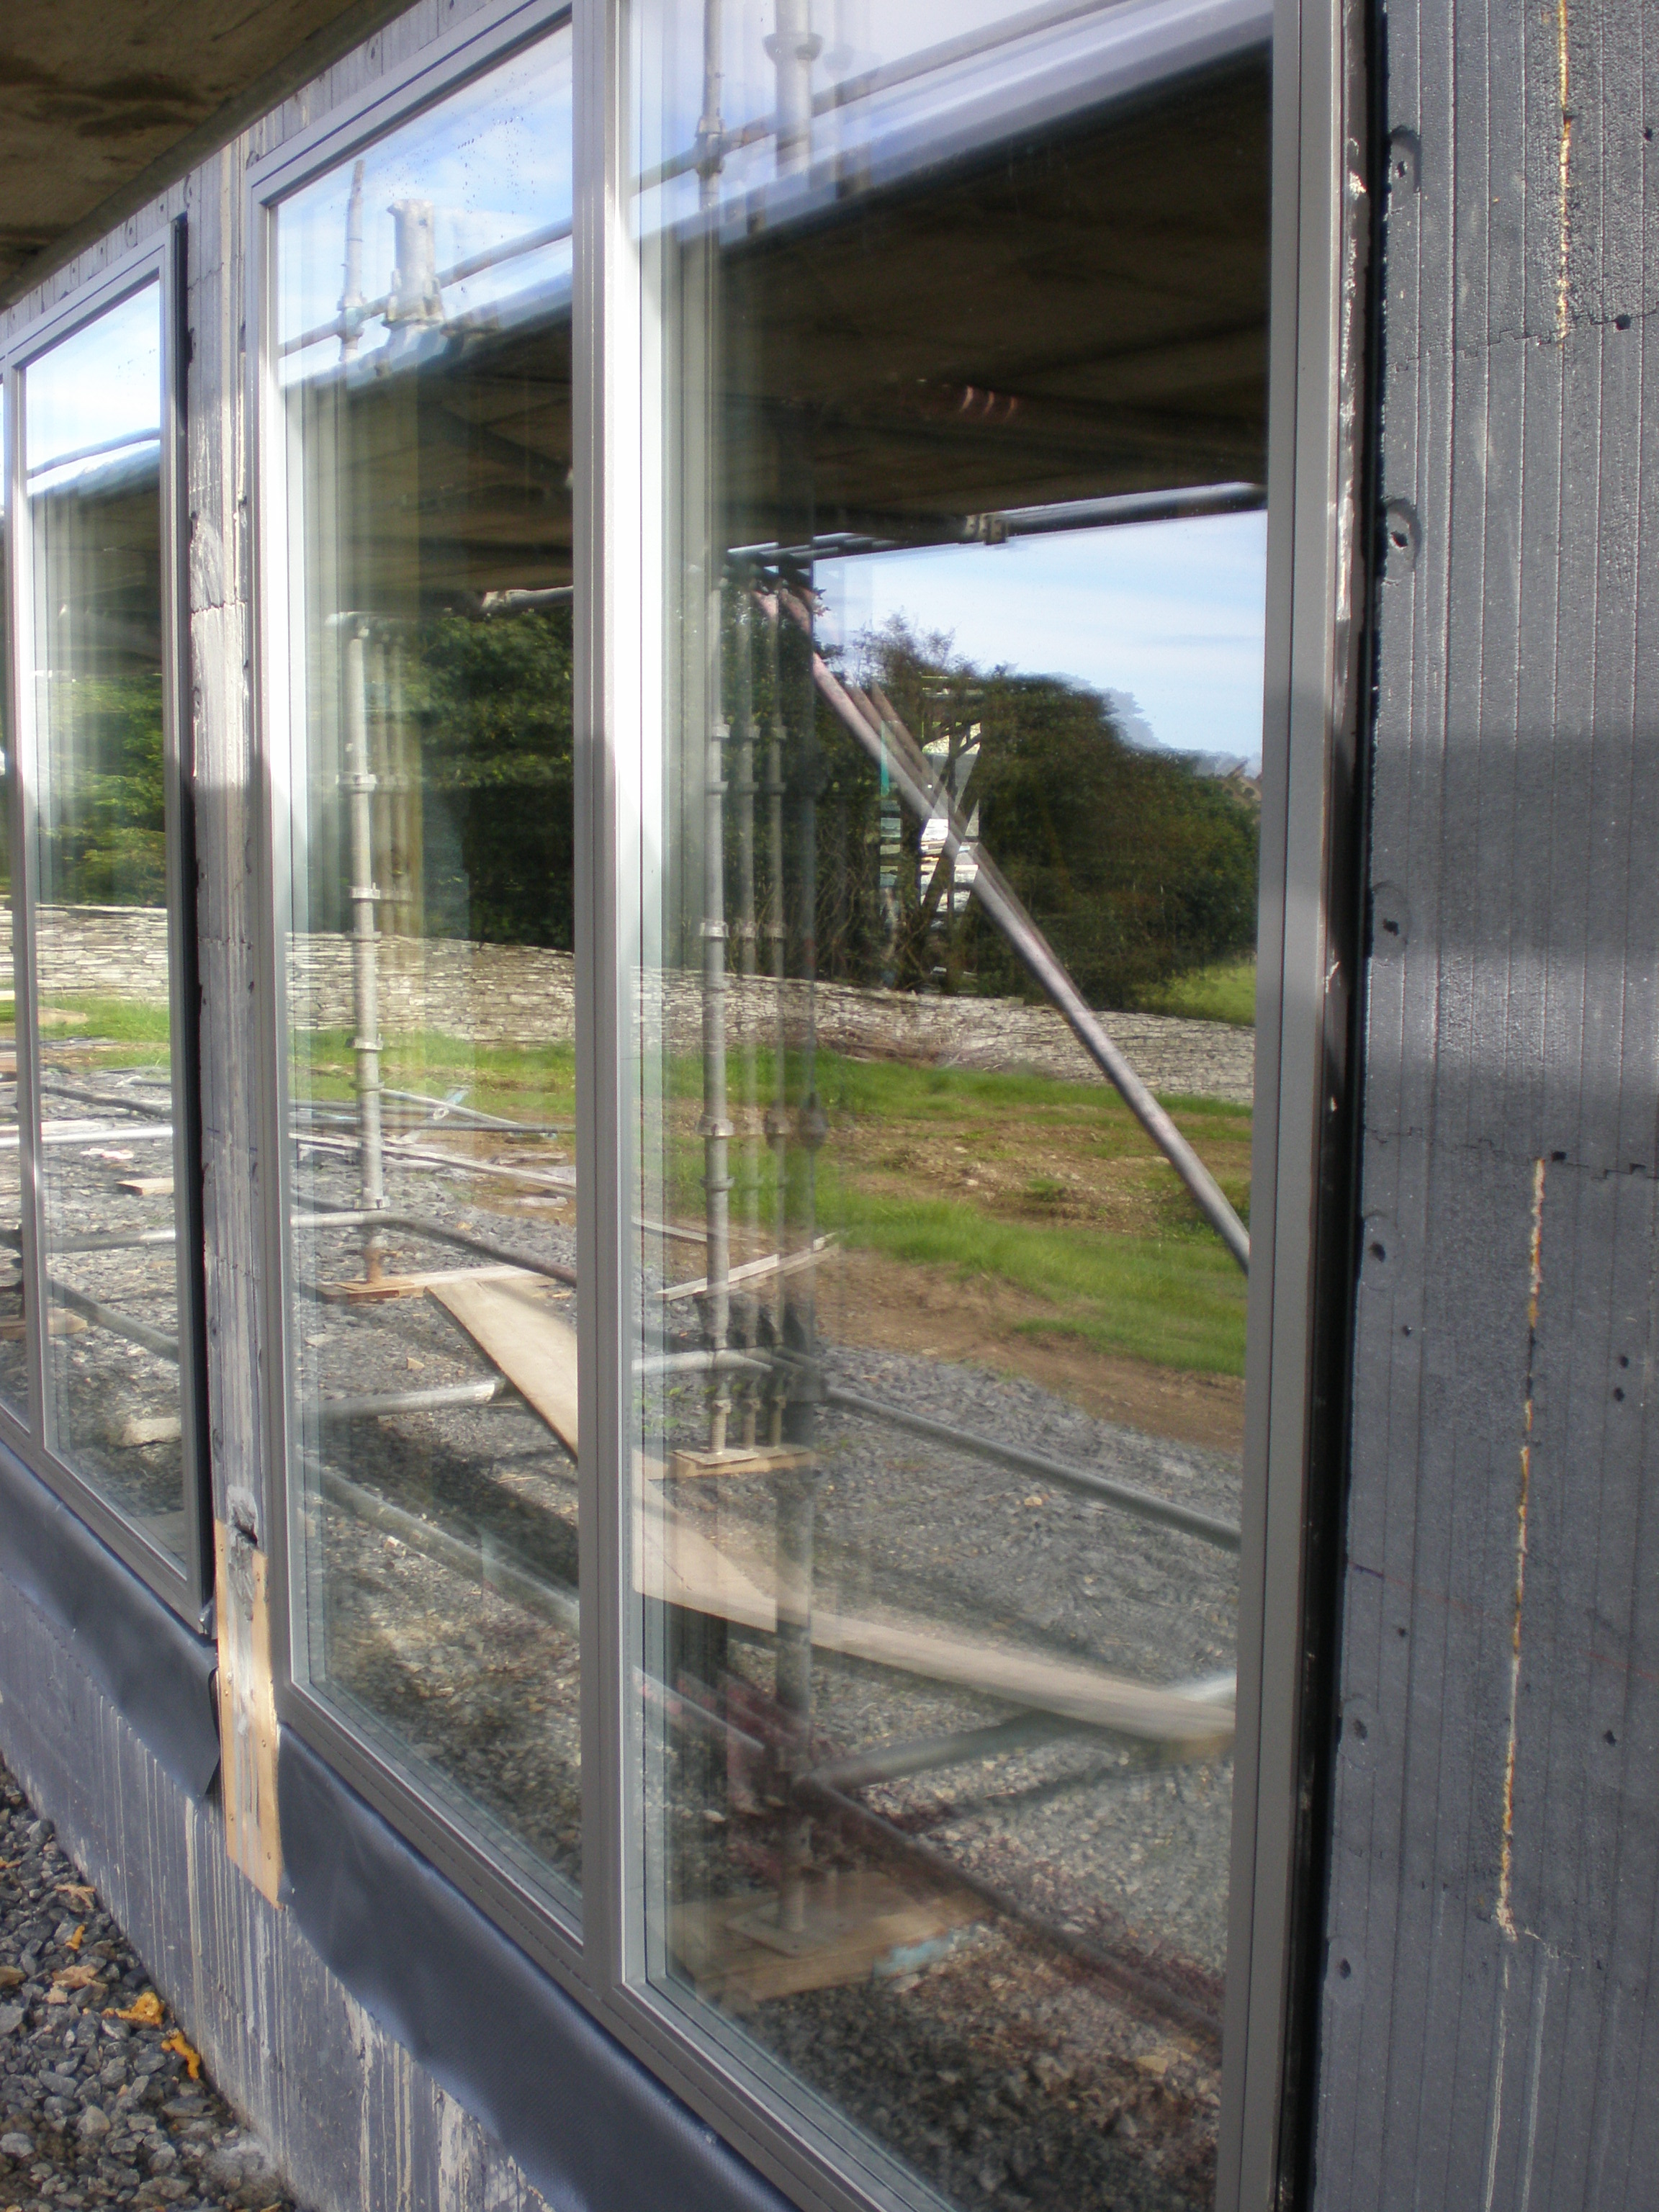
and are secured in place internally be metal straps fixed to the window frame and the timber openings:


P7250006.JPG


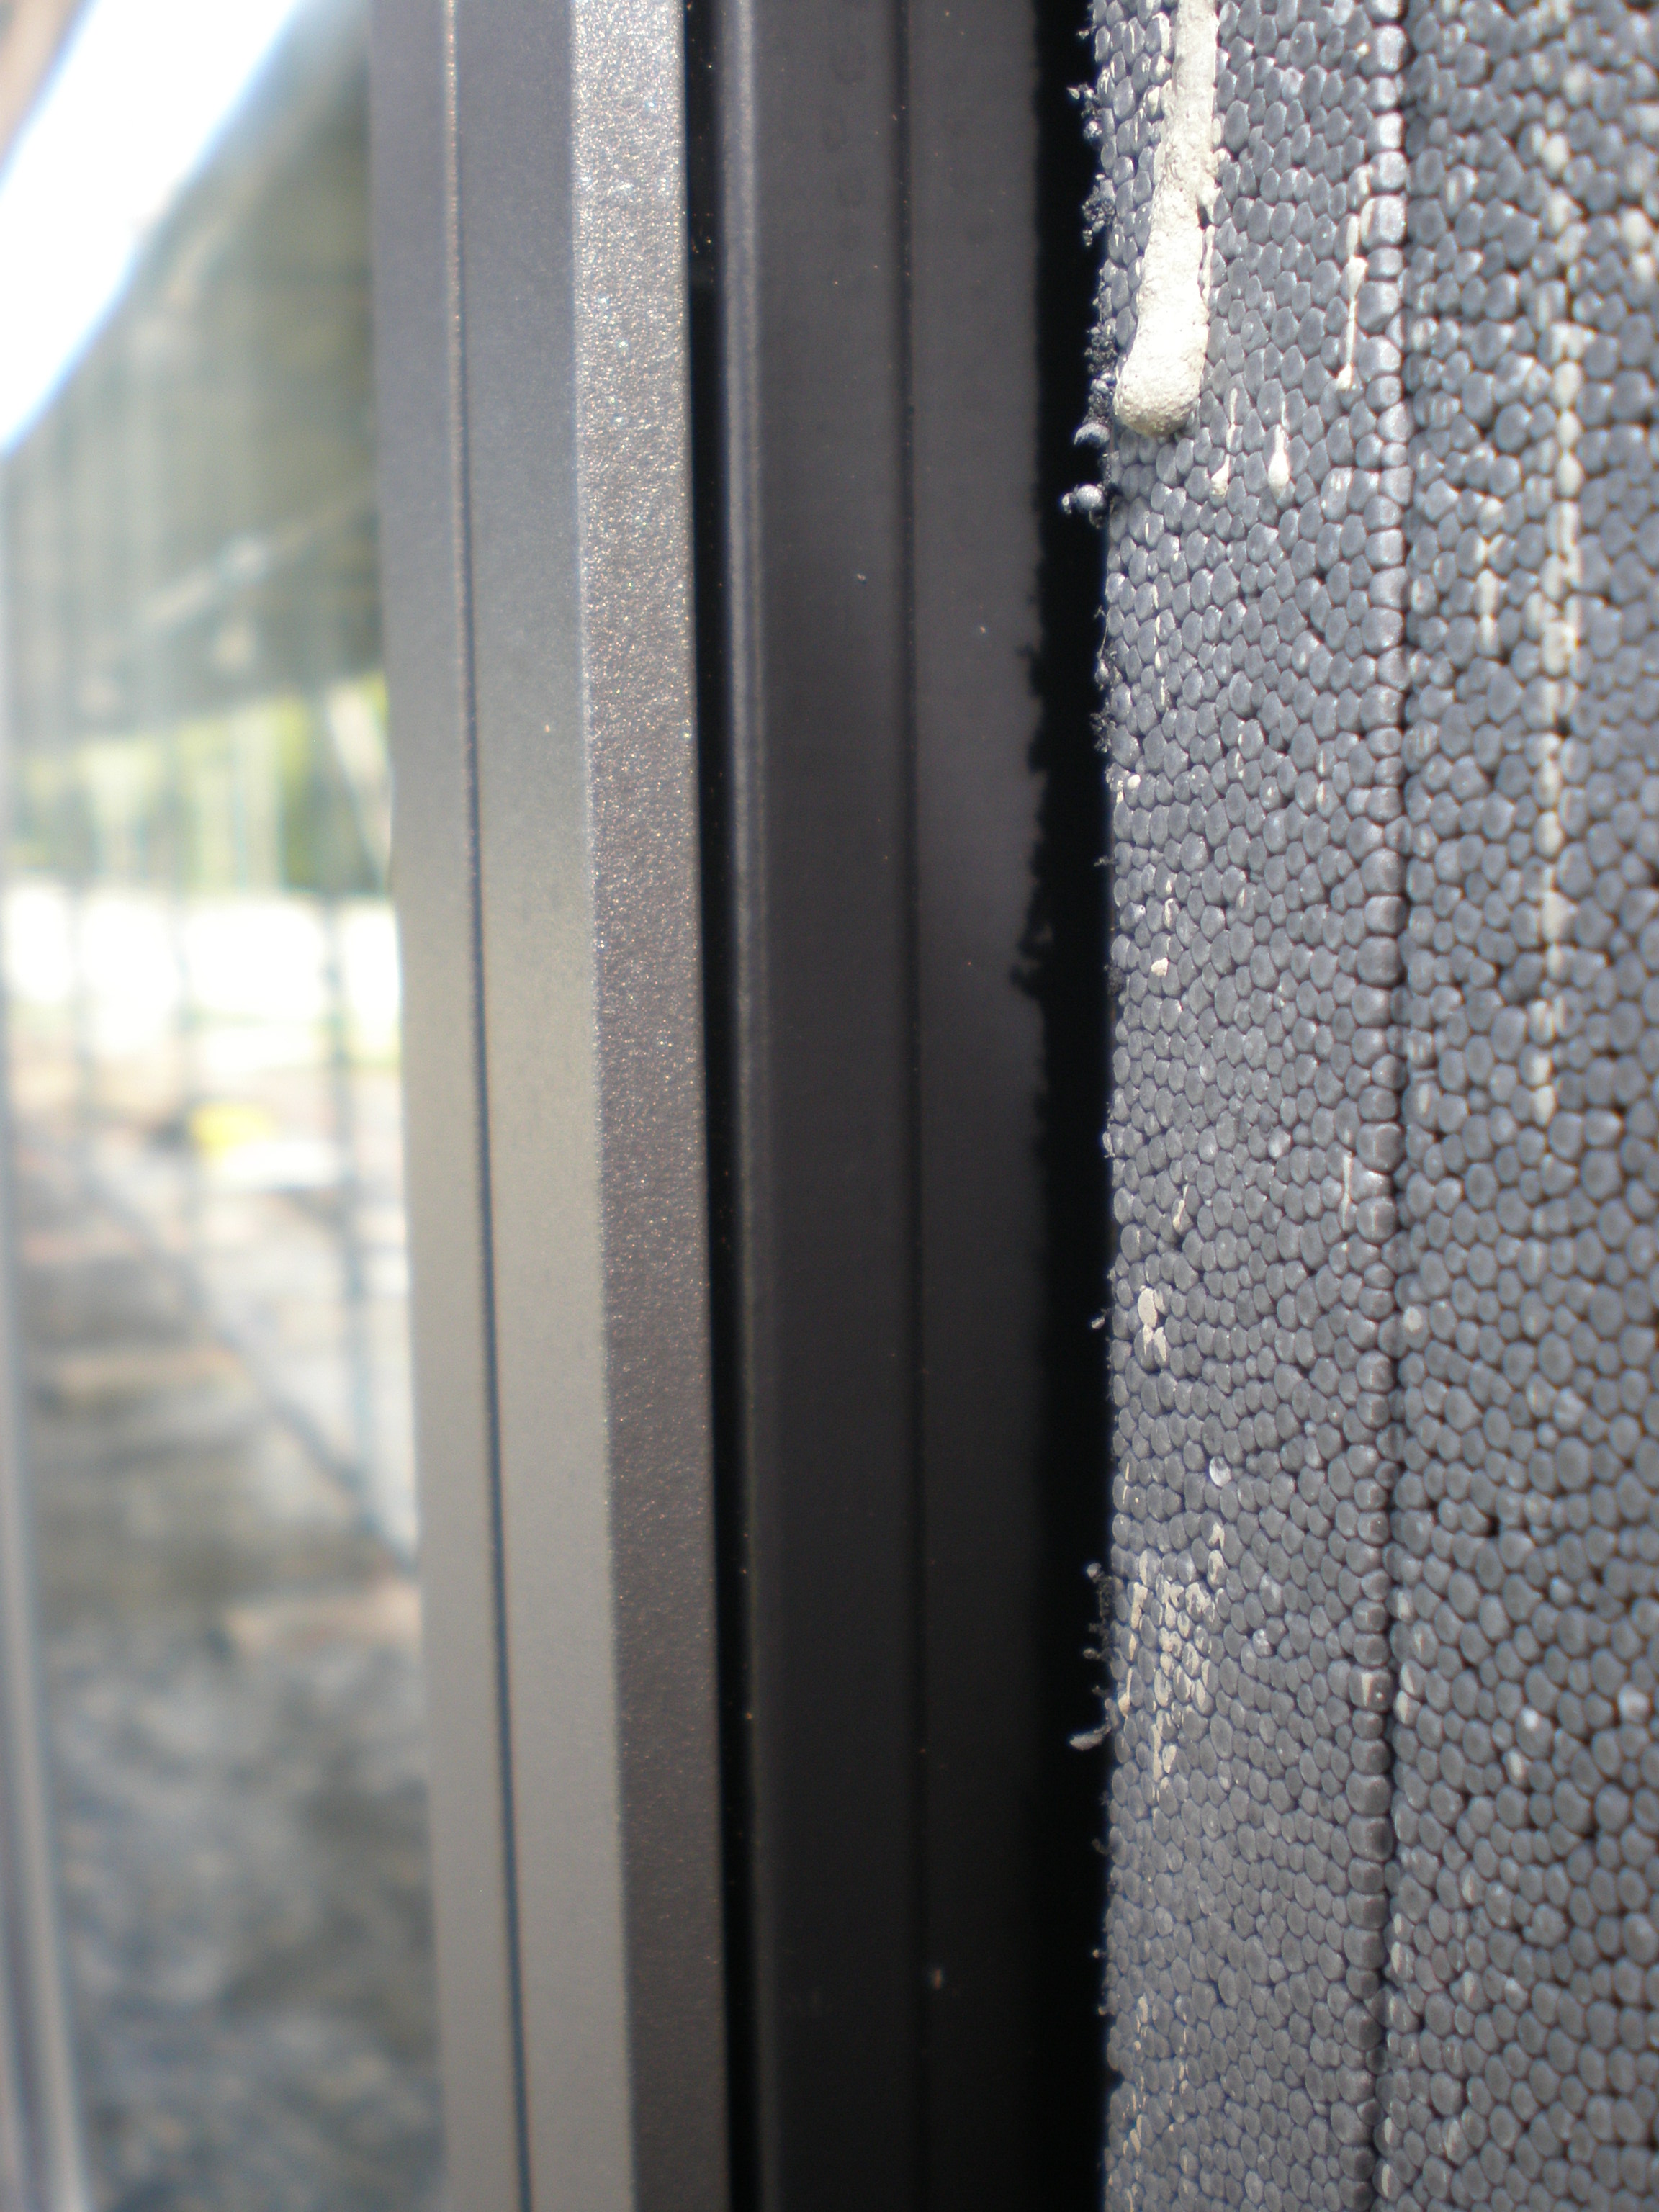
The standard Rationel installation detail is a little odd (as has been experienced by ProDave) in that they want a gap left between the edge of the alu cladding and the window reveal / ingo, so as not to block the drainage channel that forms part of the alu cladding.  We deviated from this detail, primarily because neither I nor my builder had any confidence in it.  We were both of the view that if left exposed, such a seal was bound to fail within a relatively short period.  In fairness, Rationel do say that it is up to the installer to fit the window to suit local conditions.


http://www.rationel.co.uk/media/1614084/Installation-Drawings-ALDUS.pdf


Rather than using expanding mastic tape (compriband) we are using a Soudal sealant to seal the timber window frame to the timber opening.  External  insulation is then brought hard up to to the aluminium window cladding.  This keeps the drainage channel on the alu cladding open but completely conceals the main line of sealant behind.  


P8020040.JPG


The window reveals / ingos will be finished with render or timber clad hard up to the alu cladding.  In the case of render, a stop bead will be used at the alu cladding junction to ensure a good finish and an effective seal.


The window cill which you can see pictured above was sourced independently of Rationel / ADW Ltd.  For reasons I cannot quite fathom, Rationel do not supply cills.  This is the responsibility of their agents who in the case of ADW Ltd source them and have them painted to match the windows here in the UK.  Unfortunately, they were unable to supply me with cills deep enough for me needs, so I had them fabricated and painted by a company in Glasgow - MSP Scotland Ltd.  I paid just under £250 for all my cills.  Again, we are delighted with the quality - 2mm folded cills, which fit snugly into the preformed cill groove on the underside of the Rationel windows.  


Two depths of wall insulation have been fitted to our house, 100mm to the section to be timber clad, and 140mm to the section to be rendered.  The main reason for restricting extra insulation on the timber clad section to 100mm, was to facilitate the subsequent fixing of battens to carry the timber cladding.  


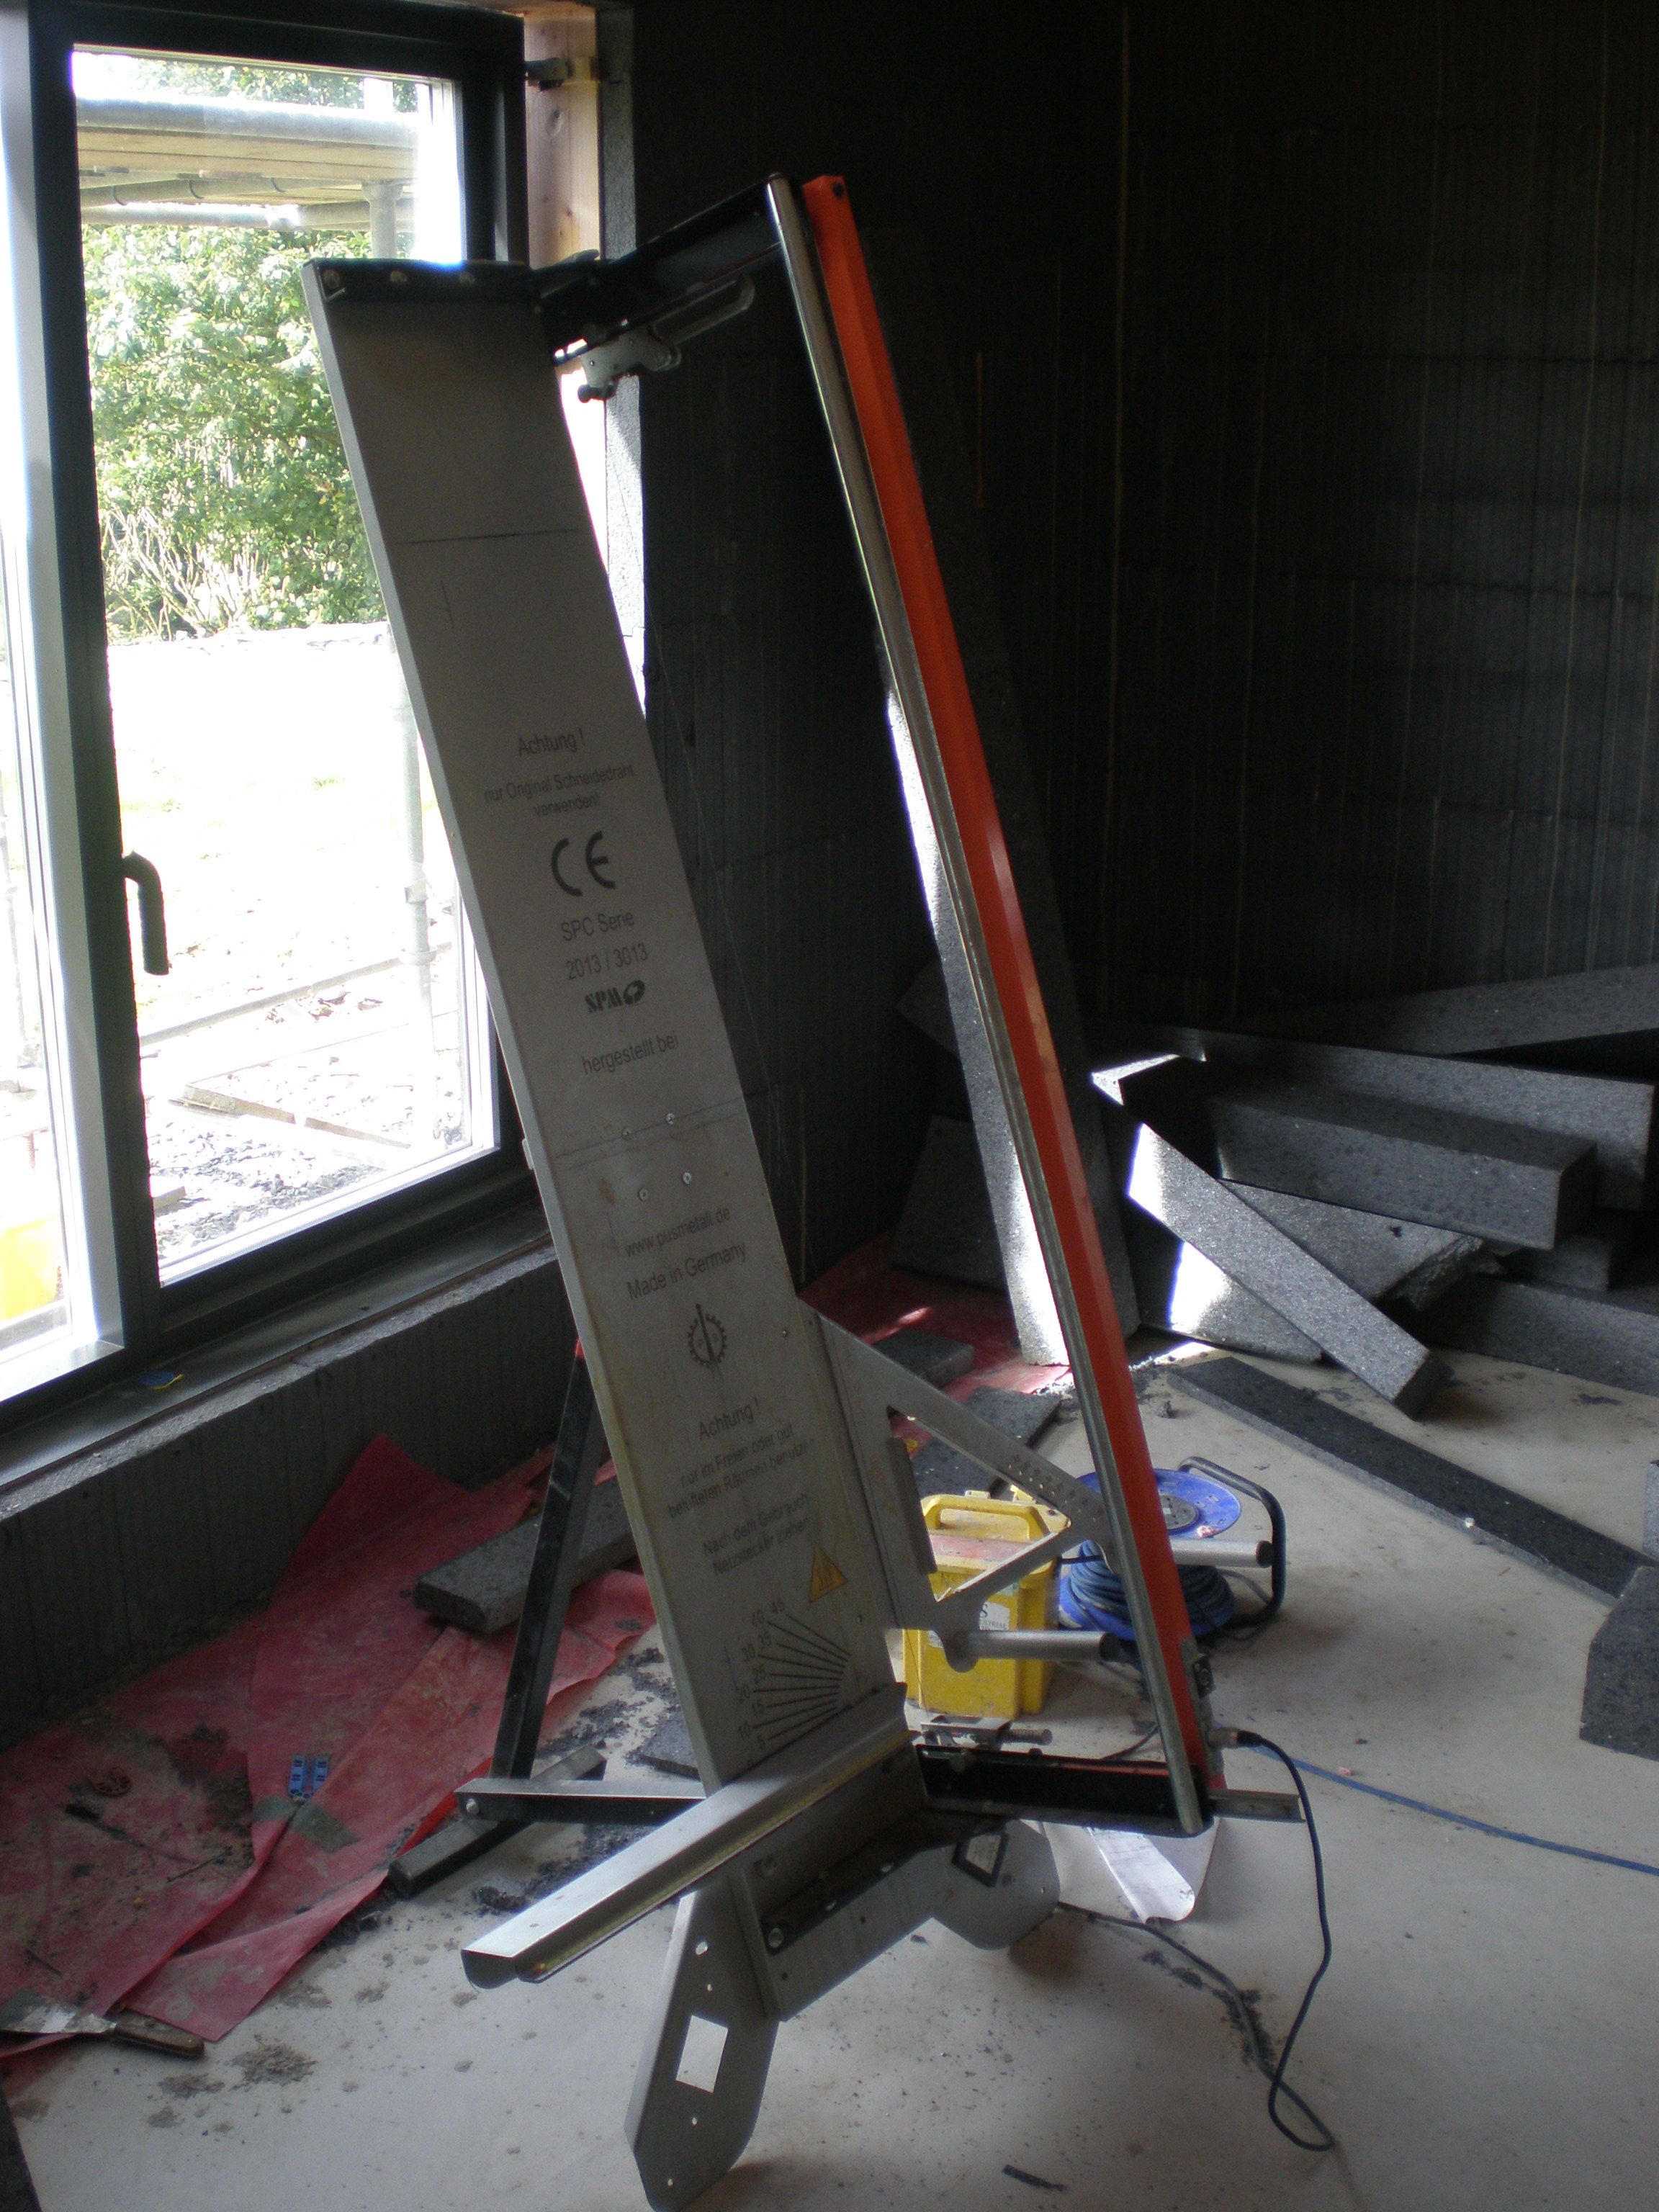
To facilitate precision cutting of insulation, a hot wire cutter was used:


P7280030.JPG


The external insulation was fixed using a combination of expanding foam and mechanical fixings.  Foam was applied to the back of the insulation sheets which were then positioned on the wall.  Mechanical fixings (pictured below) were then used to firmly secure the sheets, in the case of the timber clad section (100mm insulation), the long screw and black washer which fixes into the plastic ICF block formers in the core of the block, and in the case of the rendered section (140mm insulation) a plastic type plug drilled into the concrete core of the block.


P7280028.JPG


The insulation itself came in different sizes.  The 100mm insulation was supplied in interlocking 1200 x 600 mm sheets.  The 140mm insulation came in 2400 x 1200mm sheets.  Opinion on site was split between the pros and cons of each size with advantages and disadvantages to both.  Fewer joins when using bigger sheets, but smaller interlocking sheets were easier to work with.


A couple of pictures of how it now looks:


P8020046.JPG


P8020047.JPG


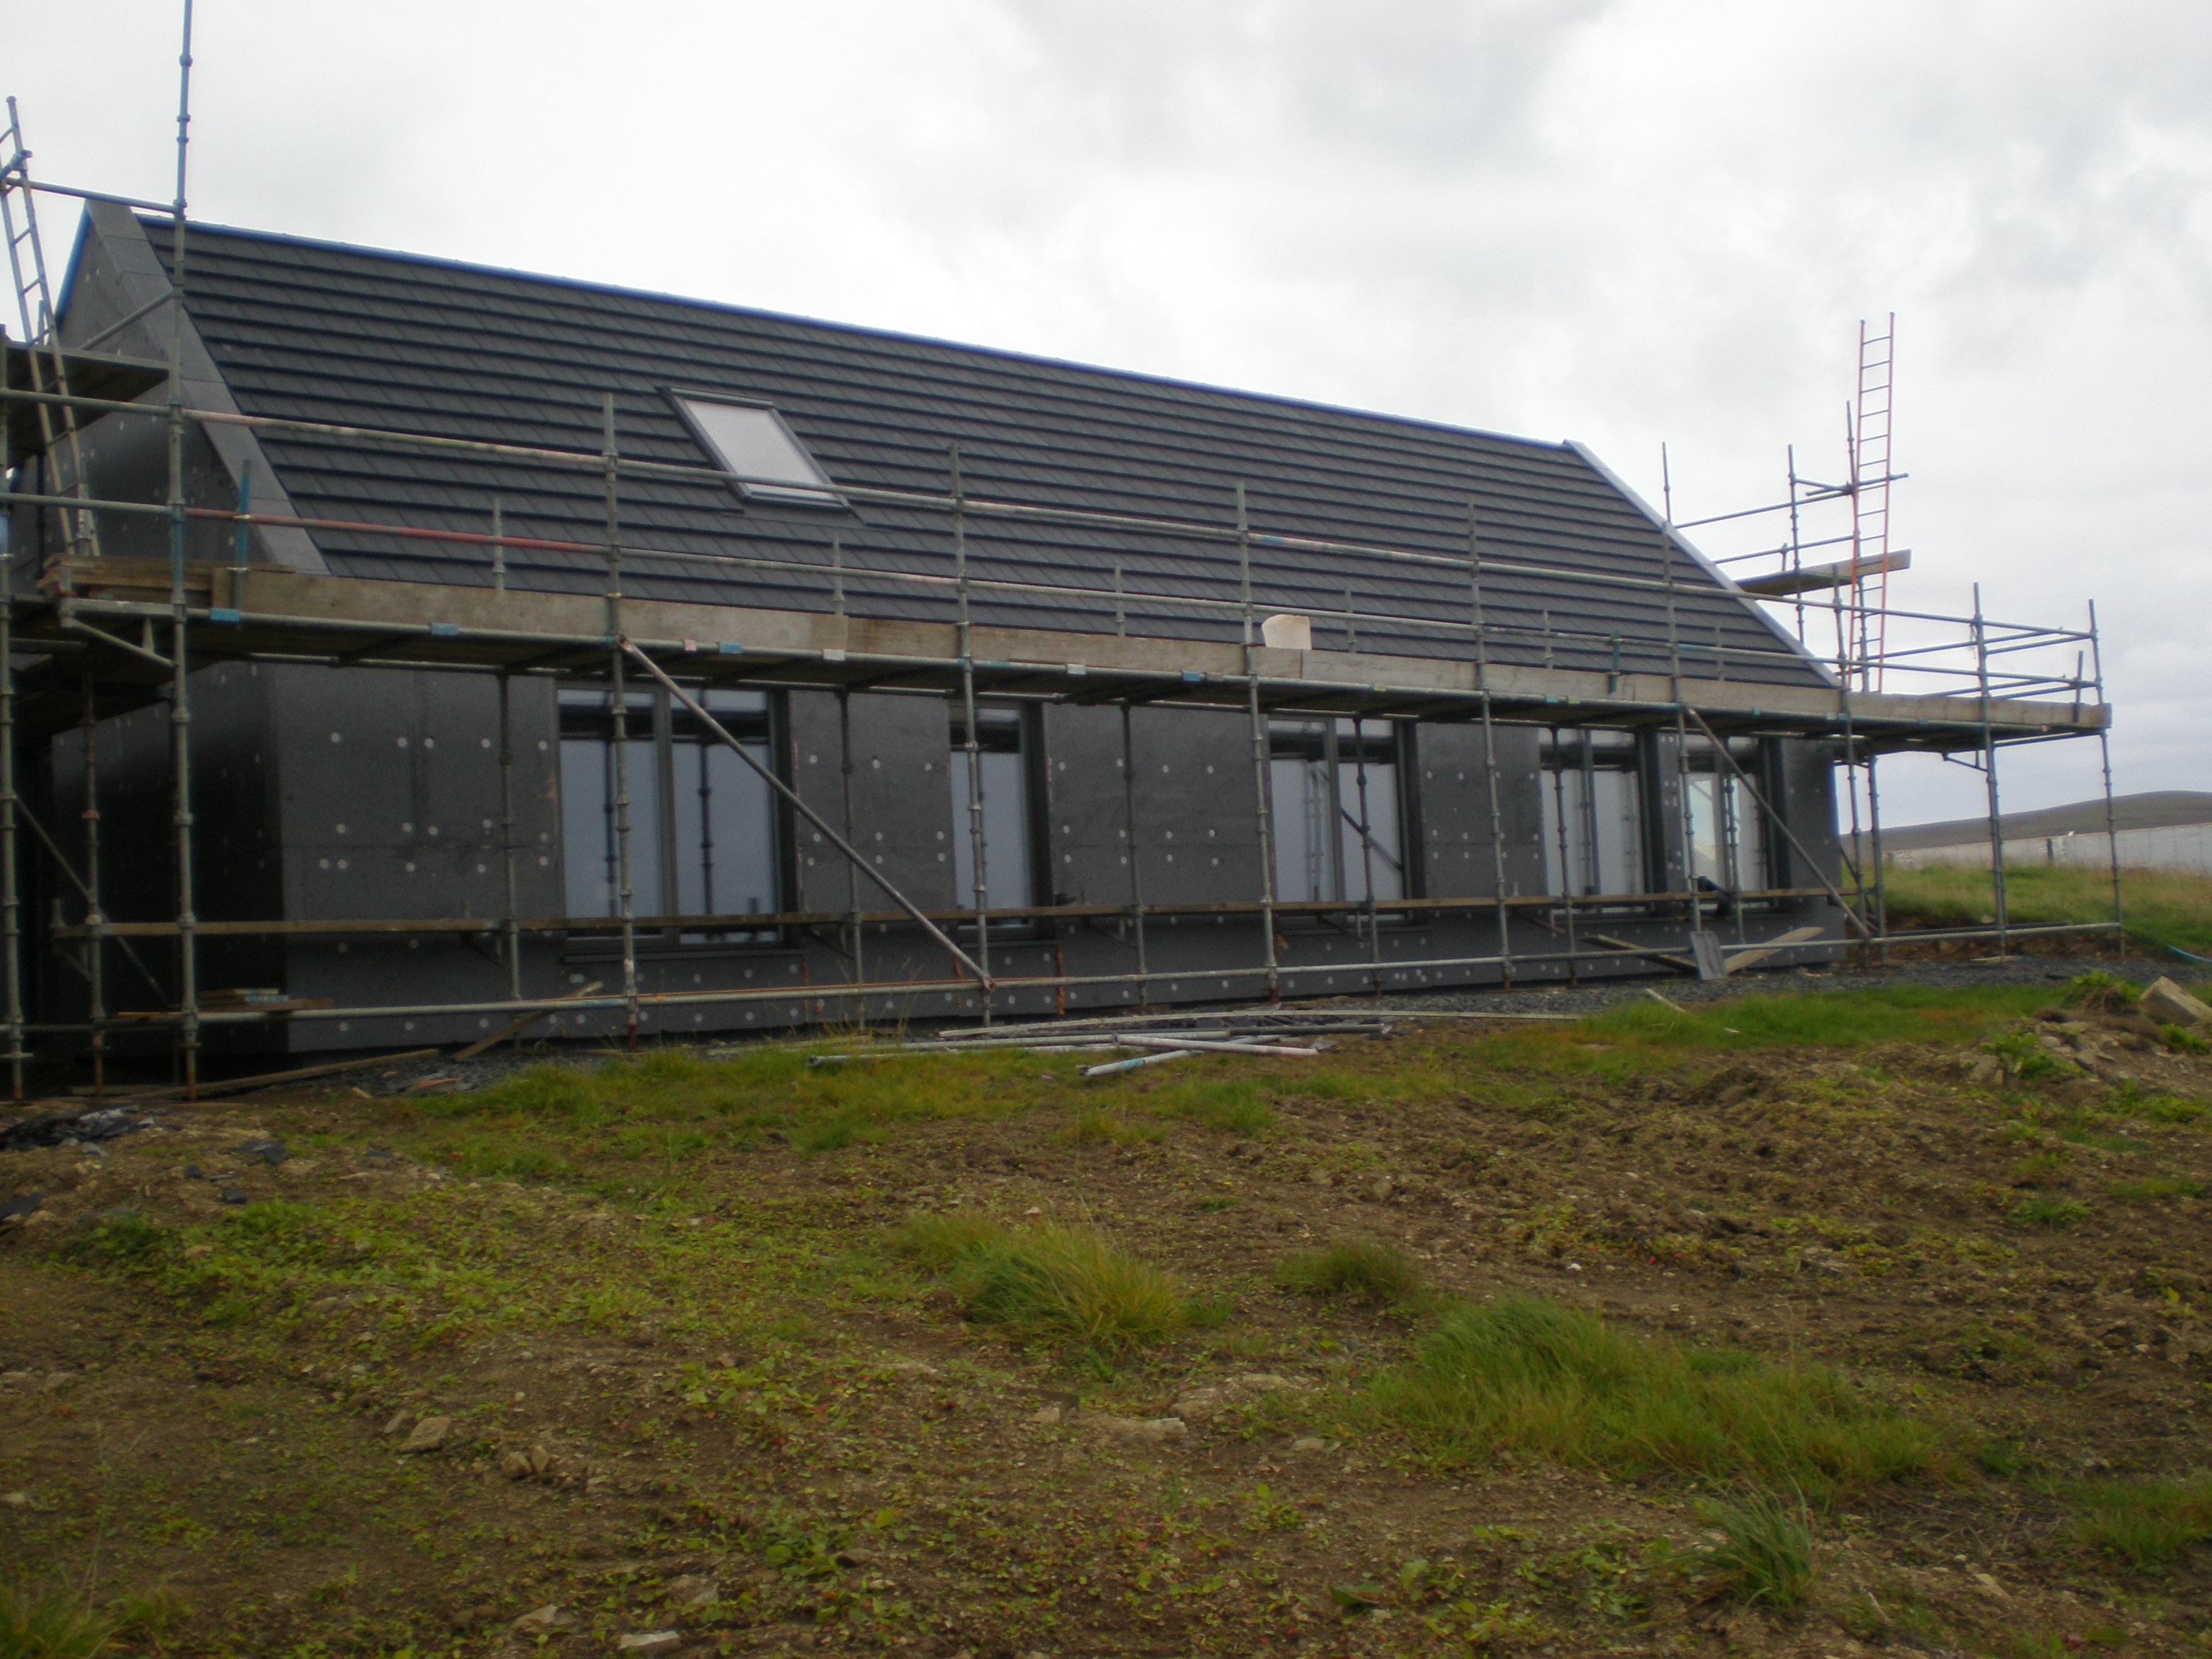
All being well, the scaffolding should be removed shortly, ready for the render system to be applied.  The joiners have started fitting battens to the section to be timber clad so it's all systems go.   


  • Like 3

17 Comments


Recommended Comments

Glad you like them.  I didn't realise you hadn't seen them before.


I know them as I have worked in houses with them before, and the local rep also visited our site with his normal small demonstration window to show us the details.  I like them as apart from being good windows, they are a very clean profile from both inside and outside, and of course the bonus being they were the cheapest of all the ones we had quotes for. Also only Internorm offered a very slightly better UW value, but at twice the price!!!


We also have a few 4, 20, 4, 18, 6.8 windows. Those are mainly the doors and a few of the bigger windows that have toughened glass that's a bit thicker, so they narrow the inner gap slightly to keep the overall glass unit thickness the same.


P.S what make of roof window have you used? 
 

Link to comment

Glad it all went smoothly. We've just finished fitting ours - which have been a disaster and still ongoing (a story for another day I think). We used Compriband around the outside edge and filled the rest with TP600 foam, although we could probably have managed with the foam alone, Compriband looks great - shame it'll all be covered!

Link to comment

Why is the scaffold coming down for the render? how will they do it?


Normally you just remove the hop up's leaving the scaffold with a greater clearance between the scaffold and the walls.
 

Link to comment

We visited a house locally where they had fitted Aldus 2G and I also visited their showroom in Cumbernauld, which certainly gave me a reasonable indication of what they were like but nothing really compares to actually having them and being able to get up close and personal with them. 


We fitted a 3G Velux, mainly because that's what our builder normally uses. We went for the white plastic version  which despite my aversion to UPVC Windows in general, we preferred to the more common Velux timber finish.


Re the scaffold, it's a spray render system that my builder uses. I'm guessing scaffolding gets in the way so they remove the main runs and leave what they need at the gables.


Link to comment
1 hour ago, jamiehamy said:

Glad it all went smoothly. We've just finished fitting ours - which have been a disaster and still ongoing (a story for another day I think). We used Compriband around the outside edge and filled the rest with TP600 foam, although we could probably have managed with the foam alone, Compriband looks great - shame it'll all be covered!


What went wrong?

Link to comment

I have been considering roof windows (see my recent thread)  I have decided I don't like the plastic velux ones, but I do like their painted wood finish version which I think will work well with the painted wood interior finish on the Rationel windows.


I quite understand the scaffold issue re  a spray render. Let's hope they mask the windows properly!!!!
 

Link to comment

What went right? I'll not name the company yet as we're still trying to get a resolution but here goes:


  • On arrival, three of the biggest units had fallen onto the side of the truck. Not only was there cosmetic damage, but it took 3 hours to move everything to get the canopy back and the HIAB operational. Three units damaged. 
  • 6 of the units did not turn up and took a further month to arrive
  • Despite being listed to be offloaded by HIAB, the pallets were totally unsuitable and I had to fabricate pallets in-situ before anything could be lifted off
  • The external seals on the moving units were felt - despite assurances that they would be rubber as per the units in the showroom. 
  • 5 of the units have grey spacers bars between the triple glazing - as opposed to black we ordered and that the other units have. 
  • Two of the units have the wrong color cladding - a clearly different shade of grey
  • The same two units also have a noticably different timber colour inside - we think they were both made in a different factory. 
  • The French doors are seriously out of alignment - we noticed this on the truck and are unable to fix without taking the doors off and doing structural work
  • The front door has cosmetic damage where it was strapped down without protection
  • The biggest unit of them all (2.3mx2.2m) has blue solar tint applied - despite no other unit on that elevation being specifed as such. (We have it on another elevation). So on a sunny day, this window is shining blue when the others are not!

BUT

  • Best of all - every single unit was manufactured 20mm too big. Despite us signing a form saying 20mm would be taken off all the dimensions we had provided, this was not done. 

It's been pretty horrendous to be honest. My big mistake was not simply rejecting the lot when they turned up as the pic - we were persuaded that we should unload everything and any damage would be fixed - only once we had unpacked did all the other issues present themselves - by which time it was took late to reject them and send back. 


Fun and games eh?!


20160721_112231.jpg

Link to comment

Om my what a disaster!!!!


All I can say is my Rationel windows arrived when they said, were all packed well on substantial pallets,, unloaded by hiab without problem, all unpacked without any damage found, and all fitted perfectly.


Only one "issue" is I got the order slightly wrong an have keys inside on the doors when I really wanted thunbscrews, but that's something I will change later on.
 

Link to comment
43 minutes ago, ProDave said:

I have been considering roof windows (see my recent thread)  I have decided I don't like the plastic velux ones, but I do like their painted wood finish version which I think will work well with the painted wood interior finish on the Rationel windows.


I quite understand the scaffold issue re  a spray render. Let's hope they mask the windows properly!!!!


I've been following that thread. Wish I'd known that a painted finish was an option as we may well have gone down that route (do they do any RAL colour?), albeit we are more than happy with what we have chosen, as we are going with all white walls and ceilings.


Thankfully, my builder is very particular when it comes to details like masking...

Link to comment

What a nightmare Jamie, puts a few weeks delay in perspective. Hopefully your making some headway on getting the matter resolved.


Link to comment

Hi All, 

I think Windows and doors are probably one of the biggest stresses in a project - they are a big ticket item and obviously need to be made to exacting dimensions. The final ones of ours have just gone in this week so that's a relief - we had two issues - one caused by me where the patio slider opened the wrong way and had to be remade, and one by the supplier who hinged the front door on the wrong side. Thankfully they are on the case of sorting it out and at least I have a front door for now.

Edited by Trw144
Link to comment

It's obviously a bit late but you should have a word with one of the local building inspectors (Gwynn) who built his own house in Kirkwall about his windows. 


You have a very nice project.

Link to comment

Hi @Stones a few questions about your additional insulation sheets. Why were the panels for the rendered sections drilled in to the conc core and not just the webs within the ICF blocks?


Also, do you think it would be feasible to fit the EWI sheets to the ICF BEFORE the concrete is poured? I'm thinking it might help with stability and bracing during the pour.


Thanks.

Link to comment

The different fixings used were due to the difference in the depth of insulation - 100mm vs 140mm, and the plastic type plug fixing being more cost effective.  I suspect what may also have played a part was the fact that the 100mm insulation was marked such that it could easily be fixed to the plastic webs (markings on EWI lined up with markings on ICF blocks, whereas the 140mm insulation came in large sheets without markings.


I suppose you could fix the EWI beofre pouring, but I'm not sure it would really do much in the way of adding much in the way of bracing / stability, and I certainly wouldn't advocate doing it differently. Ultimately, there will be movement / ripple when the concrete is poured and the braces do two jobs.  Brace during the pour, then allow adjustment and support after the pout to ensure the wall is true. The latter is as important as the former.

Link to comment

Cheers. Might be best skipping the EWI fixing.


Looks like Amvic ICF? Did you get the 100mm EPS panels from them also?

Link to comment

@StonesWhat screws/washers did you use to fix the 100mm insulation sheets to the plastic webs? I'm assuming I'll need stainless as I'll be rendering over.

Link to comment

100mm panels were Amvic supplied.  It was a 150mm stainless screw and black plastic 'washer' that was used to fix them to ICF block webs, as pictured above.

  • Thanks 1
Link to comment

Create an account or sign in to comment

You need to be a member in order to leave a comment

Create an account

Sign up for a new account in our community. It's easy!

Register a new account

Sign in

Already have an account? Sign in here.

Sign In Now
×
×
  • Create New...